Repair an original VCM / GNA600?


#2
 07-13-2016, 08:57 PM

Depends on what's wrong with it.
I've been able to revive a couple of VCM's, one by mixing & matching PCB's from other bad units, another was by resoldering the CPU with a special infrared soldering station.
The CPU fix was for a VCM that would not boot up, when you connect power all 5 LED's light up and it would freeze up there. The CPU was not booting up properly.
#3
07-13-2016, 10:17 PM
Depends on what's wrong with it.
I've been able to revive a couple of VCM's, one by mixing & matching PCB's from other bad units, another was by resoldering the CPU with a special infrared soldering station.
The CPU fix was for a VCM that would not boot up, when you connect power all 5 LED's light up and it would freeze up there. The CPU was not booting up properly.
I've been able to revive a couple of VCM's, one by mixing & matching PCB's from other bad units, another was by resoldering the CPU with a special infrared soldering station.
The CPU fix was for a VCM that would not boot up, when you connect power all 5 LED's light up and it would freeze up there. The CPU was not booting up properly.
#4
07-14-2016, 05:41 AM
The CPU is a Ball Grid Array mounted chip, so you won't be soldering it by hand, you need a special machine to do it. "Soldering of BGA devices requires precise control and is usually done by automated processes." Thanks Wiki... https://en.wikipedia.org/wiki/Ball_grid_array
By pressing down on the CPU when connecting power, you might find that the unit boots up correctly. This was the case with one of mine, which meant that there was a broken connection at one of the "*****" on the chip.
Pics of the offending CPU


And this is what the back side of it looks like...
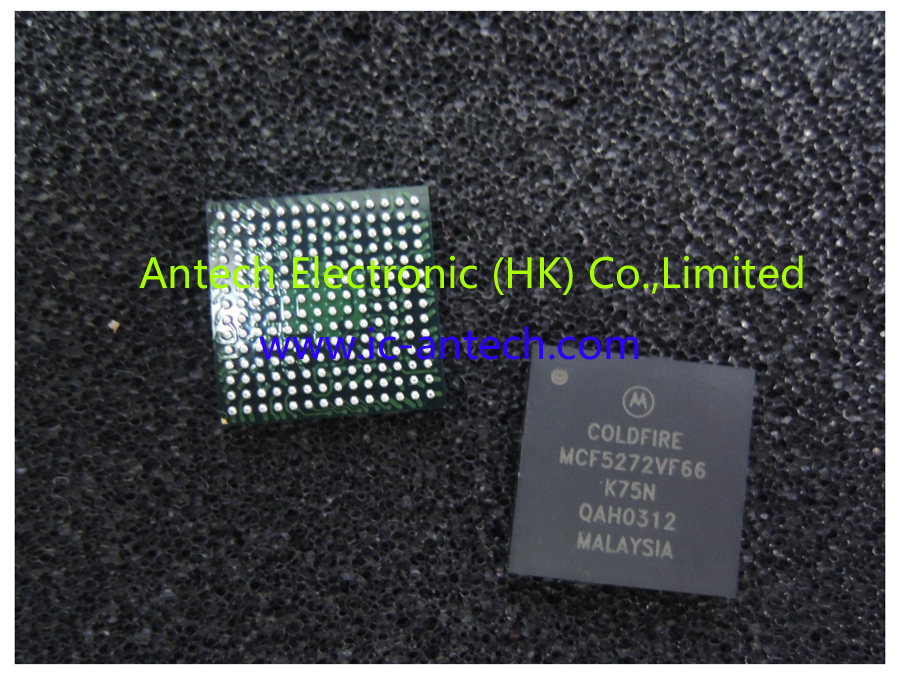
It's not possible to replace the CPU with a new one (the original is no longer available and although there is a replacement version, I did try one of them and it did not work, the VCM did kind of "boot up" but it would not communicate over the ethernet connection).
All you can do is get the existing CPU "reflowed" which can only be done with the special infrared soldering machine which is specifically for soldering BGA chips.
Very interesting machine!


I could revive one of the VCM's by having the CPU reflowed, actually it was reflowed twice.
You can see on the computer screen it's necessary to look at the solder ***** with a microscope that they are properly melted.
If the reflowing doesn't fix it, then it's scrap.
By pressing down on the CPU when connecting power, you might find that the unit boots up correctly. This was the case with one of mine, which meant that there was a broken connection at one of the "*****" on the chip.
Pics of the offending CPU
And this is what the back side of it looks like...
It's not possible to replace the CPU with a new one (the original is no longer available and although there is a replacement version, I did try one of them and it did not work, the VCM did kind of "boot up" but it would not communicate over the ethernet connection).
All you can do is get the existing CPU "reflowed" which can only be done with the special infrared soldering machine which is specifically for soldering BGA chips.
Very interesting machine!
I could revive one of the VCM's by having the CPU reflowed, actually it was reflowed twice.
You can see on the computer screen it's necessary to look at the solder ***** with a microscope that they are properly melted.
If the reflowing doesn't fix it, then it's scrap.
The following users liked this post:
Brahm (05-20-2017)
#5
07-14-2016, 09:15 AM
#6
07-14-2016, 04:23 PM
Honestly I don't remember what the temperature was, I remember the tech that ran the machine saying it needed to be a bit hotter than he expected.
For some reason I have 190�C in my head, but don't take that as gospel...
EDIT
It was for sure above 170�C and less than 200�C, I remember that much...
For some reason I have 190�C in my head, but don't take that as gospel...
EDIT
It was for sure above 170�C and less than 200�C, I remember that much...
Last edited by Cambo; 07-14-2016 at 05:00 PM.
#7
07-15-2016, 12:47 AM

Veteran Member
Trending Topics
#8
08-11-2016, 09:11 PM
So thanks to Cambo I figured out what the issue was, the good old chip.
A while back I picked up fixing plasma TV's as a hobby. My father in law started a maintenance job at an upscale appartement highrise so all of the sudden he would be bringing me flatscreens every other week that people got rid of because they broke. Now I got more flatscreens than rooms lol, but I learned how to fix them as it's usually a $5 component that fails. To do that I picked up a decent soldering station.
Just like this one:
https://www.ebay.com/itm/381253195679
I always wanted to learn how to reball BGA ICs so this was the perfect opportunity to pickup more toys. (I might even reball my XBOX since last time I turned it on it gave me the RROD).
So I ordered this:
https://www.ebay.com/itm/331723620147
It finally arrived from China a few days ago so as soon as my SO went for some errands with my 2year old and I had some
time I went to play with my toys
#9
08-11-2016, 09:20 PM

Getting ready to remove the chip

This is the stencil I used

Playing with my *****

Got a lot of stencils for $37

This is what you use to wick old solder. I didn't take more pictures as I was finally alone and not sure how much time I have. Plus taking pics alone when doing stuff takes 3 times as long.
#10
08-11-2016, 09:31 PM
#12
08-12-2016, 12:44 AM
#13
08-12-2016, 08:53 AM
#14
08-12-2016, 09:41 AM
Good stuff.
It was the same for mine after the reflowing of the CPU, wierd bootup routine from the LED's but after reflashing the PROM with the ClearVCM utility it was fine.
I have another one here which has the same problem and the reflowing did not fix it, the repair shop I use would not go the whole route of reballing the CPU like you did. I might send it to you instead!
#15
08-12-2016, 02:25 PM
Good stuff.
It was the same for mine after the reflowing of the CPU, wierd bootup routine from the LED's but after reflashing the PROM with the ClearVCM utility it was fine.
I have another one here which has the same problem and the reflowing did not fix it, the repair shop I use would not go the whole route of reballing the CPU like you did. I might send it to you instead!
It was the same for mine after the reflowing of the CPU, wierd bootup routine from the LED's but after reflashing the PROM with the ClearVCM utility it was fine.
I have another one here which has the same problem and the reflowing did not fix it, the repair shop I use would not go the whole route of reballing the CPU like you did. I might send it to you instead!
#16
10-28-2016, 03:13 PM
Veteran Member
#17
10-28-2016, 10:18 PM


PM Cambo... He may have some extras. I think I have seen some on eBay as well but they're pricey...
The following users liked this post:
plums (10-30-2016)
#18
10-30-2016, 06:04 PM
You can still buy original and brand new USB and DLC cables from Bosch/Rotunda.
$400 for the pair, plus tax if you're in a tax state https://rotunda.service-solutions.co...cs%20%3E%20VCM
I only ever found one aftermarket USB cable that worked like a genuine one, and I got it with a VCM that I bought off ebay, I was never able to find a vendor who had them...
I don't have any spare for sale right now, the two I have are waiting on the VCM's to be repaired and then they will go into kits.
The aftermarket DLC cables can also be problematic, I got a couple once that worked with Jags but not with Ford or Mazda, I also got one aftermarket DLC that worked perfectly with all vehicles, then others which did not work at all.
If you want something reliable to work with a genuine VCM then i'd suggest bite the bullet and get the original cables from Bosch/Rotunda while you still can, sooner or later they will go obsolete...
#19
10-30-2016, 10:14 PM
Veteran Member
The following users liked this post:
abonano (10-30-2016)
#20
10-31-2016, 08:41 AM
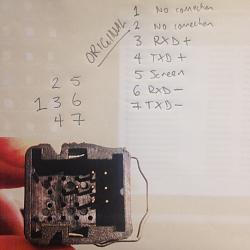
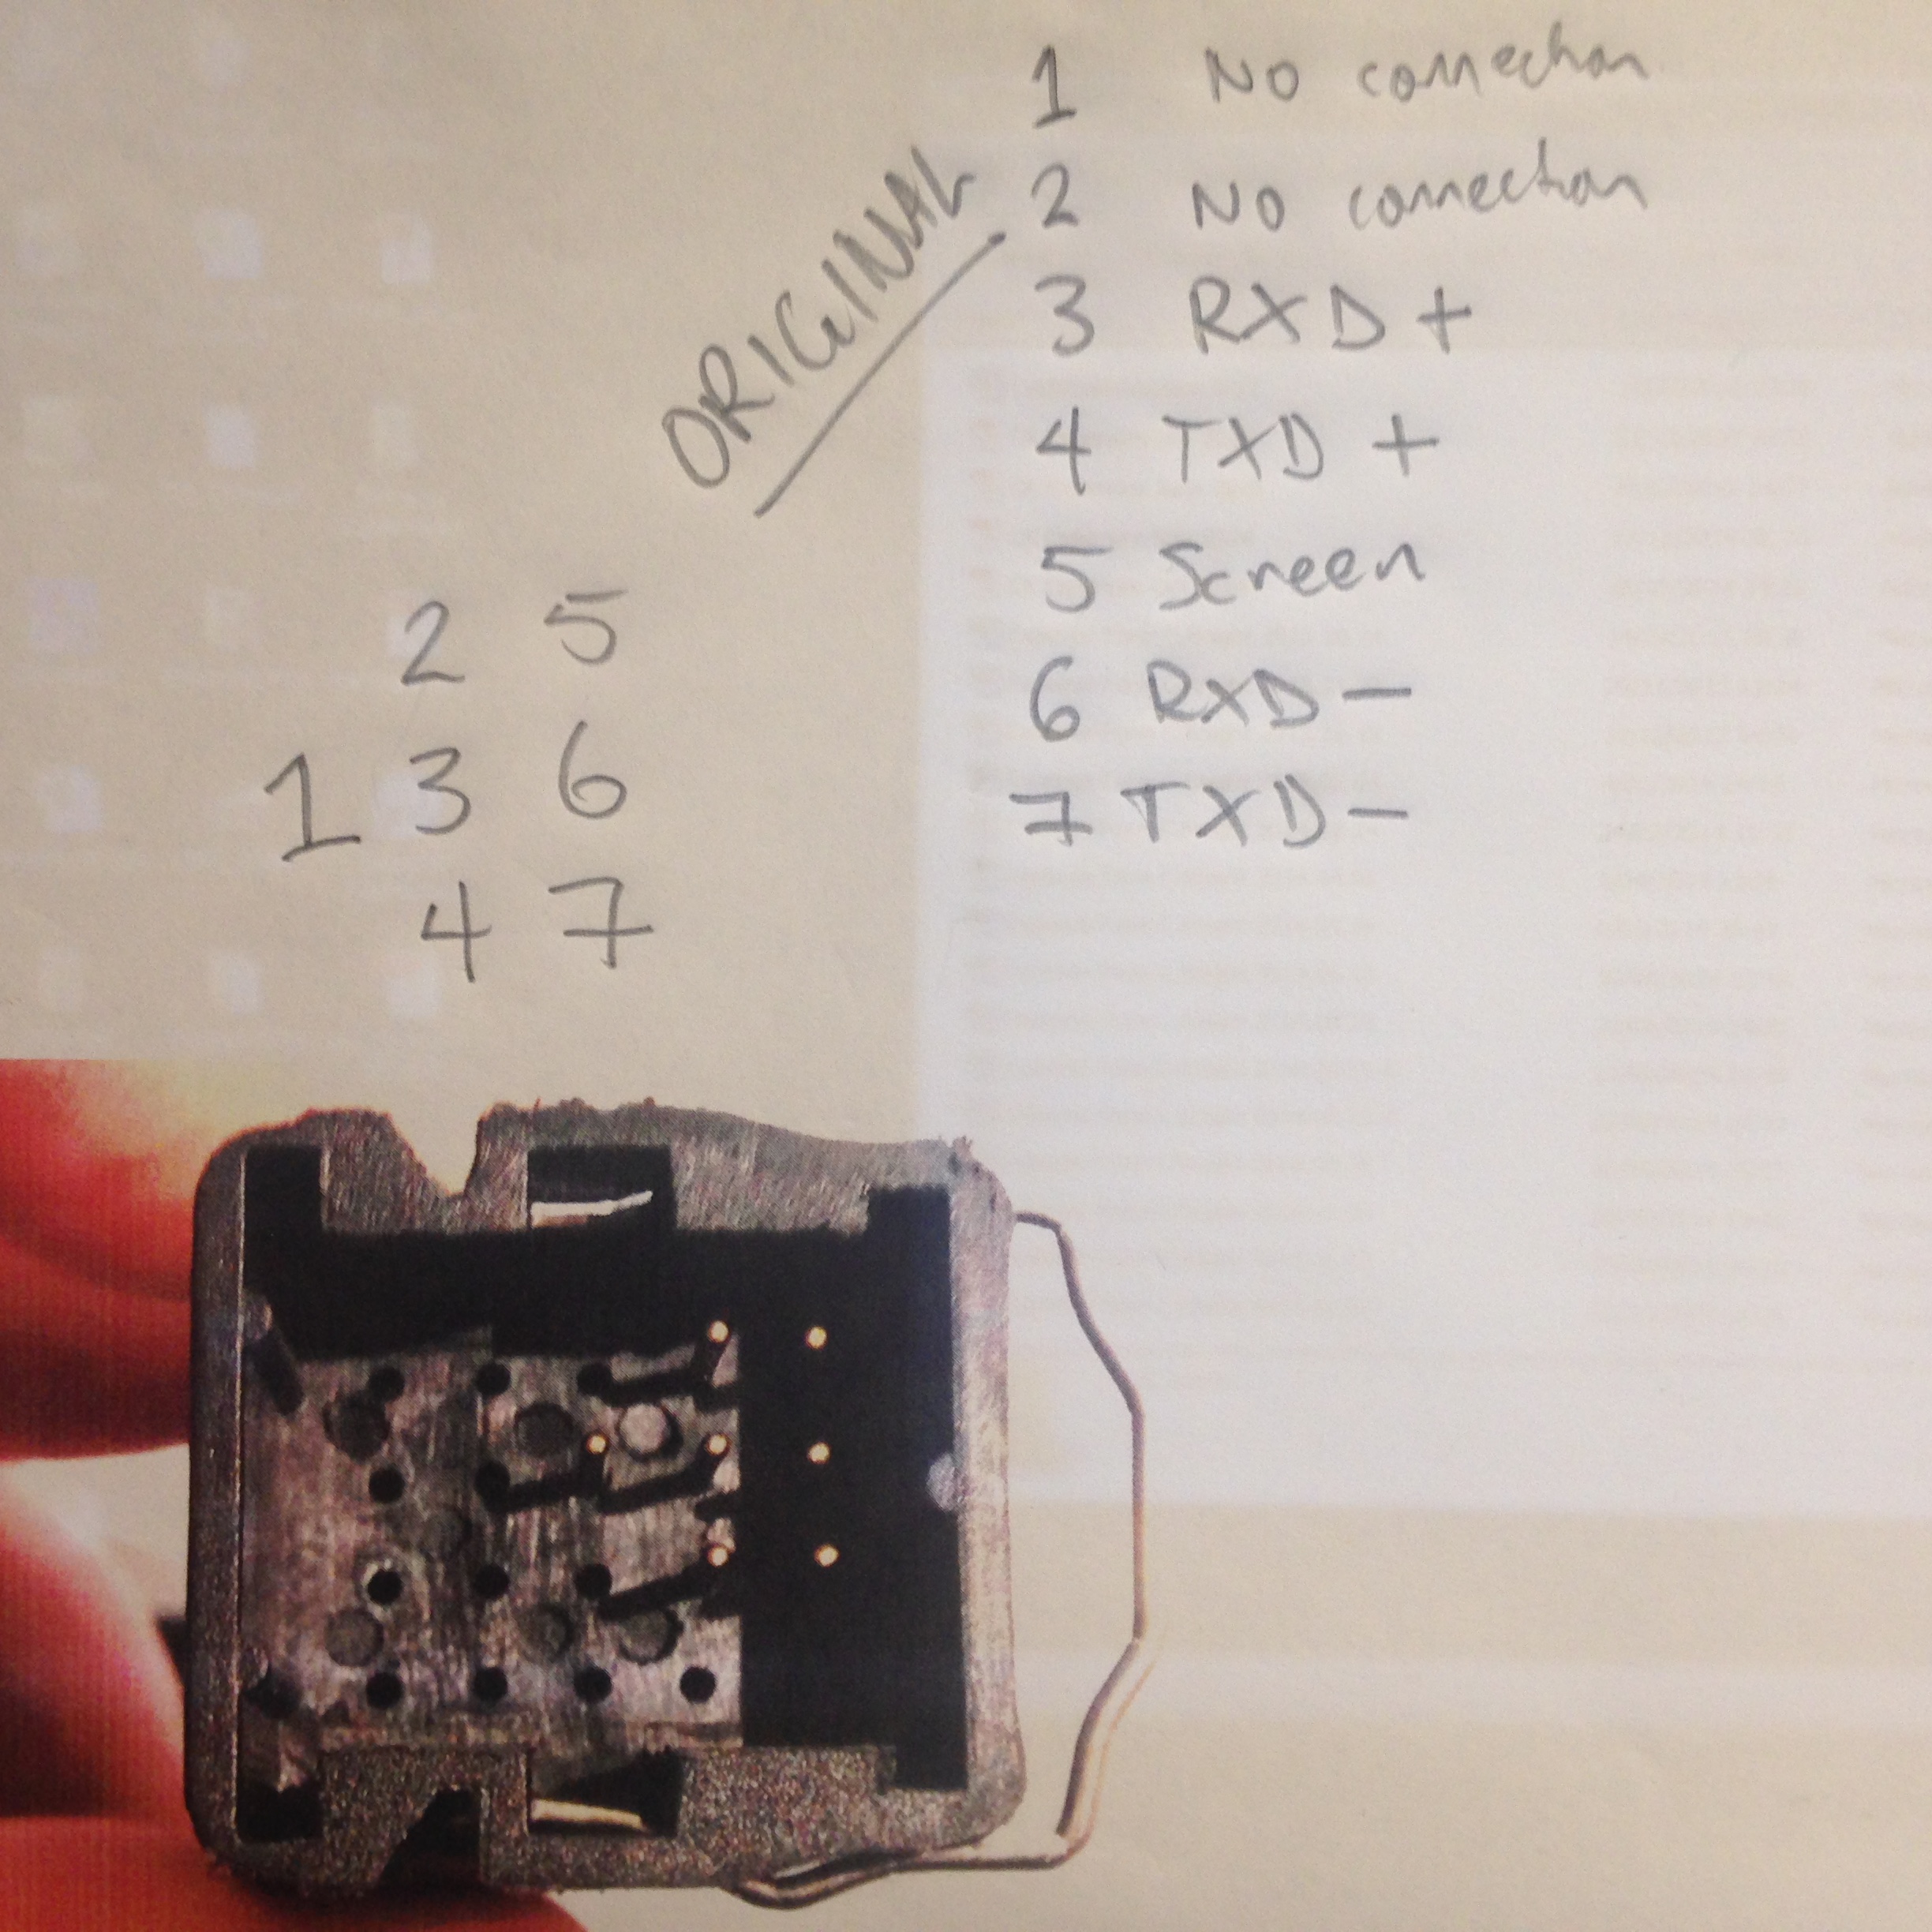
There is a pin-out of the original DLC cable to test one if you have one that you're not sure about.
Testing the USB cable is not so easy, but I did take notes of the connections of one of my originals, but to test it you need to open up the "box" in the middle of the cable, and then make a continuity test from the PCB to the connectors at each end. You can see the RX, TX, etc from the PCB to the VCM connector.
I thought I had noted the USB side of the cable as well but i don'e seem to have that in my notes. Live-testing a USB cable is pretty straight forward though, it either works or it doesn't, regardless of if you are connected to a vehicle (external power to the VCM).
Live testing the DLC is a bit complicated if you don't have access to different vehicles Ford, Mazda & JLR, but it's easy enough to check the pinouts according to the instructions.
The following users liked this post:
plums (10-31-2016)