Leather "dye" surprising results.
#1
 02-25-2013, 08:06 AM

The Oatmeal seats on my XJ8 had seen better days and I have a good friend that does stitchwork so I plan on having him re-do the seats for me at some point. I have other cars taking priority at the moment so I was looking for a quick solution for this casually driven car.
Now let me preface this post by saying I usually do not agree with shortcuts, and most of the time I take the longest way around just to be sure something is done right. However, this project was purely cosmetic and I had to come up with a short term fix.
I found the repairwizard, a UK company that sells a leather paint/re-dye/repair kit for leather and happened to have the proper AGD Oatmeal color which to me meant they must have done some research. My goal was to dab a bit on the cracked areas of my interior so it would look a bit more presentable, however once it arrived I fell in love.
I bought 2 pots of it, which it states one pot does one seat and I only planned on doing the cracks. I ended up doing more but it matches the factory color so very well that I did not have to to them top to bottom.
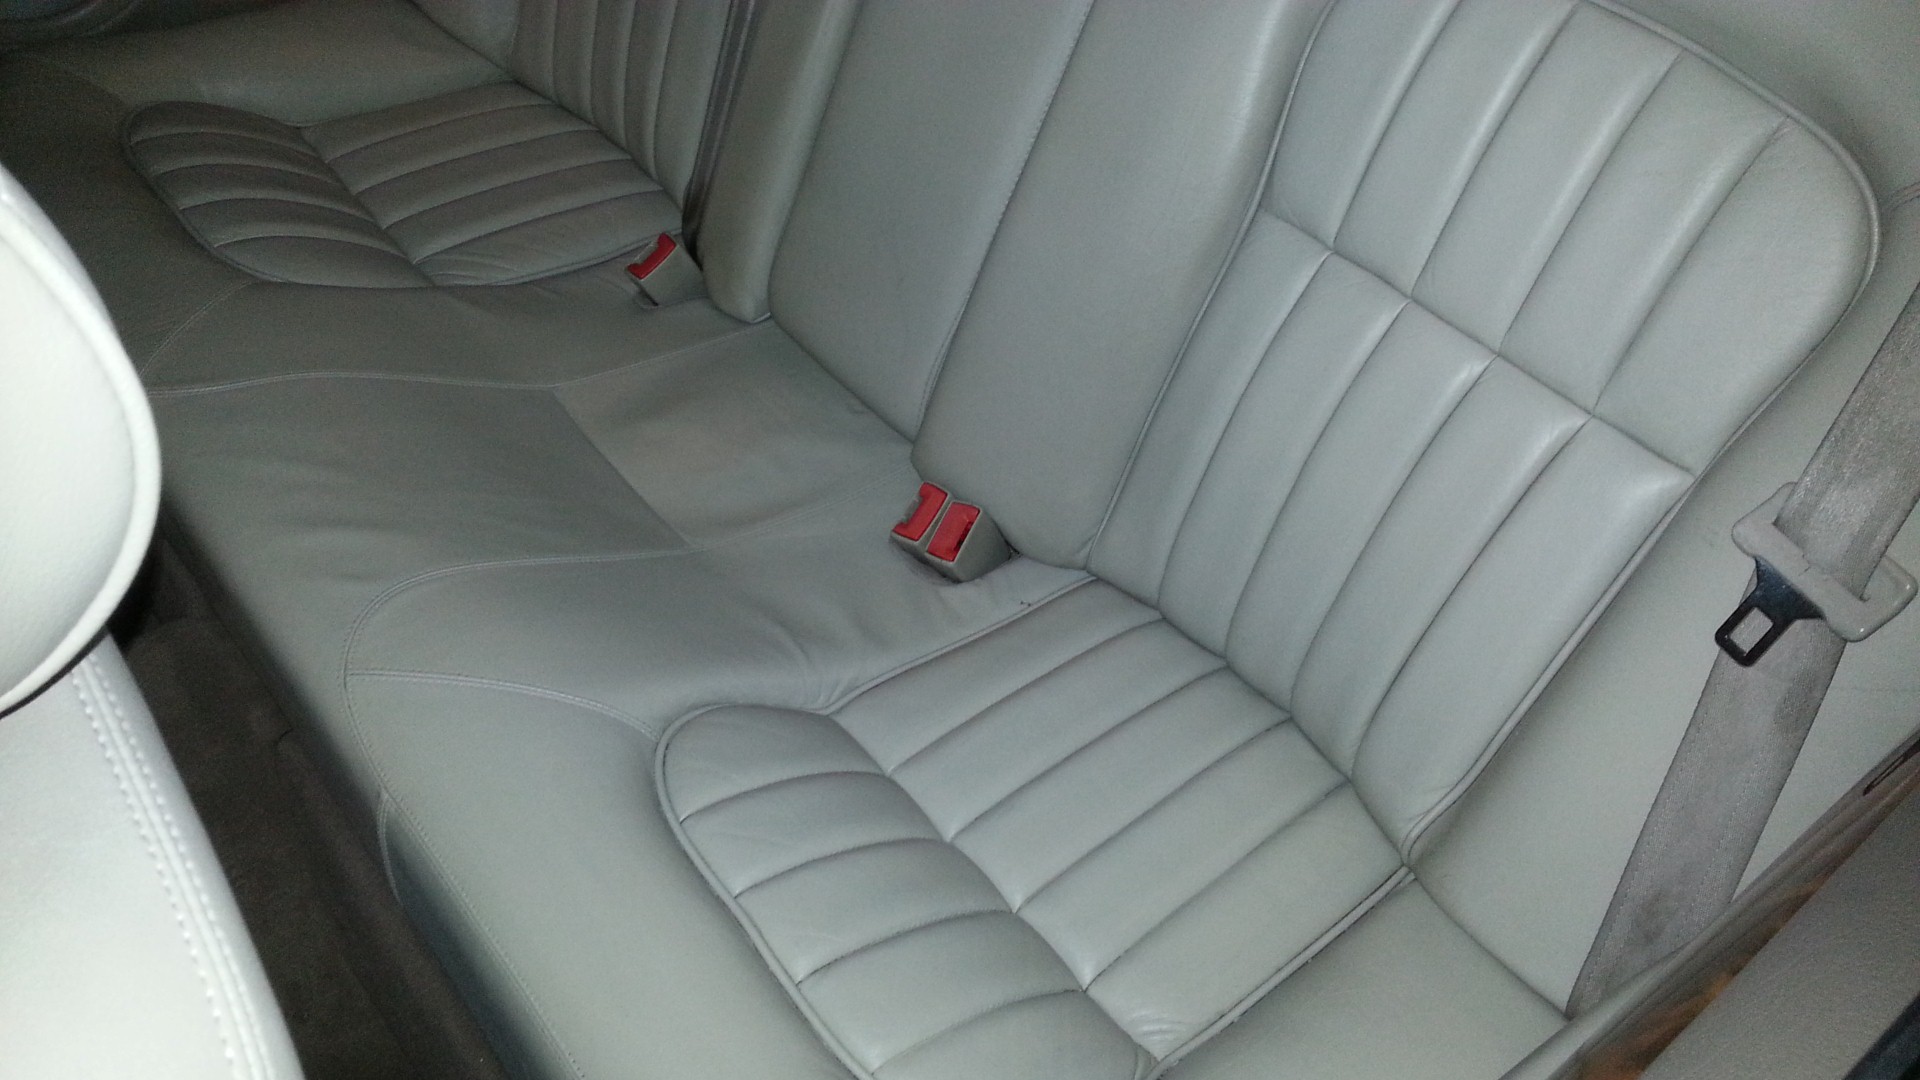
I ended up doing the seating surfaces of the front seats, the entire bottom of the rear and the centers of the back of the rear seat. It feels and looks great. No word on longevity yet but this was quick and simple - if I had to do this once a year I would.
Anyway, on with the pics.
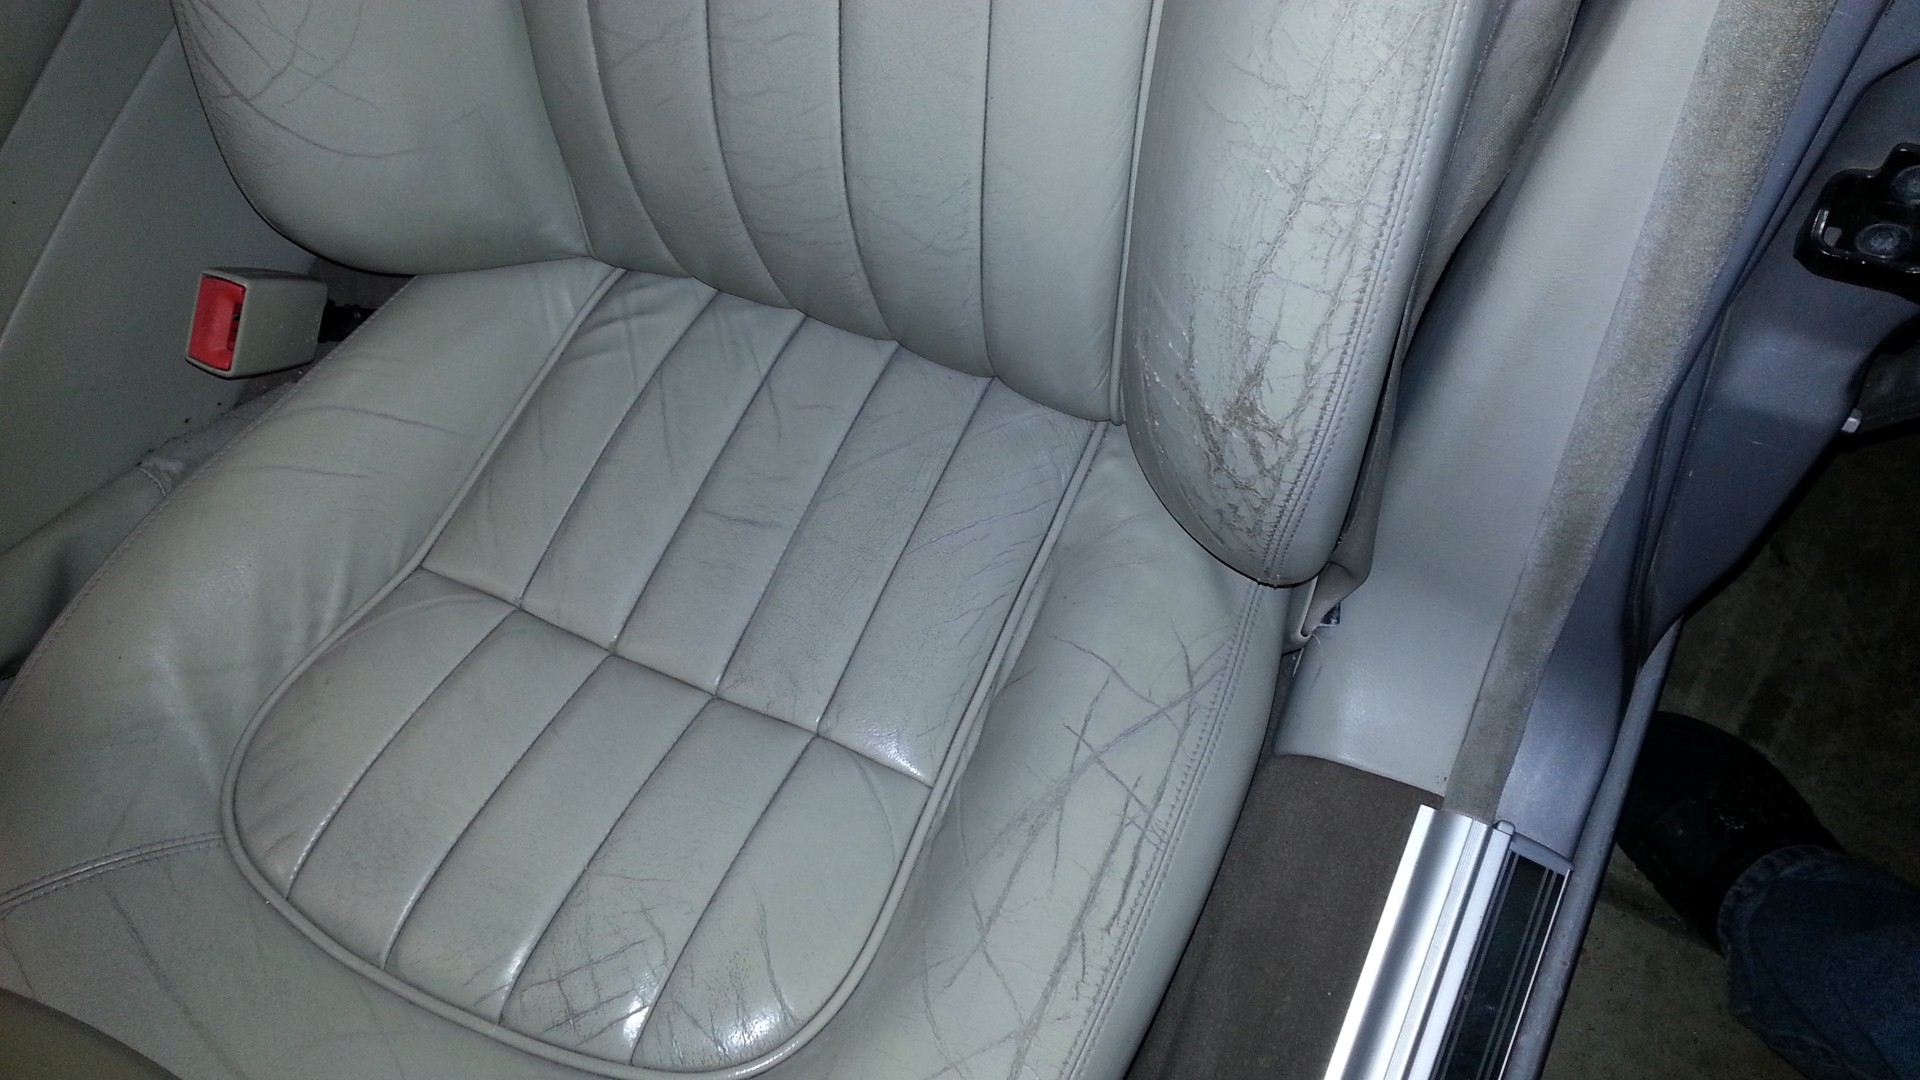
BEFORE

AFTER


Now let me preface this post by saying I usually do not agree with shortcuts, and most of the time I take the longest way around just to be sure something is done right. However, this project was purely cosmetic and I had to come up with a short term fix.
I found the repairwizard, a UK company that sells a leather paint/re-dye/repair kit for leather and happened to have the proper AGD Oatmeal color which to me meant they must have done some research. My goal was to dab a bit on the cracked areas of my interior so it would look a bit more presentable, however once it arrived I fell in love.
I bought 2 pots of it, which it states one pot does one seat and I only planned on doing the cracks. I ended up doing more but it matches the factory color so very well that I did not have to to them top to bottom.
I ended up doing the seating surfaces of the front seats, the entire bottom of the rear and the centers of the back of the rear seat. It feels and looks great. No word on longevity yet but this was quick and simple - if I had to do this once a year I would.
Anyway, on with the pics.
BEFORE
AFTER
Last edited by Probesport; 02-25-2013 at 09:03 AM.
The following 8 users liked this post by Probesport:
06TimXJS (02-25-2013),
burmaz (02-25-2013),
King Charles (04-18-2014),
Platinum XJR (09-05-2013),
Safi (02-25-2013),
and 3 others liked this post.
#2
02-25-2013, 10:07 AM
#3
02-25-2013, 10:12 AM
I wasn't sure if links were allowed or it was advertising.
The company is therepairwizard.co.uk but I purchased mine via eBay from them as that is how I stumbled upon their products.
It takes about as long as conditioning the seats, the rear bottom I took out and then I folded the fronts all the way down. Less than 30 mins per seat.
I must note that my seats are very clean in the before pictures, they were washed, cleaned with Lexol leather cleaner and also conditioned just a week before. The before's are as good as I could get them with typical cleaners, they were worse than that when I got the car.
Last edited by Probesport; 02-25-2013 at 10:16 AM.
The following users liked this post:
orlee (09-17-2013)
#4
02-25-2013, 10:28 AM
#6
02-25-2013, 11:31 AM


Join Date: Apr 2012
Location: Summerville, South Carolina
Posts: 24,357
Received 4,180 Likes
on
3,643 Posts
#7
02-25-2013, 01:29 PM
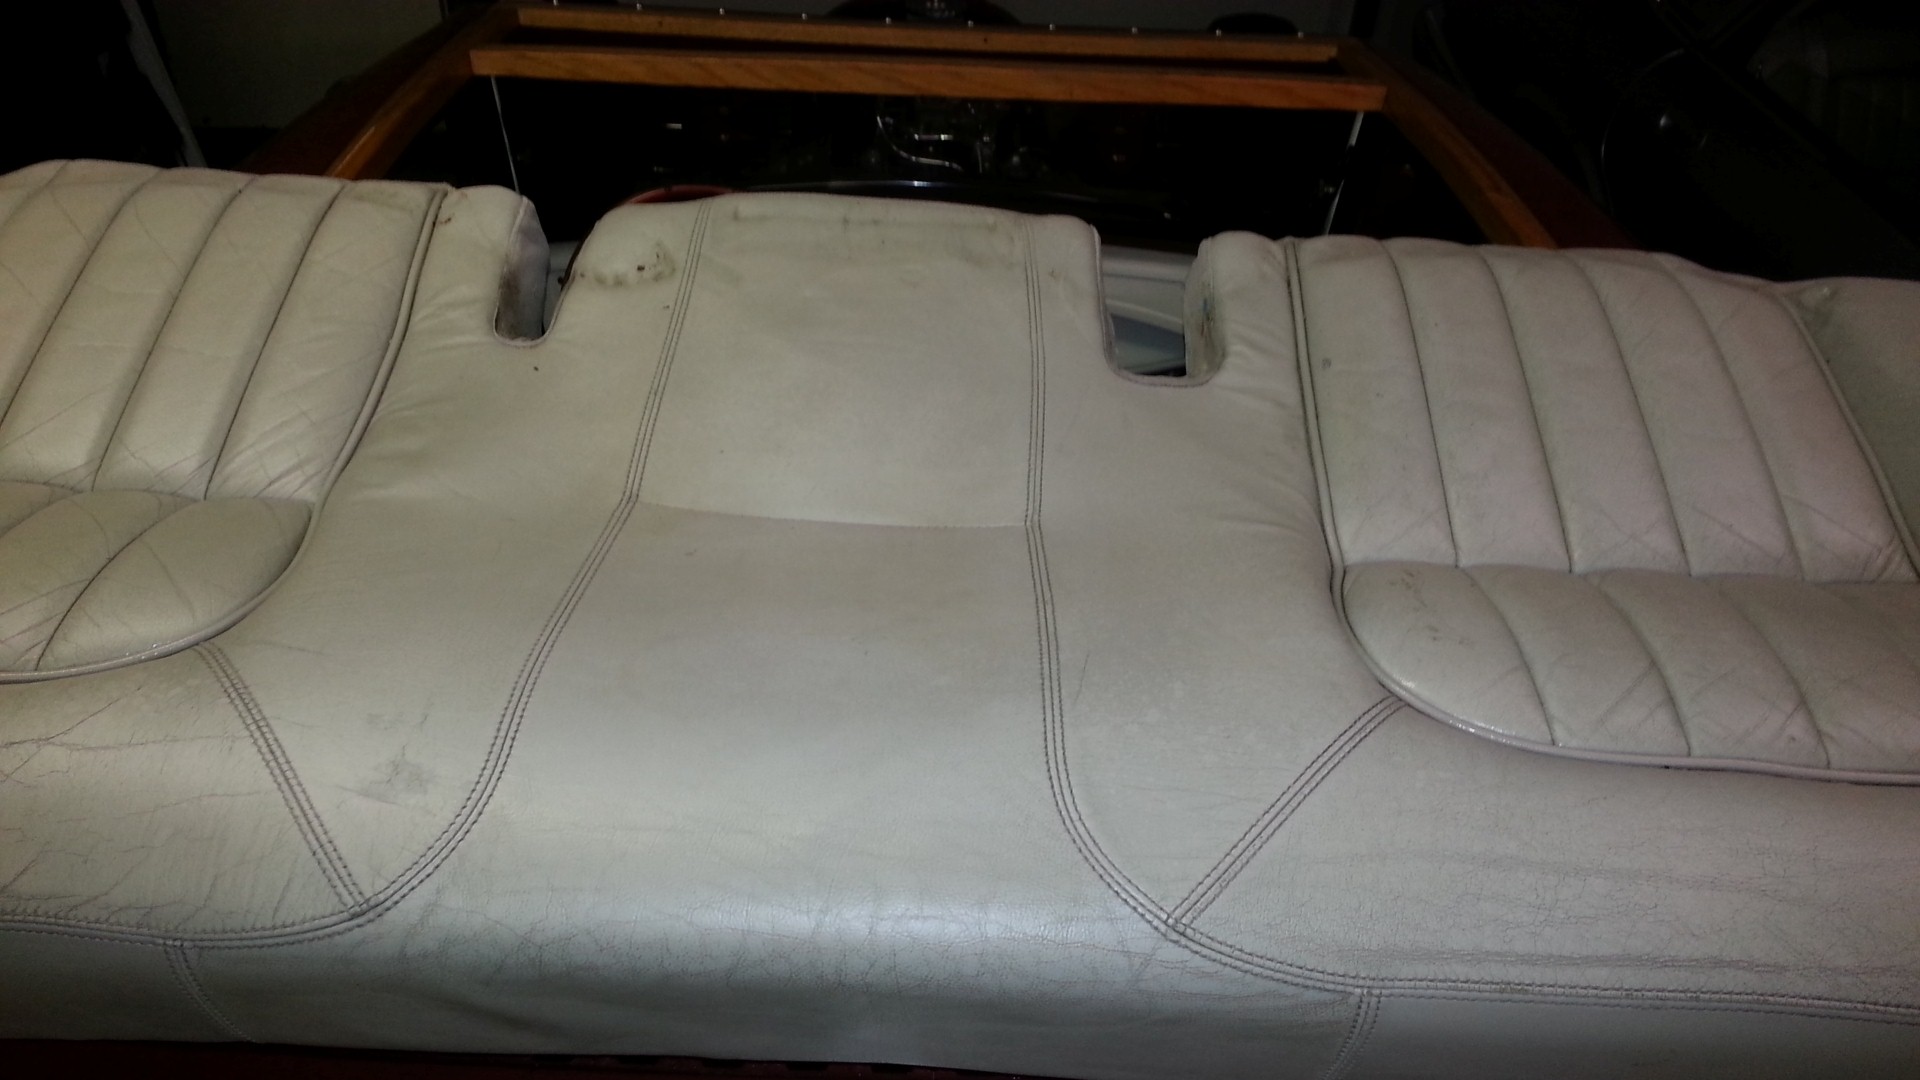
I did this recently as well, just dye and foam pads, what method did you use as I noticed your cracks are quite well covered.
Best way I found was to wet dab the worst bits and to dry dab your way out to blend in. The only problem being its doesnt seem to last a vast amount of time I dont use my car much and I need to top up once every 6 months to stay on top of it. Also did the leather wear on my steering wheel as well.
Heres my results
Last edited by L80ous; 02-25-2013 at 01:33 PM.
The following users liked this post:
The_Ikon (03-04-2022)
Trending Topics
#8
02-25-2013, 01:34 PM
Leather dye for JAGUAR xk8 xjs x300 x type s type xj8 x320 XF XJ colour matched | eBay
#9
02-25-2013, 02:52 PM
Senior Member
#10
02-26-2013, 02:12 PM
#11
03-03-2013, 05:53 PM

Senior Member
Used a simillar dye and the Gliptone cleaner and Gliptone conditioner on mine and it looks great.
Got mine from Sevelewissaabs.co.uk who does it for land rovers, jags and saabs. Apply the cleaner, allow to dry then apply the conditioner, allow to dry then apply the dye with a sponge. Use light coats not heavy ones.
I will use the same products when I do the XJC.
Got mine from Sevelewissaabs.co.uk who does it for land rovers, jags and saabs. Apply the cleaner, allow to dry then apply the conditioner, allow to dry then apply the dye with a sponge. Use light coats not heavy ones.
I will use the same products when I do the XJC.
#12
03-03-2013, 08:46 PM
Veteran Member
I just placed my order. Will post before and after photos when I do it. Thanks for the info.
This is where I got it Jaguar Oatmeal agd Leather Repair Pigment Dyes with Unique Applicator Sponge | eBay
This is where I got it Jaguar Oatmeal agd Leather Repair Pigment Dyes with Unique Applicator Sponge | eBay
#15
03-07-2013, 09:20 PM
I'm in the process of doing this on my car. How did you keep the paint off of the stitching? Also, do your seats feel as smooth and soft as they did originally? Mine feel a bit rougher so that it is a bit harder to slide in and out of my driver's seat. I'm hoping it will get better after more than 24 hrs of drying.
#16
03-08-2013, 09:08 AM
I'm in the process of doing this on my car. How did you keep the paint off of the stitching? Also, do your seats feel as smooth and soft as they did originally? Mine feel a bit rougher so that it is a bit harder to slide in and out of my driver's seat. I'm hoping it will get better after more than 24 hrs of drying.
My Stitching is the same colour as the seats, but I would imagine you would have to carefully mask with sticky tape of some sort.
As for the roughness this is normal, by the time you�ve got in and out a couple of times it should feel like the rest of the leather, perhaps try conditioning the leather after the dye has dried if you've covered a large area.
The only problem I found was that if you wear newish jeans the blue can rub off quite easily onto the dye. Also it doesn�t seem to last very long before touching up either.
#17
03-08-2013, 09:35 AM
I'm in the process of doing this on my car. How did you keep the paint off of the stitching? Also, do your seats feel as smooth and soft as they did originally? Mine feel a bit rougher so that it is a bit harder to slide in and out of my driver's seat. I'm hoping it will get better after more than 24 hrs of drying.

#19
03-14-2013, 04:17 PM
Veteran Member
My kit came in the mail today -- decided to try it right away!
My driver's seat is (was) the worst, so that's where I started. As you can see, the seat was in pretty bad shape, and the result is quite amazing! I've never done anything like this before, so if I can do it, anybody can.
Here are a couple of before and after photos -- this only took me about 1/2 hour or so.
The following users liked this post:
The_Ikon (03-04-2022)