When you click on links to various merchants on this site and make a purchase, this can result in this site earning a commission. Affiliate programs and affiliations include, but are not limited to, the eBay Partner Network.
STR Brake Booster Hose to Induction Elbow-Causing P0171,P0174?
My 2005 STR is throwing P0174 and P0171 after removing the entire intake system to replace the dreaded under SC hose.
Brutal has posted that the power brake vacuum line connection to the induction intake can leak.
Brutal-"brake booster pipe where it goes into the induction elbow below the throttle body. Theres a oring in there that is behind the plastic release ring. Jag only sells the induction elbow. That oring is always brittle and in piece and is a big source for vacuum leaks"
Can this O-ring be replaced?
How do you remove the vacuum hose from the elbow? It rotates and moves in and out just a bit. The hose seems too loose and I suspect it's got a small vacuum leak.
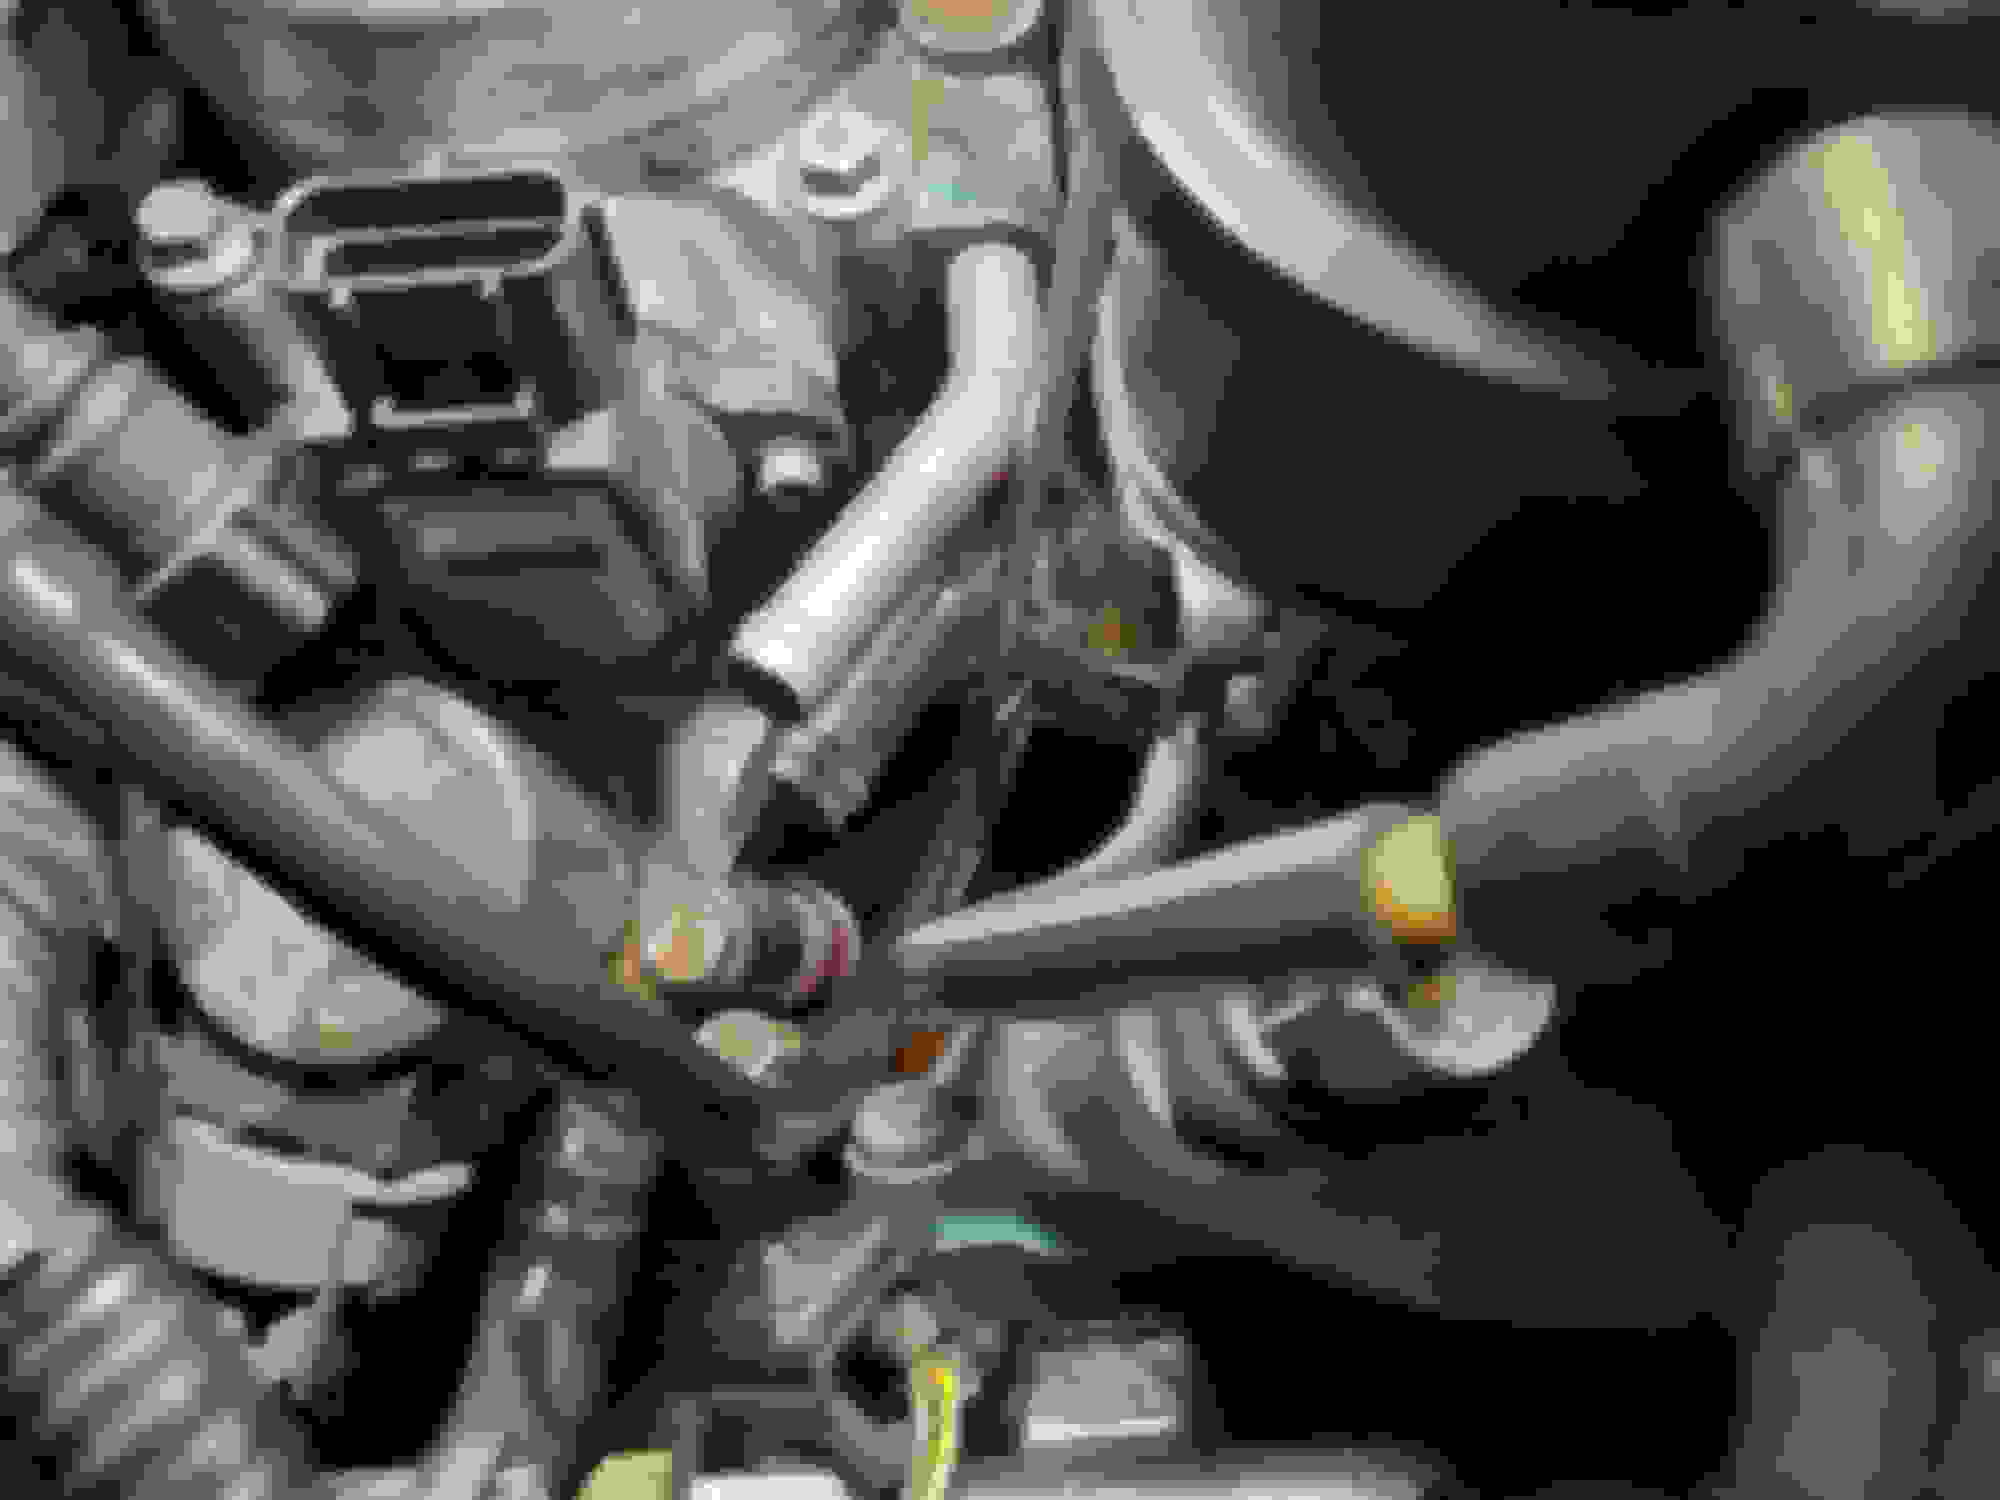
Here are two picture showing where the hose is.
STR Induction Elbow-PB hose
STR Induction Elbow-PB hose-view
I think if I had more time I would drill the dumb plastic bushing and O-ring completely out and thread a 90 brass fitting in. Seems overly complicated for just a vacuum line connection.
.
.
.
Last edited by GGG; 12-16-2022 at 02:52 PM.
Reason: Edit typo in thread title
I owe you a great big thank you for always posting about the ELM327 used to interface with the OBD-II. I used this along with my ScanXL software on a laptop to exactly pinpoint where my vacuum leak is and it would have been almost impossible any other way.
Like you advise I got the short term fuel trims up on the laptop screen and monitored them real time with the engine running at idle. (Another thank you to factory Jaguar tech Steve for the custom dashboards!). Car had a restricted performance and check engine light on. Codes where the old stand by ones P0174, P0171. Short term trims for both sides were +20 to +25 way out of range and an obvious air leak somewhere!
I immediately started spraying carb cleaner at all the gaskets and connections. Everything was very clean until I hit this vacuum elbow in the intake elbow. STFT went nuts. Going from +20 to 0 to -20 in a couple of seconds before going back to +20 or so. No doubt where the problem is. The engine hardly did anything. No stumble or miss so I would never have seen this much change just by listening.
This also fit my cars symptoms. I have a constant check engine light but only get restricted performance if the car idles a bit. The vacuum leak is constant so the more air the engine is using the smaller percent the leak is and the restricted performance goes away as soon as I get off idle. Funny that the yellow light restricted performance does not put me in limp home mode and the car seems to drive as normal. Even the fuel mileage seems the same.
.
.
.
Not a bad idea but it looks like the factory fitting is only about $15 and is part number C2S15816 and is used on a number of Jaguars. At least the XJR and STR plus the X-Type. This part is all over EBay and is easy to get.
Great picture of the odd fitting and O-ring from Jim Lombardi (Sure wish he would post more too!). He came up with the part number and that's great because the JEPC does not list this part separately and I was told you had to buy the entire induction elbow from Jaguar!
Th�nk you for that well-documented bit of research, tbird6. Since this part C2S15816 perishes invisibly over time and with heat, for $15 it sounds like a great investment for preventive maintenance. Going to order one right away.
No problem as we all gain from each others repairs and breakdowns!
Just a bit of worry as I found one post from Brutal stating there are 3 sizes of this fitting and the part number I posted would not fit the 4.2L SC engines. But I also found several XJR guys who claim it is the right part and it does fit. So right now I plan to go into the repair armed with two ways of fixing it.
Get the brass compression fitting LFA-110 (About $6-$10 depending on where you get it) and Jaguar part #C2S15816 (About $15 on EBay or Dealer). Both of these are cheap enough and I am really thinking of doing the brass fitting repair because it looks much more permanent.
I still don't under stand why Jaguar made this one and only vacuum connection swivel with an internal O-ring?? Right next to it is the normal metal vacuum nipple for the SC bypass and it works fine.
Here is an induction elbow for sale off EBay and it comes complete with the broken vacuum line you will need to fix before you can use the part!
Wanted to finish this off to help anyone reading it.
As I posted the under super charger hose finally let go on my 2005 STR. 10+ years and 119K miles so it took at while! No picture because it failed like all of them I have seen. In the short section that is larger in diameter about 1" or 2" from the steel nipple at the front of the motor.
I only could do it because of the prior forum members posting their tricks to get access. Here are a couple of very good threads to study.
I have had the hose and all the gaskets for about 4+ years because I thought it would happen sooner rather than later. But I am glad I waited as it is a very hard job.
The real tricks are;
Remove the engine compartment cross brace, wiper cowling and cabin air filter stuff so you have access to the fire wall on the passenger side.
Unhook the 3 heater hoses going into the heater core and remove the two bolts on the clamps holding the heater hoses to the side of the engine compartment. I used a soft line to pull the hoses back and tie them out of the way. You need to get at the back of the engine to get at the two "evil" EGR bolts Ttwotees had so much trouble with.
The P/B booster vacuum hose is attached to the induction elbow with a real strange plastic bushing and O-ring. At this late date it will be hard as a rock and will crack with the slightest movement. Follow the threaded brass fitting repair I posted above. It's simple and costs $6 and you will never need to mess with it again.
That vacuum hose caused me to remove the super charger a second time in 2 weeks! Yes I am getting better at it! I had a large vacuum leak with the two codes I posted. They are fixed now. This was much harder than it needed to be because I had neglected to slot the bolt hole on the back of the blower as Brutal suggests! It is slotted now!
One final slap in the face was the first time I drove it to work after the vacuum hose repair I did not even get to work before the low coolant light came on. Coolant was pouring out of the front of the engine. Since I have changed every hose on the motor I was confused about where it was coming from?
Turned out my water pump let go just at that time. Good news again is that all Lincoln LS 3.9L V-8's and all Jaguar 4.2L NA and SC V-8's (Should include the 4.0L too but I am not sure?) use the exact same water pump. It is pretty easy to change and they have a simplified improved water pump in the after market. $90 with a lifetime warranty. They had it in stock on a Monday night at 9 PM too. No core required.
I also replaced my blower with one that only had 35K miles. I bought this off EBay a couple of years ago when I was planning to port the SC. After the poor results of other people I gave up on that idea. But the lower mileage blower does sound better and the car has more power so the blower does wear and get less efficient with age.
Finally I also broke the plastic nipple off the top radiator tank for the second time!! I did it exactly the same way as the first time. I leaned on the tank and was not watching what I was pushing on. That was $150 mistake.
.
.
.
I won't lie it's a tough repair and I think I am a pretty good shade tree mechanic!
I use to post under Tbird6 too so it's a bit confusing.
I tried to round up everything that helped me because people have went thru hell fixing this and I sure benefited from their pain!
I now have a 2014 XJR but the STR was a very good car and was my daily driver for over 6+ years and over 100K miles.
Now time has gone by so please post back because parts and part number might have changed.
.
.
.
Thanks! Im still waiting on the car to be delivered (today or tomorrow) and all my part orders to come in (end of the week maybe).
Right now im trying to get that damn JTIS software to work!
For anyone facing this issue of a vacuum leak at the point of the brake booster hose going into SC elbow, I'll attach some pics with a brief write up on how I did mine. BTW Clubairth thank you kindly for your suggestions and input! I've posted my repair as you recommended.
I was able to do the job on the car by only removing wipers, cowel, cross brace, intake, and throttle body. I used a number of long picks and a well placed mirror and light to see what I was doing.
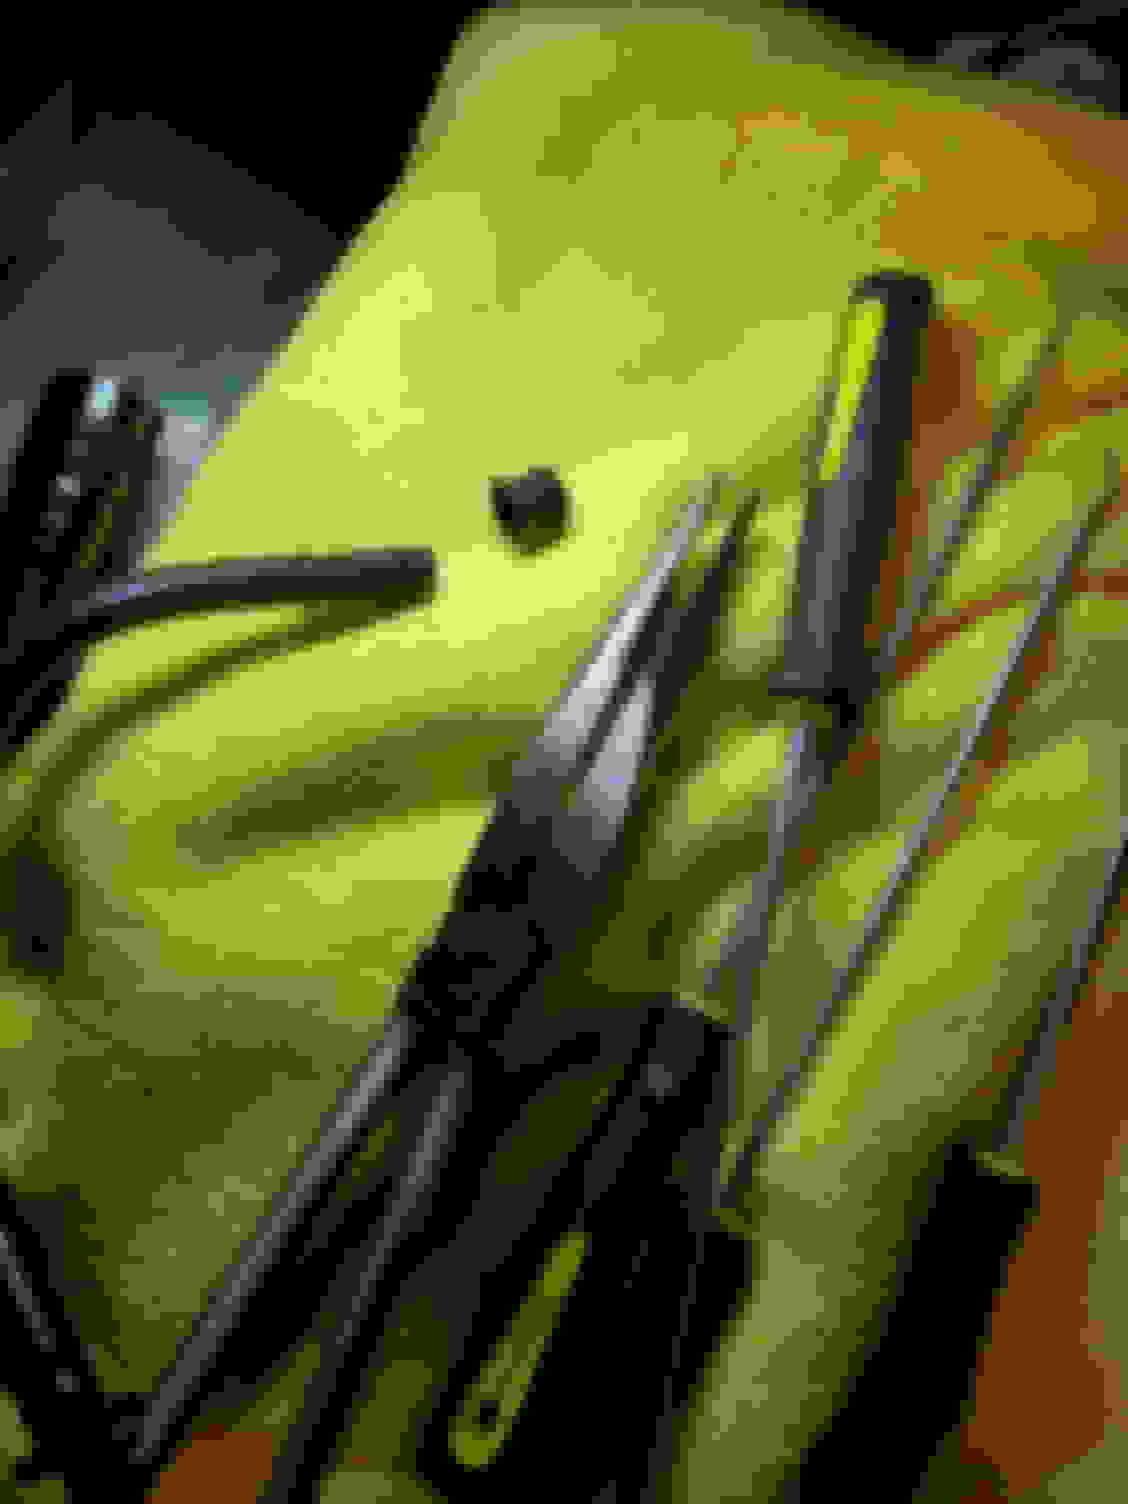
To get the vaccum line, and the locking collar out of the brass bushing, I used a pick and pushed in-between the locking collar and the vacuum line and gently pulled it out. As shown below (zoom in to see the tip of the pick in image). By doing this the teeth of the locking collar expand a tiny bit and gives you enough space between the line and the locking collar, to pull the vacuum line straight out without issue. The lock will then remain inside the bushing and can be taken out with a pick once the line is removed.
Place the tip of the pick between the line and the locking collar and pull the vacuum line straight out.
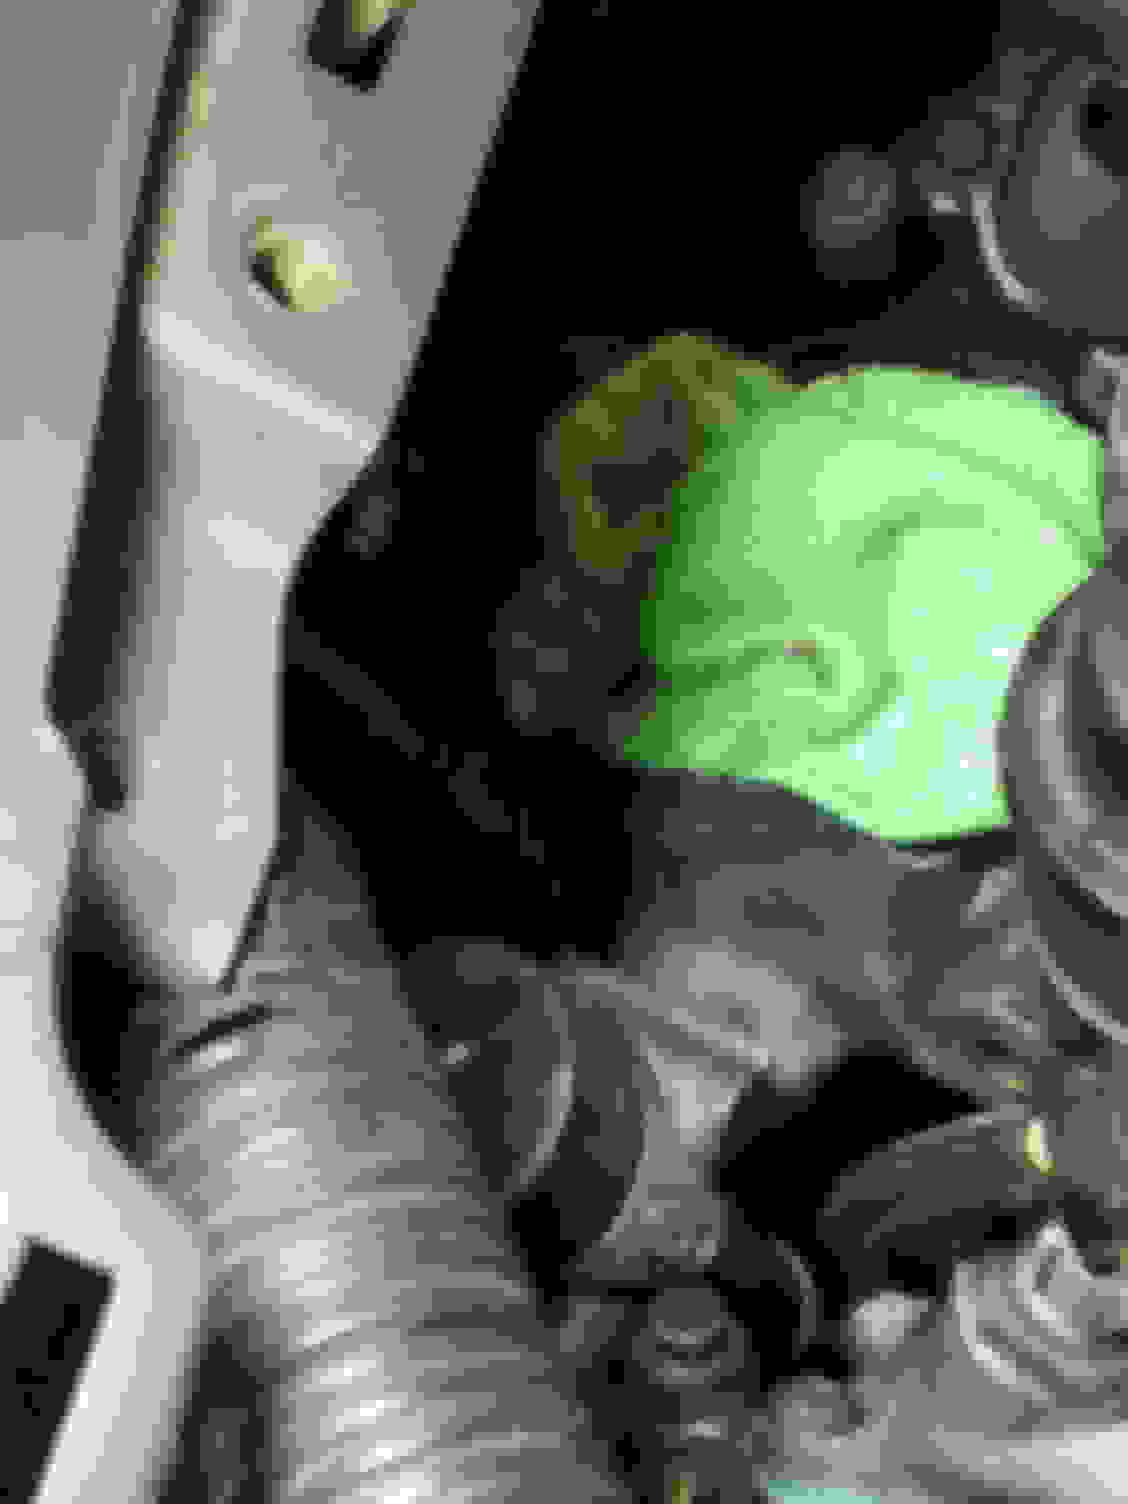
This is the area i had to work with TB, the vacuum line and locking collar removed from brass bushing.
With a well placed light and mirror you can see inside the brass bushing and see the o-ring (can't see my mirror here as I couldn't hold mirror, the light and camera but any small mirror angled towards the hole works). With a little gentle prodding and re-positioning with various style picks, you will be able to get the o-ring out.
it took a bit of time as I didn't want to damage the bushing or push the o-ring in further but it was manageable. Once out the o-ring just crumbled in my hand.
I bought a new brass bushing and vacuum line and then removed the new o-ring from the new bushing. I gently placed new o-ring back into the old bushing with a pick. Double check it is seated properly againt the rear of the brass bushing. This is really only possible if you have a small mirror and light to see into the hole of the bushing. I then put the new locking collar on the new line, sprayed some wd40 and pushed it into bushing gently. I felt a slight click and I knew it had seated properly. My P0174, P0171 codes are gone and the vacuum leak resolved.
Has anyone else experienced a leak still at the area after replacing the o-ring and plastic retainer? I inspected the line going in, and looked to be in decent shape. But after smoke testing it, it�s pouring out tons of smoke through that area again. I�m guessing the vacuum line itself is bad. Is there a replacement part for that? I was searching through the forums and googlefu with no answer.
If not, I�m guessing the next solution would be removal of that section and having it threaded for a fitting like mentioned above.
Yes I would just put the brass fitting repair in and move forward. I had a lot of time and effort fixing that as you have seen above and I was VERY happy to permanently repair this vacuum leak! I would consider replacing the vacuum hose from the SC elbow to the booster itself but replace the fitting first just to make sure. On my car that was a tough vinyl/plastic hose but now it's even older so certainly possible it needs replaced at this time. Sure would not hurt to do it.
I still am embarrassed that I had a typo in the title too after all these years!!
Are you looking for the part number for the hose from the SC elbow to the brake booster?
.
.
.
Last edited by clubairth1; 12-16-2022 at 08:12 AM.
Yeah I�ll just tap it and move on, but I think the previous owner already replaced the longer hose that goes from the booster to right above the throttle body, into the plastic fitting/coupler.
I was looking to see if there was a replacement for the one after the coupler into the the supercharger elbow. If not I�m sure I can cut the end of the original long booster hose stuff a little vacuum fitting and put a new rubber vacuum hose to the brass fitting. That hose that goes into the elbow does seem to be very stiff and probably do for a replacement.
Has anyone else experienced a leak still at the area after replacing the o-ring and plastic retainer? I inspected the line going in, and looked to be in decent shape. But after smoke testing it, it�s pouring out tons of smoke through that area again. I�m guessing the vacuum line itself is bad. Is there a replacement part for that? I was searching through the forums and googlefu with no answer.
If not, I�m guessing the next solution would be removal of that section and having it threaded for a fitting like mentioned above.
Thanks,
Luis
My brass fitting seemed to check out but I did replace the entire line with the o-ring/retainer combo. That brass bushing seems to be pretty solid unless otherwise tampered with so I didn't deem it as the issue. After replacing the 3 parts above my issue was resolved.
Yes after all this time I would change the tubing. As you can see it gets very stiff and brittle even when new and now it's just waiting to crack!
Mine was almost solid and with any bending the tube broke.
.
.
.

 09-07-2015, 10:14 AM