
Front sub frame Mount captive nut broke free.
#1
 03-08-2014, 11:03 AM


Hi guys and Girls,
Hoping to get a little help could not find any threads on this.
Just replaced the front antirollbar bushings and during this had to loosen and drop the subframe 25mm. (side note you only need to lower the passenger side to get the mount off the drivers side can be done without lowering the subframe if you use a ratchet wrench with a swivel head.) now the problem i have is the captive nut on the drivers side mount is no longer captive broke free and spins while i was trying to loosen. Could anyone help and tell me what size wrench i need for the nut and how do i get it in there hopefully without cutting anything.
paul.
Last edited by Paulc732; 03-12-2014 at 11:00 AM. Reason: change title so as not to misslead
#2
03-13-2014, 04:31 PM
ok guys, I did a little hunting around and found this from our friends across the pond.
Suspension overhaul nightmare
what I am going to try this weekend is find a cheap (harbor freight probably) 21mm combo wrench and cut off the open end so i can slide it up inside the rail will let you guys know how it goes and post pics. wish me luck.
Suspension overhaul nightmare
what I am going to try this weekend is find a cheap (harbor freight probably) 21mm combo wrench and cut off the open end so i can slide it up inside the rail will let you guys know how it goes and post pics. wish me luck.
#3
03-21-2014, 04:22 PM
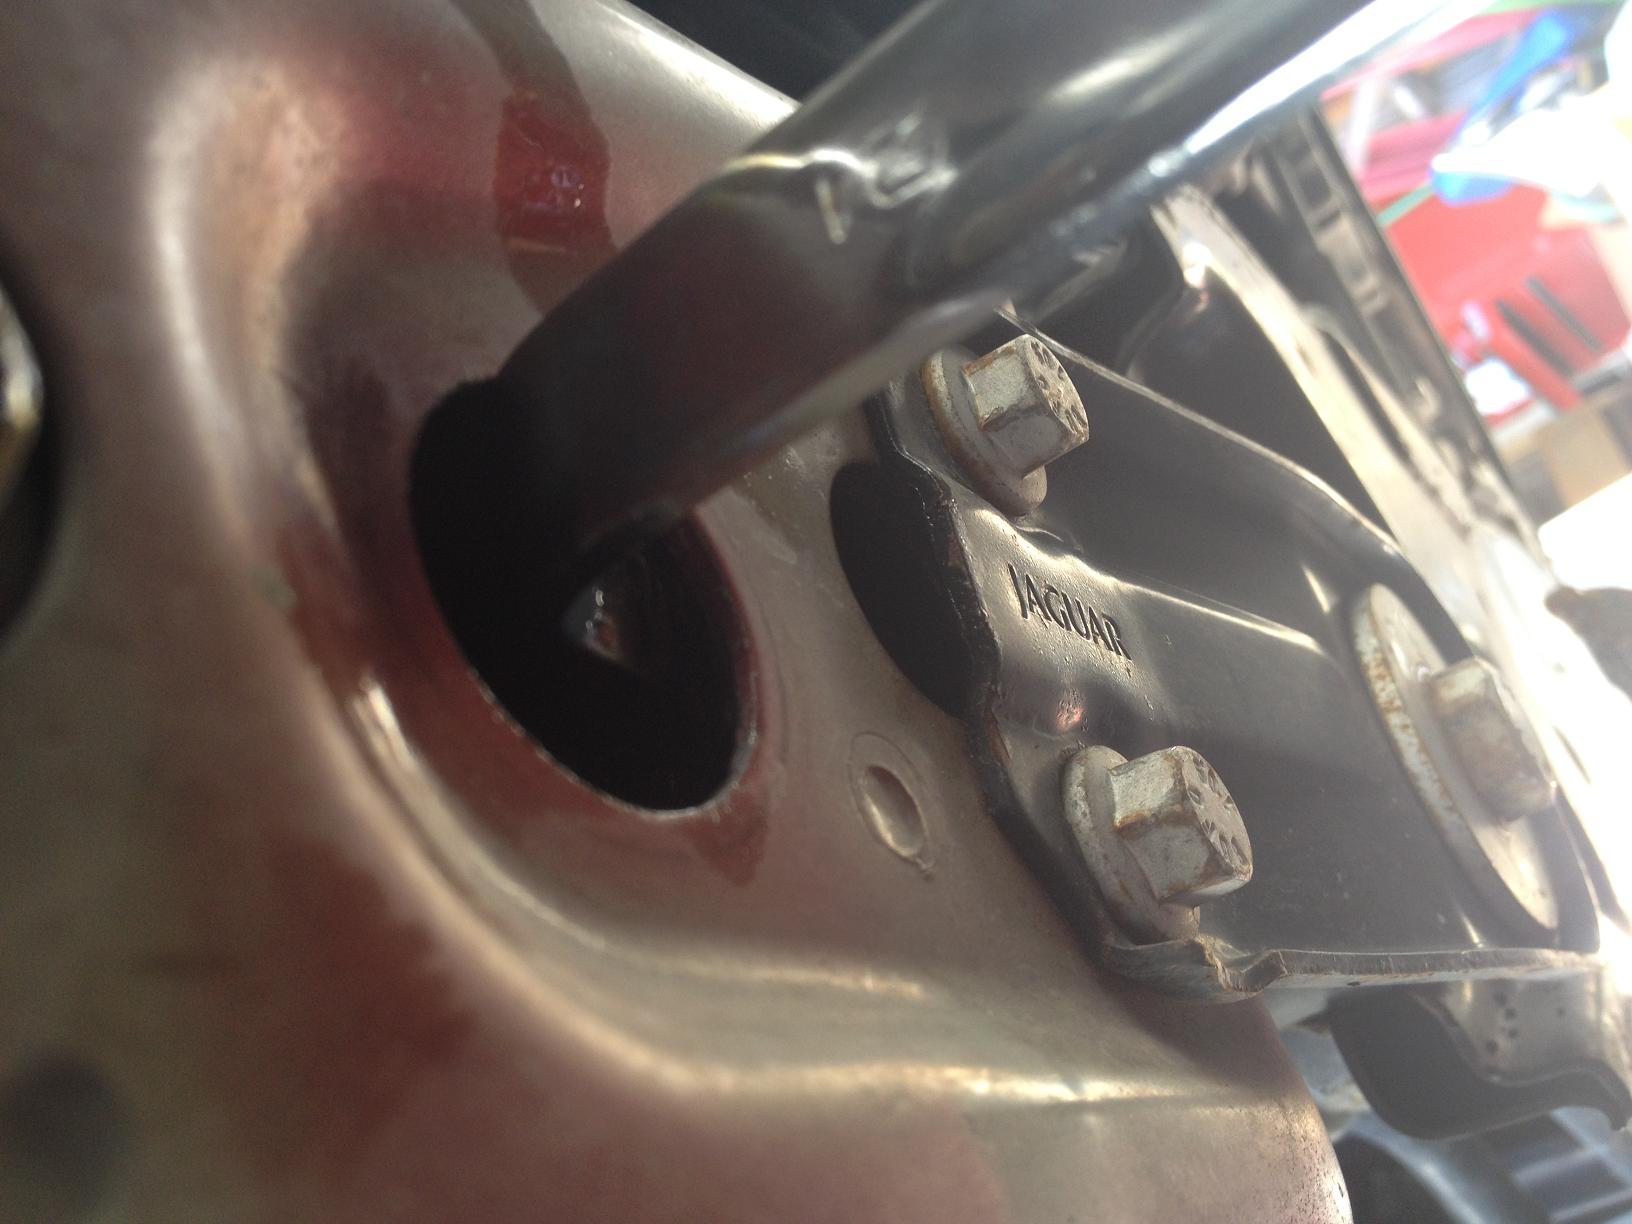
Ok Guys and girls
managed to tighten the bolt without cutting the floor pan here is how I did it.
remove the plastic plug.
Attachment 76956
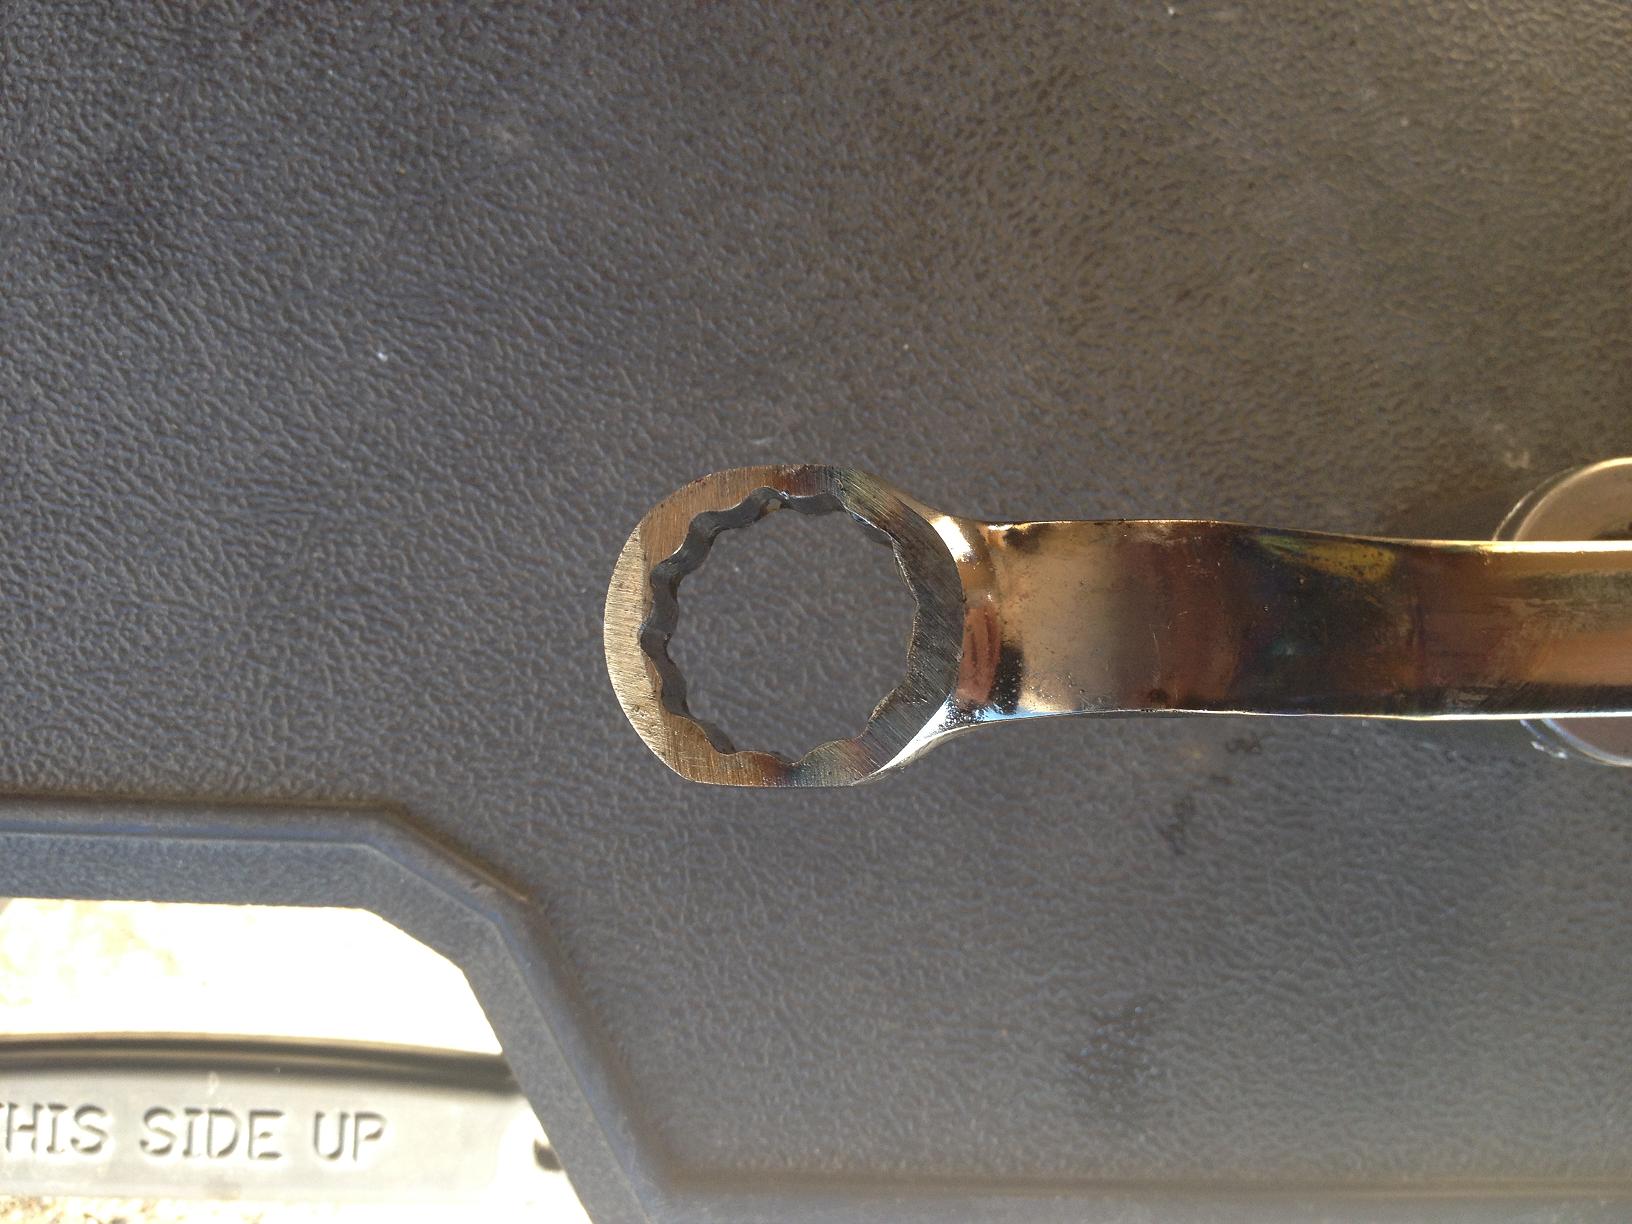
Grind the sides of your 21mm wrench.
Attachment 76957
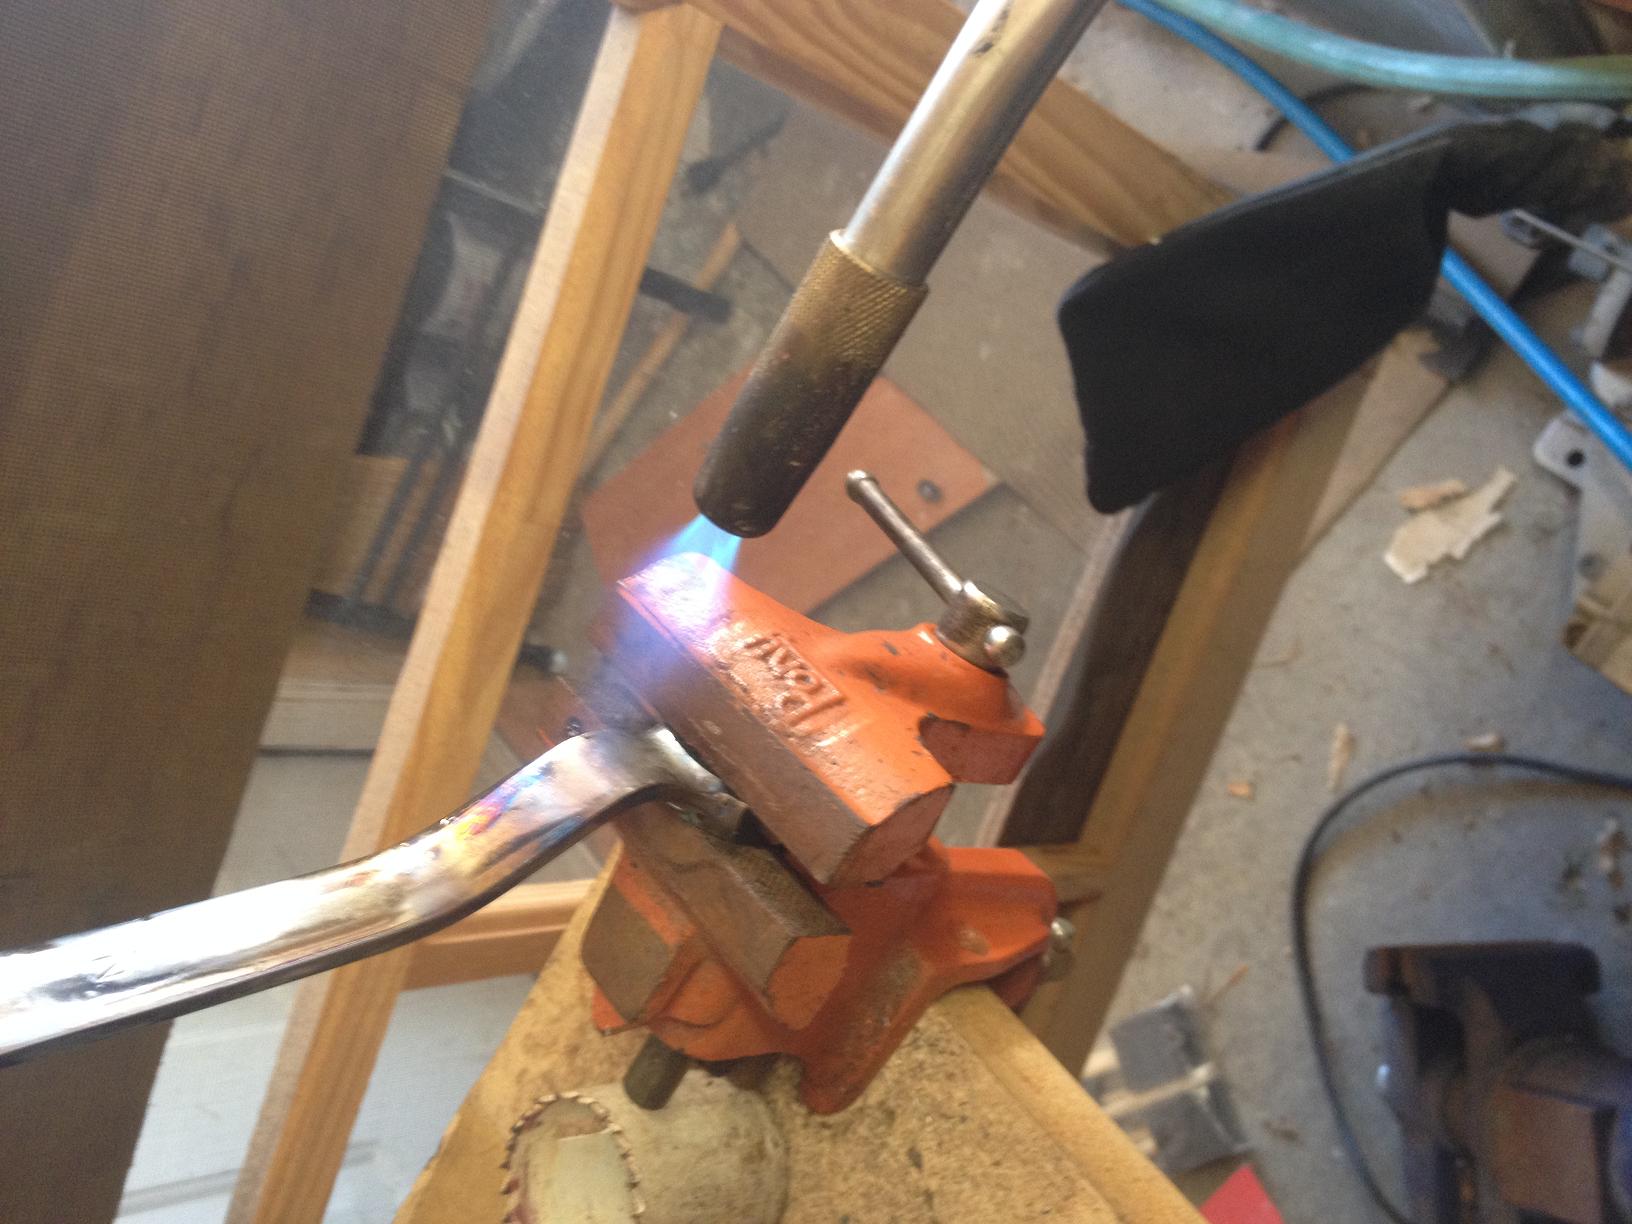
now we need to bend the wrench to fit.
Attachment 76960
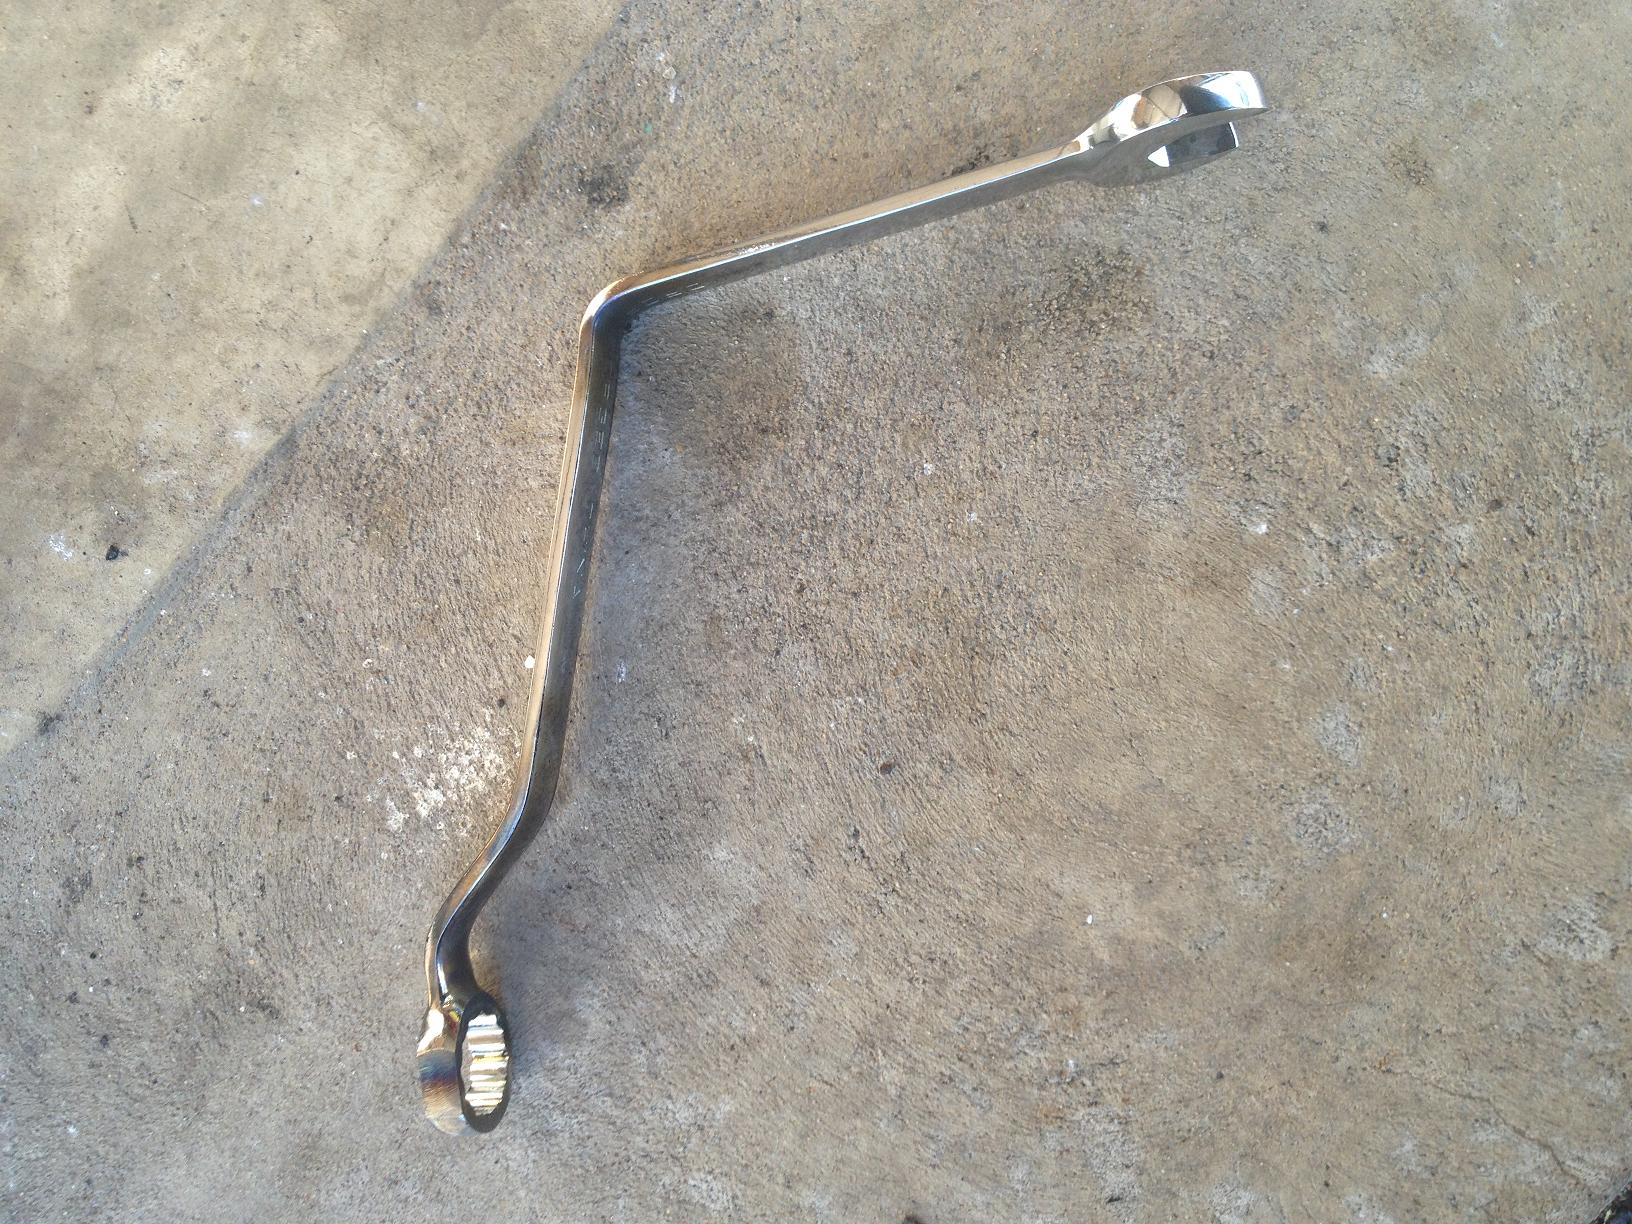
kind of looks like this when you are done.
Attachment 76961
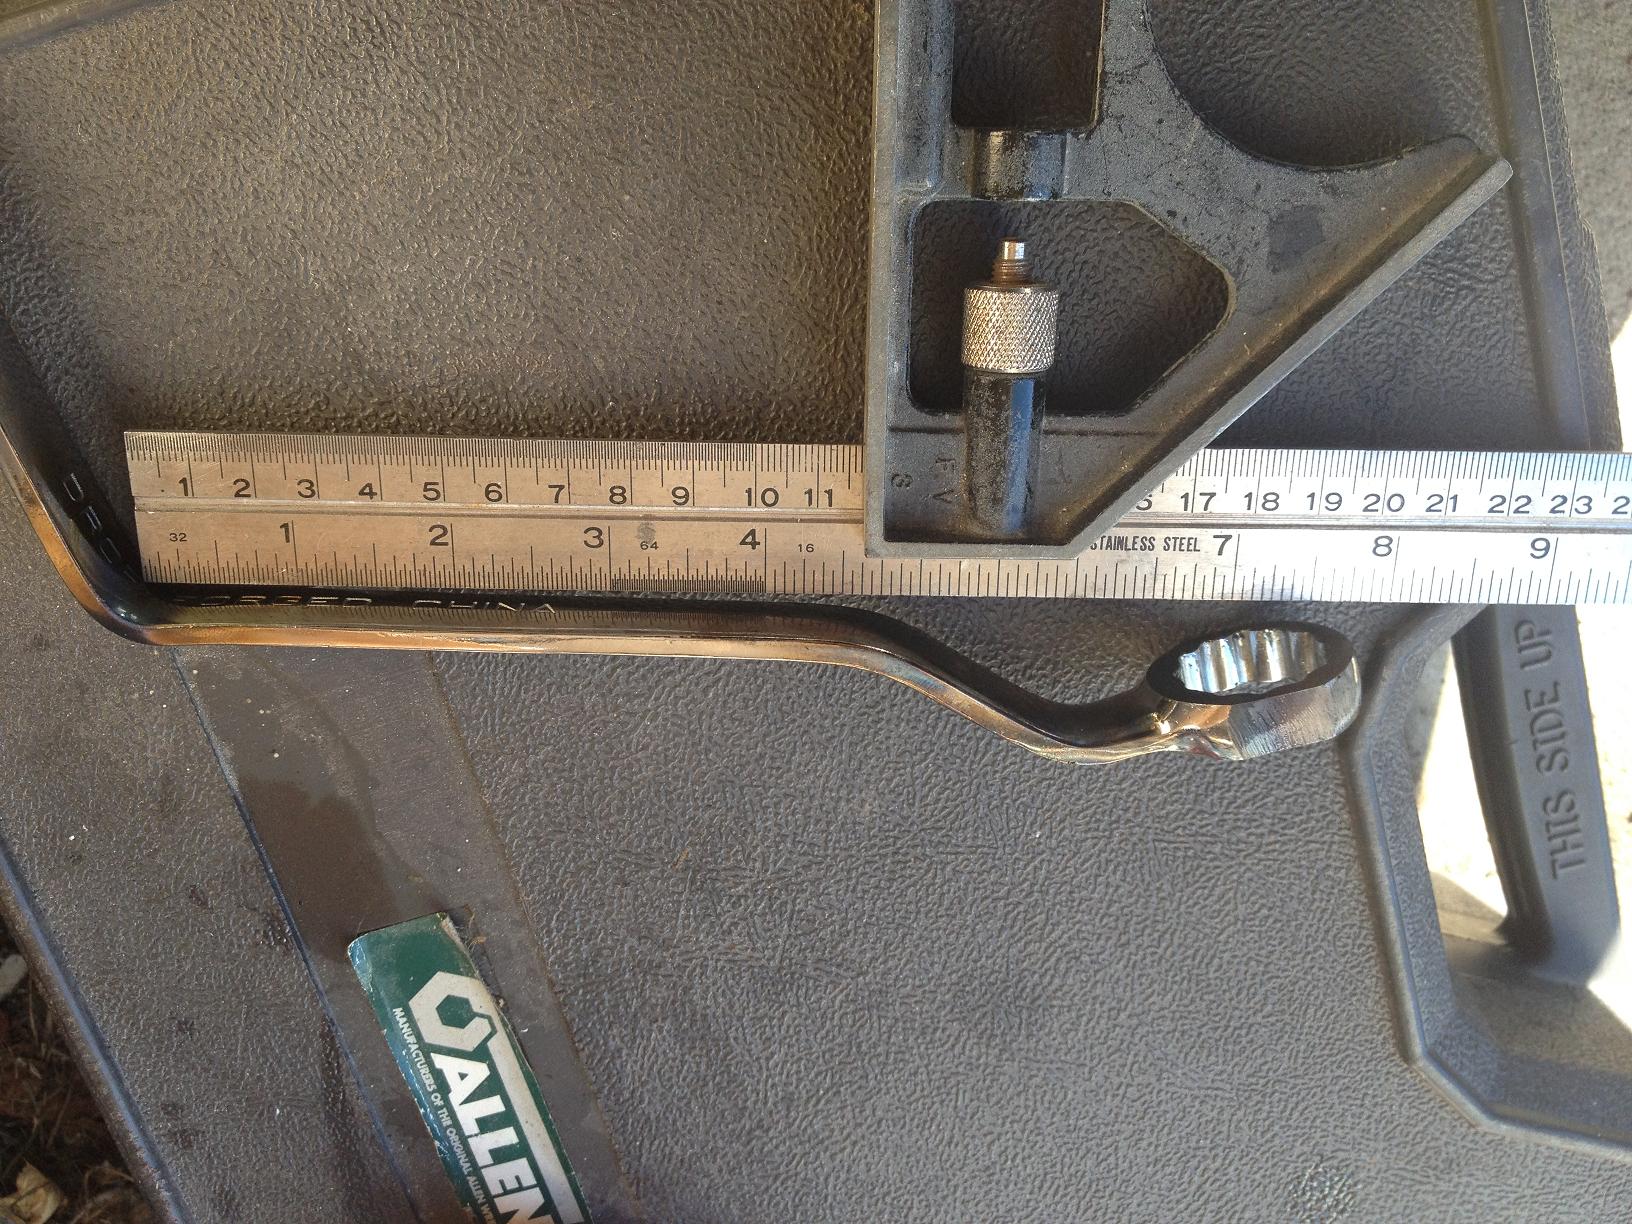
slide the wrench in the hole takes a little wiggle had to remove the front wheel and shine a flashlight in through the front to see.
Attachment 76959
use a screwdriver through the front holes to get it on the bolt. also had to turn the bolt to get it in the correct position.
torque the bolt down when you have finished to 142Nm 105lb-ft
No cutting the floor just a little patience and test fitting and a cheap 21mm wrench from harbor freight
managed to tighten the bolt without cutting the floor pan here is how I did it.
remove the plastic plug.
Attachment 76956
Grind the sides of your 21mm wrench.
Attachment 76957
now we need to bend the wrench to fit.
Attachment 76960
kind of looks like this when you are done.
Attachment 76961
slide the wrench in the hole takes a little wiggle had to remove the front wheel and shine a flashlight in through the front to see.
Attachment 76959
use a screwdriver through the front holes to get it on the bolt. also had to turn the bolt to get it in the correct position.
torque the bolt down when you have finished to 142Nm 105lb-ft
No cutting the floor just a little patience and test fitting and a cheap 21mm wrench from harbor freight
#4
03-25-2014, 10:47 AM
Ok Guys and girls
managed to tighten the bolt without cutting the floor pan here is how I did it.
remove the plastic plug.

Grind the sides of your 21mm wrench.
now we need to bend the wrench to fit.
kind of looks like this when you are done.
slide the wrench in the hole takes a little wiggle had to remove the front wheel and shine a flashlight in through the front to see.

use a screwdriver through the front holes to get it on the bolt. also had to turn the bolt to get it in the correct position.
torque the bolt down when you have finished to 142Nm 105lb-ft
No cutting the floor just a little patience and test fitting and a cheap 21mm wrench from harbor freight
__________________
managed to tighten the bolt without cutting the floor pan here is how I did it.
remove the plastic plug.
Grind the sides of your 21mm wrench.
now we need to bend the wrench to fit.
kind of looks like this when you are done.
slide the wrench in the hole takes a little wiggle had to remove the front wheel and shine a flashlight in through the front to see.
use a screwdriver through the front holes to get it on the bolt. also had to turn the bolt to get it in the correct position.
torque the bolt down when you have finished to 142Nm 105lb-ft
No cutting the floor just a little patience and test fitting and a cheap 21mm wrench from harbor freight
__________________
#6
03-26-2014, 05:21 PM
#7
03-27-2014, 05:52 AM
Trending Topics
#9
03-28-2014, 08:01 AM
#10
01-03-2016, 08:41 AM

Member
#11
01-03-2016, 12:45 PM
Member
#12
01-03-2016, 01:39 PM
Plus now i have the wrench (only took me about an hour to make) its easy to remove the bolt, the nut is still retained in place.
Did you follow the link on post #2 above? This shows pictures of cutting the hole as you are planning to do.
good luck !!!
#13
01-03-2016, 01:55 PM
Member
Sounds like a plan I did the wrench (spanner)as I am lazy and didn`t want to remove the carpet cut holes in the floor weld the nut and then have to patch the hole to prevent water ingress.
Plus now i have the wrench (only took me about an hour to make) its easy to remove the bolt, the nut is still retained in place.
Did you follow the link on post #2 above? This shows pictures of cutting the hole as you are planning to do.
good luck !!!
Plus now i have the wrench (only took me about an hour to make) its easy to remove the bolt, the nut is still retained in place.
Did you follow the link on post #2 above? This shows pictures of cutting the hole as you are planning to do.
good luck !!!
#14
01-03-2016, 02:11 PM
Member
#15
01-04-2016, 03:43 AM
Member

Clip of grill. Make sure you cut enough off metal away so not to interfere with the mig welding.
Last edited by Lubino Do Rego; 01-04-2016 at 12:49 PM.
#16
04-22-2016, 08:40 AM

Senior Member
Ok, so it happened. I was dreading having to drop the subframe for exactly this reason but there is absolutely no way to remove the swaybar without dropping the subframe. Sure enough my nightmare came true...
I'm going to attempt Paulc's bent wrench idea first tonight and if that doesn't work I'm going to open up the front hole closest to the outside of the car enough to get a wrench on it and eventually have a patch welded in to fill my entry point.
I'm going to attempt Paulc's bent wrench idea first tonight and if that doesn't work I'm going to open up the front hole closest to the outside of the car enough to get a wrench on it and eventually have a patch welded in to fill my entry point.
Last edited by X-TypeMentality; 04-22-2016 at 10:37 AM.
#17
04-24-2016, 08:43 AM
Senior Member
Ok, so it happened. I was dreading having to drop the subframe for exactly this reason but there is absolutely no way to remove the swaybar without dropping the subframe. Sure enough my nightmare came true...
I'm going to attempt Paulc's bent wrench idea first tonight and if that doesn't work I'm going to open up the front hole closest to the outside of the car enough to get a wrench on it and eventually have a patch welded in to fill my entry point.
I'm going to attempt Paulc's bent wrench idea first tonight and if that doesn't work I'm going to open up the front hole closest to the outside of the car enough to get a wrench on it and eventually have a patch welded in to fill my entry point.
#18
05-03-2016, 09:38 AM
Seriously a very good idea with the wrench, it worked great! Front sway bar is in. Have a few things to button up but otherwise the jag is back on all fours finally. Ran into a couple speedbumps along the rebuild road but worth every struggle. I can't wait to feel the difference with the polyurethane bushings everywhere and the new sway bars!!!
 glad to hear it worked for you.
Let me know how the polyurethane bushings work thinking of doing that upgrade this summer.
#19
05-04-2016, 08:28 AM
Senior Member
I sure will. Fitting the flares this weekend. I was going to wait a month or so to do the flares but figured screw it, I might as well finish it to the vision I've had all winter, flares are just sitting there anyways...