Hazard Lights not working Help
#1
#3
Join Date: May 2008
Location: Great Mills, MD
Posts: 14,200
Likes: 0
Received 3,823 Likes
on
3,142 Posts
Daniel, give me a little bit. i will pull up the diagrams for your car and confirm what I am thinking. From what I am remembering, it is sounding like the hazzard switch is what is your problem.
If you want an owners manual, PM me your email addy and I will send you all the owner's manuals in PDF format.
If you want an owners manual, PM me your email addy and I will send you all the owner's manuals in PDF format.
#4
Join Date: May 2008
Location: Great Mills, MD
Posts: 14,200
Likes: 0
Received 3,823 Likes
on
3,142 Posts
Daniel, ok, I have looked at the diagrams and they are as I thought they were. The hazzard switch really only sends a signal to the GEM module to say to flash the lights. So, what you are going to want to do is to access the back of the hazzard switch. Once there, you should see 2 wires (an all black wire and a black wire with an orange stripe). What you are going to do is to use a paperclip or something of the like and short these two wires together (may find it easiest to unplug the wiring from the hazzard switch and plug it in the plug itself, otherwise you will have to slide the paperclip along the wires and into the back of the plug). Do the hazzard lights come on now? If yes, then this confirms a bad hazzard switch. if they don't come on, then remove the end of the paperclip that is connected to the black wire. Take this free end and touch any metal piece inside the dash (do not worry, you are not going to hurt anything). Do the hazzard lights come on now? If yes, then you have a problem with the black wire (most likely at some point the black wire has been removed from the grounding point and is not allowing the black/orange wire to get grounded, causing the hazzard lights to work). If no, then you have either a problem with the black/orange wire or your GEM module has an issue (GEM module will require replacing).
If you need more info, let me know.
If you need more info, let me know.
The following users liked this post:
Lcgi (04-06-2017)
#5
Hey Thermo sorry I haven't had the chance to work on it but I am taking a look right now and I just wanted to ask if I will have to remove the whole Unit since I do have an aftermarket stereo and will it need to be all removed in order to check the wires. I never had experience with this before so I just don't want to mess anything up
#6
Join Date: May 2008
Location: Great Mills, MD
Posts: 14,200
Likes: 0
Received 3,823 Likes
on
3,142 Posts
Daniel, from what I remember, you will simply need to remove the trim around the radio, then this should give you access to the fasteners holding the hazzard switch in place. Worst case, you can remove the radio and then reach up and in to disconnect the plug on he back of the hazzard switch.
#7
Trending Topics
#8
Join Date: May 2008
Location: Great Mills, MD
Posts: 14,200
Likes: 0
Received 3,823 Likes
on
3,142 Posts
#9
I didnít want to start a completely new thread for similar issue with wiring and lights so I will post the new issue here...
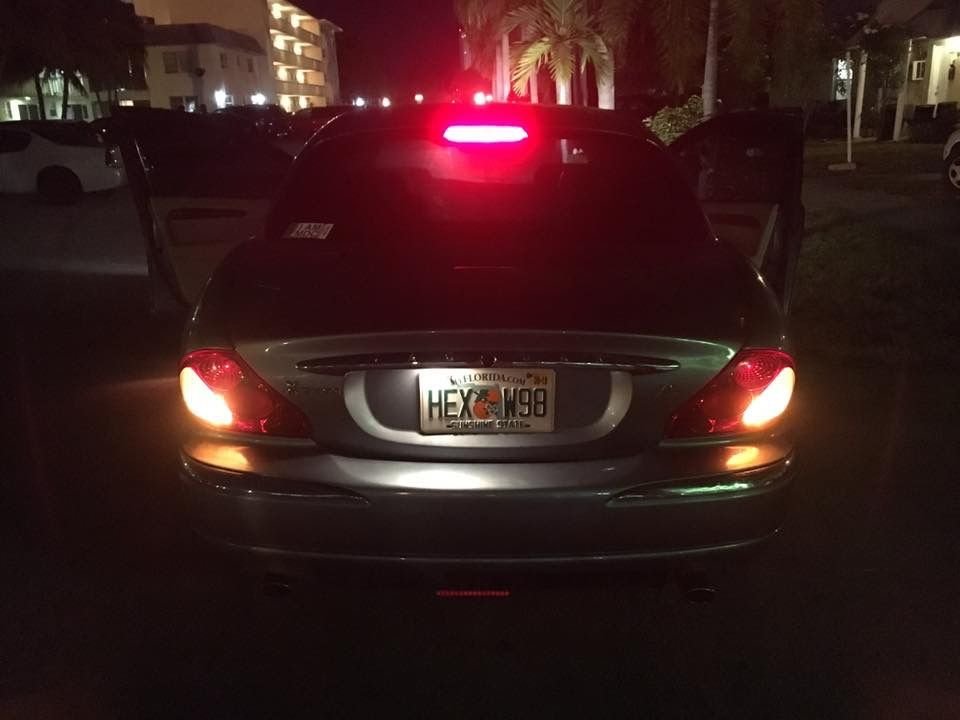
My rear drivers side taillight is acting up when I have my headlights on. When I switch the turn signals all three rear lights will go on and off like crazy. When I brake my reverse lights will come on and will stay on as I drive instead of my brake lights. I will attach pictures for better understanding. I havenít seen anyone completely close out a thread regarding this issue on what there final solution worked. I have a multimeter for starters I just donít know what to check but I am willing to learn. Thanks in advance to all that can help.
My rear drivers side taillight is acting up when I have my headlights on. When I switch the turn signals all three rear lights will go on and off like crazy. When I brake my reverse lights will come on and will stay on as I drive instead of my brake lights. I will attach pictures for better understanding. I havenít seen anyone completely close out a thread regarding this issue on what there final solution worked. I have a multimeter for starters I just donít know what to check but I am willing to learn. Thanks in advance to all that can help.
#11
Join Date: May 2008
Location: Great Mills, MD
Posts: 14,200
Likes: 0
Received 3,823 Likes
on
3,142 Posts
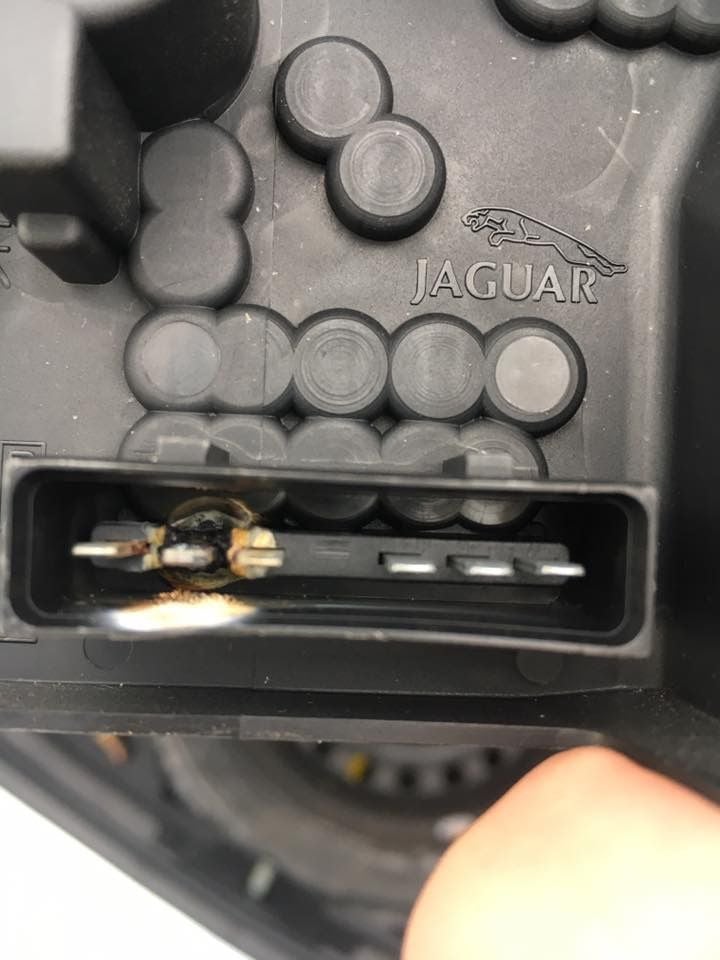
Daniel, as you can probably guess, where you see the charred plastic (second pin from the right, pin 6), that is the source of your problems. In short, because that has done what it has, when you try and activated a light, it can't make it through ground, so, it attempts to find another path to ground. With out the tail lights are wired, it will go through another light. hence you random light issue.
As for the fix, what you are going to end up doing is removing the red plastic clip inside the plug and then removing the female clip. The clip can be removed using a very small screw driver to depress the two small hair retainers. This will then let you pull the wire/pin out the back of the connector. You will then be able to cut off the pin and going to a local auto parts store, you should be able to pick up some spare pins. You can then strip the wire back a little bit and crimp it into place. As for the male pin, you can take a screw driver or knife blade and scrape the pin flats to remove the oxidation (from the heat) and get it back to a silvery appearance. You should be good then.
On a side note, this is a common issue with the X-Types.
#13
#14
Just cross reference standard bulb number to LED in google. The only exception is the visor vanity bulbs. I have a thread on how to overcome and find those bulbs as standard (VERY difficult to find) as well as LED change out. I additionally added LED supplemental light strip on interior, hood and trunk (pics in my mod lighting threads). Pics of difference in brake, back up lights illumination are also in my threads.


