serpentine belt diagram?
#1
HELP!
Hey y'all: I'm getting far too frustrated here, over something so stupid. I can't get my JTIS to install (another problem!!) and so I've been searching all over the internet looking for a diagram of the routing of the serpentine belt on mt '02 X, 2.5.
I can't find one!
Can somebody please help me? The old one broke off on my limp home, and I can't beleive it, but I can't make the new belt short enough, no matter how I route it.
TIA
#2
Join Date: May 2008
Location: Great Mills, MD
Posts: 14,200
Likes: 0
Received 3,823 Likes
on
3,142 Posts
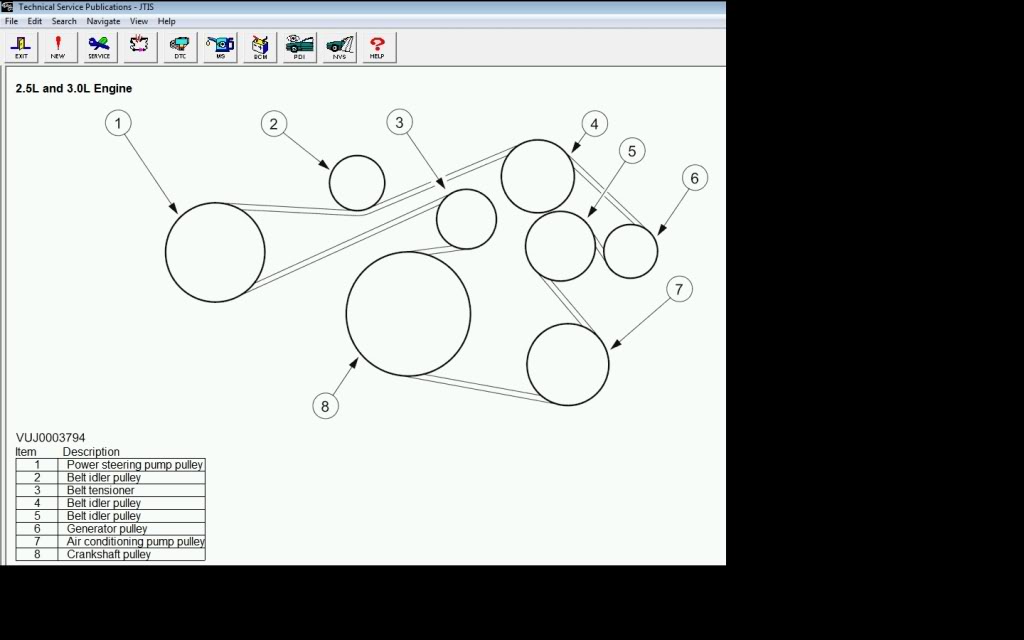
jag-ooo-r, I am not able to get a copy of the diagram from off of the JTIS, but I will try to explain it as good as I can. I am going to start at the power steering pump pulley and go clockwise so that you are ending at the belt tensioner. That should make things as easy as possible.
Put the belt around the power steering pump such that the belt is going to touch the pulley starting at the 6 o'clock position and going around clockwise to the 1 o'clock position. You will then run it under the idler pulley just to the left of the tensioner. Then you will run the belt over the top of the idler pulley to the right of the tensioner (touches pulley from the 10 to 2 o'clock positions). You will then run it around the alternator pulley from the 12 o'clock to 9 o'clock position (clockwise). You will then run the belt over the top of the idler pulley immediately to the left of the generator (2 to 7 o'clock position running counter clockwise). From here the belt will run down to the A/C compressor. The belt will run over this pulley from the 1 to 7 o'clock position (clockwise). The belt will finally run over the crankshaft pulley from the 6 to 12 o'clock position (clockwise). This will leave you with only having to run the belt over the belt tensioner from the 6 to 10 o'clock position (counter clockwise). To get the belt into place, you will need to take up the pressure applied by the tensioner to put some slack into the belt. Once the belt is in place, you can then release the tensioner and all should be good.
If you have the JTIS, look in section 303-05 under the "Description and Operation" section. Under there you have the option to look at the accessory belt.
#3
#5
Guest
Posts: n/a
I just completed putting on the serpentine belt. The tensioner had to pull back about 1.5" to get the belt on. I read how to put a ratchet wrench in the square hole to pull back, but not easy to do. I just used two pieces of 1/8" wire rope, four crosby clips and one turnbuckle. Wrap wire rope around pulley on tensioner, then through turnbuckle eye and 2 clips. Then other end through turnbuckle and around steering tie rod (no harm done, doesn't pull tight enough to bend). Then draw up with turnbuckle.
#6
Blast it all,I felt soo good this morning, I swapped out AC compressors and thenwent to install my new serpentine belt. I did my research here and went to work, 10 mins later, I have the tensioner held with a breaker bar and I slip the belt around the crankshaft pulley; I release the tension from the breaker bar and find that the Advance Auto belt is way too loose. I undo everything and compare the new belt to the original....It was .5 inches longer. My initial comparison did not even notice that they were different because they are SO close but not exact. Now back to the parts store to get the proper size. Thanks to those of you who posted here, though. The job was easy enough the first time around and should be a breeze the second. Oh, except for Im working in my driveway and it is supposed to breach 100 F outside by noon, AAGH!
#7
Trending Topics
#10
#11
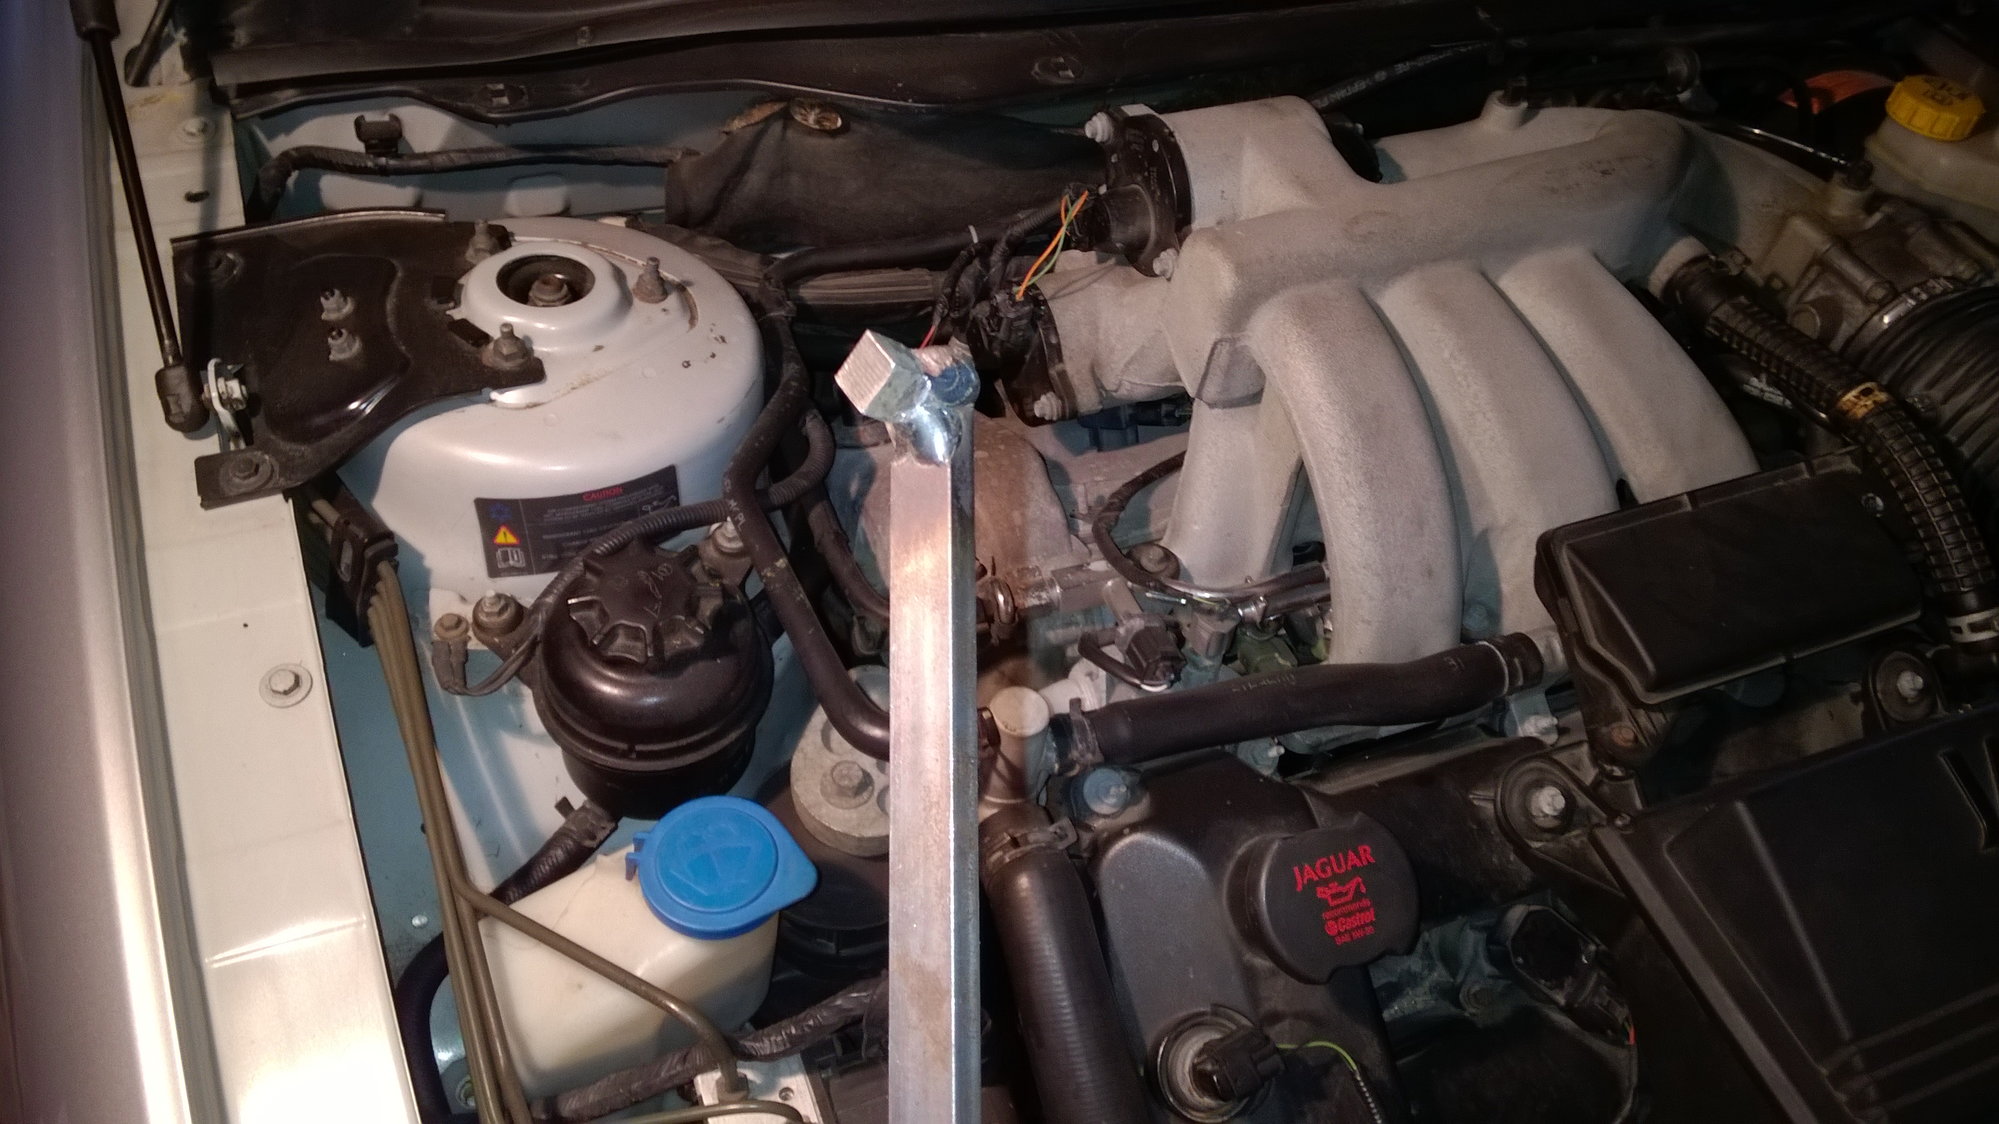
Impressive ingenuity. For those of us who envy your welding skills & expertise, Harbor Freight sells a 3/8 inch x 17 inch breaker bar for $9: 3/8 in. Drive 17 in. Breaker Bar
#13
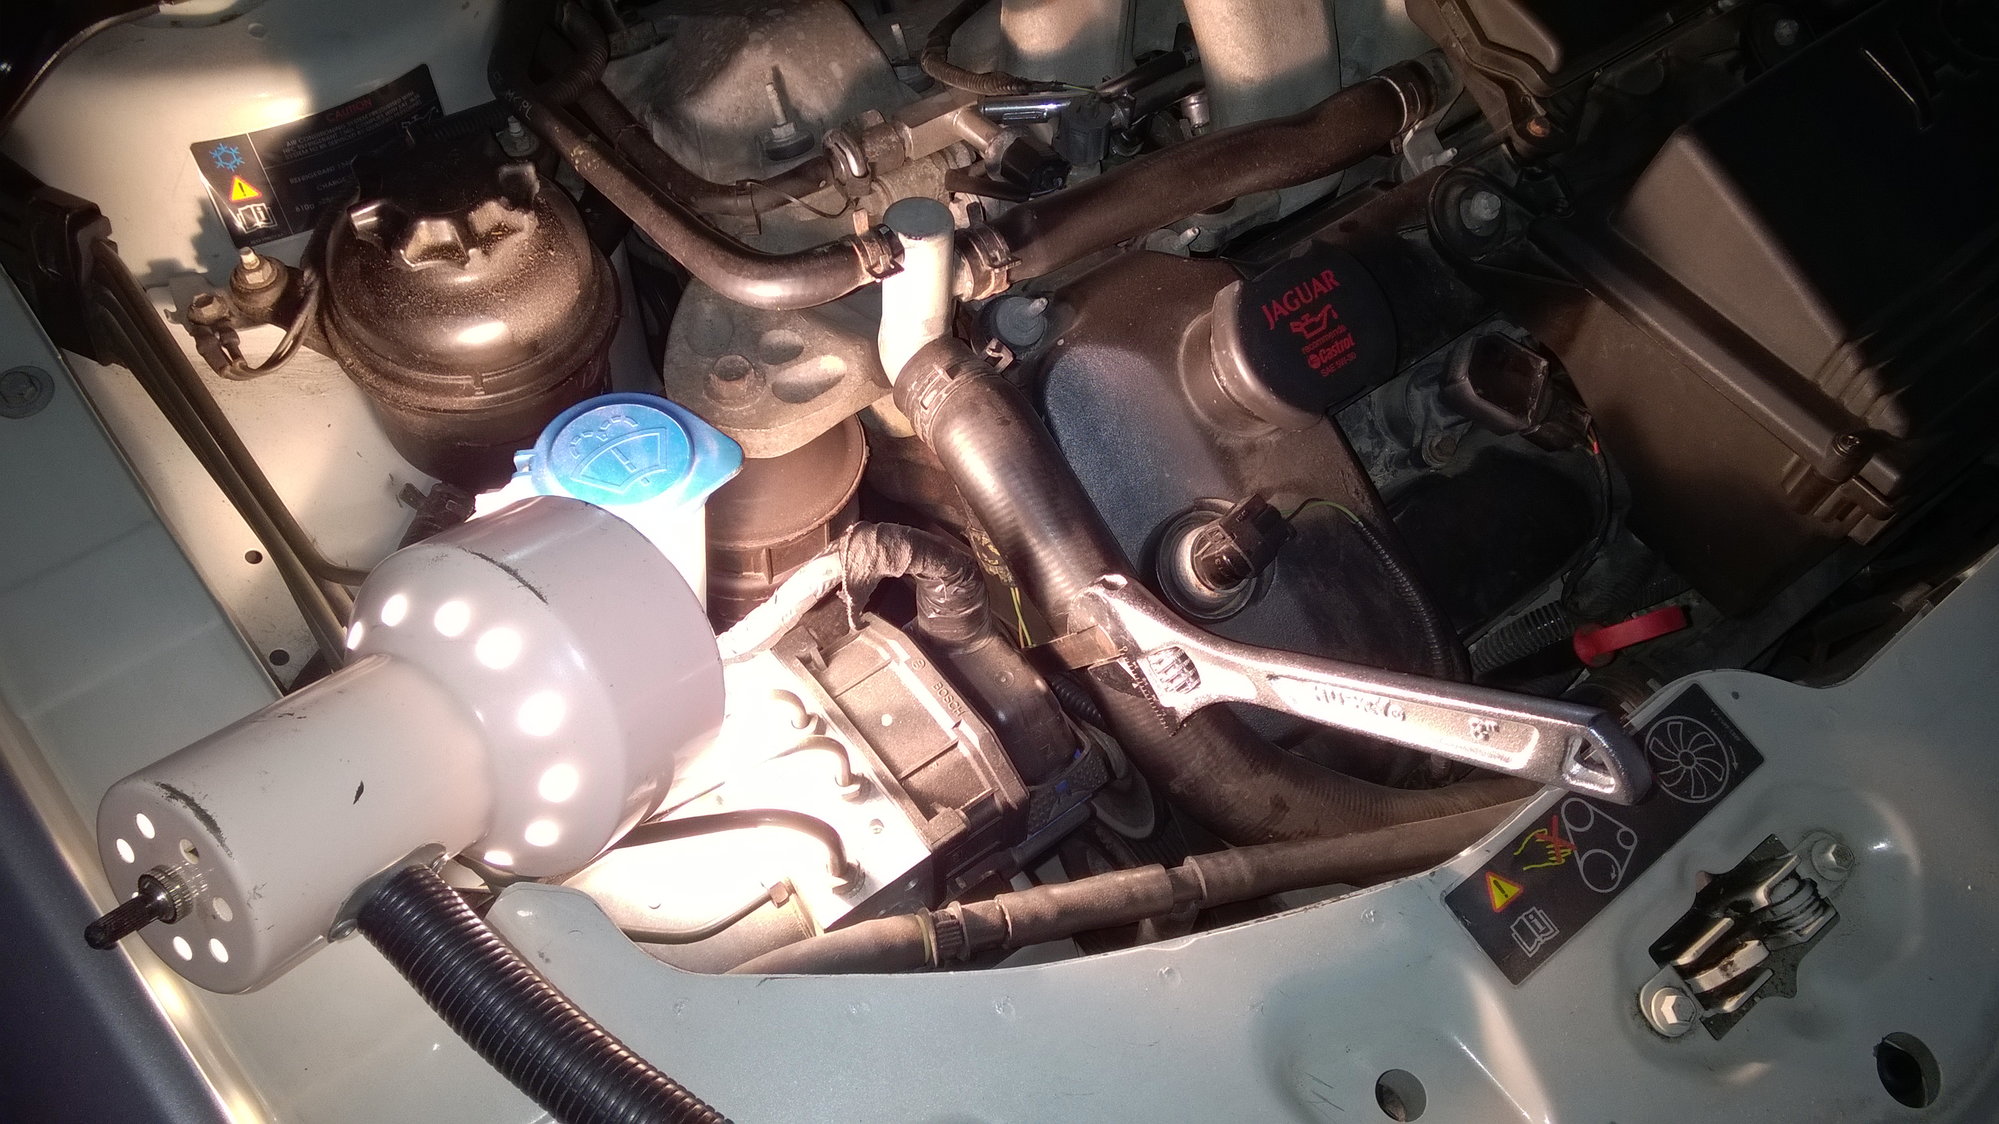
Mike: Agreed. A socket wrench is too 'fat' to squeeze between the tensioner and wheel well. Some folks have used a grinder to 'skinny down' an old socket wrench. But the simple & cheap solution is a 3/8 inch breaker bar.
For the benefit of others, if you roll the front tires onto ramps, lie under the car and position a 3/8 inch breaker bar in the tensioner with the handle towards the firewall, you can pull down on the breaker bar to release the tension, and with your other hand, slip the serpentine belt on/off the crankshaft and A/C pulleys. A longer breaker bar with more leverage makes the job easier. Be careful that your fingers are never in the "line of fire" between the belt and pulley.
For the benefit of others, if you roll the front tires onto ramps, lie under the car and position a 3/8 inch breaker bar in the tensioner with the handle towards the firewall, you can pull down on the breaker bar to release the tension, and with your other hand, slip the serpentine belt on/off the crankshaft and A/C pulleys. A longer breaker bar with more leverage makes the job easier. Be careful that your fingers are never in the "line of fire" between the belt and pulley.
Thread
Thread Starter
Forum
Replies
Last Post
baskervillema
XJ XJ6 / XJR6 ( X300 )
4
10-01-2015 06:43 PM
FS[MidWest]: 2001 Supercharged Vanden Plas
Col. Sandurz
PRIVATE For Sale / Trade or Buy Classifieds
1
09-28-2015 07:29 PM
FS[MidAtlantic]: 1997 XJ6 VDP $3,900 - Very RARE Anthracite on Warm Charcoal
42Ajd
PRIVATE For Sale / Trade or Buy Classifieds
0
09-26-2015 07:04 PM
Currently Active Users Viewing This Thread: 1 (0 members and 1 guests)


