The Ultimate LED Q&A Thread
#61
 08-06-2014, 01:53 PM


The following users liked this post:
bollocsk187 (09-20-2014)
#62
08-07-2014, 12:38 PM
The following users liked this post:
bollocsk187 (09-20-2014)
#63
08-30-2014, 12:27 PM
#64
09-20-2014, 01:31 PM
Senior Member
Replaced my Courtesy lights with Pilot Automotive - LED Replacement Bulb: IL-194W-5 bought from PEPboys PILOT.
Job Time: 5 Minutes per Bulb MAX.
1) Open doors
2) Turn off the courtesy lights !
3) Remove light bulbs in driver - using a set of pliers to grip and pull OEM light Bulbs out
4) Replace with LED.
5) Repeat on other side
I must have been lucky and I had no problems with placing LED in correct slots - unless I was lucky i.e. no polarity issues. Also no engine light problems noticed. Next job is to buy some more LED from PETboys for the Dome lights off.
Okay then I hit the road Dynamic Mode, Sports Mode.....after 10 Minutes I then got a SERVICE ENGINE LIGHT & RESTRICTED PERFORMANCE MESSAGE !!!!!! This resulted in very little acceleration capability, engine starts to flutter on idle as if it is going to stall.
After failing to to overtake a "horse and carriage" I pulled over. Removed the LED on both sides less than 30 seconds. Back on the ROAD everything was fine once again.
There is nothing more frightening than to see a RESTRICTED PERFORMANCE on a JAG.
Okay so I Would say on this thread of LED We really need to understand the electrical manual first: .
.
Job Time: 5 Minutes per Bulb MAX.
1) Open doors
2) Turn off the courtesy lights !
3) Remove light bulbs in driver - using a set of pliers to grip and pull OEM light Bulbs out
4) Replace with LED.
5) Repeat on other side
I must have been lucky and I had no problems with placing LED in correct slots - unless I was lucky i.e. no polarity issues. Also no engine light problems noticed. Next job is to buy some more LED from PETboys for the Dome lights off.
Okay then I hit the road Dynamic Mode, Sports Mode.....after 10 Minutes I then got a SERVICE ENGINE LIGHT & RESTRICTED PERFORMANCE MESSAGE
!!!!!! This resulted in very little acceleration capability, engine starts to flutter on idle as if it is going to stall. After failing to to overtake a "horse and carriage" I pulled over. Removed the LED on both sides less than 30 seconds. Back on the ROAD everything was fine once again.
There is nothing more frightening than to see a RESTRICTED PERFORMANCE
Okay so I Would say on this thread of LED We really need to understand the electrical manual first:
Last edited by bollocsk187; 09-20-2014 at 02:43 PM.
#65
09-24-2014, 09:35 AM
#66
09-24-2014, 05:59 PM
Veteran Member
Join Date: Feb 2014
Location: Adelaide, South Australia
Posts: 8,286
Received 3,113 Likes
on
2,296 Posts
The following 2 users liked this post by OzXFR:
93905g (09-24-2014),
bollocsk187 (09-28-2014)
#67
09-24-2014, 06:10 PM
#69
09-25-2014, 10:16 AM

I added these LED strips to the mirror lights as DRL. $25 for the 3". I also ordered the mirror lights. They were $15 each but it is not required. I just wanted them just in case I messed up and could return to stock. These things are bright.
Morimoto XB LED Strips - Accessories from The Retrofit Source Inc <-- This is where I ordered the LED strip from. I personally would not recommend these guys.
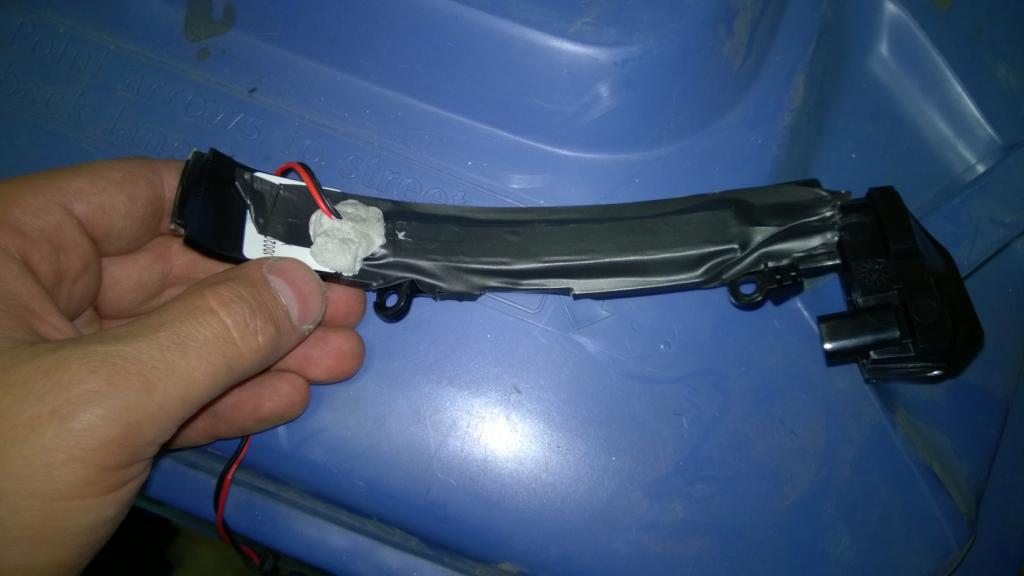
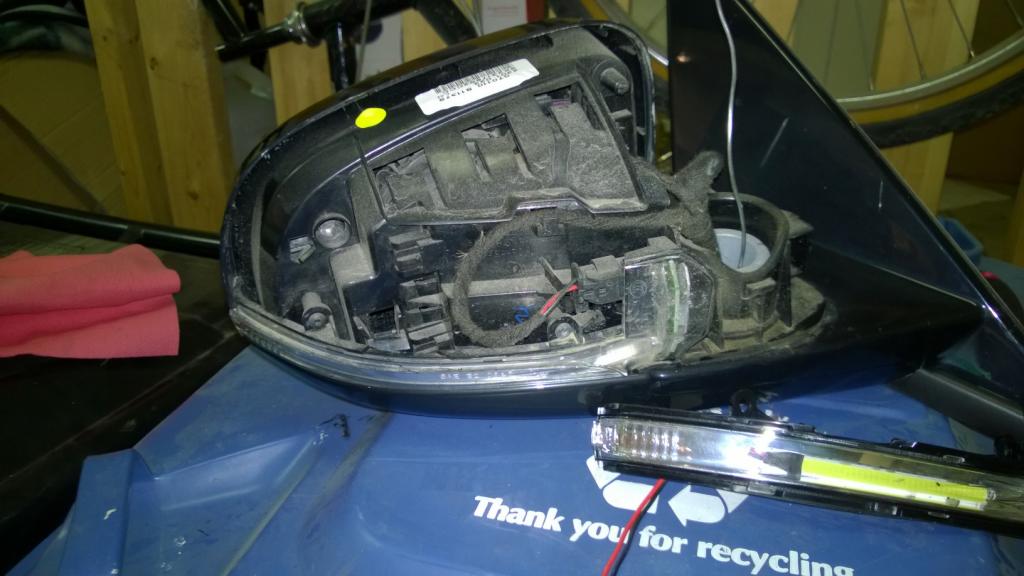
You can see the size of the LED strip compared to the light.
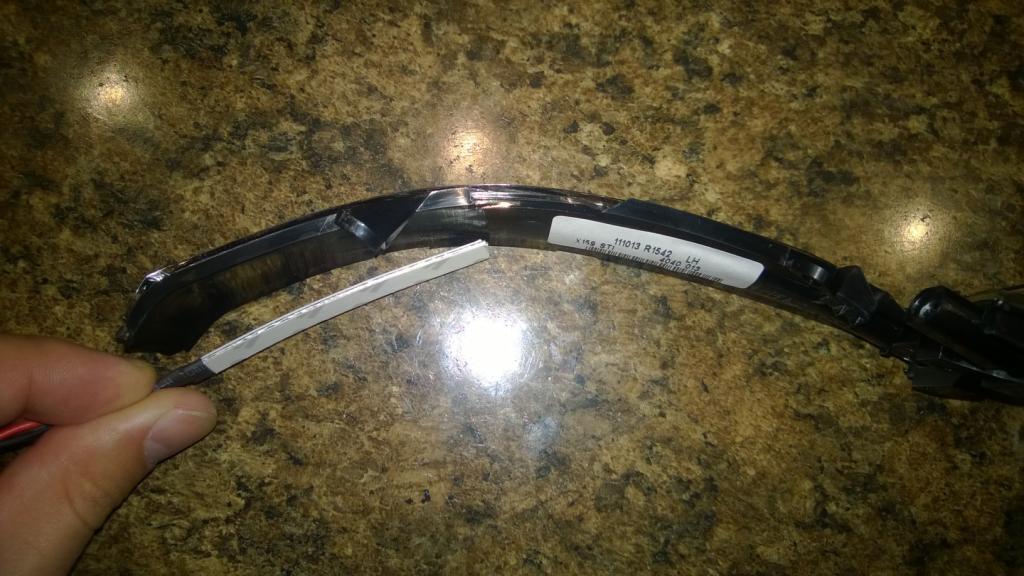
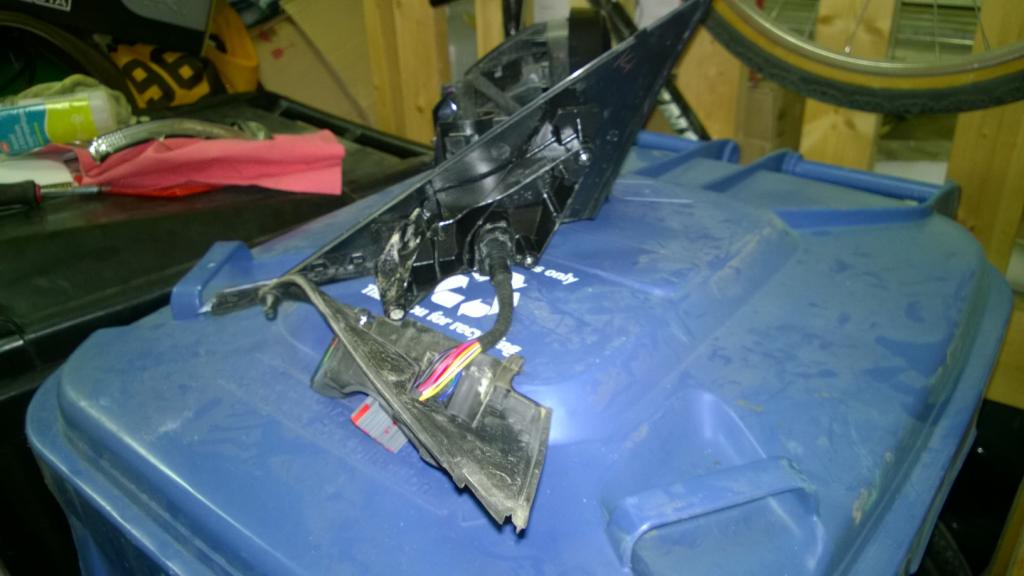
I used a Dremel to cut an opening in the back of the light. I tried to bake the lights open but the plastic just melted.
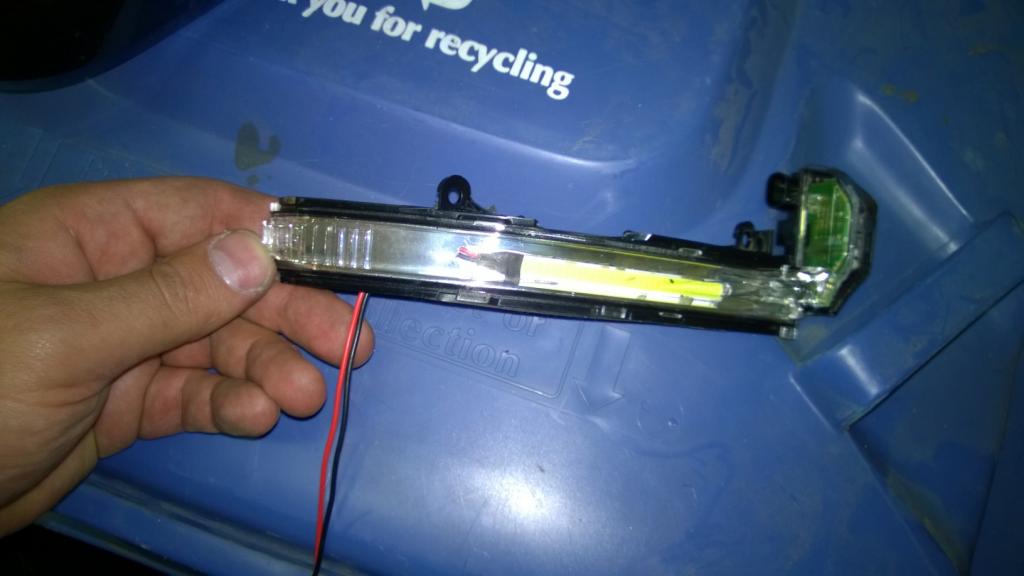
This is what it looks like inside the light.
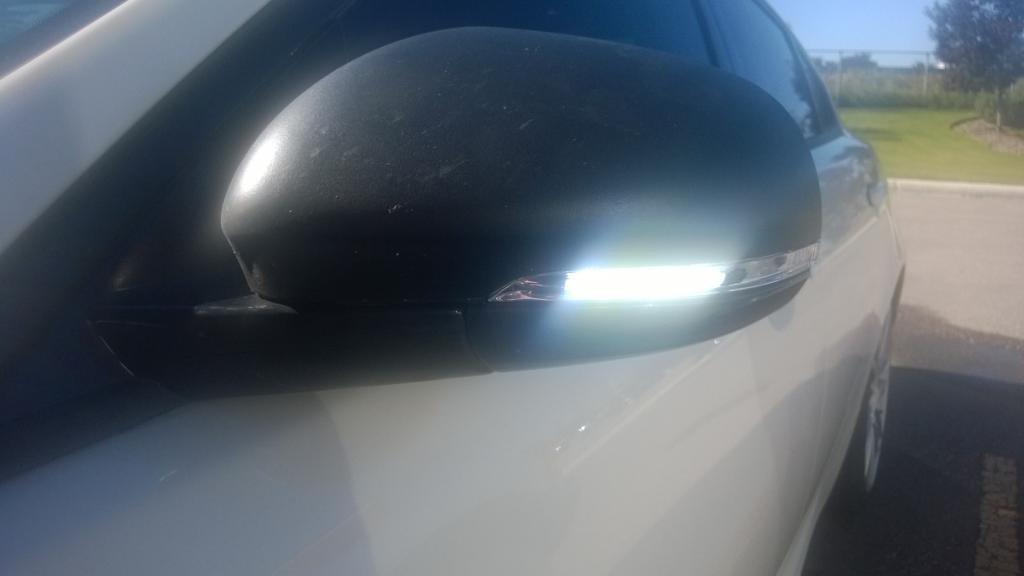
Crappy cell phone daytime shot. These LED strips are very bright.
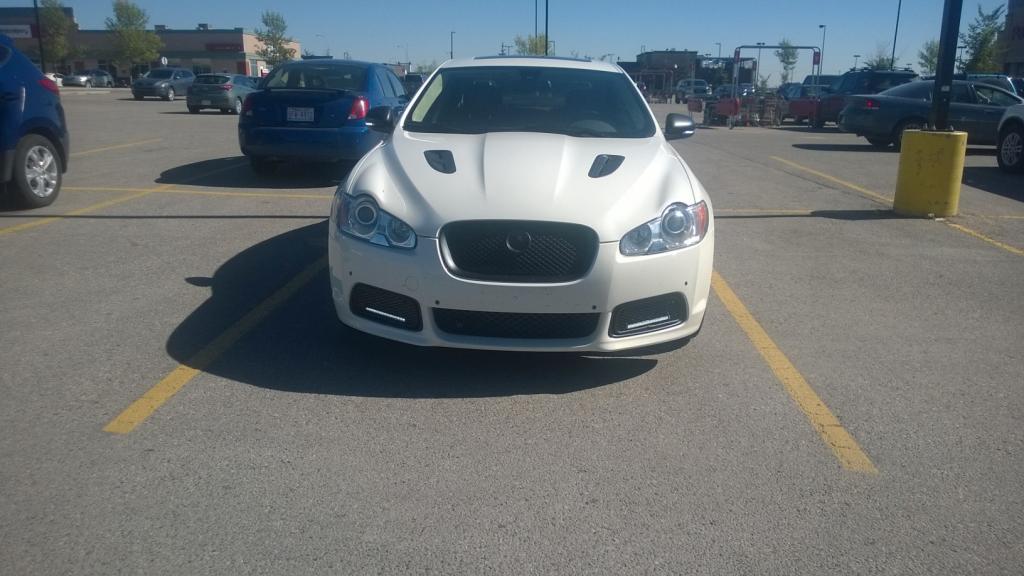
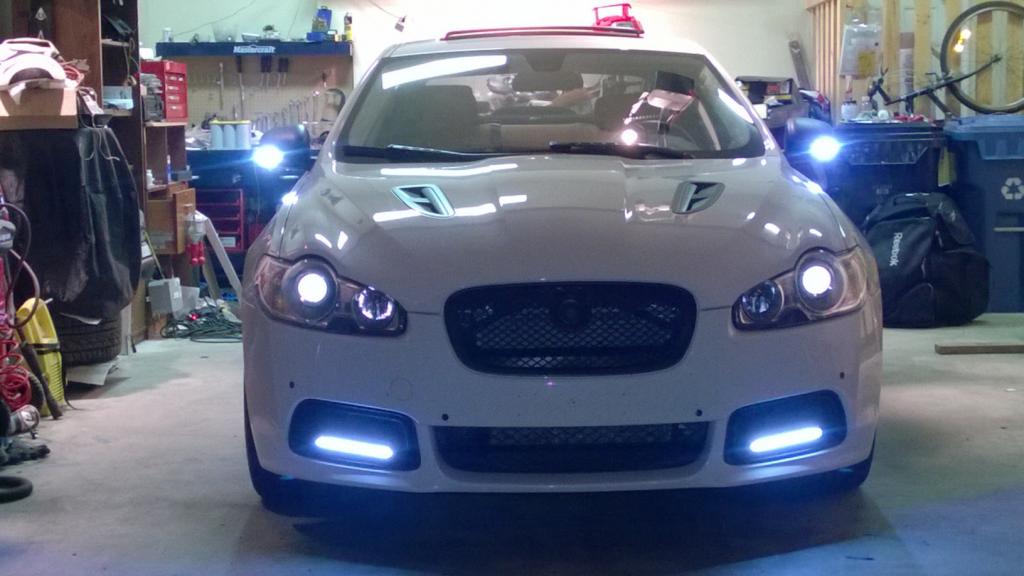
Crappy cell phone night time shot. The headlights are just reflections.
Morimoto XB LED Strips - Accessories from The Retrofit Source Inc <-- This is where I ordered the LED strip from. I personally would not recommend these guys.
You can see the size of the LED strip compared to the light.

I used a Dremel to cut an opening in the back of the light. I tried to bake the lights open but the plastic just melted.
This is what it looks like inside the light.

Crappy cell phone daytime shot. These LED strips are very bright.

Crappy cell phone night time shot. The headlights are just reflections.

The following users liked this post:
bollocsk187 (09-26-2014)
#70
09-26-2014, 12:14 AM
Senior Member
[QUOTE=nate96;1065785]I added these LED strips to the mirror lights as DRL. $25 for the 3". I also ordered the mirror lights. They were $15 each but it is not required. I just wanted them just in case I messed up and could return to stock. These things are bright.
Morimoto XB LED Strips - Accessories from The Retrofit Source Inc <-- This is where I ordered the LED strip from. I personally would not recommend these guys.
1) Why would you not recommend them ?
2) Did you also add the lower DRL on using the same strips ?
Can you share how you wired things up ?
Morimoto XB LED Strips - Accessories from The Retrofit Source Inc <-- This is where I ordered the LED strip from. I personally would not recommend these guys.
1) Why would you not recommend them ?
2) Did you also add the lower DRL on using the same strips ?
Can you share how you wired things up ?
#71
09-26-2014, 12:15 AM
Senior Member
Replaced my Courtesy lights with Pilot Automotive - LED Replacement Bulb: IL-194W-5 bought from PEPboys PILOT.
Job Time: 5 Minutes per Bulb MAX.
1) Open doors
2) Turn off the courtesy lights !
3) Remove light bulbs in driver - using a set of pliers to grip and pull OEM light Bulbs out
4) Replace with LED.
5) Repeat on other side
I must have been lucky and I had no problems with placing LED in correct slots - unless I was lucky i.e. no polarity issues. Also no engine light problems noticed. Next job is to buy some more LED from PETboys for the Dome lights off.
Okay then I hit the road Dynamic Mode, Sports Mode.....after 10 Minutes I then got a SERVICE ENGINE LIGHT & RESTRICTED PERFORMANCE MESSAGE!!!!!! This resulted in very little acceleration capability, engine starts to flutter on idle as if it is going to stall.
After failing to to overtake a "horse and carriage" I pulled over. Removed the LED on both sides less than 30 seconds. Back on the ROAD everything was fine once again.
There is nothing more frightening than to see a RESTRICTED PERFORMANCE on a JAG.
Okay so I Would say on this thread of LED We really need to understand the electrical manual first:.
Job Time: 5 Minutes per Bulb MAX.
1) Open doors
2) Turn off the courtesy lights !
3) Remove light bulbs in driver - using a set of pliers to grip and pull OEM light Bulbs out
4) Replace with LED.
5) Repeat on other side
I must have been lucky and I had no problems with placing LED in correct slots - unless I was lucky i.e. no polarity issues. Also no engine light problems noticed. Next job is to buy some more LED from PETboys for the Dome lights off.
Okay then I hit the road Dynamic Mode, Sports Mode.....after 10 Minutes I then got a SERVICE ENGINE LIGHT & RESTRICTED PERFORMANCE MESSAGE
!!!!!! This resulted in very little acceleration capability, engine starts to flutter on idle as if it is going to stall. After failing to to overtake a "horse and carriage" I pulled over. Removed the LED on both sides less than 30 seconds. Back on the ROAD everything was fine once again.
There is nothing more frightening than to see a RESTRICTED PERFORMANCE
Okay so I Would say on this thread of LED We really need to understand the electrical manual first:
#72
09-26-2014, 03:20 PM
[QUOTE=bollocsk187;1066279]
1. I ordered 2 sets and only received 1 set. When I inquired where the second set was it took 2 hours for them to say they would send another set. During that time they were telling me they were out of stock and then found some. When they shipped the second set they did not supply me with the correct tracking number. I still do not have the second set of strips and it has been a couple weeks and their response was it could take up to 2 months. I have ordered other things from other vendors and they have showed up with no problem.
2. I made the bottom lights as an experiment. I am hoping this winter I will have time to prototype a mold to place the lights where the factory grill is.
Installation:
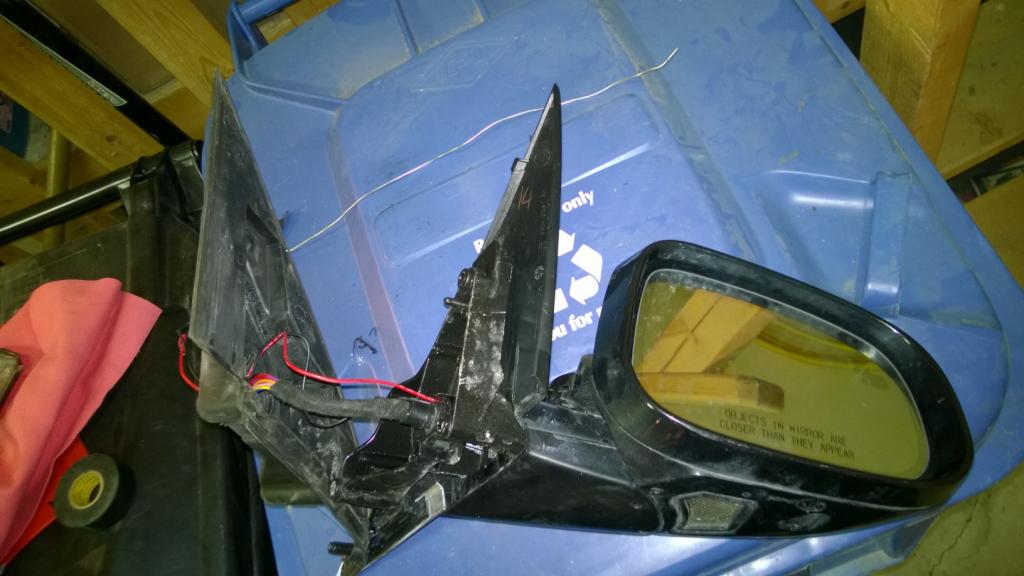
Take mirror cover off: With a small flat blade pop up the mirror and then pull off with your fingers. Remove the two torx screws and pull the light up.
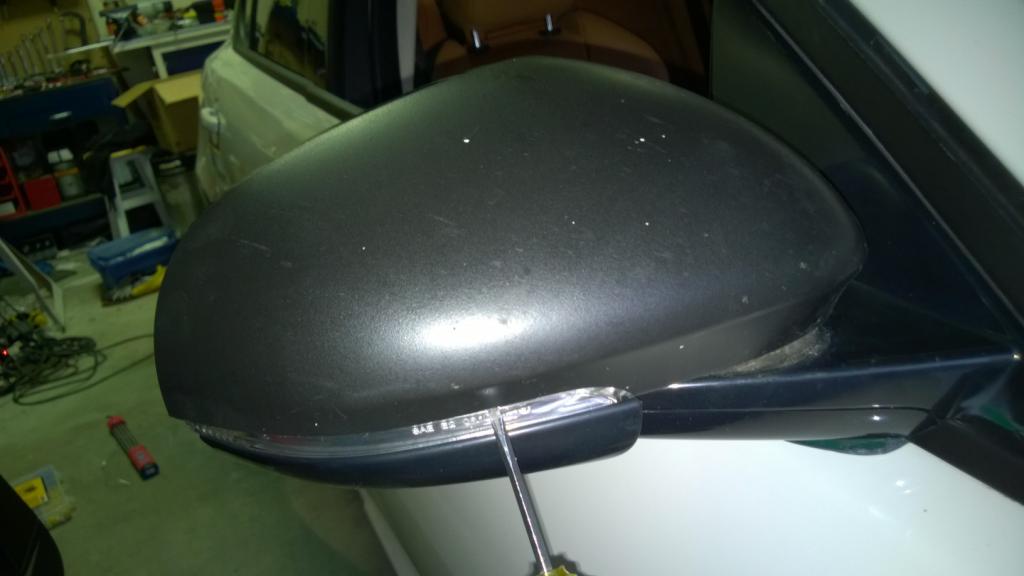
Take the LED strip and mark where it will be cut out. There is a square marking on the light that I used as a the edge of the light. Use Dremel and cut out an opening. Use a small disc with light pressure. Make sure not to go too deep or you will score the light itself. I used a piece of aluminum and bent it to affix to the light to. Seal the aluminum piece to the light with silicon. This is the first one I did. I re did it so it looks better but this is all hidden anyways.
I really do not like the yellow LED strip but you do not see it when it is on the car so not that big of a deal.
Remove the door card
https://www.jaguarforums.com/forum/xf-xfr-x250-44/how-remove-xf-xfr-door-card-panel-fix-door-rattles-how-110947/
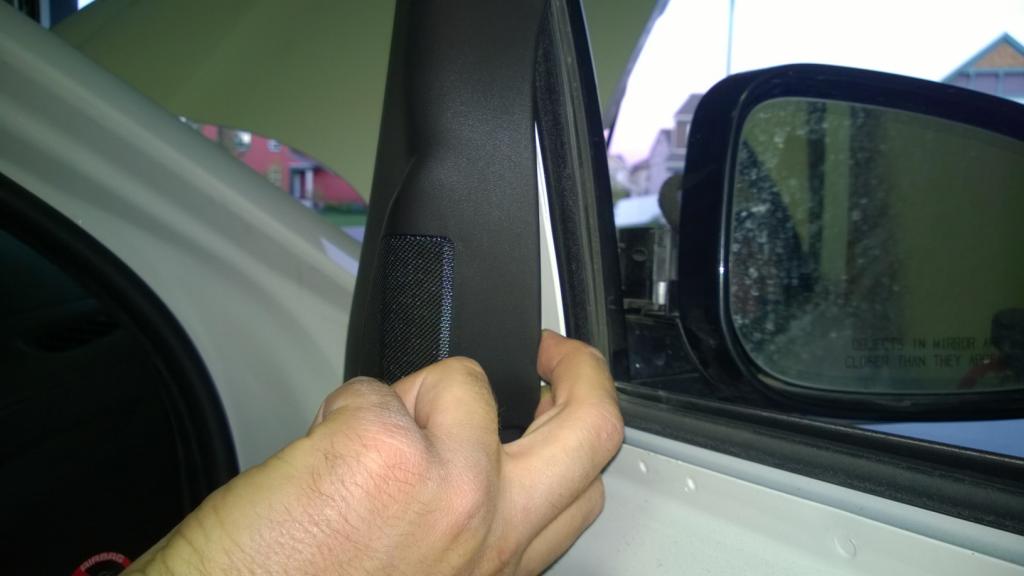
Remove top trim piece for the mirror
Remove and disconnect the mirror. 3 bolts and 1 screw.
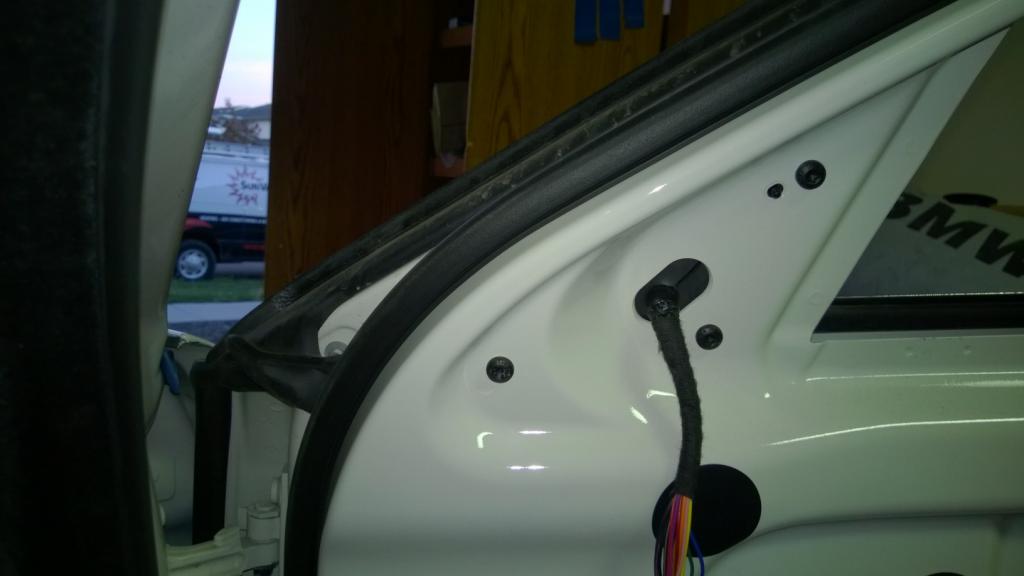
Pull back the mirror rubber
Fish through something that you can attach the wire to. I used a piece of solder.
Pull the wire through.
Attach the new light to the mirror and bolt the mirror back in place.
Remove the cover with the speaker. Poke a hole in the rubber in the door jam and feed the wire in to the door. Poke a hole in the rubber on the door and feed the wire up. Terminate and connect to the light. Run the wire in the door jam up by the fender and to the fuse box.
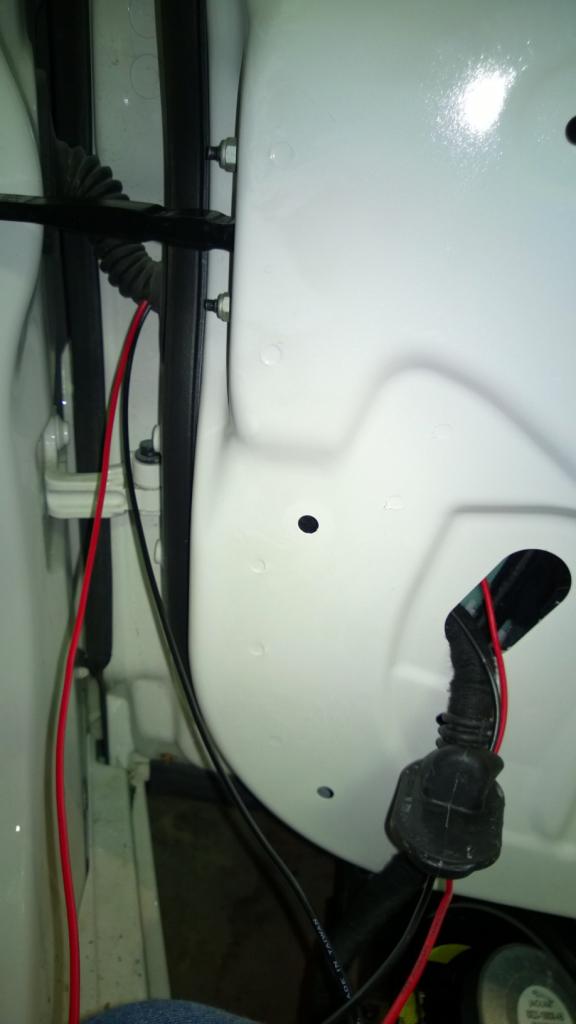
On the fuse box there are a couple spare terminals that are powered with accessories. Note that these are powered when the car is unlocked and then power is turned off when the car is locked. The car will shut the power off after about 10 mins.
Put the mirror cover , speaker, door trim and door card on and you are done. This all took me 4 hours to do trying to figure it all out. I'd say 2-3 hours with the directions.
I added these LED strips to the mirror lights as DRL. $25 for the 3". I also ordered the mirror lights. They were $15 each but it is not required. I just wanted them just in case I messed up and could return to stock. These things are bright.
Morimoto XB LED Strips - Accessories from The Retrofit Source Inc <-- This is where I ordered the LED strip from. I personally would not recommend these guys.
1) Why would you not recommend them ?
2) Did you also add the lower DRL on using the same strips ?
Can you share how you wired things up ?
Morimoto XB LED Strips - Accessories from The Retrofit Source Inc <-- This is where I ordered the LED strip from. I personally would not recommend these guys.
1) Why would you not recommend them ?
2) Did you also add the lower DRL on using the same strips ?
Can you share how you wired things up ?
1. I ordered 2 sets and only received 1 set. When I inquired where the second set was it took 2 hours for them to say they would send another set. During that time they were telling me they were out of stock and then found some. When they shipped the second set they did not supply me with the correct tracking number. I still do not have the second set of strips and it has been a couple weeks and their response was it could take up to 2 months. I have ordered other things from other vendors and they have showed up with no problem.
2. I made the bottom lights as an experiment. I am hoping this winter I will have time to prototype a mold to place the lights where the factory grill is.
Installation:
Take mirror cover off: With a small flat blade pop up the mirror and then pull off with your fingers. Remove the two torx screws and pull the light up.

Take the LED strip and mark where it will be cut out. There is a square marking on the light that I used as a the edge of the light. Use Dremel and cut out an opening. Use a small disc with light pressure. Make sure not to go too deep or you will score the light itself. I used a piece of aluminum and bent it to affix to the light to. Seal the aluminum piece to the light with silicon. This is the first one I did. I re did it so it looks better but this is all hidden anyways.

I really do not like the yellow LED strip but you do not see it when it is on the car so not that big of a deal.

Remove the door card
https://www.jaguarforums.com/forum/xf-xfr-x250-44/how-remove-xf-xfr-door-card-panel-fix-door-rattles-how-110947/
Remove top trim piece for the mirror

Remove and disconnect the mirror. 3 bolts and 1 screw.

Pull back the mirror rubber

Fish through something that you can attach the wire to. I used a piece of solder.

Pull the wire through.

Attach the new light to the mirror and bolt the mirror back in place.
Remove the cover with the speaker. Poke a hole in the rubber in the door jam and feed the wire in to the door. Poke a hole in the rubber on the door and feed the wire up. Terminate and connect to the light. Run the wire in the door jam up by the fender and to the fuse box.

On the fuse box there are a couple spare terminals that are powered with accessories. Note that these are powered when the car is unlocked and then power is turned off when the car is locked. The car will shut the power off after about 10 mins.
Put the mirror cover , speaker, door trim and door card on and you are done. This all took me 4 hours to do trying to figure it all out. I'd say 2-3 hours with the directions.
#73
09-26-2014, 10:29 PM
Senior Member
#74
09-28-2014, 02:37 PM
Senior Member
#75
09-28-2014, 03:41 PM
Senior Member
[QUOTE=hlgeorge;620675]My lamps finally came (from China) and I was ready to get started. Using BigCat09's photos gave me a very good reference to start.
The Front Panel:
I made two �pulling tools� from large paperclips. The small loops were inserted as shown and I kept a slight twist pressure until the loop turned freely and then pulled it down to catch on the panel edge on each side. A good grip and a firm pull deployed the front interior light panel. The twist and pull sockets made it easy to turn the lamp around if I didn�t get it in proper polarity. After checking that the lamps were working, snap the panel back into place.
The "pulling Tools":

Thanks hlgeorge !
For those of you who have a sunroof, you can open it and look between the liner and the roof of the car and actually see the assembly. Key is to make sure you twist the hooks so they are on the inside of the light assembly You can also see the two retainer clips that hold the plastic assembly in place - this is what the force is needed to compress and release the assembly.
The Front Panel:
I made two �pulling tools� from large paperclips. The small loops were inserted as shown and I kept a slight twist pressure until the loop turned freely and then pulled it down to catch on the panel edge on each side. A good grip and a firm pull deployed the front interior light panel. The twist and pull sockets made it easy to turn the lamp around if I didn�t get it in proper polarity. After checking that the lamps were working, snap the panel back into place.
The "pulling Tools":
Thanks hlgeorge !
For those of you who have a sunroof, you can open it and look between the liner and the roof of the car and actually see the assembly. Key is to make sure you twist the hooks so they are on the inside of the light assembly
You can also see the two retainer clips that hold the plastic assembly in place - this is what the force is needed to compress and release the assembly.
#76
10-23-2014, 03:48 AM

#77
10-24-2014, 06:17 AM
Senior Member
I think that's the way it's supposed to work. It's how it works in mine, anyway.
The following users liked this post:
jagmt (10-25-2014)
#78
12-24-2014, 11:32 AM
Junior Member
Join Date: Dec 2014
Location: Wrexham
Posts: 4
Likes: 0
Received 0 Likes
on
0 Posts
Hi, I joined this thread, as I have the facelift version 2013 and the magical 3rd bolt hidden in the wheel arch does no longer appear to be accessible, Do I have the remove whole interior wheel lining to access the 3rd bolt to remove the headlight unit? which are know equipped with D3S bi xenon 4300k bulbs. I have D3S 8000k but cannot remove the headlight unit. Has anyone done this and any advice /tips would be greatly received.

#80
02-18-2015, 08:38 PM
Veteran Member
Join Date: Feb 2014
Location: Adelaide, South Australia
Posts: 8,286
Received 3,113 Likes
on
2,296 Posts
They will fit, I have put even longer ones in.
But you need to watch the width/diameter.
Anything over about 11 mm diameter and they won't fit through the holes in the light assembly, at least not without a lot of shoving and swearing, and if you do manage to jam them in like that they are nearly impossible to remove again. The bulb holder/plug just pulls out leaving the bulb behind, which is then a real PITA to get out of the light housing!
Many of these types of multi-chip bulbs are right on the borderline of fitting, and I solve that problem by gently filing a bit off the edges of the chips, all the way around.
I'm currently running Cree LED bulbs as they are much brighter than the SMD LEDs, but again you need to watch the diameter of them. 95% of them you see on eBay and elsewhere are 12 mm in diameter, and they won't fit, they must be 11 mm or less in diameter.
The following users liked this post:
Rique (02-18-2015)

