5HP24 home repair on a BMW X5.
#1
 01-17-2012, 03:33 PM

Well, my Christmas "vacation" has continued to go down the tubes. The slipping transmission in the X5 (the same one as our Jags, except with a small transfer case bolted on the back) needs repair. My son works at a BMW dealership so I took it there for a fluid level check and computer scan. No fluid needed,a code pulled (I'll post it later if I can get it).
They agree it's internal. Symptoms are: pulling away from a light, it revs high, then engages with an almighty bang. It has happened maybe 4 times on a drive home, it hasn't been driven since except for today to the dealer.
I am pricing out parts, I figure I'll have to fix this myself. Just for laughs, the retail cost for a "factory" rebuilt unit installed, is in the $11,000 dollar range.
I hope to get away under a $1,000 myself.
First interesting tidbit. There's a company in Canada that says Lifeguard 5 is ok for the 5HP24. I have emailed them for more info, but it's interesting.
More to come, with pictures and the odd swear word, I'm sure.
#2
01-17-2012, 08:14 PM

I did a reverse drum and the valvebody on a 1995 740IL a while back.
This site has some good info on that trans.
e38.org BMW 7-series information and links
This site has some good info on that trans.
e38.org BMW 7-series information and links
#4
01-18-2012, 12:45 AM
Veteran Member
Join Date: Nov 2006
Location: Glasgow, Scotland UK
Posts: 47,303
Received 9,005 Likes
on
4,113 Posts

#5
01-19-2012, 12:28 PM
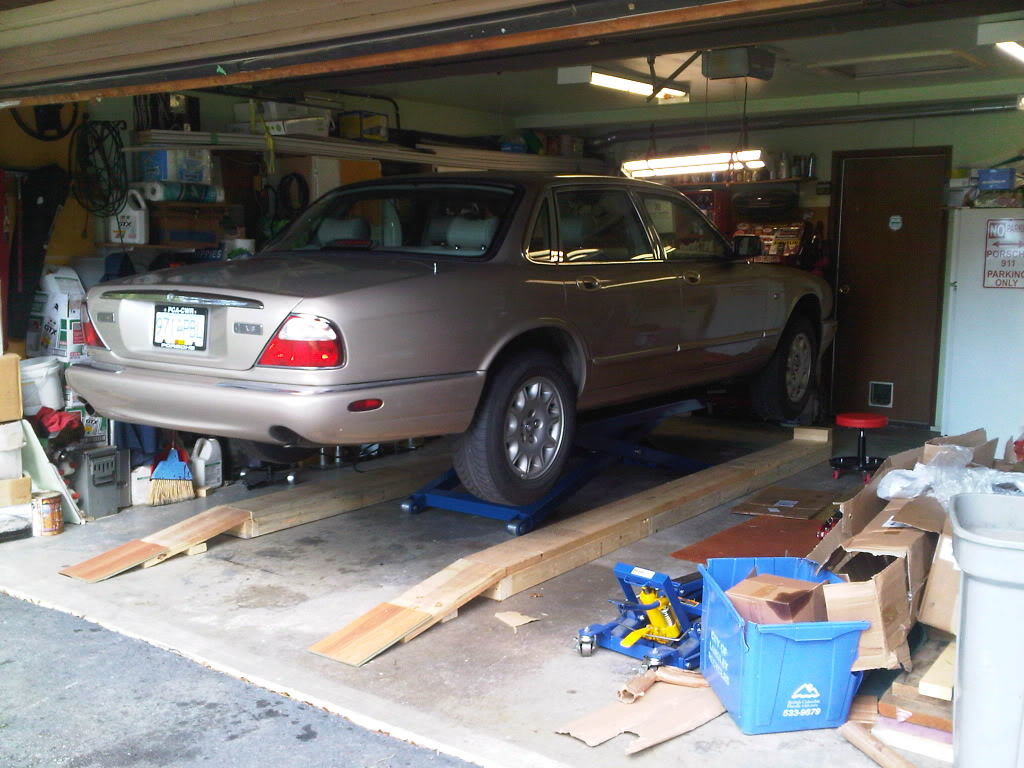
I'm going to use the lift to do all the prep work, then lower it onto the blocks to hold the front end up high enough. I'm looking forward to the challenge of fixing the transmission, but all the removal and install looks to be a real PITA.
I looked at buying a transmission jack, $130 from Harbor Freight, or $200 from Princess Auto here in Canada, but hopefully I'll only use it once, so I opted for a floor jack and transmission adapter instead. $30 for an external Torx socket set (Made by Lisle, sold by KMS Tools), and the pile of bills begins.
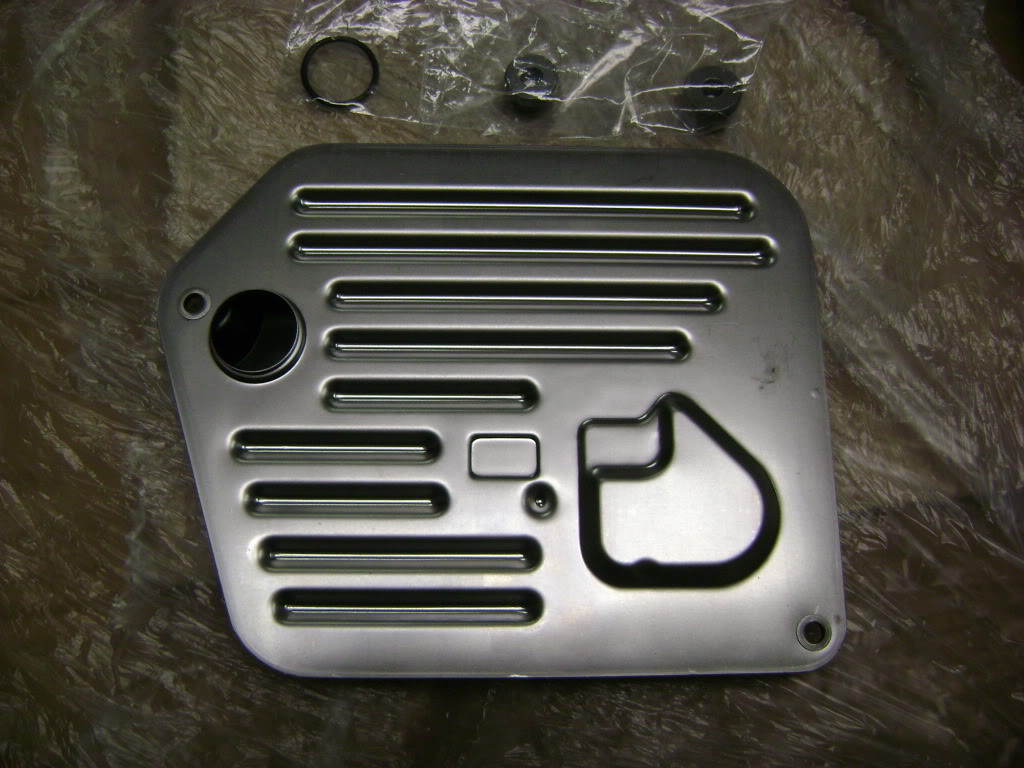
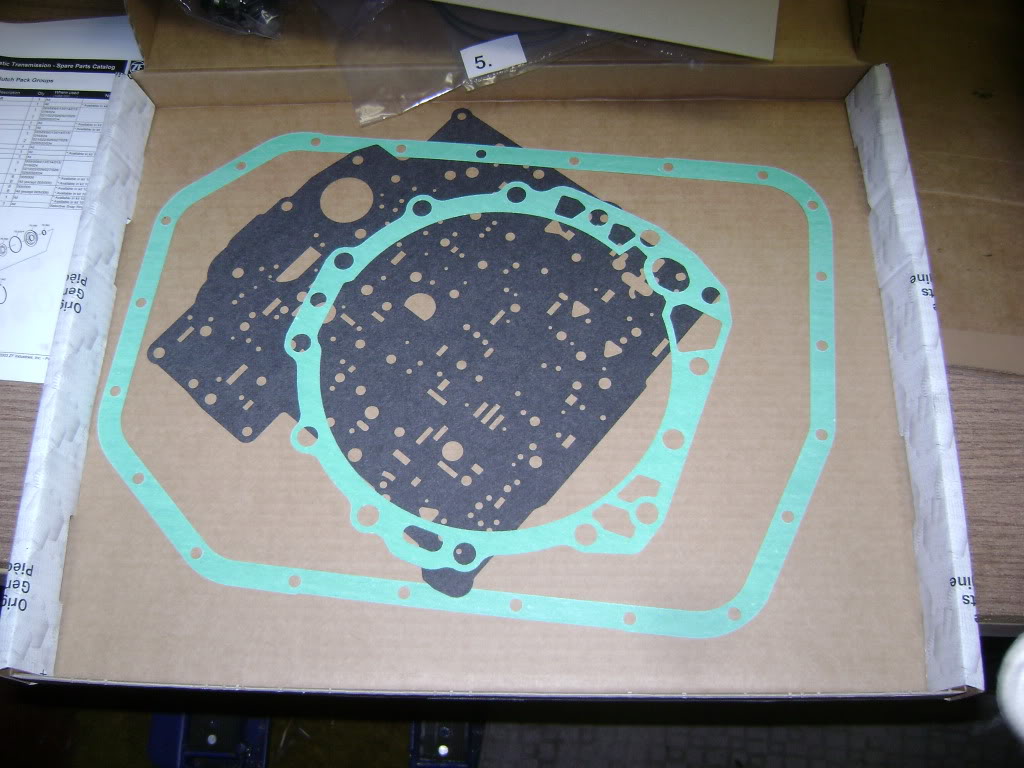
I ordered a gasket set and filter from CTSC, it's backordered but not for long I hope.
$220 including shipping to my mailbox across the border.
I spent the night cleaning the garage and it was bloody cold given the nasty weather we're having. We're not used to sub zero temperatures here, in fact it's a major reason why I live here.
More to come as the weekend progresses.
Last edited by avt007; 01-19-2012 at 12:32 PM.
#6
01-19-2012, 02:45 PM

Senior Member
#7
01-19-2012, 05:58 PM
Veteran Member
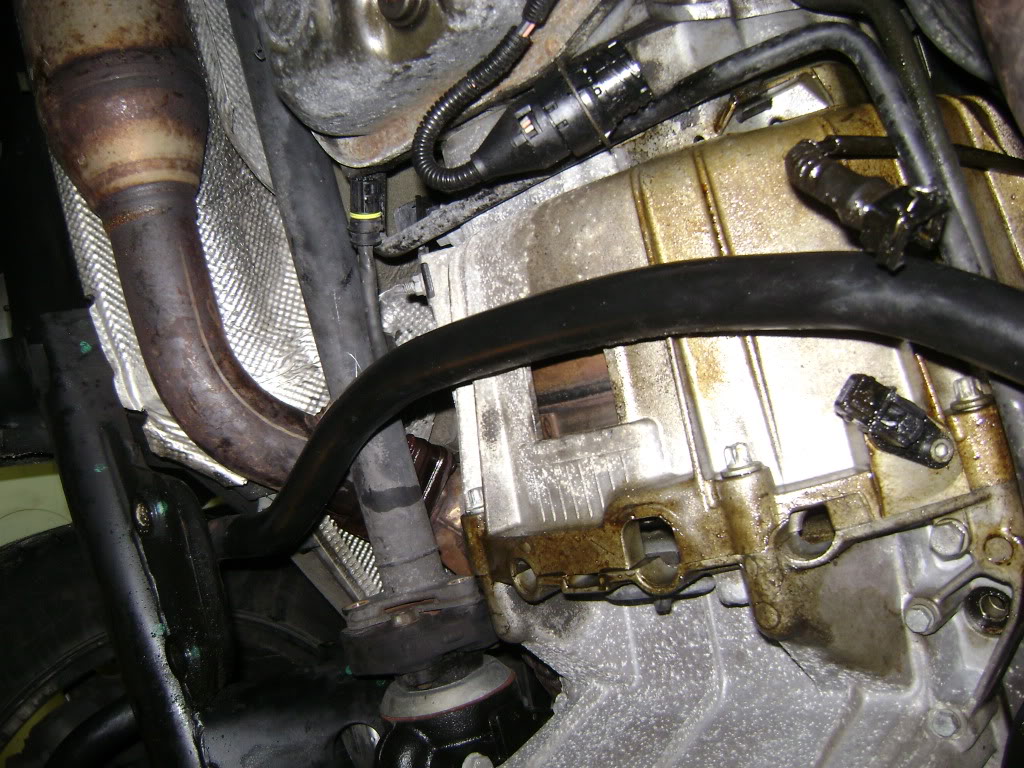
First remove the pan and look at your valve body on the transmission and look for a possible crack in the casing. It appears that Land Rover uses the ZF5HP24 and is experiencing the same problem. The valve body in this picture is from a Land Rover. I am gathering information on this now so what you find will help me and others. PM me if you wish.
Trending Topics
#8
01-19-2012, 09:50 PM
Gus, I will have a look, but not until the unit is out of the car, so it may be a few days. That crack doesn't appear to be a problem, unless that's a passage it crosses.
I still have a fuel injector to change in my sons 300zx before the X5 gets started. I think it is time to tell my boss that I am too busy to work!
Last edited by avt007; 01-19-2012 at 10:11 PM.
#9
01-19-2012, 10:14 PM
Veteran Member
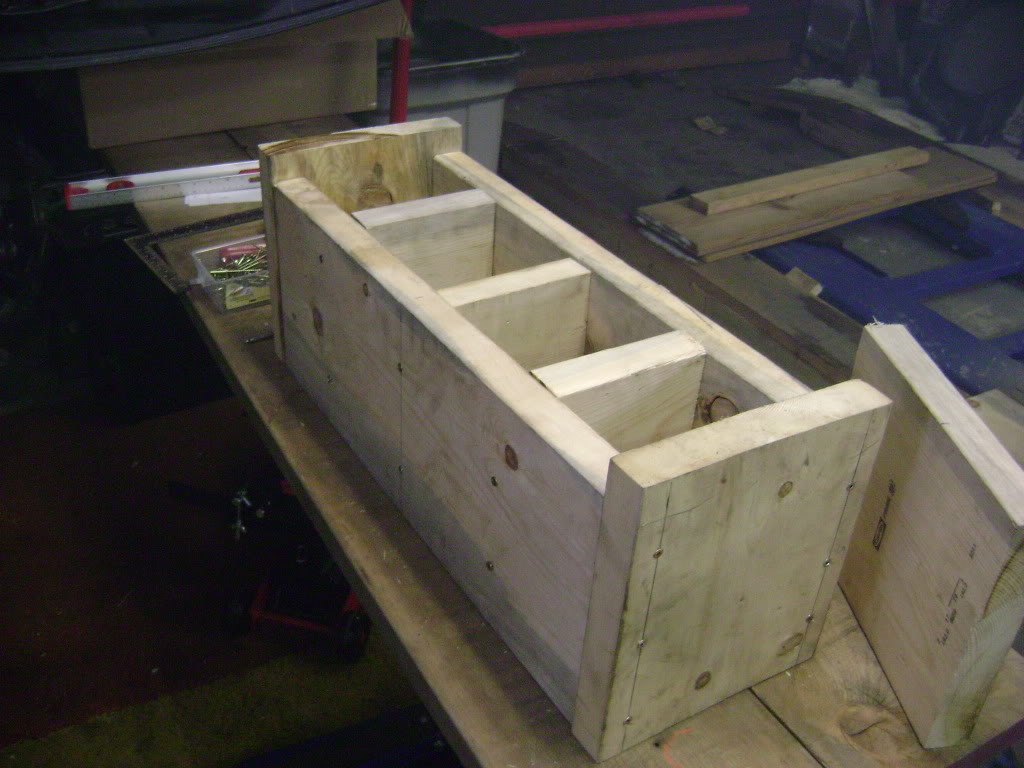
Could you perhaps put big lumber across the existing longitudinal ramps and pin them into the existing ramps with lag bolts? That might let you go higher with safety.
A pair of railroad ties at each end separated by three inches with the tires resting in the three inch gap comes to mind. Or, jackstands on top of single railroad ties seems ok too. Just not tires on a single railroad tie.
Then ... use the scissor lift and a piece of plywood in place of a transmission jack.
whatever you do ... make sure it is stable before getting underneath
Last edited by plums; 01-19-2012 at 10:17 PM.
#10
01-19-2012, 10:16 PM
Veteran Member

#12
01-21-2012, 08:20 PM
Veteran Member
#14
01-22-2012, 10:39 PM
Nearly 6 hours of miserable work, and she's almost ready to come out. I knew the re and re would be the biggest hassle. Thanks to BMW for using oddball sizes like 18mm for some of the hardware. 30 years of metric vehicles and I've never needed a 18mm until today.

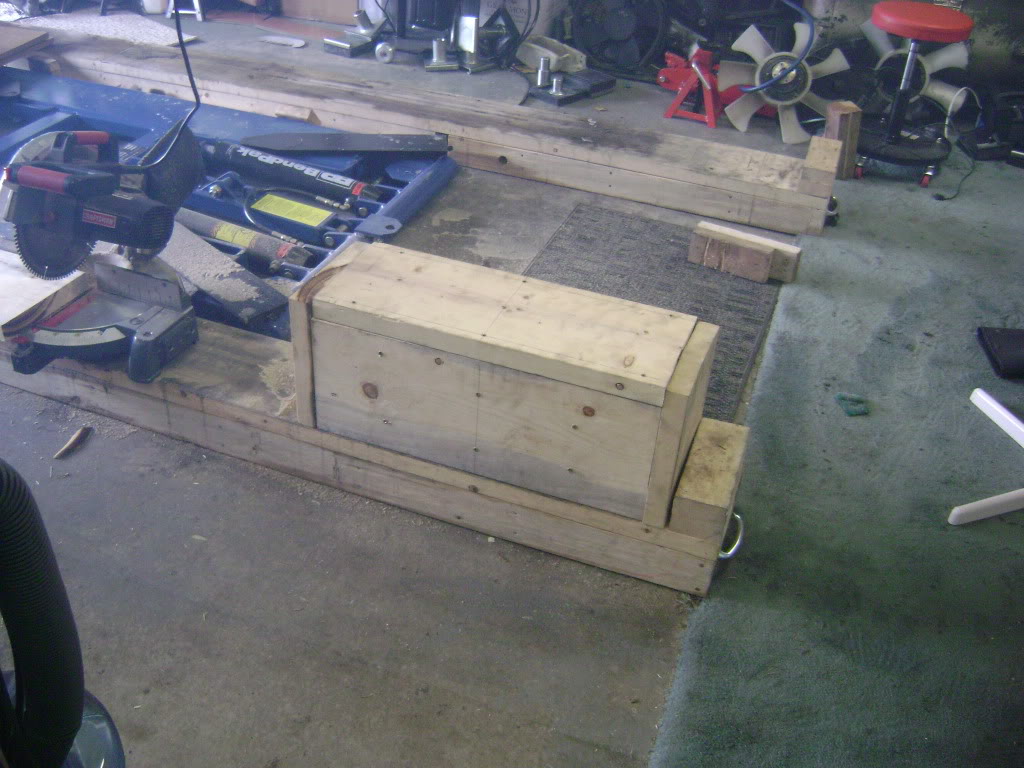
I was uncomfortable with the height when the blocks were on top of the ramps so I put them on the floor.

The BMW installation is complicated a bit by having a transfer case and an extra driveshaft running forward. At any rate it all came out without any blood loss on my part. Sure was a lot of crawling around the floor though.
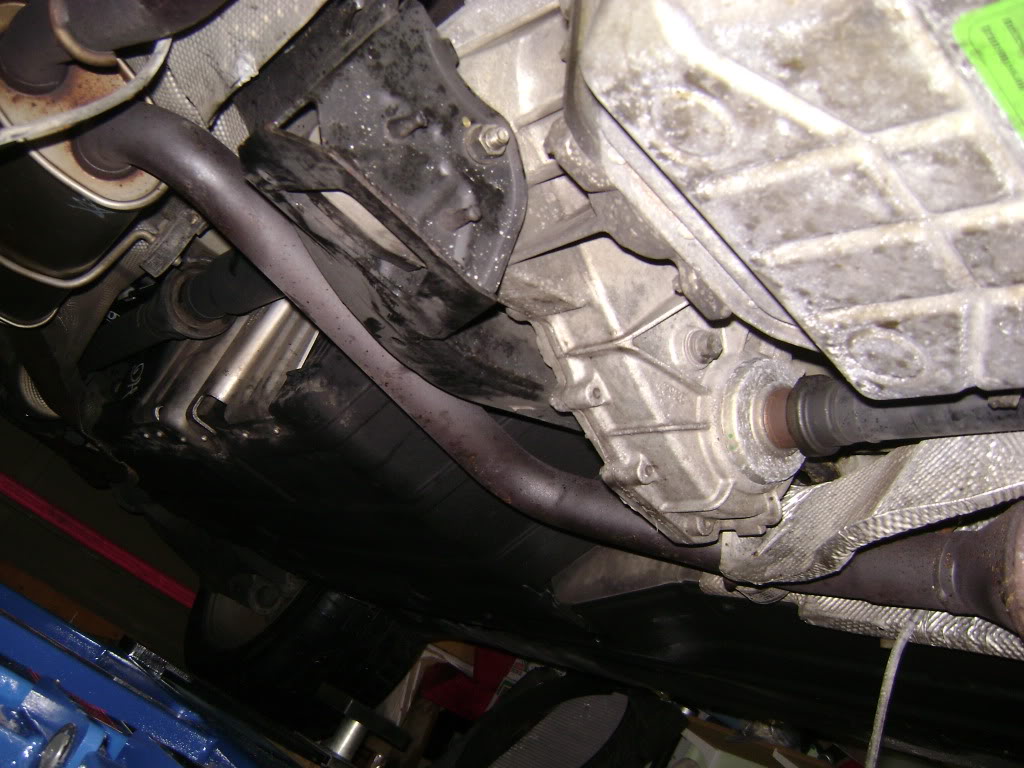
I have to say all the hardware came apart easily, even the exhaust system, which had me worried. But we don't have salt on our roads thanks to the normally mild climate, so rust wasn't an issue.
With any luck, a couple more hours should see it out and on the bench.
I was uncomfortable with the height when the blocks were on top of the ramps so I put them on the floor.
The BMW installation is complicated a bit by having a transfer case and an extra driveshaft running forward. At any rate it all came out without any blood loss on my part. Sure was a lot of crawling around the floor though.
I have to say all the hardware came apart easily, even the exhaust system, which had me worried. But we don't have salt on our roads thanks to the normally mild climate, so rust wasn't an issue.
With any luck, a couple more hours should see it out and on the bench.
Last edited by avt007; 01-31-2012 at 06:48 PM.
#15
01-25-2012, 10:44 PM
"With any luck, a couple more hours should see it out and on the bench."
Surprise, surprise, it wasn't that easy. The external torx bolts (E10 and E12) were a real bear to access and remove. Interestingly, at least 4 of the 8 bolts were loose!
In case I didn't explain it earlier, the exhaust has to come out, no way around it. Don't try to get it out in one piece, unless you want to remove the rear bumper to clear the pipes. Take apart the connections under the rear seat. Before you do anything, buy some good penetrant oil and spray everything exhaust related a day before you try to get it apart.
4 bolts hold the torque converter to the drive ring, but I didn't have a socket big enough to turn the crank using the belt pulley. I resorted to a big screwdriver prying the ring gear around. The bolts were not tight, luckily, since the manual referred to a special tool to get the bolts out. I used a 17mm I think, but the bolt heads were neither metric nor standard. EDIT: I found a ZF reference explaining it is 17mm, and the special tool is just a socket with a magnet in it. The magnet is unnecessary.
The manual also calls for a stand to support the engine, I used a piece of 2x4 instead.
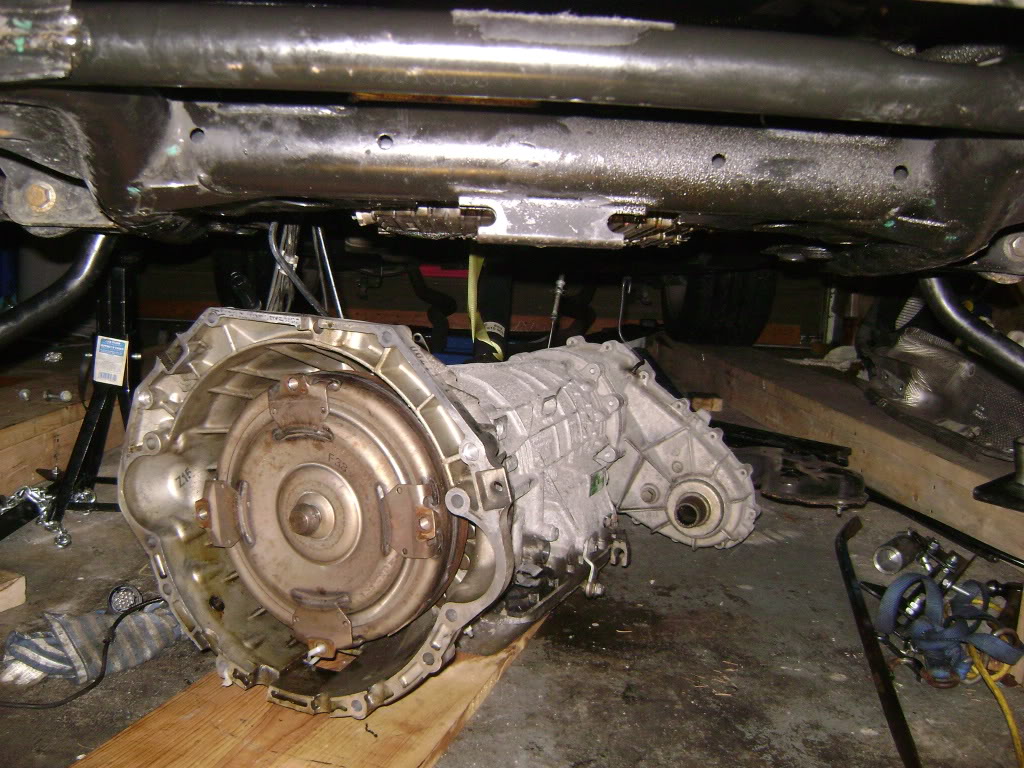
The transmission jack adaptor worked pretty good, but the vehicle height was not high enough.EDIT: 10.5 inches. I ended up using blocks of wood and a tie down strap to help me get the trans off the jack once it was lowered. There was no way it was coming out from under the car until it was on the floor.
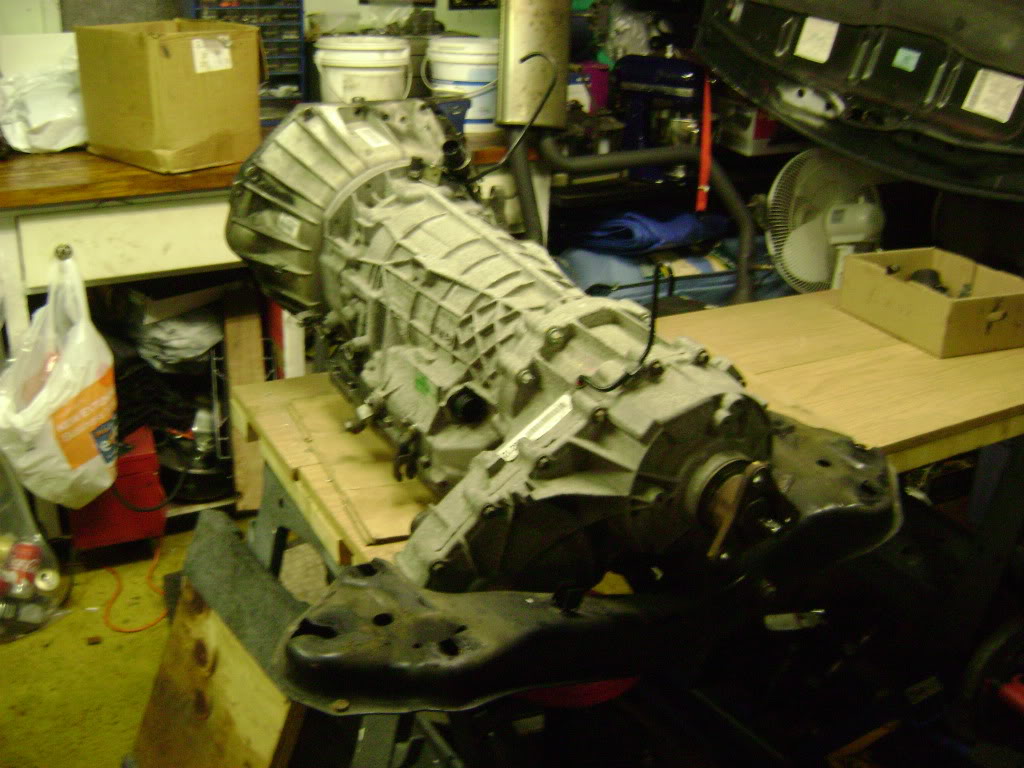
At any rate, it's out and on the bench. I'm happy not to be crawling around on the floor, but now I'm a bit nervous about pulling it apart. The gasket kit and filter came today, very good service from CTSC.
Tool notes- I don't have an 18mm, and at night it's hard to find one. I used digital calipers and found that an 11/16 wrench is 17.5 mm, so a bit of work with a file and a Dremel made a great tool. This is needed for the upper and lower bolts on the swaybar droplinks. They all have to come off, and even when they do, the swaybar will not come out,although it is now free enough to move around and get the tranny past. Other bolts (I think the crossmember ones) were 18 mm as well, but I have a set of impact sockets from about 30 years ago and the 11/16 had just enough wear that it fit perfectly.
You will also need a 16 mm wrench and socket for assorted bits. On the left hand side of the tranny there are at least a couple of the Torx bolts that have 16mm nuts on the backside.
Oh yes, the manual doesn't tell you that the starter will be just hanging there once the tranny bolts are out, but it is ok. The book does say to remove the ground lead from the battery, but it's buried deep in the trunk, under the spare and a bunch of plastic housings, so I removed the bulkhead connector under the hood, very similar to what Jaguar has.
Overall, pulling the tranny from an X5 is a massive exercise in frustration. It's not technically difficult, but it's very awkward, a lot of pieces have to come out and it is very time consuming. Keep in mind too that I have a scissor lift, industrial compressor and air tools, and 25 years experience as an aircraft mechanic. I am not boasting, I am merely saying I am not an amateur.
Surprise, surprise, it wasn't that easy. The external torx bolts (E10 and E12) were a real bear to access and remove. Interestingly, at least 4 of the 8 bolts were loose!
In case I didn't explain it earlier, the exhaust has to come out, no way around it. Don't try to get it out in one piece, unless you want to remove the rear bumper to clear the pipes. Take apart the connections under the rear seat. Before you do anything, buy some good penetrant oil and spray everything exhaust related a day before you try to get it apart.
4 bolts hold the torque converter to the drive ring, but I didn't have a socket big enough to turn the crank using the belt pulley. I resorted to a big screwdriver prying the ring gear around. The bolts were not tight, luckily, since the manual referred to a special tool to get the bolts out. I used a 17mm I think, but the bolt heads were neither metric nor standard. EDIT: I found a ZF reference explaining it is 17mm, and the special tool is just a socket with a magnet in it. The magnet is unnecessary.
The manual also calls for a stand to support the engine, I used a piece of 2x4 instead.
The transmission jack adaptor worked pretty good, but the vehicle height was not high enough.EDIT: 10.5 inches. I ended up using blocks of wood and a tie down strap to help me get the trans off the jack once it was lowered. There was no way it was coming out from under the car until it was on the floor.
At any rate, it's out and on the bench. I'm happy not to be crawling around on the floor, but now I'm a bit nervous about pulling it apart. The gasket kit and filter came today, very good service from CTSC.
Tool notes- I don't have an 18mm, and at night it's hard to find one. I used digital calipers and found that an 11/16 wrench is 17.5 mm, so a bit of work with a file and a Dremel made a great tool. This is needed for the upper and lower bolts on the swaybar droplinks. They all have to come off, and even when they do, the swaybar will not come out,although it is now free enough to move around and get the tranny past. Other bolts (I think the crossmember ones) were 18 mm as well, but I have a set of impact sockets from about 30 years ago and the 11/16 had just enough wear that it fit perfectly.
You will also need a 16 mm wrench and socket for assorted bits. On the left hand side of the tranny there are at least a couple of the Torx bolts that have 16mm nuts on the backside.
Oh yes, the manual doesn't tell you that the starter will be just hanging there once the tranny bolts are out, but it is ok. The book does say to remove the ground lead from the battery, but it's buried deep in the trunk, under the spare and a bunch of plastic housings, so I removed the bulkhead connector under the hood, very similar to what Jaguar has.
Overall, pulling the tranny from an X5 is a massive exercise in frustration. It's not technically difficult, but it's very awkward, a lot of pieces have to come out and it is very time consuming. Keep in mind too that I have a scissor lift, industrial compressor and air tools, and 25 years experience as an aircraft mechanic. I am not boasting, I am merely saying I am not an amateur.
Last edited by avt007; 01-31-2012 at 06:48 PM.
#17
01-26-2012, 06:19 PM
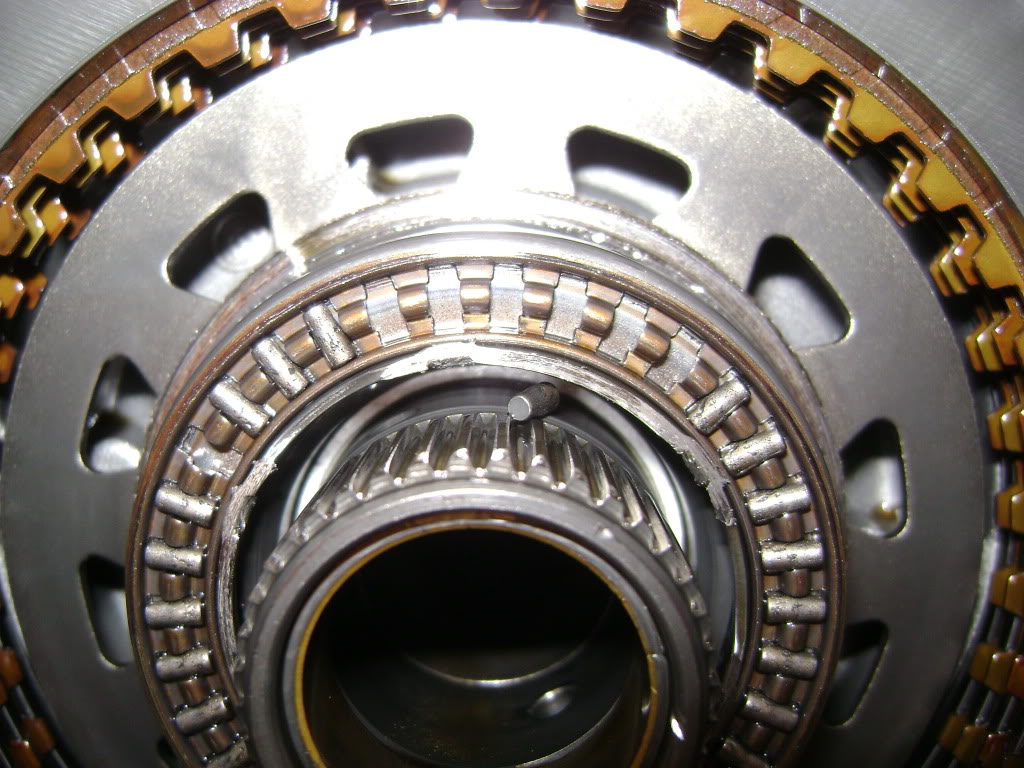
The autopsy results are in, at least partially. Primary cause of death appears to be a failed bearing between the B and C drums.
Here's my points and questions for you folks, I appreciate your honest input.
1. There's about 110,000 miles, 175k km.
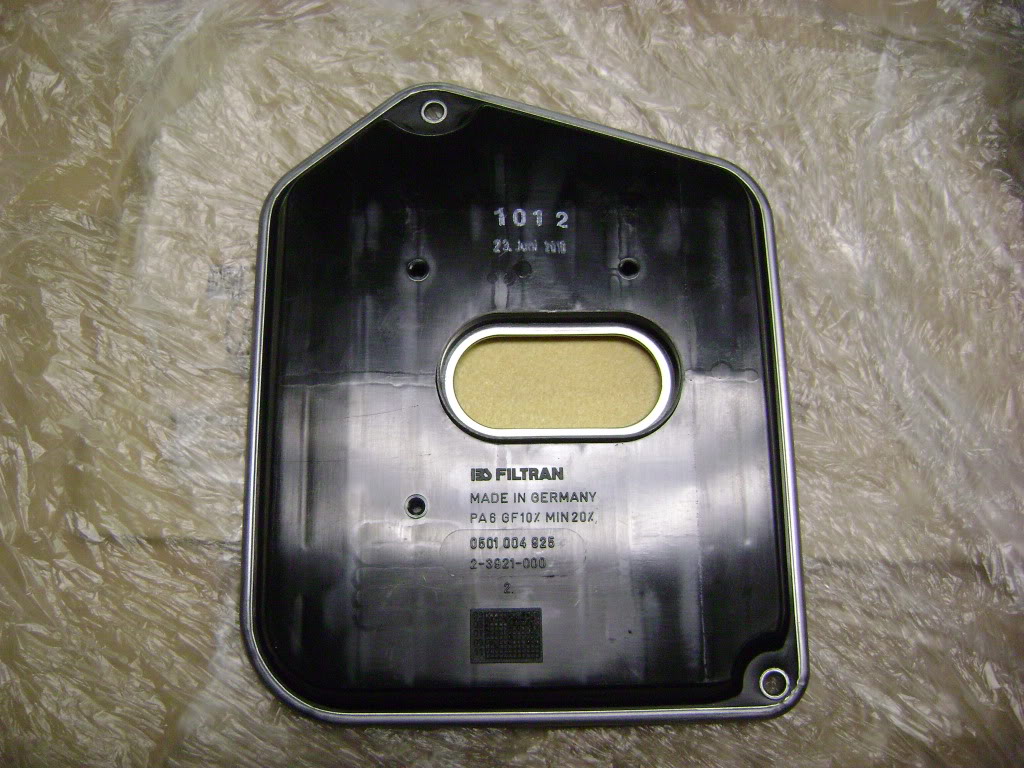
2. The filter has the original date, so I assume everything is original, never serviced or repaired.
3. The pan has sludge on all the magnets, but it is a very fine paste, no shaving or chunks.
4. The tranny drove beautifully and the minute it acted up I stopped using it. In other words there was no slippage or abuse.
6. The A drum is the original, with no signs of damage or cracking.
7. So the question is, how far do I go? I could just buy the bearing, slap it in and go. But that seems silly given all the effort so far.
8. I should replace the A drum while I'm there.
9. Should I spend time and money on the valve body?
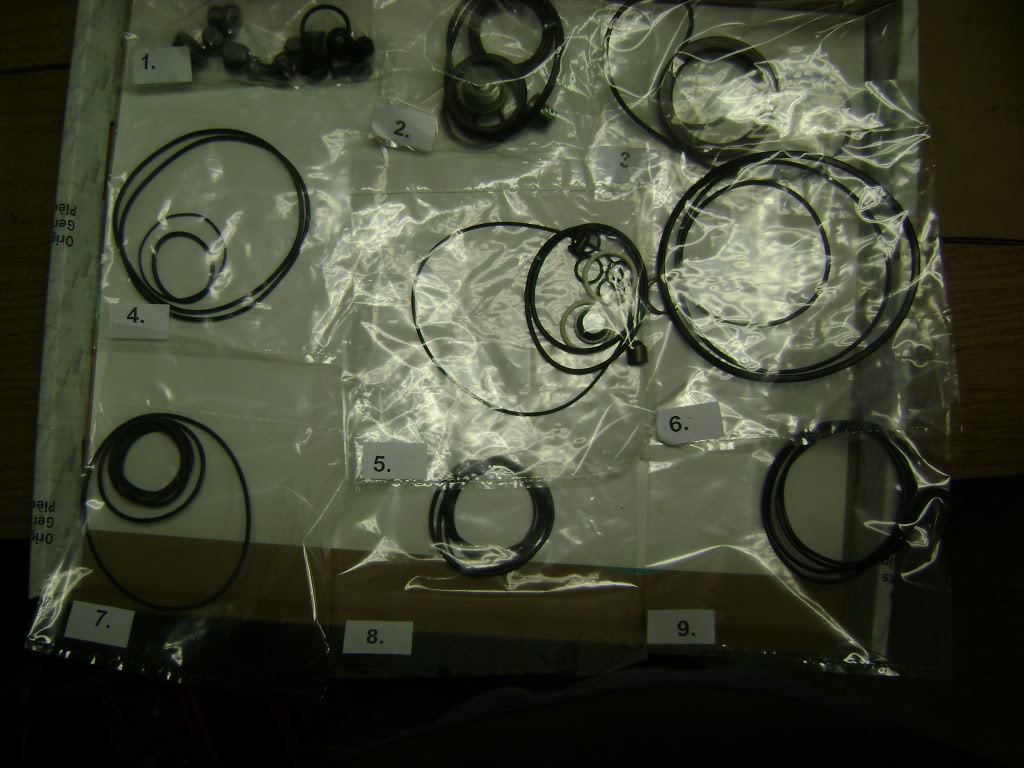
10. Should I tear down the whole thing and replace all the o rings in the kit?
11. Should I do the same for the pistons? ( I saw a post in another forum with a picture of an ugly piston seal on the verge of failure).
12. I don't feel the need to replace all the friction material.
In short, I don't want to completely rebuild this thing, as money is tight, but where do I draw the line?
PS How much fluid do I need if I pour out the torque converter?
Thanks
Here's my points and questions for you folks, I appreciate your honest input.
1. There's about 110,000 miles, 175k km.
2. The filter has the original date, so I assume everything is original, never serviced or repaired.
3. The pan has sludge on all the magnets, but it is a very fine paste, no shaving or chunks.
4. The tranny drove beautifully and the minute it acted up I stopped using it. In other words there was no slippage or abuse.
6. The A drum is the original, with no signs of damage or cracking.
7. So the question is, how far do I go? I could just buy the bearing, slap it in and go. But that seems silly given all the effort so far.
8. I should replace the A drum while I'm there.
9. Should I spend time and money on the valve body?
10. Should I tear down the whole thing and replace all the o rings in the kit?
11. Should I do the same for the pistons? ( I saw a post in another forum with a picture of an ugly piston seal on the verge of failure).
12. I don't feel the need to replace all the friction material.
In short, I don't want to completely rebuild this thing, as money is tight, but where do I draw the line?
PS How much fluid do I need if I pour out the torque converter?
Thanks
Last edited by avt007; 01-31-2012 at 06:49 PM.
#18
01-26-2012, 08:18 PM
Veteran Member
Wow!
You reached the common problem which is the failure of the bearings that you can see are missing that cause the trans to slip or hesitate going into gear. Good for you! I was told that this is a common problem with the ZF.
If it were me I would replace the “A” drum installing the newer and beefed up one and install the rebuilding kit. As for the shavings I replaced my torque converter to eliminate any shavings that might be available in it to get into the trans. As for the valve body if it is not cracked it should be good. What I have been told is that the fluid pressure (because of the missing bearings) will bleed threw the vacant barring position causing low pressure and resulting in the hesitation in shifting. The question I would ask myself is where the shavings are from the missing bearings and question myself how long will I be keeping this car.
Should you go all the way or part of the way? The best answer I can offer is that you will get out of it what you put into it.
The following users liked this post:
CJM (04-09-2012)
#19
01-28-2012, 11:38 AM
Veteran Member
#20
01-28-2012, 12:18 PM