DIY X350 Rear Suspension Strut Change.
#1
 08-19-2015, 07:34 PM

I decided to change my rear shock after getting DTCs and "suspension fault" and orange light on the MIL. I think the code was C2303. Can't rightly remember.
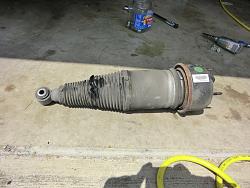
Anyway I purchased a second hand air shock from "British Parts International" out of Houston for $250 and prepared to fit it. They were great and quick (Thanks).
Here is my story. All of My photos (30+) are at the bottom of this Know How...
1. I watched multiple YouTube Video's.The best one I found is linked at the bottom of this thread.
2. I researched all I could on the jaguar Forum.
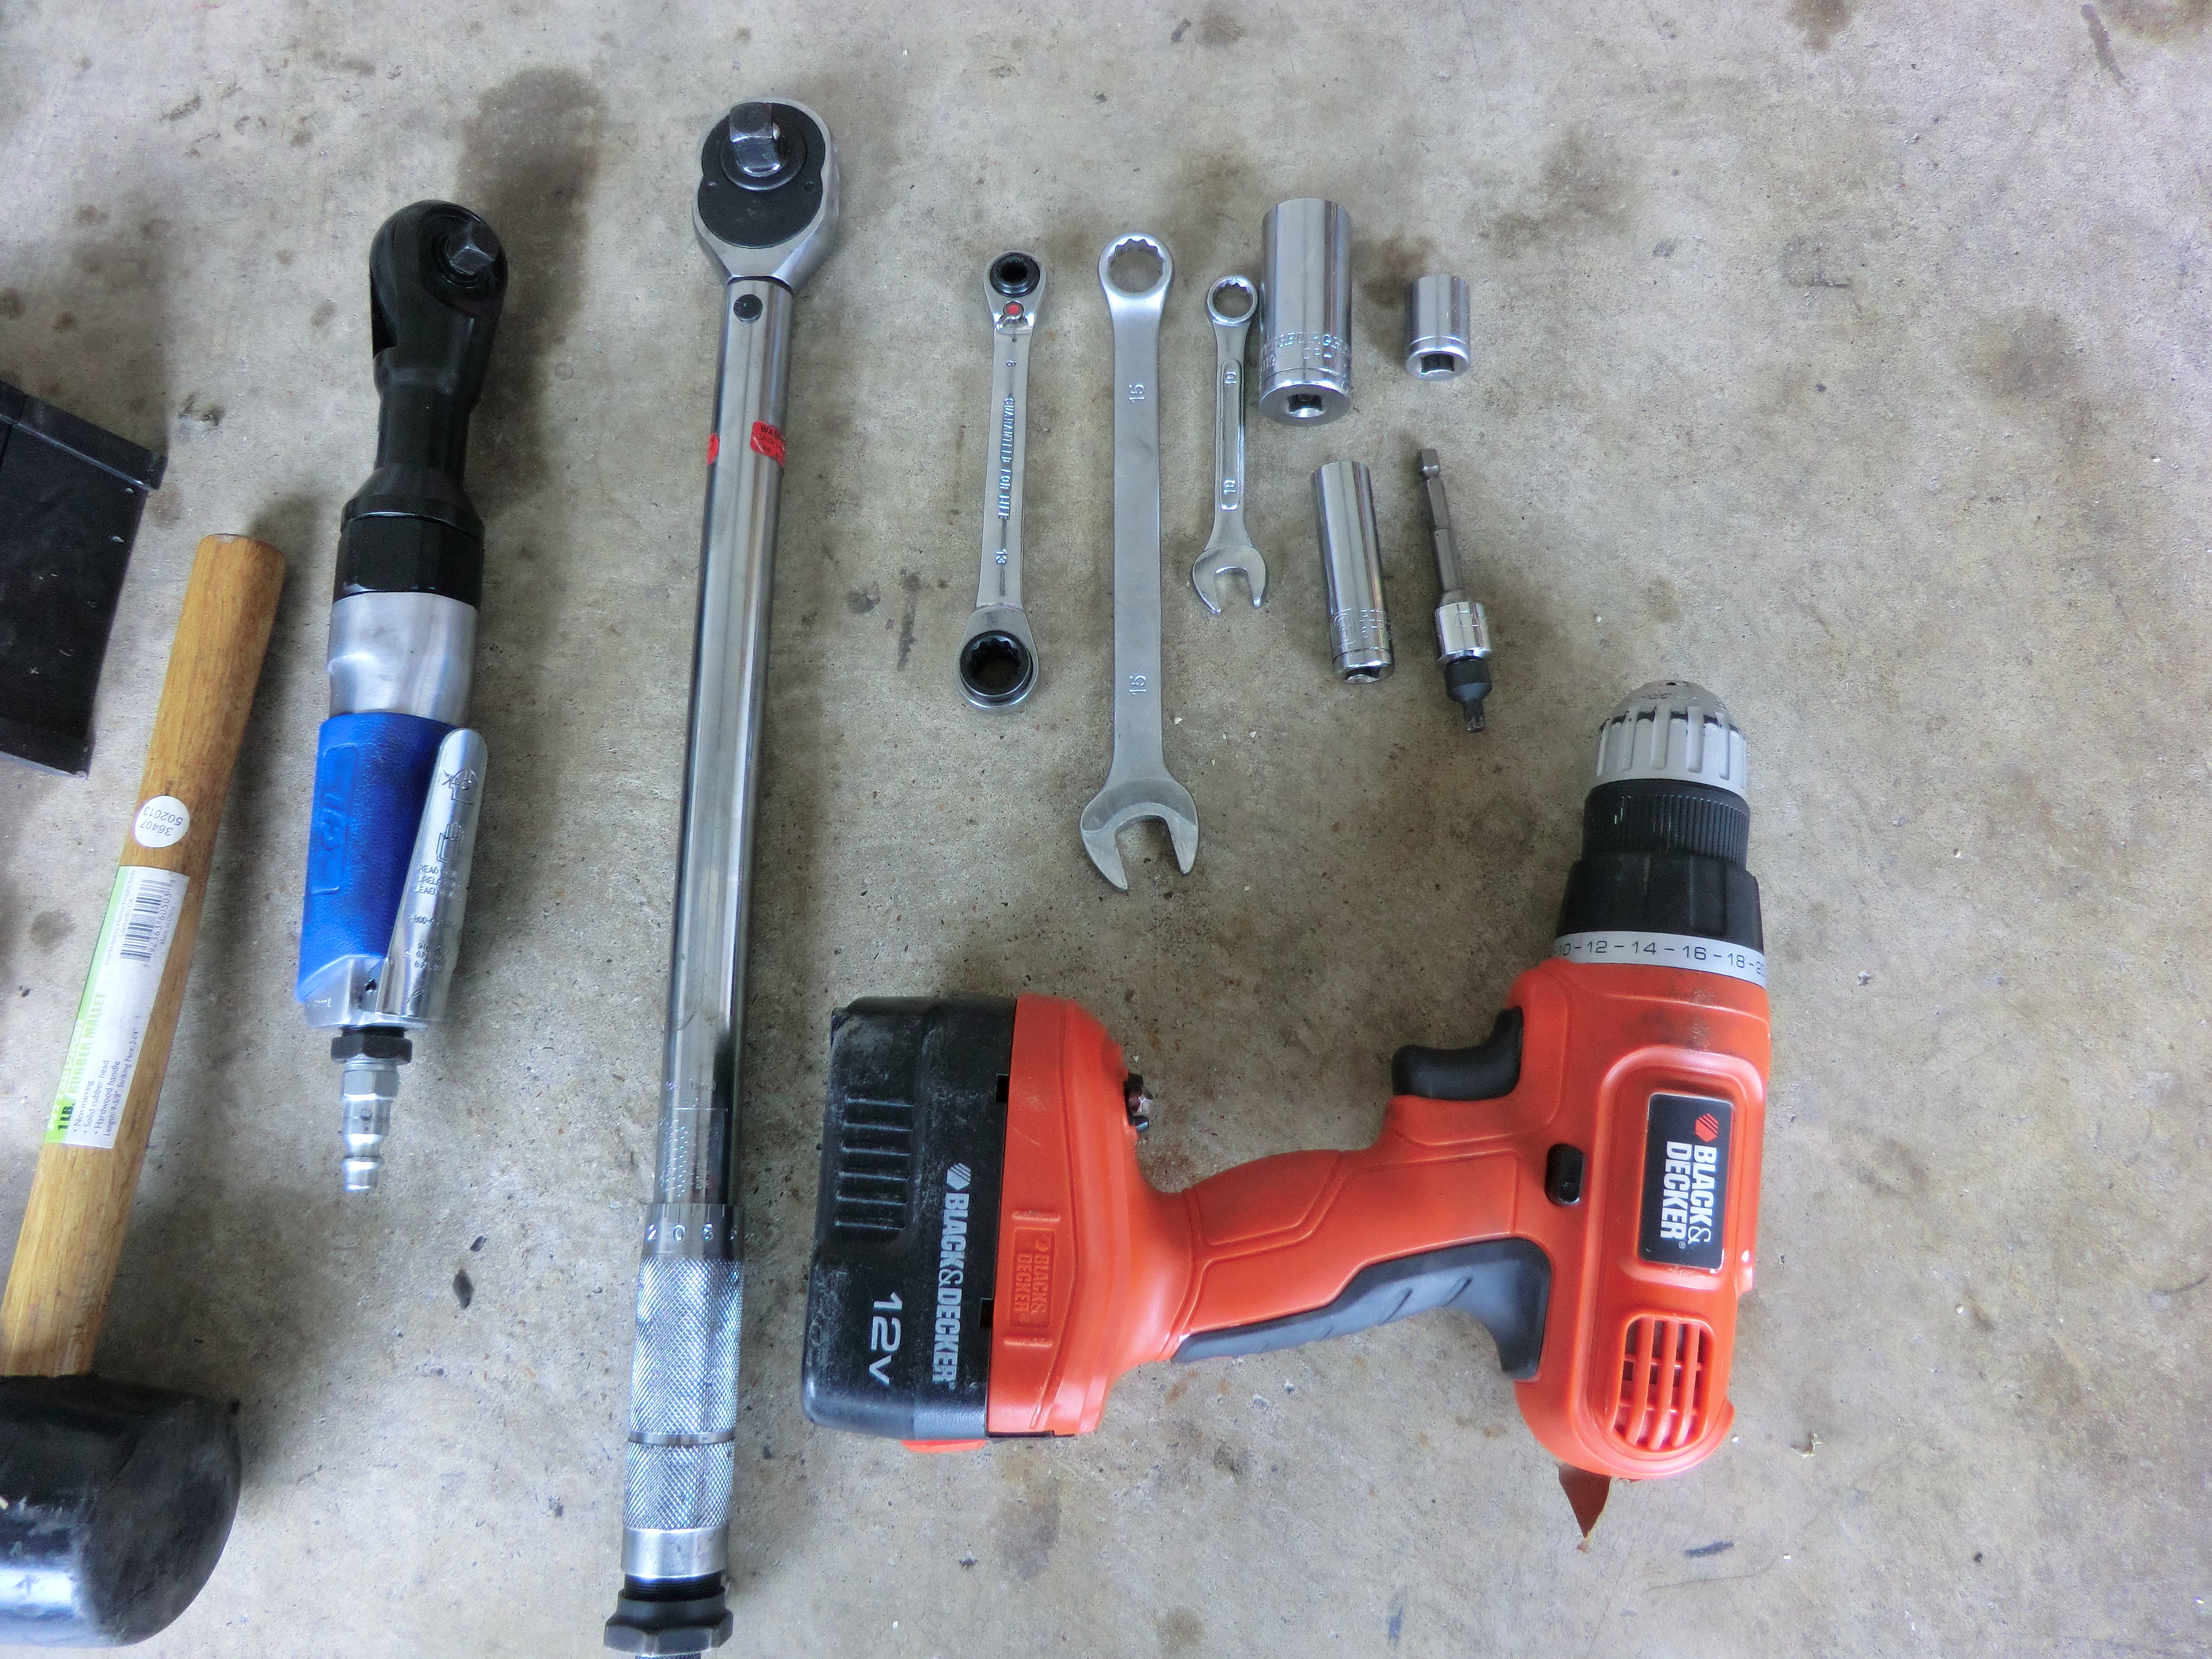
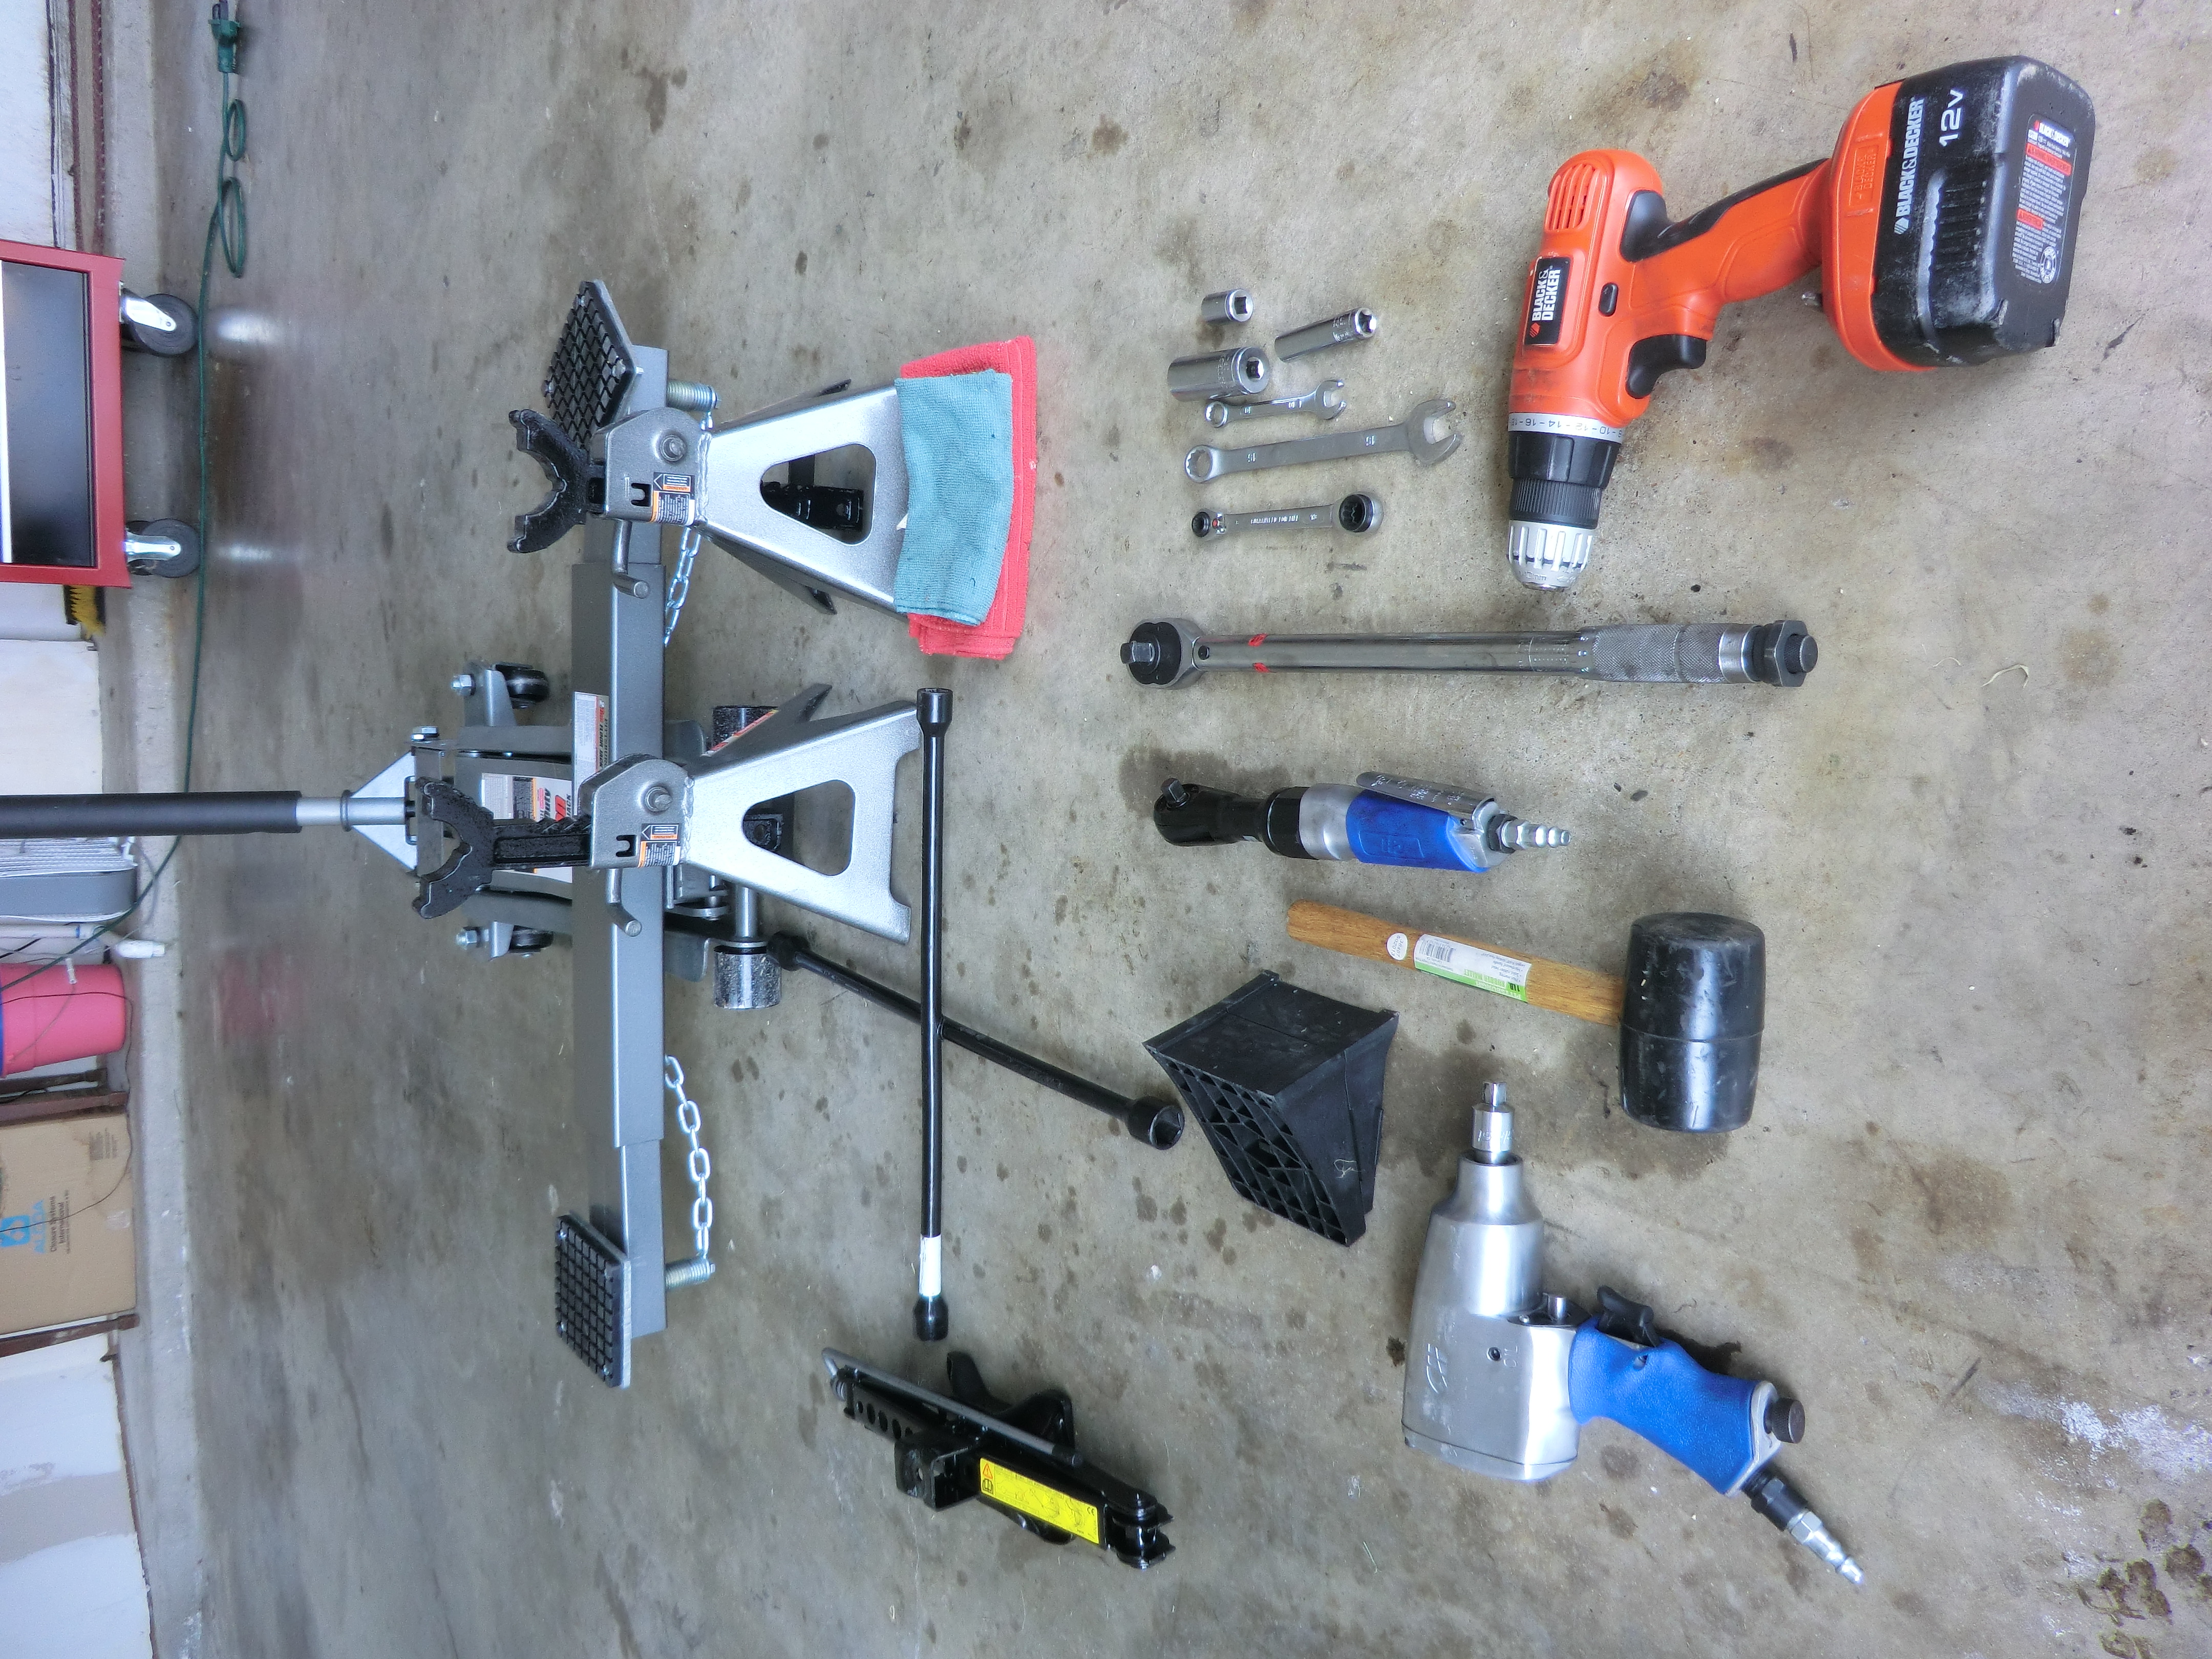
3. I got all of the tools required [see photograph]. Then follow my lead, Your Mileage may vary and you may not agree with my method, but it worked for me.


Dissassembley
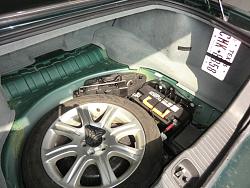
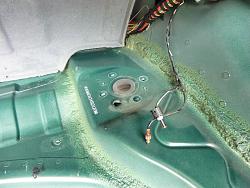
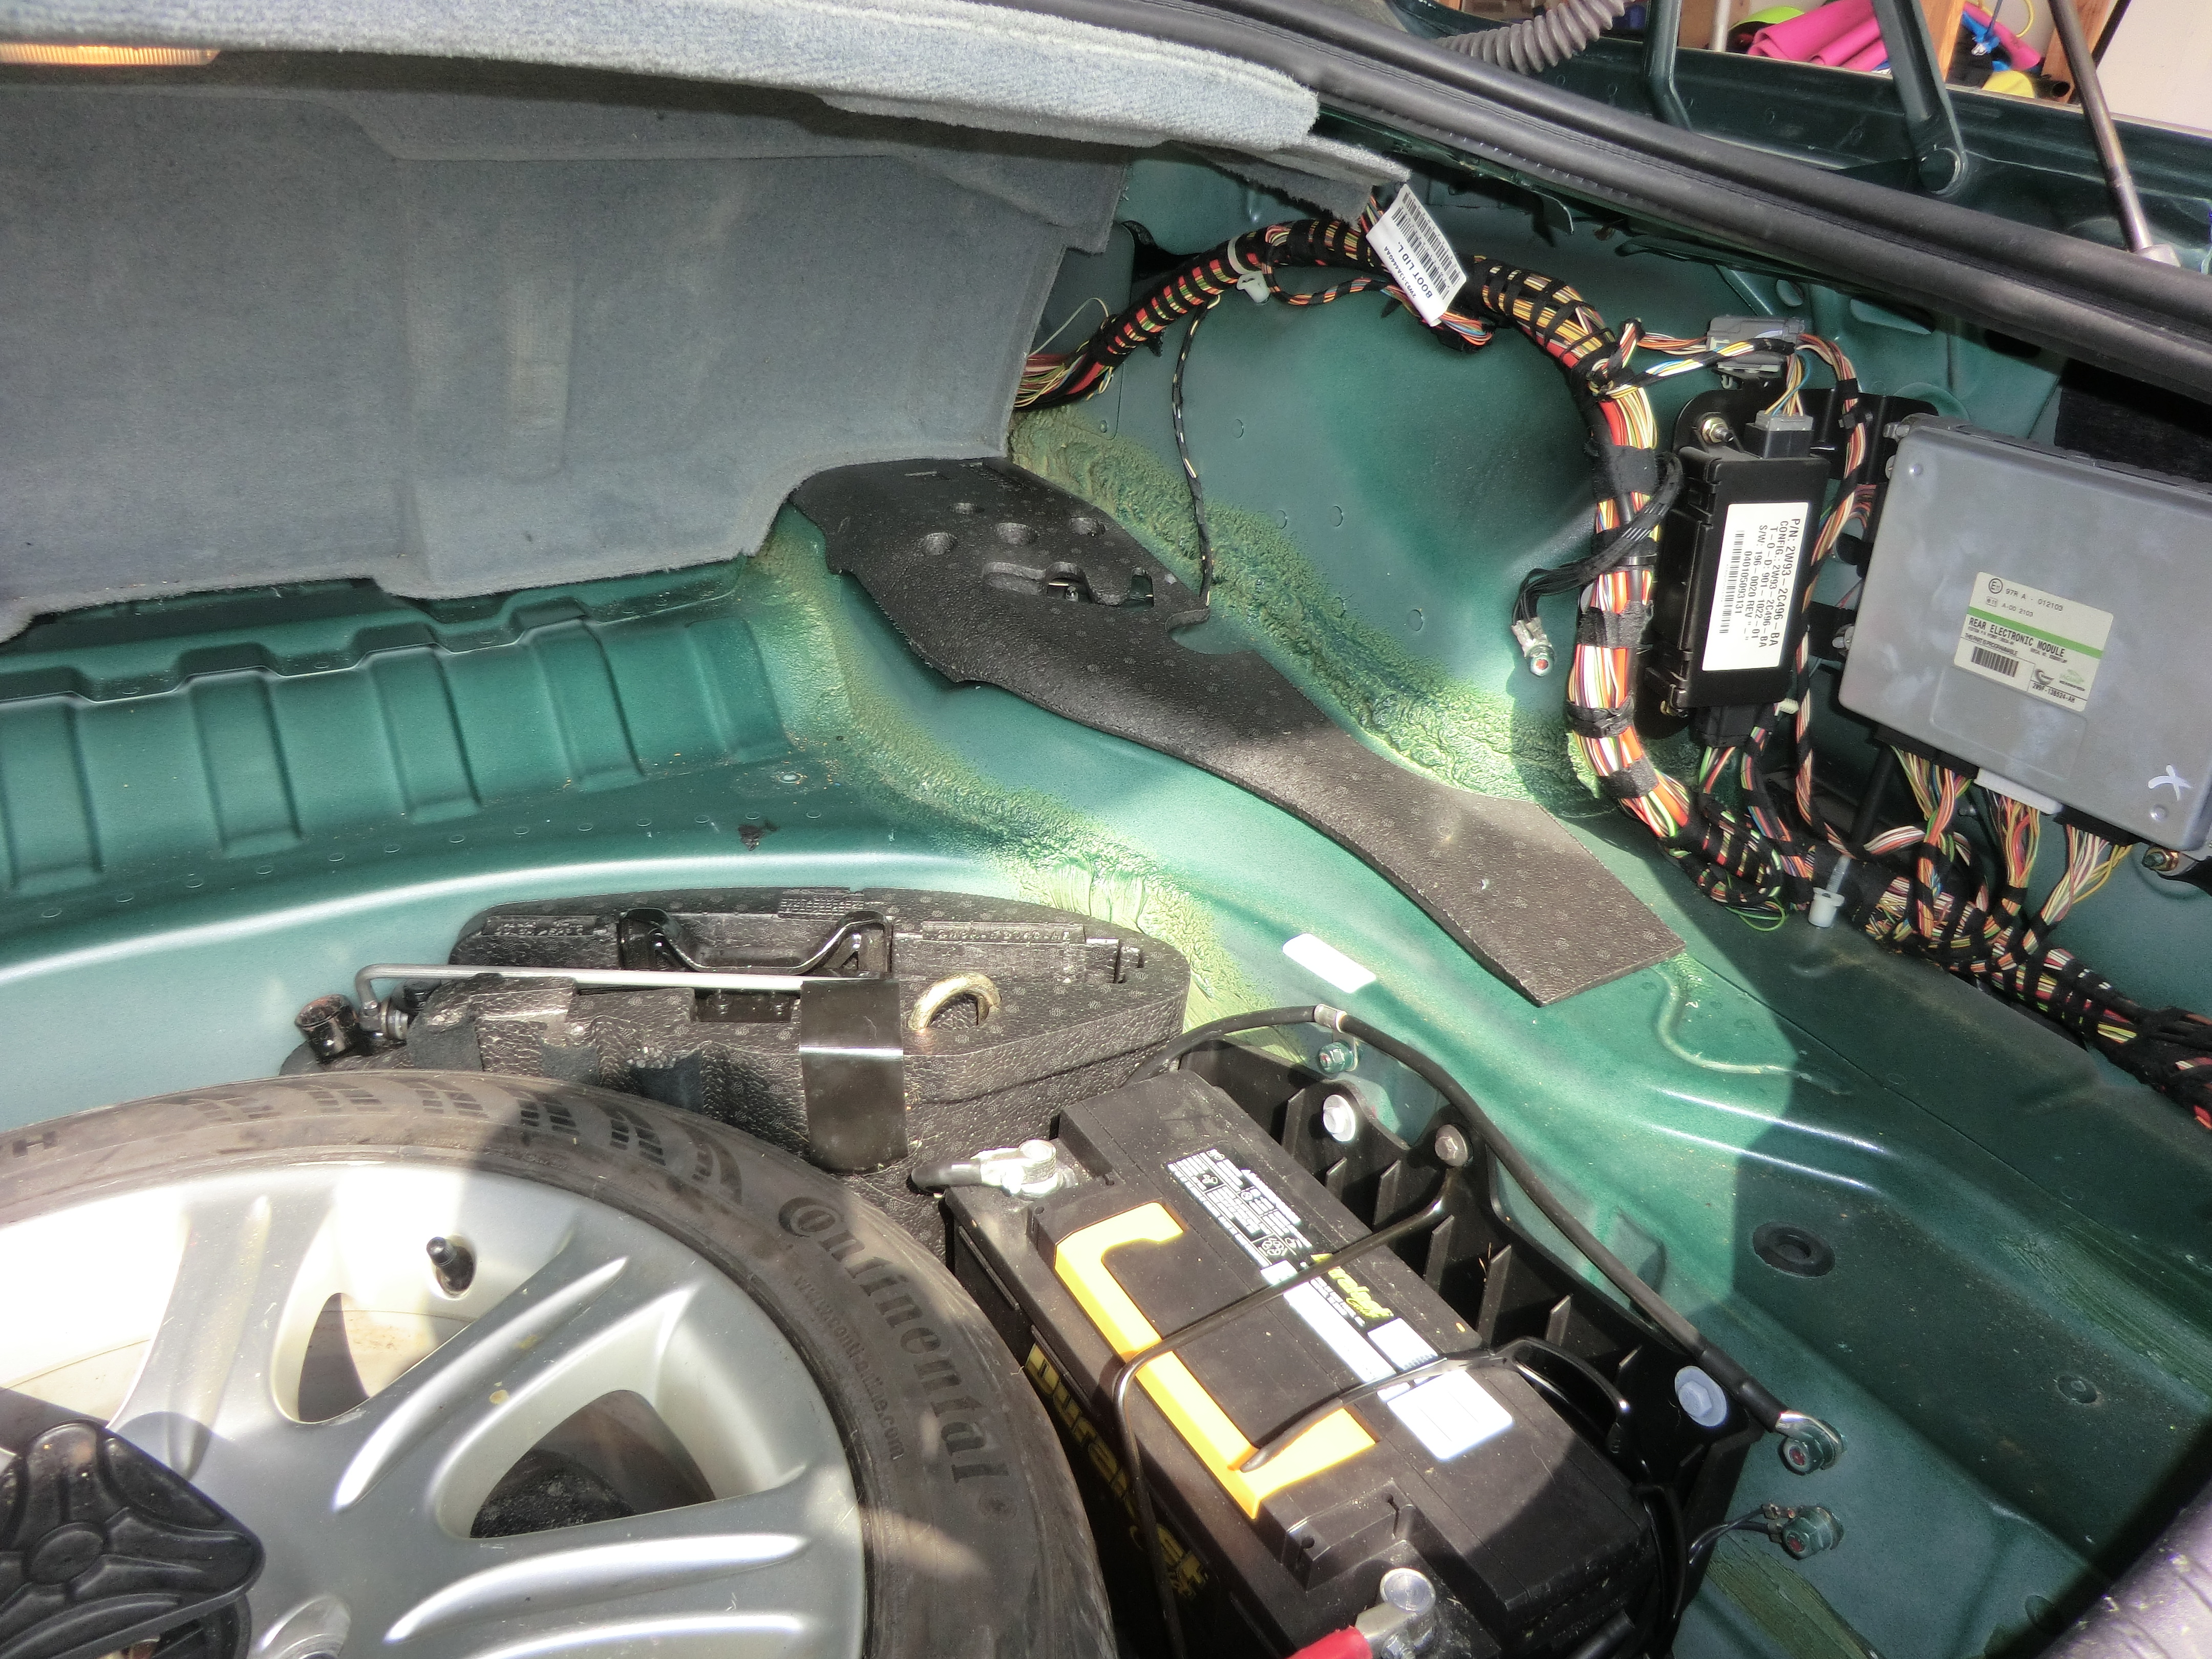
4. Remove boot cover.
5. Remove site cover.
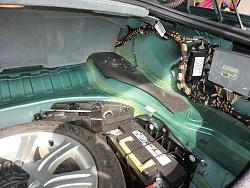
6. Remove sound inhibitors.
7. Loosen wheel nuts [19 mm].
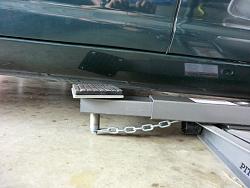
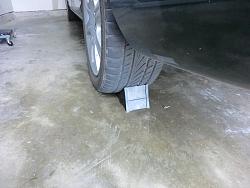
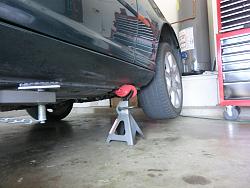
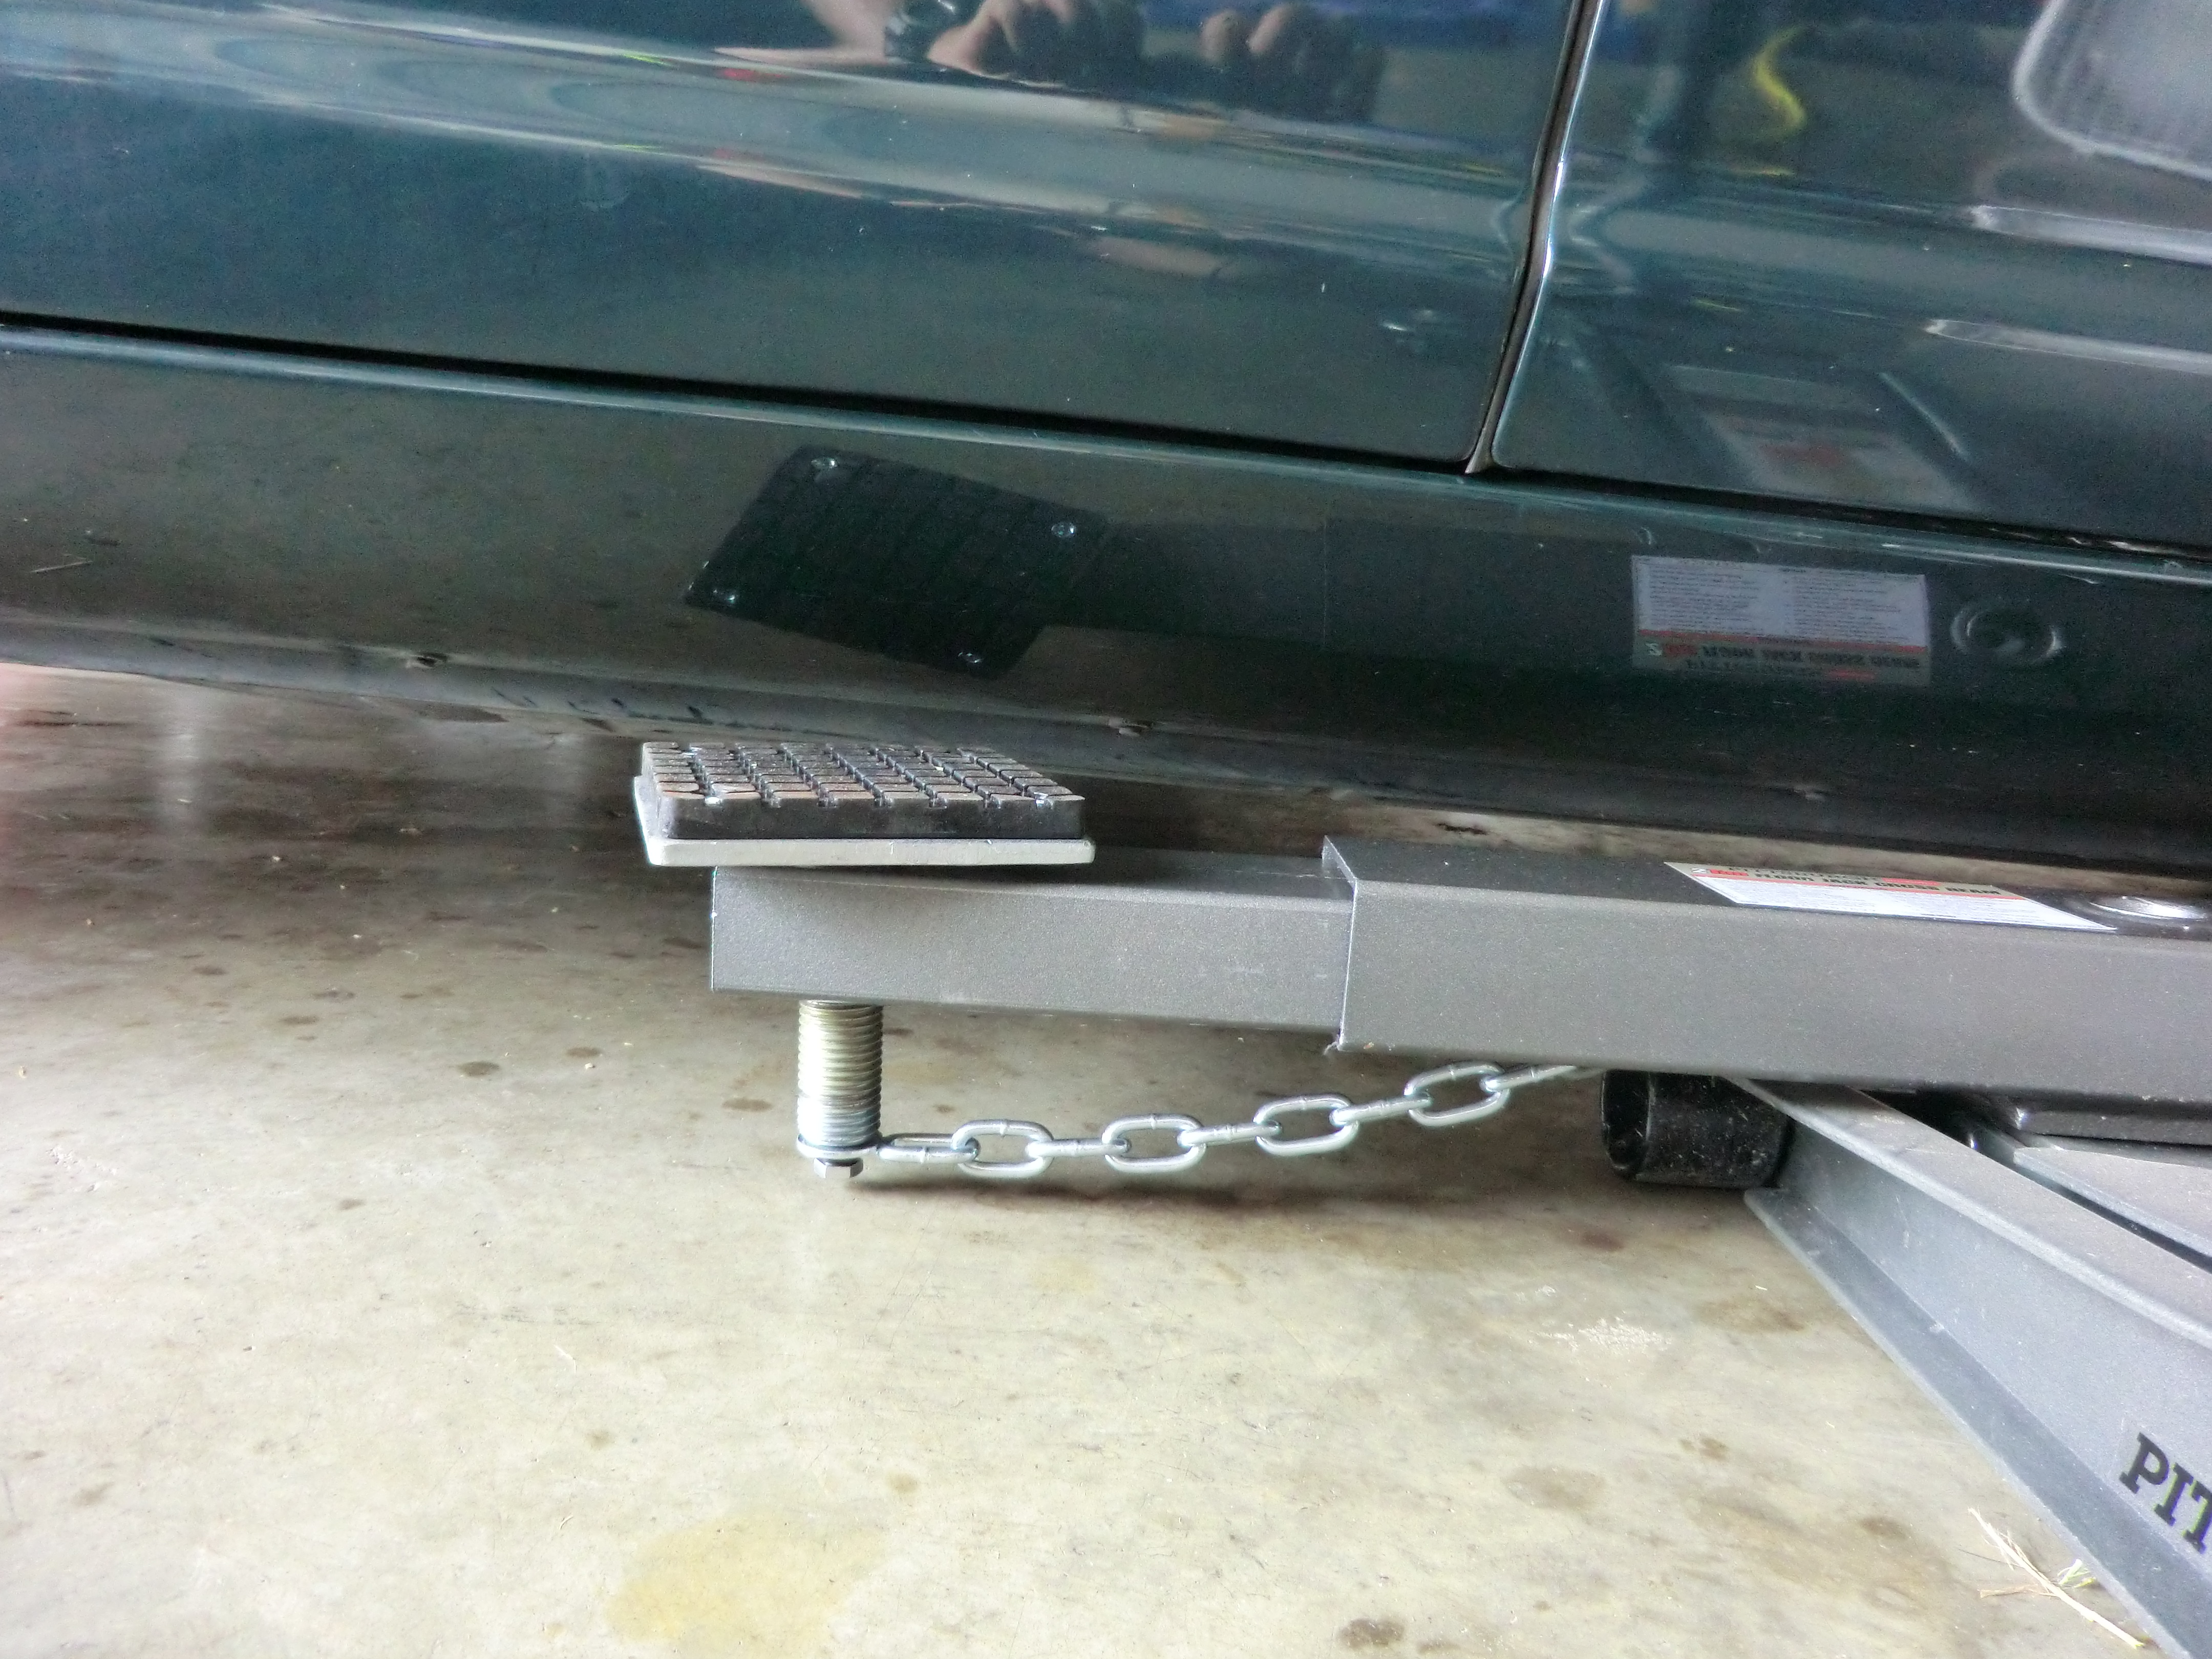
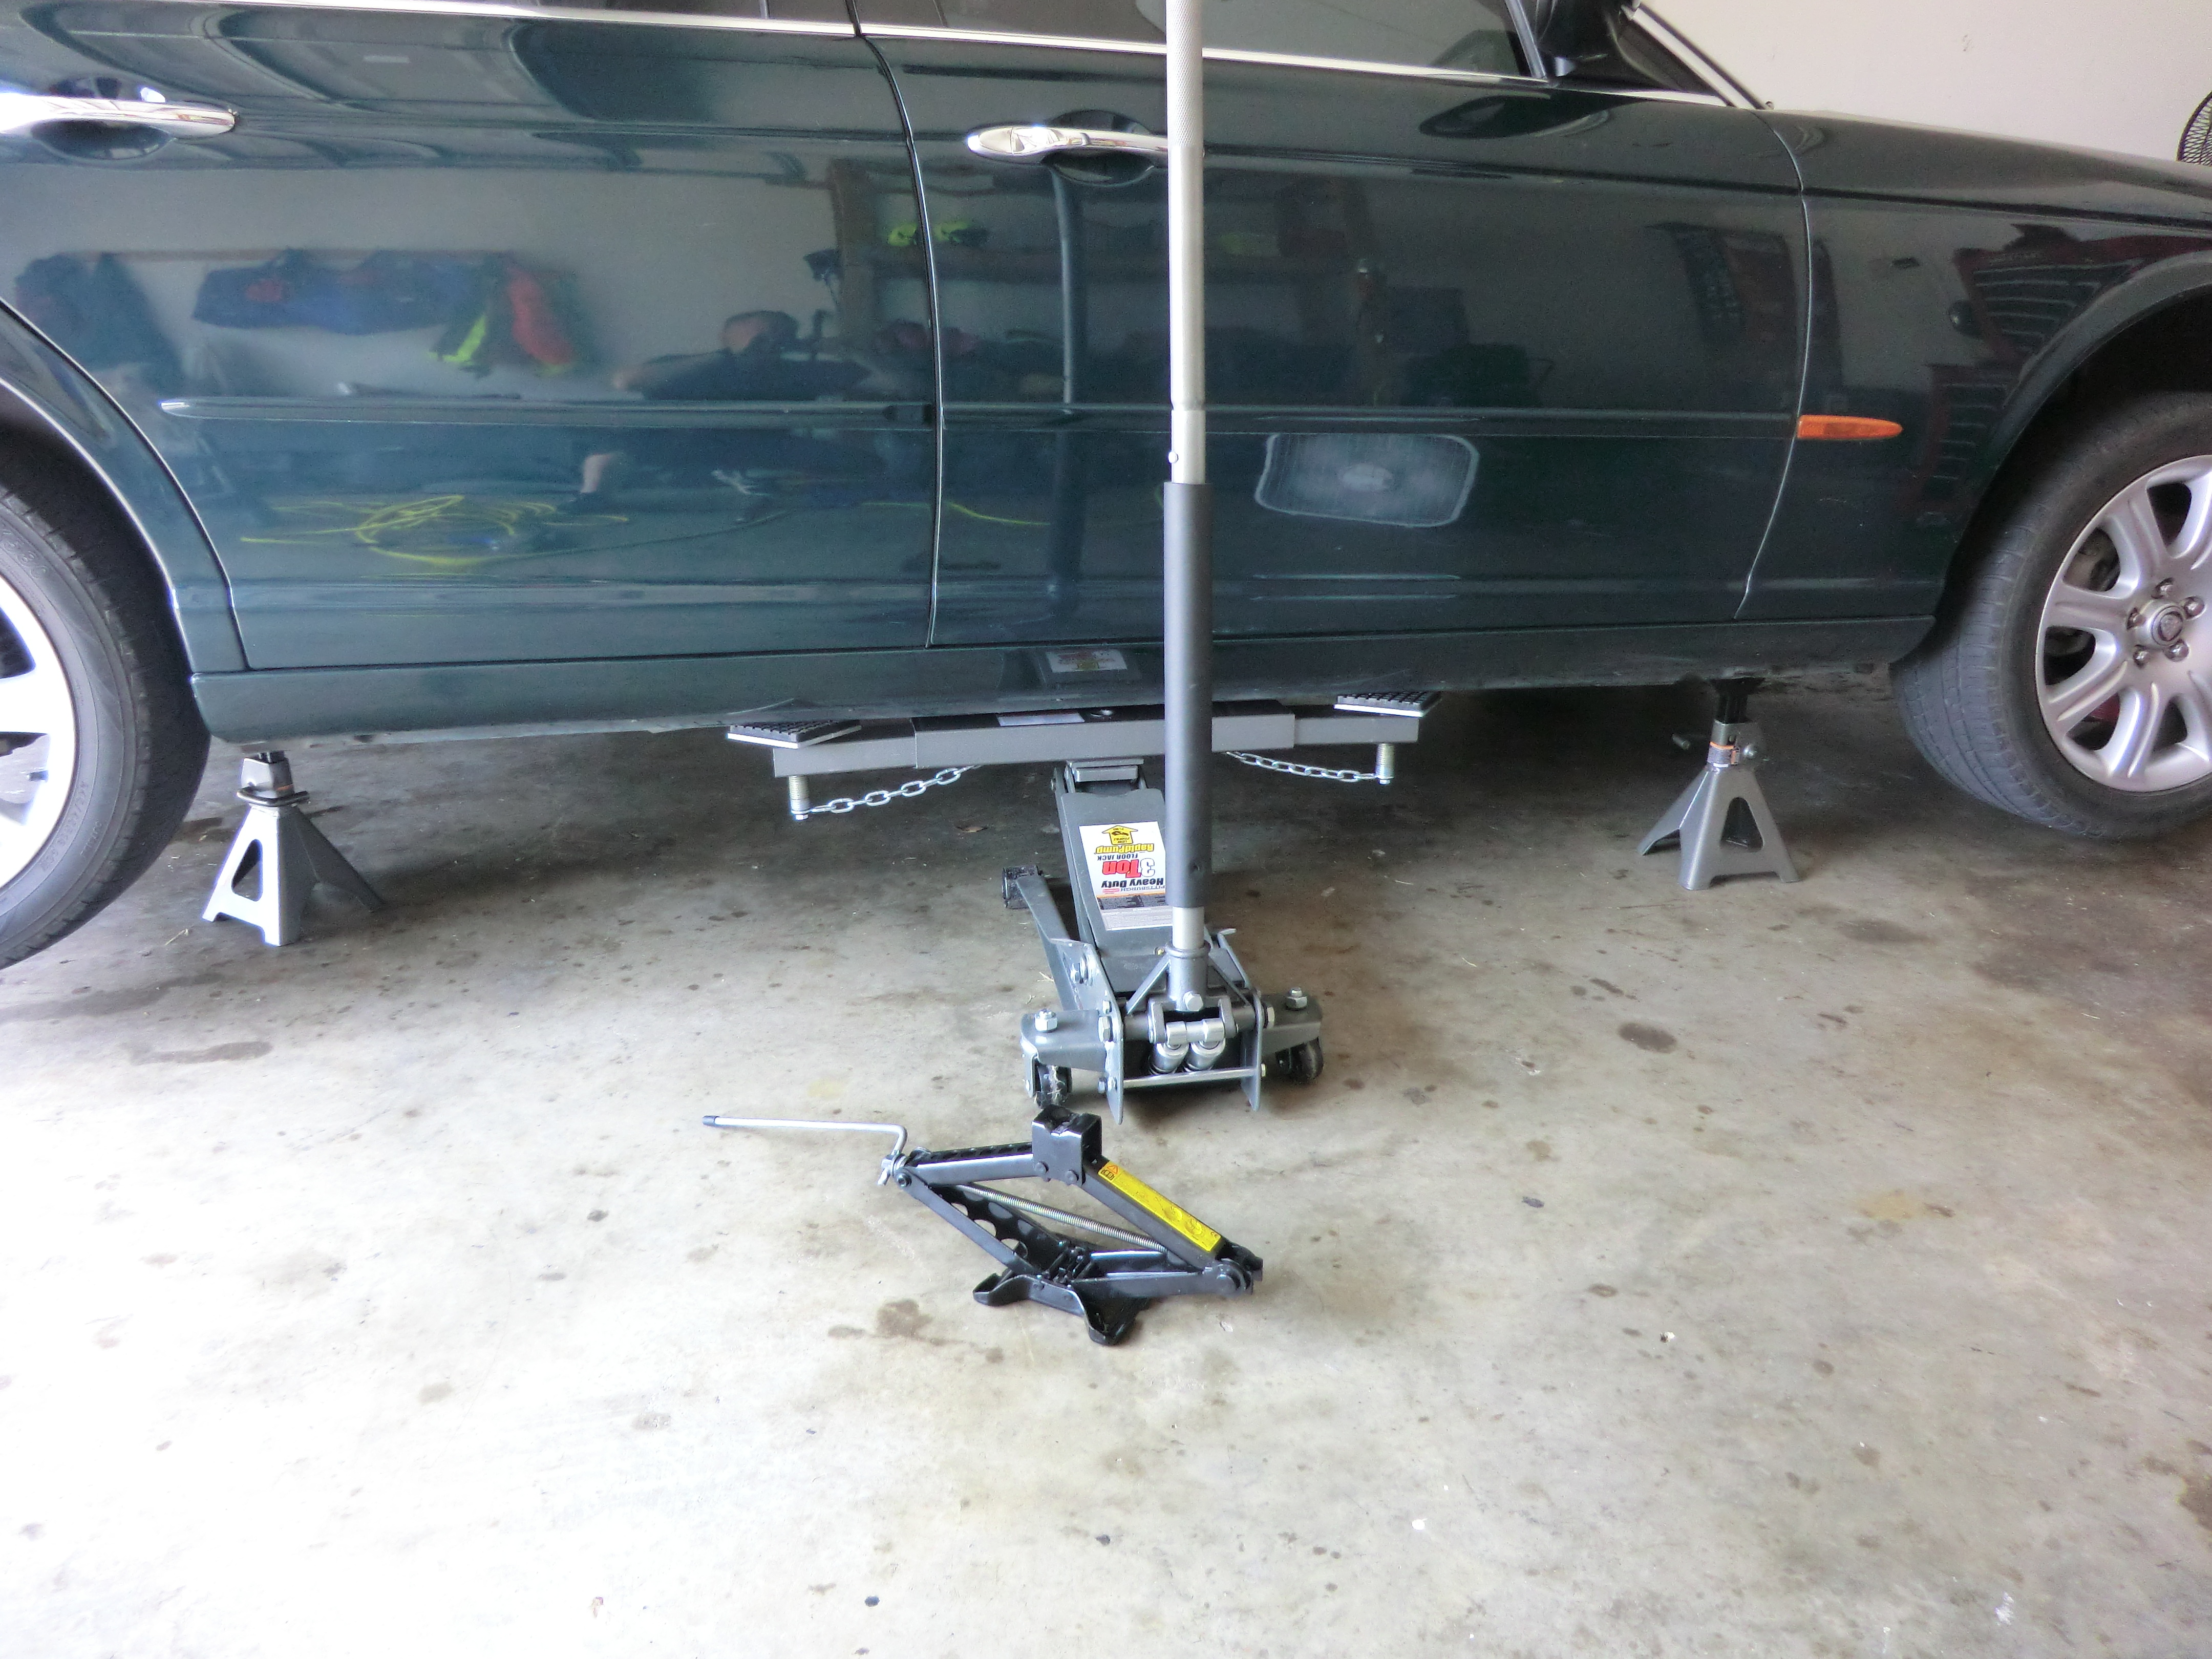
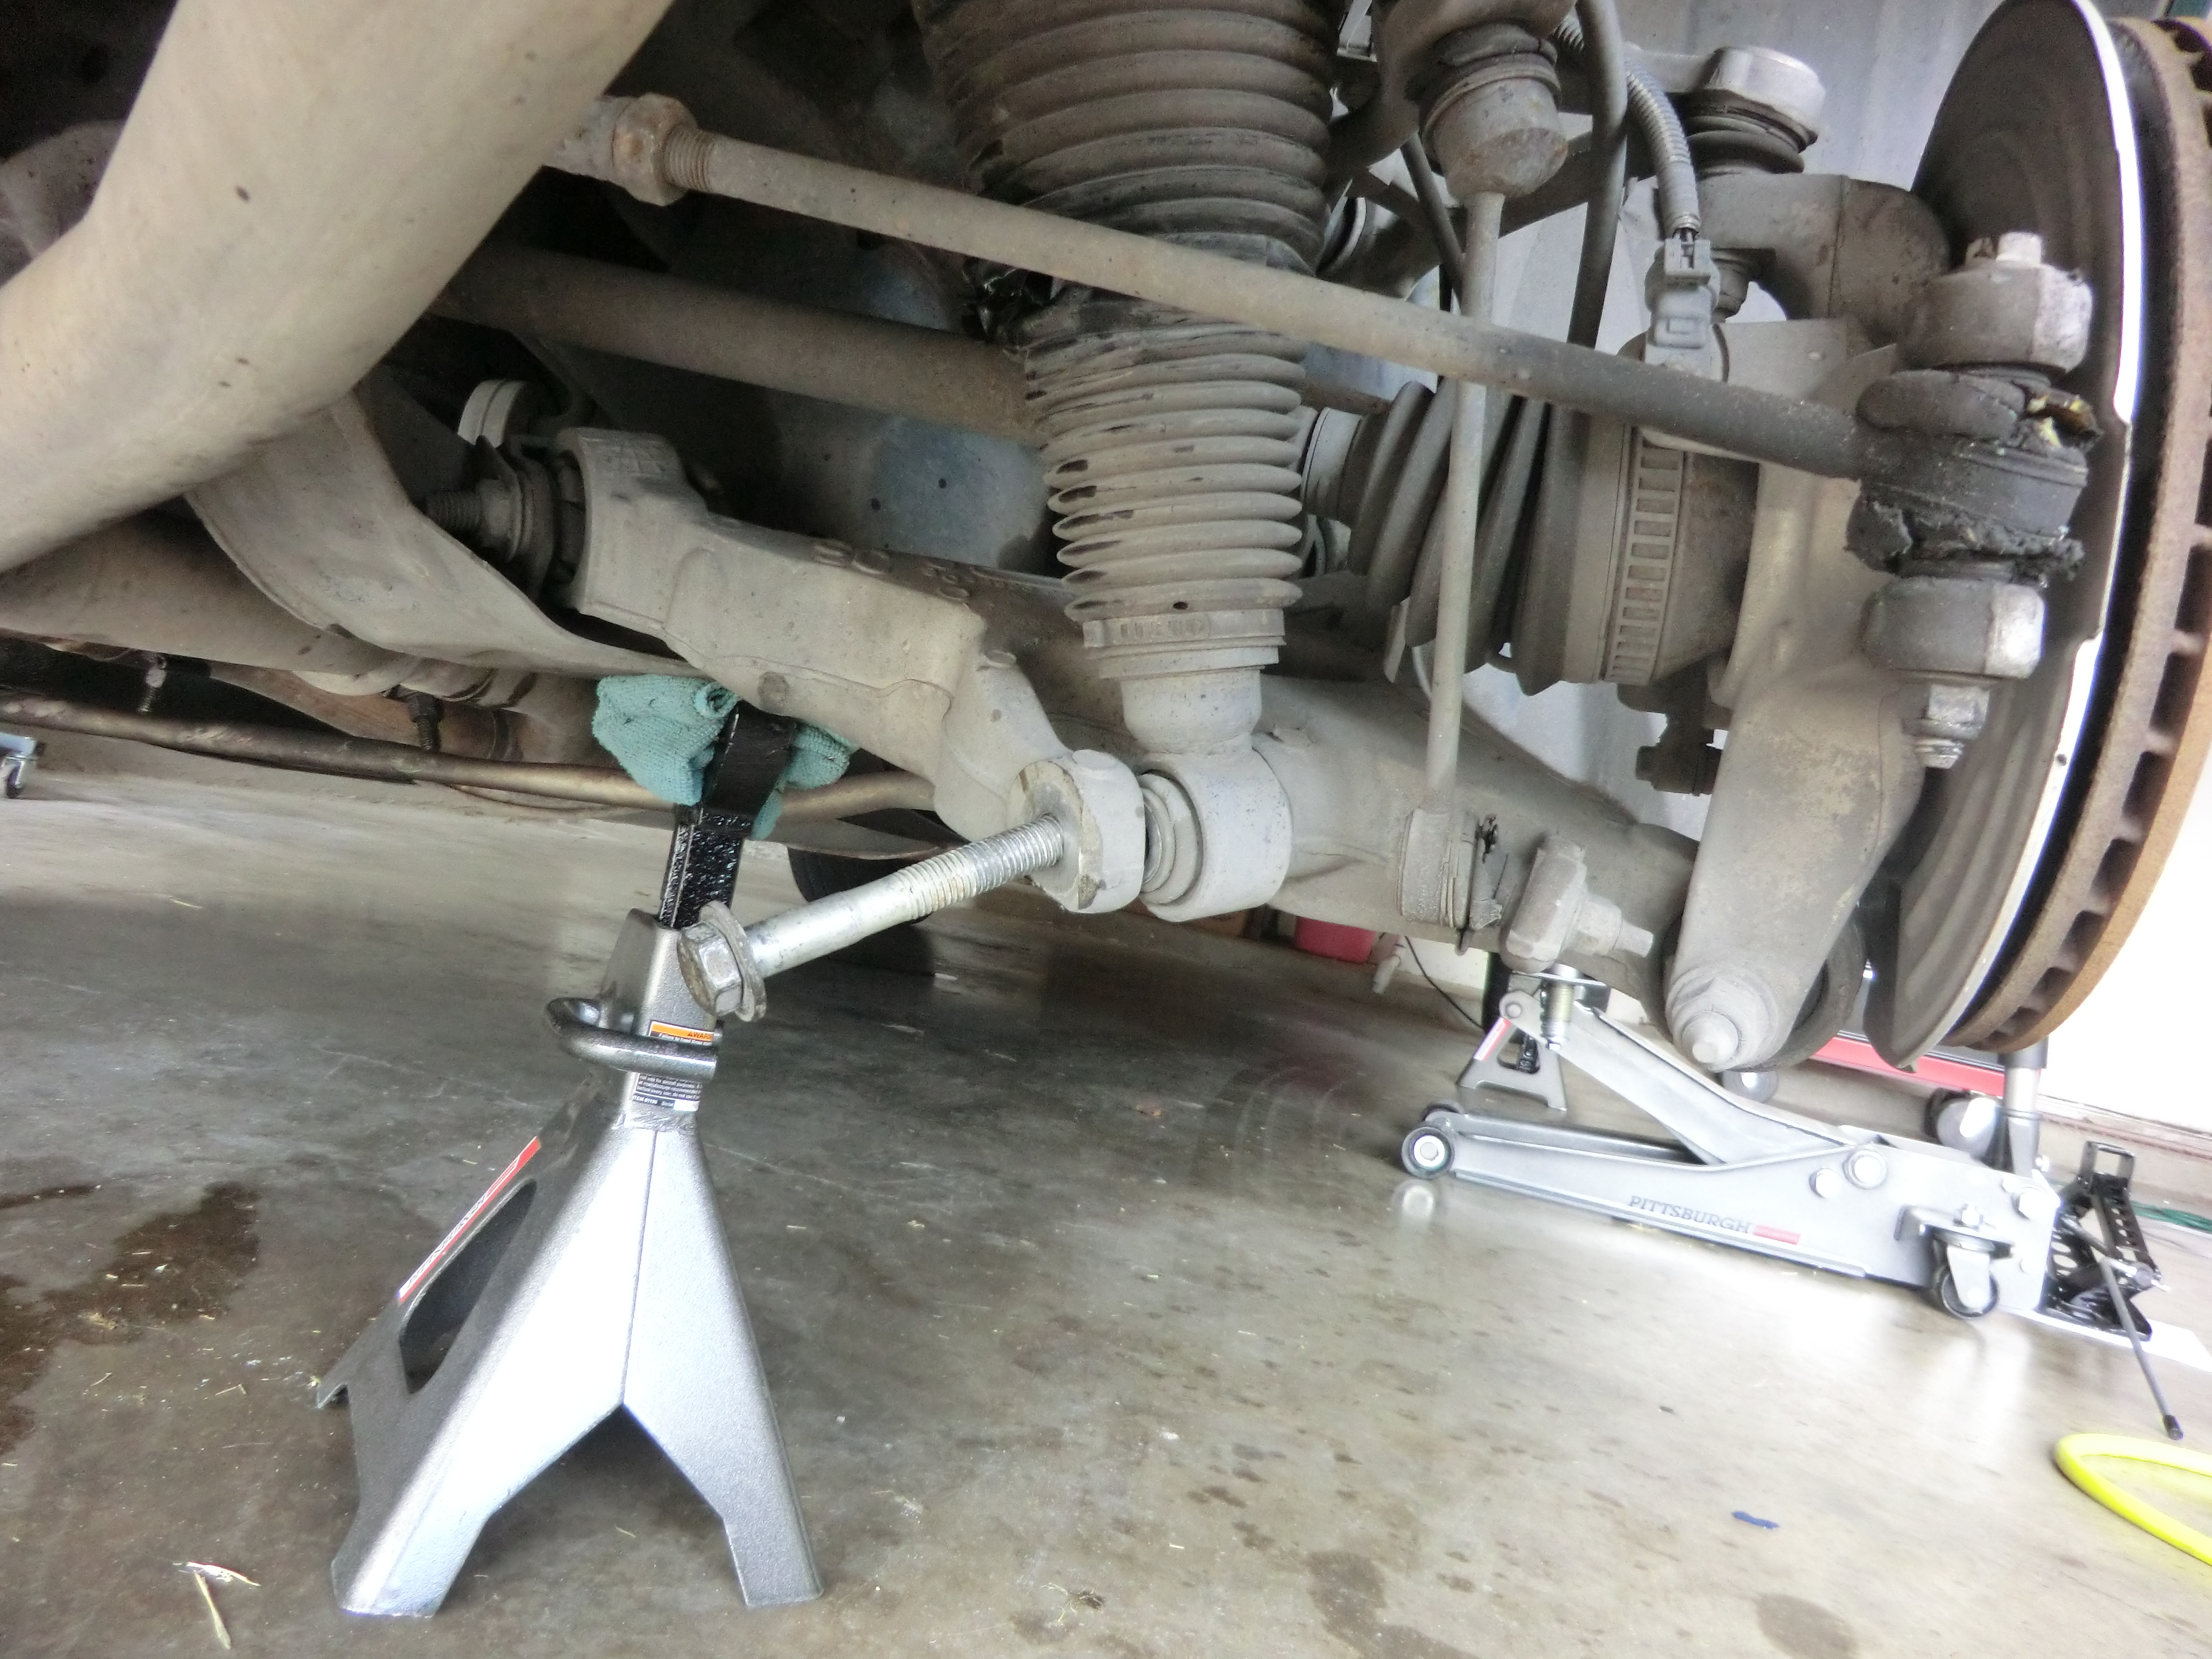
8. Place carjack in position, my vehicle was too low and I had to use the carjack to lift the vehicle to allow me to place the trolley Jack underneath the vehicle.
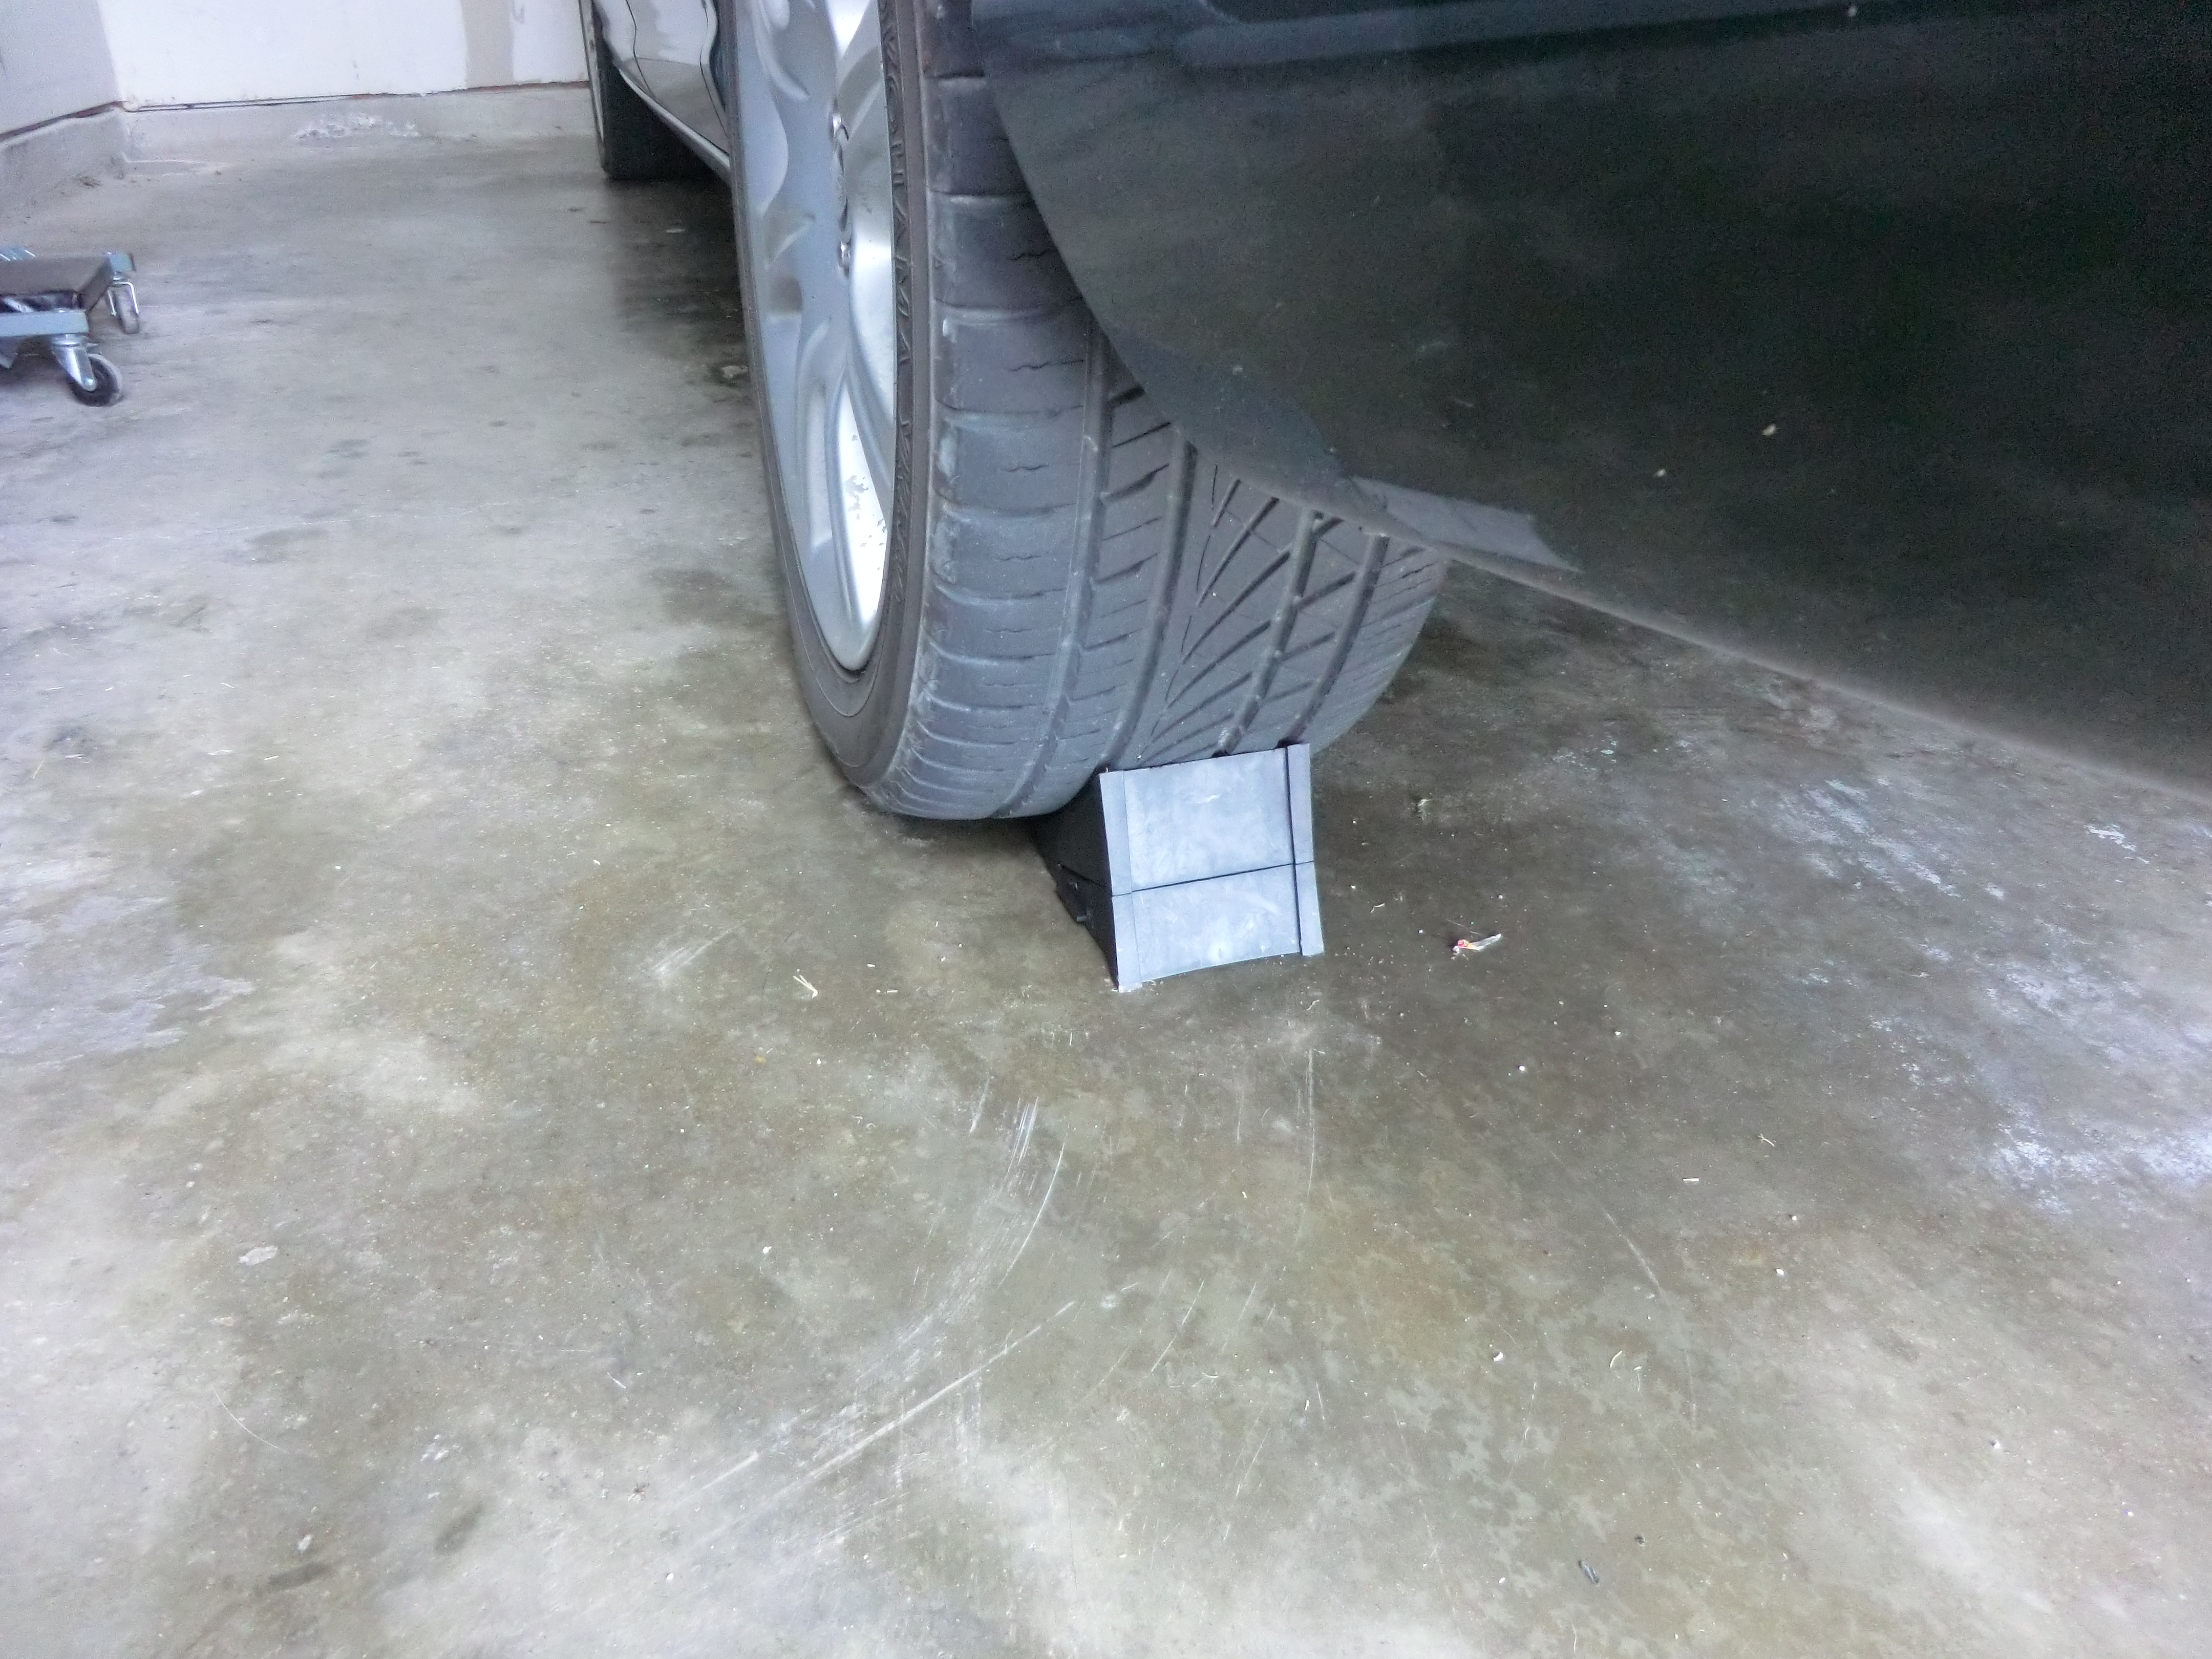
9. Chock the opposite wheels.
10. Switch vehicle ignition to II setting and release the emergency Park break, by placing the vehicle in neutral and releasing the EPB switch.
11. Disconnect the battery [10 mm spanner]. At this point I realised the vehicle was still in a LIVE state (probably not a good idea!).
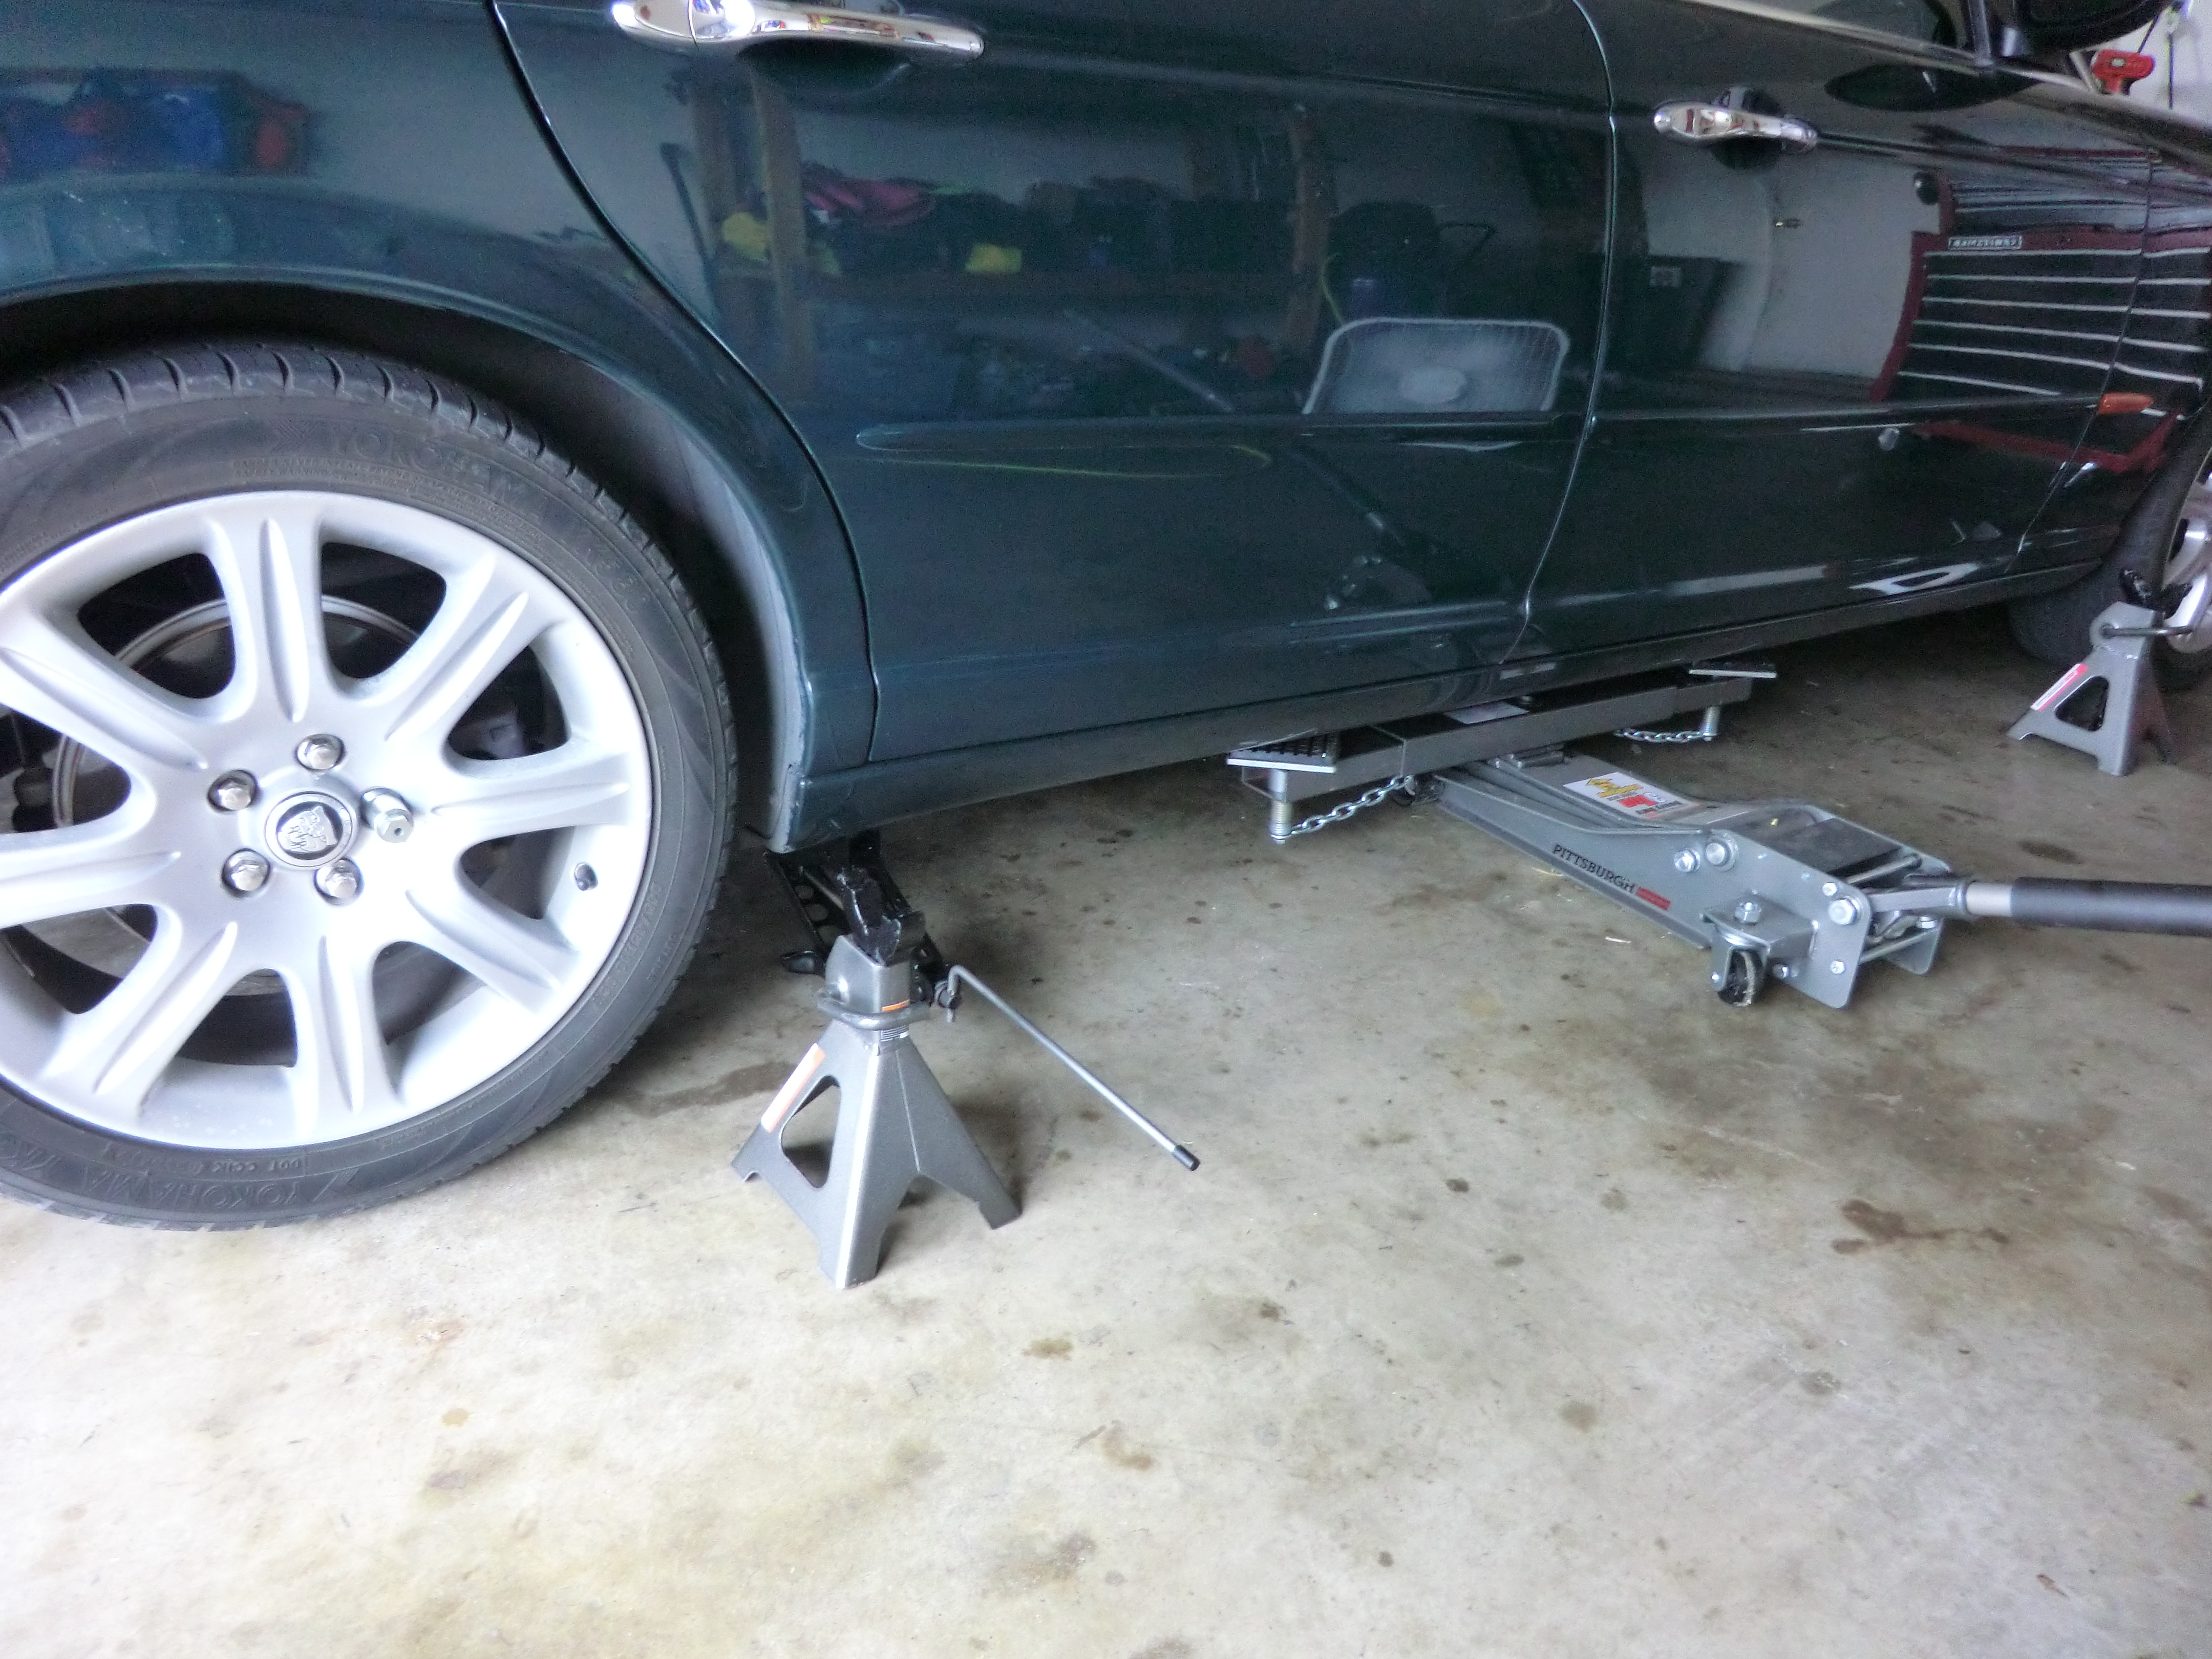
12. Jack up the vehicle with the normal car jack.
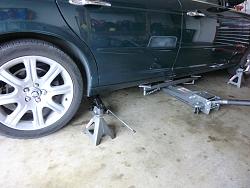
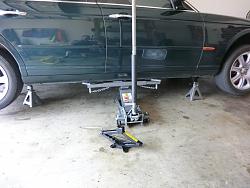
13. Place the trolley Jack in a central position underneath the vehicle. Jack up the car with the trolley Jack.
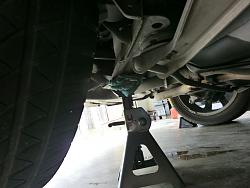
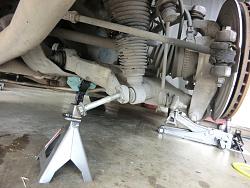
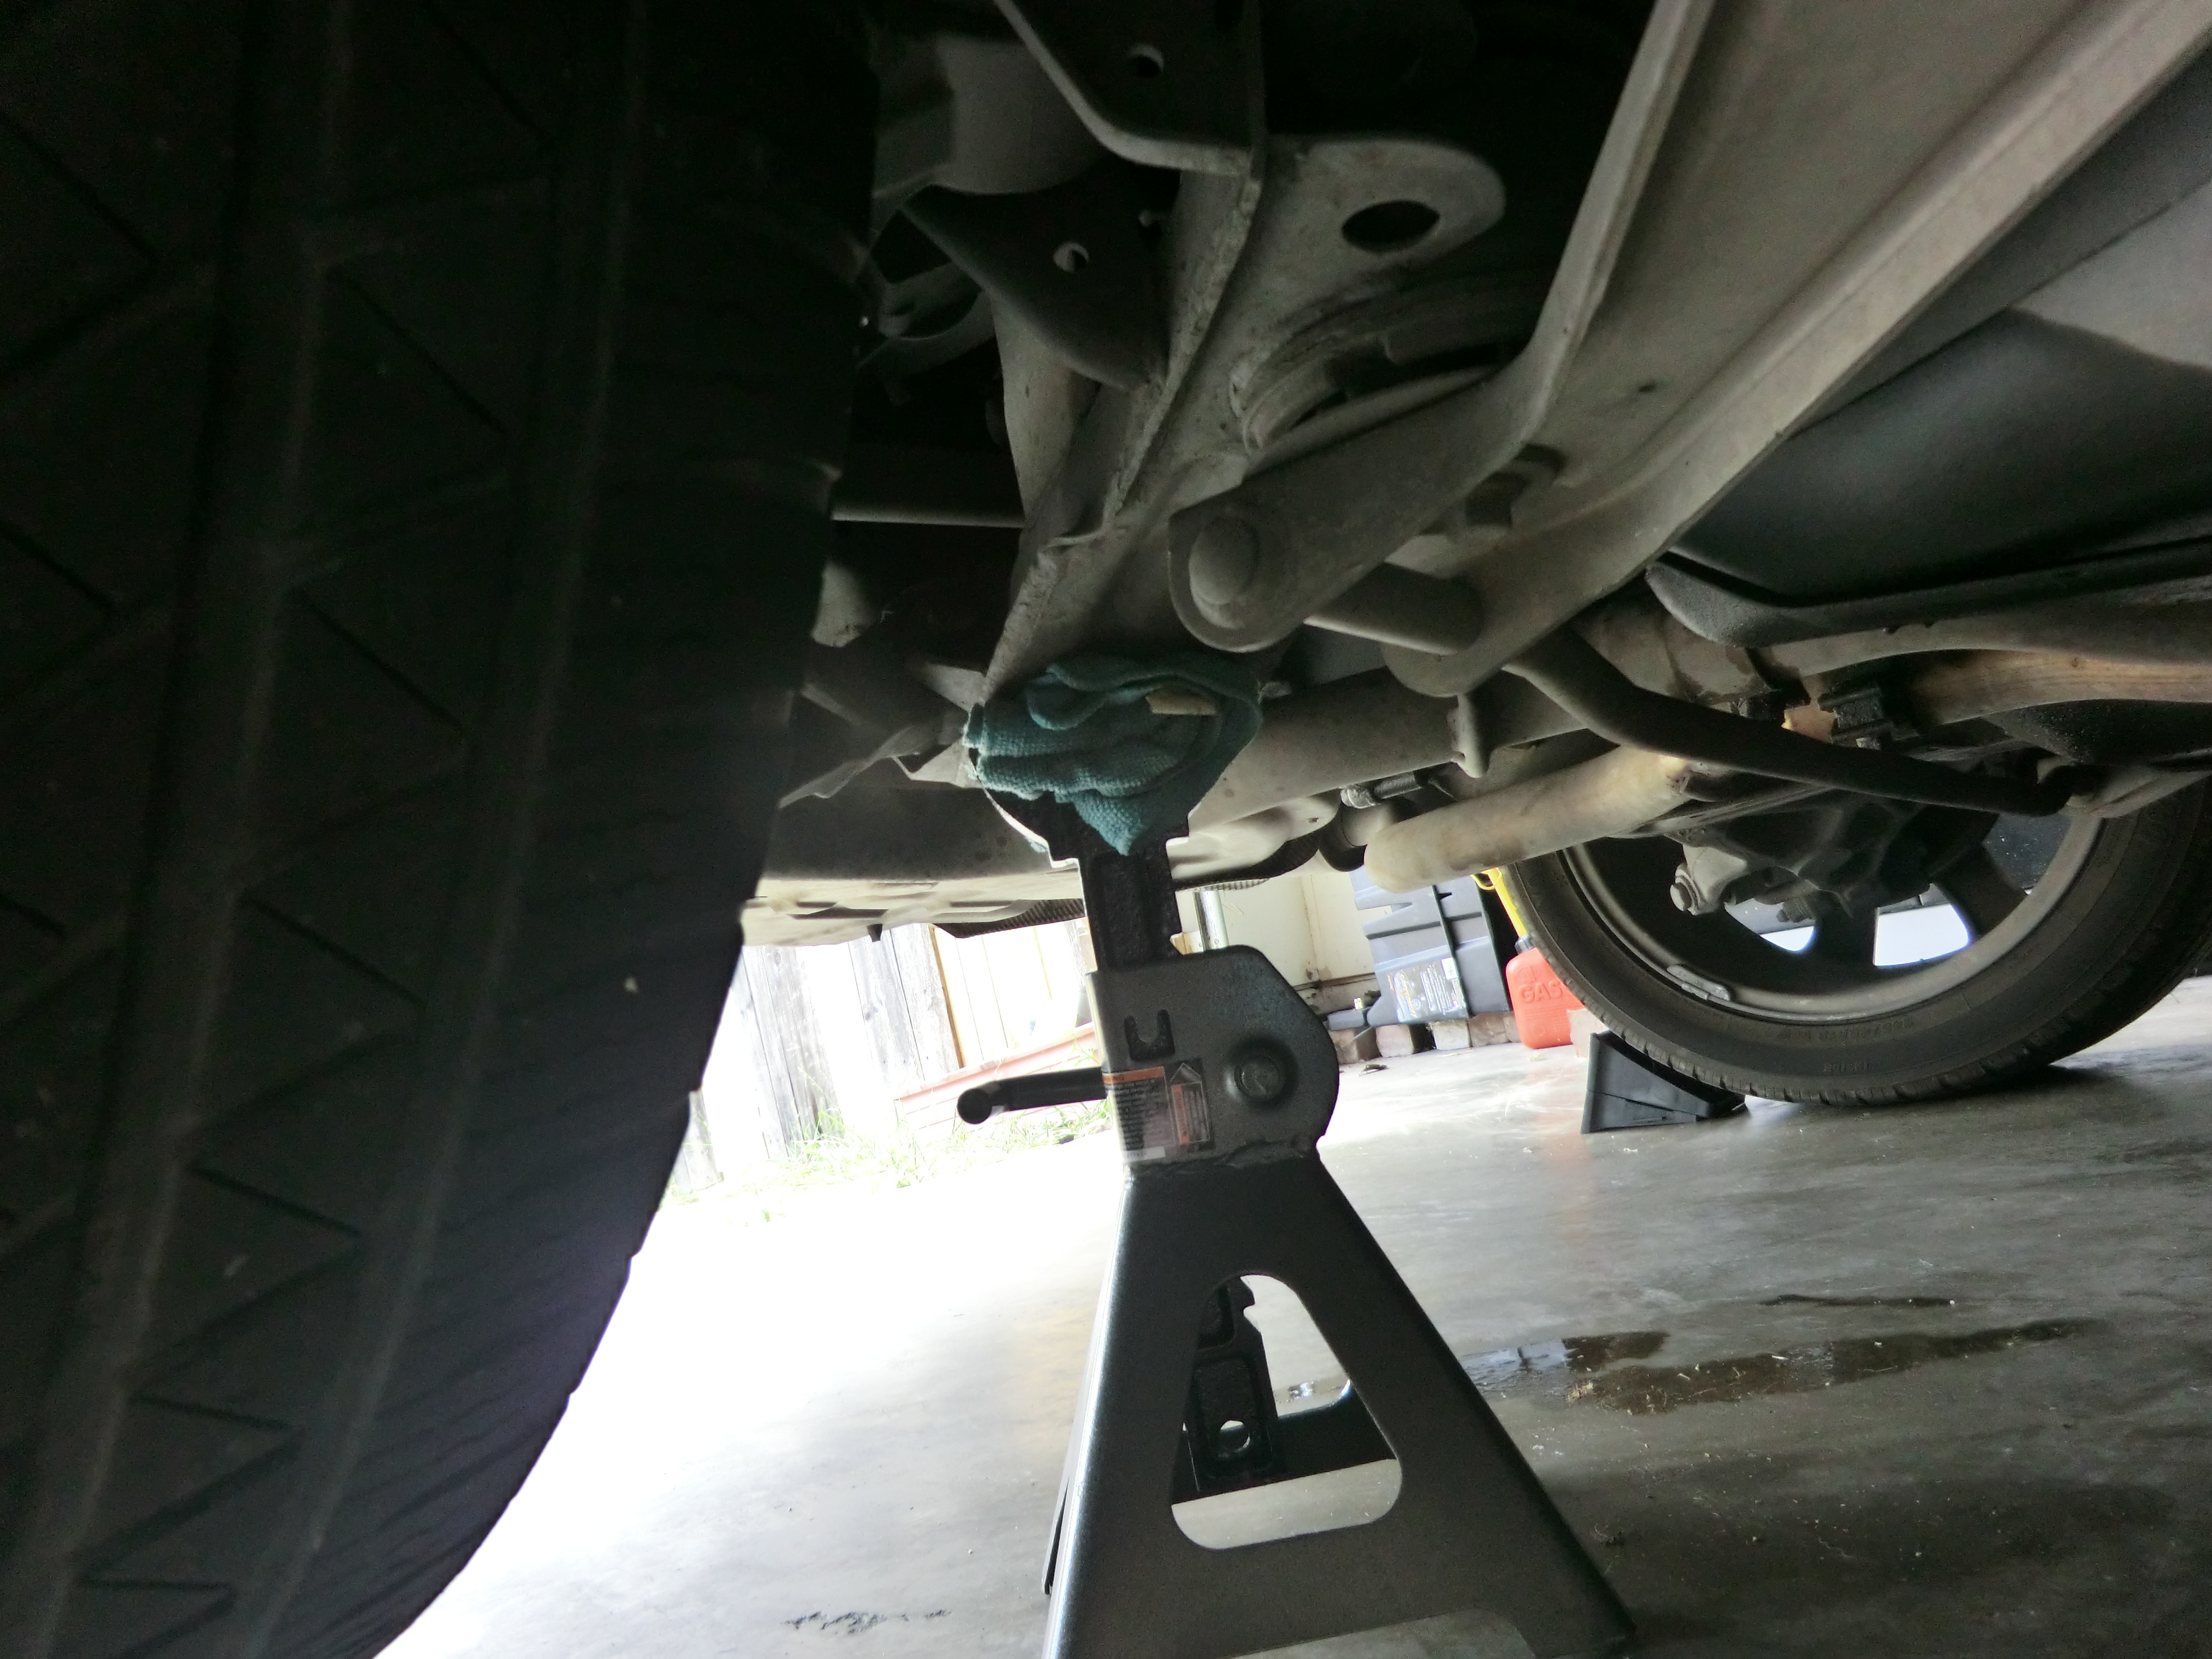
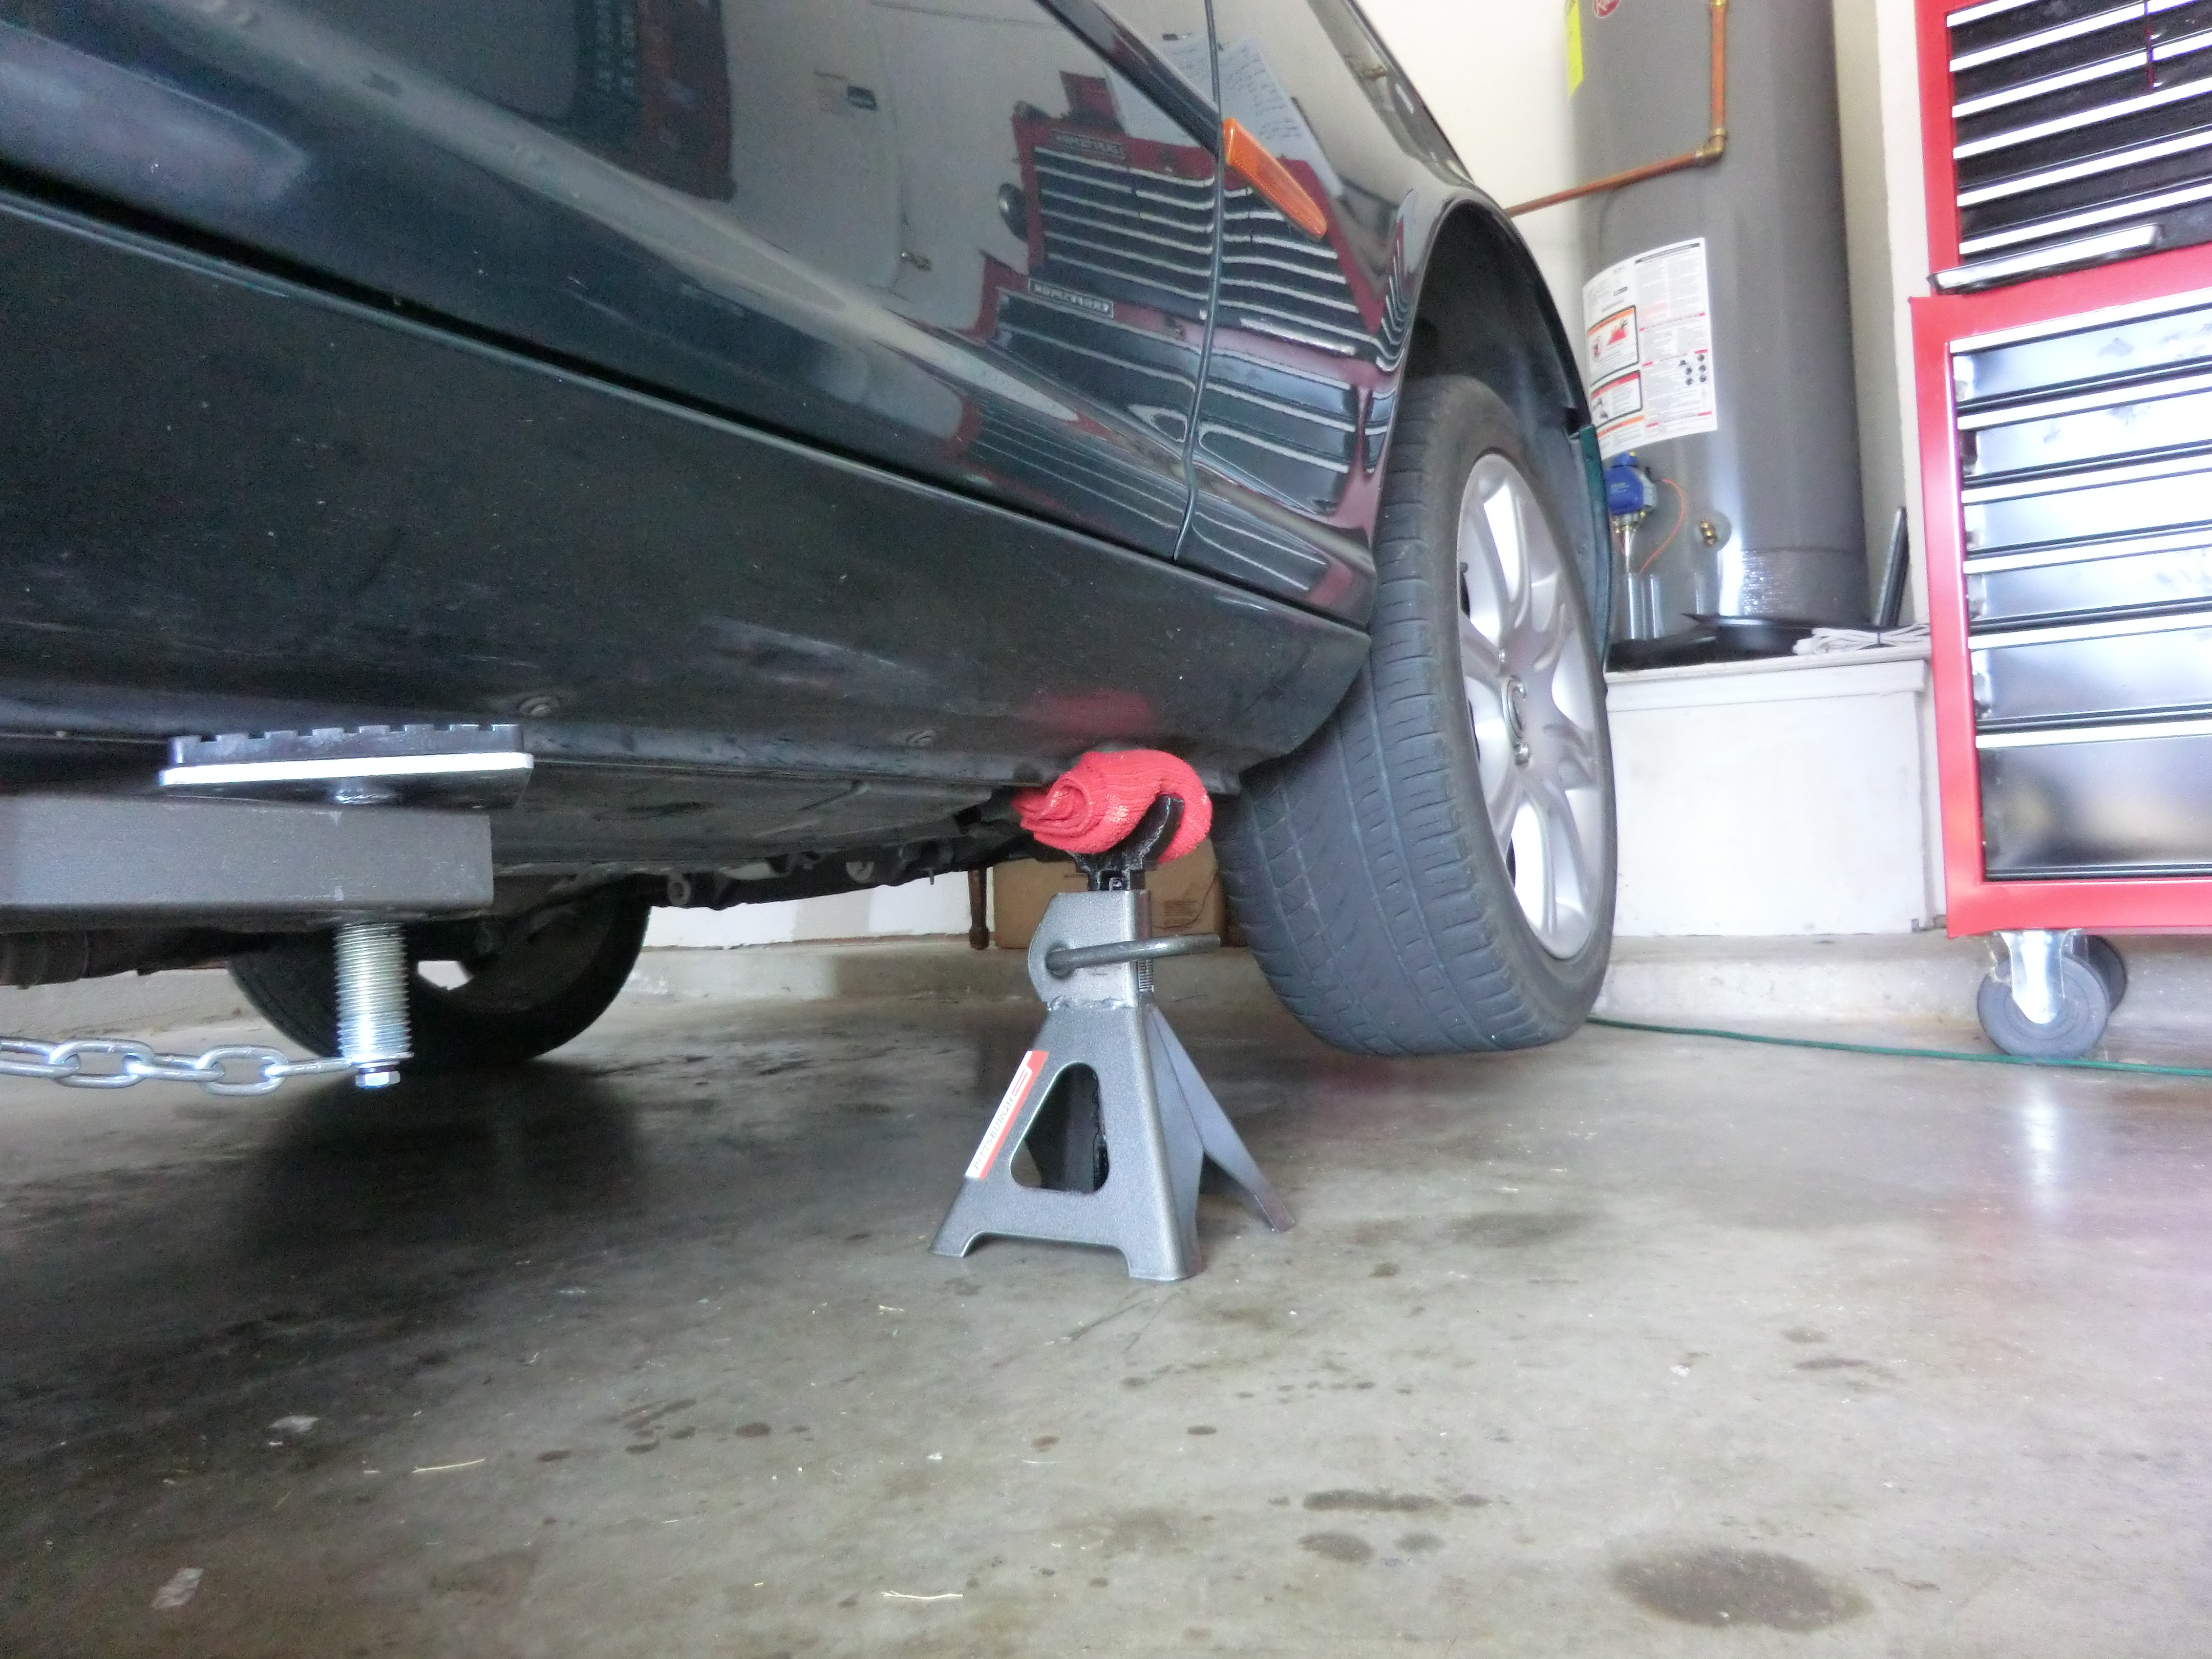
14. Place cloth on top of the axle stands and place the two axle stands in the correct position under the vehicle as per the Workshop manual.
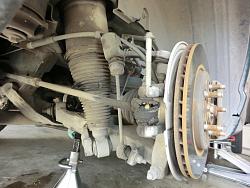
15. Remove the wheel.
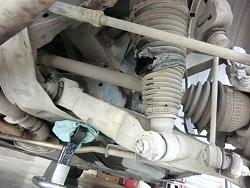
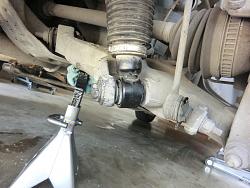
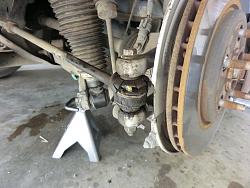
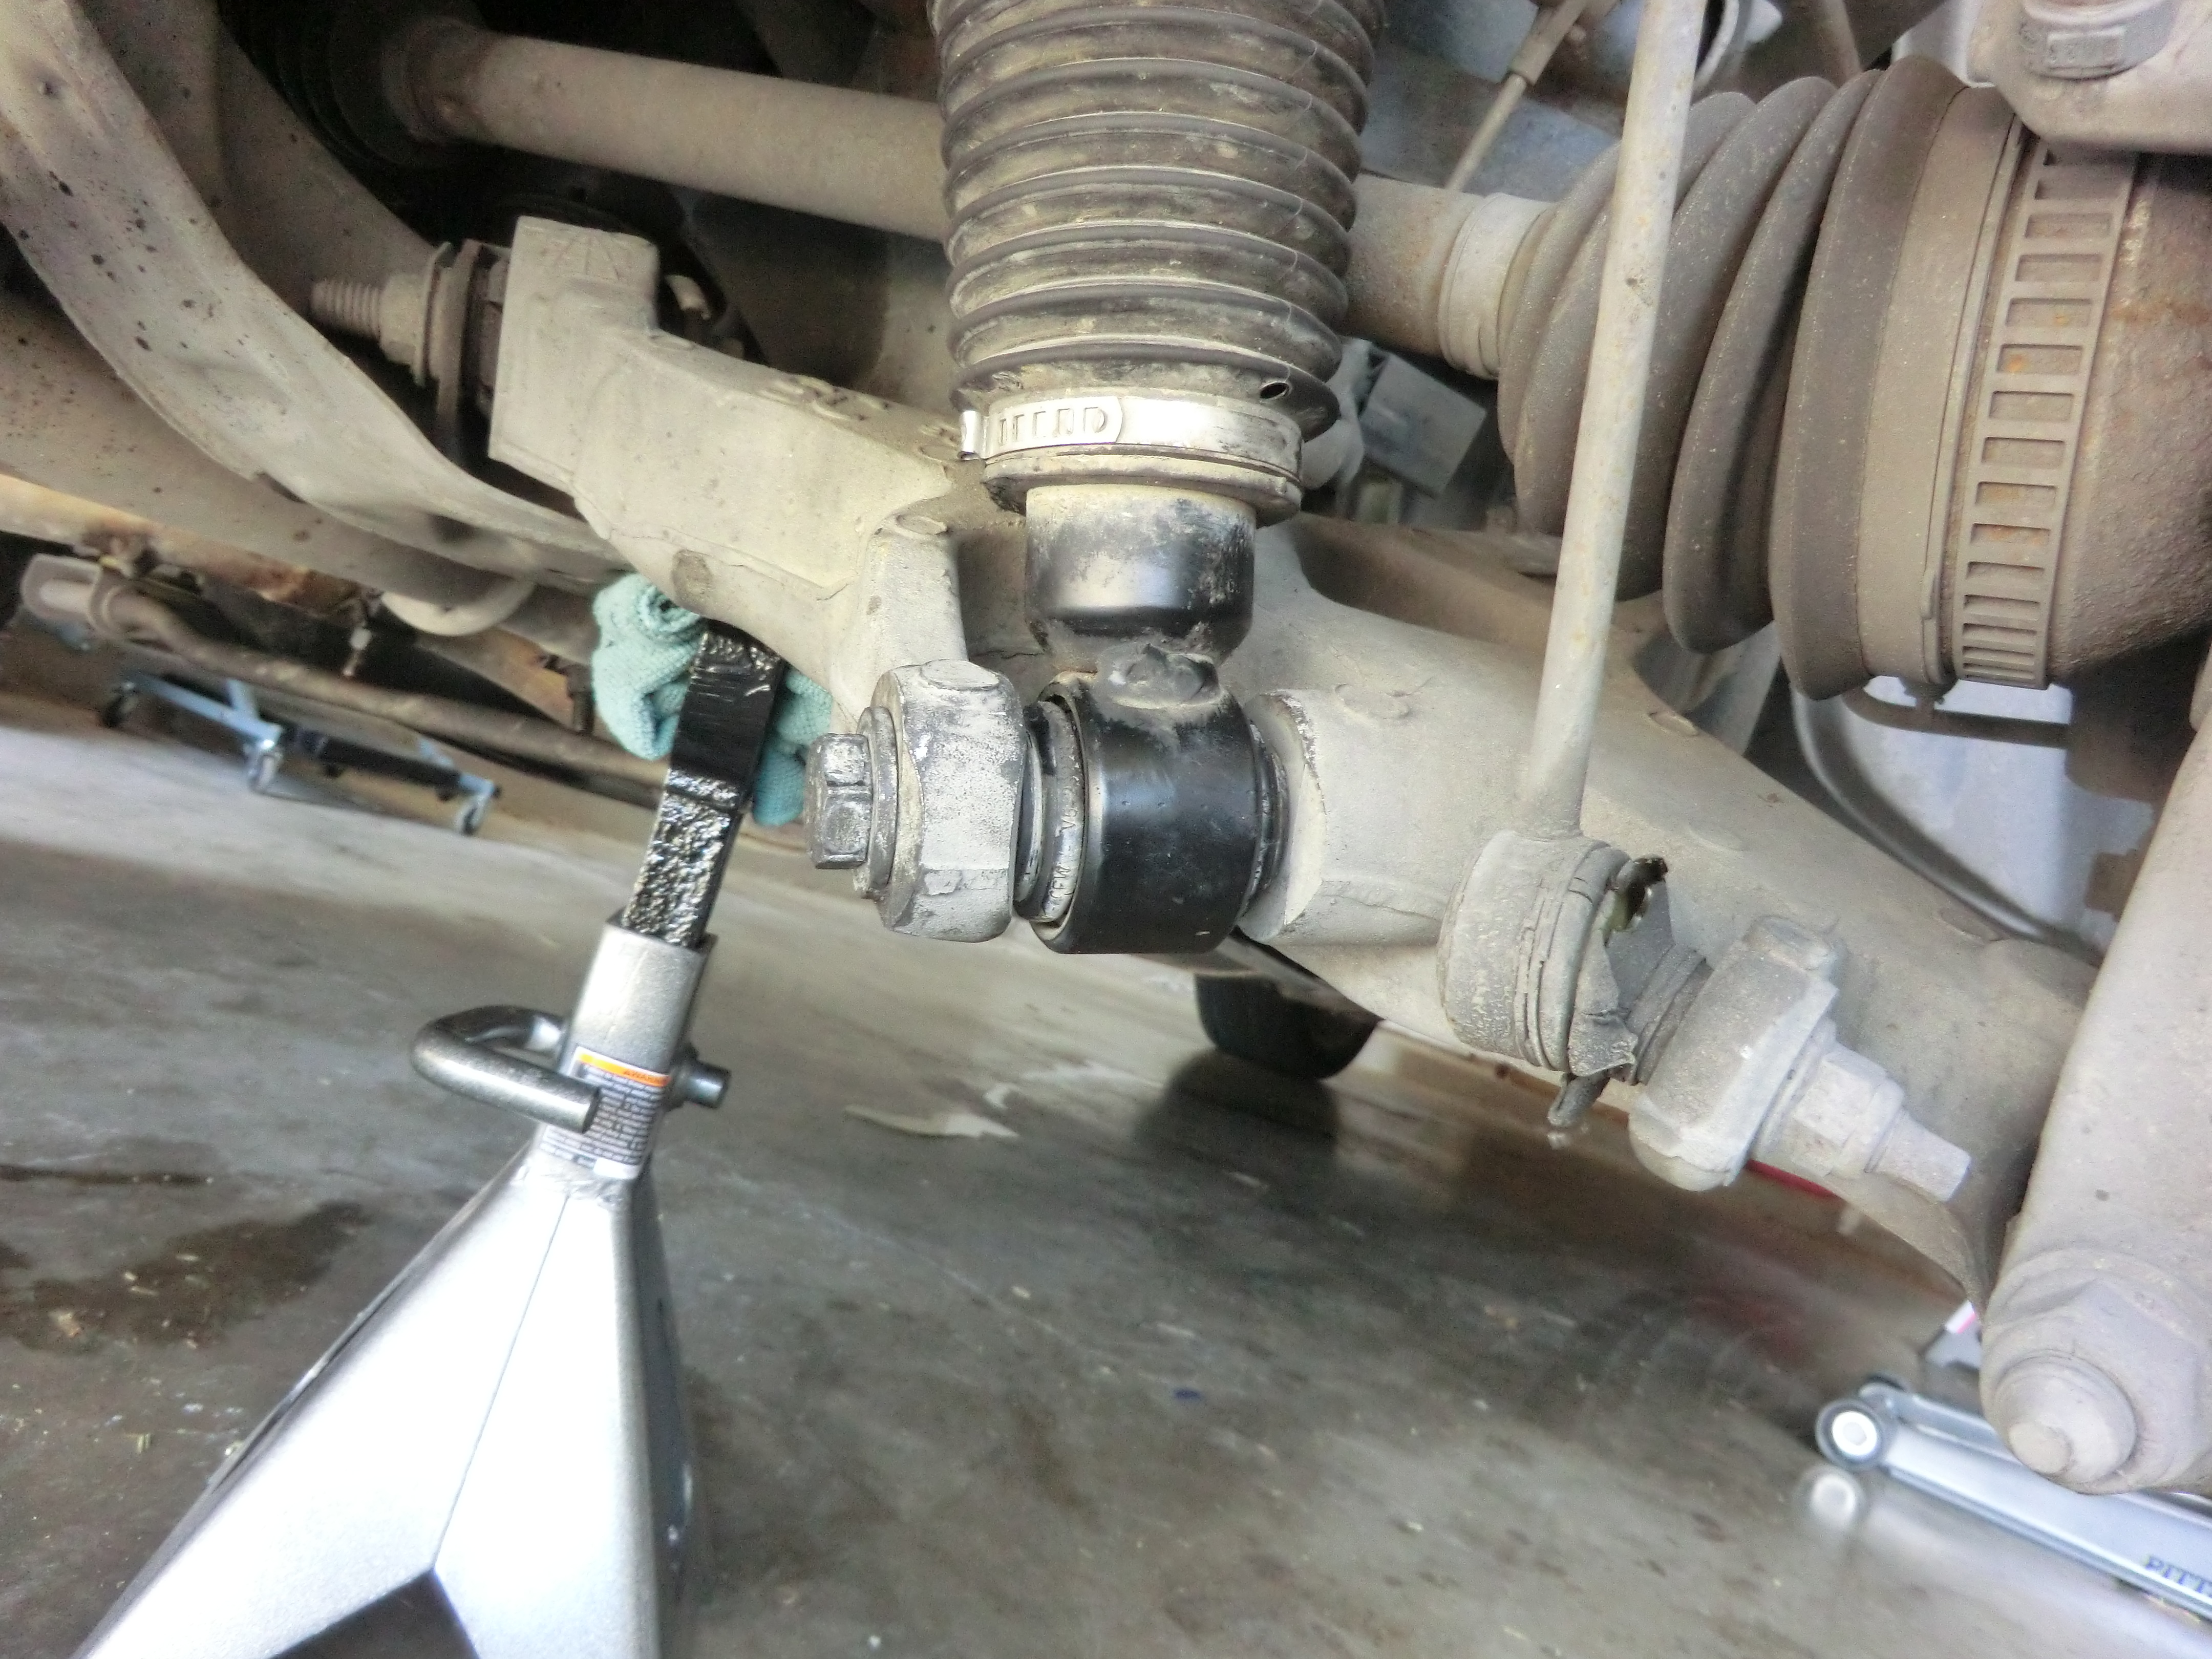
16. Remove the large bolt holding the bottom of the air strut to the chassis [21 mm].
17. Undo the toe in connection with a 15 mm spanner and 13 mm socket.
18. Loosen, but do not remove the upper bolts on the strut [13 mm socket].
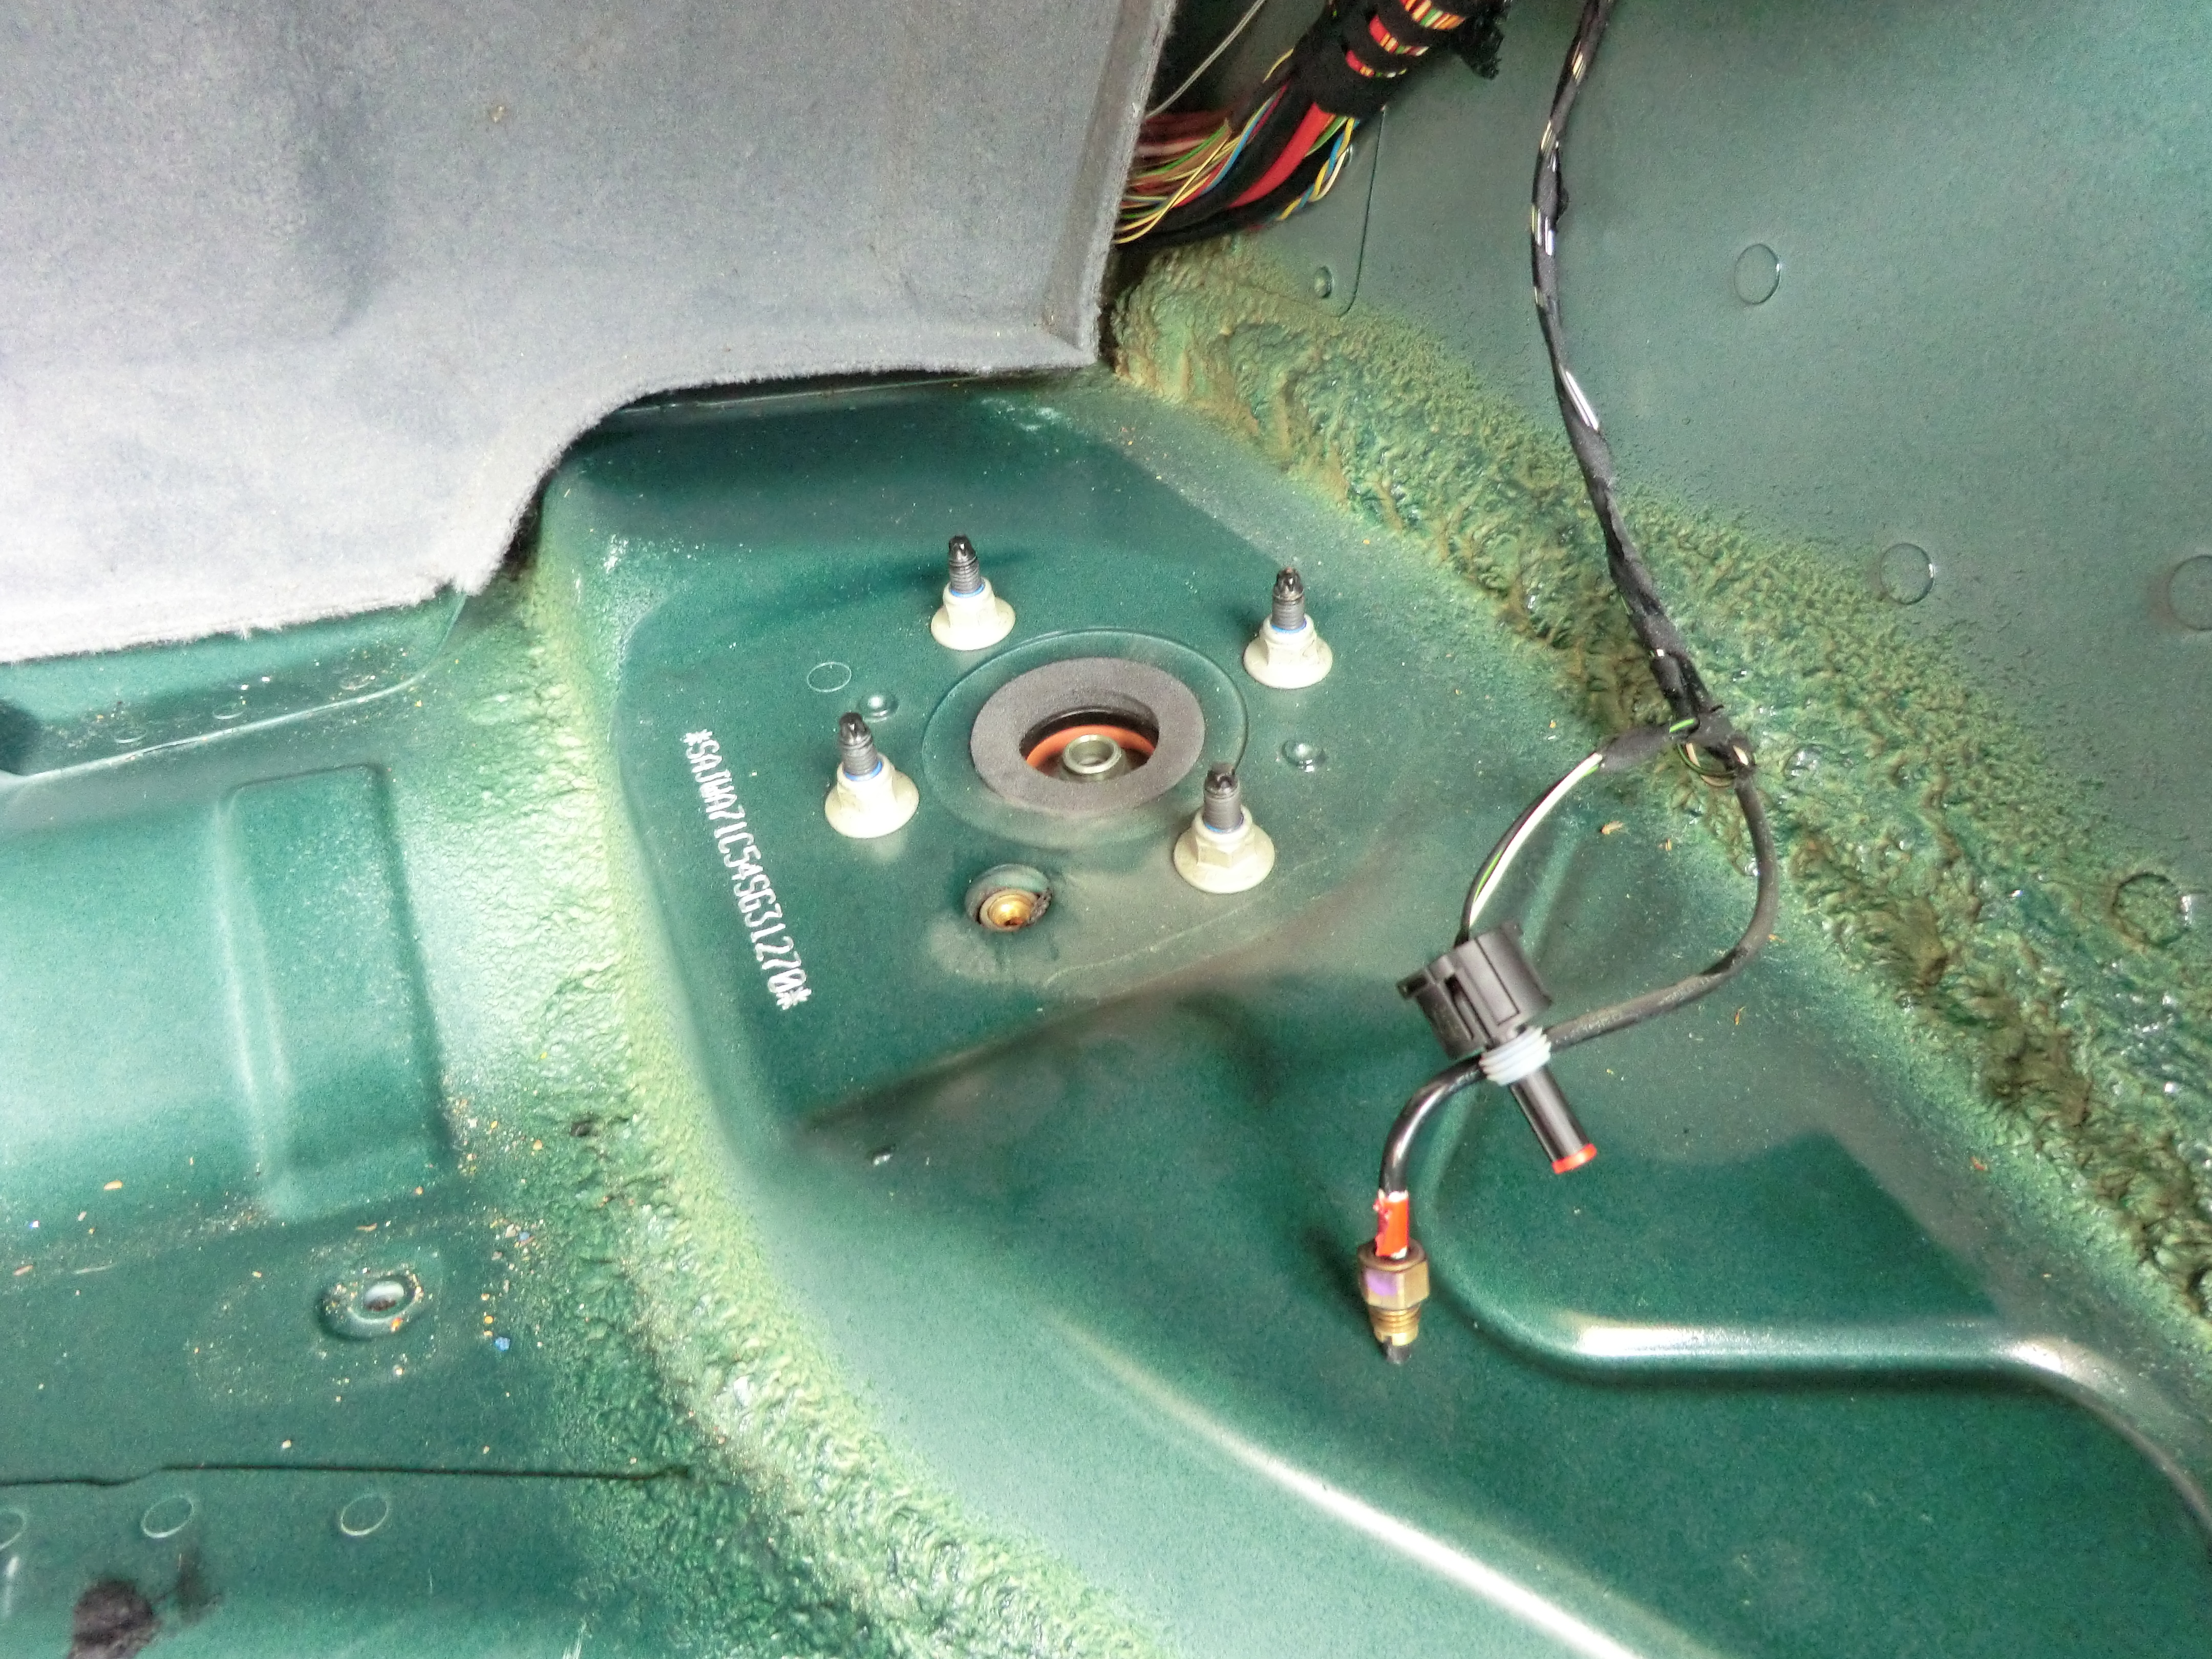
19. Release the air connection brass nut [10 mm].
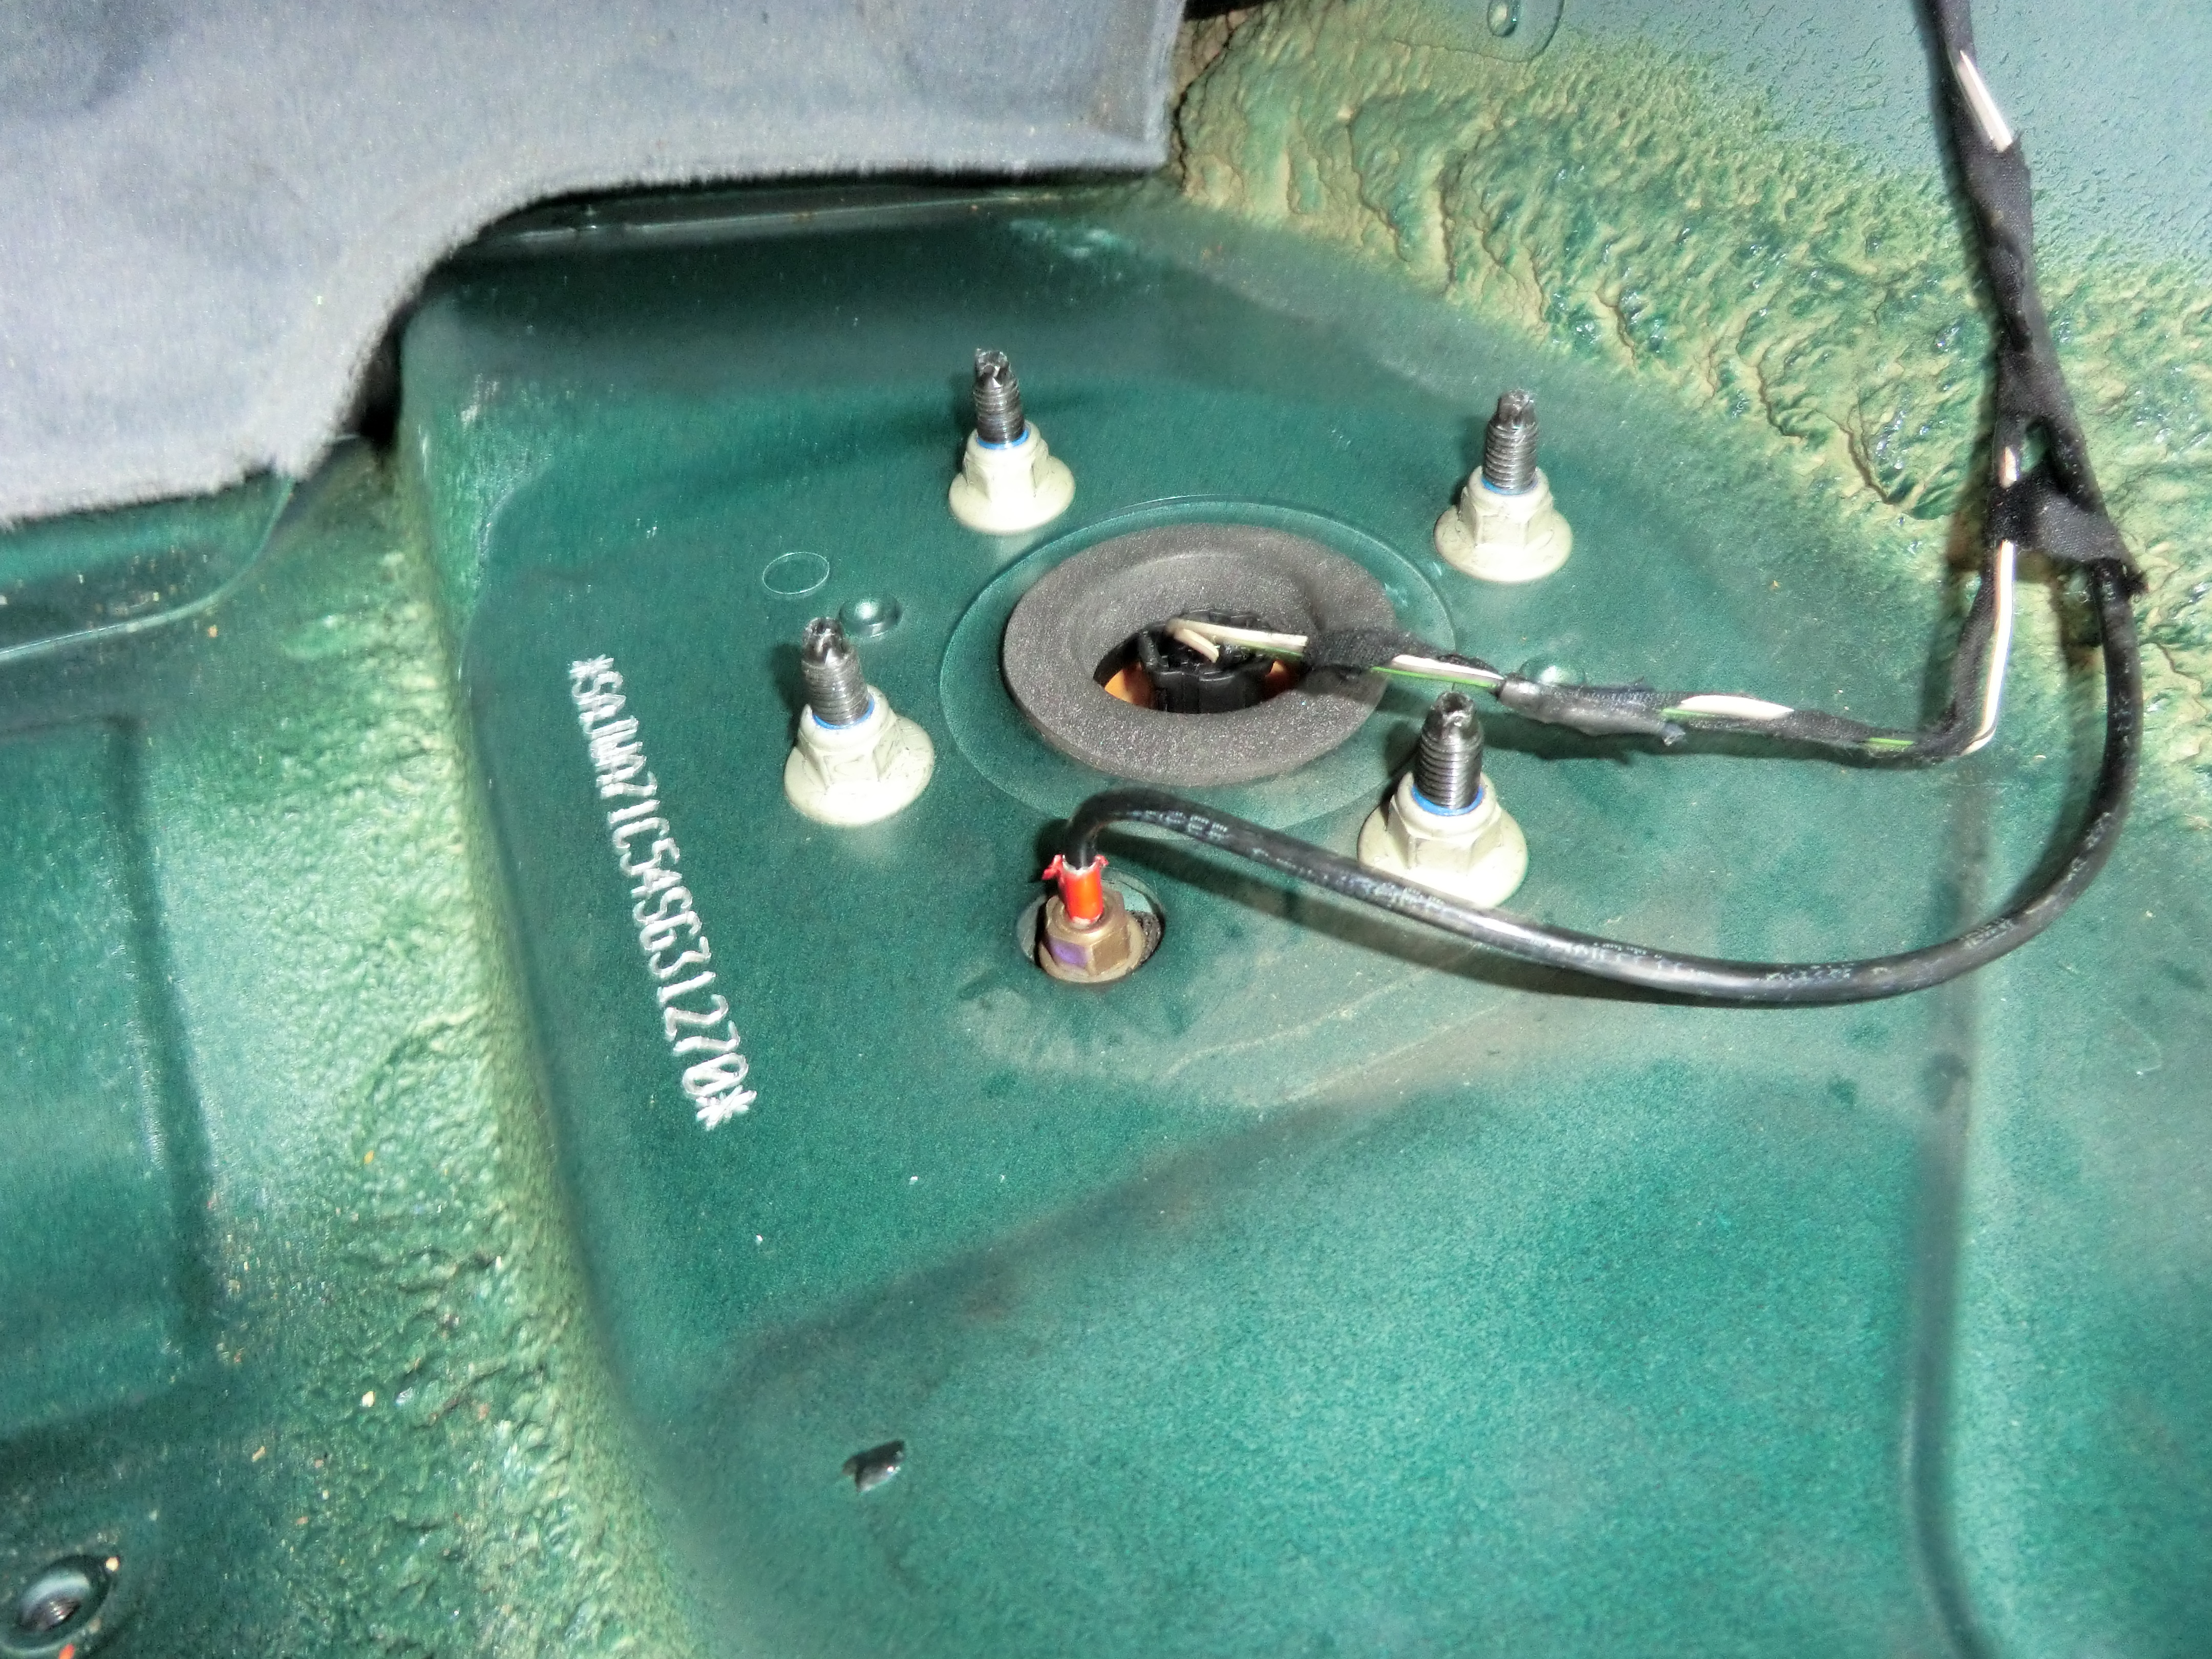
20. Remove the electrical connector, push the sides in and slowly withdraw the connector out.
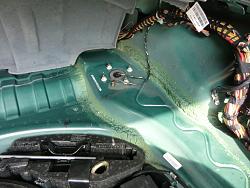
21. Remove the Top bolts and the air strut may fall to the floor. Mine did.
Assembly
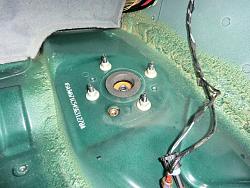
22. Line up the new strut with holes in top of chassis, you may need to wiggle the spring until it lines correctly to allow you to pull the threads through.
23. Refit all top bolts nice and snuggly.
24. Reconnect the air pipe [10 mm].
25. Reconnect the electrical connector. Note, be very careful with this connection as there are two small holes that need to fit correctly with two electrical pins inside the strut.
26. Refit the bottom of the strut 21 mm bolt.
27. Refit the toe in [13 mm, 15 mm set], you may need to use a rubber mallet to encourage this washer to go back and sit correctly.
28. Replace the wheel.
29. Remove the axle stands.
30. Replace the normal carjack to hold the weight of the vehicle while you remove the trolley Jack.
31. Remove the normal carjack, tighten the wheel locking nuts.
32. Reconnect the battery [10 mm], this part I was not very happy about, the system was live immediately on connecting due to having left the key in the ignition to allow the EPB to stay released.
33. Remove the wheel chock.
34. Start the engine, watch for any fault codes, go around to the rear of the vehicle and watch your vehicle rise.
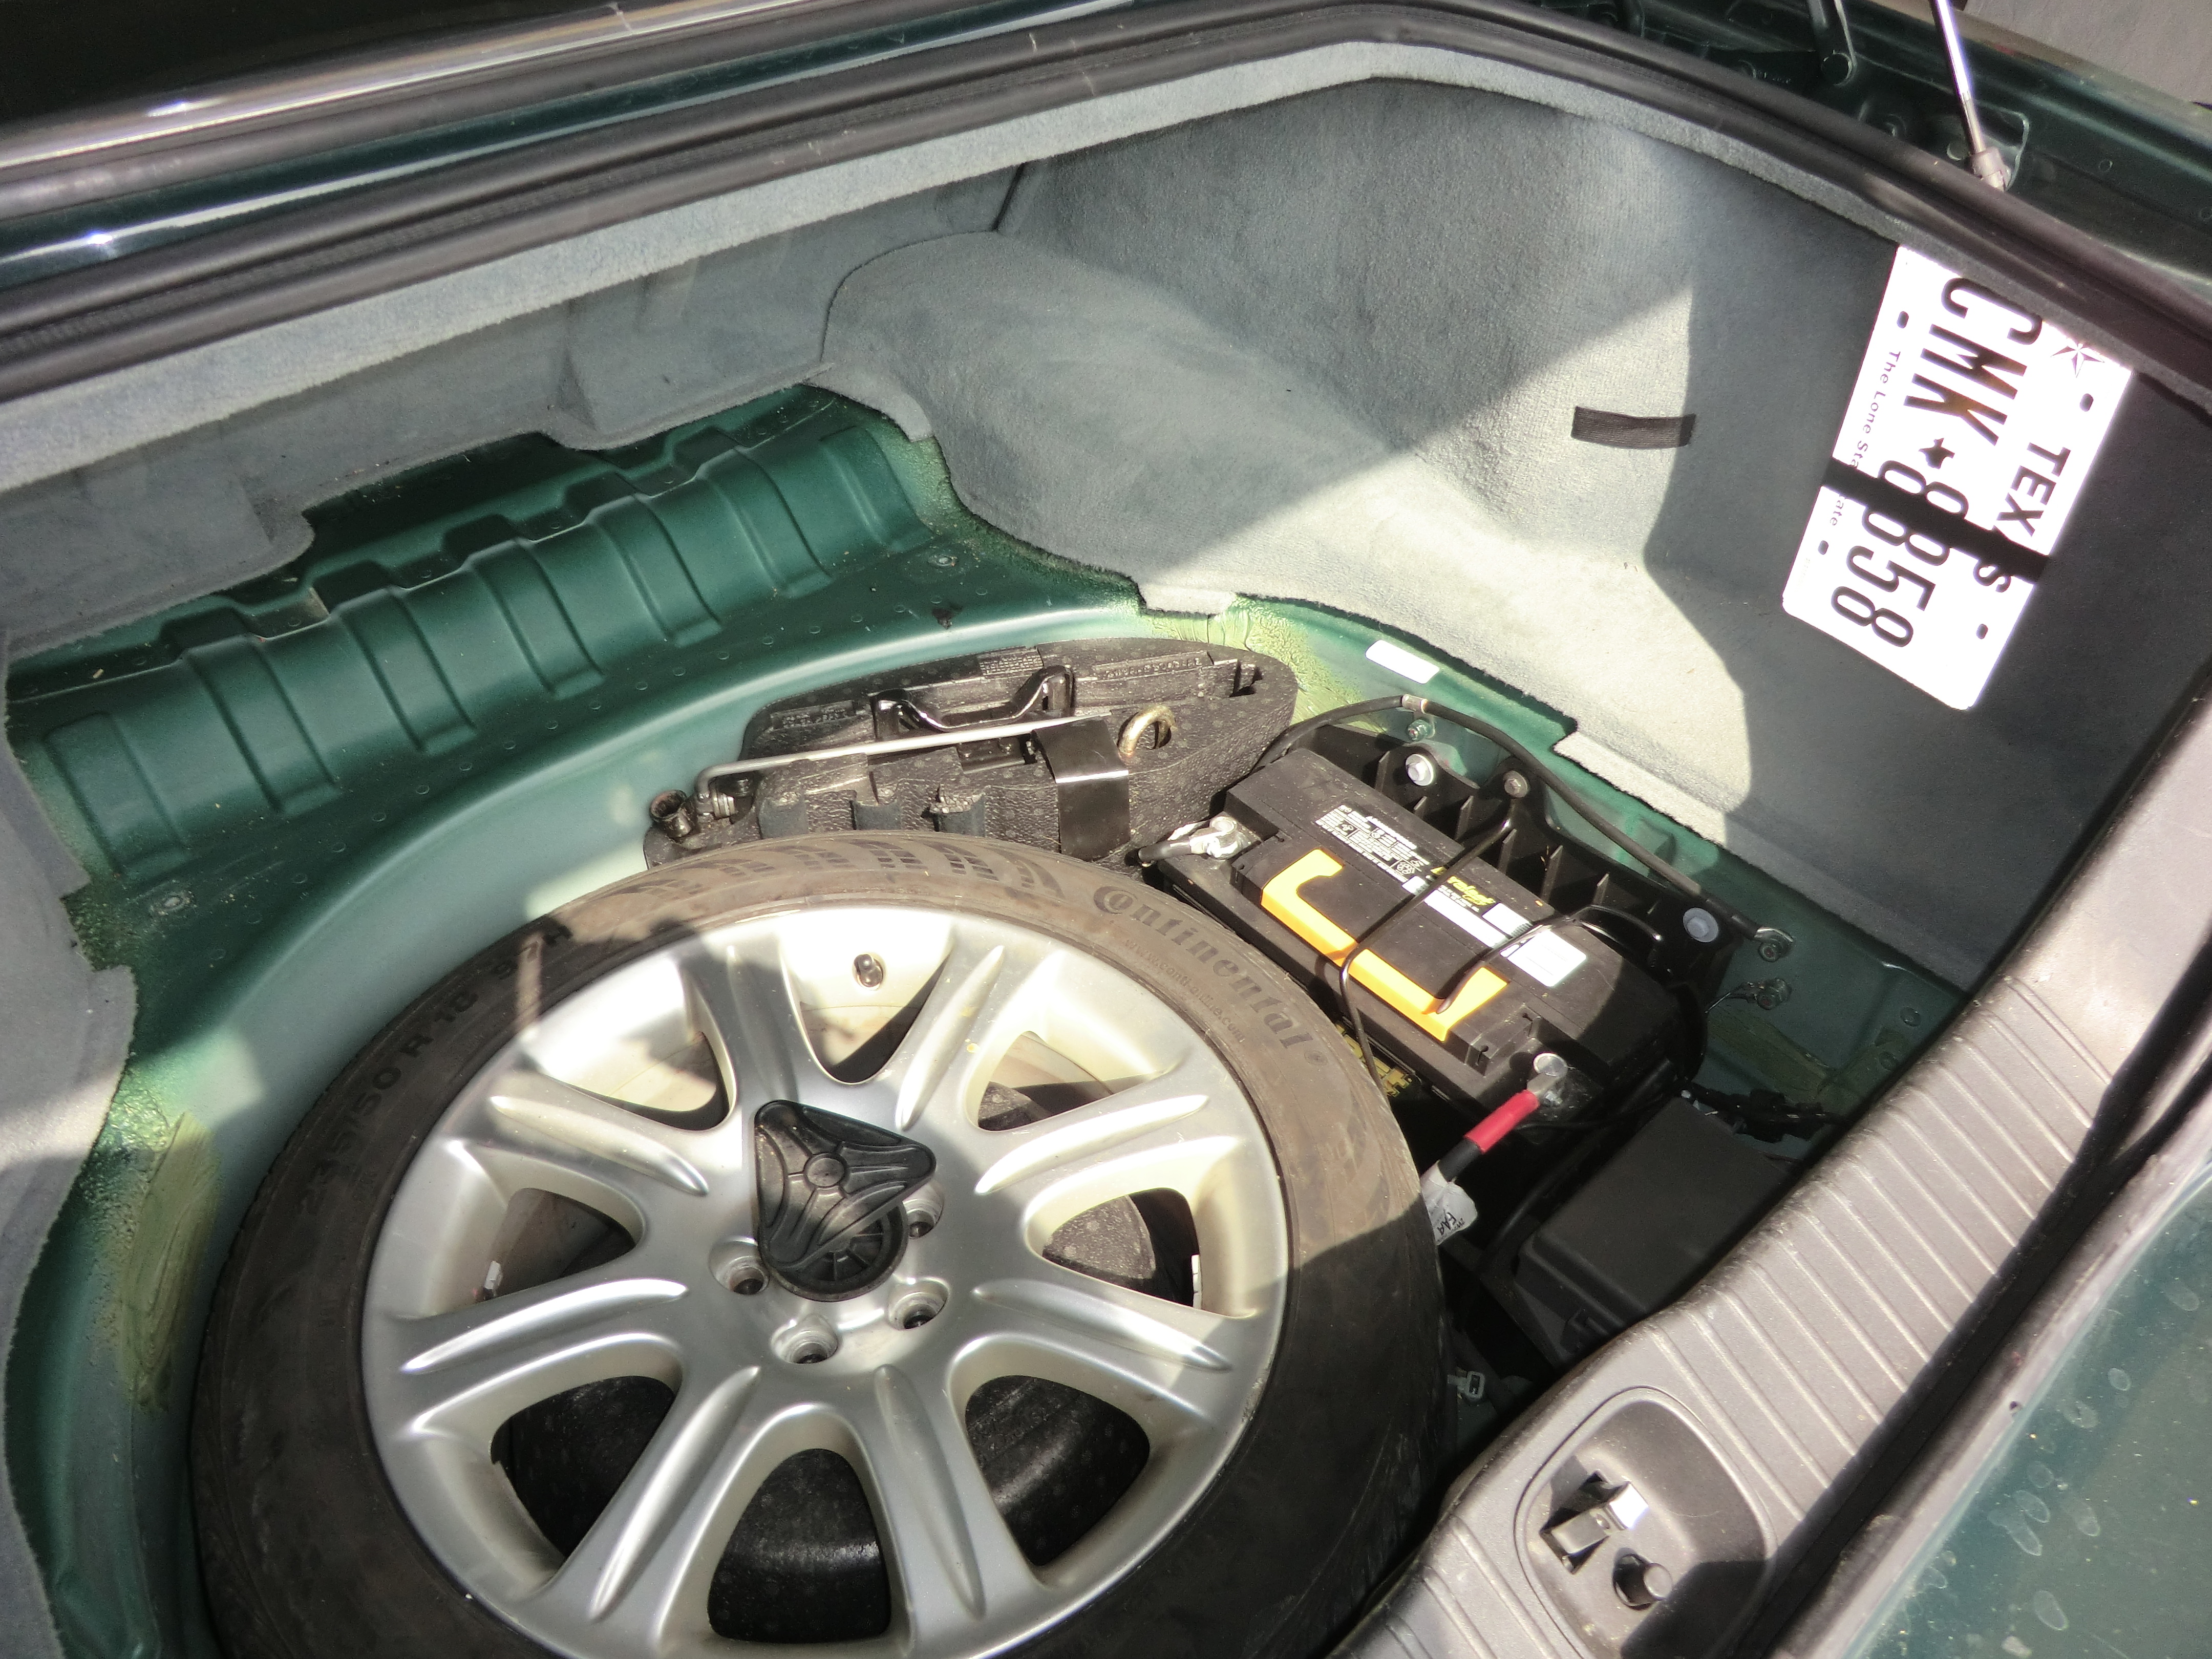
35. Replace all of your tools into the boot of the vehicle, check your spare tire air pressure while you're there. Mine was flat.
36. Replace the sound proofing.
37. Replace the sidewall cover.
38. Replace the trunk wheel cover [Torx 35].
39. Start the vehicle again, take her for spin - No codes, no lights, no MIL. I will check with SDD later.
I hope somebody finds this DIY description for how to change a Rear air shock when a lift is not available helpful.
However I do note that you could probably have done the whole job on the trolley jack with only that particular corner raised off the ground. YMMV


Anyway I purchased a second hand air shock from "British Parts International" out of Houston for $250 and prepared to fit it. They were great and quick (Thanks).
Here is my story. All of My photos (30+) are at the bottom of this Know How...
1. I watched multiple YouTube Video's.The best one I found is linked at the bottom of this thread.
2. I researched all I could on the jaguar Forum.
3. I got all of the tools required [see photograph]. Then follow my lead, Your Mileage may vary and you may not agree with my method, but it worked for me.
Dissassembley
4. Remove boot cover.
5. Remove site cover.
6. Remove sound inhibitors.
7. Loosen wheel nuts [19 mm].
8. Place carjack in position, my vehicle was too low and I had to use the carjack to lift the vehicle to allow me to place the trolley Jack underneath the vehicle.
9. Chock the opposite wheels.
10. Switch vehicle ignition to II setting and release the emergency Park break, by placing the vehicle in neutral and releasing the EPB switch.
11. Disconnect the battery [10 mm spanner]. At this point I realised the vehicle was still in a LIVE state (probably not a good idea!).
12. Jack up the vehicle with the normal car jack.
13. Place the trolley Jack in a central position underneath the vehicle. Jack up the car with the trolley Jack.
14. Place cloth on top of the axle stands and place the two axle stands in the correct position under the vehicle as per the Workshop manual.
15. Remove the wheel.
16. Remove the large bolt holding the bottom of the air strut to the chassis [21 mm].
17. Undo the toe in connection with a 15 mm spanner and 13 mm socket.
18. Loosen, but do not remove the upper bolts on the strut [13 mm socket].
19. Release the air connection brass nut [10 mm].
20. Remove the electrical connector, push the sides in and slowly withdraw the connector out.
21. Remove the Top bolts and the air strut may fall to the floor. Mine did.
Assembly
22. Line up the new strut with holes in top of chassis, you may need to wiggle the spring until it lines correctly to allow you to pull the threads through.
23. Refit all top bolts nice and snuggly.
24. Reconnect the air pipe [10 mm].
25. Reconnect the electrical connector. Note, be very careful with this connection as there are two small holes that need to fit correctly with two electrical pins inside the strut.
26. Refit the bottom of the strut 21 mm bolt.
27. Refit the toe in [13 mm, 15 mm set], you may need to use a rubber mallet to encourage this washer to go back and sit correctly.
28. Replace the wheel.
29. Remove the axle stands.
30. Replace the normal carjack to hold the weight of the vehicle while you remove the trolley Jack.
31. Remove the normal carjack, tighten the wheel locking nuts.
32. Reconnect the battery [10 mm], this part I was not very happy about, the system was live immediately on connecting due to having left the key in the ignition to allow the EPB to stay released.
33. Remove the wheel chock.
34. Start the engine, watch for any fault codes, go around to the rear of the vehicle and watch your vehicle rise.
35. Replace all of your tools into the boot of the vehicle, check your spare tire air pressure while you're there. Mine was flat.
36. Replace the sound proofing.
37. Replace the sidewall cover.
38. Replace the trunk wheel cover [Torx 35].
39. Start the vehicle again, take her for spin - No codes, no lights, no MIL. I will check with SDD later.
I hope somebody finds this DIY description for how to change a Rear air shock when a lift is not available helpful.
However I do note that you could probably have done the whole job on the trolley jack with only that particular corner raised off the ground. YMMV


Last edited by trosty; 08-19-2015 at 08:51 PM. Reason: added text.
#2
08-20-2015, 12:59 PM


Veteran Member
#4
08-20-2015, 02:32 PM

I decided to change my rear shock after getting DTCs and "suspension fault" and orange light on the MIL. I think the code was C2303. Can't rightly remember.
Anyway I purchased a second hand air shock from "British Parts International" out of Houston for $250 and prepared to fit it. They were great and quick (Thanks).
Here is my story. All of My photos (30+) are at the bottom of this Know How...
1. I watched multiple YouTube Video's.The best one I found is linked at the bottom of this thread.
2. I researched all I could on the jaguar Forum.
3. I got all of the tools required [see photograph]. Then follow my lead, Your Mileage may vary and you may not agree with my method, but it worked for me.
Attachment 117309Attachment 117308
Dissassembley
4. Remove boot cover.
5. Remove site cover.
6. Remove sound inhibitors.
7. Loosen wheel nuts [19 mm].
8. Place carjack in position, my vehicle was too low and I had to use the carjack to lift the vehicle to allow me to place the trolley Jack underneath the vehicle.
9. Chock the opposite wheels.
10. Switch vehicle ignition to II setting and release the emergency Park break, by placing the vehicle in neutral and releasing the EPB switch.
11. Disconnect the battery [10 mm spanner]. At this point I realised the vehicle was still in a LIVE state (probably not a good idea!).
12. Jack up the vehicle with the normal car jack.
13. Place the trolley Jack in a central position underneath the vehicle. Jack up the car with the trolley Jack.
14. Place cloth on top of the axle stands and place the two axle stands in the correct position under the vehicle as per the Workshop manual.
15. Remove the wheel.
16. Remove the large bolt holding the bottom of the air strut to the chassis [21 mm].
17. Undo the toe in connection with a 15 mm spanner and 13 mm socket.
18. Loosen, but do not remove the upper bolts on the strut [13 mm socket].
19. Release the air connection brass nut [10 mm].
20. Remove the electrical connector, push the sides in and slowly withdraw the connector out.
21. Remove the Top bolts and the air strut may fall to the floor. Mine did.
Assembly
22. Line up the new strut with holes in top of chassis, you may need to wiggle the spring until it lines correctly to allow you to pull the threads through.
23. Refit all top bolts nice and snuggly.
24. Reconnect the air pipe [10 mm].
25. Reconnect the electrical connector. Note, be very careful with this connection as there are two small holes that need to fit correctly with two electrical pins inside the strut.
26. Refit the bottom of the strut 21 mm bolt.
27. Refit the toe in [13 mm, 15 mm set], you may need to use a rubber mallet to encourage this washer to go back and sit correctly.
28. Replace the wheel.
29. Remove the axle stands.
30. Replace the normal carjack to hold the weight of the vehicle while you remove the trolley Jack.
31. Remove the normal carjack, tighten the wheel locking nuts.
32. Reconnect the battery [10 mm], this part I was not very happy about, the system was live immediately on connecting due to having left the key in the ignition to allow the EPB to stay released.
33. Remove the wheel chock.
34. Start the engine, watch for any fault codes, go around to the rear of the vehicle and watch your vehicle rise.
35. Replace all of your tools into the boot of the vehicle, check your spare tire air pressure while you're there. Mine was flat.
36. Replace the sound proofing.
37. Replace the sidewall cover.
38. Replace the trunk wheel cover [Torx 35].
39. Start the vehicle again, take her for spin - No codes, no lights, no MIL. I will check with SDD later.
I hope somebody finds this DIY description for how to change a Rear air shock when a lift is not available helpful.
However I do note that you could probably have done the whole job on the trolley jack with only that particular corner raised off the ground. YMMV
Attachment 117287
Attachment 117288
Attachment 117289
Attachment 117290
Attachment 117291
Attachment 117292
Attachment 117293
Attachment 117294
Attachment 117295
Attachment 117296
Attachment 117297
Attachment 117298
Attachment 117299
Attachment 117300
Attachment 117301
Attachment 117302
Attachment 117303
Attachment 117304
Attachment 117305
Attachment 117306
Attachment 117309
https://www.youtube.com/watch?v=Lc2Z...tAirSuspension
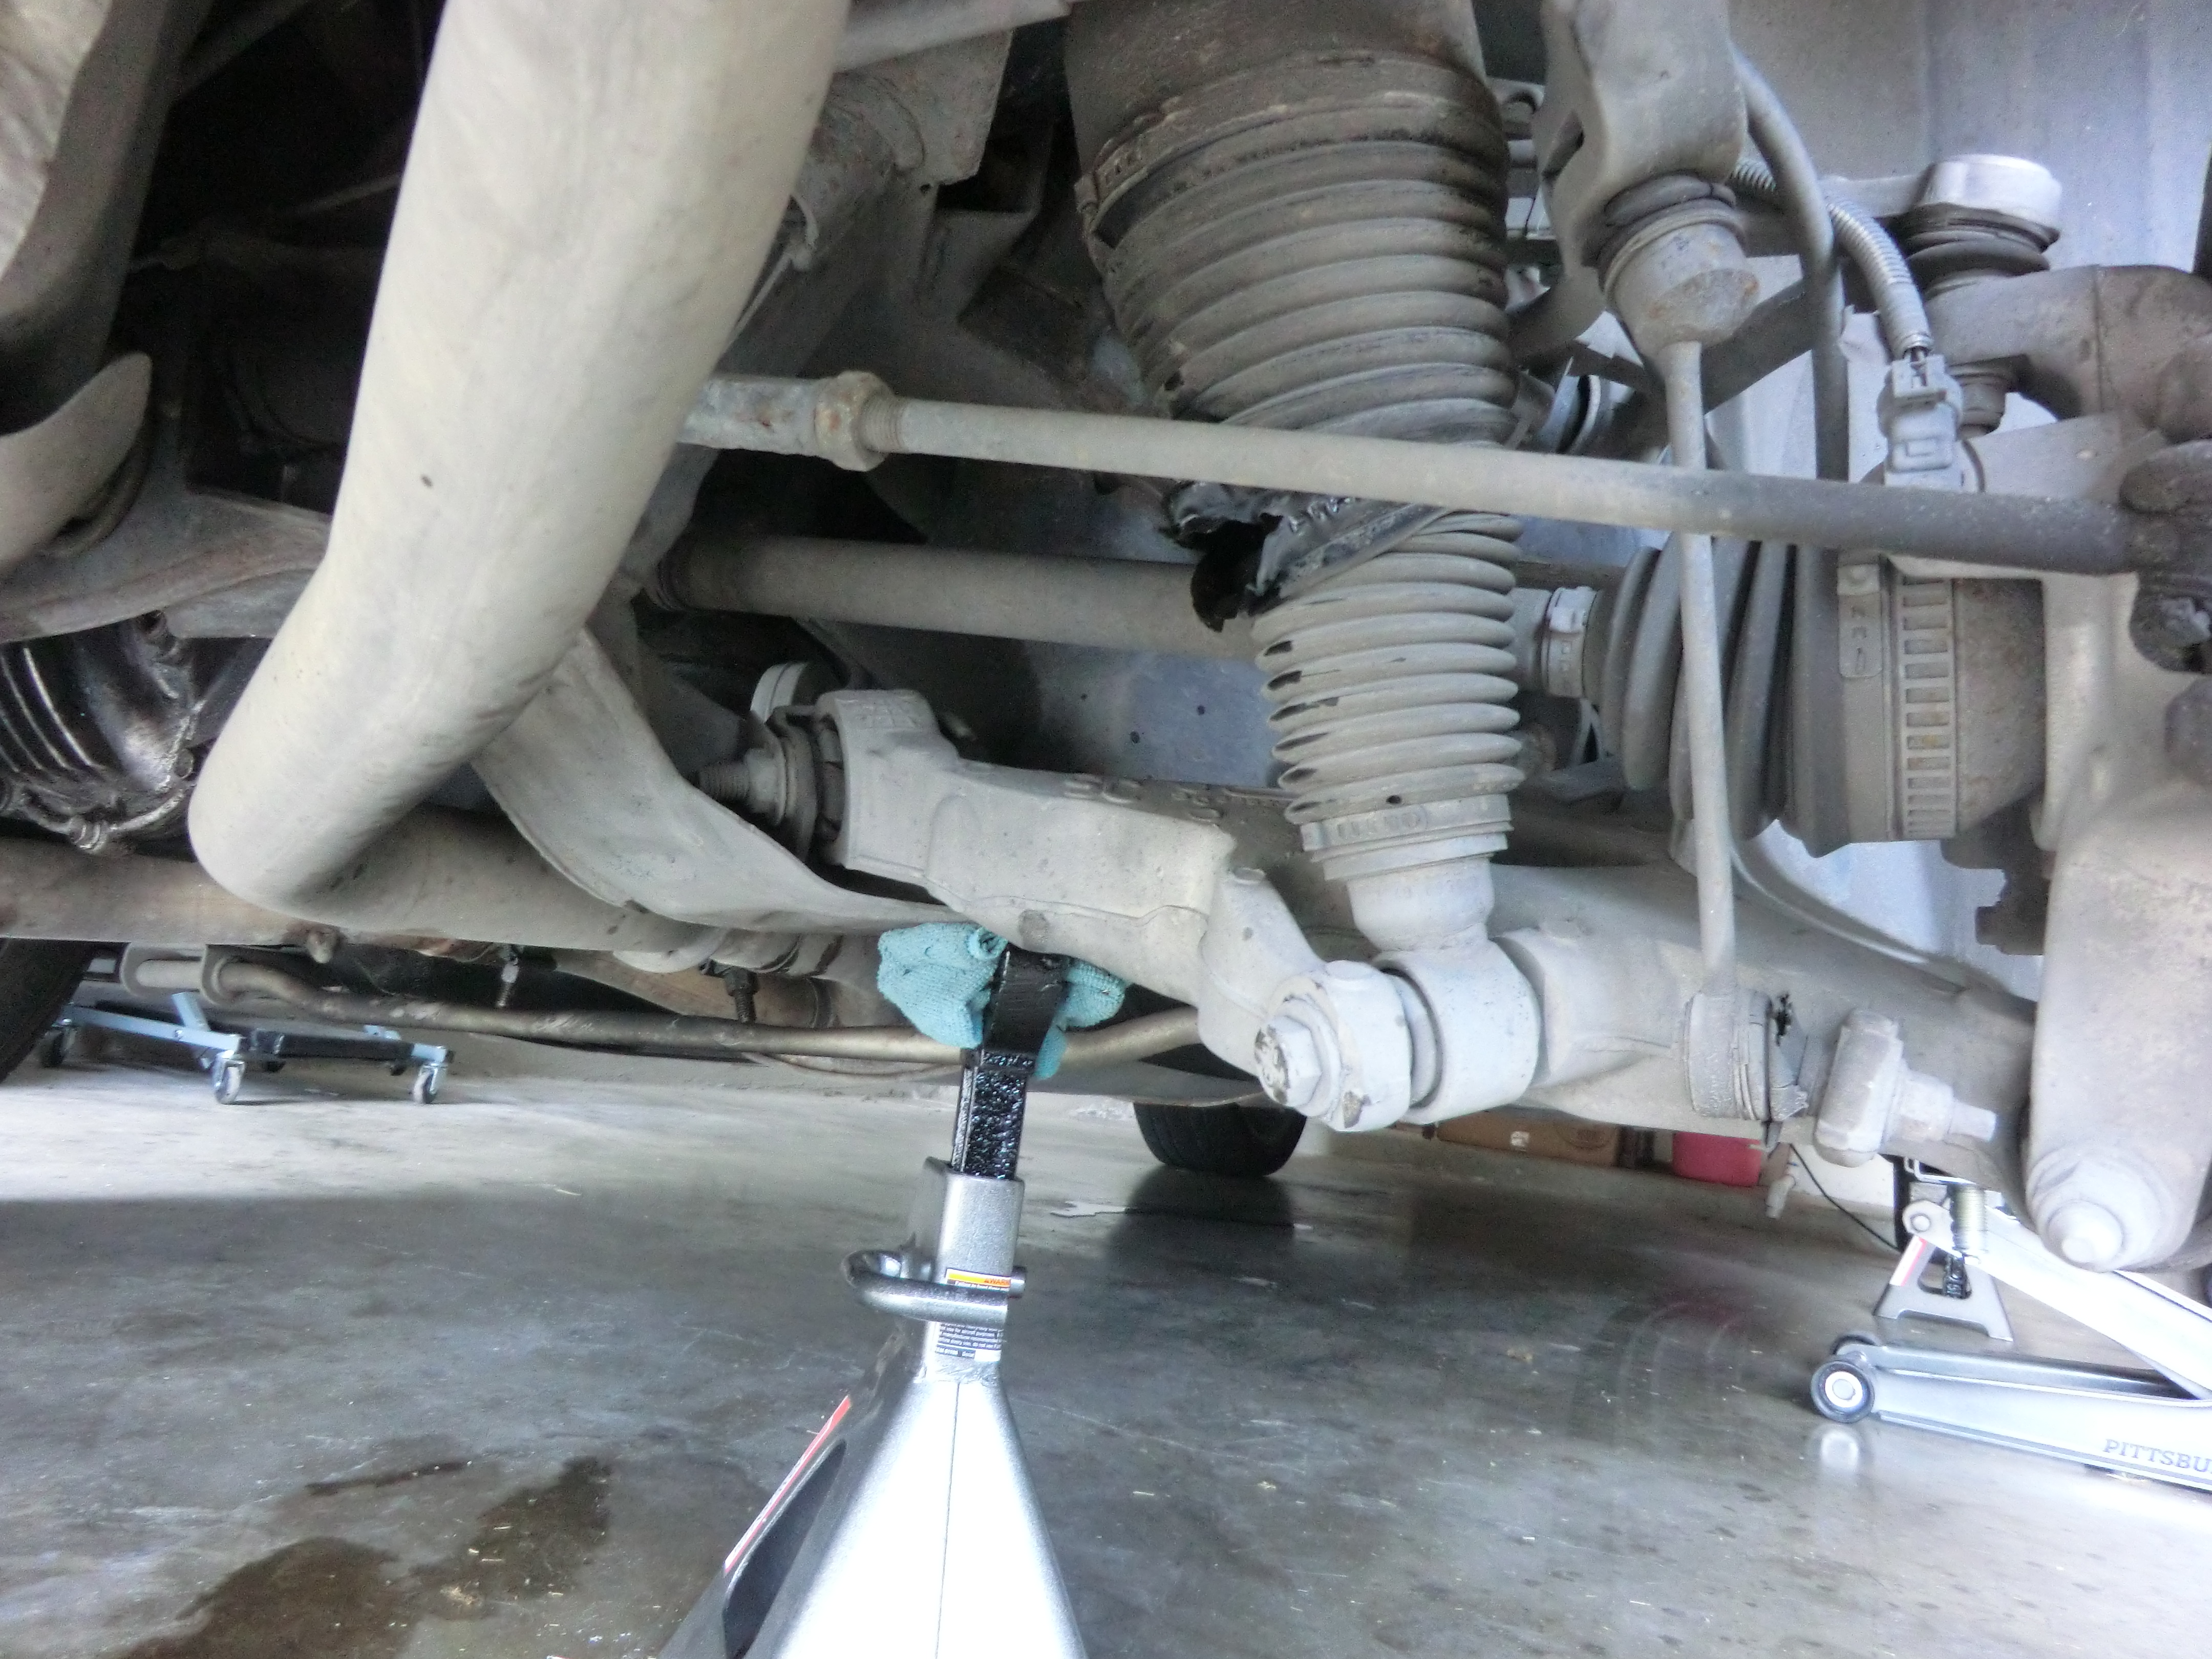
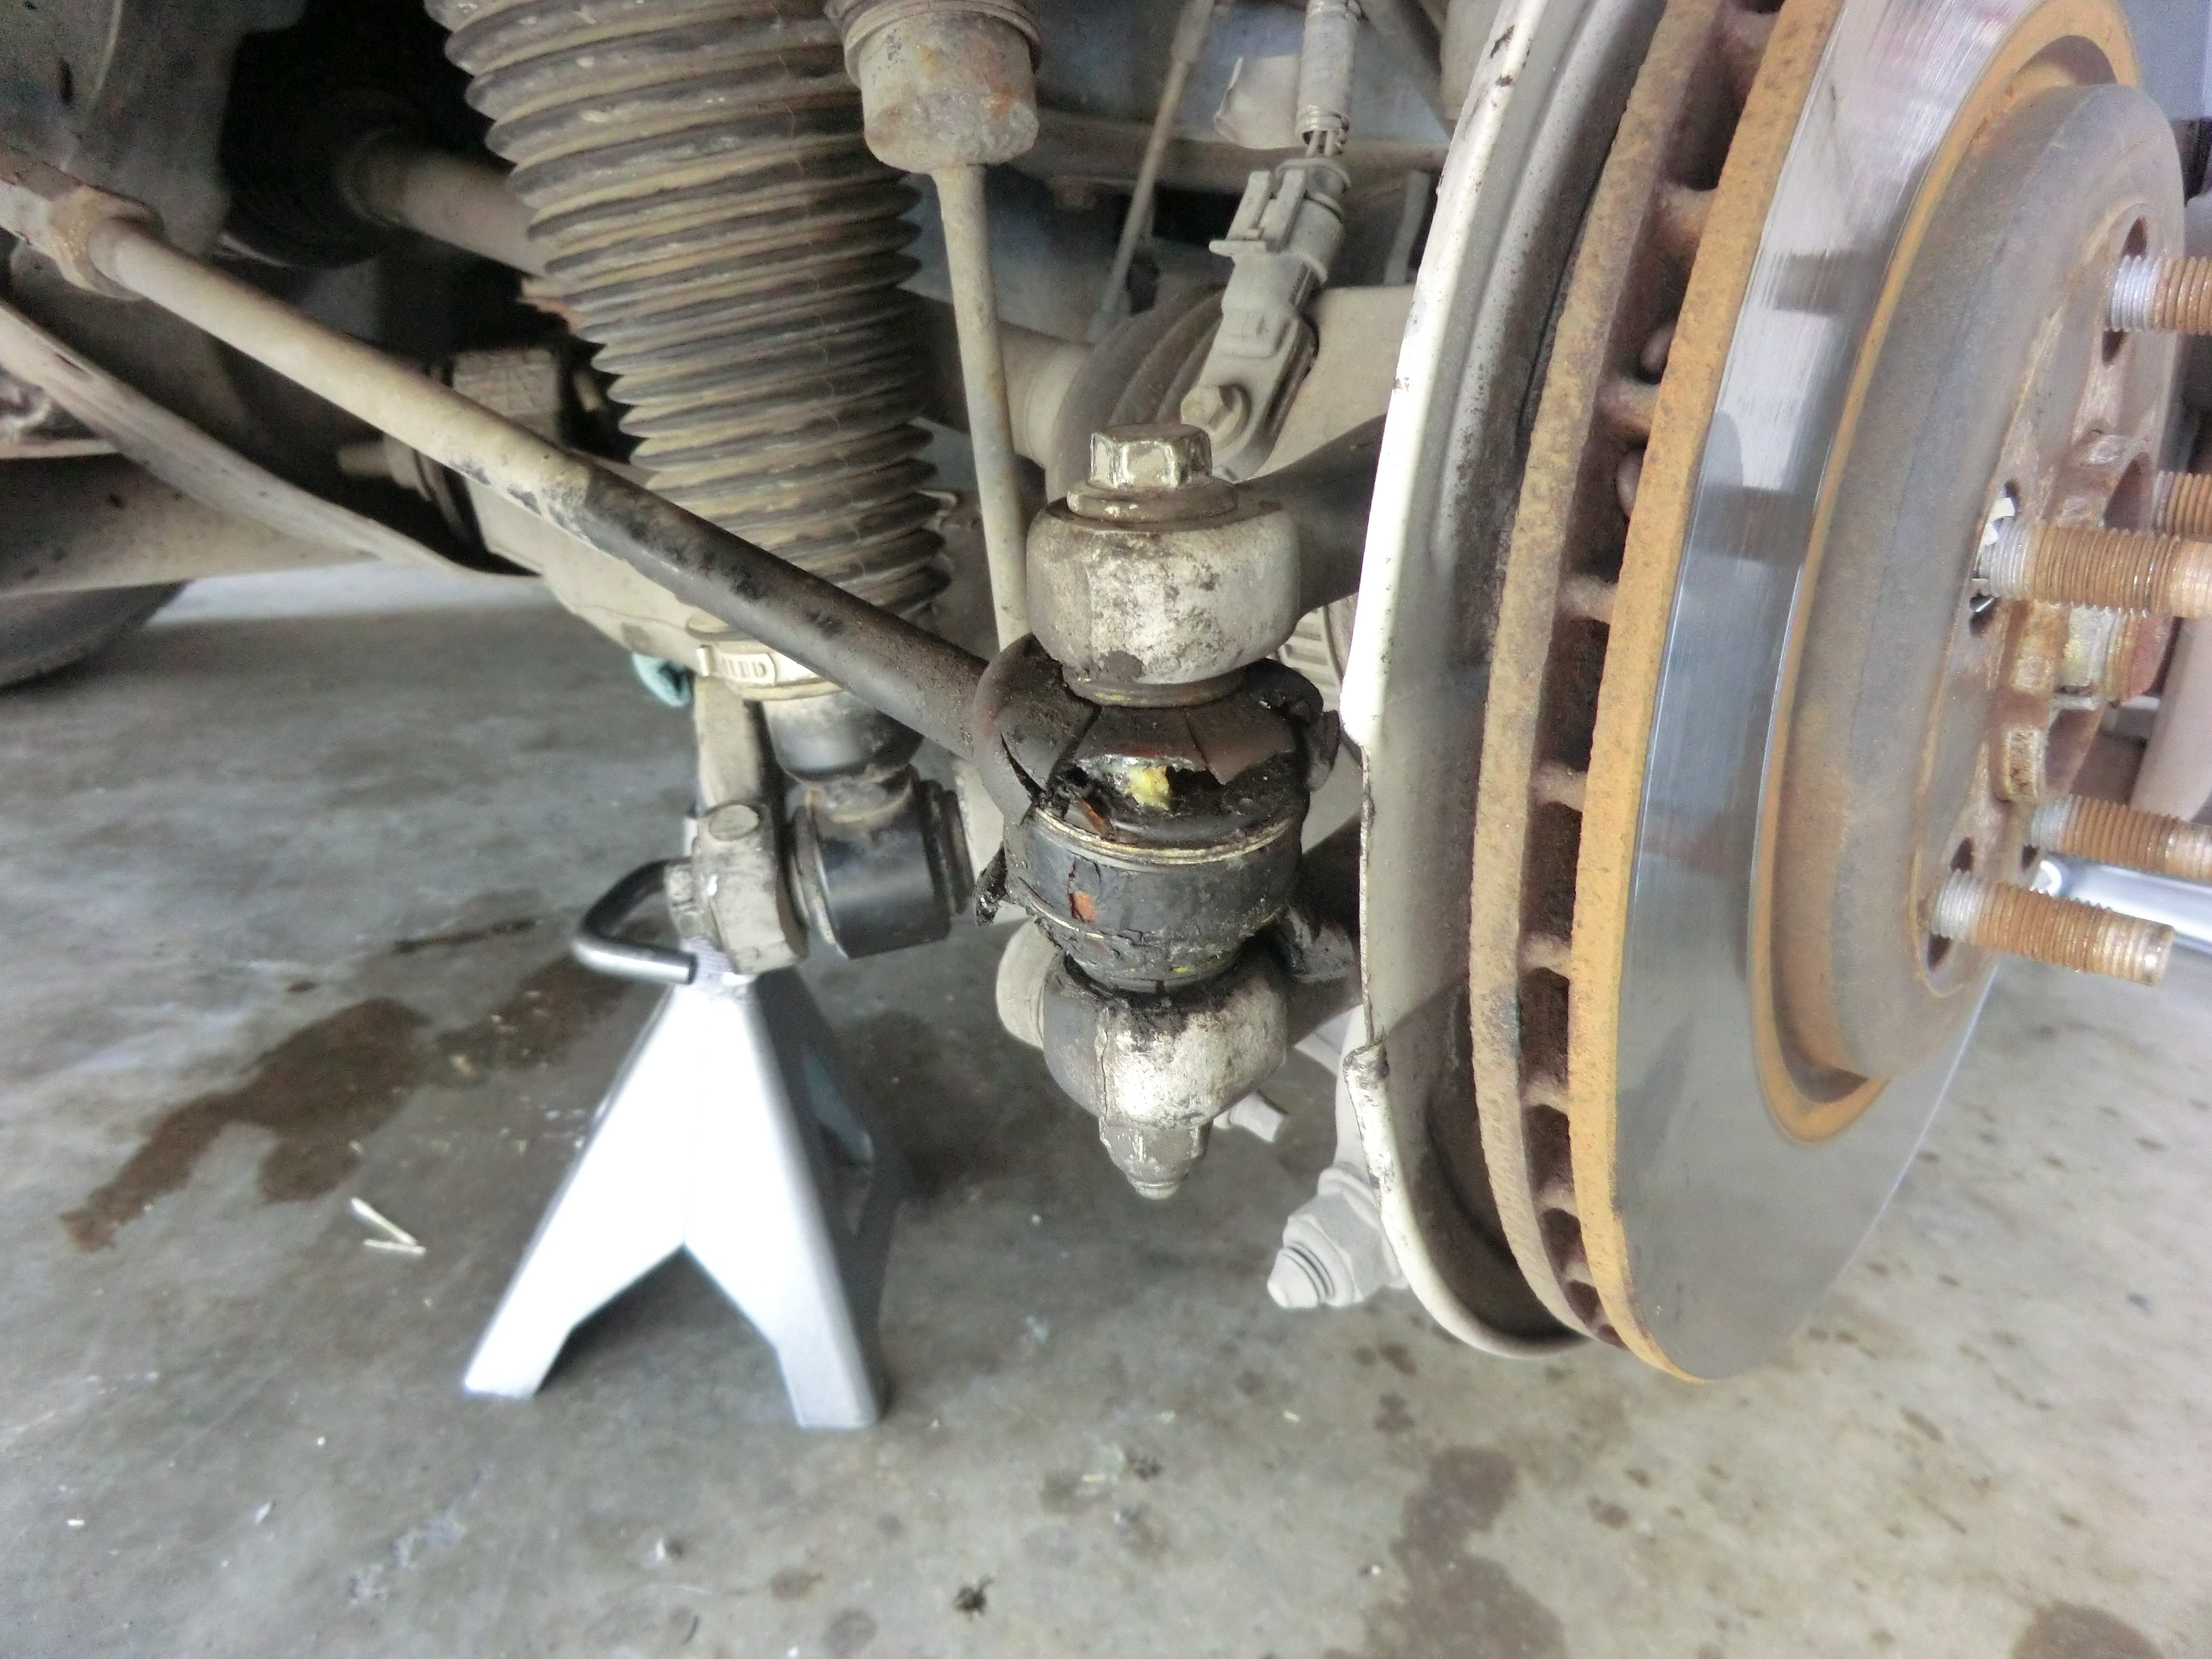
BTW, did you check out the sway bar link, toe adjuster, and lower control arm bushings? They look like the ones that were on mine.
#6
08-20-2015, 05:28 PM
Thanks, The hardest part of the whole job was getting the trolley jack under the vehicle because it was sat so low. Everything else was really, really simple and the whole process took 1.5 hrs.
I did not jack up the other side of the vehicle and rest the whole vehicle on axel stands. If I was going to do both side struts then that would have been an option.
I replaced the lug nuts for toyota ones and rotated the wheels at the same time. But only on this side. I will get around to replacing the other lug nuts and rotating the other wheels shortly.
With regards to the bushings, rubbers and washers, they are all shot and will need replacing sometime soon. :-(
#7
08-26-2015, 05:53 PM
Veteran member

Trending Topics

Thread
Thread Starter
Forum
Replies
Last Post
34by151
XJ XJ6 / XJ8 / XJR ( X350 & X358 )
4
09-06-2015 05:14 PM
02jagstype
S-Type / S type R Supercharged V8 ( X200 )
0
09-04-2015 08:20 PM
Currently Active Users Viewing This Thread: 1 (0 members and 1 guests)