2003 XJ8 Sport LS2 Swap
#21
 06-23-2016, 05:53 PM

Back from vacation, haven't worked on the car much but did make some observations on the brakes.
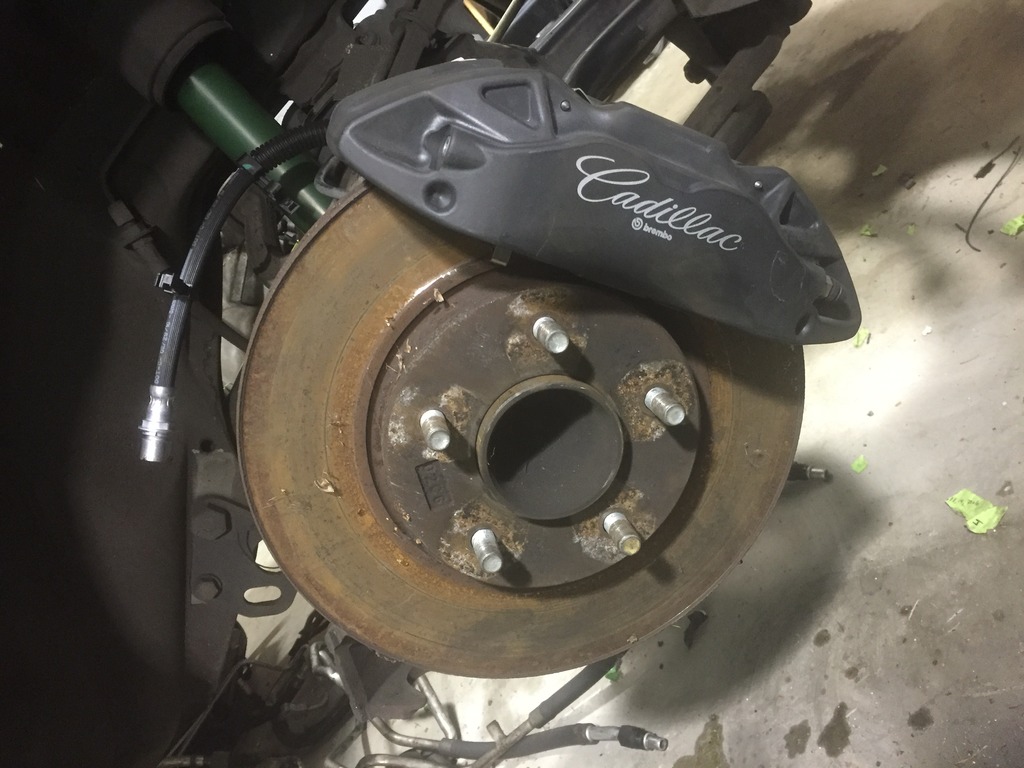
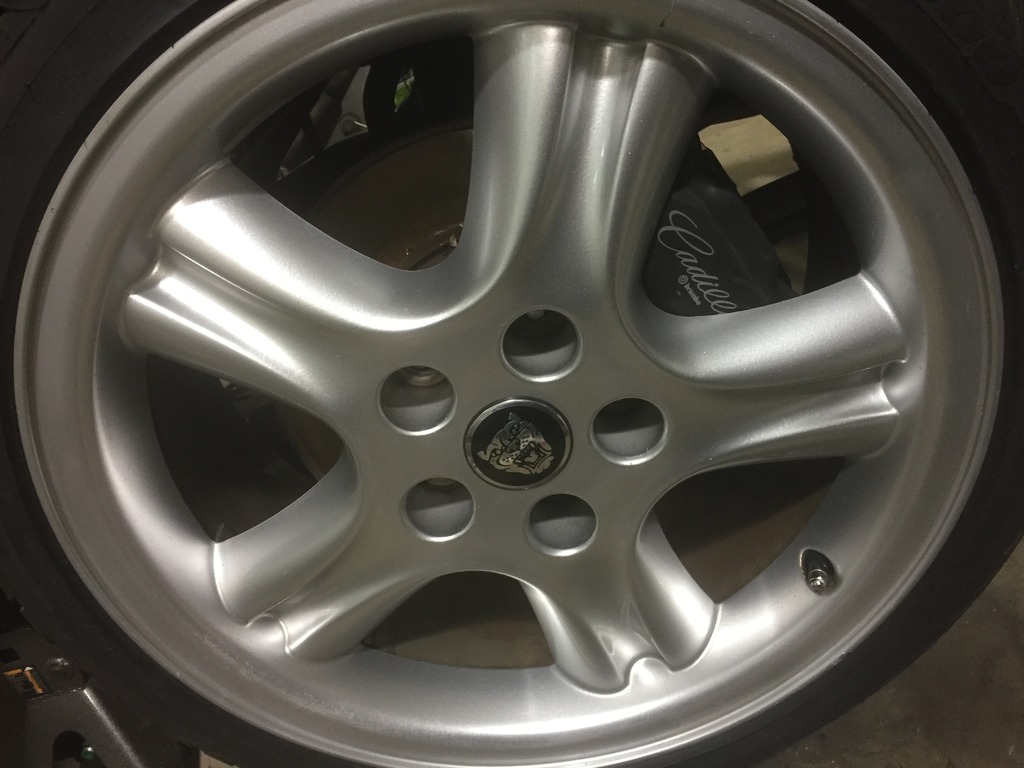
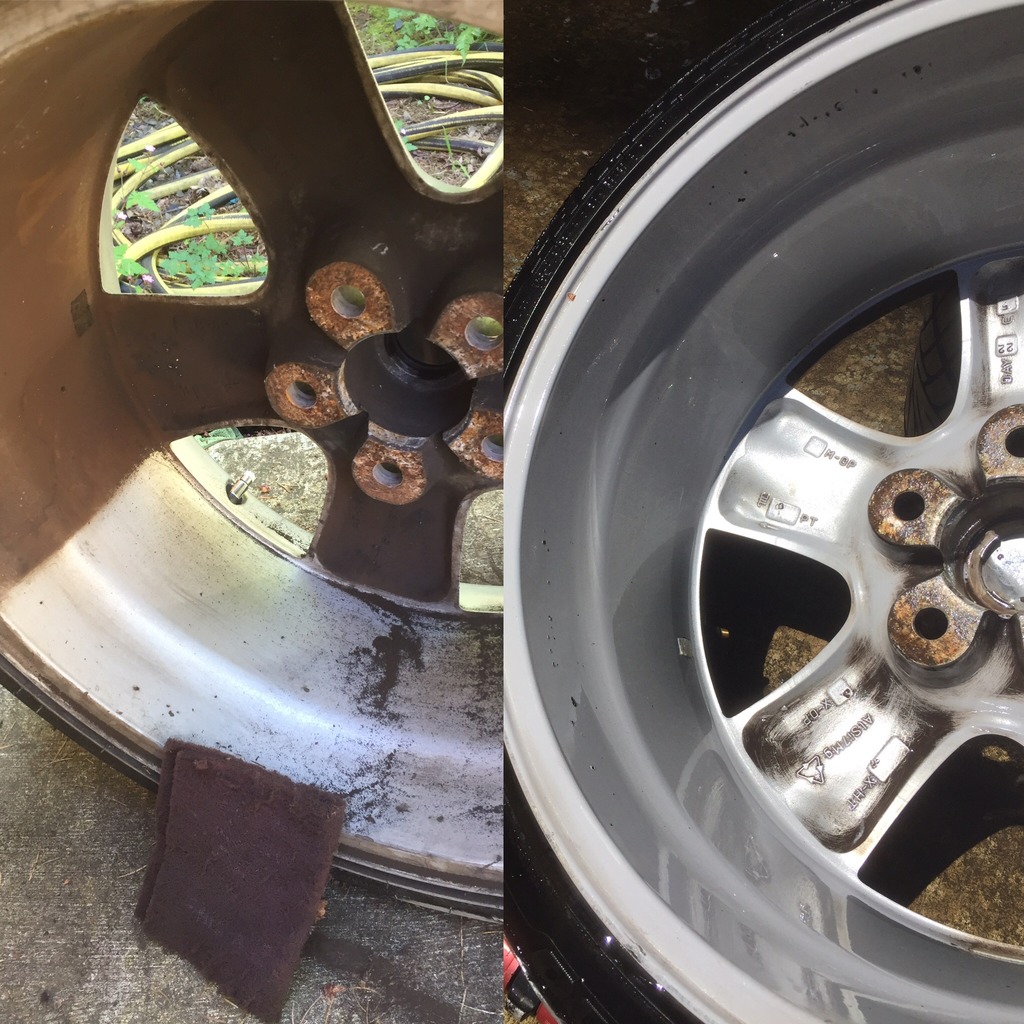
The offset of the Cadillac ATS rotor is about 10mm more than the Jag (isn't that the magic number for 18" wheels and R1 brakes?). I plopped the caliper on the old rotor just to get an idea of fitment - not looking good. The bolt pattern and mounting offset is entirely different so I can't say for sure but at a glance, spacing the wheel out would be required to clear it. I didn't dabble with it too much, and haven't given up on it yet, but this may not be a good combination. Not to mention the caliper looks disproportionately big, though a larger rotor would be used, not the one pictured.

Oil pan done by a good friend of mine:

Modifying the floor of the pan did move the internal transfer tubes a touch closer to the engine, which caused them to touch the pilot tip on one of the main studs - acting first and thinking second I masked it off, cut the stud flush to the nut, cleaned it up and rechecked - all good now.
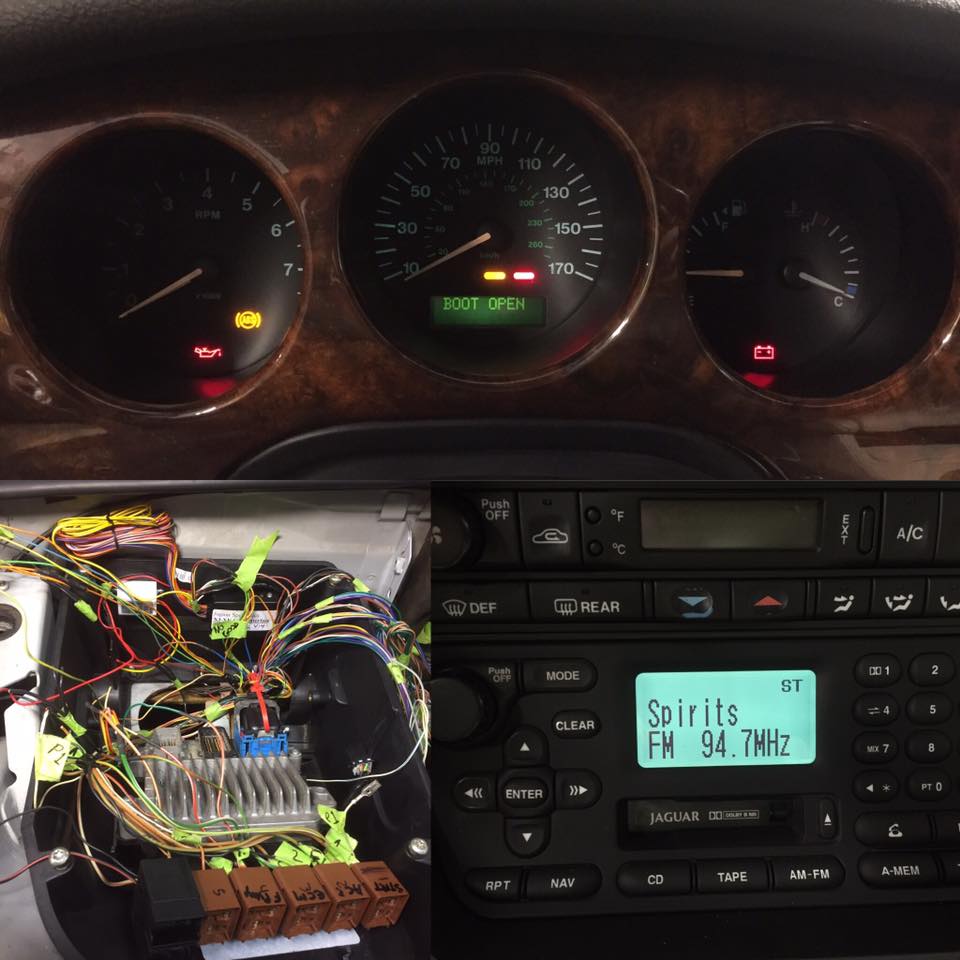
The harness is just about done, just have the last two relays to re-purpose and calling it good until the engine goes in. I did power the car up, and nothing exploded or caught fire, so we're off to a good start. I turned it on with and without the Jaguar Specialties module and even without the GM ECM powered up it removed several error messages and indicators - NICE.
That's all for now, more to come this weekend.
The offset of the Cadillac ATS rotor is about 10mm more than the Jag (isn't that the magic number for 18" wheels and R1 brakes?). I plopped the caliper on the old rotor just to get an idea of fitment - not looking good. The bolt pattern and mounting offset is entirely different so I can't say for sure but at a glance, spacing the wheel out would be required to clear it. I didn't dabble with it too much, and haven't given up on it yet, but this may not be a good combination. Not to mention the caliper looks disproportionately big, though a larger rotor would be used, not the one pictured.


Oil pan done by a good friend of mine:

Modifying the floor of the pan did move the internal transfer tubes a touch closer to the engine, which caused them to touch the pilot tip on one of the main studs - acting first and thinking second I masked it off, cut the stud flush to the nut, cleaned it up and rechecked - all good now.
The harness is just about done, just have the last two relays to re-purpose and calling it good until the engine goes in. I did power the car up, and nothing exploded or caught fire, so we're off to a good start. I turned it on with and without the Jaguar Specialties module and even without the GM ECM powered up it removed several error messages and indicators - NICE.

That's all for now, more to come this weekend.
#22
07-02-2016, 10:57 PM
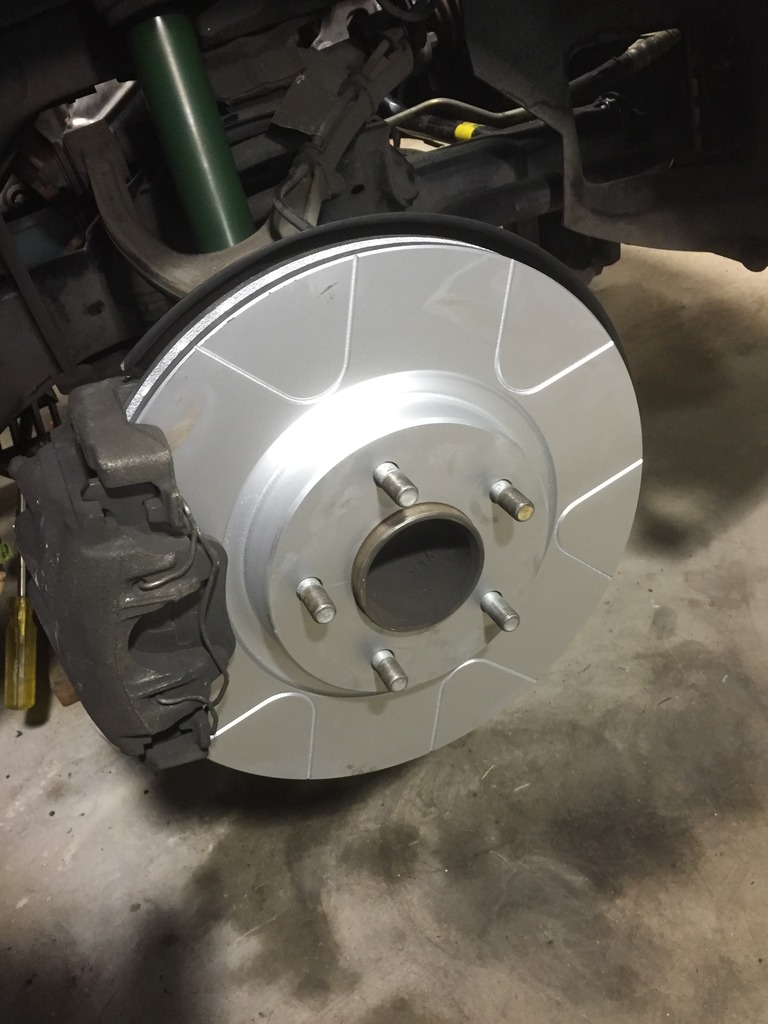
A little progress in the brake department; scored the Brembo rear rotors from RockAuto I'm sure most of you have seen in another thread (PN 09721720), and some great 13"/325mm front rotors discovered by accident through interchange on RockAuto. They are cataloged for 2000-2006 XK8, part number 980505 (generic aftermarket numbering); not sure how great the brand "Ultra Rotor" will be, but $25.79 (wholesale closeout) for slotted, painted, nicely sealed rotors with ISO certification I'm not about to complain - they actually look like Bosch rotors but slotted. XJR/XK8 calipers are the backup plan, back to contemplating a C5/GTO setup after the Cadillac ATS caliper let down.
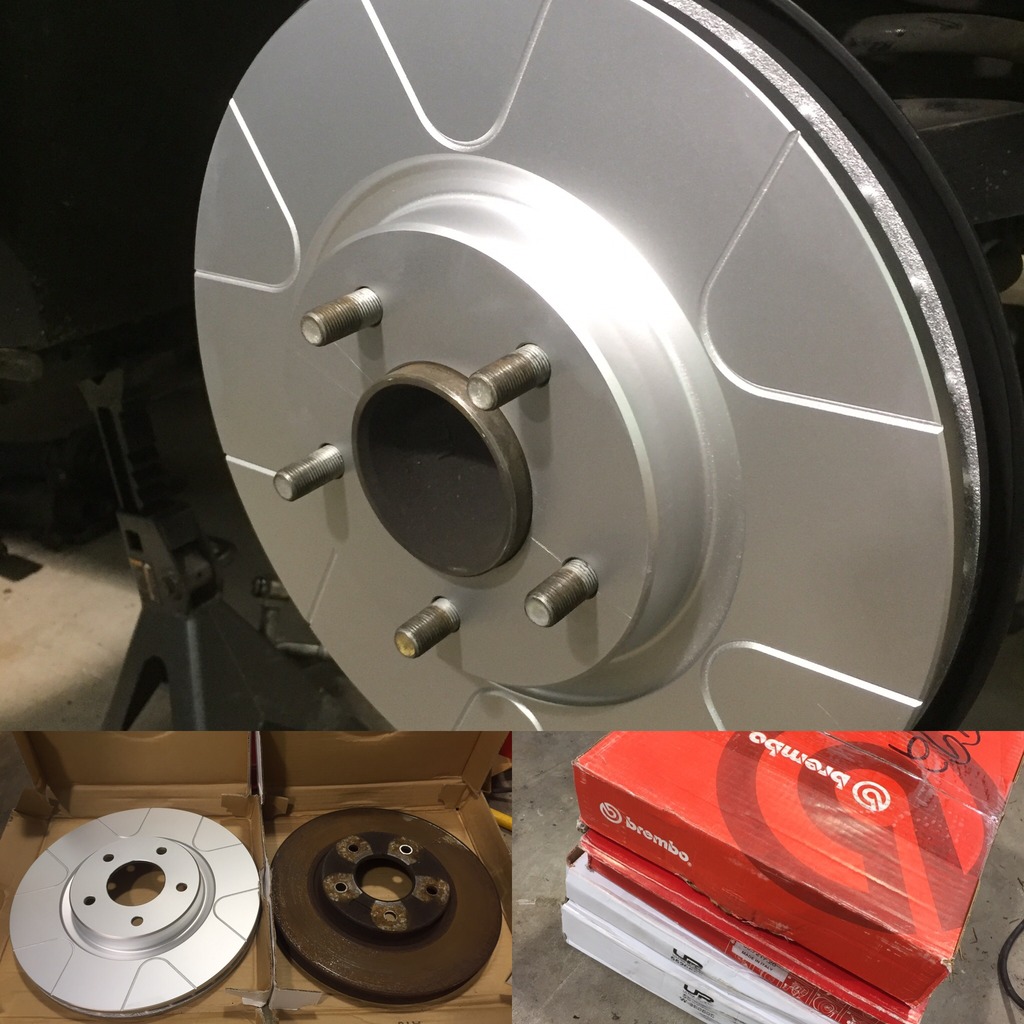
Being a perfectionist sucks; crazy difference though!
GTO pan full of Mobil1 passing the leak test post modification so far, may drop it in tomorrow. Looking at oil coolers to help compensate for the reduced oil capacity of the notched pan.

Being a perfectionist sucks; crazy difference though!

GTO pan full of Mobil1 passing the leak test post modification so far, may drop it in tomorrow. Looking at oil coolers to help compensate for the reduced oil capacity of the notched pan.

The following 4 users liked this post by ixfn:

#24
07-03-2016, 11:11 PM


#26
07-04-2016, 08:58 PM
Not familiar with the dimensions of the Coyote, but it looks HUGE to me - that said, the DOHC Jag V8 is quite wide as well. Lots of room up top, so my guess is the heads may clear, but exhaust would be super tight.
#27
07-04-2016, 09:27 PM


The following 5 users liked this post by ixfn:
dhardison (07-11-2016),
Johnny_B (07-06-2016),
someguywithajag (10-28-2018),
xjay8 (07-26-2016),
Z07Brandon (10-11-2017)
#29
07-05-2016, 07:55 AM
The following users liked this post:
Johnny_B (07-06-2016)
#30
07-08-2016, 01:46 AM
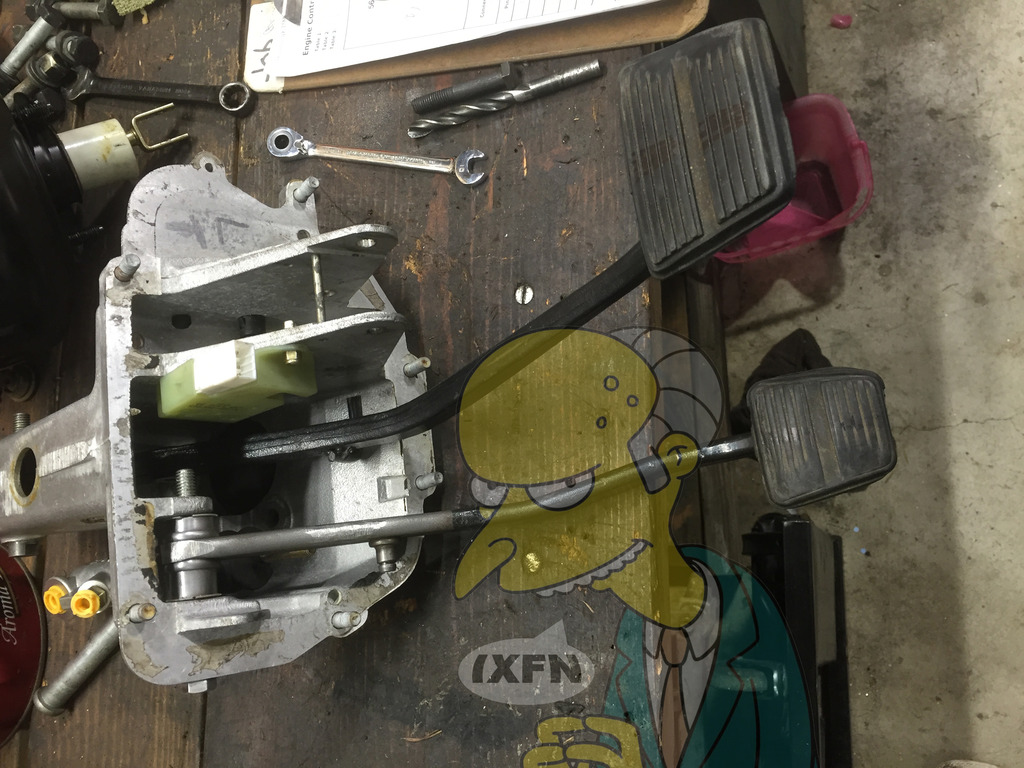
I was hoping to hold out until I had this all ironed out and proven, but I can't help myself. Long story short, there had been some turmoil regarding the clutch master cylinder arangement - examined some options, researched many designs, rejected one suggestion (faux offer), and had built a very elegant scratch built solution by this point. Then finally the "NO DUH" moment which I can't believe took me this long:
X300 LHD booster/pedal housing, Wilwood 260-6089 clutch master, and the rest is simple.
I paid $28.42 for the housing (used), and $46.40 for the master (new); $74.82.
More details on the vacuum booster to come (3 & 4 bolt vs. clocking of iron & aluminum master cylinder, and dismantling and re-clocking the booster). Details on pedals to come also; I have a pile of various brake and clutch pedals (GM and Jaguar) to sift through for best fit/modify.
So if you want to put a hydraulic clutch in any X300/X308 go for it, and tell any "specialist" that wants to sell you a "solution" for $875 to **** OFF.
Let it burn.
The following 2 users liked this post by ixfn:
someguywithajag (10-29-2018),
xjay8 (07-26-2016)
#31
07-17-2016, 01:10 AM
Hey gang, giddy to have too much to do at this point - here's all I got for today.
PLEASE EXCUSE THE MR. BURNS WATERMARK - I MAY BE ADDING IT TO MORE PHOTOS ACCORDINGLY (Foreseeable Politics).
Nothing major here; hideous XK8 calipers to accommodate the 13" rotors for now while sorting everything else out.

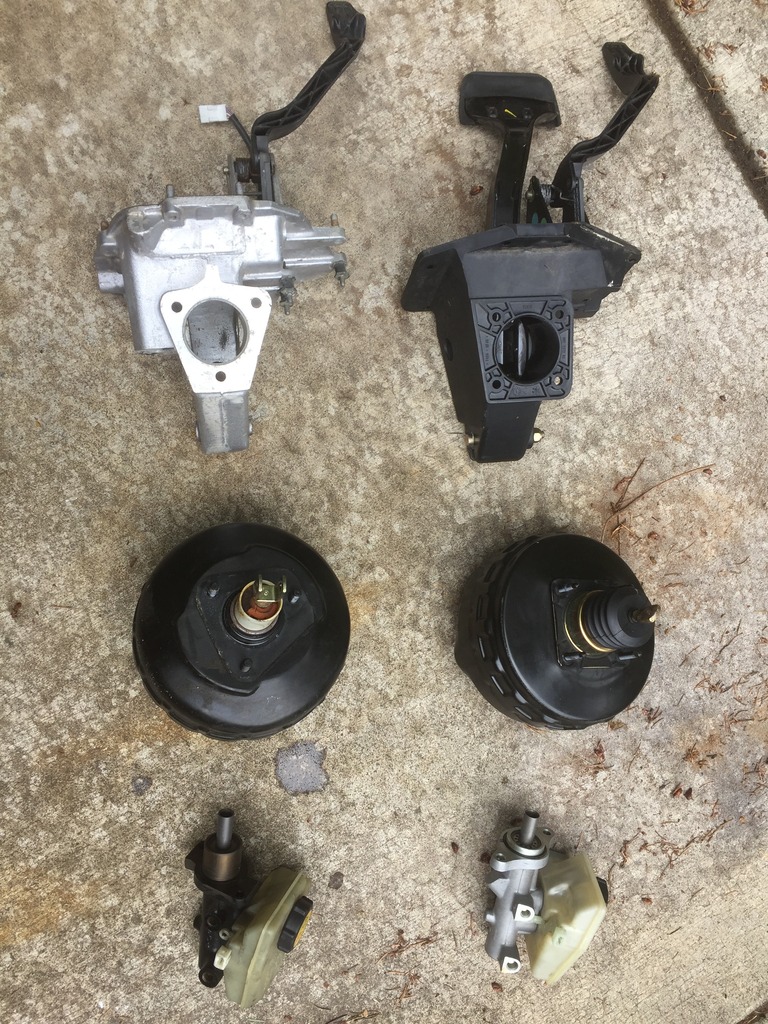
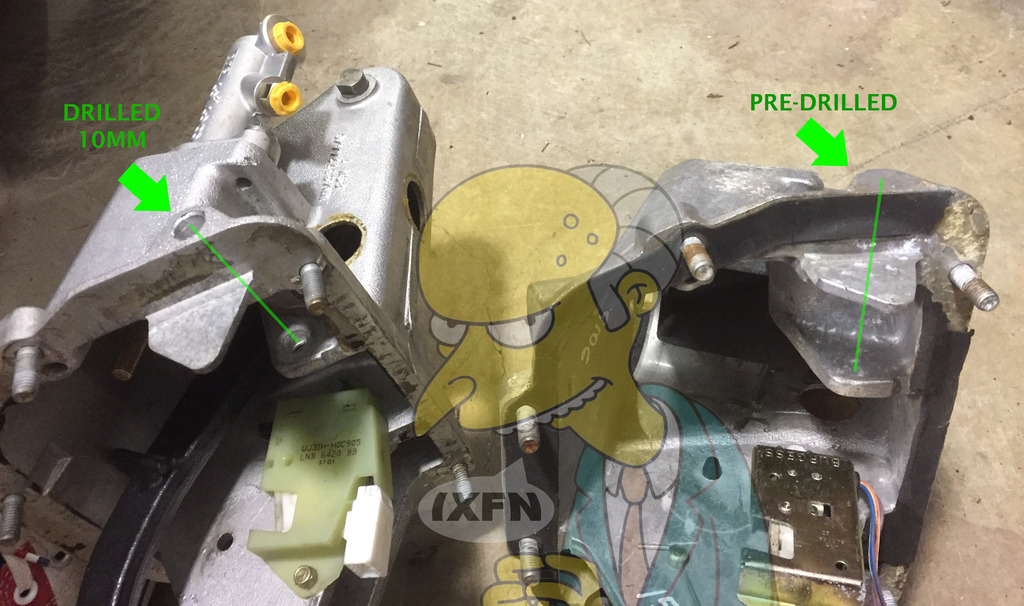
Here's a side by side of the X300 components vs X308; I was hoping to use the aluminum master cylinder by reclocking the 3 bolt booster, but due to other differences, and saving myself one more rabbit hole to go down, I'll just go with the iron one (both 1" bore anyway).
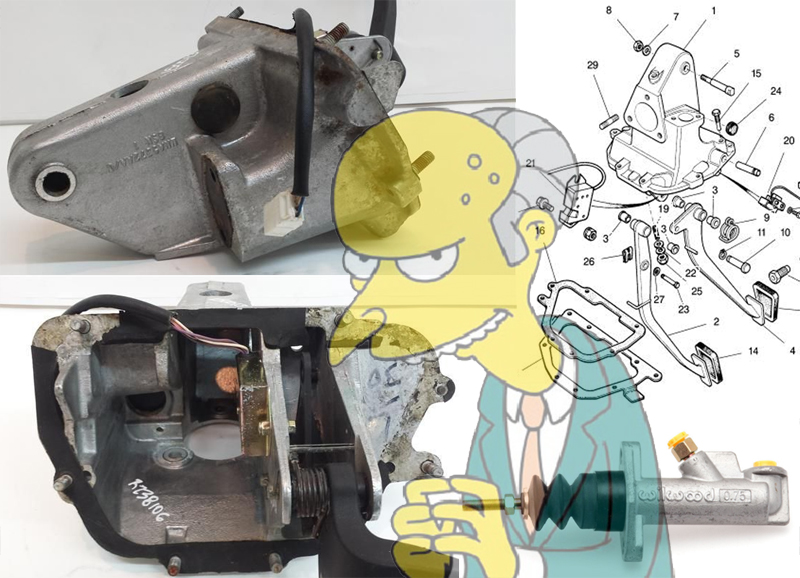
The X300 housing is a drop in to the X308, and the only modification to mount the Wilwood master cylinder was to enlarge the hole a couple MM, and grind a bit off the master cylinder on the inboard side of the mounting flange (pictured next).
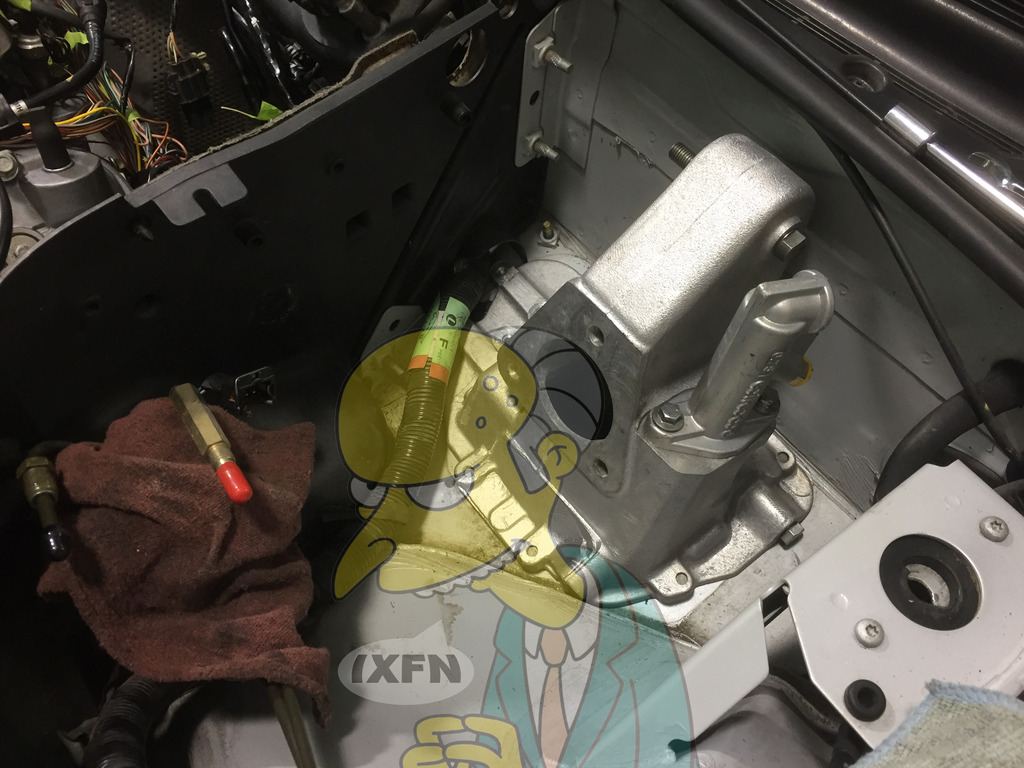
The green arrow shows the radius cast to modify/follow, the yellow arrow is reference for the new clutch pedal bolt/axis.

Left is drilled, right is not, and the green line shows the axis for the rod/bolt/pin you're drilling for the pedal swings on. Side note for this pic; the X308 stop lamp switch works in the X300 housing.
Jag brake pedal modified to accept GM pedal pad cover - trim all you can from the left, you'll need the room!
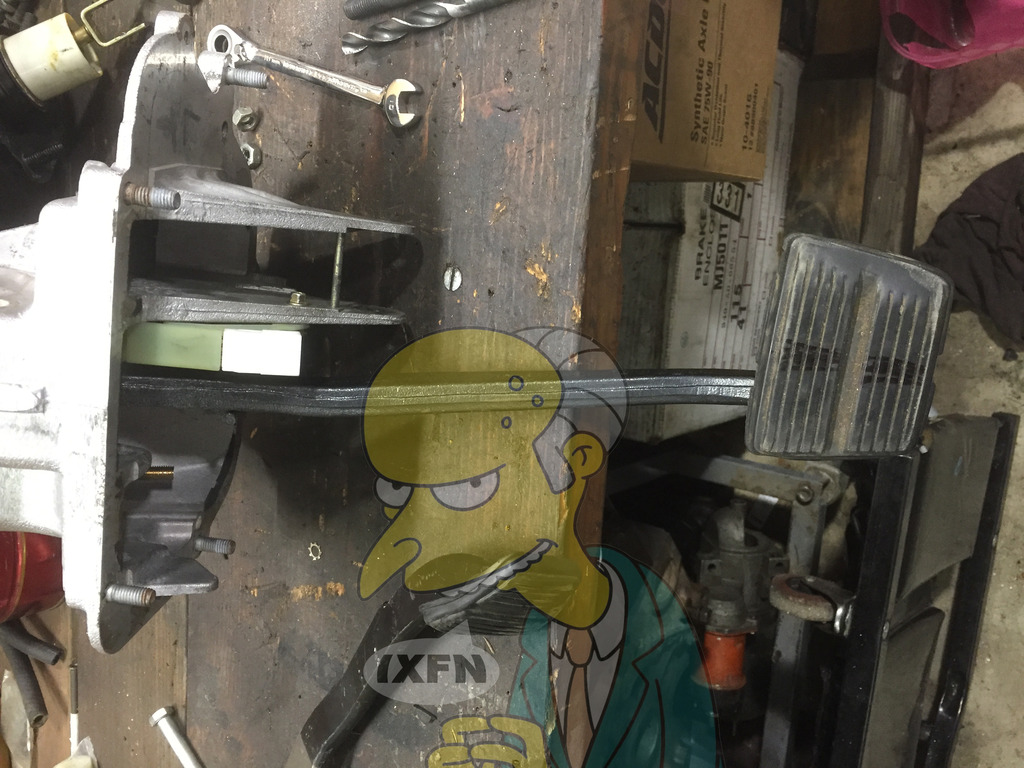
This is actually a brake pedal from an early 3rd gen manual Camaro, tweaked a couple ways, and narrowed for clutch pedal pad from the same application. The key here was to carefully narrow the top of the pedal and the inner bushing so it all fit snug in the housing without play, and utilized the nylon bushings (movement feels fantastic). At first I thought I may have gone too far with the super narrow clutch pedal, but it worked out by design - it's tight, more on that later.
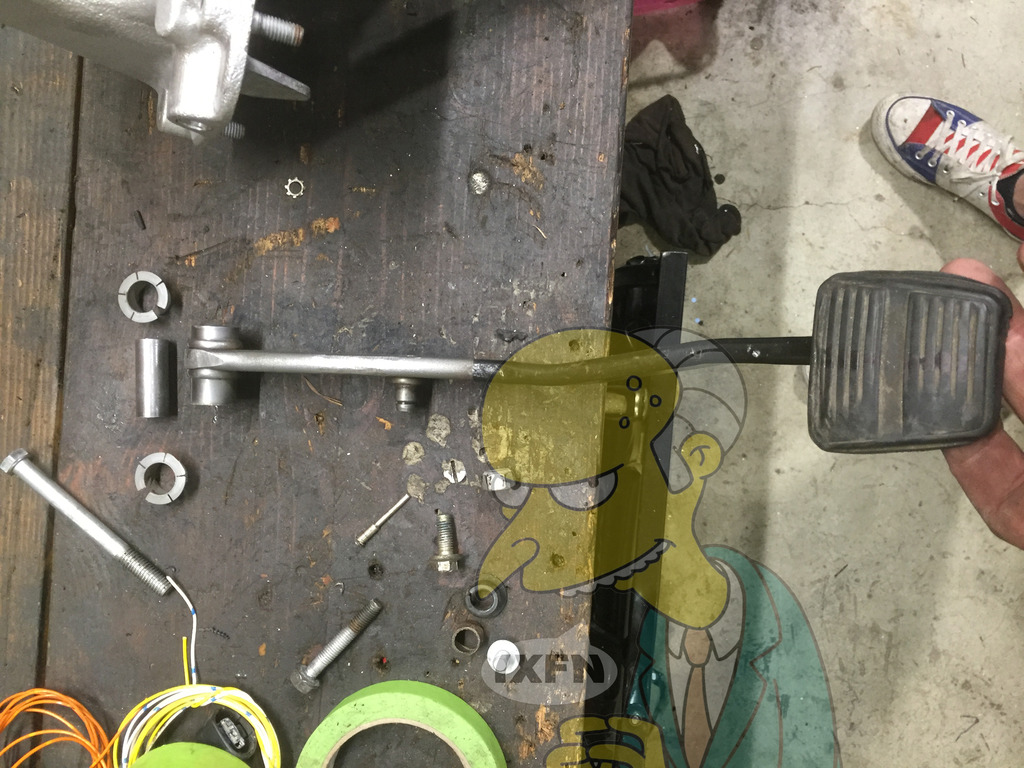
Perspective is poor here, they actually line up nicely at height- a bit more tweaking on the pad position for the clutch, and new pedal pads of course.
That's all for now, details on clutch pedal to master cylinder to follow.
Part numbers for LHD X300 manual pedals are MNA5373BA (brake) and MNA5390BB (clutch) if needed - the purist in me still wants to go that route, but DIY rules too.
So that will be $900 for that information, pay up... oh wait, I'm not an *******, so that will be $0.00! Have a nice day.
PLEASE EXCUSE THE MR. BURNS WATERMARK - I MAY BE ADDING IT TO MORE PHOTOS ACCORDINGLY (Foreseeable Politics).
Nothing major here; hideous XK8 calipers to accommodate the 13" rotors for now while sorting everything else out.

Here's a side by side of the X300 components vs X308; I was hoping to use the aluminum master cylinder by reclocking the 3 bolt booster, but due to other differences, and saving myself one more rabbit hole to go down, I'll just go with the iron one (both 1" bore anyway).

The X300 housing is a drop in to the X308, and the only modification to mount the Wilwood master cylinder was to enlarge the hole a couple MM, and grind a bit off the master cylinder on the inboard side of the mounting flange (pictured next).

The green arrow shows the radius cast to modify/follow, the yellow arrow is reference for the new clutch pedal bolt/axis.

Left is drilled, right is not, and the green line shows the axis for the rod/bolt/pin you're drilling for the pedal swings on. Side note for this pic; the X308 stop lamp switch works in the X300 housing.

Jag brake pedal modified to accept GM pedal pad cover - trim all you can from the left, you'll need the room!

This is actually a brake pedal from an early 3rd gen manual Camaro, tweaked a couple ways, and narrowed for clutch pedal pad from the same application. The key here was to carefully narrow the top of the pedal and the inner bushing so it all fit snug in the housing without play, and utilized the nylon bushings (movement feels fantastic). At first I thought I may have gone too far with the super narrow clutch pedal, but it worked out by design - it's tight, more on that later.

Perspective is poor here, they actually line up nicely at height- a bit more tweaking on the pad position for the clutch, and new pedal pads of course.


That's all for now, details on clutch pedal to master cylinder to follow.
Part numbers for LHD X300 manual pedals are MNA5373BA (brake) and MNA5390BB (clutch) if needed - the purist in me still wants to go that route, but DIY rules too.
So that will be $900 for that information, pay up... oh wait, I'm not an *******, so that will be $0.00! Have a nice day.
The following 3 users liked this post by ixfn:
#32
07-17-2016, 03:50 AM
 Lookin' good!
#33
07-17-2016, 04:47 AM

Veteran Member
Just read through your post, I'm impressed by your work. It is good that you have a nice big garage to work in though, sadly I am not blessed with such a thing!
You should get in touch with Budwiser though to see if they want to donate to your project seeing as you've given them some free advertising with all their boxes. Good storage tip though!
I look forward to seeing how you get on.
You should get in touch with Budwiser though to see if they want to donate to your project seeing as you've given them some free advertising with all their boxes. Good storage tip though!
I look forward to seeing how you get on.
#34
07-17-2016, 09:41 AM
Thanks - that remark was just me airing frustrations - I should probably quit that (clearly there's a backstory).
Thank you, just trying execute the cleanest swap I can. Blessed is a good word for the shop, I couldn't have done it otherwise. The Bud boxes are a bit trashy but damn they work well!
Just read through your post, I'm impressed by your work. It is good that you have a nice big garage to work in though, sadly I am not blessed with such a thing!
You should get in touch with Budwiser though to see if they want to donate to your project seeing as you've given them some free advertising with all their boxes. Good storage tip though!
I look forward to seeing how you get on.
You should get in touch with Budwiser though to see if they want to donate to your project seeing as you've given them some free advertising with all their boxes. Good storage tip though!
I look forward to seeing how you get on.
#35
07-17-2016, 02:33 PM

Still doing my research. Question for you: would this harness adapter have helped your wiring? It's new from Pace and seems like it would be nice for a lot of builds.
GMP-AWRE5130 - LS Pass Thru Harness

Padre
#36
07-17-2016, 09:31 PM
Honestly no, that looks handy and all, but you get deep enough into the harnesses to access those connections directly anyway. I suppose if you were working with a completely standalone harness that was pre-made, it would be convenient, but then again, a competent standalone harness should have those provisions readily available anyway.
The following users liked this post:
Padre (07-17-2016)
#38
07-17-2016, 10:29 PM
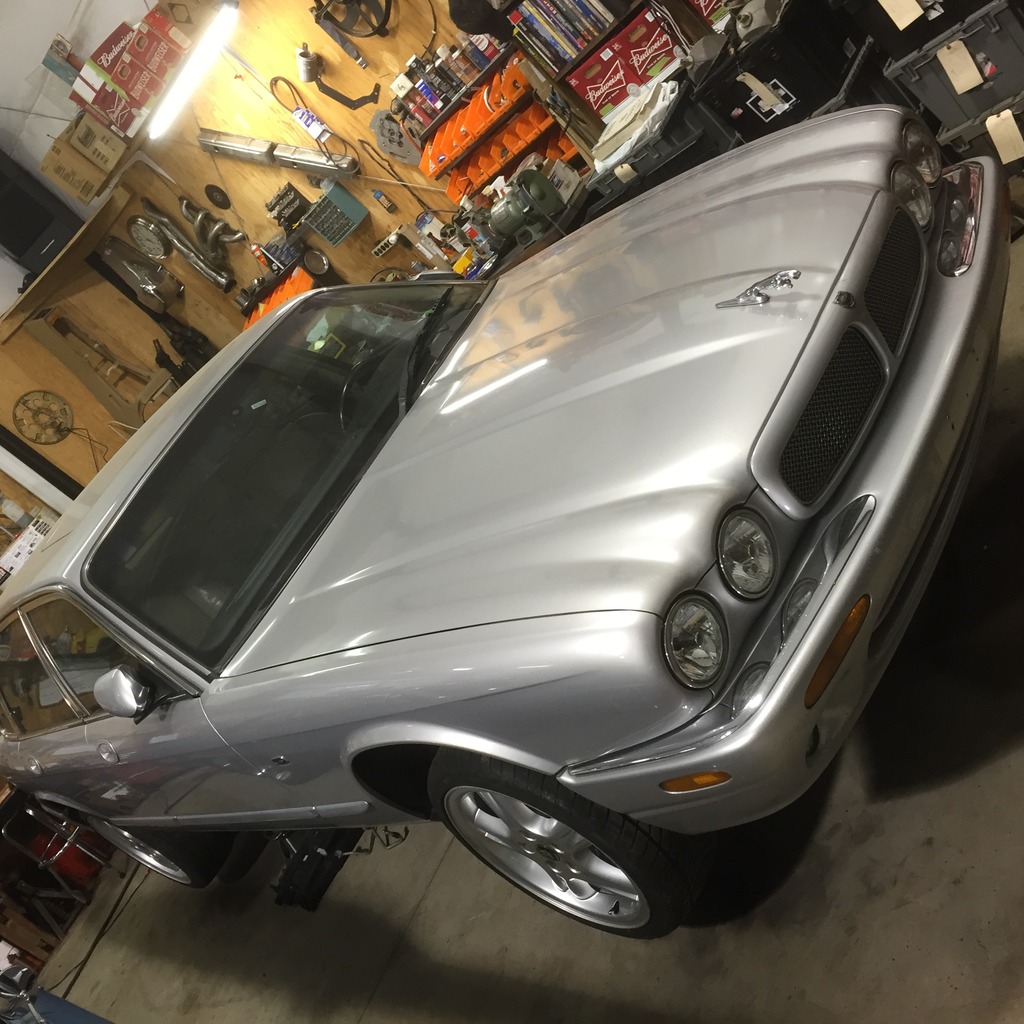
All over the place today, just slapped one of the as-is XK8 calipers with bracket to ensure it would fit - so there you have it, 12" to 13" brakes on the cheap using XK8 stuff (should be the same as X308 XJR, right? Cataloging can be a disaster for these cars). Ugly either way, will revisit this arrangement later.
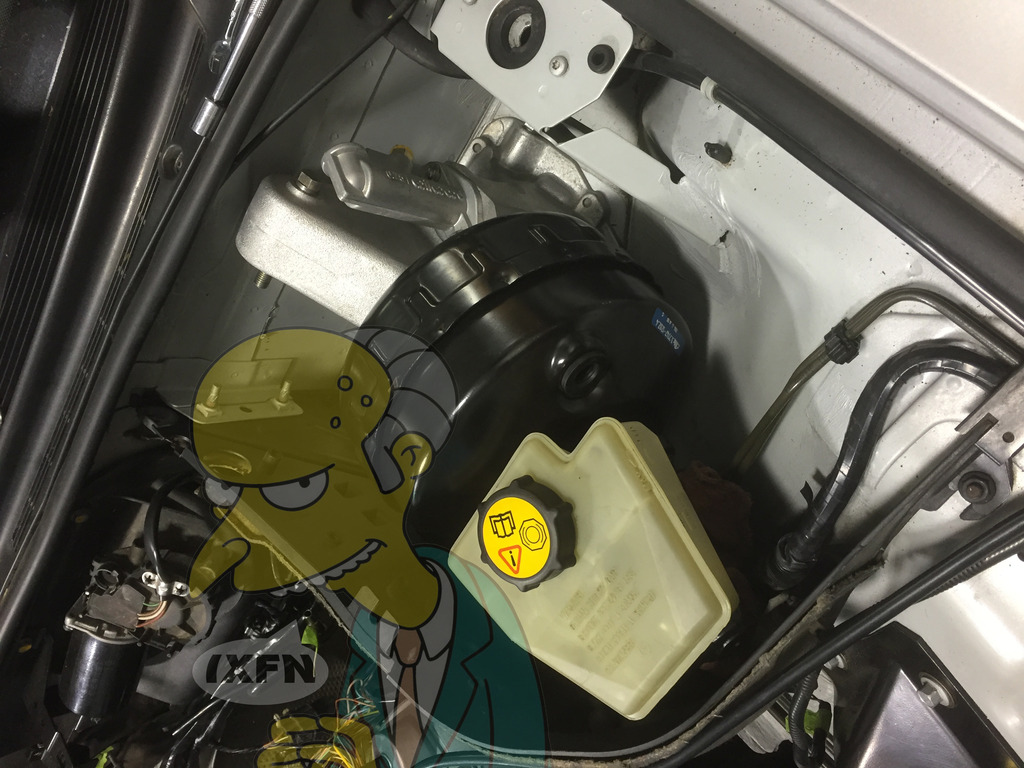
Decided to mock a few things in place to get an idea of overall fit and plumbing obstacles.
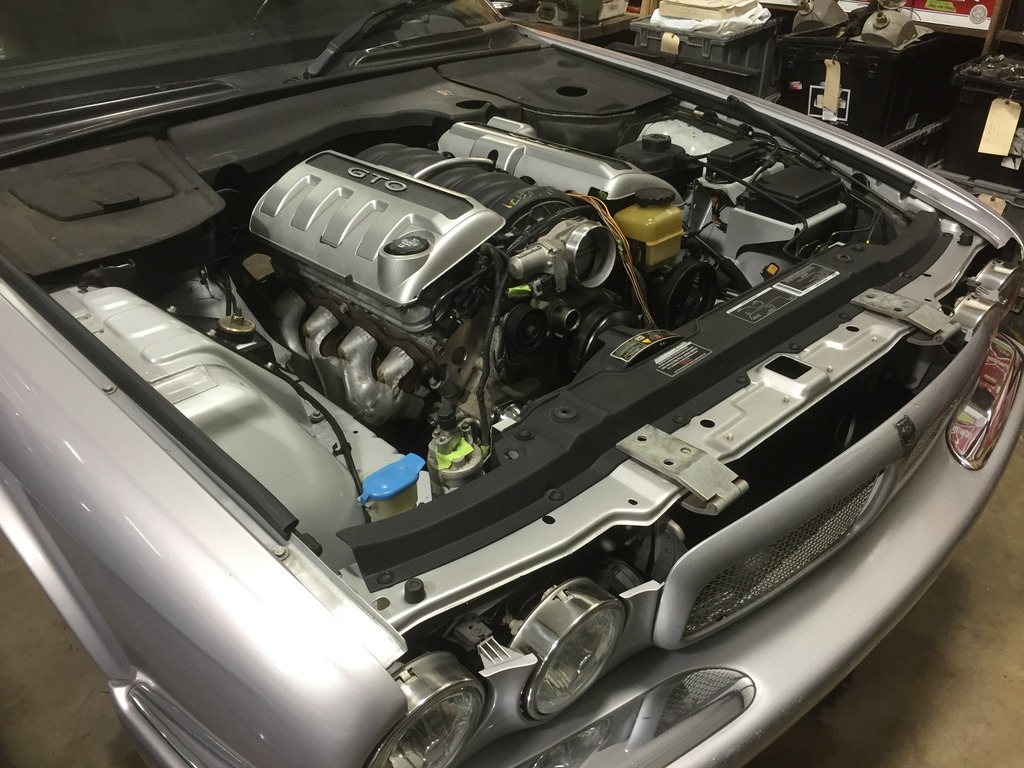
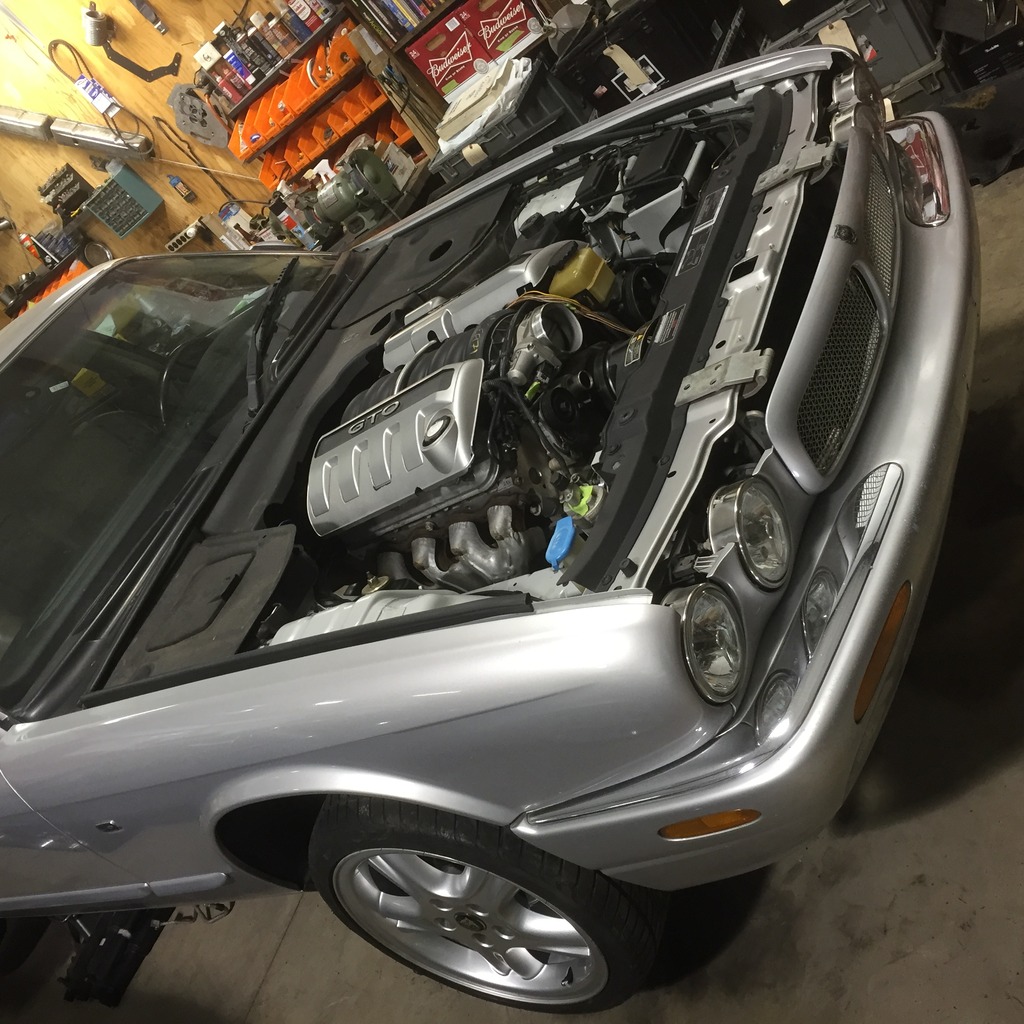
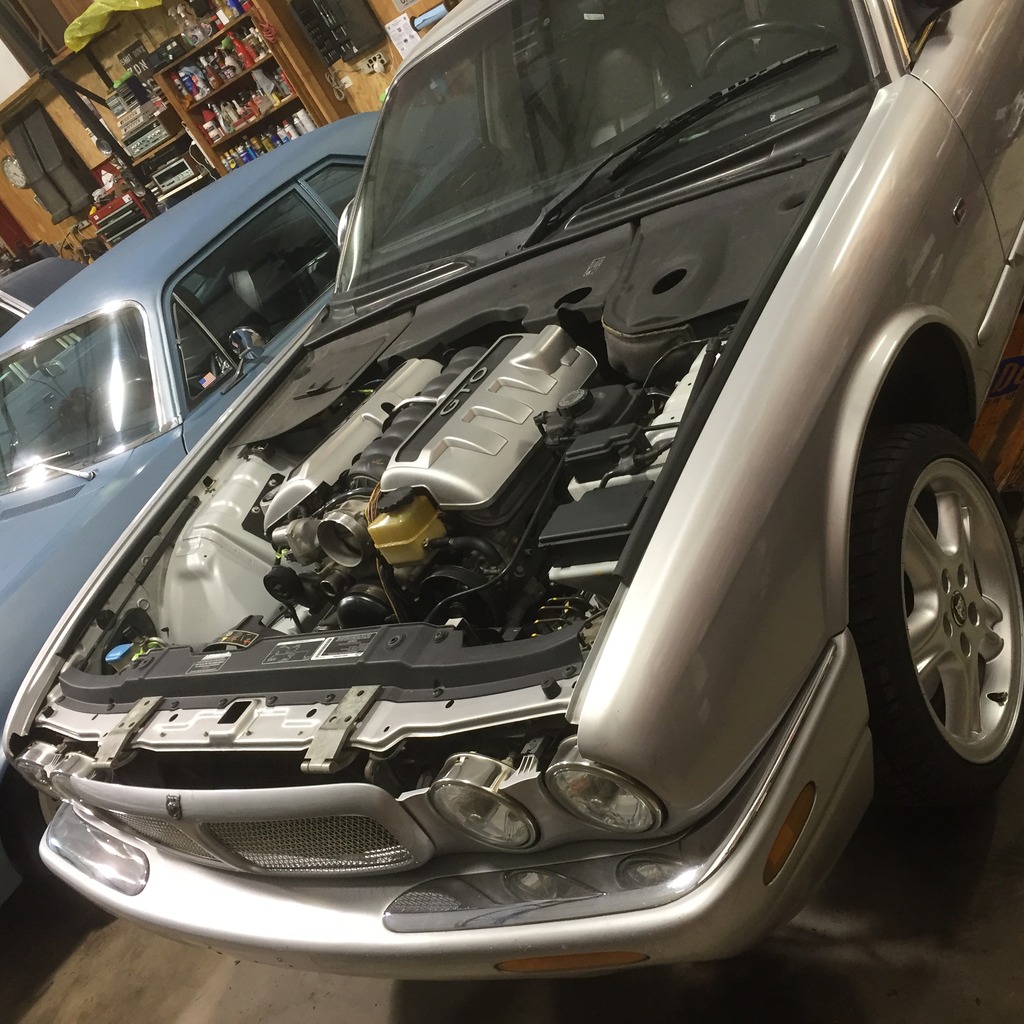
Then I wondered about the hood...
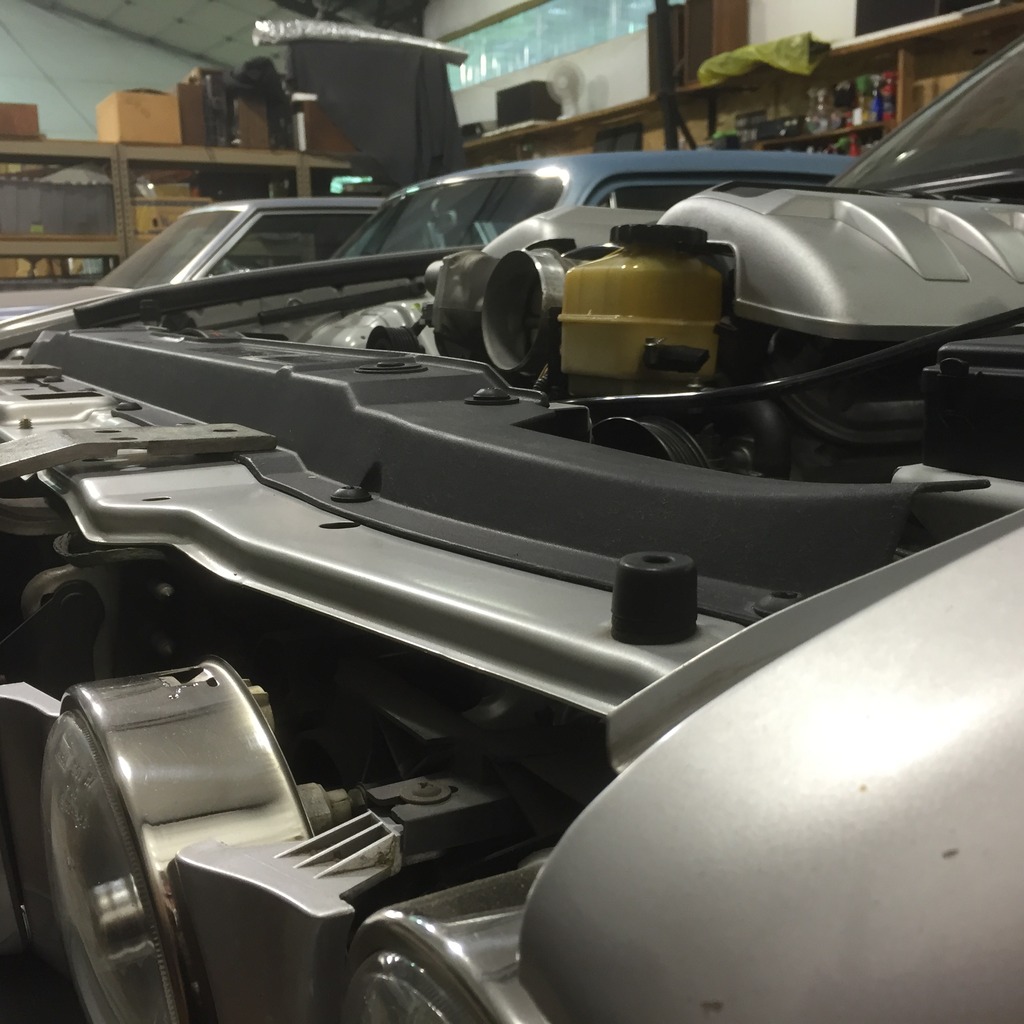
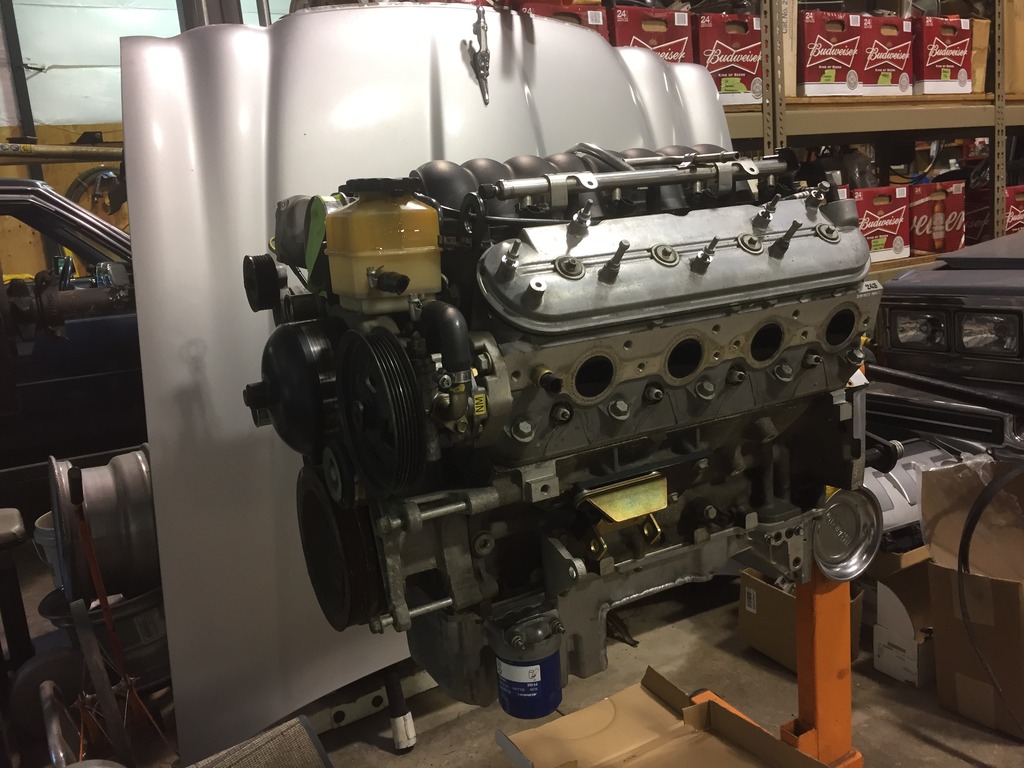
BAM! The GTO covers don't appear to fit, not with the hood pad anyway. The throttle body is quite close, and the oil fill cap barely touches the pad - but it closes! Will need to double check the power steering reservoir.
Worked on cooling system lines, fuel lines, steering lines, but didn't address anything further with the pedals - until next time!

Decided to mock a few things in place to get an idea of overall fit and plumbing obstacles.


Then I wondered about the hood...

BAM! The GTO covers don't appear to fit, not with the hood pad anyway. The throttle body is quite close, and the oil fill cap barely touches the pad - but it closes! Will need to double check the power steering reservoir.

Worked on cooling system lines, fuel lines, steering lines, but didn't address anything further with the pedals - until next time!
The following users liked this post:
xjay8 (07-26-2016)
#39
07-17-2016, 10:41 PM
It is a lot of wiring, and it comes down to how "legit" you want it to be. Part of me wishes I had made it more standalone, but it was also very satisfying to take the time studying schematics to integrate and re-purpose as much of the Jag wiring as possible.
The following users liked this post:
xjay8 (07-26-2016)
#40
07-19-2016, 04:30 PM
Veteran Member
The Bud boxes are a good idea, although the amount of them makes me slightly concerned about your alcohol intake! Just kidding! Good Idea.