
1976 XJC Rescue
#1
 05-03-2016, 12:04 AM


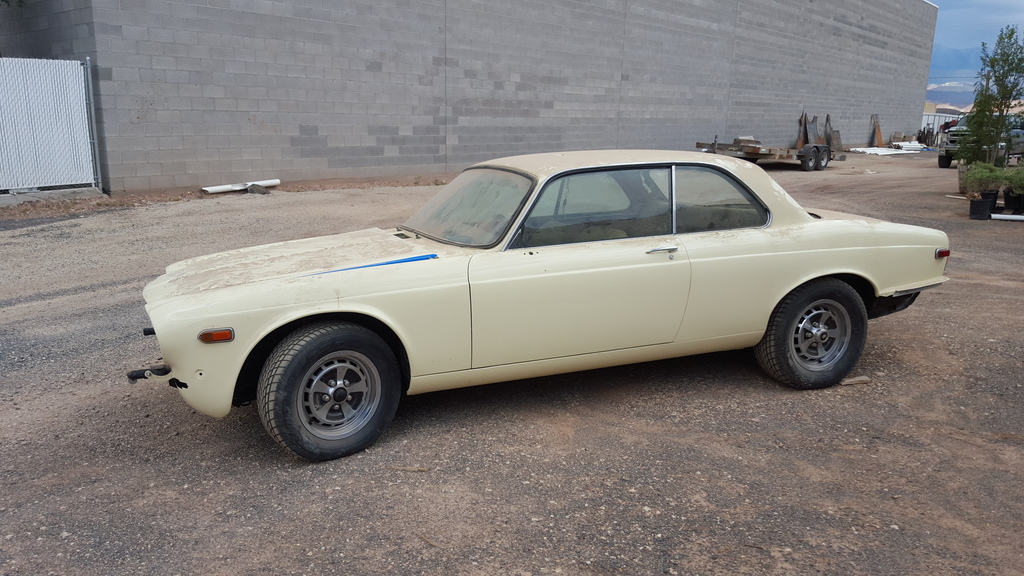
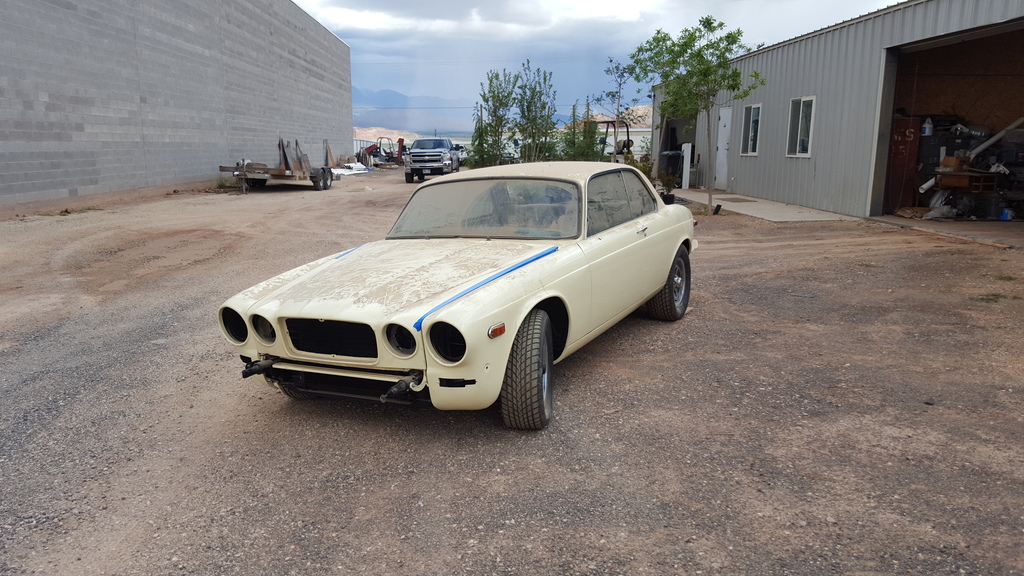
Well, I finally got a chance to get my newly acquired coupe back to the house and really start looking it over. It looks to be a very solid car with no rust inside or out. The chassis had been restored at some point, with what looks to be very little mileage on it. Paint is good and the seats and door panels are brand new also. The bad news is that it's missing almost all of the trim, Front and rear bumpers and rear window. Not all bad, but it may take awhile to find parts that are as nice as the rest of the car.
Step one will be to install the new fuel tanks and get it mobile, then I'll move on to reassembling the interior. Wish me luck haha!
Step one will be to install the new fuel tanks and get it mobile, then I'll move on to reassembling the interior. Wish me luck haha!


#2
05-03-2016, 02:31 AM

Join Date: Jan 2014
Location: Delaneys Creek,Qld. Australia
Posts: 28,379
Received 6,317 Likes
on
4,367 Posts
#3
05-03-2016, 03:41 AM

Join Date: Mar 2015
Location: Dural, Northwest Sydney. Australia.
Posts: 38,881
Received 3,805 Likes
on
2,785 Posts
#5
05-03-2016, 09:17 AM

Veteran Member
Join Date: Mar 2014
Location: Tehama County, California, USA
Posts: 25,161
Received 8,935 Likes
on
5,285 Posts
#6
05-03-2016, 09:44 AM

Veteran Member
Join Date: Jul 2012
Location: Walnut Creek, California
Posts: 6,796
Received 2,399 Likes
on
1,880 Posts
Super!!! The hunt begins. All part of the challenge and fun, of course.
1. In 1958, I built a "T" Ford speedster. Started with a derelict 23 Ford that had last seen service in the fields as an oiler for tractors. Gathered stuff from all over, mostly cast off stuff. It became a very nice Cat yellow and black car. Yellow to commerate some of it's [past
heritage.
2. Decades later. A "Hot Rod of the forties" theme. Began with the cast off chassis, axles, steering and engine and transmission from a guy's Street rod project. He kept the 40 coupe body and fenders, etc. More alterations and chasing. Fun. Stripped to the bones. "Z'd the frame. Dropped front axle from Classic Mordrop. First plan of hot 4, morphed into hot 46 V8. Red 16'" wire wheels. 32 grill and shell.
27 T roadster repop in glass body. Lots of garage time in joining all this stuff. But, wow, Hot flattie on headers and twin straight pipes!
The epitome of vroooom!!
Carl
#7
05-03-2016, 05:06 PM

Trending Topics
#8
05-03-2016, 05:24 PM
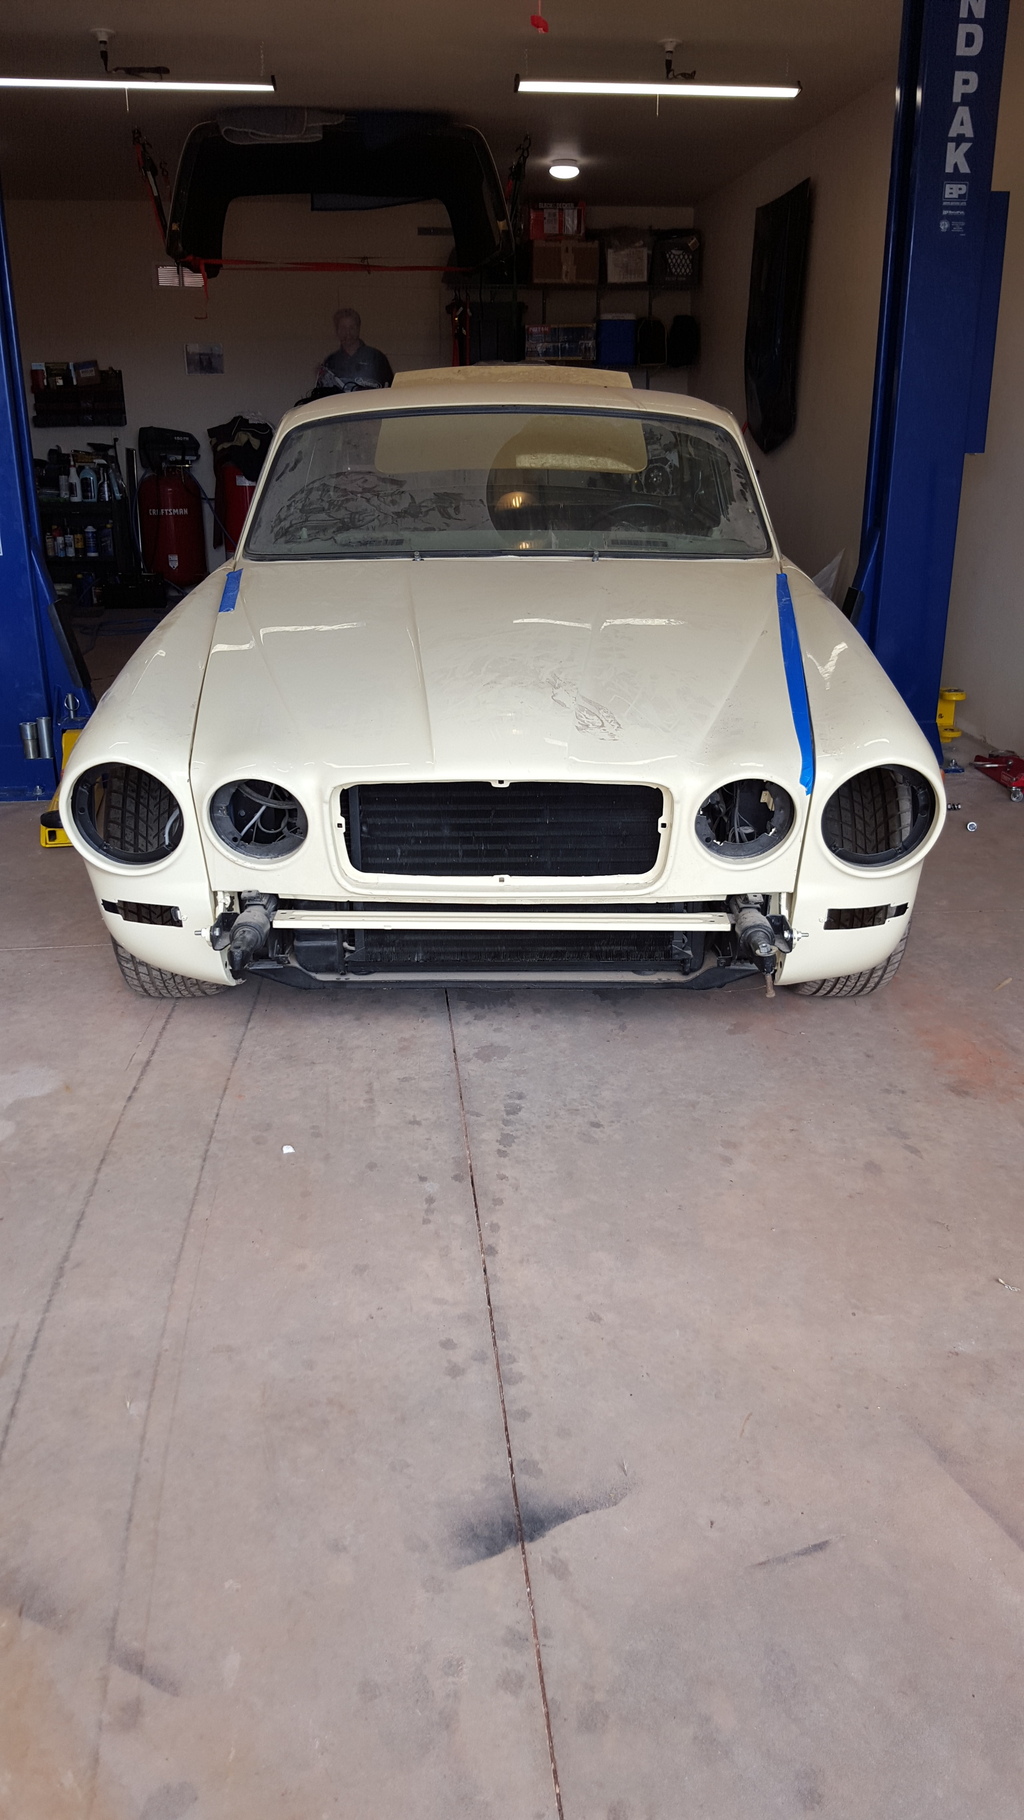
Thanks guys, it should be a fun little project. I think I have a line on almost everything except the front bumper. If anyone has any suggestions on where to get one it would be much appreciated.
The only other thing I had a question about at this point is how exactly the hood mounts and is adjusted at the front hinge point. I'm missing all of the correct hardware and such. If anyone has a series 2 car with some pictures of this area, it would help me out.
The only other thing I had a question about at this point is how exactly the hood mounts and is adjusted at the front hinge point. I'm missing all of the correct hardware and such. If anyone has a series 2 car with some pictures of this area, it would help me out.
#9
05-03-2016, 05:34 PM

Senior Member
One source of the bumpers is Harrington who do some stainless steel ones.
XJ6 S1 | Harrington Group
Not sure about the US spec bonnet hinges, but AFAIK they can be adjusted through the grill hole.
XJ6 S1 | Harrington Group
Not sure about the US spec bonnet hinges, but AFAIK they can be adjusted through the grill hole.
The following users liked this post:
Jeremy58 (05-03-2016)
#10
05-03-2016, 06:27 PM
Thanks, I had looked into the Harrington bumpers. I am assuming that these won't just bolt up to the car. Does anyone know how much modification it takes to fit these? I think the euro bumpers look great, I'm just not sure much front end modification it takes to get them to work, I've heard it's fairly significant.

#12
05-04-2016, 08:39 PM
[QUOTE=slofut;1454910 Is the interior color cinnamon?
Euro bumpers can't be much more than brackets and new marker lights...[/QUOTE]
I believe its either Biscut or "New Tan" which may be pretty close to the same color. I'm getting some color swatches sent to me now. I may finish the upper trim panels in matching leather, not sure which look I prefer yet.
I had heard that unless you had a whole series I front end, the euro bumper would not fit. That doesn't really make much sense, but I have also yet to see a detailed swap. Might be just that easy.
#13
05-04-2016, 10:40 PM

Veteran Member
Thanks, I had looked into the Harrington bumpers. I am assuming that these won't just bolt up to the car. Does anyone know how much modification it takes to fit these? I think the euro bumpers look great, I'm just not sure much front end modification it takes to get them to work, I've heard it's fairly significant.
The clean way is to use Euro hood hinges....good luck finding them though...sometimes they pop up on Ebay.co.uk
If you cant find them then it is possible to modify american hinges by flush cutting them and welding on a plate and stud to mount
For the rear you need to cut off the protrusion for the USA bumper shock and then weld a plate flush to the body and then weld a bolt to that plate forming a stud to bolt the bumper to.
The following users liked this post:
Jeremy58 (05-05-2016)
#14
05-04-2016, 11:49 PM
Veteran Member
Hi Jeremy
Welcome. Great to see another Coupe coming back to life. We are making steady progress here on ours : https://www.jaguarforums.com/forum/x...thread-156495/
We are just at the fuel tank stage. We have replaced both tanks and senders, both switch over valves in the trunk, and the fuel pump. All rubber and metal hoses have been replaced with stainless steel braided. We just have the runs front to back under the car to do and we'll be back in business. A few pics of the trunk space attached, but more importantly, a few pictures of the hood latches as you asked for.
Our car is 100% all there, so if you need other pictures of things you are missing, let me know.
The following users liked this post:
Jeremy58 (05-05-2016)
#15
05-05-2016, 08:21 AM
#16
05-07-2016, 09:36 AM
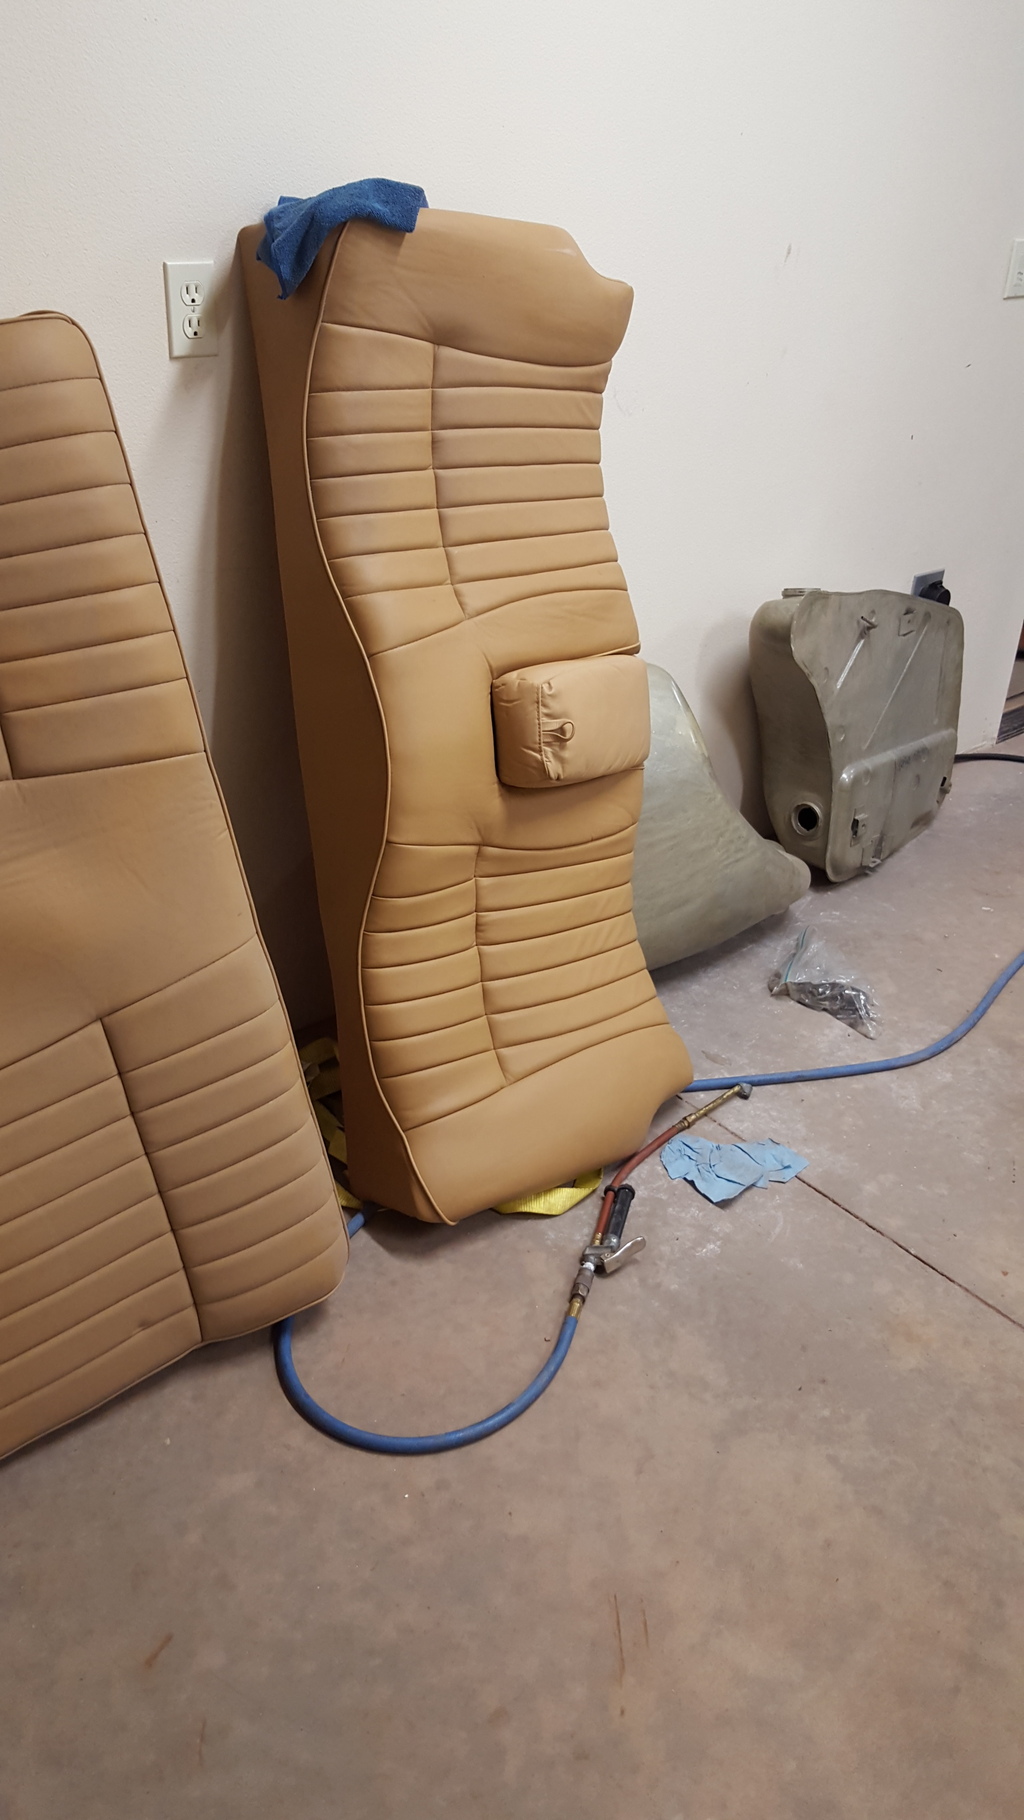
Quick update, I haven't gotten too far into the car as of yet. Mainly cleaning and trying to eradicate all of the body shop dust out of the car. I think I have a bulk of the missing parts sourced. My wife is going to have a stroke when she sees the pile of boxes that will bee arriving!
Got the rear seat cleaned up. The covers are brand new, but they were covered in dust. Massaged them out with some Zaino Leather Cleaner/Conditioner, then followed up with their protectant. You can see the difference between the seat back and lower cushion.
I do have one question before I stab the fuel tanks. My new tanks have bungs both front and back. The front side looks to be where the sender/fuel feed goes, what was installed in the rear bung? In tank fuel pump? And if I don't end up going that direction what are your opinions about how to seal off that rear bung?
Got the rear seat cleaned up. The covers are brand new, but they were covered in dust. Massaged them out with some Zaino Leather Cleaner/Conditioner, then followed up with their protectant. You can see the difference between the seat back and lower cushion.

I do have one question before I stab the fuel tanks. My new tanks have bungs both front and back. The front side looks to be where the sender/fuel feed goes, what was installed in the rear bung? In tank fuel pump? And if I don't end up going that direction what are your opinions about how to seal off that rear bung?
#17
05-07-2016, 02:16 PM
Veteran Member
Join Date: Mar 2014
Location: Tehama County, California, USA
Posts: 25,161
Received 8,935 Likes
on
5,285 Posts
Jeremy, tell your wife that at least she Knows where your money is going! You Could be spending it on something much more objectionable to her.
Fuel tanks:
My tanks had In-tank pumps, fuel line exits the front bottom of the tank. It's a pretty good sized bung for removing the pumps from the tanks.
Sending units are in the upper back, look like a normal sending unit bung, with 2 spade connections or one spade and one bullet.
(';')
Fuel tanks:
My tanks had In-tank pumps, fuel line exits the front bottom of the tank. It's a pretty good sized bung for removing the pumps from the tanks.
Sending units are in the upper back, look like a normal sending unit bung, with 2 spade connections or one spade and one bullet.
(';')
The following users liked this post:
Jeremy58 (05-07-2016)
#19
09-05-2016, 03:09 AM
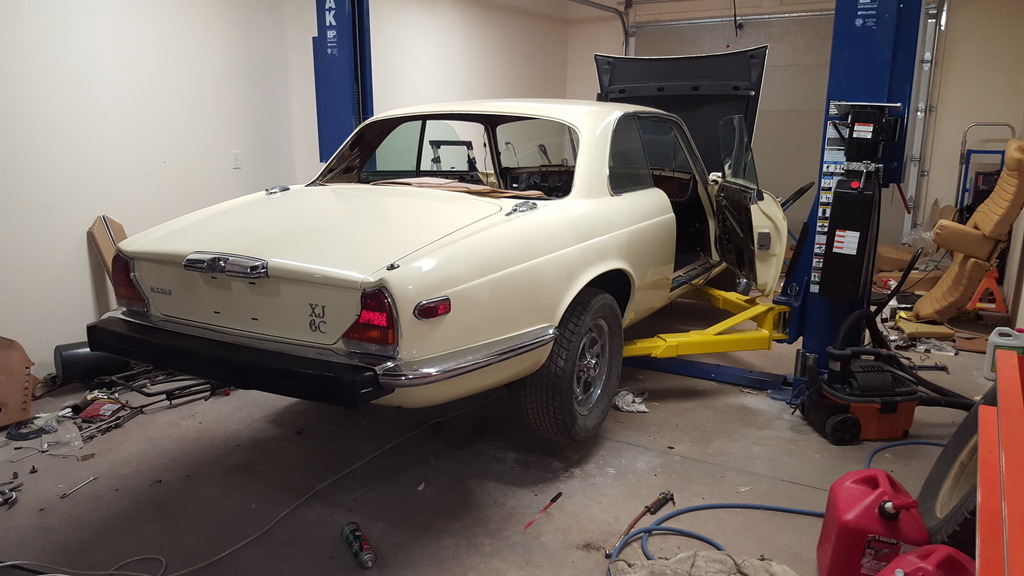
Hey guys, sorry for the lack of updates lately. I spend a majority of the summer up in Alaska, but finally made it home and got some work done on the coupe. Big news is that it LIVES! Fired it up yesterday after swapping all of the fluids. It Runs incredibly well considering how long it was sitting. I don't think it even needs any tuning, other than maybe a couple tweaks of the carb. Here's some pics of where I'm at.
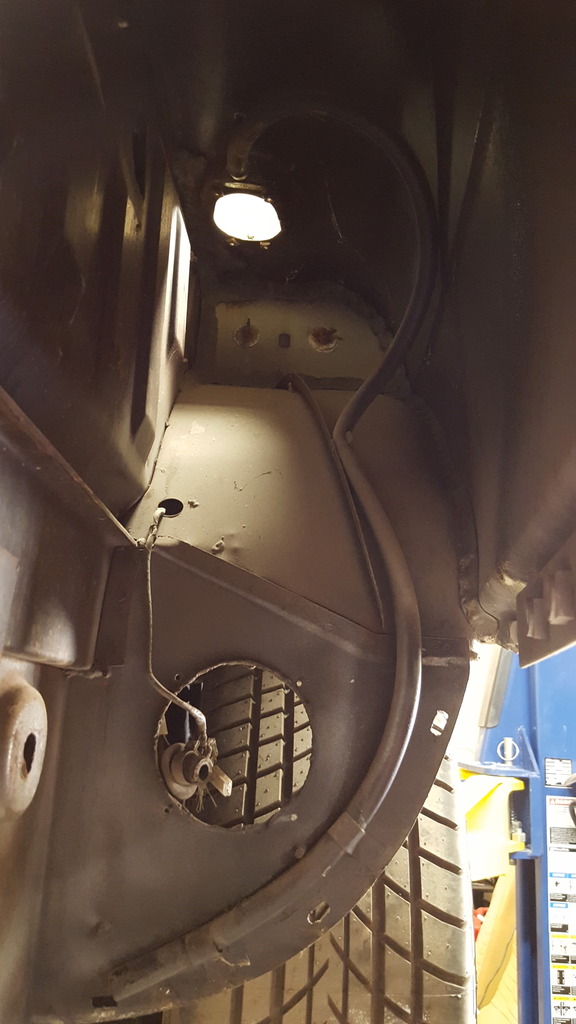
Dusted out the fuel tank wells. All of the undercarriage has been cleaned and painted including the fuel tank wells
Tanks installed, new senders and hardware. Tanks have been epoxy coated internally to ward off any future corrosion.
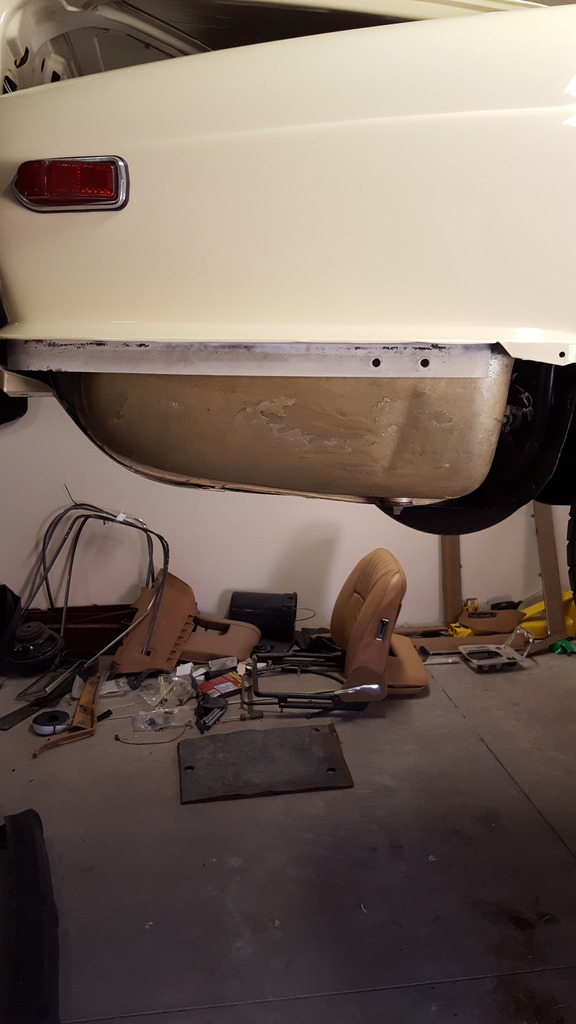
Rear end buttoned back up. I was able to source a majority of the missing trim pieces from David Boger. Super good guy, really helped me out! You'll notice the series 3 tailights. The car was already set up with them when I got it. I was on the fence about whether to go back to the series 2 set up or not. I ended up keeping them and am really pleased at how clean the rear looks all put together. That and I didn't end up having to drill out the holes that they had filled in the new paint!

Dusted out the fuel tank wells. All of the undercarriage has been cleaned and painted including the fuel tank wells

Tanks installed, new senders and hardware. Tanks have been epoxy coated internally to ward off any future corrosion.

Rear end buttoned back up. I was able to source a majority of the missing trim pieces from David Boger. Super good guy, really helped me out! You'll notice the series 3 tailights. The car was already set up with them when I got it. I was on the fence about whether to go back to the series 2 set up or not. I ended up keeping them and am really pleased at how clean the rear looks all put together. That and I didn't end up having to drill out the holes that they had filled in the new paint!
#20
09-05-2016, 03:29 AM
Moving on to the interior. The carpet wasn't in horrible condition, but I had to pull the seats anyway so I figured I may as well swap it out with new goods.
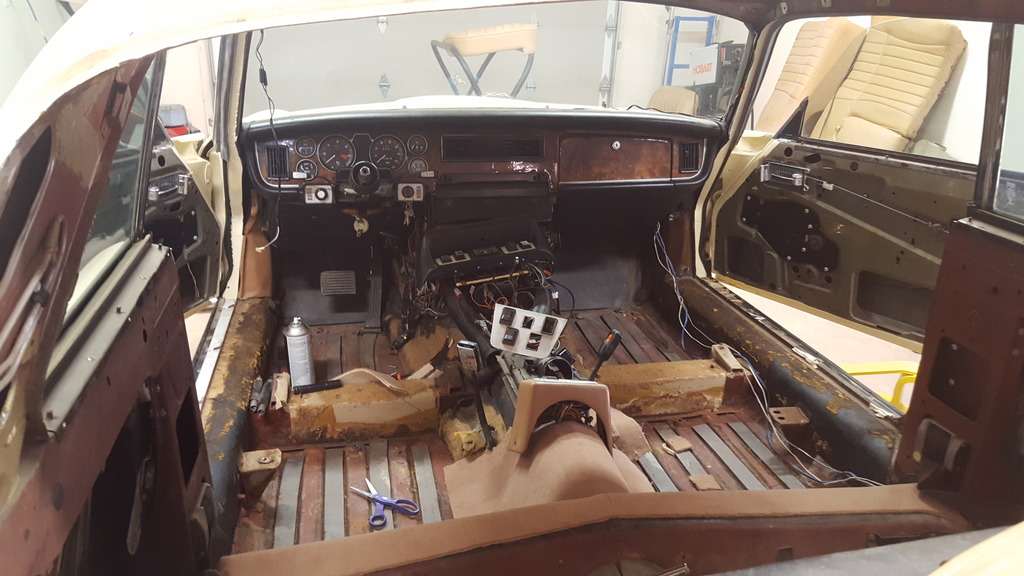
Yeesh, pretty scary. Check out those floor pans though, super clean! That's a California car for you.
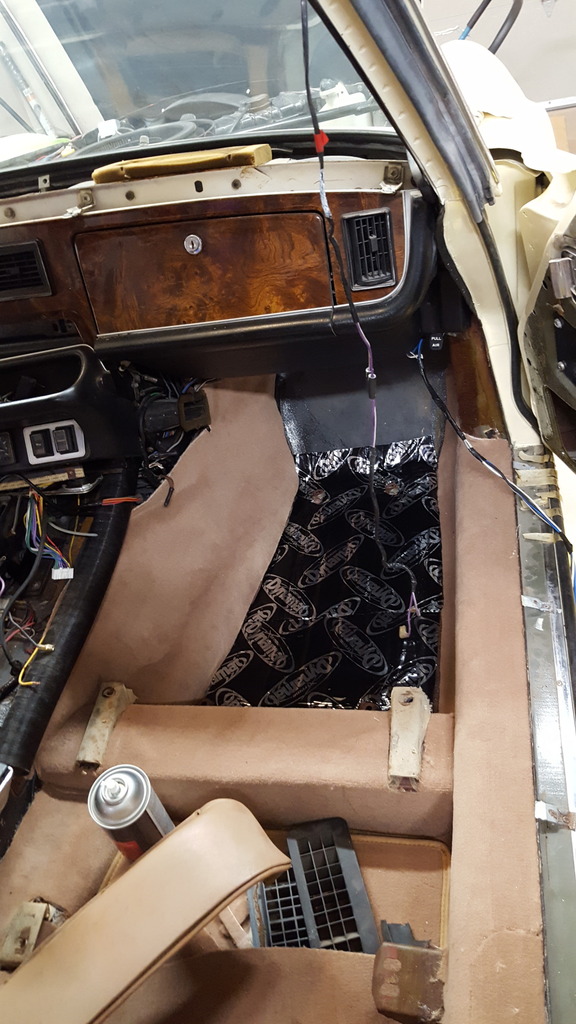
Layed down some dynamat along with new insulation.
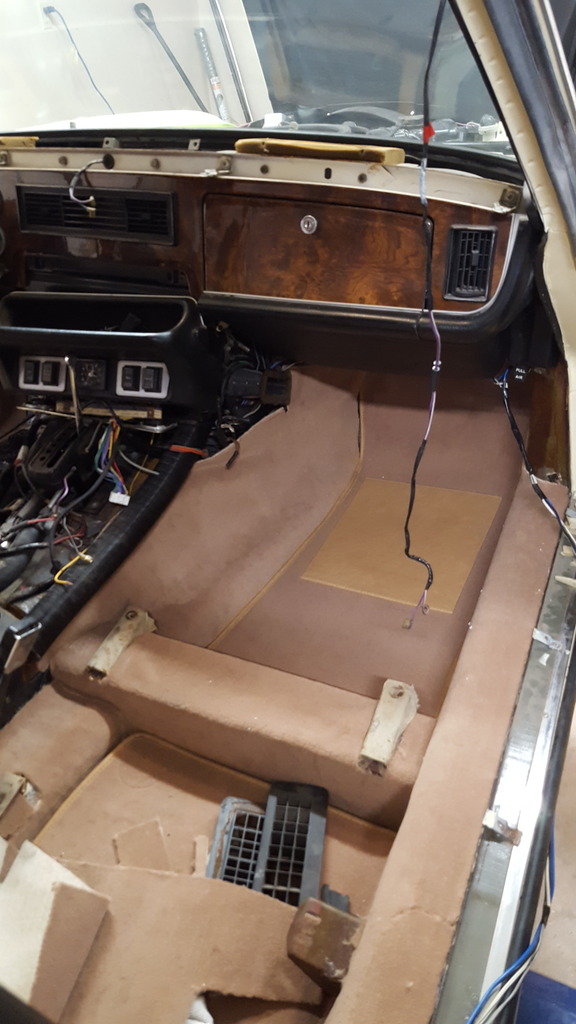
Looks way cleaner. I ended up pulling the dash pad also. It had a couple of cracks in it and you would definately notice it against the new interior.