When you click on links to various merchants on this site and make a purchase, this can result in this site earning a commission. Affiliate programs and affiliations include, but are not limited to, the eBay Partner Network.
The first thing was to strip the car out almost completely and get it on to the rotisserie.
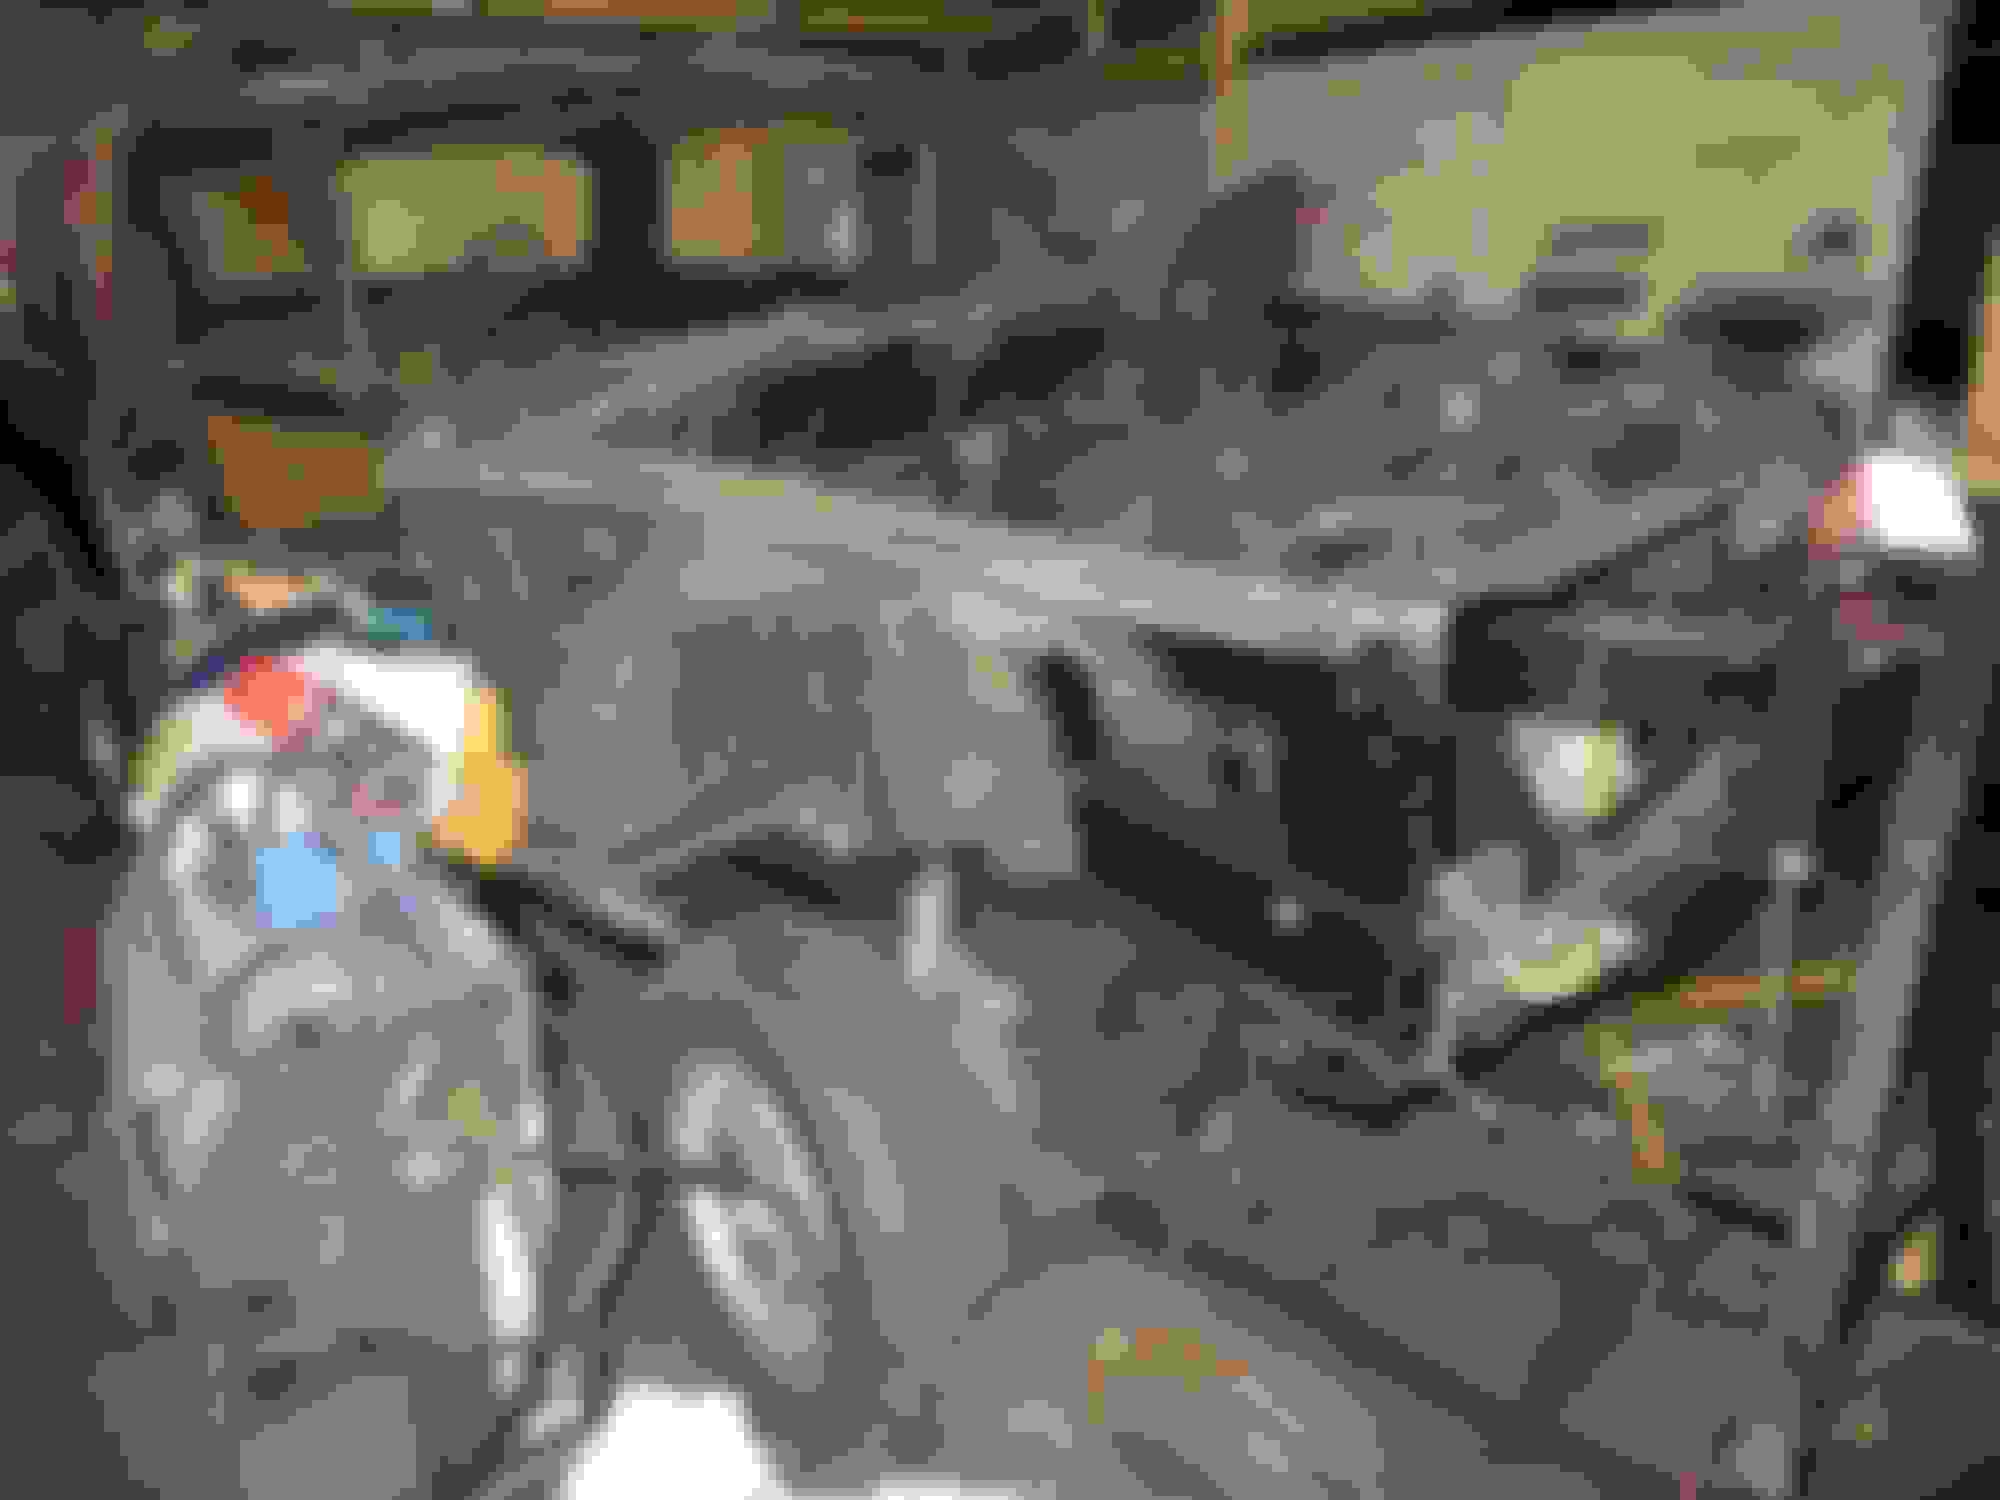
There was the first major problem (well after the rusted in screws etc.). The jig attaches to the bumper mounts and as you can see there wasn't much left of the front chassis or bumper mounts.
So I had to rebuild this section, before that I had to make a metal folding brake which took me a few days, not entirely happy with the jig but it works and did the job (until I redesign and rebuild it).
Oh Goodie!
You get to Fabricate nearly the whole entire car!
My driver floor just under the gas pedal was lacework; the shop floor under the car was plainly visible. By comparison, your driver floor looks solid, sound and pristine!
Appearances can be deceiving I know.
Anjum, yer gonna have Such a lot of fun with this car!
I'll be watching!
(';')
There is fun and there is "fun". The first is clearly defined. The latter, beyond definition.
But, I seen worse !!! On another forum, we were regaled by the tales
of a nucleur engineer that took up fixing Jaguar rust buckets. He taught himself the art of MIG welding. The first efforts were clearly those of a beginner. As the tales progressed, his skills improved vastly.
At least your "professionals" used metal. I've seen patching with chicken wire and "plaster". Outwardly, looked OK. Strength, none....
Or old license plates screwed to metal that just barely formed an anchor.
Inner wing repairs using bits of sheet from donor jag as I didn't have the right thickness of new steel.
Inner box section formed from 2mm steel, hard work to get the shape right and the inner reinforcing plates made and welded in.
Inner box section welded in. Took a couple of attempts and corrections to get it to line up due to distortion from the welding. The top edge is spot welded on the flange and stitched on the top edge. I will fully seam weld later.
Outer reinforcing plate welded in. Spot welded and seam welded to seal it from water ingress and rust.
Front upright channel welded in, note the top is open to allow epoxy primer to be sprayed in. I put in a cross brace after refitting the front subframe to help it stay aligned. <br/>The mounting for the subframe has been fully seam welded at the sides , I will seam weld it underneath once I can rotate it on the jig for now it is stiched and spot welded. ditto the anti-roll bar mount.
A view from the other side.
Because it was so hard to form the u-shaped channel on the other side, I boxed clever and just welded in the side and bottom. THe top side was unrusted. The brown stuff is weld through primer.
Pic of the view from the wheel arch you can see the reinforcement plates, I decided to beef these up by running some welds down the edges (looks a bit messy but hey it's deep inside the channel. <br/>The bottom crossmember is clamped in position and the front subframe is in position to help align everything. Took measurements from various points as well.
The inner wing and reinforcement panels welded in
Front crossmember welded in, at last took some effort to get it into position. <br/>The suspension mount area has also been welded with 2mm sheet and seamed/ filled with weld at the top to stop water ingress. I will seam weld the suspension reinforcement plate as well as this is one one of the other areas prone to trapping water and rusting from between the layers.
welds ground down a bit (only had the angle grinder ) seam sealed polyurethane and epoxy primed again.
Epoxy primer inside and outside bottom cross member.
welds ground down a bit (only had the angle grinder ) seam sealed polyurethane and epoxy primed again.
Top cross member from donor xj6 fitted to brace.
Finally on the rotisserie!!!!! <br/>The bumper bracket were also for the donor XJ6 as the ones from the xjc were very rotten. The ones from the xj6 need a plate welding into each. rust removed by soaking in citric acid for a few days, cleaning, epoxy priming inside and out. I put some seam sealer around all the edges and the bolt holes to avoid them damaging the epoxy inside the box section, although I will abrade the epoxy primer there again apply more and then some Raptor.
The back on the jig as well I disconnected the subframe, removed the exhaust except for the over axle pipes then wound it onto the rotisserie. <br/>I have removed the tanks as well one actually had rusted through severely and been bodged with filler.
THe epoxy at this point in the external places at least is somewhat sacrificial as it will need to be panel beaten, welds cleaned up and smoothed etc. Then the epoxy primer seam sealer etc will be reapplied.
Don't like having to do the job twice but I wanted to get it on to the jig before I went on holiday. I didn't get as far as I wanted but it's enough.
The interior is stripped down to the blower motors, plenum (LnrB!!), associated plumbing and wiring, steering column and little else except a lot of rusty metal.
The rear and front screens are out, the doors are off and replaced with braces.
So tidied the garage up a bit, packed my bags and am boiling in the heat of the tropical sun!
A bit of warmth would be appreciated here. But, upper 50's and possibly upper 60's here clearly show, I'm spoiled. I do much better in hot weather than cold....
Added compliment. Adding braces to limit or eliminate warping from heat and relief from what ever bracing existed in the patched patches!!
In a past project. Much simpler critter than these, I set upon a chassis change. Known as "Zing". Model A Ford simple ladder frame.
Objective: Lower the body by raising the rear cross member.
I did it way back and the rails went wild!!! So, this time, I added a brace before the cut. Much better....
It will be freezing when I get back plus the double whammy of coming back from a hot climate will make it feel worse! There will be more braces going in later, especially as this will be on a rotisserie supported by the bumper mountings.
No secret project going on here, Elinor! I've been warning that this thread was coming for a while now. So far I've worked on it for 3 months including putting up the "garage" in a friends yard.
It's a bit slow as I first had to strip it out and the screws were even rustier than the XJ6 donor! and I needed to preserve the bits peculiar to the XJC.
I've managed to find a nearly complete set of waist trims (all bar one front wing trim) but they are in relativley poor condition. I'm thinking, rather than rechroming, of getting a set made out of stainless steel bar and polishing them. I'm not sure of my polishing skills for something like that. I asked one metal fabricator and he declined,i suppose not surprisingly.
The other idea I had was to wrap them in chrome vinyl and see how it looks, at least for a couple of years.
I won't drill holes etc to mount them, just use Sikaflex or similar. That's a long way off though!
The other thing I'm thinking about and trying to do as I go along is to identify all the water traps Jaguar built into the car (not difficult in this case!!!) and providing extra drain holes and rust protection as I go along. E.g. The front chassis rails I have put a couple of drain holes at the bottom, the upright I have put a couple of drain holes in the bottom above the chassis rails, the section at the top of the inner wings I have added a couple of drain holes. I will add more as I feel necessary.
I need to seriously address the drainage shortcomings under the rear windows as well as the sill-y little tube that jaguar thought was adequate is plainly not!
Not quite sure why the front floor pans rot on the XJs. One reason is obviously leaky windscreens but I'm sure there are others e.g. inner and outer sill rot. The Saab c900 often have wet floors (took me a little while to sort out where all the leaks were, but my C900 verts are now wet carpet free. At least Saab put some decent waterproofing (for then) under the water collecting sound insulation, unlike the bits of sponge in the Jags.
I will also be adding reinforcing plates to various bits e.g. the front and rear jacking points as well. I may have to use a bigger engine to pull the added weight!
Sorry to through cold water on you but that car is a gonner! IT's rusted and has thin metal in all the major stress points. The chassis may have settled and flexed so few of the seams will ever look right. If there is that much visible rust then there is probably much more you cant see in the rear frame rails, sills, under the rear seat, and the rails down the center of the transmission tunnel.
I hear what you are saying, (psst!! better not tell Stig that!!) I bought a rusty cheap one deliberately so I could strip it, weld it properly and improve it.
With so many "restored" cars the underlying rust and weaknesses are not addressed properly and show themselves a few years later. So it was a choice between buying a "decent" car and not being confident in what had been done, a fully restored by a known professional restorer, or someone on one of these forums, which would have cost me a fortune (and I still wouldn't trust a "professional" unless I knew him personally) or buying a heap that needed everything doing.
Yes, most of the areas you mention (and more, I have gone through the entire car! ) are rusty and will need serious refabrication (still got to have that discussion with Stig as to who has the rustier one!) but it will allow me to access all the internal structure and de-rust and rustproof as I go. The door gaps and boot gaps all seemed fine and there wasn't any attempts by the previous "welder/ butcher" to hide any distortion!
I'm aware that most professionals (and people!) will consider it the wrong decision but their motivation is different to mine, I'm not doing it for profit. I'm sure I will learn a lot along the way!
Appreciate the thought anyway and really like what you did with your XJC. I'm going to put some sort of tubing/ reinforcement inside the sills like Fiboys and yours but I haven't designed it yet, what size and thickness of tube did you use?
I will probably do your window motor conversion as well.
I want the outside to look as original as possible bar the paint and keep to the original style engine.

 12-01-2016, 04:38 PM