
Choosing the right weapons in the 21st century, or...., rattle can 101
#1
 05-01-2013, 11:45 PM

While my XKR is garaged for engine work I have had the opportunity to upgrade or repair the small issues found after purchasing a " pre-owned" cat. I must say the members of this forum have been so helpful in directions, maybe I can also throw in my 2 cents.
Having noticed the outside mirror covers have taken their good share of road rash,(normal chips and rock dings), I decided it was time for a repaint. I've been doing restoration/custom paint on auto's and bikes for over 30 yrs, actually started as a hobby/turned second job many yrs ago. 5 years ago I hung up the guns, sold all my equiptment, and decided to call it quits. So I thought.........................
Fast forward to today, and now wanting see my Cat as pristine as possible, the ability to "do it myself" overshadowed the thought of paying a shop to have it done. But, alas, I have paint equiptment no more. Soooo... here in lies the alternatives! I have had a loathing for "cheap rattle can fixes" and backyard paint repairs. But, have found that technology in that respect has grown in leaps and bounds. So, I jumped in, and after extensive research and came across automotivetouchup.com.
Reviews were good, so I made my purchase. Their site claims to custom mix and color match to our OEM color. I purchased the following
12oz aerosol 1924 Phoenix Red
12 oz aerosol easy sanding gray primer
12oz aerosol plastic parts adhesion promotor
12 aerosol high gloss clear
2k urethane clearcoat aerosol (yes, catalyzed urethane clear in a spray can!!!)
All told, about $74.00 in cost, including freight.
I removed the mirror covers, and sanded both down to base plastic, 220 dry first, then 400 wet. I removed ALL original paint as to avoid any lifting issues caused by fast drying new paint. The adhesion promotor was an extra that may not have been needed.
After sanding, cleaning, then preping, I began with the adhesion promotor, letting dry as reccomened, followed by primer. After several coats of primer, of which I allowed proper dry time, I again wet sanded with 800, cleaned preped, and was ready for color.
3 coats of color, letting flash between coats, then 2 coats of high gloss clear. Let me say, having owned some the BEST paint guns made, (SATA, Iwata,etc.) this stuff shot beautifully, laid down smooth, dryed quickly, temp was about 75 degrees.
Most of all, the color match was "dead nut on the money"!!!!!
Thank You, automotivetouchup.com !!!!!!!
Next step is to again wet sand w/800, then 2 or 3 coats of the 2k urethane clear. Now this I find amazing, as shelf life of catalyzed paint is short. To activate, you apply a special "button" in place of the spray head, push it down, replace with spray head, then shake to mix. You now have 24 hrs to use this clear before it hardens beyond use, amazing.
I have yet to shoot the urethane, (temp dropped) so I'll shoot it on the next available warmer day. I highly reccomend this to those of you looking for professional results with ease of use. Hmmm, maybe the front fascia next? I'll let the picks tell the story
The following 5 users liked this post by Hdpartsman00XKR:
GGG (05-02-2013),
JagTheRipper (05-22-2013),
Jeff in Tucson (05-02-2013),
RJ237 (05-02-2013),
SPIJohn (05-22-2013)
#2
05-02-2013, 12:18 AM

Senior Member
The following users liked this post:
Hdpartsman00XKR (05-02-2013)
#3
05-02-2013, 03:14 AM

Good write-up, Bob.
The fact that you took the covers back to base plastic in step 1 of the prep means anyone who needs a replacement for a damaged mirror can source a used one of any colour and then follow your procedure to match it to their vehicle. Much easier than trying to find one the right colour.
Graham
The fact that you took the covers back to base plastic in step 1 of the prep means anyone who needs a replacement for a damaged mirror can source a used one of any colour and then follow your procedure to match it to their vehicle. Much easier than trying to find one the right colour.
Graham
The following users liked this post:
Hdpartsman00XKR (05-02-2013)
#4
05-02-2013, 06:49 AM

Veteran Member
The following users liked this post:
Hdpartsman00XKR (05-02-2013)
#5
05-02-2013, 07:01 AM


Join Date: Apr 2012
Location: Summerville, South Carolina
Posts: 24,322
Received 4,170 Likes
on
3,636 Posts
The following users liked this post:
Hdpartsman00XKR (05-02-2013)
#6
05-02-2013, 07:36 AM
Yes Graham, replacing parts with non original color are best to be stripped to substrate before recolor, this avoids any possible bleed through or reaction with old paint. I'll post more pics after the 2k clear has been applied, temps under 70f for the next few days, catalyst takes much longer to "kick" when cool. Best to have temp over 72f.
Cheers to all
#7
05-02-2013, 08:43 AM
Veteran Member
Trending Topics
#8
05-02-2013, 10:10 AM
Senior Member
#9
05-02-2013, 10:57 AM
Senior Member
#10
05-02-2013, 11:10 AM
Veteran Member
#11
05-02-2013, 06:53 PM
Way to go Jeff, nothing like jumping in with both feet!! Sounds like you've had paint experience. Remember, the devil is in the details, prep, clean, prep, clean, prep...prep.....prep! The key to refinishing quality and longetivity is take your time, don't rush it, then have a little fun while your at it.
As I said, typical road debris acne on front fascia on my Cat, clear is delaminating on left front fender, so I'll go the same route as you. My mirror covers were the acid test of this product, which passed with flying colors, (LOL, pun intended) Yes, beats cleaning and mixing and reloading guns continuously.
Most important, if spot repairing, you can blend panel using color and high gloss clear. If doing so, color sand full panel (door, fender, bumper,etc.) Prime repair area, blend color and base clear into existing good paint. Color sand repair area and remainder of affected panel, clean and prep for Urethane clear. Thoroughly mask remainder of vehicle, leaving full panel exposed for Urethane clear. Prep clean and tack thoroughly, then shoot Urethane clear to cover FULL panel. Let each coat dry to "masking tape feel" stickiness. Then apply following coat, repeat. Approx 3-4 wet coats should give correct coverage and mil thickness. Allow to dry thoroughly, final sand and buff if need.
Now, sit back, pop a cold one, and admire your phenomenol repair, you have now become the neighborhood "Gunslinger." Bask in the glory and satisfaction that you did it all right in your own garage!!!!
Friends and family will be amazed, those that are unsuspecting will never know your such a deadly shot, and the bad guy's will cower in fear. Yeah, I know, corny, but what the hell.... Oh, and thanks WhiteXKR, now to purchase some Dorchester gray, as my trim is in need of attention.
Happy Shooting, Look forward to hearing others results
The following users liked this post:
sklimii (05-02-2013)
#12
05-02-2013, 07:05 PM
#13
05-02-2013, 09:58 PM
Senior Member
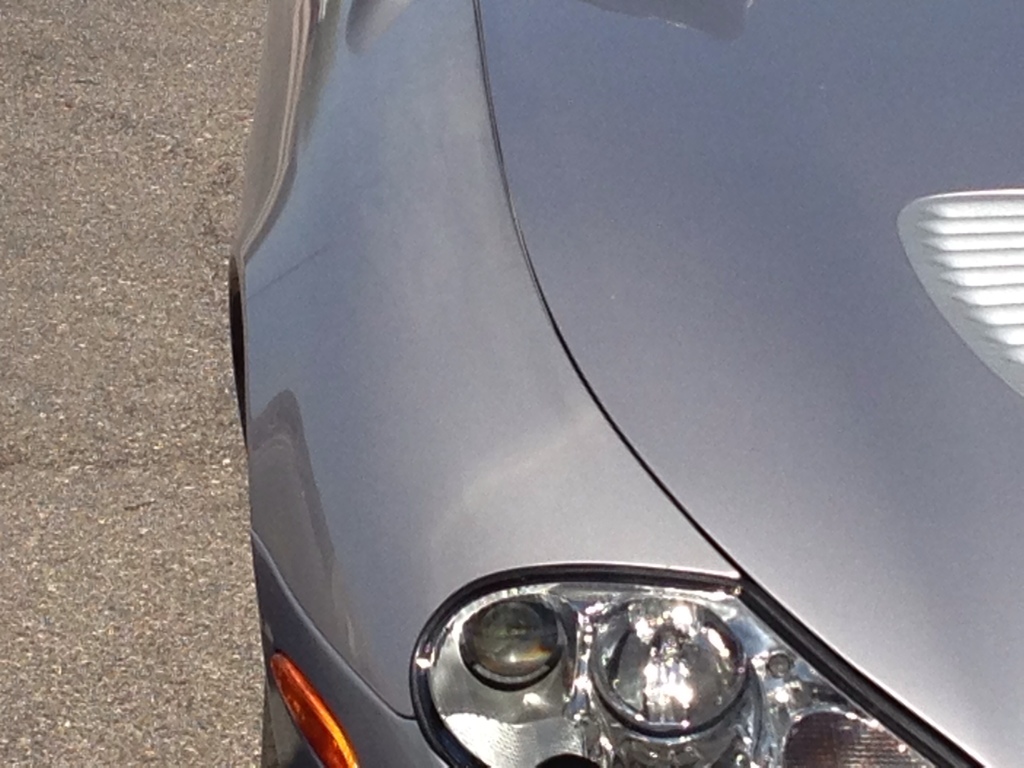
This is how the fender was when I bought the car last year. Whoever repaired a ding in the fender had no clue what they were doing. The grey that runs along the fender edge near the hood is just that... grey primer with a few atoms of silver metallic on it. It's time to get this fixed! I'll do it as soon as the paint supplies get here. I've painted a lot of things, but still appreciate the input. I'll do it like you suggested.
#14
05-02-2013, 11:00 PM
I see your issue of repair, hate to see shoddy work on such a regal ride, as your car looks great. Shoot a test (color and base clear) on the color card that comes with your paint supplies, then check against your best surface for match, especially metallic. Remember, you already have one repair possibly over original paint. Decide whether to shoot whole fender, of which I would then strip,prime, block, then shoot and clear, which is most labor intensive, or remove all old repair material to avoid any reaction (lifting) when new paint (especially if blending) is applied.
You seem to have things under control, as I see from your other posts your pretty crafty. Hope to see your repair looking like new, pm if me if I can help in any way
Best to you
You seem to have things under control, as I see from your other posts your pretty crafty. Hope to see your repair looking like new, pm if me if I can help in any way
Best to you
#15
05-21-2013, 10:00 PM
Senior Member
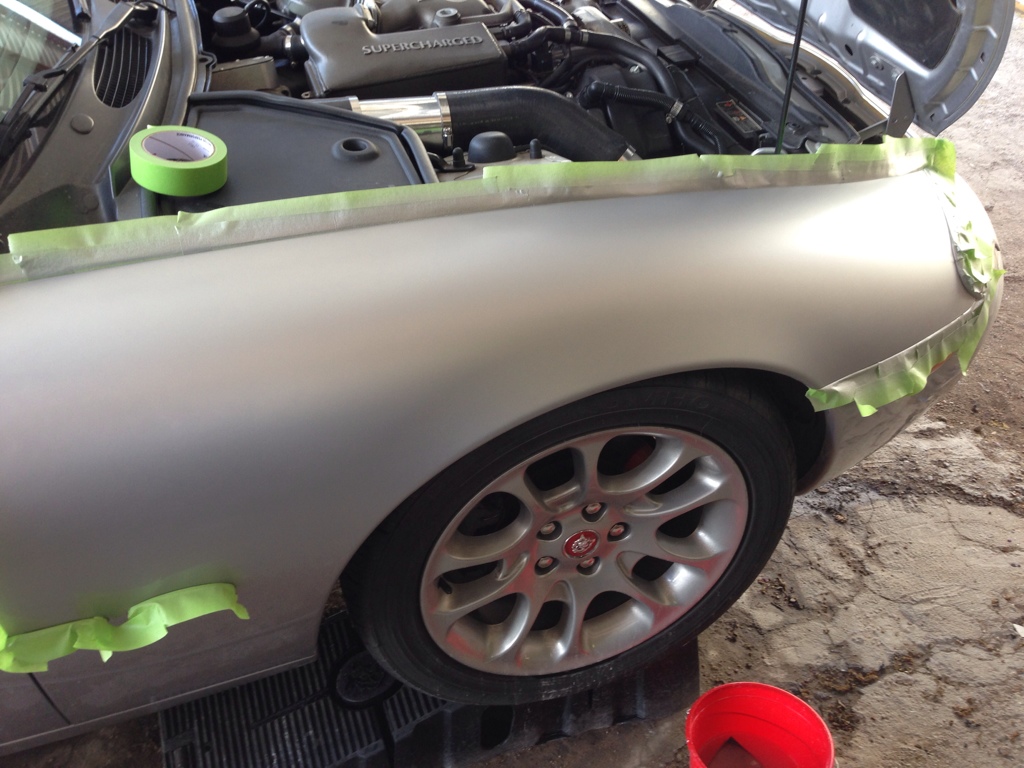
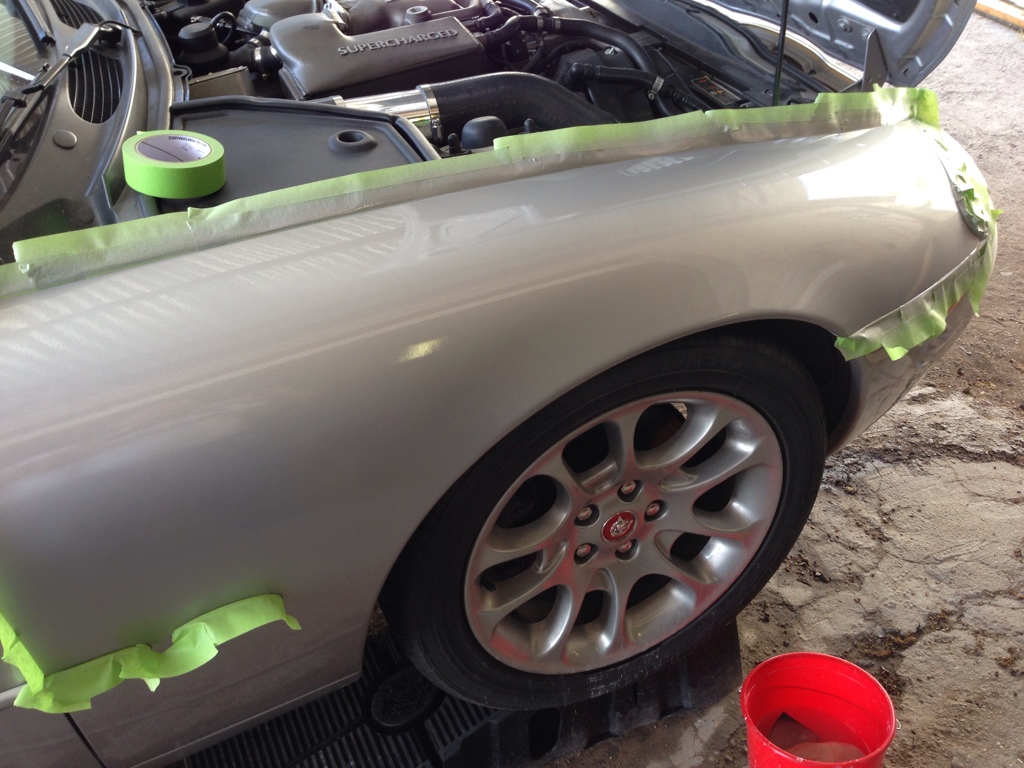
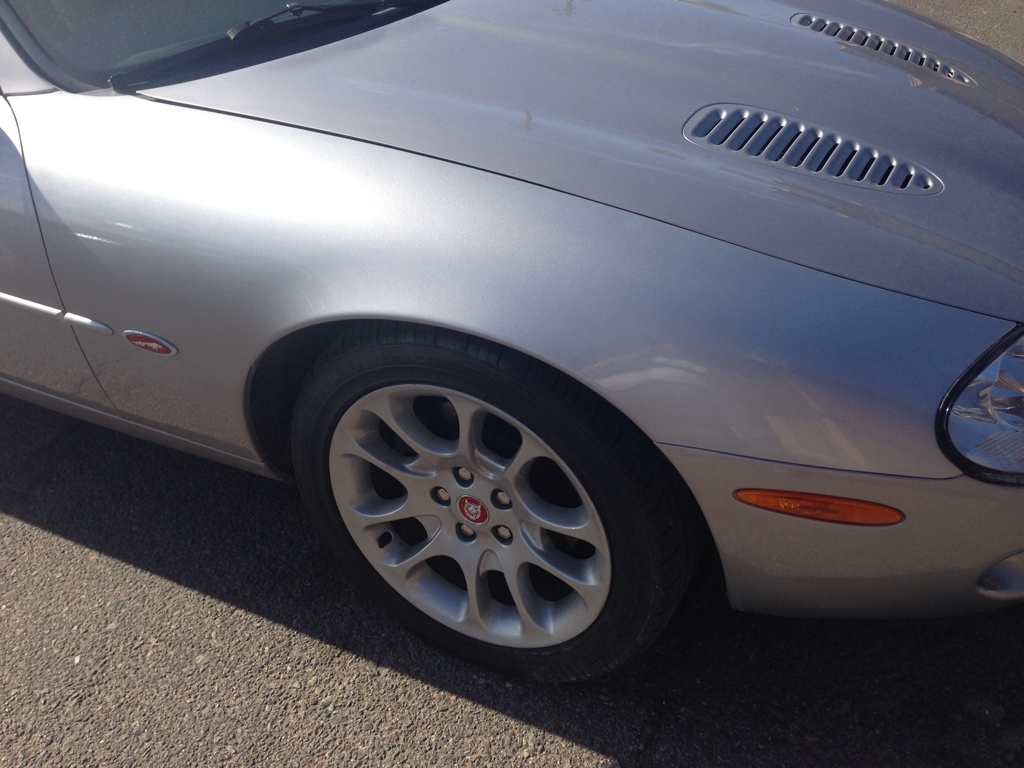
I shot the fender today. It's got several layers of clear now. I'll wet sand it tomorrow then hit it with the catalyzed clear. The color match is about 98%. The paint is new and nicer than the factory spray. It is certainly better than it was and will suffice until I get a complete respray. =)
I'll do the scuffed rear bumper over the weekend.
It didn't take long at all!
I'll do the scuffed rear bumper over the weekend.
It didn't take long at all!
The following users liked this post:
SPIJohn (05-22-2013)
#16
05-22-2013, 09:59 PM
#17
05-22-2013, 11:11 PM


Thread
Thread Starter
Forum
Replies
Last Post
FS[NorthWest]: 2004 X-type 3.0 24,500miles! $8500
millertic
PRIVATE For Sale / Trade or Buy Classifieds
0
09-30-2015 08:11 PM
Currently Active Users Viewing This Thread: 1 (0 members and 1 guests)

