
Rear wing repair
#1
 08-25-2012, 09:20 AM


I dropped into a local repair shop and asked for a quote to get this fixed, they quoted Ł380 for painting only with no gaurantee and wih the likely hood that it would come back, they did not want to take it on as a cut out bad metal and replace. So I decided to have a go at it my self with a basic repair.
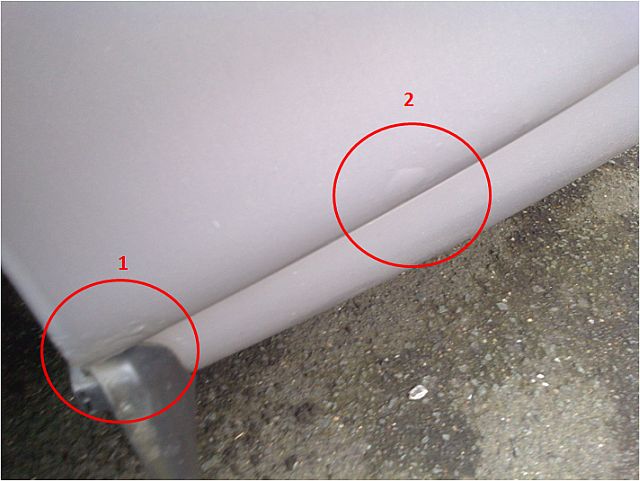
Now as I have no welding skills I'm going to try to rustproof and paint, if it all goes wrong then is mostly just my time that has been waisted.
Unfortunately the wing is not a single skin so there is no easy way to get to the outer wing inner surface.
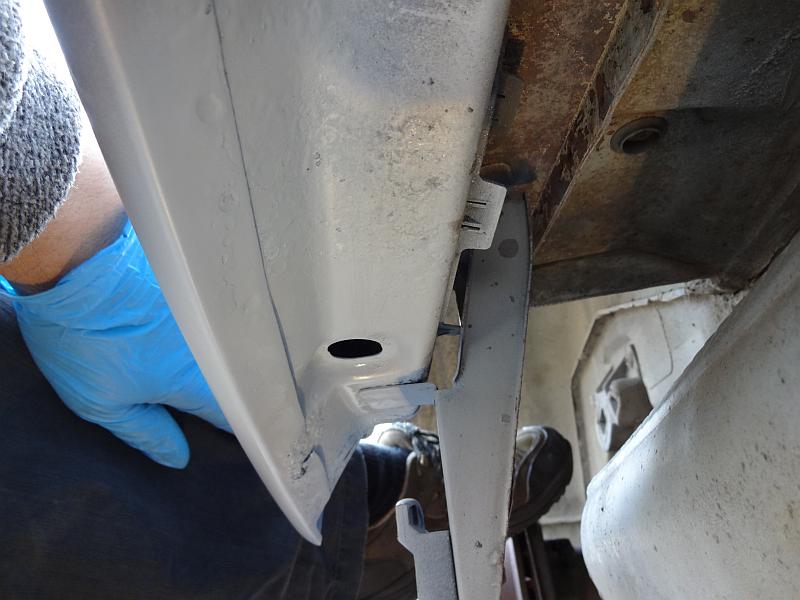
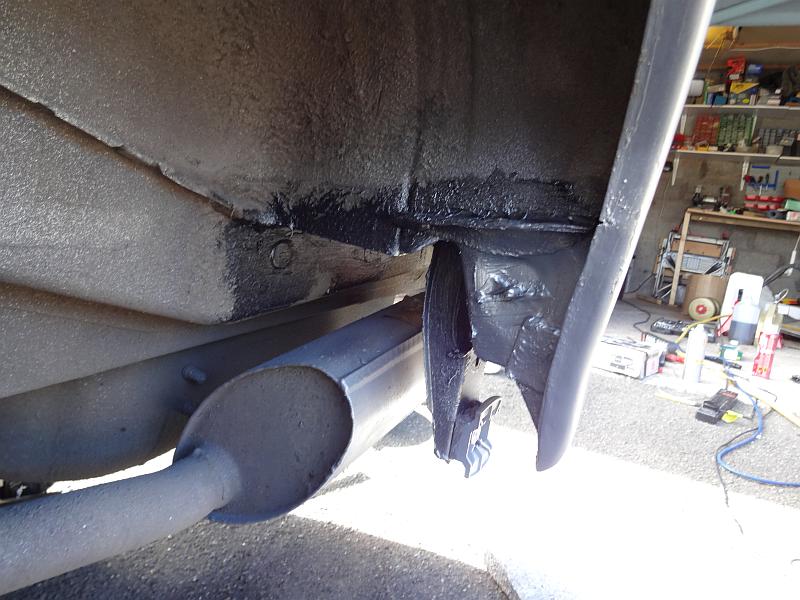
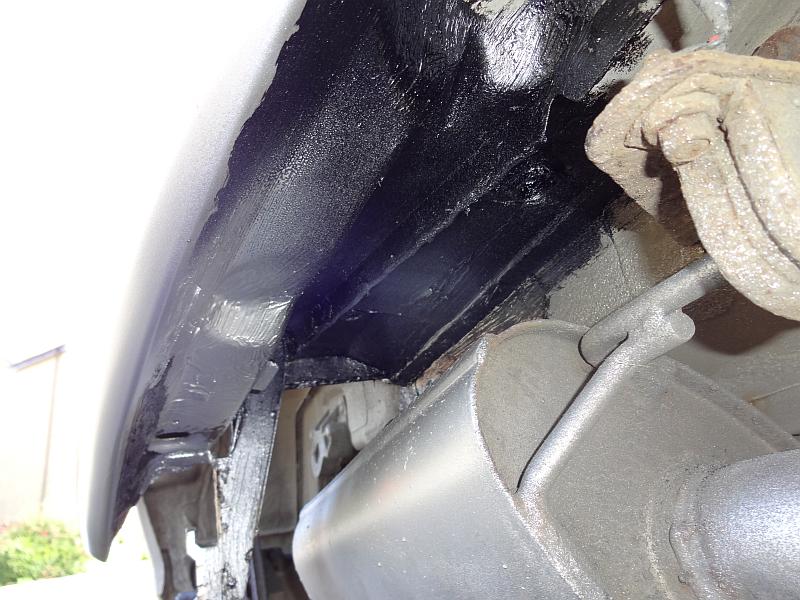
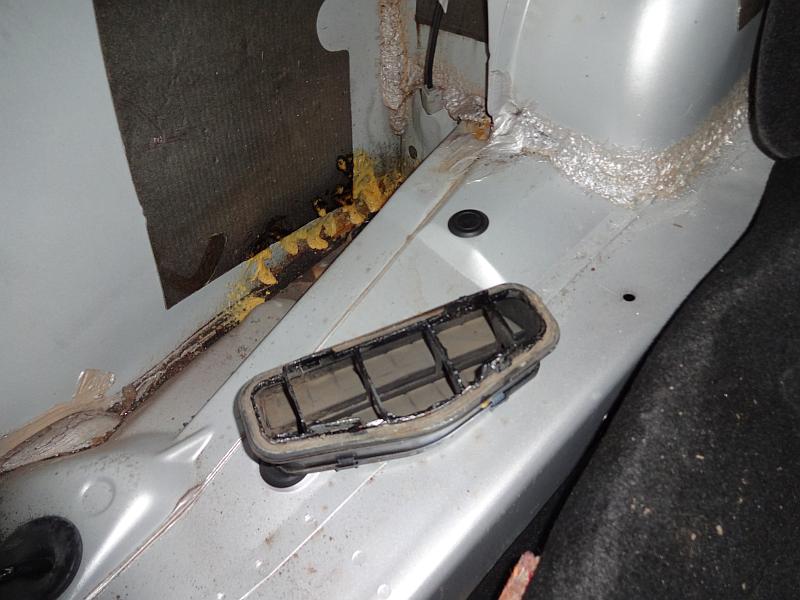
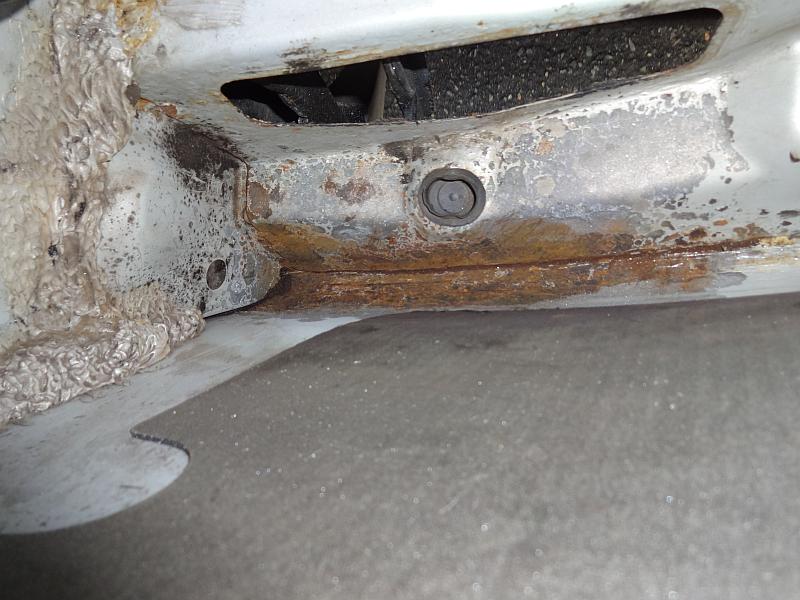
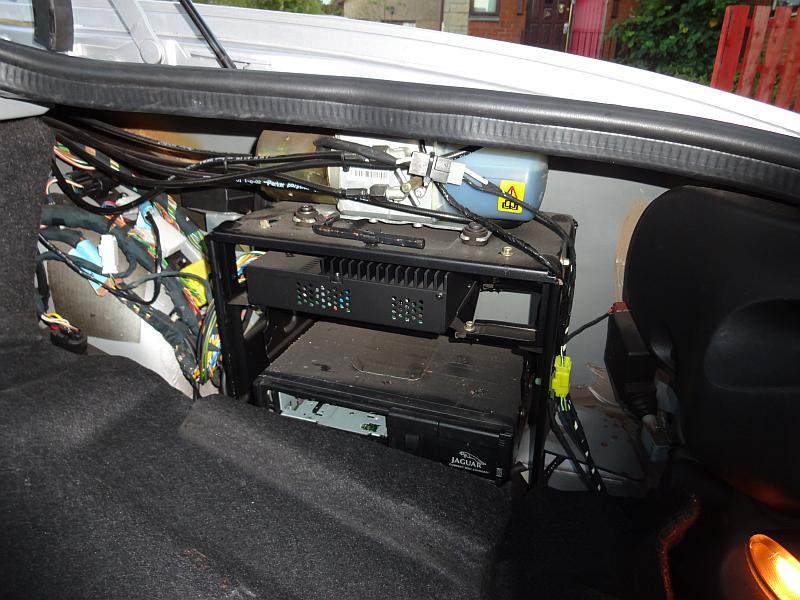
Here is a vew of the inside of the wing with the bumper off.
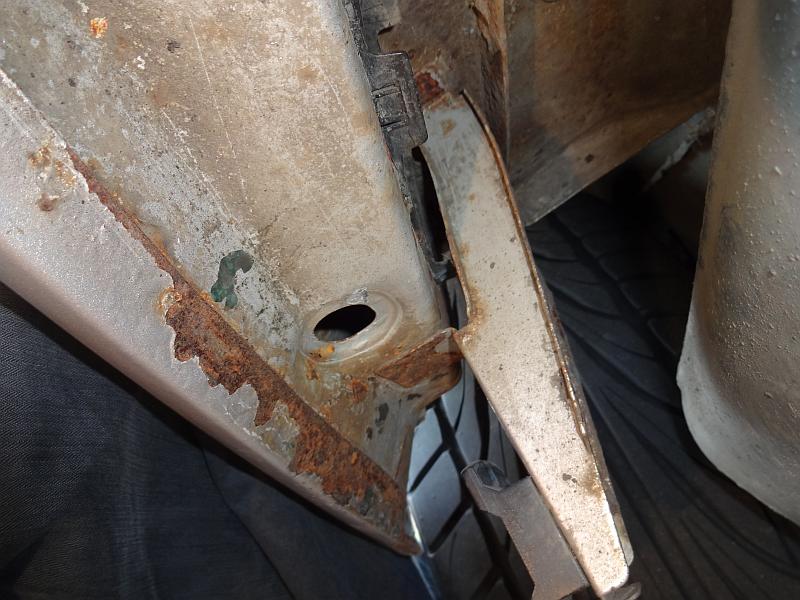
There was a bung in the hole and there is a large plastic access hatch, but it seems impossible to remove because of the bumper hanger.
Has anyone been able to remove it?
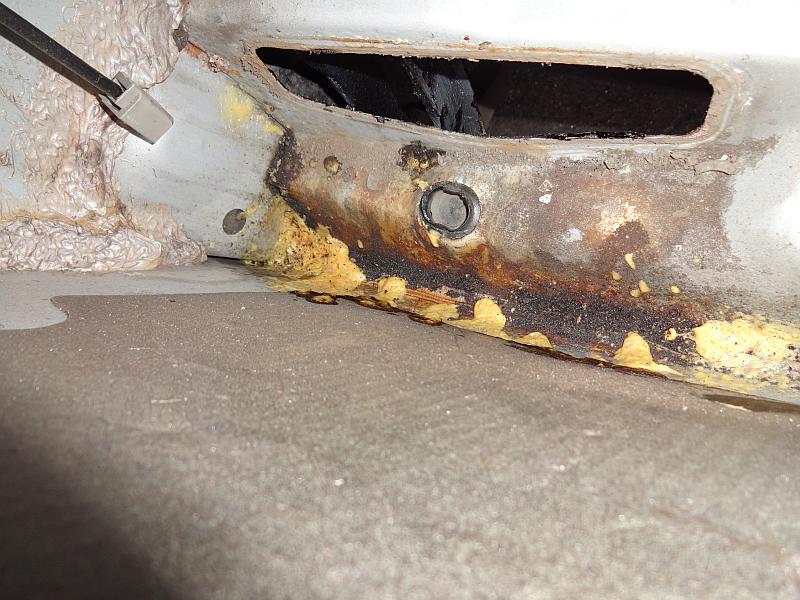
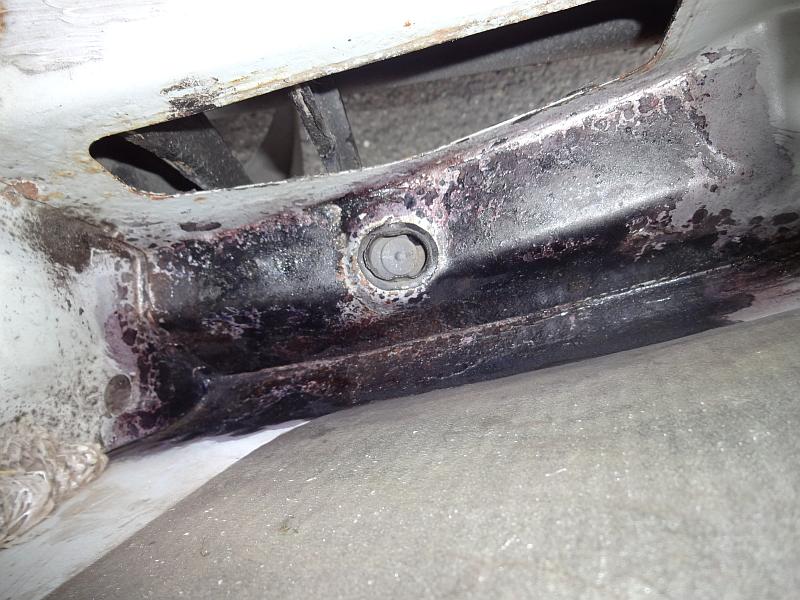
Did a bit of sandblasting to clean the area up.
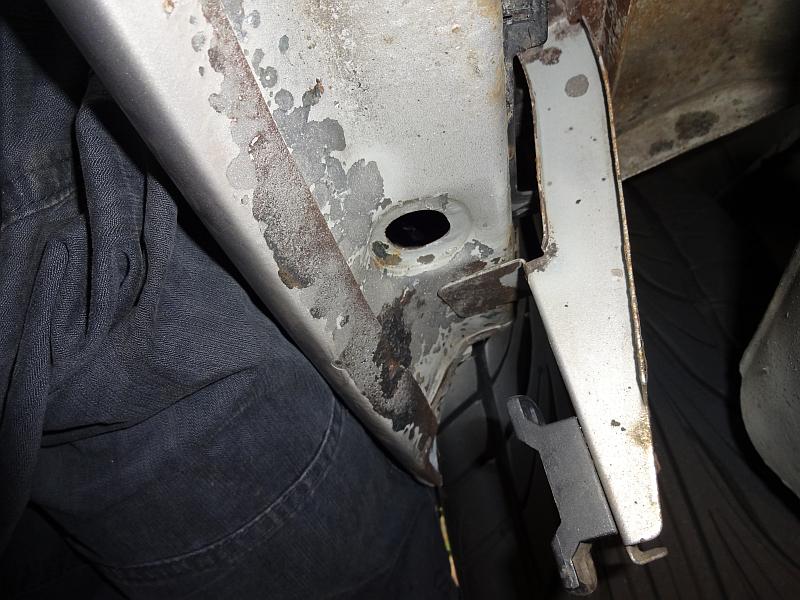
My plan is to pump waxoil into the cavity to try to stop any further corrosion from the inside, then coat the entire area in underseal.
For the outside ill sand and repaint.
But that's on hold right now due to....
Now as I have no welding skills I'm going to try to rustproof and paint, if it all goes wrong then is mostly just my time that has been waisted.
Unfortunately the wing is not a single skin so there is no easy way to get to the outer wing inner surface.
Here is a vew of the inside of the wing with the bumper off.
There was a bung in the hole and there is a large plastic access hatch, but it seems impossible to remove because of the bumper hanger.
Has anyone been able to remove it?
Did a bit of sandblasting to clean the area up.
My plan is to pump waxoil into the cavity to try to stop any further corrosion from the inside, then coat the entire area in underseal.
For the outside ill sand and repaint.
But that's on hold right now due to....
#2
08-25-2012, 09:57 AM

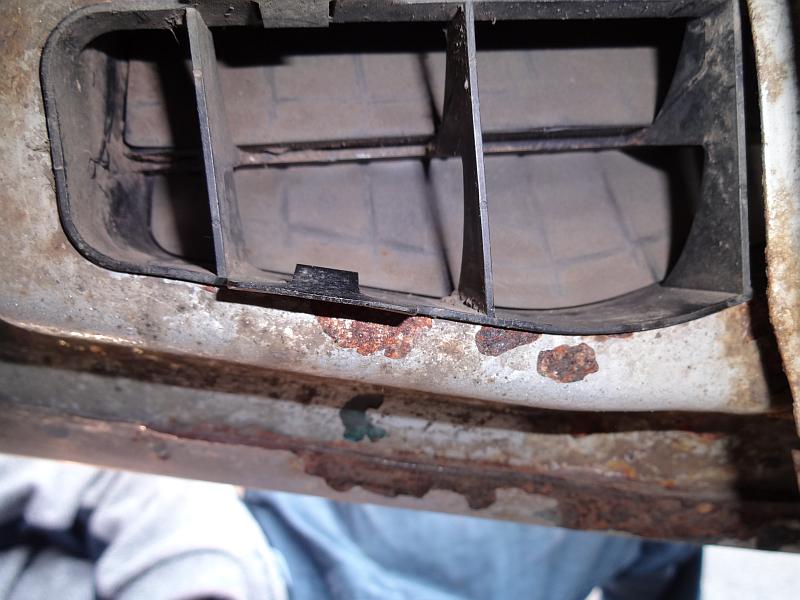
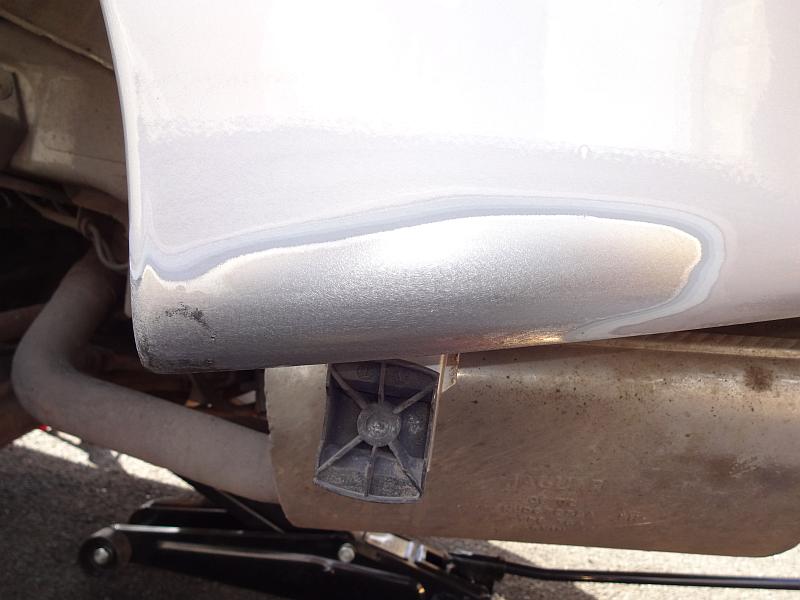
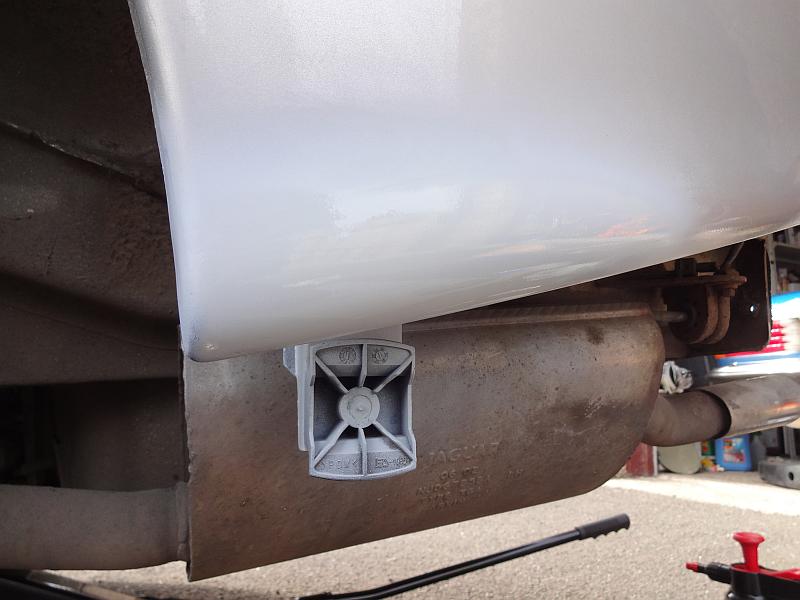
Checking the Parts Manual, it appears to be the Vent Box Housing:
There's one either side each secured by two plastic push on nuts.
Part of the heating and ventilating system, they allow warm air to escape from the luggage compartment.
I see you're 'enjoying' a similar day to the North East of England.
Graham
Last edited by GGG; 08-25-2012 at 11:04 AM.

#4
08-26-2012, 02:30 PM
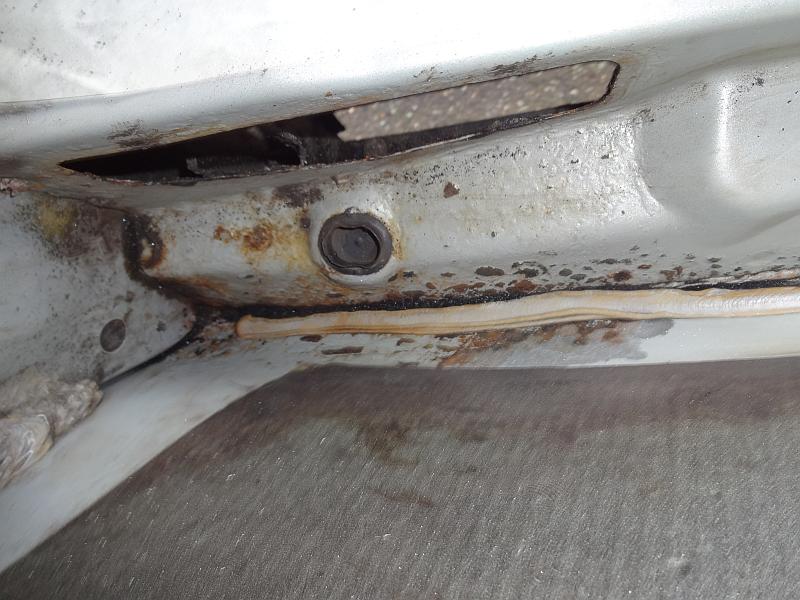
Ok this was what I did today.
Sanded down the paint bubles.
Acid etch.
Inside and out.
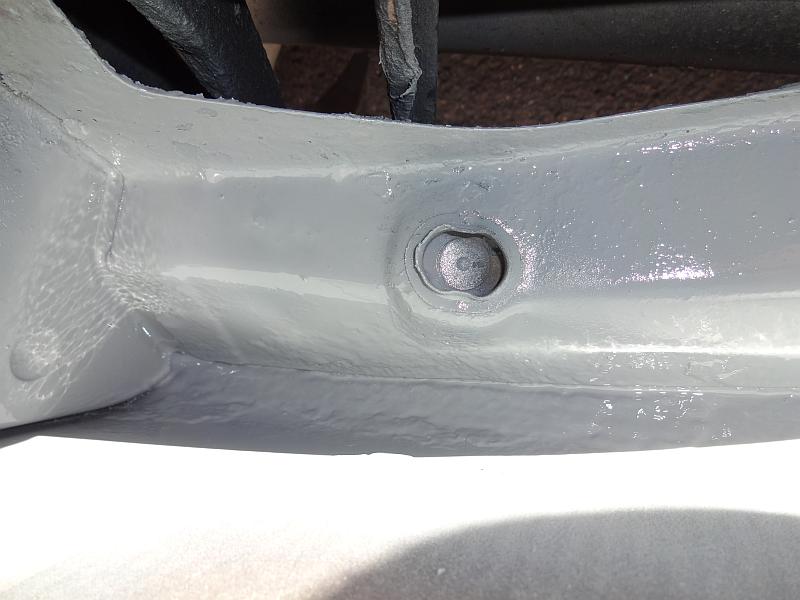
Primer.
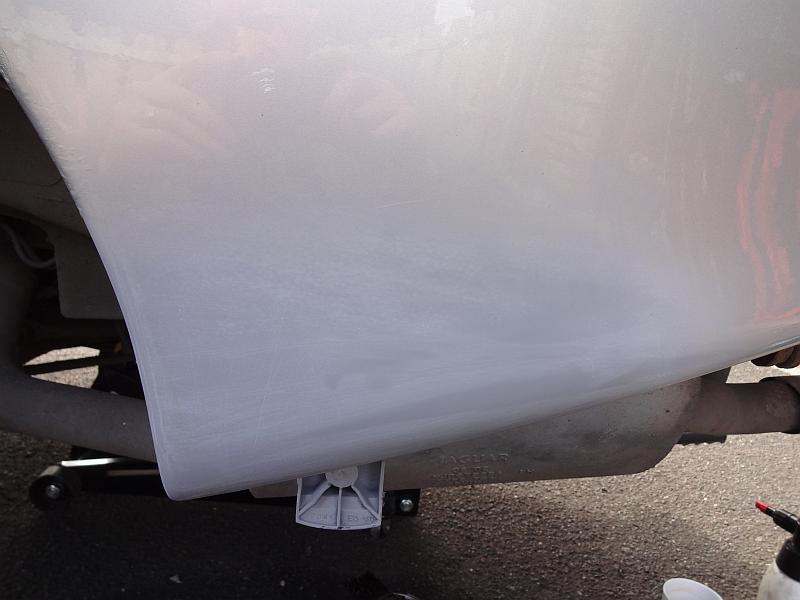
I coated all the serfaces with Hammerite underseal with waxoyl.
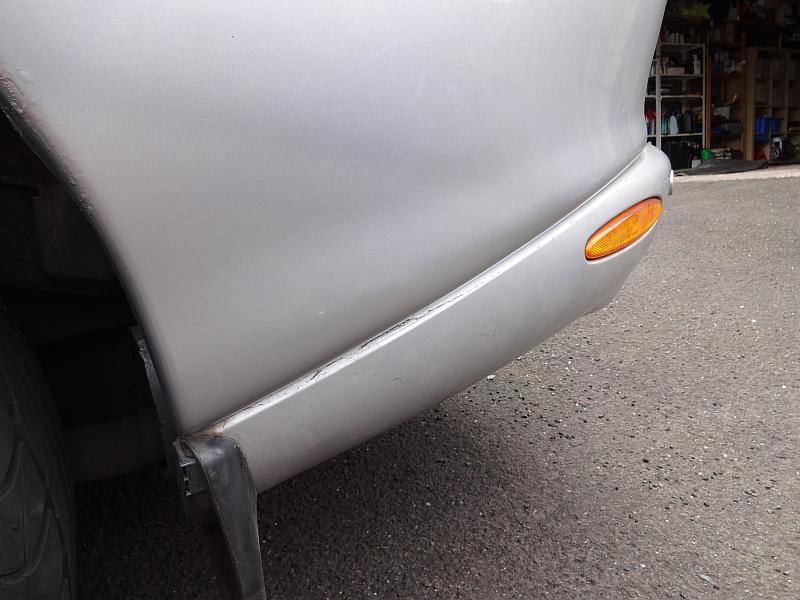
Topcoat on, but you can see i put a fingernail mark in it, arhhh, I'll fix before clearcoat. The colour match is also not great but may blend in a bit with the clearcoat. It will do for now. Clear coat will go on as soon as its dry again.
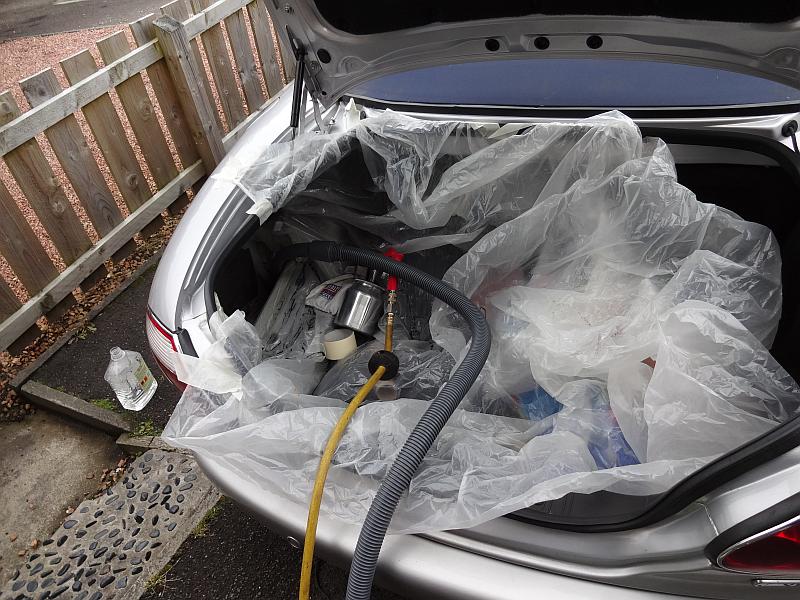
Now I sprayed in some waxoyl into the hole in the above pictures to try to stop more rot from the inside before I found out that it could be accessed from the boot. So I'll give this a clean out and coat more effectively as suggested above.
Next weekend, the other side.
Sanded down the paint bubles.
Acid etch.
Inside and out.
Primer.
I coated all the serfaces with Hammerite underseal with waxoyl.
Topcoat on, but you can see i put a fingernail mark in it, arhhh, I'll fix before clearcoat. The colour match is also not great but may blend in a bit with the clearcoat. It will do for now. Clear coat will go on as soon as its dry again.
Now I sprayed in some waxoyl into the hole in the above pictures to try to stop more rot from the inside before I found out that it could be accessed from the boot. So I'll give this a clean out and coat more effectively as suggested above.
Next weekend, the other side.
#5
08-26-2012, 07:57 PM
Veteran Member
Although I keep my cat stored in the winter, they must be dumping the salt in the UK. We are known as the rust belt in the Midwest. but in the later years they have been using lest corrosive chemicals over here I've notice that the SUVs we drive have been holding up for about ten to twelve years through winter driving. I've got a 12 year old Explorer that hasn't started to rust through yet. I know they do a better job of coating the cars now than they did twenty and thirty years ago. I noticed all the surface rust on your underside.
#6
09-01-2012, 09:18 AM
#7
09-01-2012, 10:09 AM
Veteran Member
Trending Topics
#8
09-02-2012, 10:39 AM

#10
09-02-2012, 03:41 PM

#11
09-03-2012, 05:18 AM
Well it certainly isn't round here, and we have a lot of salt on the roads in the winter too. What I have done is not perfect but is the best I could do for the time being. I've been looking out for a mig welder so once I have one and have had a bit of practice I will have a go at cutting out the bad area and replacing with new metal.
In the mean time, it will be interesting to see how this repair holds up so I'll stick a reminder into my phone and take some pictures in a year from now and post the results.
In the mean time, it will be interesting to see how this repair holds up so I'll stick a reminder into my phone and take some pictures in a year from now and post the results.
#12
09-03-2012, 07:10 AM
Well it certainly isn't round here, and we have a lot of salt on the roads in the winter too. What I have done is not perfect but is the best I could do for the time being. I've been looking out for a mig welder so once I have one and have had a bit of practice I will have a go at cutting out the bad area and replacing with new metal.
In the mean time, it will be interesting to see how this repair holds up so I'll stick a reminder into my phone and take some pictures in a year from now and post the results.
In the mean time, it will be interesting to see how this repair holds up so I'll stick a reminder into my phone and take some pictures in a year from now and post the results.
You've certainly rectified the alarming corrosion you found and halted any immediate further deterioration.
Like you, I'll be interested to see how it withstands the rigours of rain and salt.
Graham
#13
09-11-2012, 02:07 PM
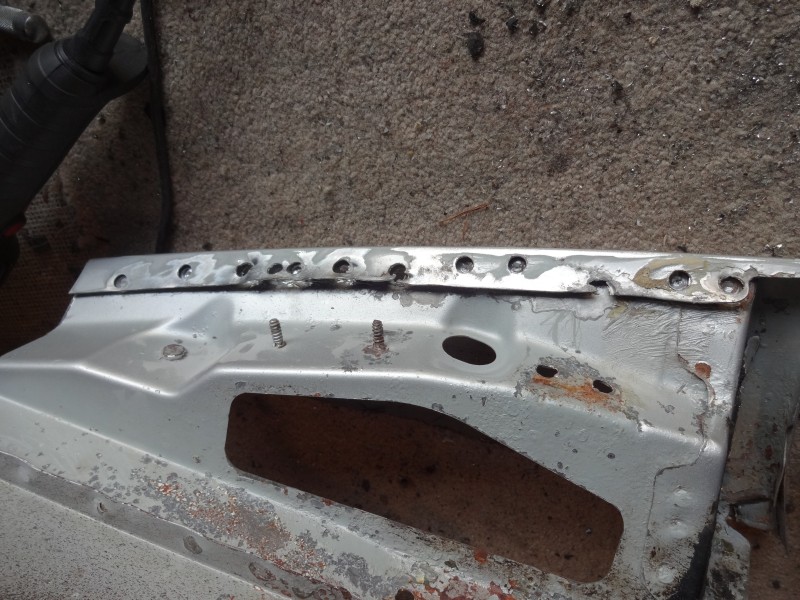
So now the left wing is sorted out, the wheel well is also sorted so now onto the right wing. Looks like another real pain.
Seems like there is a fair amount in the way.
And it gets worse.
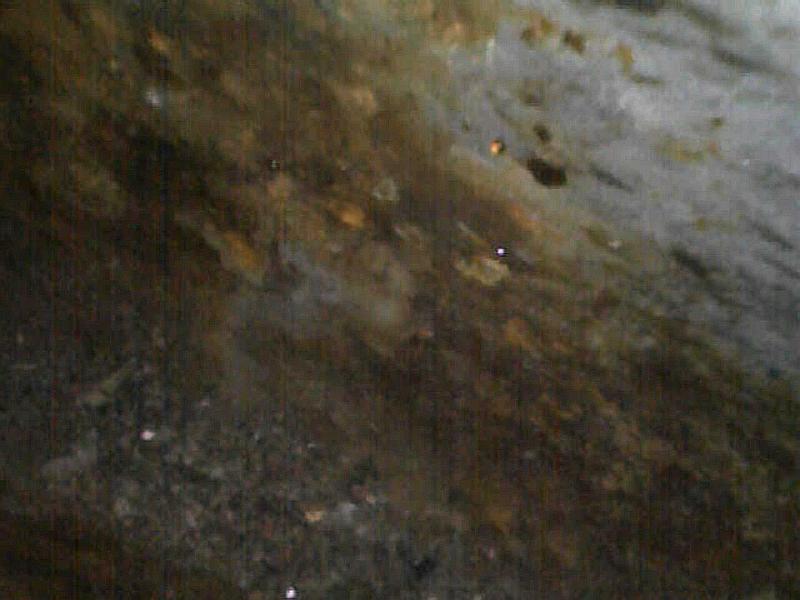
And even worse, I used an endescope to see down into the wing well, the image is not too good but you can clearly see a lot of rust and a lot of grit in the bottom of the well.
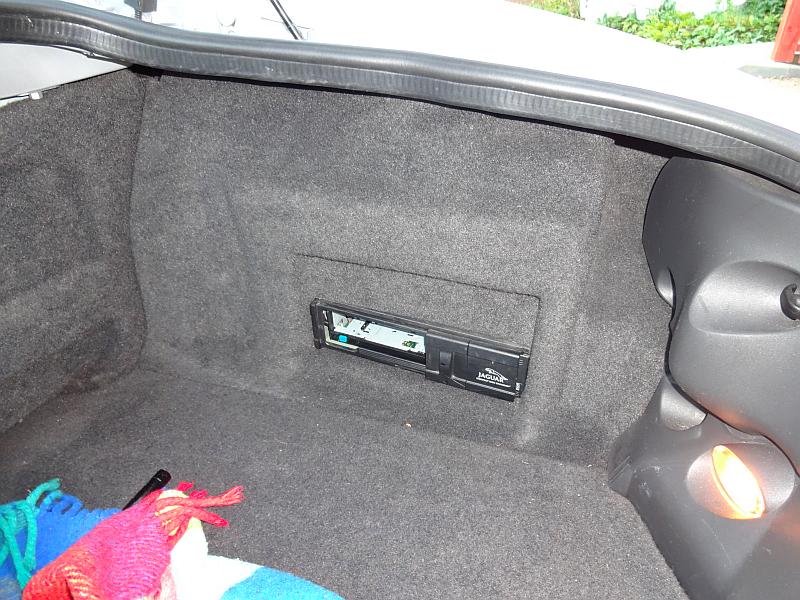
So next I will need to strip out the cage with the cd player and pump for the roof to start the remedial work. Is there anything I need to watch out for while doing this?
Seems like there is a fair amount in the way.
And it gets worse.
And even worse, I used an endescope to see down into the wing well, the image is not too good but you can clearly see a lot of rust and a lot of grit in the bottom of the well.
So next I will need to strip out the cage with the cd player and pump for the roof to start the remedial work. Is there anything I need to watch out for while doing this?
#14
09-11-2012, 04:35 PM
Veteran Member
If the sheetmetal is further sandwiched on both sides with fiberglass and resin, no air or water can get at the metal. No air or water means no rust. The result is actually stronger due to the addition of the fiberglass layers. Works great on floor pans as it turns the floor pan into a waterproof fiberglass bucket.
#15
08-10-2013, 05:27 AM

Junior Member
Join Date: May 2013
Location: south oxon
Posts: 3
Likes: 0
Received 0 Likes
on
0 Posts
my 1999 xkr had worse rust damage than this. Not only did the lower rear wings need new metal welded in, but we found on removing the rear bumper, that the chassis member shown very clearly in these excellent photos, were rotten. These are the sections which the rear bumper bolts to on each side of the car. However we found that jaguar supply these as replacement parts for Ł100 each side. They are part numbers JFJA3325AB and JFJA3324AB. I had the work done for a very reasonable price by classic car restorers located in a South Oxfordshire village near me. The result was excellent but time taken was an issue. If any one wants further details pl e mail me.
Chris McCutcheon
Chris McCutcheon
#16
06-09-2014, 07:21 PM
So 18 months after carrying out the repair to the lower wing sections the rust bubbles are back.
I now have two donor wings and will soon attempt the repair.
Donors...


I did a bit of practice, looks like I need a lot more.
I decided to try on this part of the donor, the left hand half of this is double skinned with a foam filler you will see in the pics below.

Chopped off.
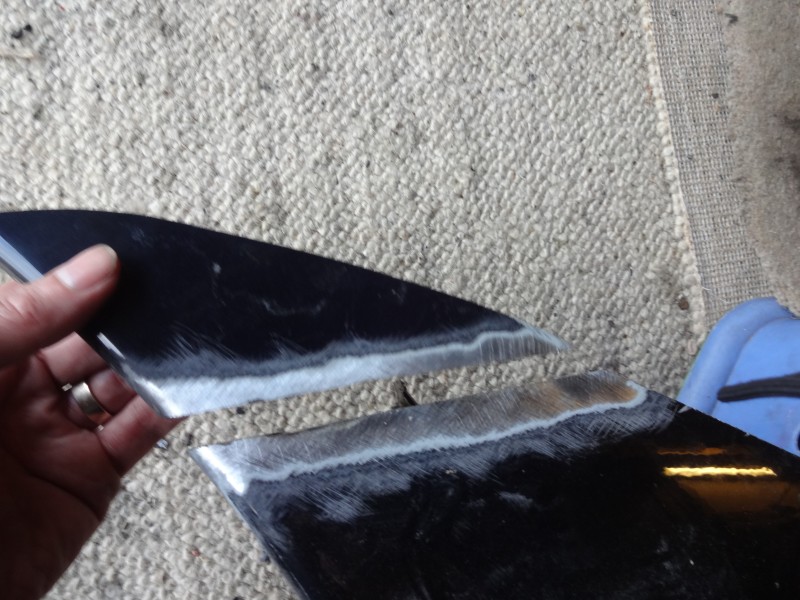
Cross section

First mistake, I held the two parts together with magnets and not clamps.

Now I set the welder up and had practiced on some scrap 1mm plate and was getting nice welds, but the first one on the donor went like this.

The next one like this, at this point the foam lit up and flamed till I blew it out.

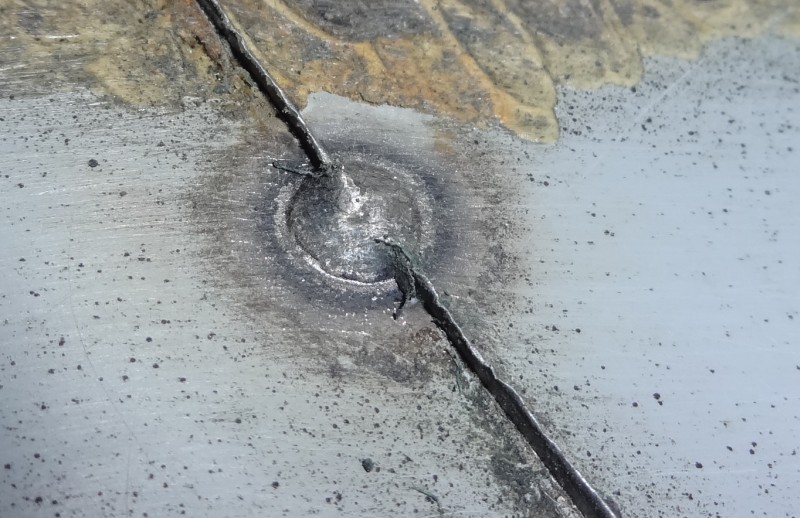
The third tack looked good but by then the two sections had deformed and overlapped.

Backside of the 3rd weld.
I then impatiently tacked up the rest after turning the voltage down a notch, had a few blow throughs.

Ground it down, too much on the bottom left which was proud till the metal was wafer thin.

I'll chop off another inch tomorrow and have another go.
I now have two donor wings and will soon attempt the repair.
Donors...
I did a bit of practice, looks like I need a lot more.
I decided to try on this part of the donor, the left hand half of this is double skinned with a foam filler you will see in the pics below.
Chopped off.
Cross section
First mistake, I held the two parts together with magnets and not clamps.
Now I set the welder up and had practiced on some scrap 1mm plate and was getting nice welds, but the first one on the donor went like this.
The next one like this, at this point the foam lit up and flamed till I blew it out.
The third tack looked good but by then the two sections had deformed and overlapped.
Backside of the 3rd weld.
I then impatiently tacked up the rest after turning the voltage down a notch, had a few blow throughs.
Ground it down, too much on the bottom left which was proud till the metal was wafer thin.
I'll chop off another inch tomorrow and have another go.
#17
06-10-2014, 01:31 PM

Senior Member
Well done for having a go. If you can produce more welds like that third one, you will create a strong repair. You are doing the right thing by practicing. I would recommend using a 40 grit flap disc rather than a grinder on the weld as it is much gentler and forgiving. I find this web site very useful: Welding - The DIY Guide
As I may need to carry out a similar myself, I would be interested to know where you managed to find a donor section?
Good luck with the repair.
As I may need to carry out a similar myself, I would be interested to know where you managed to find a donor section?
Good luck with the repair.
#18
06-10-2014, 03:03 PM
I looked at who was selling parts on ebay and the called and asked about the wings. The one I got from Eurojags was in the best condition but was also the most expensive at Ł160 inc delivery, the other I cut off myself at a breaker in Ayr and got for Ł60 + Ł20 in fuel to get there.
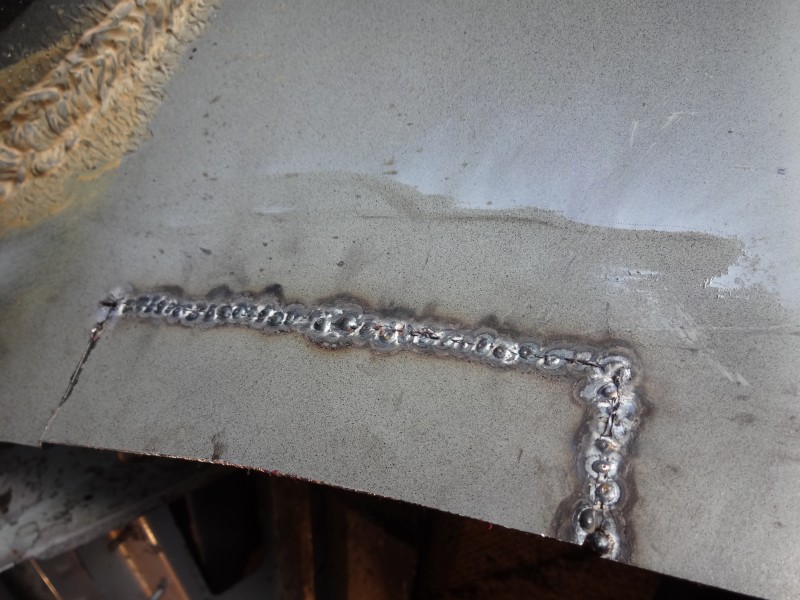
A bit more welding practice tonight.
These 7 tacks were identical, I guess the ones that exploded were directly on top of the foam and the good ones were not! I'll need to find a way to get rid of any foam before the proper job.

The new section which was clean on the back, except for paint.

Tacks went on cleanly.

Stitched up between the tacks, still needs to be better, need to take more time.

The back.
Ground down with a flap disc.
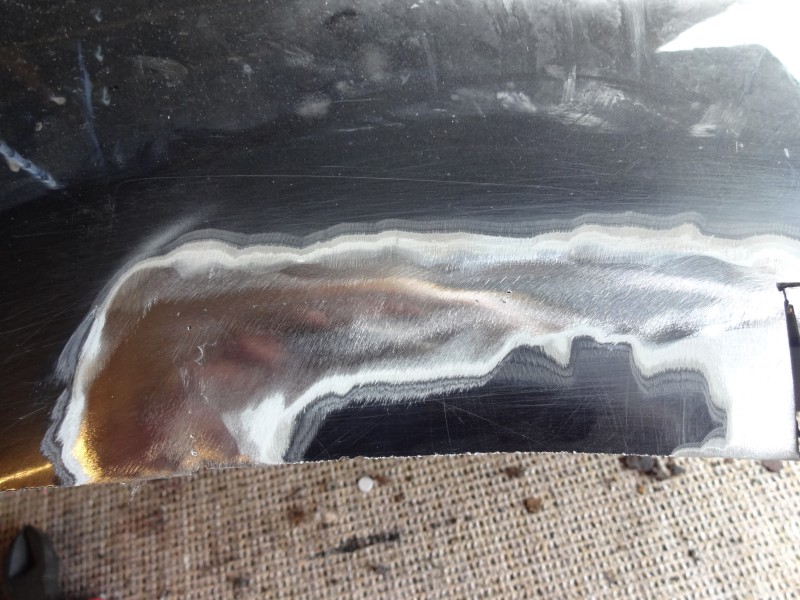
That feels a bit better.
A bit more welding practice tonight.
These 7 tacks were identical, I guess the ones that exploded were directly on top of the foam and the good ones were not! I'll need to find a way to get rid of any foam before the proper job.
The new section which was clean on the back, except for paint.
Tacks went on cleanly.
Stitched up between the tacks, still needs to be better, need to take more time.
The back.
Ground down with a flap disc.
That feels a bit better.
The following users liked this post:
Andy Cox (06-10-2014)
#19
06-10-2014, 05:26 PM

#20
06-13-2014, 03:40 PM
Progress now being held up by the word cup!
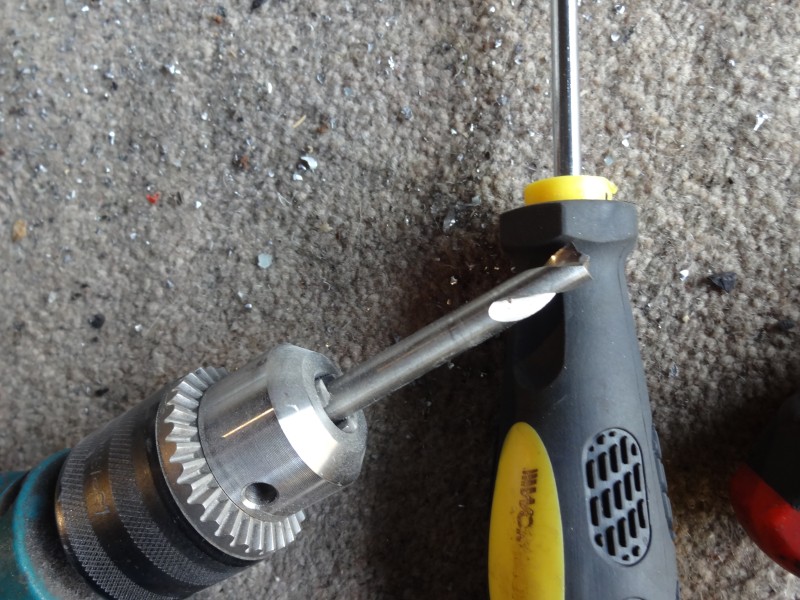
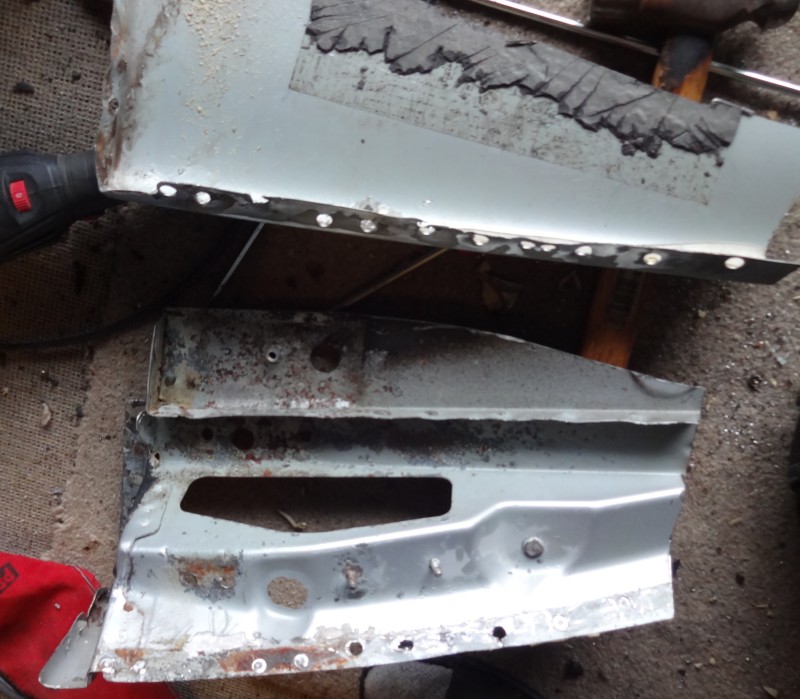
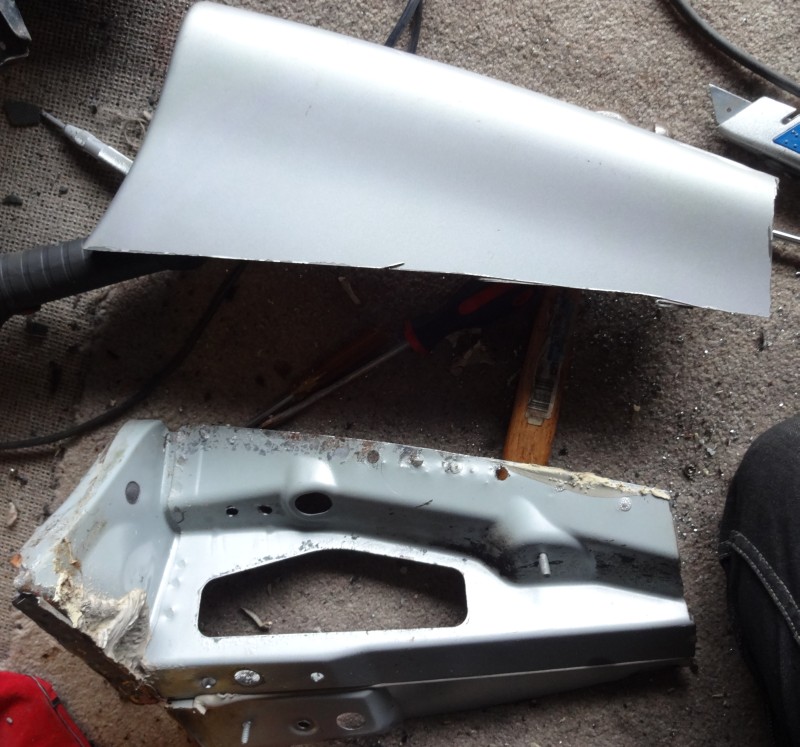
I decided to break down the donors into the component parts, I'll then strip them of paint before cutting into the car.
I used this spot weld bit but the other type with the cutting saw blade is better. I ended up having to chisel a few of them apart I ended up going right through on a couple.
I decided to break down the donors into the component parts, I'll then strip them of paint before cutting into the car.
I used this spot weld bit but the other type with the cutting saw blade is better. I ended up having to chisel a few of them apart I ended up going right through on a couple.
The following users liked this post:
rrosscoe (08-30-2016)