When you click on links to various merchants on this site and make a purchase, this can result in this site earning a commission. Affiliate programs and affiliations include, but are not limited to, the eBay Partner Network.
Replacing XK8 front lower wishbone ball joint in situ
I noticed the front nearside lower ball joint on my newly acquired 1998 XK8 had a split boot so it needed changing before its MOT in Oct. I wasn't too keen to remove the lower wishbone so I thought I would try it in situ. Here's how I got on ...
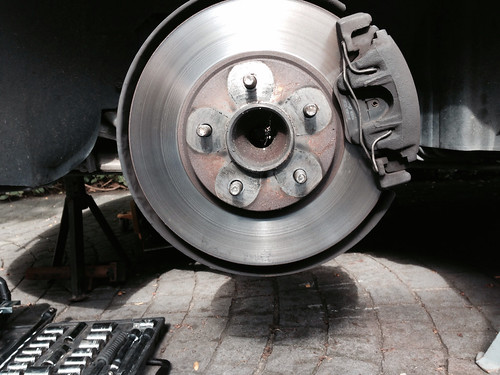
Car jacked up safely, wheel off, ABS cable disconnected and tucked out of the way.
Calliper and disk off, stabiliser link disconnected and the vertical link secured with cable ties making sure not to stress the brake cable or top ball joint. I used a ball joint separator with some heat from a butane torch to free the bottom ball joint. It took some shifting but eventually I won.
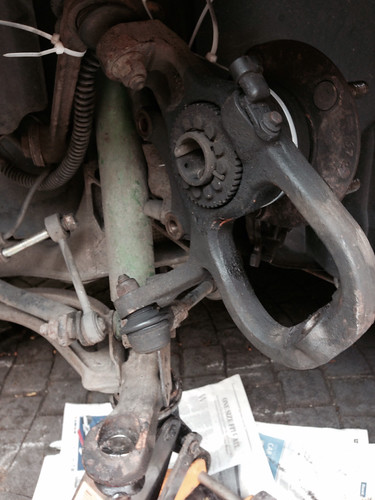
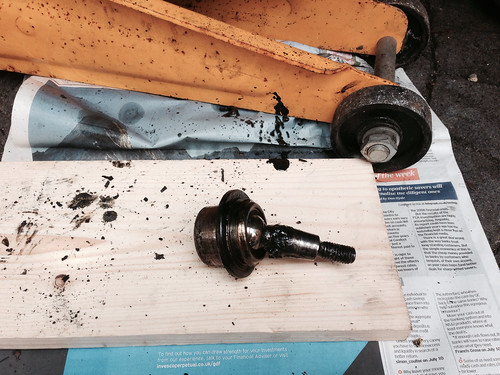
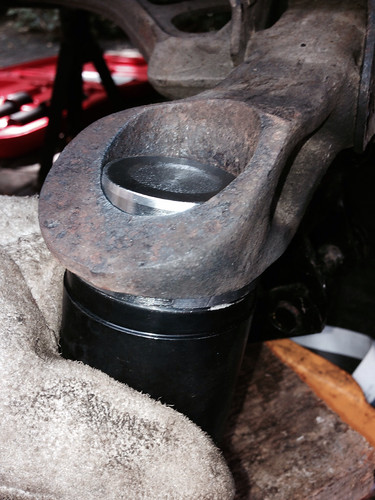
Here's what you are left with ...
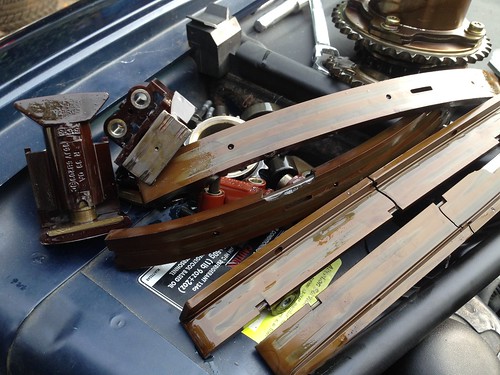
At this point some people cut the rim off the old ball joint to be able to fit a cup and C clamp but as I wasn't eager to work from underneath with a grinder, I thought I would see how I got on with a bit of heat and a hammer. A couple of minutes of heat and a few thumps with the club hammer and chisel and out she popped - Result! The photo is after the event but you can see the set-up I used and the hammer and chisel in the foreground.
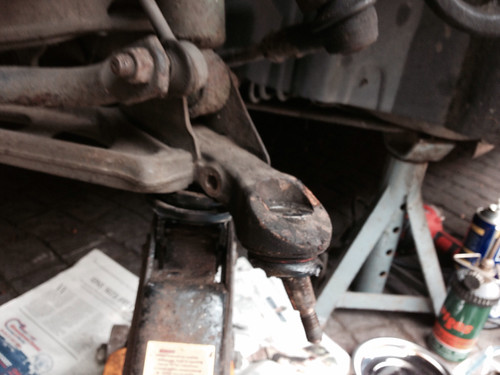
Here she is ...
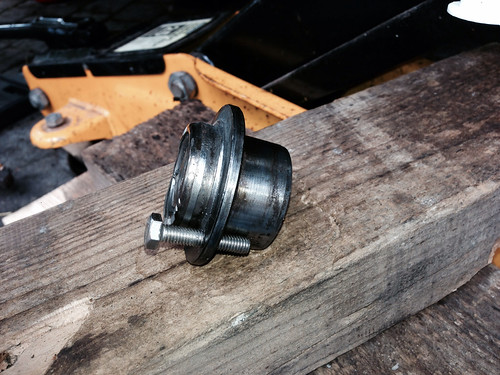
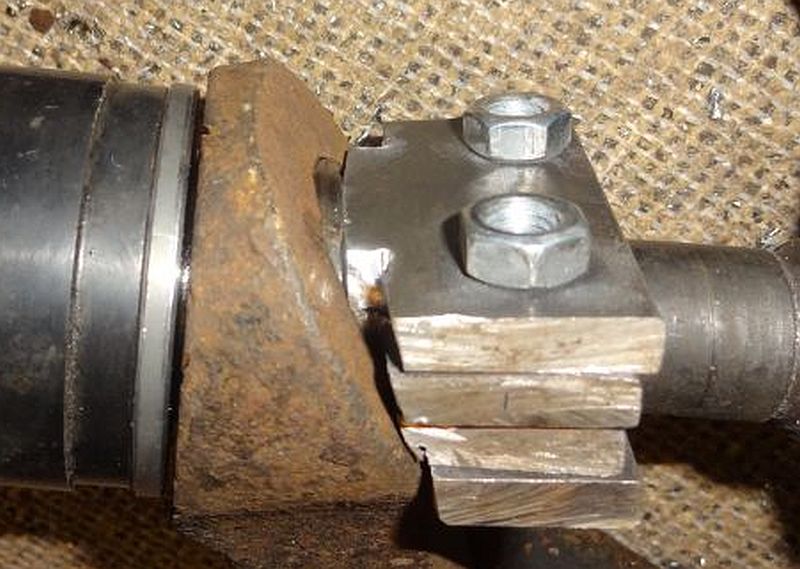
Expecting to have to press in the new ball joint with a C clamp I went ahead and hacked the old ball joint to make up this tool which I hoped would be enough to prevent the clamp from slipping on the complex curve of the wishbone.
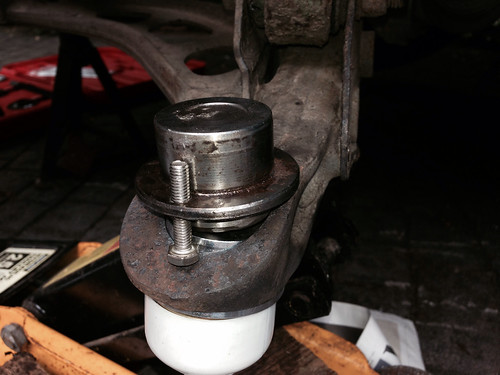
The idea was it would sit like this to provide a flat surface for the clamp.
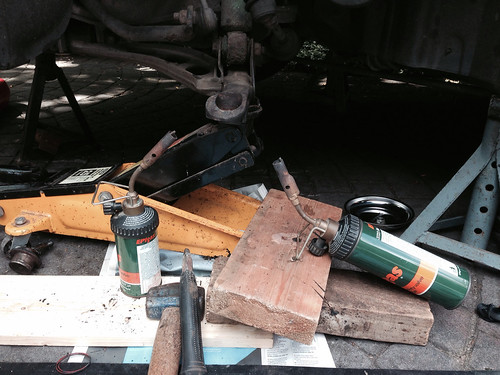
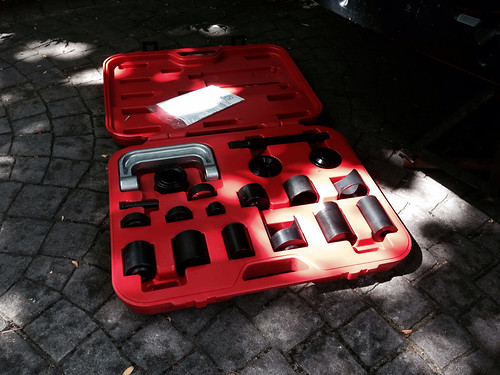
And here is the C clamp kit I bought from fleabay for �45
However in the end I didn't need the clamp or the DIY tool. The new ball joint just popped in by hand. The trick is to place the ball joint in the freezer over night and heat the wishbone arm with butane torches for a couple of minutes and then she just pops in. No one was more surprised than me - I'd been expecting a real fight to get the ball joint pressed in.
After that it's just a case of carefully putting it all back together. I reckon it took me 5 hours from start to finish, but I spent at least an hour making the DIY tool which I didn't need and rehearsing how I was going to press the ball joint in. I was also taking my time as I have not done any serious spannering for a good number of years. The C clamp kit won't go to waste as I plan to change out all the bushings this winter so it will come into it's own then.
Bamfort,
Thanks for posting this. I have the exact same situation with my '97 XK8. Wiggly ball joint and torn boot. I had the other side replaced with the control arm a few years ago. Big bucks that I don't want to spend again. What you did is exactly what I've been contemplating for a while, including the cooling and heating of parts, but have yet to move forward with it not knowing if it was really feasible. You've proven that it is. I'll be putting the order in for the new ball joint now and making plans for the installation.
Where did you get your ball joint, I tried the same freezer/butane torch with ball joints from British Parts and still had to use the C clamp and improvised tool to get it in.
Where did you get your ball joint, I tried the same freezer/butane torch with ball joints from British Parts and still had to use the C clamp and improvised tool to get it in.
SNG Barratt. I went with the cheapest one they listed in case I screwed up and trashed the ball joint trying to fit it. Having said that, the supplied part looked very serviceable. Time will tell I suppose.
I noticed the front nearside lower ball joint on my newly acquired 1998 XK8 had a split boot so it needed changing before its MOT in Oct. I wasn't too keen to remove the lower wishbone so I thought I would try it in situ. Here's how I got on ...
Car jacked up safely, wheel off, ABS cable disconnected and tucked out of the way.
Calliper and disk off, stabiliser link disconnected and the vertical link secured with cable ties making sure not to stress the brake cable or top ball joint. I used a ball joint separator with some heat from a butane torch to free the bottom ball joint. It took some shifting but eventually I won.
Here's what you are left with ...
At this point some people cut the rim off the old ball joint to be able to fit a cup and C clamp but as I wasn't eager to work from underneath with a grinder, I thought I would see how I got on with a bit of heat and a hammer. A couple of minutes of heat and a few thumps with the club hammer and chisel and out she popped - Result! The photo is after the event but you can see the set-up I used and the hammer and chisel in the foreground.
Here she is ...
Expecting to have to press in the new ball joint with a C clamp I went ahead and hacked the old ball joint to make up this tool which I hoped would be enough to prevent the clamp from slipping on the complex curve of the wishbone.
The idea was it would sit like this to provide a flat surface for the clamp.
And here is the C clamp kit I bought from fleabay for �45
However in the end I didn't need the clamp or the DIY tool. The new ball joint just popped in by hand. The trick is to place the ball joint in the freezer over night and heat the wishbone arm with butane torches for a couple of minutes and then she just pops in. No one was more surprised than me - I'd been expecting a real fight to get the ball joint pressed in.
After that it's just a case of carefully putting it all back together. I reckon it took me 5 hours from start to finish, but I spent at least an hour making the DIY tool which I didn't need and rehearsing how I was going to press the ball joint in. I was also taking my time as I have not done any serious spannering for a good number of years. The C clamp kit won't go to waste as I plan to change out all the bushings this winter so it will come into it's own then.
Anyway - that's how I did it.
Cheers
Peter
Thanks for that. I really need to do mine and they have been on the bench for a couple of months! - This might be the 'shove' I need to get them sorted...
I'd be interested to hear if others have had success with the same technique or if I just got lucky. The components on my car are generally in pretty good condition with just surface rust (part of the reason I bought it) so the bore of the wishbone was easy to clean up prior to fitting the new ball joint. I also had two butane torches on it to make sure it expanded evenly - maybe that helped.
SNG Barratt. I went with the cheapest one they listed in case I screwed up and trashed the ball joint trying to fit it. Having said that, the supplied part looked very serviceable. Time will tell I suppose.
However in the end I didn't need the clamp or the DIY tool. The new ball joint just popped in by hand. The trick is to place the ball joint in the freezer over night and heat the wishbone arm with butane torches for a couple of minutes and then she just pops in. No one was more surprised than me - I'd been expecting a real fight to get the ball joint pressed in.
Maybe the factory uses something similar in the original construction.
With that in mind, perhaps a further refinement to removal is to cool the balljoint using a can of compressed air to enhance the temperature differential between the balljoint and socket. Given the position of the stud, maybe even thread on a piece of pipe as a heatsink and immerse in a pan of ice water with salt.
Missed the original post, but glad it popped up again!
BTW, did you have to get the arm to a dull red or less?
Or maybe some brake cleaner? Anything that's volatile should cool it down. Having said that, mine popped out pretty easily with a bit of heat and a few hits with the hammer and chisel.
Wish I could say the same for my harmonic balancer! It was stuck solid and I eventually had to get it to a garage to get them to remove it. Looks like I used up my luck quota with the ball joint.
Sorry to hear about the luck running out
Thanks again for responding. I did hit the thanks button, but it does not seem to work when I am using IE. Only Netscape.
Spraying volatiles around while torches are running is much too exciting a prospect.
I purchased one of those kits for work on my old XJS years ago. It was great for pressing in and out the bushings for the steering rack also. Easy to use and lots of power.
I tried this method today, it was a total fail, I even used MAP gas to get more heat into the arm, I tried with it both on the car the eventually off the car but the ball joint wouldn't budge.
Just before 12 I walked over to a local truck shop who have a big press, it went of like a large bore rifle shot at 12 tons when it eventually popped out. Pressed the new Lemforder ball joint in with my C clamp and improvised wedge tool.
OK....I just "looked" and saw the tool made from old ball joint. I had to grind off the flanges on the old ball joints to get them off with the Clamp....now what ? lol
Here�s what I came up with. Took me about 20 mins to build. A few trials to get it right, you really have to get the flat parallel to the bottom ball joint. It it�s slightly off it slips. Once I got the angle right it was really easy to press the ball joint in

 08-07-2014, 09:49 AM