
1997 XK8 Tail light assembly - ground melted - with pictures!- RESOLVED
#1
 03-27-2010, 12:45 PM

Hello - new to the Jaguar forum. I'm kind of the caretaker for my mothers 1997 XK8. With just a hair over 150,000 miles it has been almost trouble free since she purchased it with 60k on the odo. She was only left stranded once when the transmission selector switch died.
Anyway, she took it to the dealer to find out why her tail lights were intermittent. They told her the assembly and harness would need to be replaced. Estimate of $625 for the repair.
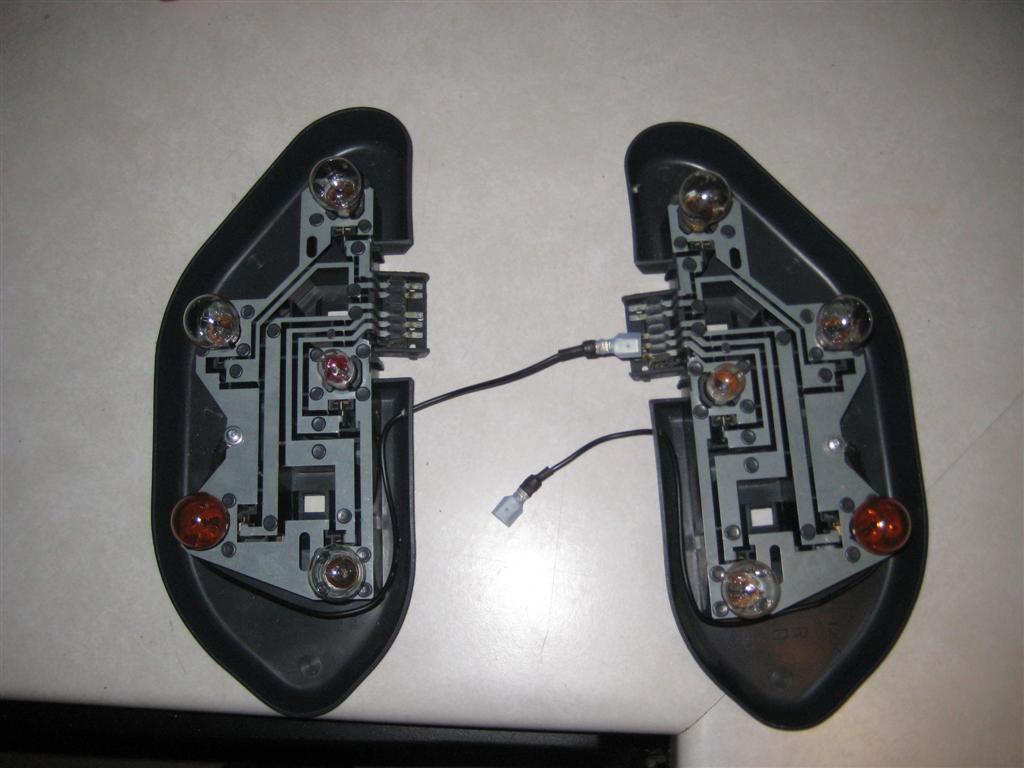
So I took them apart, sure enough, the grounds got a bit warm.....
Other than the dealer, where is a good place to buy a set of assemblies? I already have two new connectors to wire in.


Anyway, she took it to the dealer to find out why her tail lights were intermittent. They told her the assembly and harness would need to be replaced. Estimate of $625 for the repair.
So I took them apart, sure enough, the grounds got a bit warm.....
Other than the dealer, where is a good place to buy a set of assemblies? I already have two new connectors to wire in.
Last edited by steveinfrance; 03-08-2013 at 02:59 AM.
The following 3 users liked this post by hacker-pschorr:

Top Answer
03-27-2010, 12:58 PM

Join Date: Sep 2008
Location: Damon /Houston, Texas
Posts: 7,254
Received 2,183 Likes
on
1,355 Posts
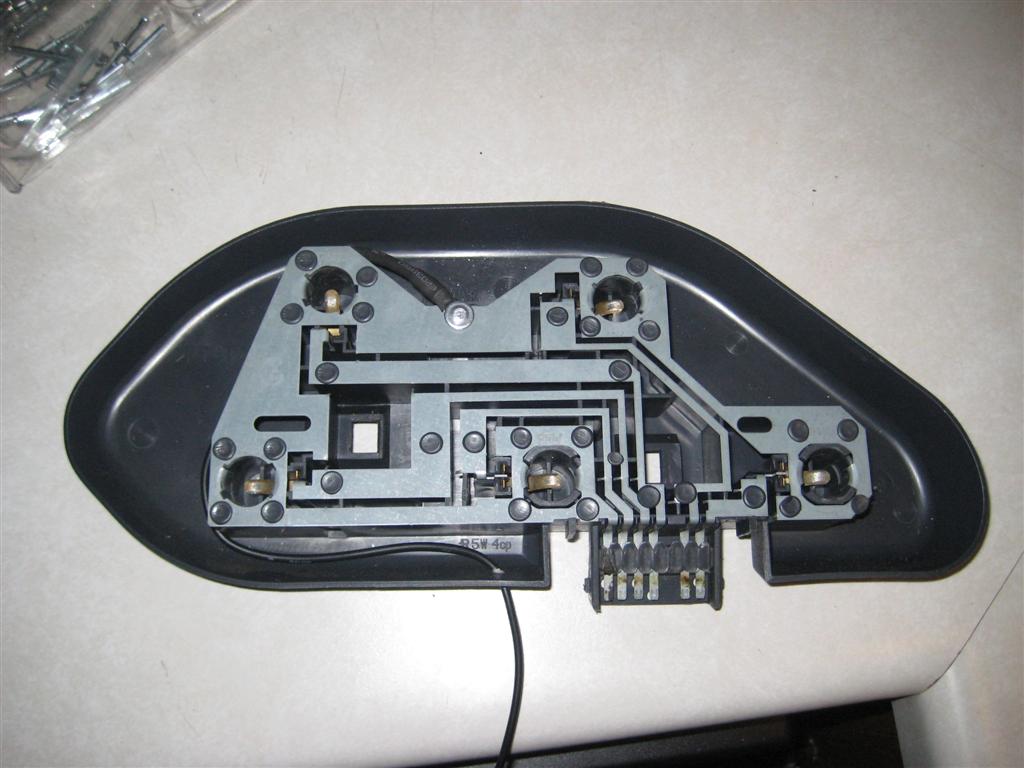
Common problem i have for years been soldering a new ground wire to the back of the light along the ground strip of the circuit board. You can screw or pop rivit a new ground wire whatever you want, then crimp a eyelet onto the other end of the wire and ground to the light assembly stud after you scrape some of the paint away to provide a good ground. Do both sides wether the other side has done this yet or not.....cost is nada if you have some electrical connectors, and solder already
#2
03-27-2010, 12:58 PM
Join Date: Sep 2008
Location: Damon /Houston, Texas
Posts: 7,254
Received 2,183 Likes
on
1,355 Posts
Common problem i have for years been soldering a new ground wire to the back of the light along the ground strip of the circuit board. You can screw or pop rivit a new ground wire whatever you want, then crimp a eyelet onto the other end of the wire and ground to the light assembly stud after you scrape some of the paint away to provide a good ground. Do both sides wether the other side has done this yet or not.....cost is nada if you have some electrical connectors, and solder already
The following 12 users liked this post by Brutal:
Bob OB (11-11-2013),
cjd777 (10-05-2014),
dmo (12-03-2014),
Don B (07-20-2016),
IcallherAJ (12-14-2010),
and 7 others liked this post.
#3
03-27-2010, 01:29 PM
Veteran Member
The following users liked this post:
Orthodixie (11-04-2017)
#4
03-27-2010, 01:48 PM
Join Date: Sep 2008
Location: Damon /Houston, Texas
Posts: 7,254
Received 2,183 Likes
on
1,355 Posts
The following 3 users liked this post by Brutal:
#5
03-27-2010, 01:53 PM
Veteran Member
The following users liked this post:
Bob OB (11-11-2013)

#7
03-27-2010, 06:31 PM
Common problem i have for years been soldering a new ground wire to the back of the light along the ground strip of the circuit board. You can screw or pop rivit a new ground wire whatever you want, then crimp a eyelet onto the other end of the wire and ground to the light assembly stud after you scrape some of the paint away to provide a good ground. Do both sides wether the other side has done this yet or not.....cost is nada if you have some electrical connectors, and solder already
When I saw what happened, my first thought mirrored your explanation. Too much for a small ground wire. Considering the size of the ground cable just below in the fuse box, I thought running a larger wire from the assembly to this ground point wouldn't hurt anything.
That would be me!!
You know it's spring when all sorts of interesting cars start showing up in my driveway.
The following users liked this post:
sklimii (11-18-2012)
Trending Topics
#8
03-28-2010, 04:56 PM
The following 10 users liked this post by hacker-pschorr:
b6283 (10-05-2014),
Bob OB (11-11-2013),
Don B (07-20-2016),
gwagner (03-07-2013),
linkspider (03-05-2013),
and 5 others liked this post.
#10
03-28-2010, 05:16 PM
Veteran Member

#12
05-28-2010, 08:53 PM

Member
yes job well done and great advice, i too had a similar problem. brought it to a garage but what you did with your tail light assembly is far better. the rivet idea is just genius.
Last edited by daviddrift; 05-31-2010 at 09:16 PM.
#13
12-14-2010, 12:15 PM

Junior Member
#15
12-16-2010, 04:27 AM

Senior Member
Thats really a cool idea, I never would have thought of that. I had one XK8 about a year ago that was having the same issue, the only problem is that everybody else in the shop had been fixing the ground everytime this guy came in. In the end I put a new trunk harness in the car.
#16
12-17-2010, 09:24 AM

Senior Member
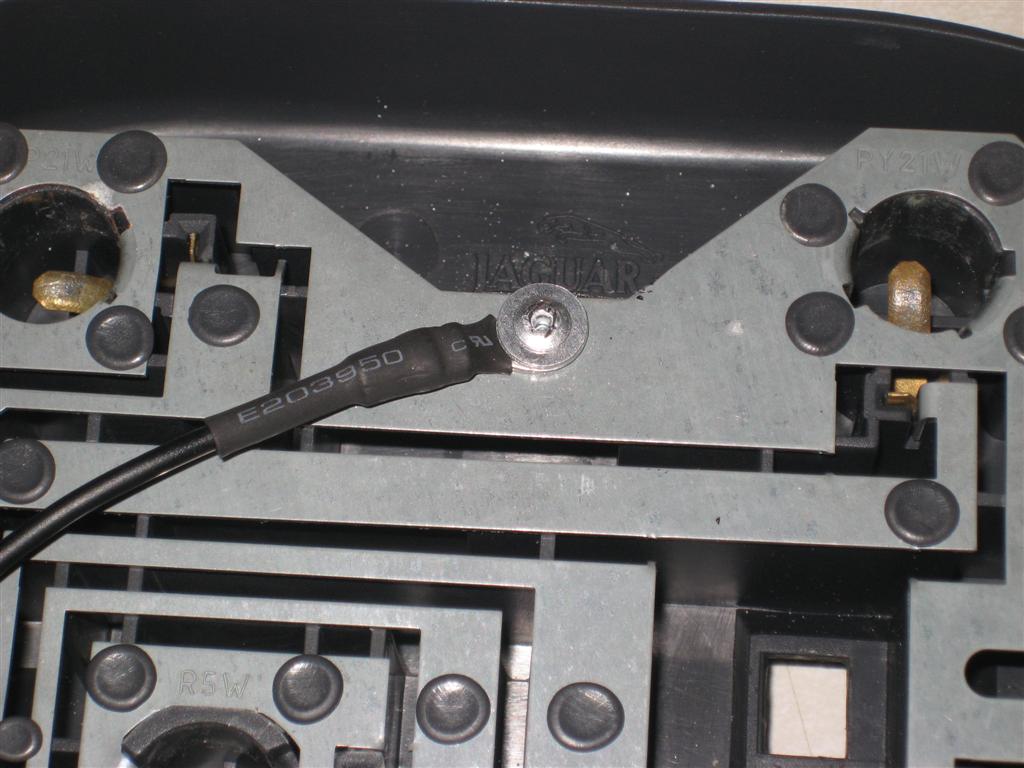
As a preventative measure, I did this yesterday (before I melted the connector -- I have some spare time, and I've become obsessed with this car!!).
I had a problem though. Where you put the rivet interferes with the body opening. If you look it dips down between the two upper bulbs. So, I moved it closer to the inboard bulb to eliminate the interference. I should have taken pictures, but I don't know how to post them yet. Anyone thinking of doing this should move the hole for the rivet. Oh, and you don't have to run the wire through a hole in the housing..just attach it to the inner tail lens stud--after scraping the paint) Otherwise it's a very good fix.
Okay, I better take pictures huh.
#18
12-18-2010, 11:02 AM
For the record, Brutal suggested this fix in post #2 - credit due 
I didn't notice anything rubbing, I'll double check the next time my mother stops over with the car (spring...) or when I'm at their place for x-mas.
Did I mention her Jag has almost 160k on it now with only routine maintenance except for a trans selector switch?
Anyway, I ran the new ground outside the housing because of the way the pin in the connector looked.
#19
06-05-2012, 01:58 PM


