When you click on links to various merchants on this site and make a purchase, this can result in this site earning a commission. Affiliate programs and affiliations include, but are not limited to, the eBay Partner Network.
Is there a 'smart' way to remove the plastic cover of the front seat tilt knob (the one in the backrest)? With smart I mean without breaking it :-)
I want to remove the backside of the backrest. The blatter of the lumbar support is inflating fine but it seems to be leaking. After 30 seconds or so the blatter is empty again. I read in another thread on this forum that the blatter can be quite easily sealed again.
There are two screws behind the plastic cover that I need to get to. And I'd like to get the little plastic cover off without breaking it. So far I haven't found the tric to do it nicely....;-)
If anyone can give me clue that would be highly appreciated.
Thanks for this info. Tried it this afternoon but so far the score is 2:0 in favour of the knob hahaha! Did break the surrounding plastic though.... Will give it another go later this weekend.
I was lead to believe the blatter is made of rubber. So my intention is to fix the leak like you fix the tire of a bicycle.... put a plaster on it with special glue. Will let you know when I make progress.
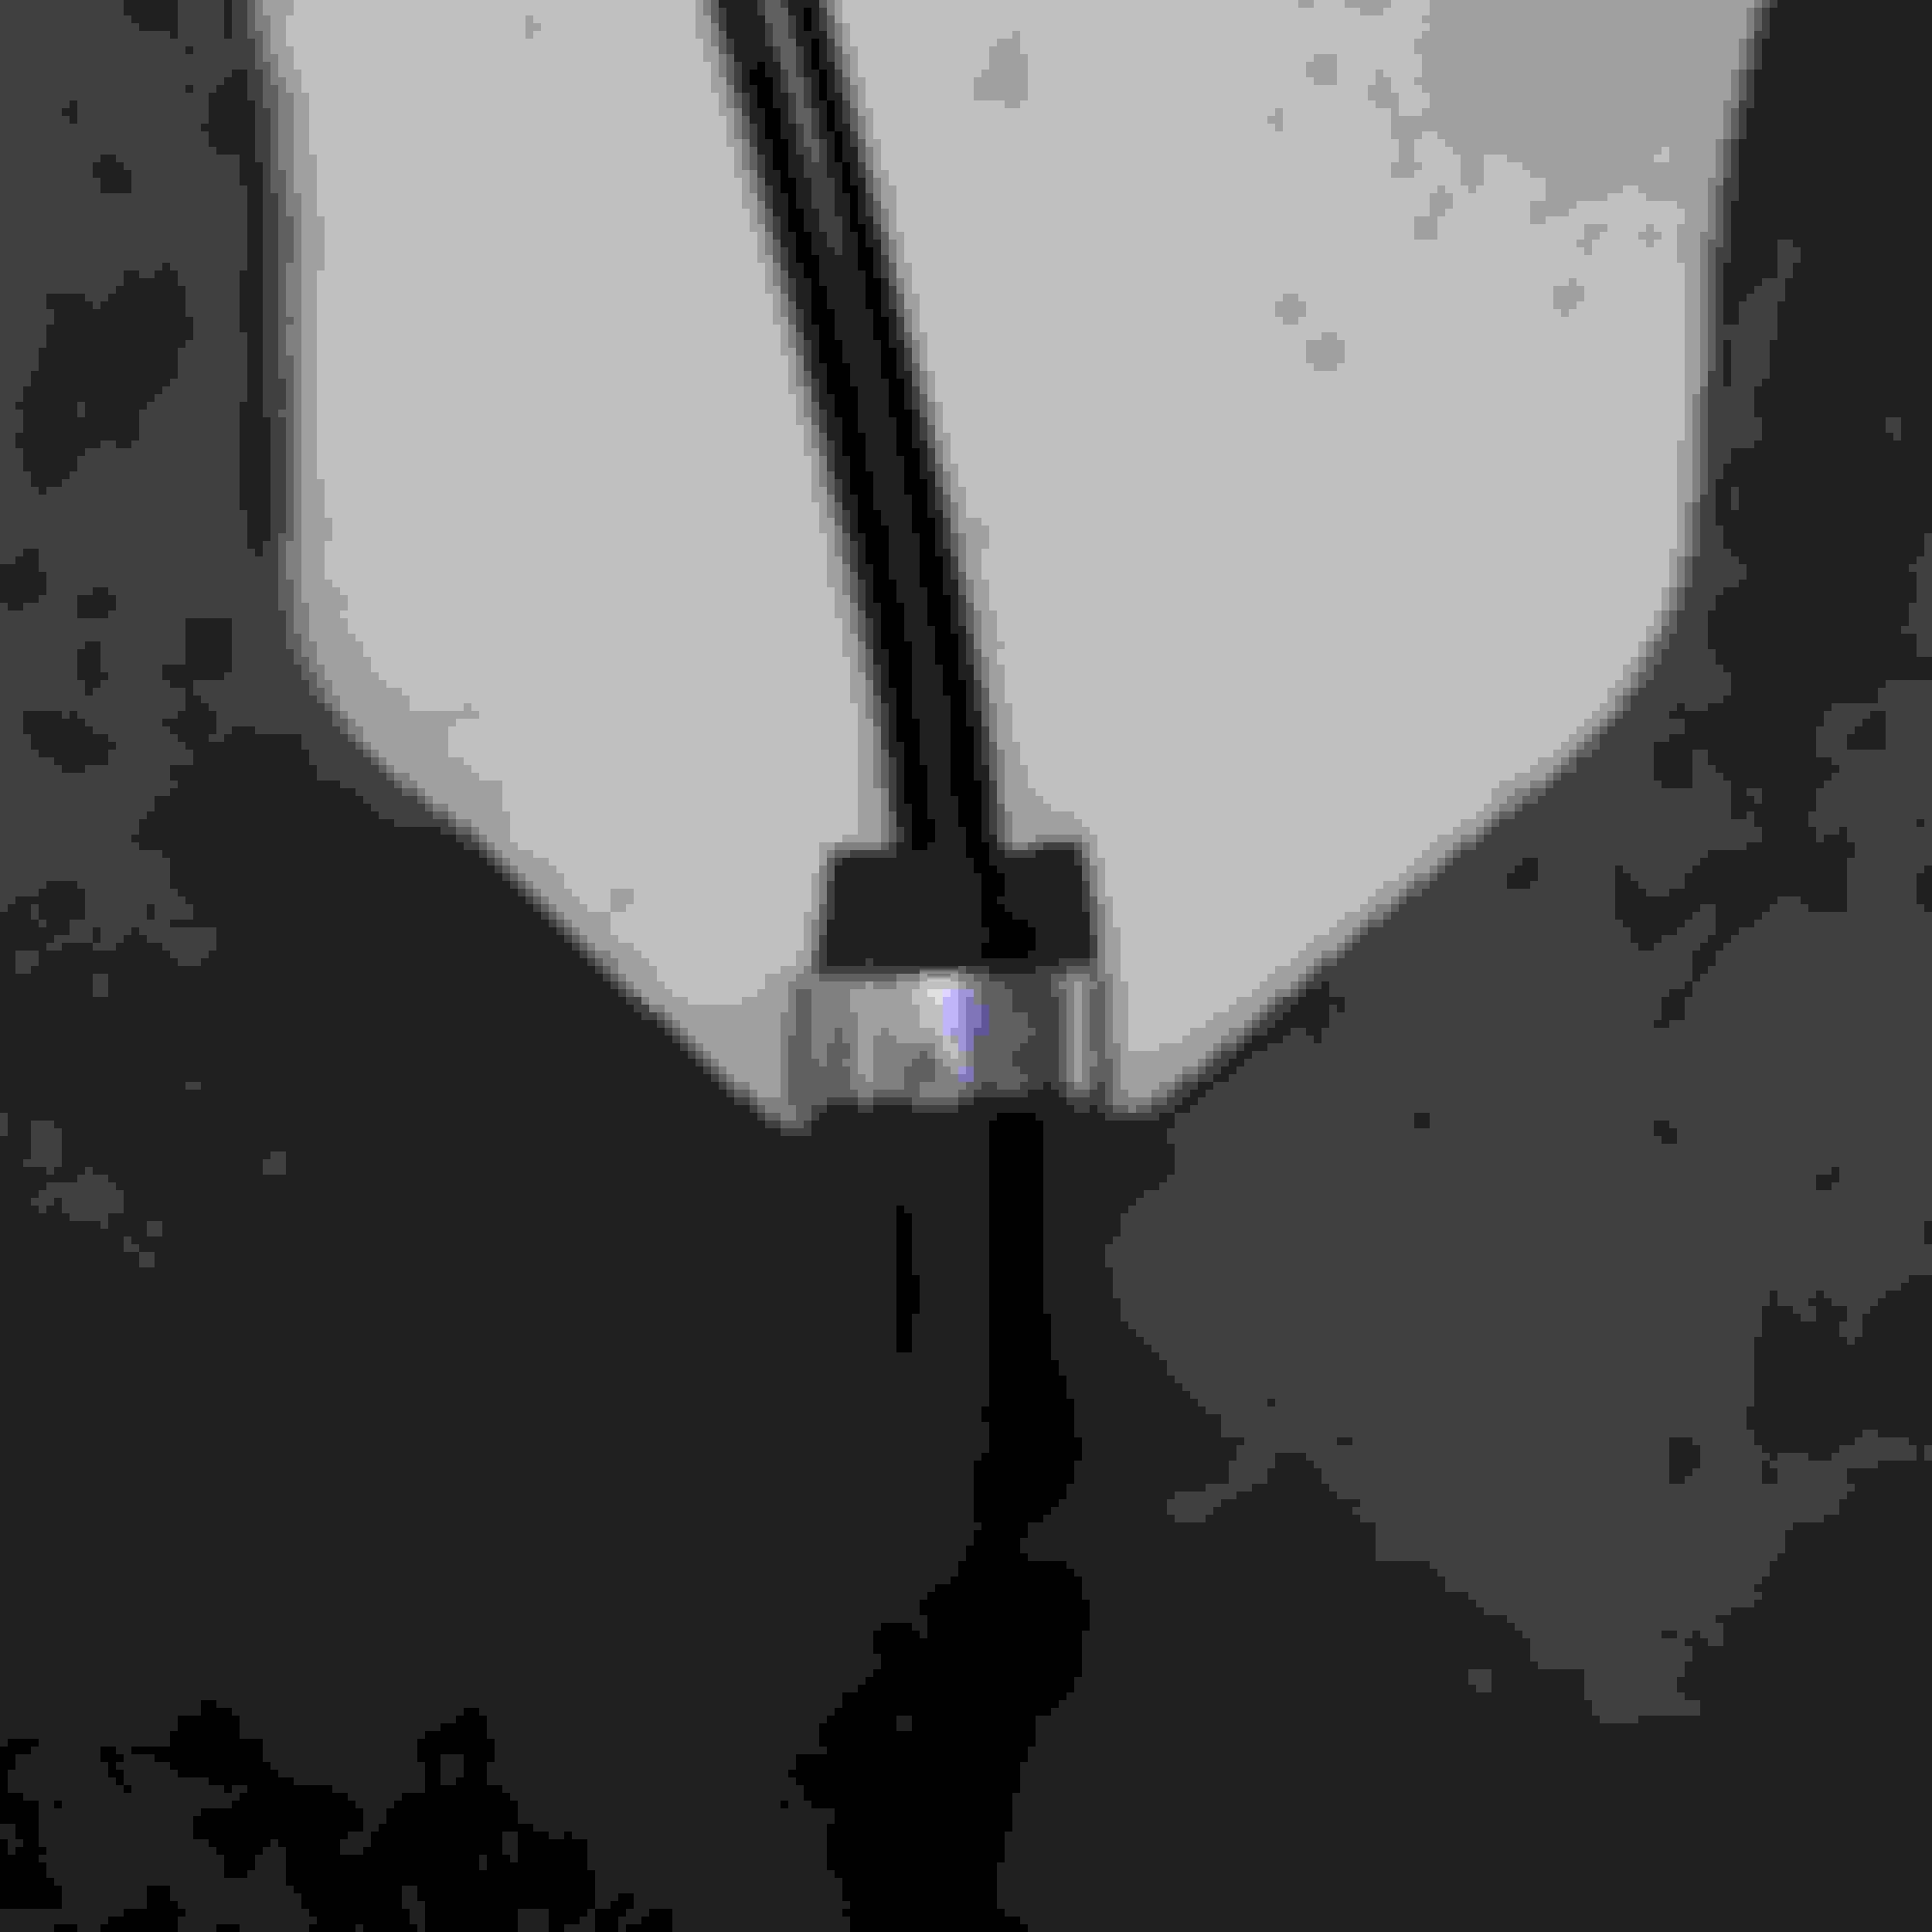
Front the JTIS picture, there is a hole shown on the side of the knob. On the lever arm there is a tab that snaps onto this hole to hone the knob on.
If I recall, you can lift the lever up and get a small screwdriver in there from the bottom side to lift the plastic and wiggle it over the tab.
Unfortunately I don't recall whether the tab faces the front or the rear of the seat, but it was defiantly only one side, even though I the knob is universal and has a hole on both.
Last time I checked, Jaguar still stocked these parts, so they probably can be replaced with new if the old brittle plastic breaks upon removal. They are a bit pricey though, and you will need to specify the correct interior color code from the door jamb.
Took me some time between my last post in this thread and today to get back to the forum. Main reason: birth of our first granddaughter
After I received the new knob from the dealer I started to take backrest of the seat apart. I broke off the old knob and removed the two screws behind it and removed the two screws at bottom of the backrest.
That made it move a little but not enough to pull it off. In order to get more room to manouver I decided to take the seat out of the car by removing the four tork screws which hold it to the chassis.
In order to get to the lumbar support blatter I started to unhook the front side leather from the backside. The leather is actually hooked into the backside with a series of metal clamps with teeths holding a rubber band that is seawn into the leather.
This felt like a tricky part as you do need some force but don't want to break the clamps nor the leather. I unhooked both left and right side until almost half way up the backrest. Going up higher seemed quite difficult as the clamps higher up did not feel like co-operating. Than I got the idea of folding the lower part of the leather front side a bit forward. That gave me just enough access to the lumbar support blatter. The blatter itself is fixed to the frame of the chair with six little metal hooks that can be easily taken out of the frame. Below are two pictures of the unhooked blatter laying on the seat. Sorry for the poor quality.
Then I had to find out where it was leaking. So I took a little dishwashing soap, put it on the blatter and started to squeeze it. I soon found out the leak was coming from the point where the black hose enters the blatter.
The metal clamp seems quite tight but still there was some air leaking. I couldn't think of any well engineered solution unfortunately. I ended up taking some strong glue and some rope and wrapping the glue soaked rope around the point where the hose enters the blatter.
I let it dry for a night before putting the seat back together in order not to break the glue in any way. First you hook the blatter back into the frame and then reassemble the back rest. Finally putting the seat back in the car of course. I waited another two days to ensure the glue had sufficient time to harden before actually testing it..... And so far so good: the leak seems fixed and my lumbar support is working again. Made me happy!
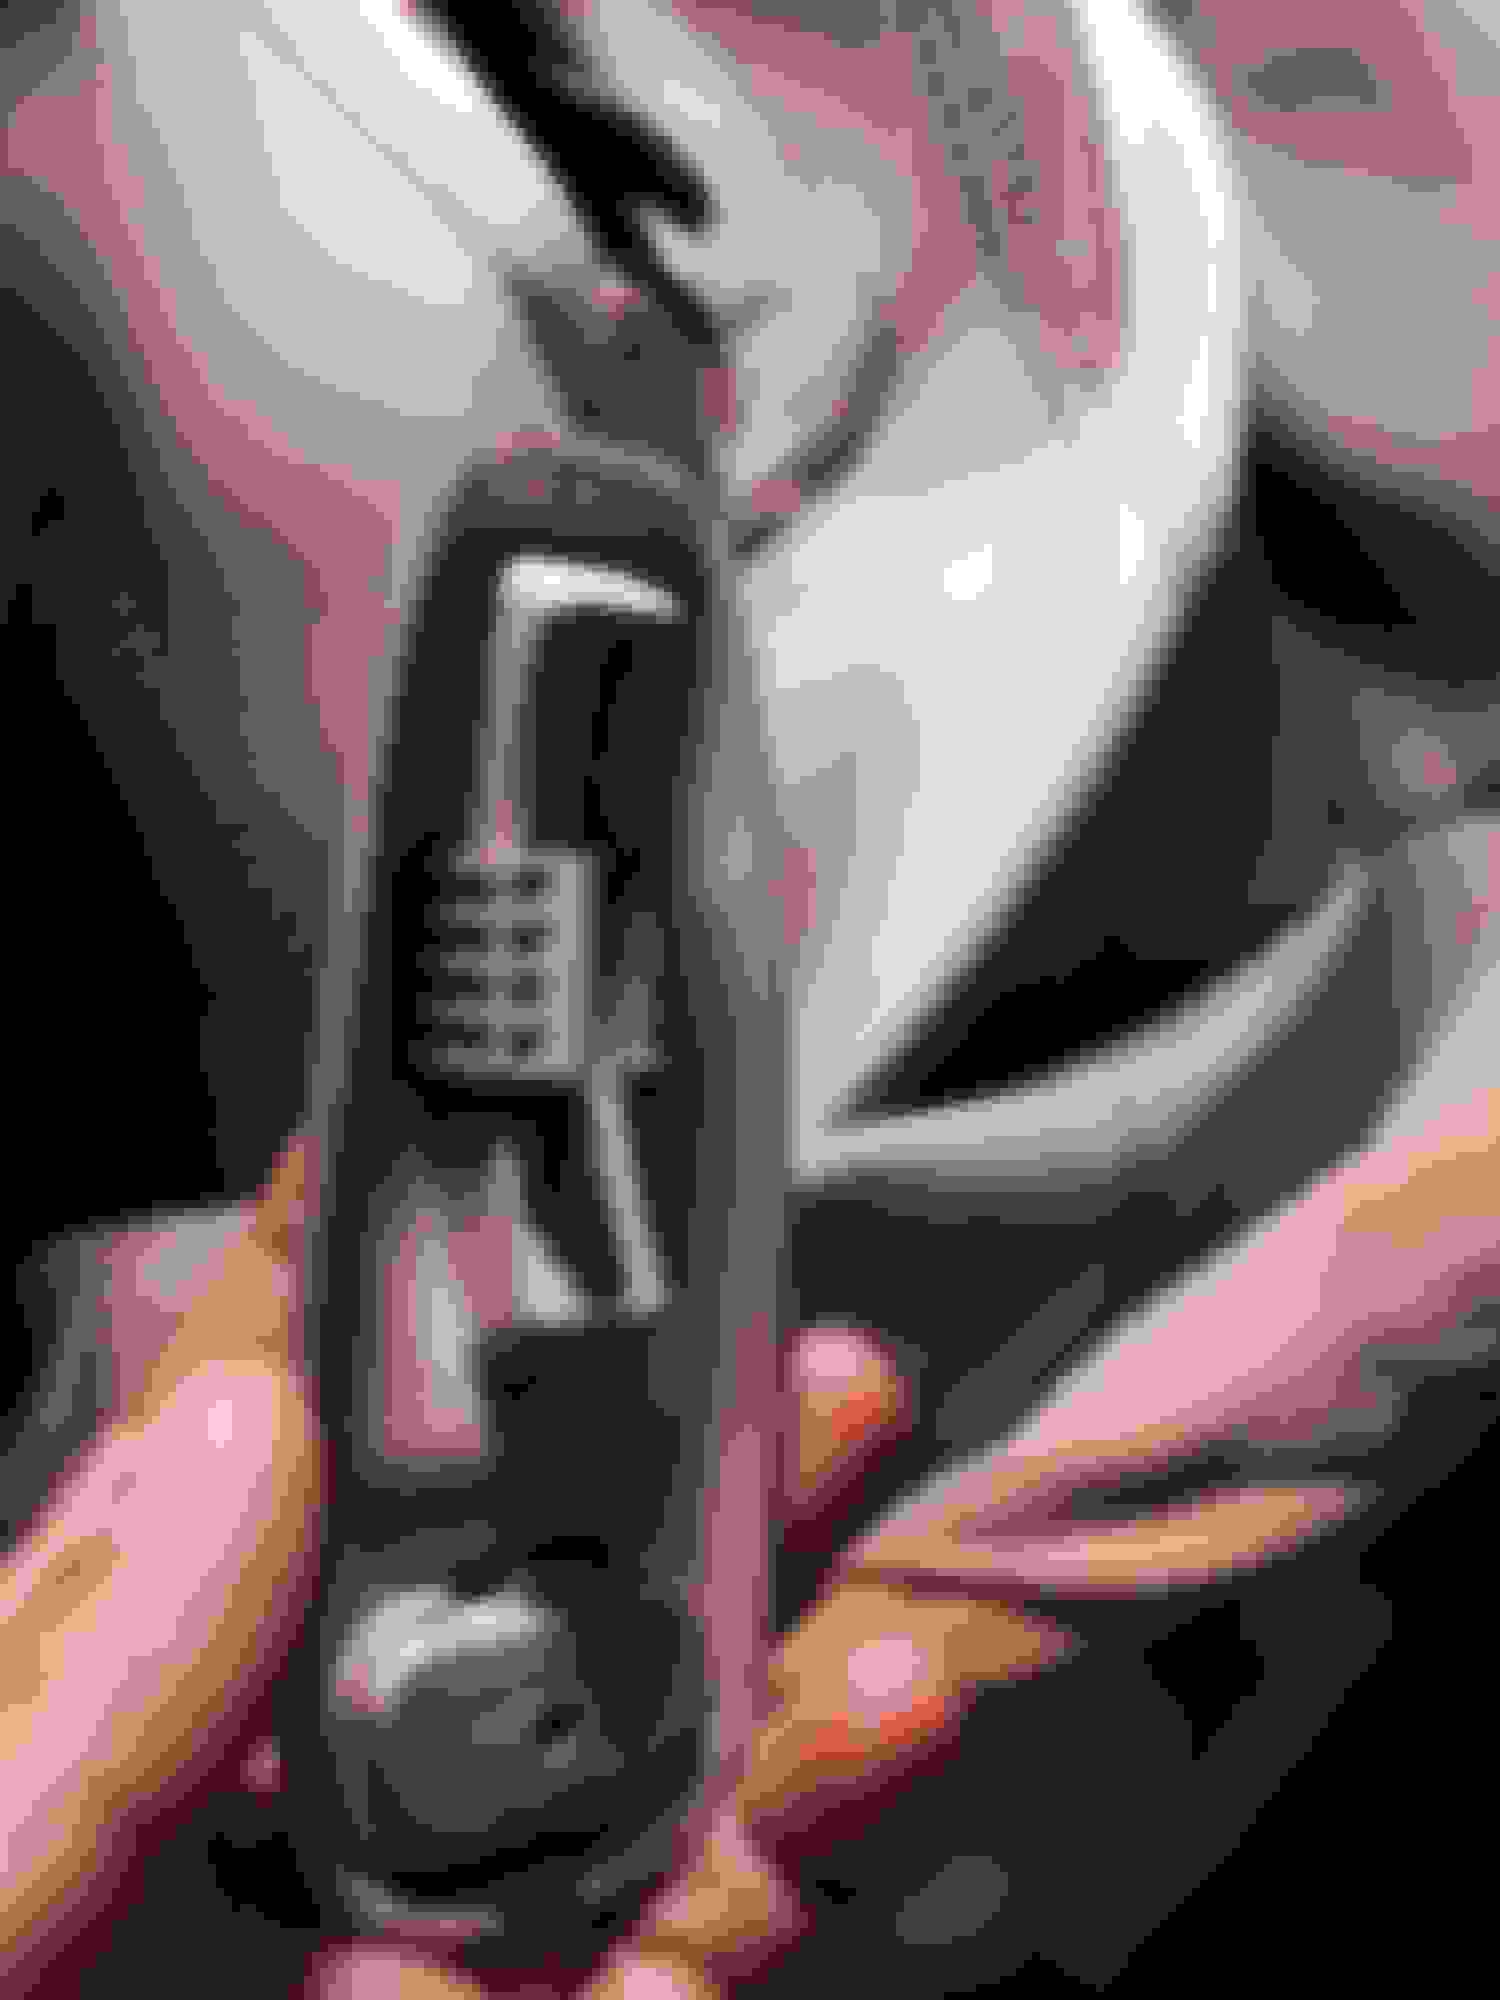
Ugh, so I broke both the knob and the back plate. For anyone who is attempting to DIY on the leather seat cover replacement, to clarify-for the knob removal on the backrest, there is a hook sort of like an eye hook that is on the forward side of the metal lever. You have to finagle the knob down (towards the seat and then out towards the front of the car to avoid breaking it. You can see in the image on my broken knob what you are tying to aviod. The Jtis states there are two screws to remove for my model on the plate but in actuality for the 01 xk8, there is only one screw and its beneath the airbag plastic piece that is easily removed with the small flat head-just pops out and since I was looking for two screws instead of tabs, I managed to also break the back plate because in addition to the one screw under the airbag piece there are two plastic tabs on the back plate that need to be depressed where the lever goes up and down, see the pic for explanation.
Rear seat access knob removed.
Metal lever, you can see the metal tab/hook that is only on the front side of the lever. It's hard to see but its really a hook.
The knob going to the lever. I've already broken it here.
You see where I cracked it-that is the part that is supposed to go over the hook.
I also broke one tab on the back plate.
Back is finally off, but now a new problem...
had to cut off the material on the old covers just to remove them and have no idea how to open these hooks, remove the fabric and reinstall the new one. There is a plastic pipe that goes through this as well. I got the rest under control I think, but I was not expecting this.
Any advise on what tool I need to remove this fabric and connect the new leather? If I could only figure out how to remove the existing, maybe I could fishing line sew the new one from the back fabric through the existing rings.

 04-02-2015, 01:23 PM