When you click on links to various merchants on this site and make a purchase, this can result in this site earning a commission. Affiliate programs and affiliations include, but are not limited to, the eBay Partner Network.
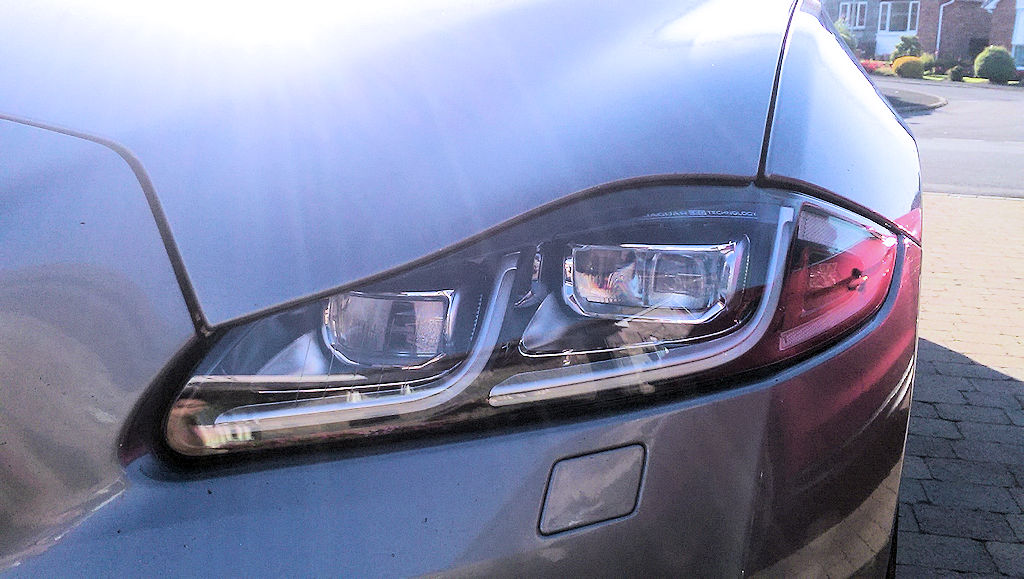
A few of us have now retrofitted the LED headlamps which are an option from the 2016 MY to the earlier X351s. AFAIK all to date have been with the AFS function, but it is possible to retrofit the AFS-less LED lamps to AFS-less bixenon cars too. It may be possible to add AFS at the same time, but I am unsure if the required module is present on those cars.
The retrofit is fairly straightforward with a couple of wiring harness changes to the car which can be done as an add-in harness, and a few relays and power diodes added. With a normal install every function will work except for the static cornering LEDs (for AFS-equipped cars, those are the ones which light up when you turn into junctions at low speed).
It may be helpful to give a brief description of the way the static cornering LEDs work. They are not on-off, they are faded (via PWM) to avoid flashing. The 2010-2015 cars use a PWM signal from the central junction box to control this, but on the 2016 cars as they have integrated PWM LED drivers the cars were modified to send a network command to turn the lamps on and off, which is then handled entirely within the headlamp units.
To mimic this on an earlier car would not be possible without injecting the new messages with some hardware and a small automotive-grade MCU, but that is unnecessary. To get the static cornering LEDs to work you can just open the headlamp units and perform a bit of simple rewiring to have it plug-and-play compatible with the 2010 cars. I say "just" - it is not an easy process by any means, but it is possible.
While you have the units open it makes sense to adjust the connector pins to adopt the earlier pin positions where possible as that reduces the amount of wiring changes you need to make to the vehicle and allows you to keep them 95% plug-and-play compatible, with only minimal wiring changes needed per unit and no external relays.
Pin outs
I will cover the changes later on, but for reference here are the connector pin positions at the LH headlamp (RH is similar). JNC means the central junction box (fuse box), JNE means the engine fuse box, and where mentioned they include the connector/pin and fuse for that circuit.
2010
1 Side Marker LED GND
2 Side Marker LED + (>1) JNC D/12 F25/5 LH Position Lamps
3 Indicator LED + (>12)
4 Static Bending Lamp LED + (16) JNC D/4 Cornering Light LH
5 Level Motor + (>6) JNC D/19 F23/5 AFS Headlamp Levelling
6 Level Motor GND
7 Level Motor Control Signal
8 nc
9 Xenon DIP Beam GND
10 Main Beam Flap (>12) JNC D/28 Main Beam LH
11 Xenon DIP Beam + (>9) JNC D/38 DIP Beam LH
12 Indicator LED + Main Beam Flap GND
13 AFS Motor Control Signal
14 AFS Motor + (>15) JNC D/40 F50/5 LH Headlamp Motor
15 AFS Motor GND
16 Static Bending Lamp LED GND
2016
1 nc
2 nc
3 Indicator LED + (>12)
4 LB Command JNC D/38 O Dipped Beam Signal LH
5 Dynamic Levelling Motor IGN (>6) JNC D/19 F23/5
6 Dynamic Levelling Motor GND
7 Dynamic Levelling Motor DCM
8 SIG PWR JNC D/28 O Signal Power LED Driver LH
9 Lighting GND
10 HB Command (>10) JNC G/27 Mainbeam Shutter LH
11 Battery JNE D/3 F22/15 ??permanent??
12 Indicator LED + SIG GND
13 Dynamic Bending Lamp Motor LIN
14 Dynamic Bending Lamp Motor IGN (>15) JNC D/40 F50/5
15 Dynamic Bending Lamp Motor GND
16 LED LIN Bus JNC E/3 LIN_5
The levelling motor is responsible for adjusting the headlamp throw (up/down) to avoid dazzling oncoming drivers. The AFS motor (dynamic bending lamp motor) is responsible for the left/right swivel of the dipped beam during cornering. Both of those are unchanged between model years and are plug-and-play compatible. Likewise the indicator position is unchanged (although you will need a relay as discussed later), and whilst the main beam operation uses a different lamp in the 2016 lamps the wiring car-side is the same with just another relay needed.
Everything else is different.
Side lamps (parking lamps) and side markers (US markets) are controlled by the internal LED driver based on LIN bus messages that are not present on earlier cars.
Static cornering lamps are controlled by the internal LED driver based on LIN bus messages that are not present on earlier cars.
The LED headlamps are provided with a permanent (unswitched) battery feed which allows the side lamps to work when the vehicle is off and locked. That is not present on earlier cars, but can be adapted from the parking lamp feed.
The dip beam activation has changed but can be replicated easily.
The vehicle indicators must be usable with the ignition off and the vehicle locked (as hazard lights). This requires some changes to allow the internal LED driver to be powered up when the hazard lights are on.
I will split the following steps into two methods �
The first will be if you want to retain all of the 2016 headlamp functionality as well as the option to switch back to the bixenon headlamps which requires opening up the new headlamps and is about 9/10 on the difficulty scale if you have not done it before.
The second will be if you don�t mind losing the static cornering lamps, in which case all the modifications can be made to the wiring behind the headlamps and is about 3/10 on the difficulty scale.
You will need the LH and RH headlamps for your market (they are not compatible). The best place is eBay when people buy them then realise they are not plug-and-play without some effort and sell them on cheap. I picked up mine brand new in original packaging for �300 each.
UK have their own spec, USA have their own spec, but I am unsure about other regions. LHD and RHD are different too.
For
Method 1 - Internal modifications
1.5mm CSA high-temperature oil-resistant wire, e.g. Lapp Lapp 51001. Plus a suitable adhesive-lined heatshrink.
Non-latching 12V 15A automotive relay, e.g. Panasonic JSM1-12V-5. You need 3 per side.
Hertalan EPDM rubber KS96 adhesive sealant (1 tube will do both units and spare).
2-part rapid set epoxy.
SB540 40V 5A diodes (2 per side).
Connector kits (available from various LR specialists, or online from Simtek http://www.simtekuk.co.uk):
CON-266 is the 16 way car-side connector with 12 wires connected
CON-144 is the same connector with 16 pins and grommets for self-termination
CON-466 is the 16 way headlamp-side connector as a kit with 16 pins and grommets.
You will need 1xCON-466 and either 1xCON-266 (if you want pigtails) or 1xCON-144 if you will terminate yourself. I recommend the pigtails unless you have appropriate crimpers.
Method 2 - External adapter harness
(i.e. if you don’t want the cornering lamps and want the easier option of an external adapter harness.)
1.5mm CSA high-temperature oil-resistant wire, e.g. Lapp Lapp 51001. Plus a suitable adhesive-lined heatshrink.
Non-latching 12V 15A automotive relay and enclosure. You need 3 per side. You could use Simtek p/n REL-905 mini relays and their REL-07U 7 way mini relay box to house everything neatly.
SB540 40V 5A diodes (2 per side).
Connector kits (again using Simtek p/ns) - you will need 2xCON-466 and either 3xCON-266 (if you want pigtails) or 2xCON-144 if you will terminate yourself. The reason for the extra CON-266 is because it only comes with 12 wires and you will need 16 per side.
Method 1 - Opening the headlamps to gain full functionality
With these headlamps there are plastic clips, but also the front and back are bedded in rubber sealant. Normally you need to apply heat to gently soften the sealant and allow the unit to be opened, either by baking in the oven or with a heat gun, however the melting point of the PP plastic is lower than that of the sealant used, so that is not an option with these headlamps.
Therefore... a cutting disc is needed. For example a Dremel or similar. You need to cut the entire lip of the PP part of the headlamp approximately 8mm from the outer edge so you take the entire seal with it. (The distance is obvious when you handle the units.) There are two things to note -
1) The inner black plastic moulding with the Jaguar logo on is also bonded to the sealant in two locations along the top (shown in the third photo below) which need to be cut off.
2) The outer bracket cannot be cut off from behind so you need to cut the clear PC front right next to the seam (it will not be visible once installed). In the photos below I have shown the cut position in red pen.
Now that may look like an extreme way to destroy the units, but it is easily repairable with the right materials. The end result will not be a significantly weakened unit.
Side lamps (parking lamps)
It is a regulatory requirement in many countries to have working parking lamps and in the UK any vehicle without them would fail its annual road test (MOT). The parking lamps on the LED units are the DRLs but a bit dimmer and must be active when the vehicle is off and locked. In order to have these work without ignition a relay is fitted inside the unit to switch the LED driver on when the headlamp switch is in the parking lamp position. The parking lamps and driver draw about 1A @ 12V. Refer to the wiring changes later for the changes. This allows the DRL �J�s to be illuminated when the vehicle is parked and the headlamp switch is in the parking lamp position.
A diode is fitted to the parking light supply wire outside the headlamp to prevent it back feeding the rear parking light wires. Why bother if both are used together? Because otherwise the relay that switches them on will be latched open and the rear lights will stay on when the vehicle is locked. We are using the functionality of the junction boxes which keep certain circuits available for a short period after the vehicle is stopped to allow the signature lights to remain on until after the vehicle is locked (mimicking the factory behaviour).
Note - US markets use an additional amber side marker on the outside corner of each lamp. I do not have them on my UK-spec lamps so I was unable to look at whether those work without changes. US owners may need to make additional changes not covered here (if so, please post below with your changes)
Static cornering lamps
These are easy to do - simply locate the connector below. On the factory boards the inner most brown wire is the -VE for the cornering lamps, and the outer most black wire is the +VE. There are no resistors on the board so we need to add a medium value (around 63ohms) to operate the two series LEDs at an effective brightness without drawing too much current.
I cut off the existing connector and isolated the cut wires. Then splice the board connector to the main unit connector as shown later on.
You can retain the two OEM cornering LEDs, or you can replace them with an even brighter version. I opted to replace them as I had to modify the boards to fit the resistors on anyway. I installed L1Q0-5770000001200 (5700K 3535 high-power LEDs), and because it was easier in my mind to have the brown wire as +VE and the black wire as �VE I reversed the circuit flow on the board, but that is entirely up to you.
Unmodified, with lines drawn to show the cuts:
The modified boards, with the new LEDs (optional) and the resistor fitted across the cut (required):
Cover any exposed copper with solder resist or epoxy to prevent oxidisation. The LH board is shown above, the RH board is slightly different but you should be able to work out the changes as the circuits are very simple.
Permanent live (Pin 8 on the 2016 units)
This is the only new wire that needs to be run to each headlamp, and it needs to be 1.5mm CSA from a 15A IGN switched supply. The peak load with full beam, indicators and cornering lamps on, is about 12A @ 13.5V going by the power ratings printed on the units. Testing with an ammeter showed about 7.5A actual draw at 13.5V.
Therefore I spliced the new Pin 8 to the existing Pin 14, which is a 5A F23 in the JNC. I use a relay to combine that with the side marker/position lamp supply which is another 5A active whenever the headlamps are on (auto or manual). With the headlamps off the peak load is about 2A from just the indicators and the LED drivers.
Pin 8 is unpopulated on the earlier cars, so it is easy to add a new wire to that position using the connector kits mentioned in the parts list later.
Note that Pin 14 is the AFS motor supply that is only �drawn� when the motor calls for adjustments. Therefore its normal load is effectively nil, making it a fair candidate. It is also switched by the battery saver relay, which means it will be active for a short while after the vehicle ignition is turned off (on my 2010 MY it switches off when the car is locked, but the battery saver functionality may change with different model years so you should check this if yours is a 2011-2015 MY). It also becomes live upon unlocking the car before the ignition is triggered, which causes the signature lights to come on and turn off with the vehicle locking, just like the 2016 models.
Dip beam activation
This is handled entirely by pin swapping in the headlamp main connector, discussed below.
Headlamp wiring changes
With regards to the 2016 unit-side connector (i.e. the connector attached to the back of the headlamp unit) make the following changes:
PLR = Parking light relay
TIR = Turning indicator relay
HBR = High beam relay
- Pin 1 (new) -> PLR(2,coil)
- Pin 2 (new) -> PLR(3,NO) + (5,coil)
- Pin 4 (move) -> pin 11
- Pin 4 (new) -> +VE corner lamp connector (brown if modifying, else black)
- Pin 11 (removed above) cut off pin and splice to pin 8
- Pin 16 cut off pin and isolate wire as unused
- Pin 16 (new) -> -VE corner lamp connector (black if modifying, else brown)
- Pin 8 (splice) to PLR(1,C), TIR(1,C) + HBR(1,C)
- Pin 12 (splice) to PLR(2,coil) + TIR(2,coil)
- Pin 3 (cut) pin end to TIR(5,coil), cut end to TIR(3,NO)
- Pin 10 (cut) pin end to HBR(5,coil), cut end to RBR(3,NO)
External wiring changes:
- Splice pin 14 to new pin 8.
- Fit SB540 diode inline on pin 2 (A to car, K to connector).
- Fit SB540 diode inline on pin 11 (A to car, K to connector).
Modifications to corner lamp board:
All:
- Cut copper track/fill above outward-most connector strip and fit 63.4 ohm or similar value min 1/4W resistor.
If changing LEDs to L1Q0-5770000001200 or other 5700K 3535 high-power LED:
- Remove existing LEDs and carefully reduce copper pad to new footprint as required
- Fit LEDs A to the right, K to the left (reversed from OEM), or reversed if you are keeping the OEM orientation.
All splices should be heatshrinked with an adhesive-lined sleeve. Pay particular attention to the external changes as they will see driven water.
Note that I opted to splice the diodes into the car-side wiring rather than placing them inside the units. There is no electrical difference between either, but there is limited space for them with the three relays and additional wiring added, and I wanted them to be in free air (heatshrinked) to aid with cooling. They do not affect you if you want to change back to the original headlamps later on (I have tested this on mine).
Reassembly
First � and I cannot stress this enough �test each unit in your car before reassembly of the headlamp unit because it will be permanent! It should be plug-and-play assuming you have run the new power wire as mentioned above (spliced 14 to new 8). Do not skip this step because if you have connected anything wrongly, or your car behaves differently to mine, this is your last chance to make changes!
Those are all the changes needed inside the lamp units. Wrap the relays in a bit of cloth tesa tape to stop any rattling and they fit perfectly on the inside of the housing near to the main connector (there is plenty of space there � see the pink area below), then use the EPDM rubber sealant to reassemble the two halves again. I also used a rapid set two part epoxy every few inches first to give more strength, then sealant over the top. Note that the sealant is not a silicone sealant like you would use in a bathroom - it is a rubber designed for high strength at high temperatures and sets solid. Remember to refix the inner black plastic piece with the Jaguar logo to the body before replacing the clear PC cover as you had to cut off the original fixings when opening it. The sealant takes about 24h to cure fully (can be handled after 4 hours) so the epoxy doubles up as a way to stopping any movement while the sealant cures.
Pay particular attention to ensure that all cuts are fully sealed, especially where you cut onto the front PC lens to avoid the mounting bracket as that will see driven water.
There is a large round rubber grommet on the rear which gives you access to the high beam projector assembly. I placed a sealed desiccant bag inside that hole after assembly to remove any moisture from the air after opening them. You may not need to do that, but it may help to avoid fogging if the air was humid.
I forgot to take a photo of the resealed unit, but they look exactly the same as they did before opening.
Now the headlamps are prepared, and you have added the diodes and spliced ping 14 to a new pin 8 on both car-side headlamp connectors, you can go ahead and swap over the headlamps. I won�t describe that process � I�ve attached the workshop manual pages to this post instead.
Angus (08-17-2016),lcmjaguar (08-24-2016),LiquidIce (08-19-2016),Panthro (11-17-2023),RoonieQ (08-16-2016),XJ8JR (12-04-2018) and 1 others liked this post. (Show less...)
Method 2 � easier option that loses the static cornering lamps
You can cut various harness wires and fit inline relays, but to retain backwards compatibility it is a good idea to use an adapter harness. There is plenty of room behind each headlamp to fit them and tie them neatly out of the way.
Please note I have not tested this approach � I have only designed it on paper � so it may have flaws. If you find any please post the revisions in this thread so others can benefit.
PLR = Parking light relay
TIR = Turning indicator relay
HBR = High beam relay
I have drawn this as a diagram as it is easier to follow that way. A high-resolution PDF version is attached to this post.
Note that the position of the diodes has changed. This is important, else your battery will run flat very quickly if you leave the car with just the parking lamps active.
Last edited by xdave; 08-16-2016 at 04:56 PM.
Reason: adding attachment
You will need the LH and RH headlamps for your market (they are not compatible). The best place is eBay when people buy them then realise they are not plug-and-play without some effort and sell them on cheap. I picked up mine brand new in original packaging for �300 each.
UK have their own spec, USA have their own spec, but I am unsure about other regions. LHD and RHD are different too.
For
Method 1 - Internal modifications
1.5mm CSA high-temperature oil-resistant wire, e.g. Lapp Lapp 51001. Plus a suitable adhesive-lined heatshrink.
Non-latching 12V 15A automotive relay, e.g. Panasonic JSM1-12V-5. You need 3 per side.
Hertalan EPDM rubber KS96 adhesive sealant (1 tube will do both units and spare).
2-part rapid set epoxy.
SB540 40V 5A diodes (2 per side).
Connector kits (available from various LR specialists, or online from Simtek http://www.simtekuk.co.uk):
CON-266 is the 16 way car-side connector with 12 wires connected
CON-144 is the same connector with 16 pins and grommets for self-termination
CON-466 is the 16 way headlamp-side connector as a kit with 16 pins and grommets.
You will need 1xCON-466 and either 1xCON-266 (if you want pigtails) or 1xCON-144 if you will terminate yourself. I recommend the pigtails unless you have appropriate crimpers.
Method 2 - External adapter harness
(i.e. if you don’t want the cornering lamps and want the easier option of an external adapter harness.)
1.5mm CSA high-temperature oil-resistant wire, e.g. Lapp Lapp 51001. Plus a suitable adhesive-lined heatshrink.
Non-latching 12V 15A automotive relay and enclosure. You need 3 per side. You could use Simtek p/n REL-905 mini relays and their REL-07U 7 way mini relay box to house everything neatly.
SB540 40V 5A diodes (2 per side).
Connector kits (again using Simtek p/ns) - you will need 2xCON-466 and either 3xCON-266 (if you want pigtails) or 2xCON-144 if you will terminate yourself. The reason for the extra CON-266 is because it only comes with 12 wires and you will need 16 per side.
If they handed out awards for most-helpful member, you would be taking home a trophy. What a stupendous effort at sharing your working knowledge and experience.
A HUGE thank you for this and your dedication to helping your fellow forum members. Wow!
I second that! xdave thank you for documenting this procedure that is the Ultimate guide for the LED Headlamp modification. I cannot get over your complete and detailed procedure. We are the definitive Jaguar Forum and I am glad to be a member of it. Again thanks is too small a word to say for what you have done.
Woooow I don't know what to say but what can I say is thank you very much for your time and effort for us many thanks my friend I already forwarded to my electrician guy hope will be helpful to him. Thanks again.
The adapter approach (the second one above) is fairly easy though. If you can't do it yourself 1 hour with an auto electrician will have the changes done and another hour if you want them to fit the headlamps too.
The harnesses will cost about �40 to make up based on a quick in-head count, but don't pay more than �500 a headlamp unless you really want those signature lamps. At �300 each I considered it good value, but I did it 20% for the looks and 80% because I wanted to see if I could do it.
A couple of weeks ago I noticed one of the lamps had been misting up where the full beam lamp is, both on the plastic cover and the projector lens.
As they are sealed units I took the back rubber cover off and inserted a plastic tube connected to a low-powered heat gun (basically a luke-warm hair dryer) to try and evaporate the water and force it out. The benefit of using the tube was that I could place the gun in my garage in a box with some desiccant to reduce the moisture going back in.
It worked well and the condensation did not come back. Then this afternoon after a trip out in the rain I noticed the signature blades flashing and then the indicator in that headlamp stopped working, shortly followed by the dip and main beams. Close inspection with a torch shows a few mm of standing water in the bottom corner of the unit, which means the circuit board on that side of the lamp which controls some of the lighting function was submerged. That'll explain why the lamps have failed!
I haven't removed the unit yet but I suspect I must have missed a small part of the seam when I resealed it which has allowed driven water in. Darnit. I will remove it, open it up again and clean and test it, but I suspect I will need a new donor lamp to replace it.
Good job I wrote the instructions on this thread so I can remember what to do!
I removed the the failing lamp from the car at the weekend and opened it up to see if I could repair it. Although I was not able to locate where it had entered, there were signs that water had entered the unit so I obviously didn't seal it correctly. There was corrosion on the main driver connector and inside the sealed driver unit itself. I cleaned up the connector and replaced the driver and it now works as before.
I am just waiting for the replacement rubber sealant to set and then I will test it. I'm going to spray it with a hose when it has set and check for ingress before putting it back on the car.
So to emphasiss the comment in my earlier instructions - make absolutely sure you reseal the units completely!
I nearly lost hope that I just paid �1000 for headlights I can't fit! I recently bought a xjl 2012 which I am repairing as it's been in a heavy collision. I own a bodyshop in dunstable and had 2 questions Dave.
1 are there any resistors that need to be added as I've read in another post for method 2?
2. how much will you charge to come and attempt it for me at my bodyshop! thanks!
Nasser - I forgot to update the thread again! Since my fix for water ingress the lamp has been faultless. They have totally changed visibility at night and reflect off road markings well outside the direct beam so road signs and anything else reflective are illuminated without shining into oncoming eyes.
Qas -
1. The only resistors I added were for the cornering lamps, which do not apply to method 2.
However it is important to reiterate that method 2 was done on paper based on what I did for method 1 so whilst electrically it makes sense I cannot guarantee it until I've actually seen it put into practise.
Maybe someone who has read this thread has done that method and could report back with their result?
You mention you saw another guide for fitting the lamps. Could you share it so I can take a look?
2. Nothing, because sadly I can't do it. Way to many liability issues with headlamps, and insurance companies will not accept a gentlemans agreement if an accident involves fatalities. I limit mods I do for others to infotainment and non-critical systems like the illuminated vents, etc.
That said, I could be persuaded to make up a pair of adapter cables as a test so we can prove method 2 works if you would like to assist. You could perhaps buy them to use as "educational aids" for making your own... (Only the once though, once proven I will not make any more.)
the other post is one that I just realised you contributed heavily to, however on the 3rd page another member describes his electrician putting resistors in the fuse box and attaches pictures which are still in the post titled "2016 xjl headlight retrofit?"
I would be more then happy to finance and purchase any educational aids to test your method. my xjl is firmly off the road as I still have to cut the quatre panel of to put a new one on.
In testing an adapter for Qas I discovered a functional issue with the earlier design. It is not a major issue, and only affects vehicles with AFS some of the time. If the ignition is started with the headlamp stalk in the full beam position and the dipped beam is active (e.g. auto lamps are selected) then the AFS system will fail to initialise about 1 in 5 times. The car then needs restarting for the lamps to function correctly.
If anyone else has used the instructions here to retrofit the lamps to an AFS-equipped vehicle, please can you try a few ignition on/off cycles to test if you see the issue? I want to work out if it is due to me using a faulty lamp unit to test with. I only have one unmodified lamp available, and the symptom does not exist with my modified lamp units. Functionally the changes are the same, but the components used are different.
1) Enter car and select dipped beam and full beam on
2) Start ignition (not the engine)
3) Wait 5 seconds and see if the AFS system fails to initialise. If it fails you will see a warning lamp (but no message) on your instrument cluster.
4) Turn off ignition
5) Lock and unlock the car using the keyfob to remove the power from the AFS module and reset it
If you repeat about a dozen times and do not see a fault it may be that my spare lamp is faulty. If you do see the fault please could you message me or reply with the relay you used to switch the LED driver power on and off so I can look up the datasheet?
I want to purchase EURO spec LED lamps. If anyone knows - please let me know. or maybe if anyone knows if UK spec can be changed to EURO - would appreciate.
 08-16-2016, 02:56 PM