Headliner renewal X350
#1
 06-12-2016, 10:47 PM

This may be a long post but I though it might be good to share a few things learned while doing this work on our current 2004 XJ8. I didn't start with pictures but took them while putting it all back together so I will be showing them in reverse order.
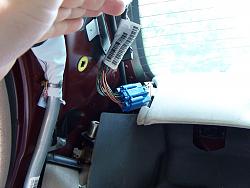
Firstly, you will need to remove the pillar covers front and rear. Simply pull them toward you to release them from the push on fasteners that locate them, and pop the last one out sideways. One will need to be released from its tether by sliding it out from the back of the panel. There are wire connectors at all four corners that will need to be unplugged before the headliner can be removed. The connectors at the rear C-pillers can be difficult to unplug, especially the one on the drivers side rear. This will require removal of the rear seat which should be done anyway.
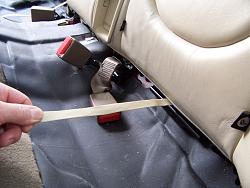
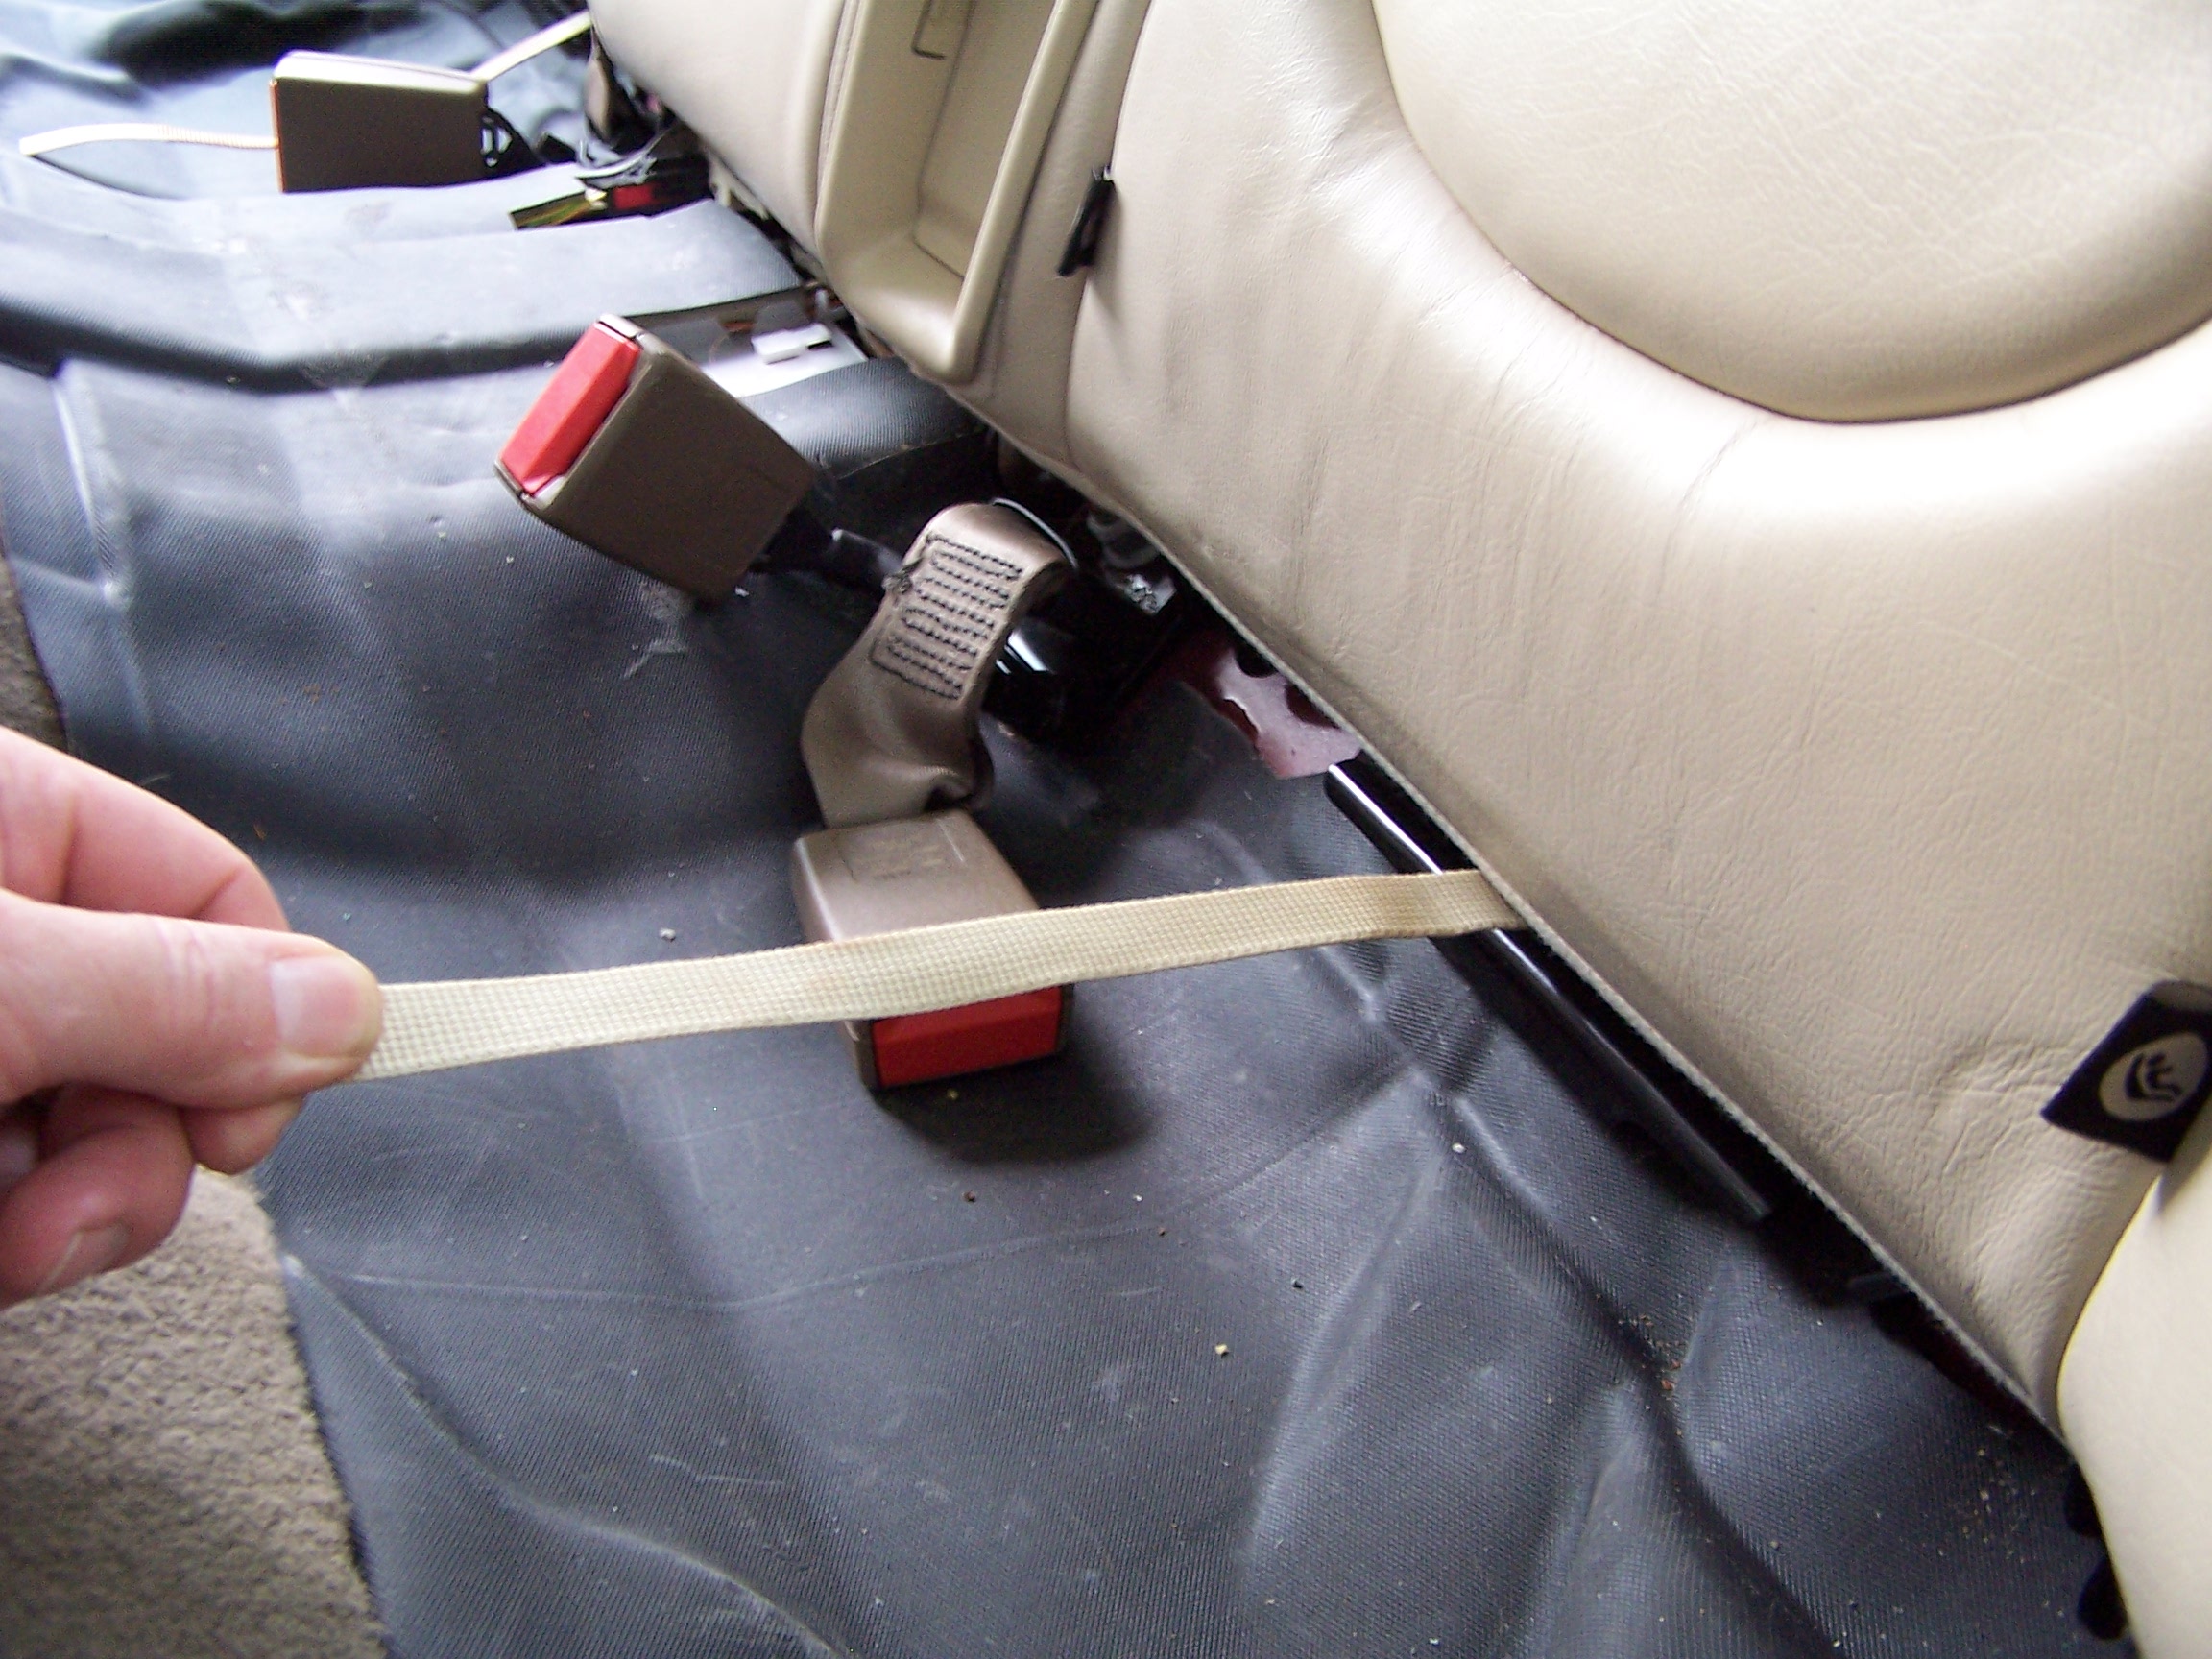
Removing the seat is much easier than one might expect. You need to find the 4 latches along the front edge of the lower seat portion to release the cushion.
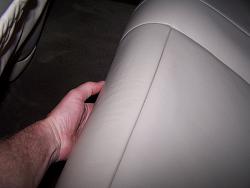
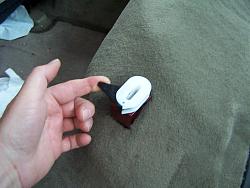
If you slide your hand along the front edge you will feel them. They need to be pulled toward the drivers side (left side here in the states) of the car to release the pin. The trick is to hold each one up as it is released while moving on to the next one as it will naturally want to settle back down on you. This may take a couple of attempts. Once released the cushion lifts right out very easily as it quite light weight. Here is a picture of the mounts that you will be feeling around for.
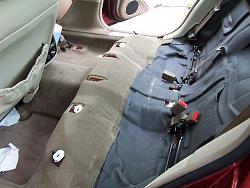
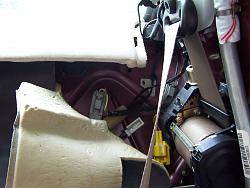
Removal of the seat back is as simple as pulling on two straps one on either side of the car.
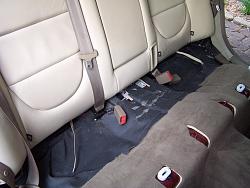
Again, it is a little tricky to keep one released while trying to undo the other. The seat back is heavy in comparison to the base. This will allow easy access to connectors located behind the rear seat back.
Once this is done you can start to remove sunroof and overhead console trimmings. Sunroof trim simply pulls down with a little effort. Console mostly just pulls out also and has connectors behind it. The mirror trim and wire connections will also need to be removed/disconnected as well.
A small screwdriver will give you access to the retaining screws for the visors and side pull handle above the doors. The handles have lights and connectors that will also need to be unplugged to fully remove them. The visors will require you to remove with the small screwdriver a little cover piece that will allow you to pinch together the retaining tang that holds the visor pivot/retainer in place.
I'm sure I may be forgetting a few small details as I did this over a month ago and didn't document everything along the way. But anything that I missed should be fairly self evident while doing the job.
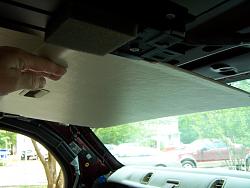
With all of the hardware removed and the wires disconnected you will be able to remove the headliner out one of the rear doors. This will require a little bit of compression of the headliner shell to accomplish removal.
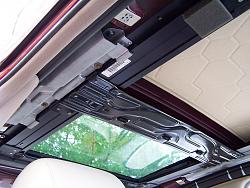
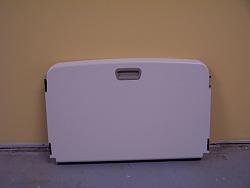
To remove the sunroof hatch cover one does not need to fully remove the whole assembly. First remove the stiffening plates, one on either side of the unit and this will give you access to all of the screws that hold the sunroof in place. Simply loosen the front two a few turns and the ones foreword most on either side you will need to loosen a little farther. Remove all the the rest toward the rear half and you will be able to tilt the whole unit down far enough to remove the panel out the back. You will have to flex the front edge of the panel down a little to get the handle portion past the frame toward the middle of the unit but once past this it will come straight out the rear.
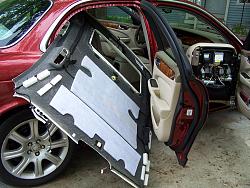
Now comes all the joy of removing the old liner and it's associated glue. The fabric comes off easily and the glue isn't too bad either, just time consuming. Make sure to remove all of the glue as any that is left over may show as lumps through the new material. This may not be as much of a concern with foam backed fabric but I chose not to use a foam backed material to avoid the same failure in the future. Once removed, the shell and door will look like this:
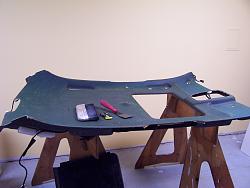

The tools I chose to remove the glue were simple: Scraper, razor blade and stiff bristled brush, along with a shop vac. The scraper has rounded corners so as to avoid digging into the headliner shell itself. The razor is to clean glue residue from the blade of the scraper and the brush is use to sweep away glue quite often, along with the shop vac.
One only needs to drag the scraper perpendicularly across the surface a simply "roll" off the glue residue. This will take some time to get it completely removed, which may not be as important when replacing with another foam backed material. But since I chose to use a vinyl instead, it needed to be very clean to prevent any chunks from showing through the finished product.
After much research I chose to go with the 3M Hi-Strength 90 spray contact adhesive. Vinyl top cement might be better or some other professional product. But this was convenient and readily available.
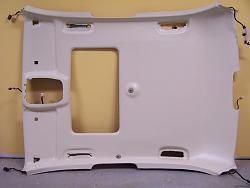
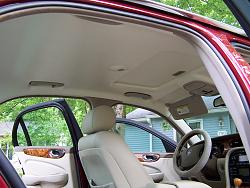
Here is the finished product:
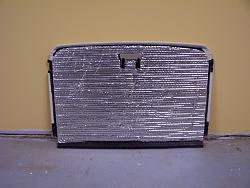
While I was at it, I chose to cover the top side of the roof panel with a reflective barrier (since I had some kicking around) to help with heat rejection when closed. And since the roof glass is tinted you really don't notice it unless you get up real close to take a look.
As suggested elsewhere on this forum I did unbolt the passenger seat and rotate it sideways and forward to get the finished shell back into the car. It does seem to come out a lot easier than it goes back in. It's funny, when I first removed it, all I did was to tilt the passenger seat all the way back with the seat fully forward.
Here is the finished product:
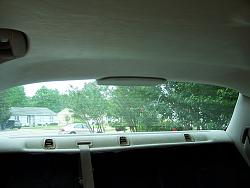
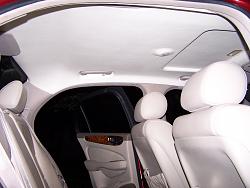
Finally, no sagging headliner or flapping sunroof panel, hooray!
At a future time I will cover the front pillars, rear C-pillers as well as the faded rear package tray. We went with the off white as it is classy looking, ties in well with the other existing colors and accents the accessories that attach to it.
I hope that this will be of some assistance to anyone else who may be tempted to try this themselves. None of it is fun but the results speak for themselves and it is sure worth the effort.
Firstly, you will need to remove the pillar covers front and rear. Simply pull them toward you to release them from the push on fasteners that locate them, and pop the last one out sideways. One will need to be released from its tether by sliding it out from the back of the panel. There are wire connectors at all four corners that will need to be unplugged before the headliner can be removed. The connectors at the rear C-pillers can be difficult to unplug, especially the one on the drivers side rear. This will require removal of the rear seat which should be done anyway.
Removing the seat is much easier than one might expect. You need to find the 4 latches along the front edge of the lower seat portion to release the cushion.

If you slide your hand along the front edge you will feel them. They need to be pulled toward the drivers side (left side here in the states) of the car to release the pin. The trick is to hold each one up as it is released while moving on to the next one as it will naturally want to settle back down on you. This may take a couple of attempts. Once released the cushion lifts right out very easily as it quite light weight. Here is a picture of the mounts that you will be feeling around for.


Removal of the seat back is as simple as pulling on two straps one on either side of the car.

Again, it is a little tricky to keep one released while trying to undo the other. The seat back is heavy in comparison to the base. This will allow easy access to connectors located behind the rear seat back.


Once this is done you can start to remove sunroof and overhead console trimmings. Sunroof trim simply pulls down with a little effort. Console mostly just pulls out also and has connectors behind it. The mirror trim and wire connections will also need to be removed/disconnected as well.
A small screwdriver will give you access to the retaining screws for the visors and side pull handle above the doors. The handles have lights and connectors that will also need to be unplugged to fully remove them. The visors will require you to remove with the small screwdriver a little cover piece that will allow you to pinch together the retaining tang that holds the visor pivot/retainer in place.
I'm sure I may be forgetting a few small details as I did this over a month ago and didn't document everything along the way. But anything that I missed should be fairly self evident while doing the job.
With all of the hardware removed and the wires disconnected you will be able to remove the headliner out one of the rear doors. This will require a little bit of compression of the headliner shell to accomplish removal.

To remove the sunroof hatch cover one does not need to fully remove the whole assembly. First remove the stiffening plates, one on either side of the unit and this will give you access to all of the screws that hold the sunroof in place. Simply loosen the front two a few turns and the ones foreword most on either side you will need to loosen a little farther. Remove all the the rest toward the rear half and you will be able to tilt the whole unit down far enough to remove the panel out the back. You will have to flex the front edge of the panel down a little to get the handle portion past the frame toward the middle of the unit but once past this it will come straight out the rear.


Now comes all the joy of removing the old liner and it's associated glue. The fabric comes off easily and the glue isn't too bad either, just time consuming. Make sure to remove all of the glue as any that is left over may show as lumps through the new material. This may not be as much of a concern with foam backed fabric but I chose not to use a foam backed material to avoid the same failure in the future. Once removed, the shell and door will look like this:


The tools I chose to remove the glue were simple: Scraper, razor blade and stiff bristled brush, along with a shop vac. The scraper has rounded corners so as to avoid digging into the headliner shell itself. The razor is to clean glue residue from the blade of the scraper and the brush is use to sweep away glue quite often, along with the shop vac.
One only needs to drag the scraper perpendicularly across the surface a simply "roll" off the glue residue. This will take some time to get it completely removed, which may not be as important when replacing with another foam backed material. But since I chose to use a vinyl instead, it needed to be very clean to prevent any chunks from showing through the finished product.
After much research I chose to go with the 3M Hi-Strength 90 spray contact adhesive. Vinyl top cement might be better or some other professional product. But this was convenient and readily available.
Here is the finished product:


While I was at it, I chose to cover the top side of the roof panel with a reflective barrier (since I had some kicking around) to help with heat rejection when closed. And since the roof glass is tinted you really don't notice it unless you get up real close to take a look.
As suggested elsewhere on this forum I did unbolt the passenger seat and rotate it sideways and forward to get the finished shell back into the car. It does seem to come out a lot easier than it goes back in. It's funny, when I first removed it, all I did was to tilt the passenger seat all the way back with the seat fully forward.
Here is the finished product:


Finally, no sagging headliner or flapping sunroof panel, hooray!
At a future time I will cover the front pillars, rear C-pillers as well as the faded rear package tray. We went with the off white as it is classy looking, ties in well with the other existing colors and accents the accessories that attach to it.
I hope that this will be of some assistance to anyone else who may be tempted to try this themselves. None of it is fun but the results speak for themselves and it is sure worth the effort.
The following 24 users liked this post by Jagman99R:
ablairato (07-09-2019),
abonano (06-13-2016),
Clamdigger (06-17-2016),
clivee (04-01-2022),
Dan R (08-13-2018),
and 19 others liked this post.
#2
06-13-2016, 01:17 AM
Senior Member
#3
06-13-2016, 01:41 AM

Member
#4
06-13-2016, 11:24 AM

It's funny you posted today. I have the flappy sun roof syndrome as well as some bubbles in the A pillar headliner on my 06 Super 8.
Took it to a well established upostery shop and he quoted me $400.00 for a new black suede headliner. $300.00 for a standard factory replacement. The price blew me away-expecting $600-$1000.00.
Now the question. I want to go to black from the standard grey. This would require :
1. Redoing the A,B & C pillars(down to the floor at the B & C pillars) and the sun visors.
2. Painting black all the grey colored plastic trim in the headliner.
I did note the side air bags in the headliner grab handles. What's involved in remove/reinstall these items?
Will take before and after pics. Bringing to the shop today to start the project.
Most likely + $100.00 xtra or so for the paint & visors.
Last edited by mberman; 06-13-2016 at 11:35 AM.
#5
07-11-2017, 10:35 AM

Veteran Member

#7
10-22-2017, 12:44 PM
Veteran Member
Took me about 4 hours. With breaks.
It took a long time cleaning off the old stuck on foam from the fiber headliner.
I would recommend two people for putting the new headliner back on. It is very tricky given the fact the glued parts grip really fast so correcting any error has to be done quickly.
It took a long time cleaning off the old stuck on foam from the fiber headliner.
I would recommend two people for putting the new headliner back on. It is very tricky given the fact the glued parts grip really fast so correcting any error has to be done quickly.
Trending Topics
#8
10-22-2017, 05:54 PM

Senior Member
It's funny you posted today. I have the flappy sun roof syndrome as well as some bubbles in the A pillar headliner on my 06 Super 8.
Took it to a well established upostery shop and he quoted me $400.00 for a new black suede headliner. $300.00 for a standard factory replacement. The price blew me away-expecting $600-$1000.00.
Took it to a well established upostery shop and he quoted me $400.00 for a new black suede headliner. $300.00 for a standard factory replacement. The price blew me away-expecting $600-$1000.00.
Even $500 would be a steal if he's doing all the work. I ended up, as I recall, paying near that for recovering everything and I did the removal and the re-install.
#9
11-08-2017, 08:44 PM
Took me about 4 hours. With breaks.
It took a long time cleaning off the old stuck on foam from the fiber headliner.
I would recommend two people for putting the new headliner back on. It is very tricky given the fact the glued parts grip really fast so correcting any error has to be done quickly.
It took a long time cleaning off the old stuck on foam from the fiber headliner.
I would recommend two people for putting the new headliner back on. It is very tricky given the fact the glued parts grip really fast so correcting any error has to be done quickly.
i thought the fabric was attached to a backer board and then that piece was or clipped in somehow.
can you add a few more details concerning the re-install. My 04 is getting worse in the rear . with your description i know i could get it out, Its back in am am starting to doubt
or maybe im reading it wrong and you mean glueing the fabric to the backer?
#10
11-09-2017, 05:19 AM
Veteran Member
The headliner material consists of a cloth with a thin foam backing.
That foam backing is glued with special glue( 3m is favored) on to the stiff but slightly flexible fiber "board structure". The fiber board is held in place by a combination of clips on its back along with screws that hold in handles, visors etc.
Putting the material back on with glue is very tricky because the glue sticks hard and quickly when the two surfaces, material and backing board come in contact with each other. Both surfaces are glued and you do a section at a time. Getting a smooth wrinkle free attachment is difficult because of all the indentations where handles go etc.
Last edited by jackra_1; 11-09-2017 at 05:23 AM.
#11
11-09-2017, 11:33 AM
Senior Member
I did the headliner in my wife's '04 XJ and let me add a couple of additional observations and tips.
Count and catalogue EVERY fastener so you don't end up with left overs and so you know where they belong.
The left and right passenger grab handles are side specific so keep them properly tagged or their internal lights will not operate correctly and may stay on all the time.
I found that by gently and carefully going in through the passenger side rear door I could work the completed headliner back into the car by resting it on the driver's seat headrest. The key words are SLOWLY & CAREFULLY so you don't 'break' and crease the backing board which will stay with you forever !!
Since I wanted as near an exact match of colors I redid all the pieces that matched the headliner so that meant the A, B, & C pillars as well. They can be a bit tricky because of the kinds of fasteners they used and the various anchoring fasteners with tethers that were used in the A & C pillar covers so they wouldn't hit an occupant when the air bags went off. I had to figure out how to disconnect them without having to cut them and pay a King's ransom to replace them. (They slide into and out of a slot and then a 1/4 turn.)
The sunroof was bit of a problem as getting it readjusted correctly so it opens and closes without binding AND seals properly is somewhat fussy but follow the directions in the svc. manual and be patient and it's really fairly straight forward.
Study each piece and what ever illustrations you have BEFORE trying to just rip it off as most of the fasteners are plastic and almost impossible to source other than through a Jaguar dealer's body shop.
Last, but not least, is something experience has probably taught most of us. Taking something apart is a hell of a lot easier than putting it back together so take your time, take pictures, make notes, and be PATIENT. It isn't a race to see who can do it fastest.
#12
11-09-2017, 12:12 PM
Veteran Member
#13
11-10-2017, 12:49 AM
I did the headliner in my wife's '04 XJ and let me add a couple of additional observations and tips.
Count and catalogue EVERY fastener so you don't end up with left overs and so you know where they belong.
The left and right passenger grab handles are side specific so keep them properly tagged or their internal lights will not operate correctly and may stay on all the time.
I found that by gently and carefully going in through the passenger side rear door I could work the completed headliner back into the car by resting it on the driver's seat headrest. The key words are SLOWLY & CAREFULLY so you don't 'break' and crease the backing board which will stay with you forever !!
Since I wanted as near an exact match of colors I redid all the pieces that matched the headliner so that meant the A, B, & C pillars as well. They can be a bit tricky because of the kinds of fasteners they used and the various anchoring fasteners with tethers that were used in the A & C pillar covers so they wouldn't hit an occupant when the air bags went off. I had to figure out how to disconnect them without having to cut them and pay a King's ransom to replace them. (They slide into and out of a slot and then a 1/4 turn.)
The sunroof was bit of a problem as getting it readjusted correctly so it opens and closes without binding AND seals properly is somewhat fussy but follow the directions in the svc. manual and be patient and it's really fairly straight forward.
Study each piece and what ever illustrations you have BEFORE trying to just rip it off as most of the fasteners are plastic and almost impossible to source other than through a Jaguar dealer's body shop.
Last, but not least, is something experience has probably taught most of us. Taking something apart is a hell of a lot easier than putting it back together so take your time, take pictures, make notes, and be PATIENT. It isn't a race to see who can do it fastest.
Count and catalogue EVERY fastener so you don't end up with left overs and so you know where they belong.
The left and right passenger grab handles are side specific so keep them properly tagged or their internal lights will not operate correctly and may stay on all the time.
I found that by gently and carefully going in through the passenger side rear door I could work the completed headliner back into the car by resting it on the driver's seat headrest. The key words are SLOWLY & CAREFULLY so you don't 'break' and crease the backing board which will stay with you forever !!
Since I wanted as near an exact match of colors I redid all the pieces that matched the headliner so that meant the A, B, & C pillars as well. They can be a bit tricky because of the kinds of fasteners they used and the various anchoring fasteners with tethers that were used in the A & C pillar covers so they wouldn't hit an occupant when the air bags went off. I had to figure out how to disconnect them without having to cut them and pay a King's ransom to replace them. (They slide into and out of a slot and then a 1/4 turn.)
The sunroof was bit of a problem as getting it readjusted correctly so it opens and closes without binding AND seals properly is somewhat fussy but follow the directions in the svc. manual and be patient and it's really fairly straight forward.
Study each piece and what ever illustrations you have BEFORE trying to just rip it off as most of the fasteners are plastic and almost impossible to source other than through a Jaguar dealer's body shop.
Last, but not least, is something experience has probably taught most of us. Taking something apart is a hell of a lot easier than putting it back together so take your time, take pictures, make notes, and be PATIENT. It isn't a race to see who can do it fastest.
just my $.02
Last edited by mberman; 11-10-2017 at 12:53 AM.
#16
11-10-2017, 04:37 PM
Veteran Member
https://www.ebay.com/itm/Jaguar-XJR-...ZXjvb-&vxp=mtr
The above is what I purchased for my 2005 XJR. I had plenty left over at the end of the roll.
The above is what I purchased for my 2005 XJR. I had plenty left over at the end of the roll.
#17
11-10-2017, 04:43 PM
https://www.ebay.com/itm/Jaguar-XJR-...ZXjvb-&vxp=mtr
The above is what I purchased for my 2005 XJR. I had plenty left over at the end of the roll.
The above is what I purchased for my 2005 XJR. I had plenty left over at the end of the roll.
i found a material i want to use but it is a full 4" thinner than the 58" you used. it is only 54"
did you cut off 2 inches all the way around or 4 inches total on any one side ?
think a 54' width would work?
#18
11-10-2017, 05:14 PM
Veteran Member
#19
08-13-2018, 04:22 PM

Senior Member
Which supplier did you use for the cloth? Was it the 1/8th foam backed material?