'96 Sovereign Driver's seat.
#1
 10-25-2014, 04:11 PM


- The driver's seat bin my car has a badly worn bolster - caused by the driver getting in or out of the car. This, I guess, is quite common. So, I have aquired a better seat! I need to remove the seat controls. I have removed the buttons and find a black plastic moulding which I have little idea of how to remove. I have seen indications that you can go under the seat and poke about and find four retaining clips to release said moulding! Any further info?
#2
11-04-2014, 10:47 AM
I am pleased to say that I have done the deed!! The seat needs to be removed from the car, and believe me that seat is heavy and cumbersome. Removed the seat control buttons - persuade them with a suitable lever such as a screwdriver. This then shows the underlying black plastic which retains the "faceplate" Again lever the faceplate off carefully. Unfortunately this means breaking a number of plastic "spotwelds" that protrude through the faceplate. Now you have access to the black swichbody. This is held in place on the bezel by four clips. The top clips can be made to release by inserting a pair of fine screwdrivers into the slots near the top of the fixture and levering away from the centre line. The top is thus released, gently lever downwards and the bottom two clips will release! Now you can see three screws holding the bezel into the seat. Unscrew and remove. It may not because it has been foam moulded/adhered into place. Gently prise it loose. One of my seats had the leather cover stapled into the bezel, so they needed to be removed first. Reassembly is simply the reverse of above. Job done - seat operates properly and does not have the badly worn bolster.
The following users liked this post:
aholbro1 (11-14-2014)
#3
11-07-2014, 04:04 AM

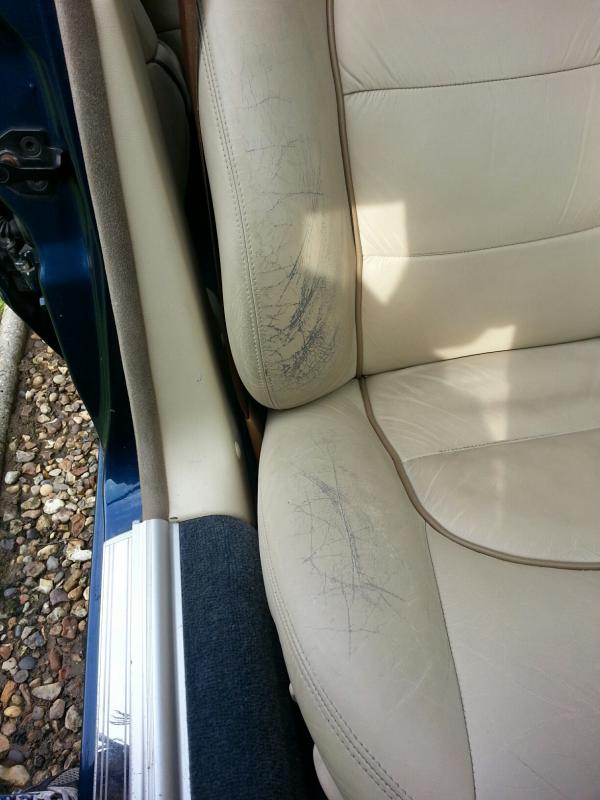
Good job. I too have removed my seat at the moment due to a worn driver's bolster but I didn't have another seat to replace it with so I have gone with the alternative approach of recolouring the leather. The leather itself still looked in good condition where it had worn so thought this would be worth a try. I'll post some before and after pics up later in case anyone searches for this thread and then they can see the options for resolving in one place. It isn't too difficult but it is time consuming and the car will be out of action for a number of days so I think just swapping seats over like you did is a better option if you need to use the car regularly.
#5
11-07-2014, 11:15 AM
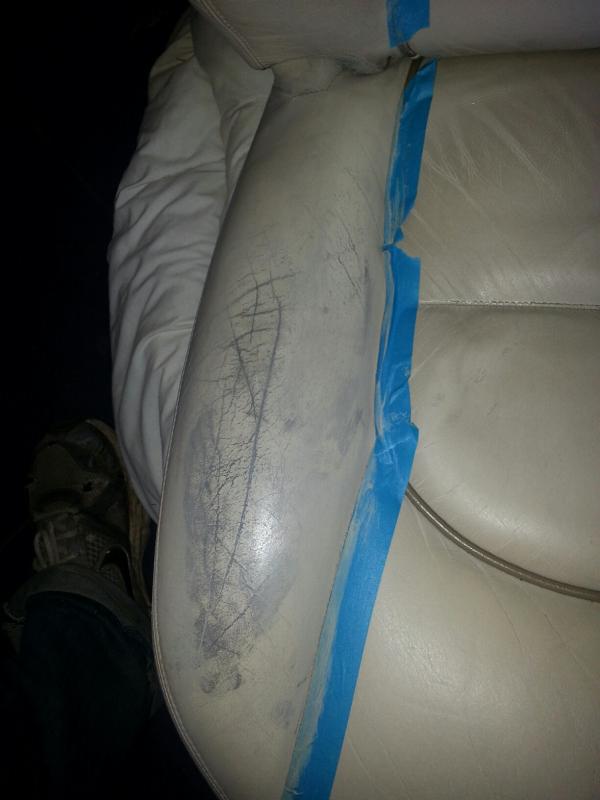
The next step (after removing the seat from the car) was to go over the leather with a solvent to remove the seal on top of the leather and then a rub down with alcohol to give a good clean surface. This left the worn areas looking worse than when I started but no need to panic:
Then I applied a few layers of the colourant. It looked good but due to the age of the rest of the seat (and the fact that I think someone had recoloured it a slightly different shade in the past) the difference in colour between the bolster and the rest of the seat was marked so I stripped and recoloured the rest of the seat too:
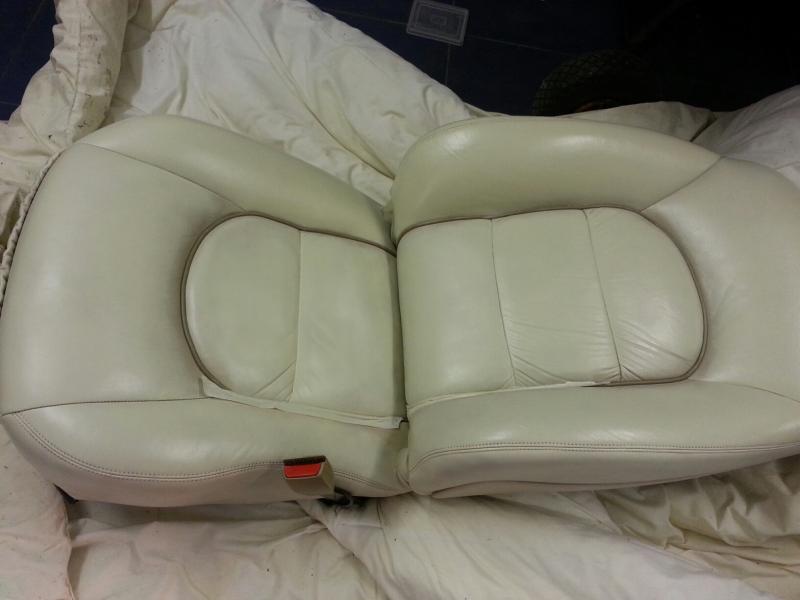
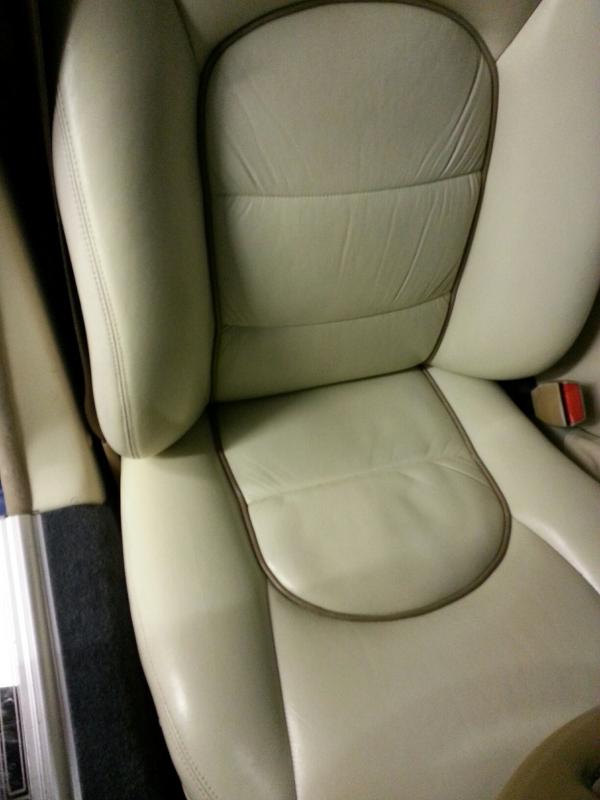
Now I just need to complete the fiddly bits around the piping and spray on a new coat of sealant over the top and I can then refit it to the car. The sealant will apparently leave it more 'matt' looking rather than the shine it has now, which should be a good match to the rest of the interior so will post pics when that is done.
Then I applied a few layers of the colourant. It looked good but due to the age of the rest of the seat (and the fact that I think someone had recoloured it a slightly different shade in the past) the difference in colour between the bolster and the rest of the seat was marked so I stripped and recoloured the rest of the seat too:
Now I just need to complete the fiddly bits around the piping and spray on a new coat of sealant over the top and I can then refit it to the car. The sealant will apparently leave it more 'matt' looking rather than the shine it has now, which should be a good match to the rest of the interior so will post pics when that is done.
The following 2 users liked this post by v12d6:
al_roethlisberger (11-07-2014),
littlelic69 (11-08-2014)
#6
11-14-2014, 03:16 AM
The following 2 users liked this post by v12d6:
aholbro1 (11-14-2014),
al_roethlisberger (11-14-2014)
#7
11-14-2014, 08:22 AM
Veteran Member
Great job, V12d6!
Littlelic69, I don't understand why you had to move the switch pack?
I would assume your replacement seat was a matching color with the same features....so would've had the proper controls, no?
My bolster had holes, so V12d6's solution would've been a no-go for me. I chose a 3rd route - removed seat, skinned it, and had the cover fixed at a shop. Would've probably been cheaper to obtain a used seat - but VDP trim in Nimbus grey was a tough find....
Trending Topics
#8
11-14-2014, 09:22 AM
Veteran Member
Looks great! Makes a huge difference in appearance, and you've also arrested the wearing through of the leather, so now it should last 'forever' until it is time to refinish it again 
Most people let it go too far and then once the finish is gone, it doesn't take long to start wearing into the leather itself.
I've read several write ups on refinishing auto seats and it seems pretty straightforward, but a lot of people don't seem to know they can do it at home.
They should
.
Most people let it go too far and then once the finish is gone, it doesn't take long to start wearing into the leather itself.
I've read several write ups on refinishing auto seats and it seems pretty straightforward, but a lot of people don't seem to know they can do it at home.
They should
.
Last edited by al_roethlisberger; 11-14-2014 at 09:25 AM.
#9
11-14-2014, 11:18 AM
Veteran Member
Guillty! It was just a discoloration when I got the car...always meant to address it but not sure which product/process to use and voila` one fine day there's a big hole there!
#10
11-14-2014, 03:24 PM
The seat that came with the car as bought two years ago had a huge hole in the side bolster and the foam was wearing away! So, I used grey gaffer tape to prevent further damage. The replacement seat came without the controls and the black plastic backing plate was shattered! Hence the need to find a solution - which came in an ivory type colour - not grey as per the original. Now I have a fully operational electronic memory seat in nimbus grey with a huge hole in the bolster, without the correct colour control switches that my wife says I need to get rid of. But, she says that about all my essential spare parts that are lurking in and around the house!

Thread
Thread Starter
Forum
Replies
Last Post
Currently Active Users Viewing This Thread: 1 (0 members and 1 guests)