When you click on links to various merchants on this site and make a purchase, this can result in this site earning a commission. Affiliate programs and affiliations include, but are not limited to, the eBay Partner Network.
HMSL (high mounted stop light, 3rd brake light) Repair - Permanent, time will tell?
I assume in an effort to make the high mounted stop light (HMSL, "third brake light") look more elegant, Jaguar glued the HMSL to the rear window of the X300 and some other models so it would appear to float above the rear package shelf and not require something so common as a plastic bracket or support.
Well, as we all know, that factory installation while good looking caused almost all of the X300 installations to fall off over time, and seemingly no effort to re-glue the HMSL to the rear window with various adhesives once fallen has lasted more than a year or two at best.
I too dealt with this same issue, and have tried to re-glue the HMSL twice with limited success. The first time lasted almost two years as I recall, the last time didn't even last that long. So for the last year or more I've had my HMSL sitting on a towel on the package shelf until I could devise a better solution than trying to replicate the factory installation.
The fundamental problem with the factory installation is that the HMSL is held on by two relatively small metal pads that are glued to the rear window just like a rear view mirror is adhered to the inside of the front windshield(windscreen). These pads are under a lot of stress with the weight of the HMSL, especially when handling or bumping the HMSL such as when removing the cover to replace bulbs. On the other hand, the surface area of both these pads is probably greater than that of the rear view mirror, but the rear view mirror typically doesn't fall off and is far heavier... so who knows really why the HMSL mounts fail more often, but they do.
Just as with replacing a rear view mirror or windshield, in theory reattaching the HMSL pads is as simple as gluing them to the rear window with rear view mirror adhesive. However we've all found that this doesn't seem to typically work well in practice. Perhaps for a small number of owners this does work out and last for another 10-20 years, but that's uncommon.
And of course many others have tried various other glues with limited long-term success.
So instead of just trying to glue the HMSL a third time to have it fall off again soon after, I let it lie and gave some thought to how I can make it more permanent.
I initially thought about simply replacing the whole HMSL assembly with a pedestal mount solution from another car, but it proved difficult to find something that would match the height, width of the HMSL mask on the window and angle of the window required. Plus I had planned to install the factory rear sun-blinds which would negate any typical pedestal that would sit on the rear package shelf.
What I arrived at was some alternate method to adhere a mount to the window with a much larger area of adhesion and then mechanically mount the HMSL to that.
I also considered fabricating a complete bracket out of plastic(e.g. ABS) or metal (e.g. aluminium) that would attach to the metal package shelf, then come up between the package shelf trim and window, and mount the HMSL to that. However even in that solution I thought that it would still need some adhesive to anchor it to the window to keep it from "flapping" when the car was driving over rough pavement, so the added complexity didn't seem like a benefit.
At this point I should say that I don't know if this is the best or ultimate solution to this problem, or if I even can say with confidence that it will last several years without also failing. But I have relative confidence that this is "overbuilt" and if it fails I swear there's a gremlin in the car working on breaking the light off the window in the wee hours of the night.
OK, so here's what I did....
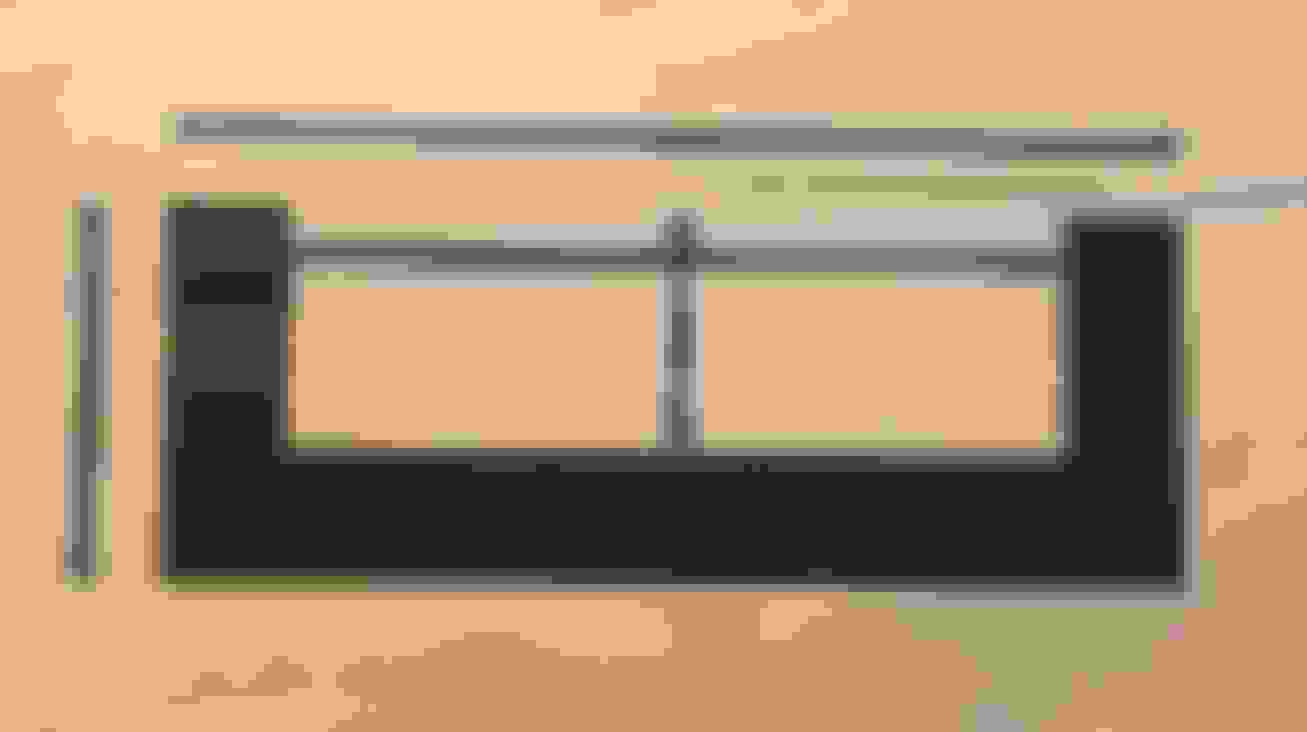
I used a piece of black ABS, smooth on one side, textured on the other (the textured side is fairly irrelevant other than aesthetic) 1/4" thick, 9 13/16" long, and 4" wide. I then trimmed it and cut a "U" shape out of the piece to accommodate the HMSL mask on the window with the following dimensions, which you can also see in the diagram in the thread below with the other installation photos.
� Total piece width 249mm
� Total piece height 102mm
� "U" shaped HMSL window width 180mm
� "U" shaped HMSL window height 70mm
I arrived at these dimensions based on measuring the size of the HMSL "mask" on the rear window and allowing space to mount the HMSL assembly and allow for a small amount, perhaps 1/2 inch, of the ABS to slide down and slot between the rear window and package shelf trim. The "slotting" of the ABS allowed for a little more positive anchor and pressure against the inside of the window. I also made a small 1/2 inch drilled slot in the bottom edge of the ABS for the HMSL wiring to pass through.
I then drilled two small holes in the "ears" of the ABS "U" to install two small machine screws. I drilled the holes a bit smaller than the screws so they would bite into the ABS and resist pushing back out. I don't know what size screws I used as they were just two stainless steel screws I had in my bin of screws that seemed to be a good size for the application. But you simply need two small countersunk screws that are a good size to fit through the slots in the HMSL unit itself.
To mount the HMSL on the screws I had to widen the slots in the HMSL frame a bit, but depending on the screw size you select this may not be necessary. To get the screws through the slots and access them, one has to also remove the two silver springs inside the HMSL mounting that normally hold the HMSL to the metal window mount tabs. These springs pull out easily once one slips a thin flat tool under the spring from the front to disengage the tab holding it in and then the spring will likely just push/fall out of the back of the HMSL or take a tug from some pliers. It's hard to describe, but if you have ever removed a pin from an electrical connector, it is a similar procedure. Once the spring is out of the way, and the screws through the front of the slots, you can then use a nut (I used a nylon locking nut) to secure the HMSL to the ABS frame. One can see in the photos where I trimmed the non-harness side of the circuit board to get better access to the spring and screw/nut. Just one screw is needed per side, and then it will be obvious that this is more than enough strength to hold the HMSL and ABS together.
The exact vertical placement of the screws on the ABS frame isn't critical as long as it coincides with the slots, and remember you can move the HMSL assembly up/down on the screw once installed. The only real constraint on vertical placement is that you leave room to install the nut. Regarding horizontal spacing of the screw, I forgot to measure that, but you can approximate that pretty easily by just placing the HMSL on the ABS and marking it through the slot. You can actually see that scratch mark on one of the photos below.
I then used some black gaffers tape to seal around the edges of HMSL and ABS to keep any red light from leaking out, but I'm not sure this is really necessary.
I used 3M double sided trim adhesive tape on the smooth side of the ABS to adhere the combined ABS and HMSL assembly to the inside of the window. The 3M tape is supposed to support several pounds per square inch once it has "set", although I think that is optimistic except for the most ideal circumstances, but on the other hand it does really stick strongly especially if used liberally and the surfaces are clean. As an aside, that 3M tape is pretty interesting stuff if one has the time to read about it. The tape is apparently a semi-solid that over time once stuck to something "bleeds" into any microscopic crevices on the surface to create a stronger bond than the initial application. I don't know what thickness of 3M tape I used as it was just whatever I had in the workbench drawer, but it looked like about 1/32 inch, so pretty thin. I thought I had a photo of the ABS frame with the 3M tape applied, but it appears I do not. But suffice to say I put tape all over the entire smooth surface of the ABS, leaving maybe an 1/8 inch gap along the edges.
I then carefully slipped in the bottom edge of the ABS between the window and package shelf trim, and pressed the 3M taped ABS assembly against the inside of the glass working upward, taking great care to align it with the HMSL "mask" in the inside of the rear window. Really take your time with this step, as I don't know if one can pull this back off the window without damaging the black mask on the glass itself. I did this completely freehand, by eye, which isn't as hard and risky as it sounds since the black mask on the window is there as a pretty precise guide. But using some painters tape as a visual guide may help too; whatever works for you. Just take your time.
To really make sure the 3M tape was making good contact, I also found some 18 inch tension rods at a local crafts store (on clearance for $2!) and used four of them to put continuous pressure on the HMSL and ABS for several days. The tension rods were up against a small strip of wood that I placed against the back of the seat. Again the photos below will help illustrate this better.
Then once all finished, one just slips the cover over the HMSL and it's all done!
All told, this probably cost less than $10, and would have been cheaper if I had some ABS scrap lying around.
....but of course I couldn't leave it just there now could I? No.
With the installation above, one is left with a generally factory appearance, and only someone looking closely and familiar with the factory installation will ever notice the ABS reinforcement from the inside or outside.
However, since I was already "in there" tinkering, I went ahead and added one more modification that is probably overkill.... but as they say, anything worth doing is worth over-doing, right?
So I made a support column/pedestal under the HMSL too. I took a small piece of wood from a nominal 2 inch by 1/2 inch strip (actual 1.5" by 1/2"), cut into a semi-triangular shape, painted it to match the Nimbus Grey color of the HMSL cover (but you could also use something like black), then mounted it to the bottom of the cover to give the entire HMSL some additional support once the cover is installed.
I used some of the same 3M tape and two tiny wood screws to attach the wood to the bottom of the HMSL cover, and some 1/4 inch felt on the bottom of the wood to protect the package shelf and take up the final little bit of height needed to put a little positive upward pressure on the HMSL. It is a perfect fit, snug.
But I'd consider this column as "extra", or maybe an alternative to the ABS frame as insurance if your HMSL hasn't fallen off yet.
With this assembly one can still change bulbs per normal, and with some effort remove the entire HMSL assembly by unscrewing the nuts, although I can't see a reason why one would ever need to remove it unless the rear window gets broken. If removing the HMSL again seems to be a worry, probably don't use locking nuts.
So that's it, and hopefully it will hold up forever. We'll see of course.
And like any first try prototype, there are some lessons learned, which are:
Potentially use thinner ABS. The 1/4 inch thick ABS proved to be surprisingly rigid even once cut down, and since the inside of the rear window is slightly concave it was hard(er) to get the ABS to conform to the window uniformly. I'm hoping that once we have warmer days I can continue to use the tension rods to help it conform a bit better. That being said, it seems to be fine even using the 1/4 inch thick ABS for now. Slightly thinner just may be easier to work with.
Cut a complete "window" and not a "U" in the ABS for the HMSL. I cut a "U" in the ABS just for ease of fabrication so I could get a nice clean cut and to provide some flexibility in the installation since this was an initial prototype. If I were to do it again, I'd cut an actual rectangular "window", but that is a bit harder to do in ABS without tearing out and melting, but is possible. The downside of the "U" is that there is red light leakage out of the top of the entire assembly unless one puts something like felt along that upper gap in the "mouth" of the "U", which is what I've done. I used the same 1/4 inch felt strip to close that gap.
Potentially use thicker 3M tape. Related to the thicker ABS issue, slightly thicker tape would have accommodated the concave window and bend resistant ABS a little better to get a better mate to the window. But, it doesn't seem to have been an actual issue yet, and too thick tape would be more visible from the outside unless one paints the edge of the tape so that's a concern, as would trying to slot the ABS with thicker tape between the window and package shelf trim. One would just have to experiment with fit if interested in trying different thicknesses of ABS and tape in combination.
Mentioning painting the edge of the tape... one can just barely see the gray edge of the tape from the outside of the window between the ABS and window itself. But one has to really be looking for it, and frankly because of how it is all assembled, that tiny thin gray line looks factory. But if that gray tape line bothers anyone, just take a Sharpee or some black paint and color the edge of the tape black to hide it fully.
And although you can't see the ABS frame from the outside of the car at all, other than upon very close inspection noting its edge inside the HMSL "mask" which looks factory, I probably could have radiused the top outer corners of the ABS frame "ears" so they weren't sharp corners for a slightly more finished appearance inside.
One final thing to mention that isn't directly related to reattaching and reinforcing the HMSL mouth, is to protect the tabs that snap into the holes in the HMSL cover. These tabs are notorious for breaking off when someone presses them too far in when trying to remove the HMSL cover. To avoid that breakage, I've used small felt bumper pads, like one would put on the bottom of a vase, to limit how far one can push in the tabs. Just stick the felt pads on top of the tab, and that felt will hit the HMSL circuit board first, limiting how far the tab can be pushed in, and not breaking off.
And one final-final note, the entire HMSL assembly is fragile, brittle 20+ year old plastic. So take care in handling and torquing on it. The main assembly is still quite tough, such as the mounting slot/ears, but the circuit board ends are tragically brittle.
There's probably a step or lesson learned I've forgotten, but that's what comes to mind for now. If you have any questions please let me know, and I'll see if I can recall what I did.
I'll also try to update the thread over time to note if any problems arise, the HMSL falls off again, or if it seems to be holding up fine.
Hopefully the ABS frame and/or column/pedestal support options will help solve this annoyingly minor but frustrating issue!
Final installation with ABS reinforcement frame and pedestal, shot in natural lighting.
Last edited by al_roethlisberger; 12-31-2018 at 04:58 PM.
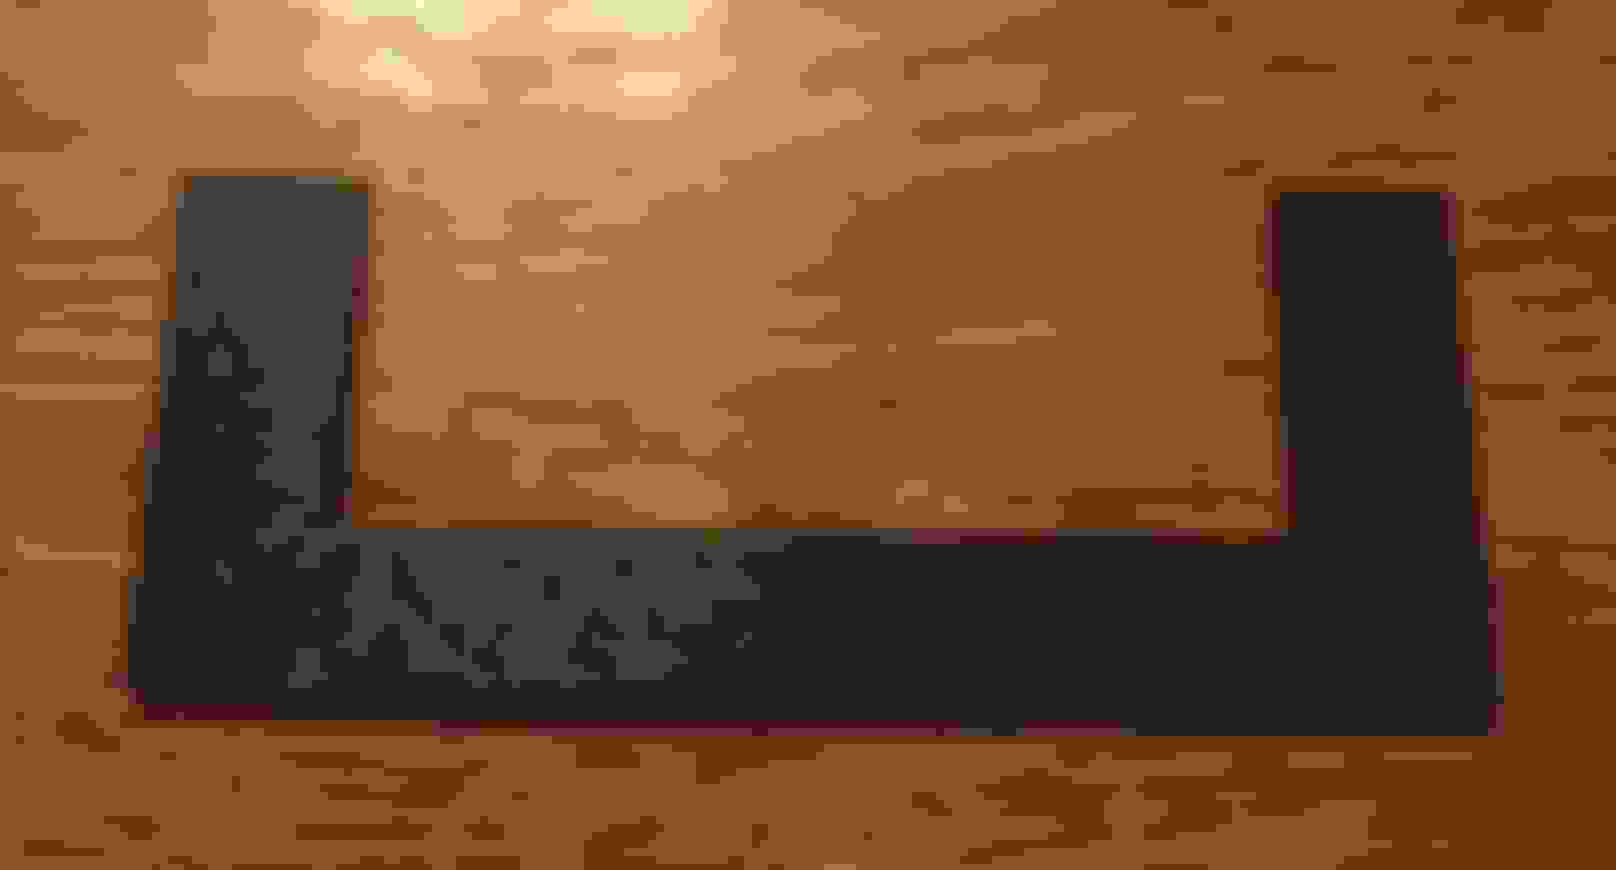
Photos of the ABS frame and HMSL unit modifications.
ABS frame dimensions. Raw ABS frame. ABS frame with screws and cable notch, interior side with texture. ABS frame with screws and cable notch, smooth window side where 3M tape will be affixed. Rear of HMSL unit. HMSL OEM mounting spring which must be removed.
HMSL OEM mounting spring, left side unmodified. HMSL circuit board trimmed to ease access to mounting spring for spring removal and later for access to mounting bolt/nut. HMSL mounting spring removal, springs shown after removal to highlight tab that must be depressed with a flat tool from the front for spring removal from the rear. The springs are discarded. ABS frame with screws, mounted in the HMSL unit. ABS frame with screws, mounted in the HMSL unit with nut affixed. Repeat for the other side. Closeup of felt pad added to HMSL cover tab to minimize travel and breakage of tab. Repeat for both tabs.
HMSL mounted to ABS frame, window side. HMSL mounted to ABS frame, bottom. HMSL mounted to ABS frame, back. HMSL mounted with gaffers tape to reduce light leakage. HMSL mounted to ABS frame with cover, bottom view. HMSL mounted to ABS frame with cover, side view.
Final mounting of the HMSL with the ABS reinforcement frame
HMSL mounted with ABS frame to the interior of the rear window, interior view with no cover. HMSL mounted with ABS frame to the interior of the rear window, side view with no cover. HMSL mounted with ABS frame to the interior of the rear window, using 18 inch tension rods to maintain pressure for 3M tape adhesion.
Wooden pedestal mounted to cover. Felt pad on bottom of pedestal. Triangular shape isn't required or specific. Small wood screws with 3M tape mounts the pedestal to the cover.
Wow, the flash really reveals every defect. In natural light the wood grain disappears unless one is really looking for it. And of course with a little more prep I could have made every defect in the wood completely disappear, but that was overkill. No one will notice. And although it looks crooked in the photos, the pedestal looks fine in person.
As I mention in the narrative, I still need to fill the top "slot" in the "U" with a strip of felt and then it will be sealed from light leakage. Although to be honest, it really isn't a big problem. The gap doesn't illuminate the interior red.
I may actually install a red "jewel" in the top of the cover though so the driver can easily see if the HMSL isn't working. I've had more than one incident where the HMSL was out, but I had no idea. With a "jewel" one could look in the rear view mirror and see that the HMSL was working without requiring someone to step behind the car.
OK, that's it
If you are having trouble keeping your HMSL affixed to the rear window, maybe give the ABS frame and optionally the pedestal a try.
If you haven't had your HMSL fall off yet, or just reattached it with standard glue, maybe the pedestal/column would be a good safety measure.
Last edited by al_roethlisberger; 12-31-2018 at 02:22 PM.
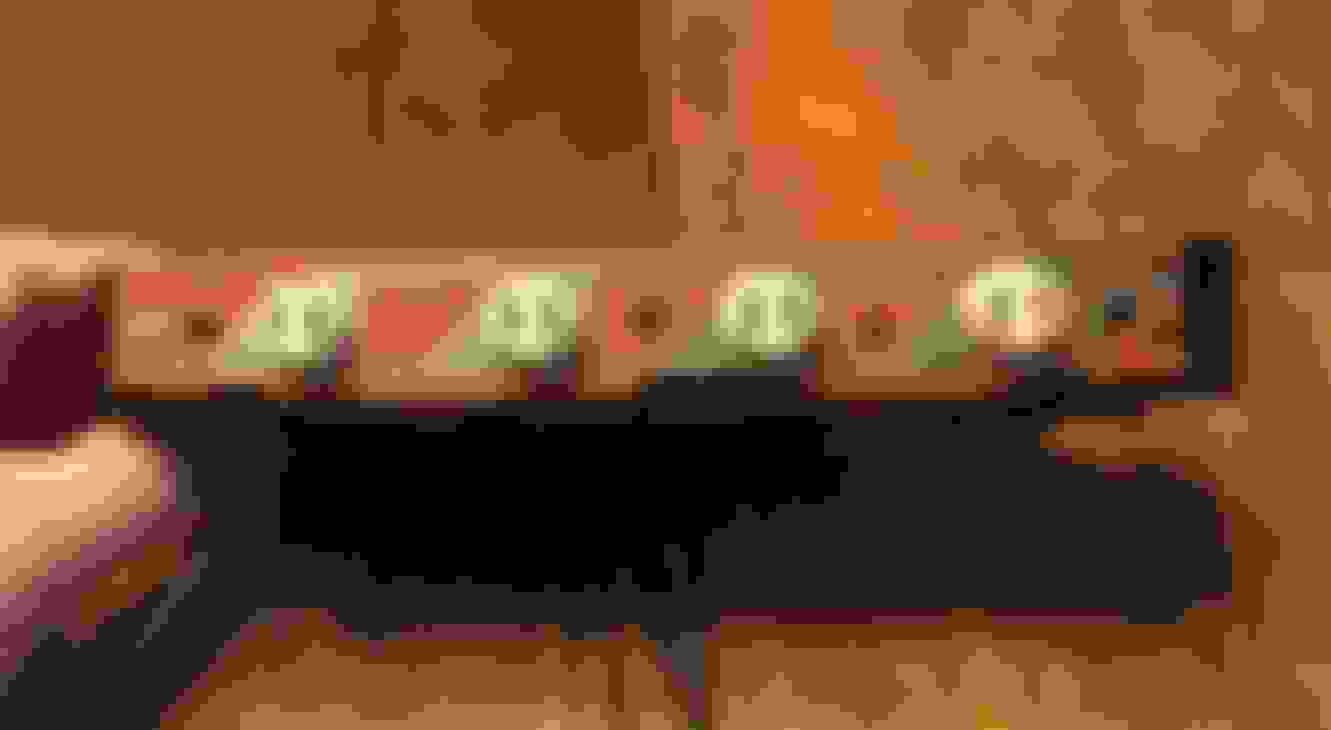
Some exterior photos, taken at night to highlight contrast
Here are some photos taken at night so the flash can highlight how the assembly looks from the exterior. As noted before, the flash exaggerates the details, so this is "worst case" and during natural light these distinctions are much less pronounced.
As I noted above, the ABS frame is essentially undetectable by anyone except someone knowing what to look for, and even then is a challenge. The only way to really tell with this prototype is that the upper outer corners of the "ears" on the ABS frame could benefit from being radiused since the HMSL mask itself is radiused at the upper outer corners. In this prototype, the corners of the ABS are just barely visible from the outside if one is really looking for them, but just barely and even they are camouflaged by the black dots that transition the mask to the clear window.
The only other place one can see the ABS frame is within the HMSL mask itself where the edge of the ABS can be seen, but again one would need to know what they are looking at to know it is anything but factory and the ABS is stepped back from the edge of the mask a bit.
I'll try to remember to get some daylight exterior photos as well.
Last edited by al_roethlisberger; 12-31-2018 at 05:26 PM.
Nice. Great job. I noticed mine hanging off the other day when I was cleaning the insides of my windows. Put it on my to do list. May have to give it a shot.
I tried various things on my XJ40, 3m hi-bond tape was ok for about 6 months but latest cure is Permatex's "The Right Stuff" gasket maker. Seems good ATM and comes highly recommended (6+ years in service w/no issues)
 12-31-2018, 01:19 PM