When you click on links to various merchants on this site and make a purchase, this can result in this site earning a commission. Affiliate programs and affiliations include, but are not limited to, the eBay Partner Network.
One of the problems we come across oh-to-often with our cars, is what is commonly known as ‘The 50/70 vibration’. There’s been loads of posts about it, including my own https://www.jaguarforums.com/forum/x...roblem-207717/ since first owning the car, I changed everything from engine to differential, from differential to road wheels, everything under the car except the diff itself.,, yet I still had this vibration.
So I decided to seek the definitive answers, did some extensive research and listened to a lot of advice both on and off the Forum. There are many reasons and theories as to why this problem exists, but I knew I had changed/renewed almost all of those reasons at some point, the only minor differences they made was when it started and when it finished, but always between 50/70 mph. So I turned to an item that wasn’t fixed as such, the prop-shaft, and I found 4 very important details that are vital, yet 3 of them are not detailed in the manual?
Without doubt, the most common cause of vibration is prop-shaft balance, and/or the Jurid Couplings at either end. The 4 important items I found
1) The Fixings
2) The Orientation of the Jurid Couplings (because Jaguar say to NEVER remove them)
3) Balance (again, because Jaguar assumed the shaft would never need re-balancing, because we wouldn't/shouldn't remove the said couplings)
4) Installation (this is mentioned in the book of course)
Fixings:
As outlined to me by a couple of members (xjr2014_de & M. Stojanovic) one of the washers on the fixing bolts is approximately the same weight as one of the pieces of metal welded to the prop-shaft to balance it. And, as the washers are fixed on a much wider circumference, the centrifugal force will be much greater than the piece of metal on the shaft and could cause significant balance issues. The point is that each and every fixing must be exactly the same. Make sure the same bolts, washer thickness, and locking nuts are used at each flange fixing, I went to the point of weighing each bolt, the 2 washers, and each nyloc nut to make sure they were all bang on.
Coupling Orientation:
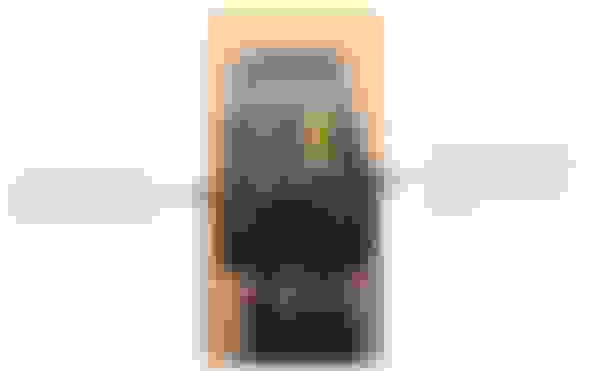
The Jurid Coupling:-
As you can see, there is a ‘thicker’ part and a ‘thinner’ part to the coupling, the thicker having 2 holes for the bolts, there are also some small arrows around the circumference of the coupling. ALL these items are very significant when installing the Jurid Couplings. 2 things the manual doesn’t mention (although some TSB’s do) is…
1) Each small arrow should point towards a flange finger, either one driving, or, one being driven.
2) BUT: If the flange finger is a ‘Driving' one (such as one of the output flanges from the gearbox) then it should be fitted to the 1st hole of the thicker part, so the thicker part is being ‘pushed’ with the rotation of the coupling. If installed into the 2nd hole just before the thinner part, then the coupling could buckle under load?
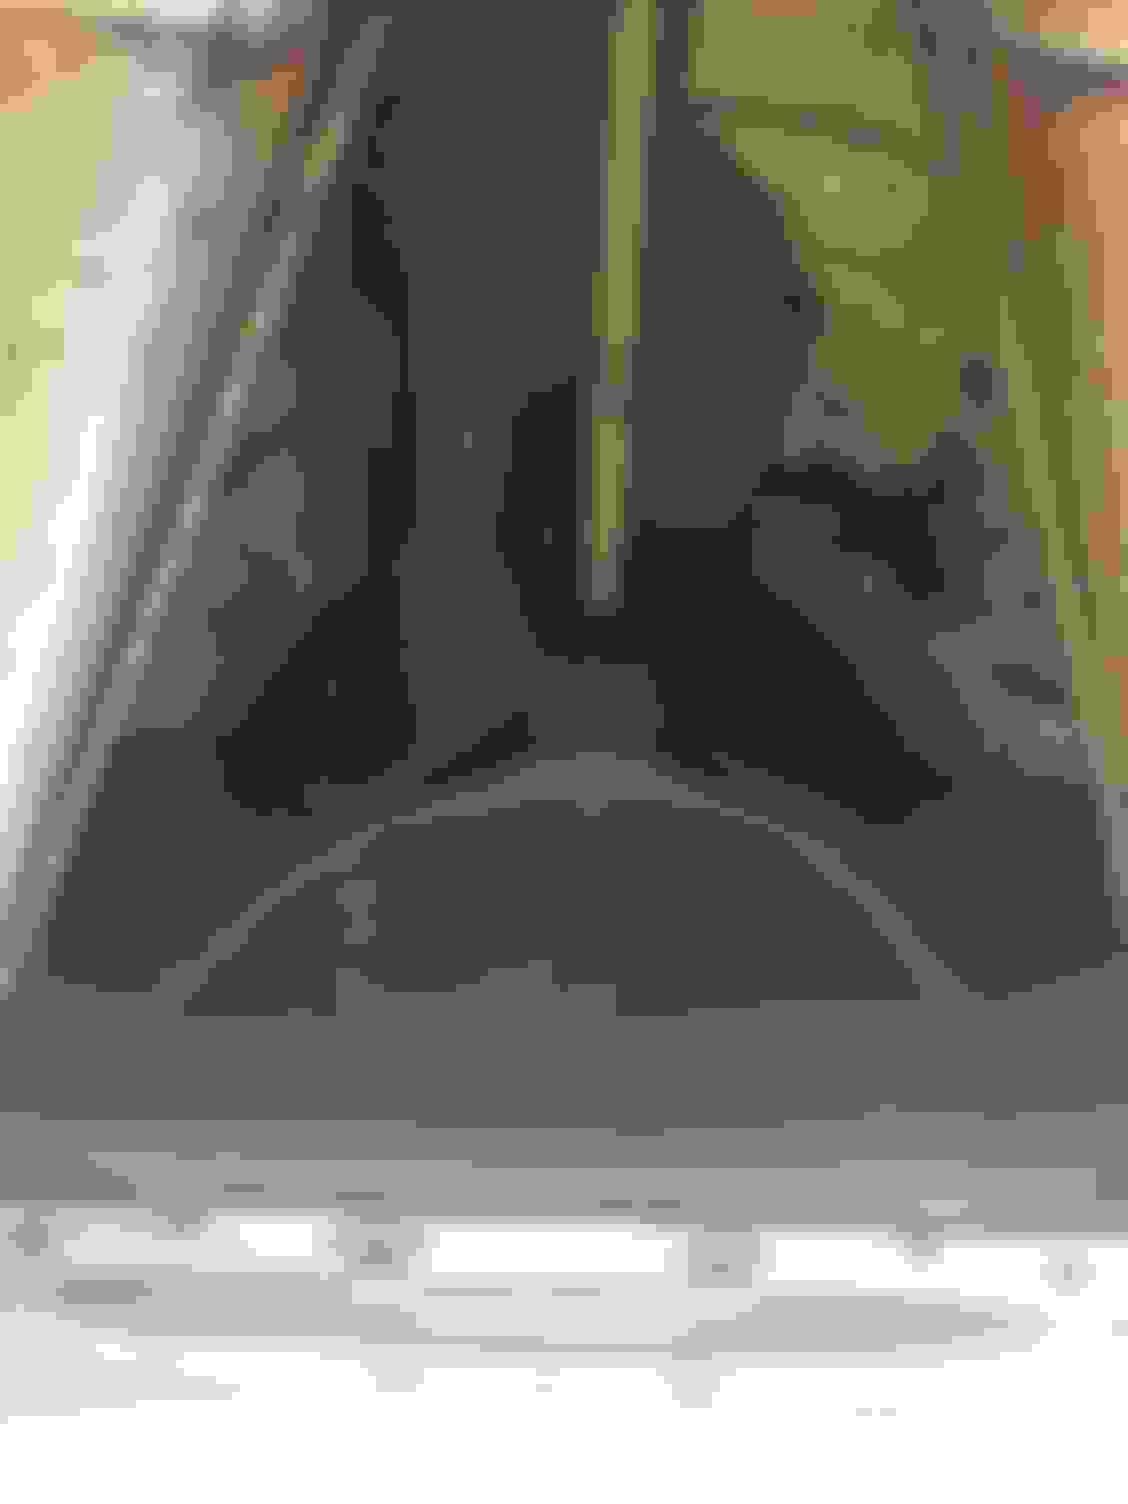
If you have the rotation right, and the driving force flange finger is being fitted to the 1st hole of the thicker part pushing the coupling around, then the arrow will be pointing at that driving flange. If not, then you have the rotation wrong, or the flange is being fixed to the 2nd hole on the coupling. Here’s my couplings fitted to the prop-shaft at the Gearbox end, and the Differential end, I’ve marked the direction of rotation for clarity.
Prop-shaft at Gearbox End......... and ......Prop-shaft at Differential End
..............
Important: Remember, the 3 driving flange fingers are the ones coming out of the gearbox and should have an arrow pointing to them. But, at the other end, the prop-shaft becomes the driving force, NOT the diff, so the coupling is fitted here with the arrows pointing towards the prop-shaft flanges! (I made this mistake time before last)
Balance:
Once the fixings are correct, and the Jurid Couplings have been fitted in the correct position, the whole prop-shaft needs to be balanced. The manual does state, in Bold Blue, “Under no circumstances may the flexible (Jurid) coupling be removed from the driveshaft (or its fixings be loosened)”so how do we replace damaged couplings? The statement, though, is for a very good reason… the aforementioned Balance! I couldn’t understand why such a statement would be important? Even at Jaguar during build, the coupling and prop-shaft will have been introduced to each other at some point for the first time, so I checked with an engineer who I believed might know. “There can only be one explanation” he said “the prop-shafts were all balanced with the couplings fitted to them before they were installed to the car”. So, I had my prop-shaft balanced as a full unit with the couplings on.
Installation:
The manual shows the Centre Bearing fixed to the cross-mounting plate with 2 spacers sandwiched between them, a thick one and a thin one. For some strange reason, although only one is shown in use, Jaguar supply the thin ones in packs of 5?... OK, enough said!
Having ordered the pack of 5 thin ones I thought I would try installing 2 of them as it was suggested by M. Stojanovic that fitting the centre bearing slightly high may help, so in went 1 thick and 2 thin, the bearing housing only just cleared the tunnel, though it was close. I am not suggesting everyone fits 2 thin spacers, it was just my preference to take the advice offered. I made sure the bearing was bang centre (though there is little movement either side) in the tunnel. Time for a test drive….
Unbelievable! 4 years I have been doing so much that made very little difference to the 50/70 mph rumble, the prop-shaft had been on and off more times than I care to remember, the whole under-car mechanicals have been renewed, so much work for little gain and I was quite p****d off as you can imagine. Now, total bliss… the drive was smooth as silk in comparison, no rumble that used to feel like I was back in the dark ages on cobbled roads, and all because of some details I knew nothing about, because it wasn’t in the book?
What worked for me was
· correct Fixings,
· correct Orientation,
· correct Balance
· Install by the book
Hope this helps someone the same as it did for me!
Paul
I got this wrong on my car when I first put my 15HU diff in. Its easy to do.
It manifests itself as distinct vibration when pulling away. In a short time (say, 3-7 months) the rubber coupling will be cracked up. All went away after the new one and correct installation was done.
So, I had my prop-shaft balanced as a full unit with the couplings on.
If I position the jurid couplers exactly the way the old ones were, does it still need balancing? If balancing requires removal of the couplers, what good does it do to balance just the propshaft?
How did you balance your prop-shaft? Does it have to be professionally balanced?
There may be some that will say you can do it yourself, I've seen the tacked on washer redneck balancing on US single drive shafts ...but you'll never attain the speed a shop can and the true balance a shop can attain with its machine. Plus, being a 2 piece shaft with the center bearing, ..you won't have to wrestle with it. You'll play hell trying to uninstall..balance...reinstall...drive, feel vibration...uninstall...balance...install..drive, feel vibration...uninstall...balance...etc.,etc., etc.....as opposed to...go to a shop, drop it off...maybe pick it up that afternoon and pay perhaps $50-75 (not really sure, obviously ask first) and put it in and drive it smoothly that night.
There may be some that will say you can do it yourself, I've seen the tacked on washer redneck balancing on US single drive shafts ...but you'll never attain the speed a shop can and the true balance a shop can attain with its machine. Plus, being a 2 piece shaft with the center bearing, ..you won't have to wrestle with it. You'll play hell trying to uninstall..balance...reinstall...drive, feel vibration...uninstall...balance...install..drive, feel vibration...uninstall...balance...etc.,etc., etc.....as opposed to...go to a shop, drop it off...maybe pick it up that afternoon and pay perhaps $50-75 (not really sure, obviously ask first) and put it in and drive it smoothly that night.
My apologizes, Highhorse, I changed my question because I read more into the other thread euphonium01 posted in. If I position everything the way it was before with the new coupling, and I guess new center bearing, will I still need balancing?
If I do get it balanced, should it be balanced with the two propshaft pieces together, along with the couplings at both ends, and the center bearing as well?
That my friend, as far as I know, you'll have to ask a shop, I'd say it depends on the equipment they have. I went to a place that can do (and does) box truck propshafts, I saw some torqued pieces there they were fixing. They have a similar one to the 308, just bigger.
That my friend, as far as I know, you'll have to ask a shop, I'd say it depends on the equipment they have. I went to a place that can do (and does) box truck propshafts, I saw some torqued pieces there they were fixing. They have a similar one to the 308, just bigger.
I called two shops. One said that it is required with any new parts that are installed on the drive shaft, and the other said it is not necessary to balance it. So, I will make sure to position everything as exact as I can, so that I can hopefully avoid the need to balance it.
I've been driving it carefully, because I'm on borrowed time at this point with the conditions of the couplers. There is a whiny noise that I hear when driving.
This is what I'm dealing with:
Dude, that's horrid, the missing pieces on the one coupler alone will cause a vibration. They aren't that expensive, get them replaced asap.
The two couplers and the center bearing should arrive soon. I'm trying to think of the easiest way to remove the center bearing. xjr_2014 mentioned using an Angle Grinder to remove the outer race of the bearing, but I'm wondering if I could use a Jaw Puller like this:
I'm just not sure if this would work because the spines seem to extrude pretty far, and don't want to spend too much on special tools for this one job.
I considered using a puller like this too, but as you already noticed the splines extrude quite far so that none of the available puller fitted properly without the risk of damaging the splines. So I choose the angle grinder instead. But for the inner race you'll need a small grinder (or Dremel/Multitool) with a small cutting disc as the huge diameter angle grinder disc probably could mess up the u-joint flange which sits right next to the race.
Last edited by xjr2014_de; 11-10-2018 at 11:56 AM.
My initial instinct after doing what XJR suggests, is to score the the inner race and using a sharpened coal chisel to complete the cut. By scoring the race it gives you a line to follow, plus if it will split, it will do that on the scoring even if its not cut all the way across. Laying the chisel parallel will prevent damage to the spline as you work it. I recommend a 4lb maul (2 kilo) to tap it along. Its easier to swing a heavy hammer lightly and be accurate, as opposed to swinging a light one hard and missing.
You also may want to try the fire wrench if available, ..again, after scoring it. But I'd score it a few times with this method because you should be able to stretch the metal at the created weak points and pry it off from behind.
You can also combine the methods as the coal chisel will cut well on heated metal.
Highhorse is dead right. After scoring the inner race a few times (since I had a small angle grinder I scored it just twice at opposite locations) I split the race using a chisel and a hammer. Just tapped it a few times and it split on one side. At the opposite side it didn't split but was widened enough so that I could easily remove the race with my fingers.
Highhorse is dead right. After scoring the inner race a few times (since I had a small angle grinder I scored it just twice at opposite locations) I split the race using a chisel and a hammer. Just tapped it a few times and it split on one side. At the opposite side it didn't split but was widened enough so that I could easily remove the race with my fingers.
Cheers, Alexander
What part of the muffler did you take off? Looks like the center resonator and the two mufflers before the axle should be removed, but how did you do it?
Unfortunately I can't help you with that since I did the replacement when my rear axle was out anyways. So I just could take the propshaft out without the axle in the way.
If I remember it right the repair manual says that you have to remove the first muffler behind the cats for sure. The European spec cars do mostly have a flange that connects the cats with the exhaust, so it's quite easy to disconnect and reconnect that part of that exhaust section. From my memory there are also cats out there which do not have a flange connection. There's something about if your exhaust system has a flexpipe or not after the cat .
But I think the difficulties will start at the point where you want to disassemble the first muffler section from the two center mufflers. Unfortunately there's no flange. The pipes are slid into one another and clamped together. This will be the hard bit to separate.
Maybe somebody else who's done this will chime in to give a hint.
To be honest, I found it much easier to first remove the back 2 mufflers, it allowed the middle 2 sections to move back and slide off the front X-pipe, then the cross-pipe from the cats. The problem is always pulling on the center section enough to break the system apart from the middle out, it's too tight. It is more work removing the exhaust from the back forward, but in the end it's quicker and probably less damage to other parts of the exhaust?
Paul
So I finally got the two couplers replaced, and also the center bearing. Took me around 2 full days to do this job. I've only taken the car to around 50 mph so I can't really test if there's any vibrations, but I aligned everything the way it was before.
This noise is still there though. I don't know what it is. It sounds like it's from a rotating assembly, possibly in the driveline, towards the center, around the transmission area. Transmission shifts smooth, and I serviced it around 4 months back. I don't suspect it to be the differential, but I did notice a little gear oil seeped out after I changed the diff oil, and sound doesn't seem to originate from the rear, or the front (engine). Maybe a mount or bearing in the driveline is bad? The noise seems to happen when letting off the gas and letting it coast, but I'm not sure if it's also under acceleration as the engine noise may cover it up.
I'll check for bad wheel bearings, drive shaft play, harmonic balancer/crankshaft pulley, half shaft play. Anything else I should check? Is it safe to drive the car?
If it ends up being another difficult job, I'm going to strongly consider just selling the car. I've done a lot of repairs within just a year of ownership, that almost doesn't justify owning and enjoying the driving experience.
Hi AZjag1999, how did things go, have you had the car over 50 now and tested for vibrations?
Reading through the posts, I found a place that balanced everything, front coupling to rear coupling, it seemed to me that it was necessary in my case as I had replaced everything up to this point and still had vibration. In all seriousness, Highhorse and I have tried virtually every thing, every way, and still had some issues. I don't have the facilities to get the car up in the air for this kind of work, so once I struggled it off, the shaft was taken to a professional balancing shop, and while waiting for it I just about recovered enough to put it all back together. I was very fortunate that whatever it was that was wrong with mine, I cured, but I can't say exactly what the problem was, sometimes it's better just to do the lot, you're more likely to fix it?
Paul
Thanks for checking in, Paul.
Unfortunately, the noise has gotten worse to the point where driving it doesn't feel safe. I found another thread where someone else had the same noise, and replacing the differential solved the problem (https://www.jaguarforums.com/forum/x...e-video-82823/). I am sure I need a new differential, and can't see a logical justification to keep my ownership of the Jag in my situation. I've posted it up for sell in a few websites, including here. TBH I'll probably just buy a beater car, as I'm still in college and just need something cheap, reliable, and good on gas.
Long story short, life happened and I had to fix the Jag. Took me about a week to change the differential, with a little help here and there, and fixing a few other problems along the way.
Rear end with old diff
Cleaned with new diff
It drives as good as it did before the whole incident--no more noise. I think this happened as a result of low oil in the diff, and hammering the gas pedal down.
Interestingly, when i tried turning the input shaft on the old diff, I could feel it get stuck at a certain position every rotation. Turning the input shaft the other way, would lock up the whole thing. It was only a matter of time before the old diff would blow up.
 10-18-2018, 11:50 AM