Cylinder head removal 1990 xj40
#1
I am about to pull the cylinder head to cure the oil leak above the distributor.
I am not doing valve seals or any other work since there are no other problems with the car.
1. Do I have to/ is it recommended that I purchase the complete Gasket set?
2. In the Haynes manual, it states that upon reassembly to retract the chain tensioner prior to installation. What releases the chain tensioner prior to startup?
3. Any tips for doing the job will be very much appreciated.
#3

It’s been a long time since I did the head on my ‘92, I can’t remember any problem with the top chain tensioner, its not like the old Reynolds tensioiner on the XK engine. I think you just need to make sure there isn’t too much slack and the engine oil pressure keeps it tensioned correctly.
#4
#5
#6


Update:
I removed the cylinder head yesterday to replace the head gasket to resolve the oil leak above the distributor.
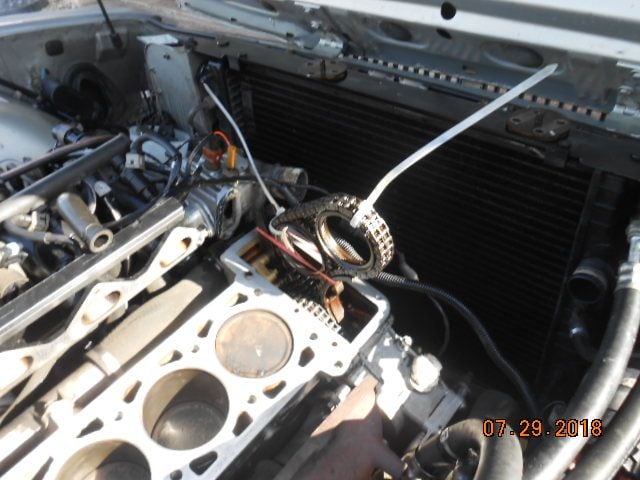
The only issue I had was having to unbolt the fuel injector rail in order to get the intake manifold to clear the studs as the wiper motor was in the way(not mentioned anywhere).
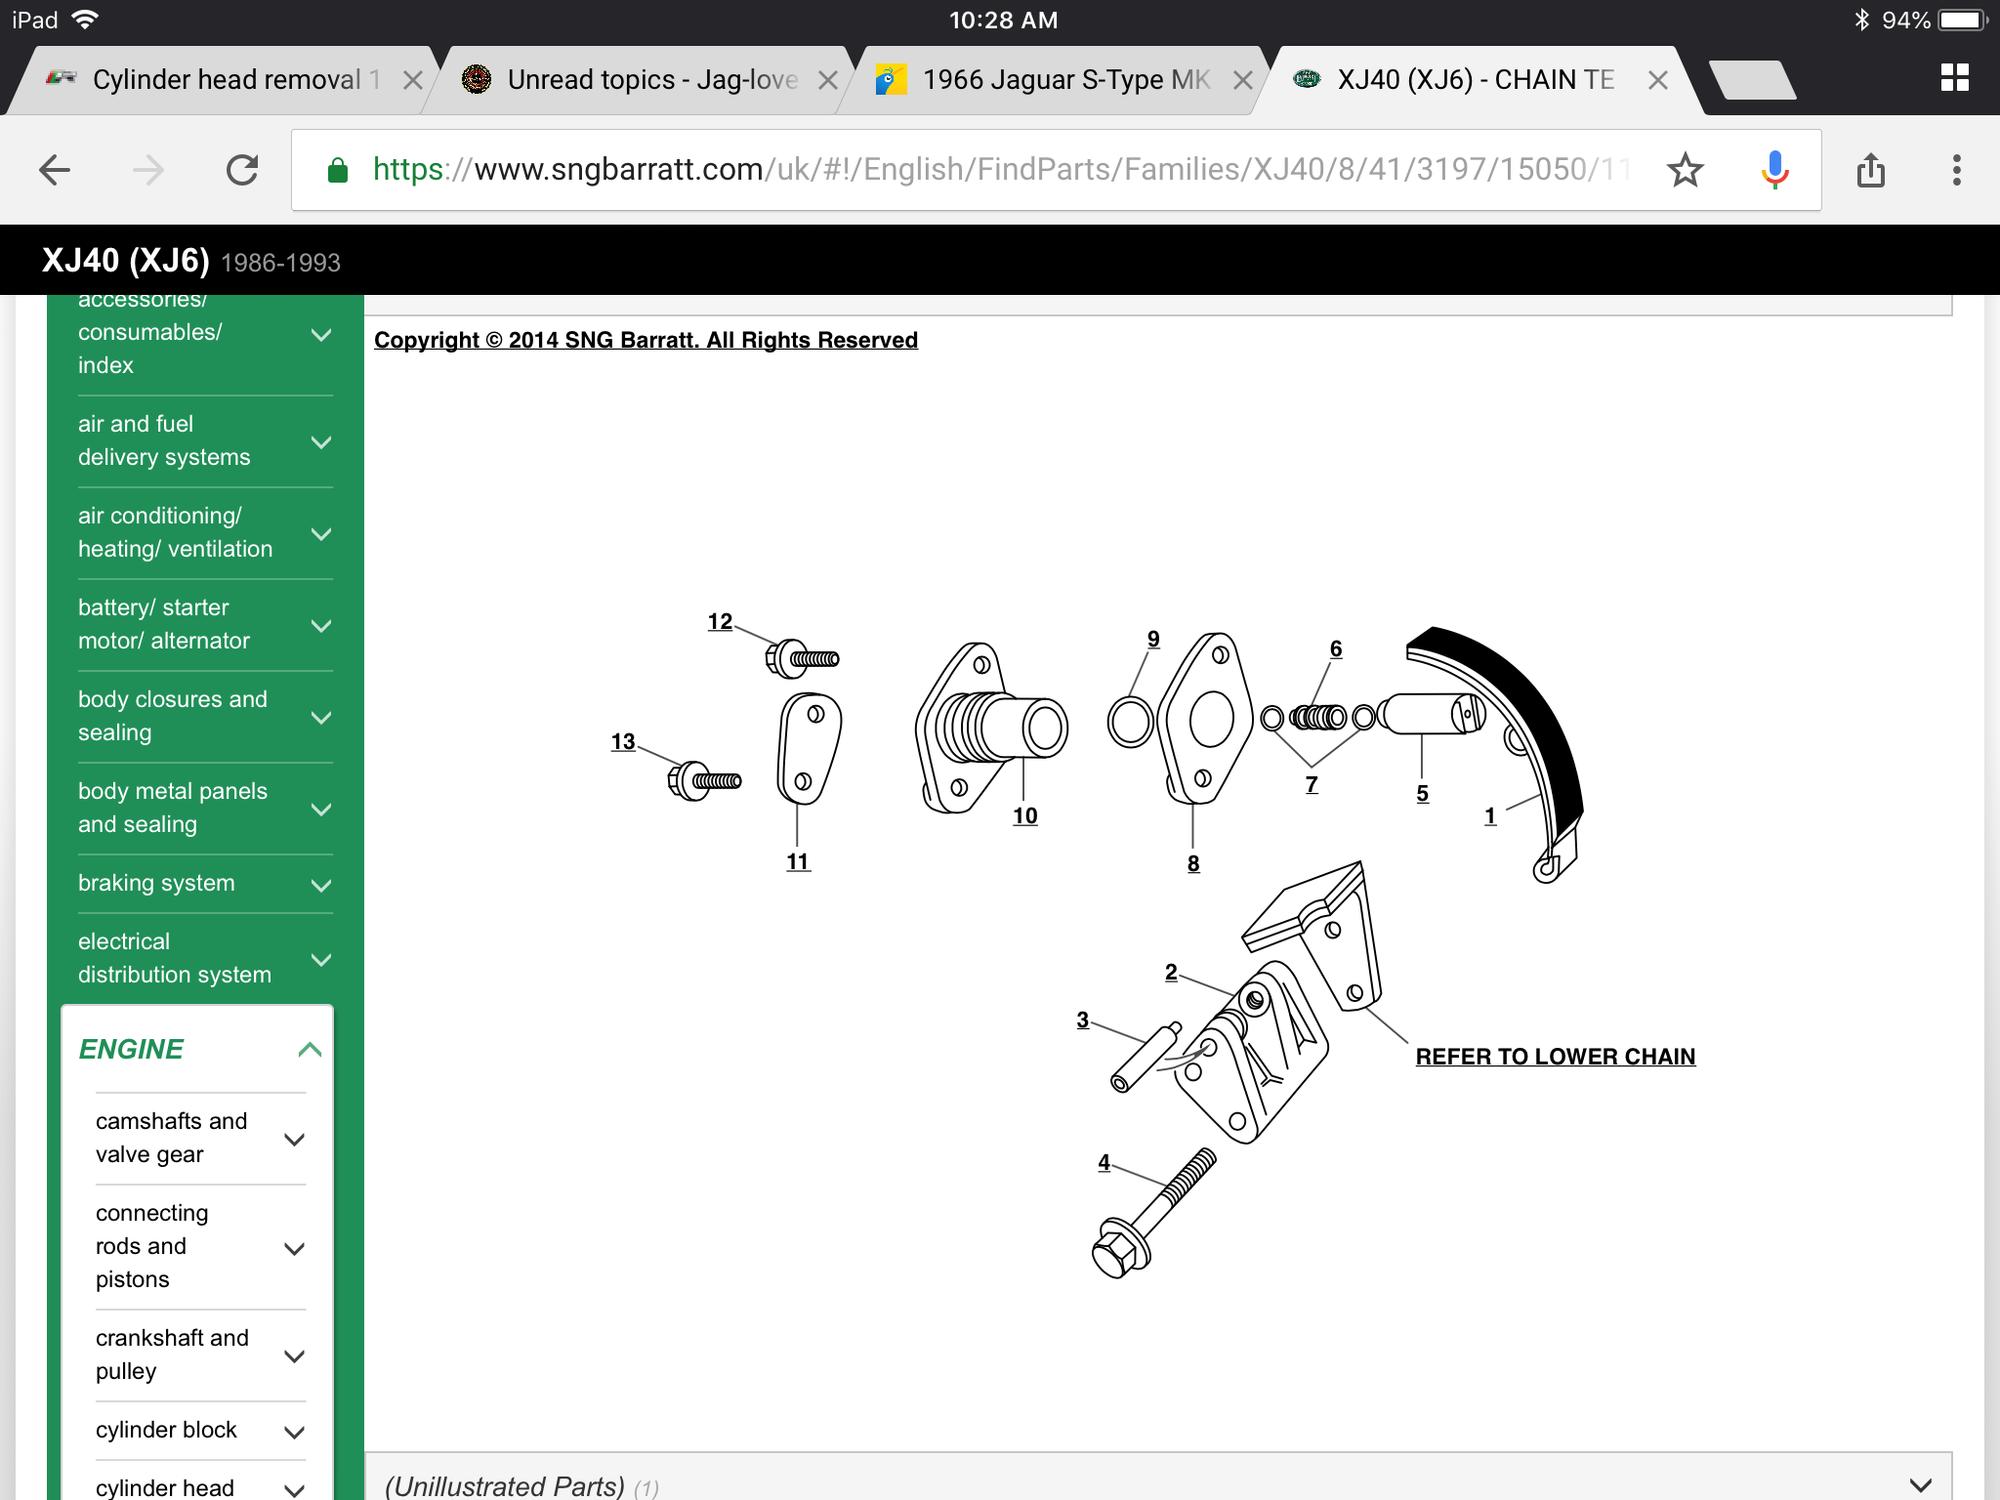
The upper chain tensioner is not the type with the allen key adjustment. I have to figure out how to take it apart to replace the inner o-ring.
Replacement parts are supposed to be here today from Coventry West. Their kit did not have the valve seals so I got those from another source.
I am also going to replace the coolant hoses under the intake as it is easier to do so now with the head off.
Am I missing anything that I should do now before installing the cylinder head?
Attached is an image of the upper chain tensioner.
I am using a hoist to install the head and two guide bolts.
DonB mentioned using Copper Spray Gasket prior to installation
Any tips for re installation will be welcome.
#7
Trending Topics
#8
#9
#10

Jerry:
There are 3 brackets. 2 that hold the fuel injector harness and 1 that holds the oil filler tube (in my case) Undo the plastic ties from the front and rear bracket and remove the brackets.
I also disconnected the fuel rail because it was hitting the wiper motor which prevented it from clearing the studs. The top fasteners are studs and the lower ones are bolts.
Once the brackets are removed, you will have clear access to most of the fasteners. To remove the rearmost bolt, I had to use a 1/4" drive extension 8" long and fish it through under the wiper motor.
Just behind and above the rearmost bolt, there is a heater hose that has to be disconnected in order to lift the head free. See attached image of bracket
Last edited by sanchez; 08-02-2018 at 06:17 AM. Reason: add info
The following 2 users liked this post by sanchez:
jerry_hoback (08-02-2018),
Kay (08-05-2018)
#11
#12
#13

When I purchased the gasket set from Coventry West, I was told that their kit did not include the valve seals, so I purchased a set of valve seals from another vendor.
However when the kit from Coventry West arrived there was a set of valve seals. Since I made the purchase from the other vendor on the same day the Coventry West kit arrived, I was able to cancel the purchase.
The CW gasket set came with:
Head Gasket
Valve cover gasket
Half round seals for the back of the valve cover
Gaskets for plate at the back of cylinder head
Upper tensioner gasket and o-rings
O-ring for distributor
EGR valve gaskets
Valve seals (24)
Exhaust pipe donuts
Exhaust Manifold Gaskets
Intake Manifold Gasket (2)
I have completed the job and the Jaguar is no longer marking its territory on my driveway.
Give Coventry West a call and have them open the box. I was surprised that the valve seals were there.
#14
I wondered about that scenario too- if the pic showed them and the write up said no, but then they would be there anyway. Yikes! Too much to worry about.
Also, looking at the Haynes Book of Lies, It says that an adapter for the valve spring compressor is needed. It looks like something I may be able to make if it is really needed. Is it really needed? or will a standard big old "C" shaped compressor be enough?
Also, looking at the Haynes Book of Lies, It says that an adapter for the valve spring compressor is needed. It looks like something I may be able to make if it is really needed. Is it really needed? or will a standard big old "C" shaped compressor be enough?
Last edited by jerry_hoback; 08-16-2018 at 07:39 PM.
#15
#16

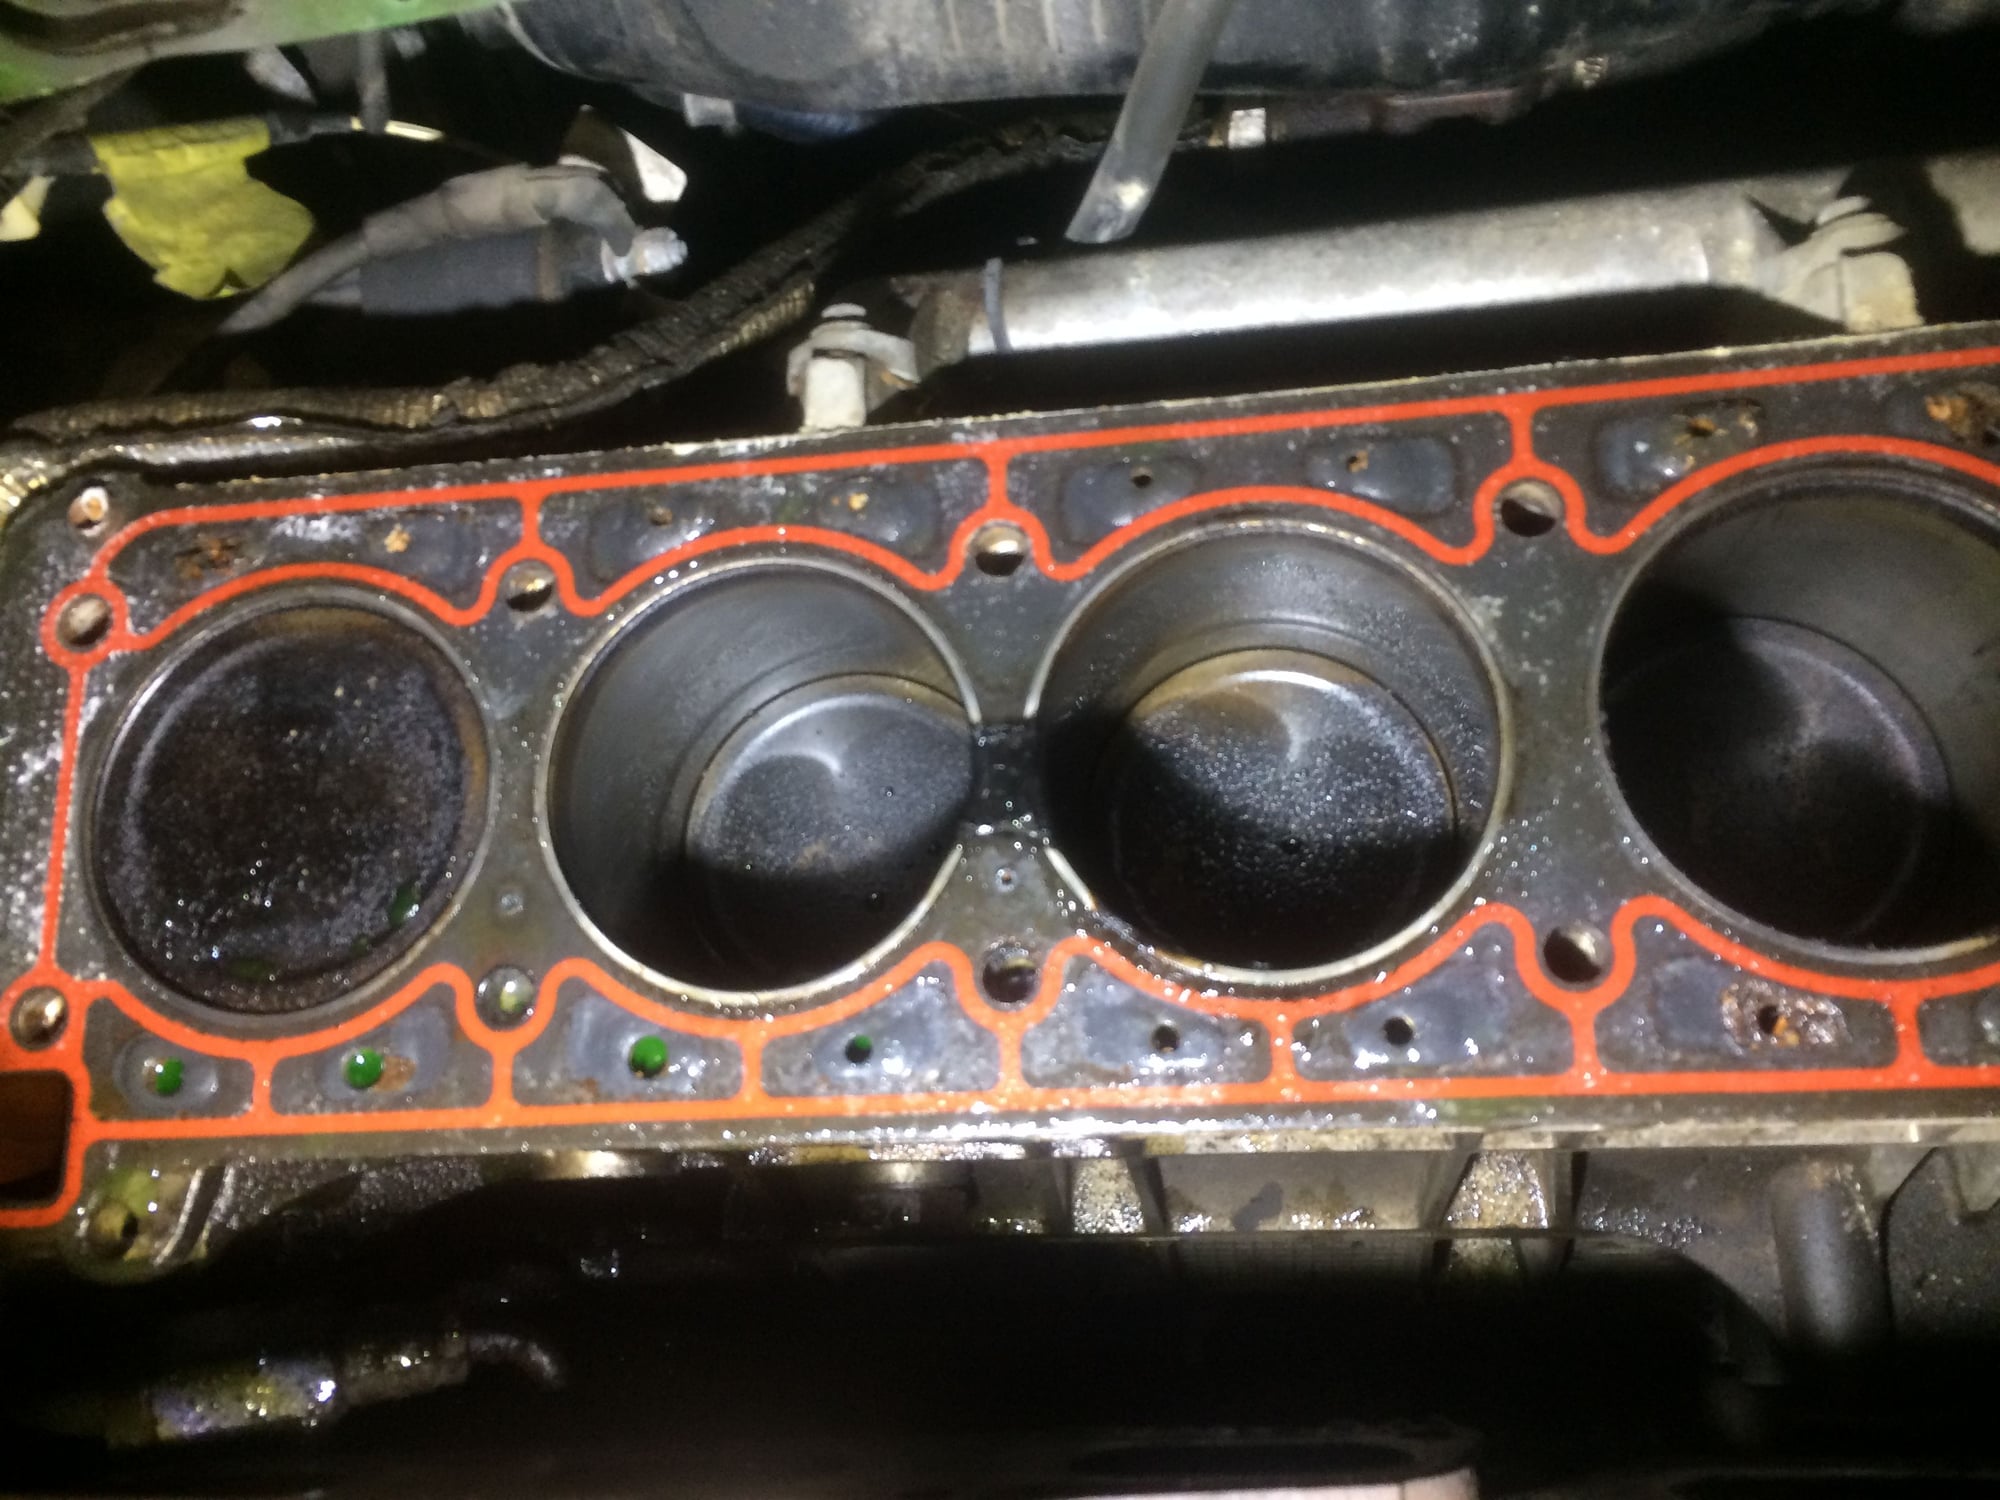
I opted to remove the wiper motor instead of the fuel rail. It worked as far as clearance but its probably a wash as far as extra Stuff to do. I didn't want the possible fuel issues as I was just there with both cars not too long ago. I used acetone and a scrubby sponge to clean up the intake face and the block face. It seems to have worked pretty well as the areas where I tried to scrape after the acetone scrub were cleaner than the scraper could do. It worked relatively fast too. Here is a shot of my blowout. I was happy that it was what I expected, if happy is the right word there.
Thread
Thread Starter
Forum
Replies
Last Post
JayJagJay
XK8 / XKR ( X100 )
44
11-15-2016 09:31 PM
Currently Active Users Viewing This Thread: 1 (0 members and 1 guests)


