When you click on links to various merchants on this site and make a purchase, this can result in this site earning a commission. Affiliate programs and affiliations include, but are not limited to, the eBay Partner Network.
Well last Tuesday I loaded up the engine on my trailer and took it down to the local community college. School has started (engine rebuilding class) and I am hoping to start tearing into this by next Tuesday.
Class is going slooooowww.. I managed to strip the ancillaries from the engine and hoping to get the head out next week. I may even get to wash the block in the industrial strength parts wash cleaner....
I know it is a PITA, and all that, but you need to take out all the core plugs in the block and flush the coolant jacket out, poking around at the back with a piece of wire to get all the crud out. It accumulates at the rear of the block where the coolant flow is much less. This also gives you an opportunity to examine the long head studs. There is also a plate on the rear face of the block that can also be removed to clear out the crud.
You might find the screwed plug where you expect a core plug to be impossible to remove. Don't worry, as this area tends not to be too crudded-up. This screwed plug was to allow a block heater to be inserted, something supplied, I believe to North American and Canadian dealers on buyer request. I have never seen one, ever, but the UK doesn't get too cold to need it.
Once you get the front timing cover off, (which is aluminium), inspect the casting where the coolant passage to the block is located. Here aluminium and iron come close together with an electrolyte, (the coolant), and the aluminium can corrode and get very close to allowing coolant to pass into the timing chest. All this happens despite the barrier of the timing cover gasket. Of course, engines that are well maintained, and anti-freeze always replaced at recommended intervals may not suffer, but still worth checking as your engine is now 30 years old.
Thank you for your comments. It looks like you've there, done that! Once I start taking the engine apart I shall report back with my findings and hopefully with more revealing pictures.
Thank you for your comments. It looks like you've there, done that! Once I start taking the engine apart I shall report back with my findings and hopefully with more revealing pictures.
S.
I have indeed been there ! My 1980 engine block was badly cracked and after the 3rd head gasket failure, I finally bit the bullet and rebuilt the engine around an uncracked block. So I made sure the block was ready for installing everything, so flushed out the block, put in new core plugs and replaced the long studs. The timing cover was corroded almost through in the way described so I had to fix this too.
The later blocks like yours are slotted at the top, so don't crack. Despite this the head gaskets usually don't get past about 80k miles.
Have a read here from an ex-Jaguar engineer on the XK engine: -
Great thread, this is where im at as well. Hoping to replace big end bearings and check crankshaft soon. good advice to flush out block and replace core plugs.
There are kits to replace the rope seal at the rear of the crankshaft, but the scroll has to be machined off. I have to say, I don't know how good these replacement lip seal kits are, but replacing the rope seal is quite a job to do successfully and if you're not successful the car just leaks oil. If you can stand this, then OK.
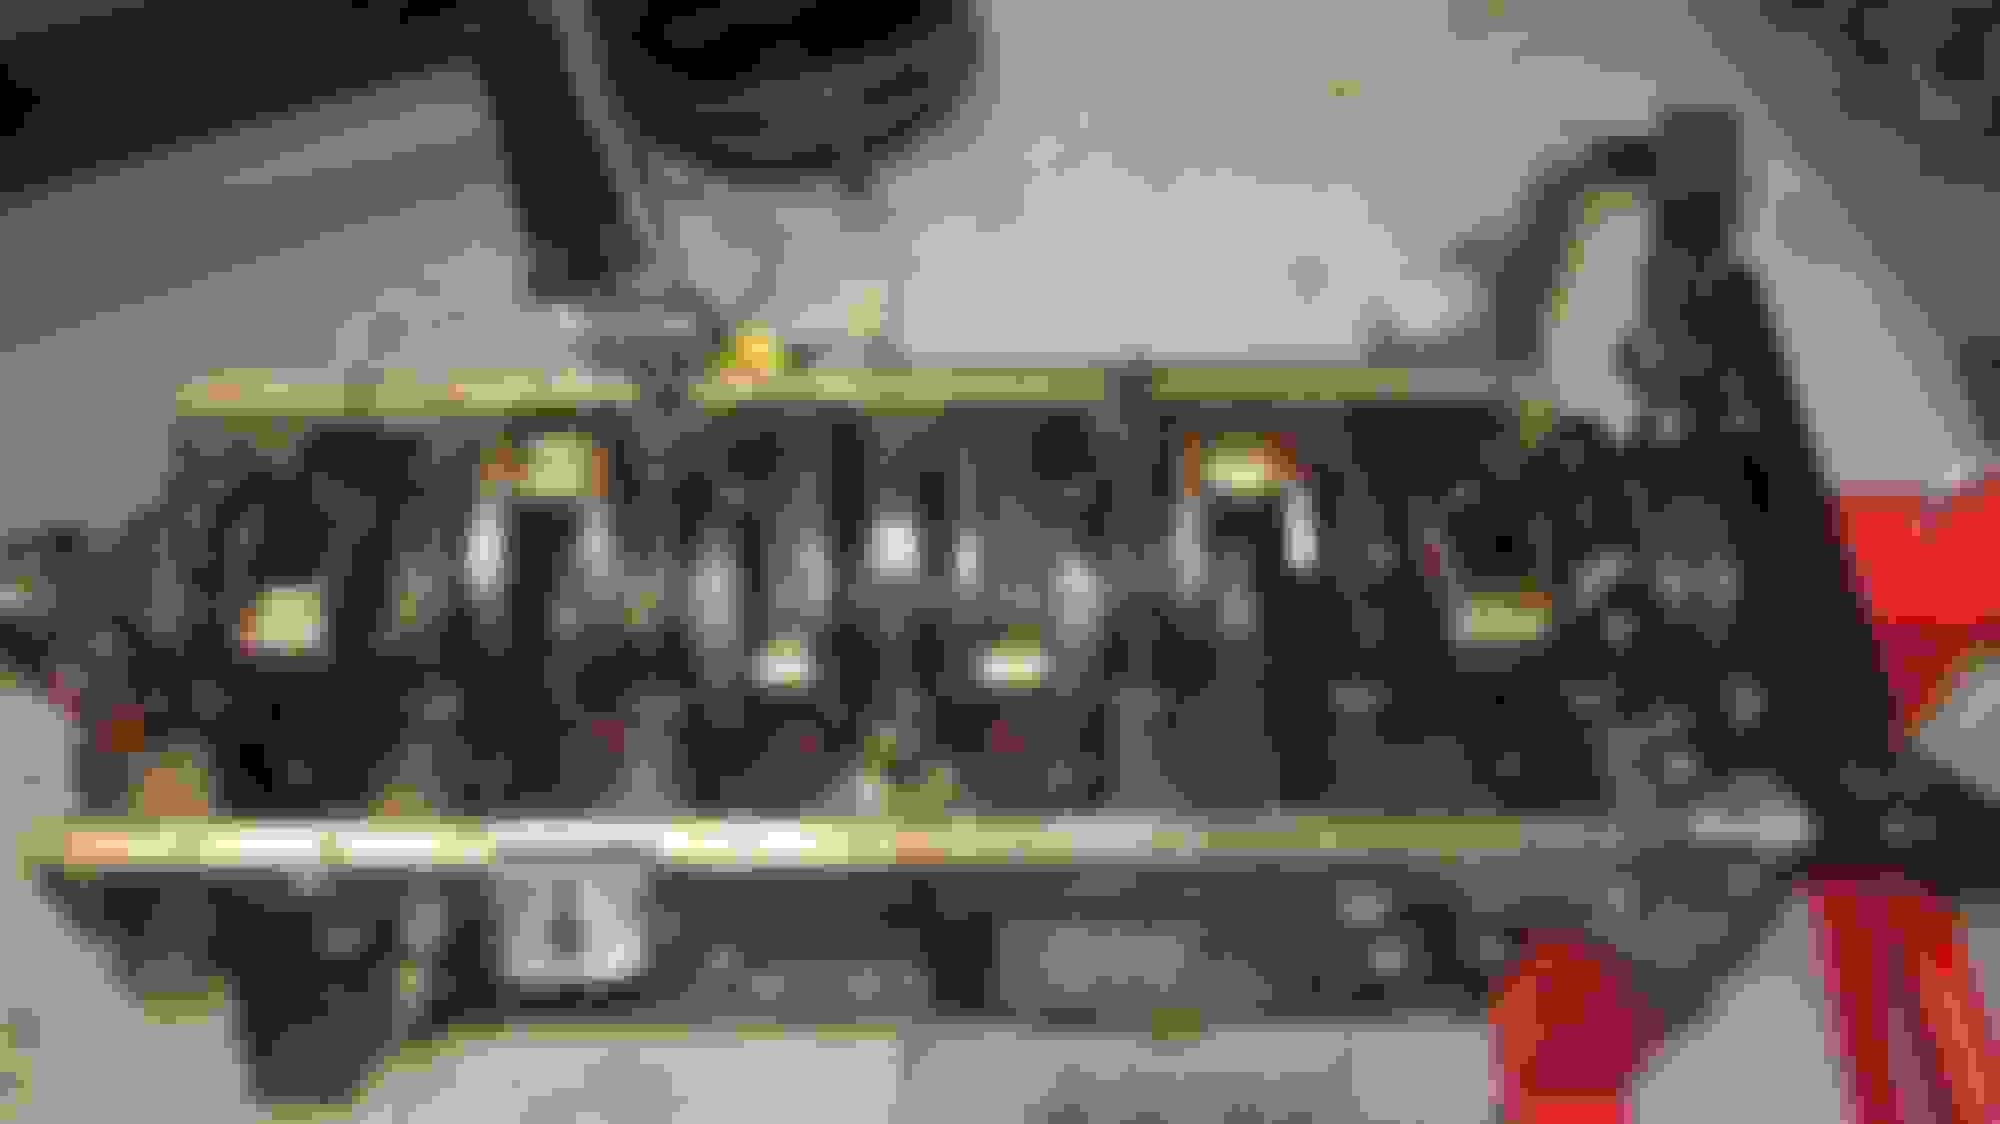
Well the head is off. Was not as bad as the first time I did it back in 1998. When I did the head back then (100K miles ago) I put brand new studs and covered them with anti-seize compound. That was the right thing to do. The head came right off and was able to get some of the studs out by hand.
Next week will be removing harmonic balancer, timing chain cover and oil pan.
It is amazing how many little things you forget to disconnect when you try to pull the engine out of the engine. I just about have it done though. I should've dropped the exhaust header out but did not, and not only that, the only oxygen sensor is on the way and hitting the steering column. I tried to disconnect that sensor but it is baked on tight. I would have to just remove the header before finally completing the extraction. Hopefully I'll get the engine/tranny combo out tomorow... stay tuned....
Thanks for sharing, this is great. Just so happens I am getting ready to do a very similar job on my Series III. Since it has been some time - I pulled the engine out over a year ago - your photos will jog the memory some. Thanks! Good Luck - and keep it coming.
Any reason you are going with the turbo 350 trans vs the 7000r4 and a rear diff ratio change?
Just out of curiosity, what happens when you pair the overdrive transmission with the stock rear gears? I used to have a 2004 Mercury with 2.73 gears in the back that had an overdrive transmission, and it worked just fine. And I'm pretty sure Ford's 4.6L engine is pretty close to Jaguar's 4.2 I6 in terms of horsepower.
Just seeing the engine there on the stand brings back some memories !! If you rebuilt the engine in 1998, it should still be pretty good. Certainly the cam shaft chambers look very clean. I see you have the tappet guide stakedown plates fitted.
Just seeing the engine there on the stand brings back some memories !! If you rebuilt the engine in 1998, it should still be pretty good. Certainly the cam shaft chambers look very clean. I see you have the tappet guide stakedown plates fitted.
In 1998 I did the head only, did not touch the block. It will be interesting to see what I find once I finish tearing down the block.... hopefully next Tuesday.
1. Brings back memories of 2001. My car in my garage. Bonnett off. Only mine was upside down, but on a nice blanket. It served as a receptacle for some of the parts that were to be reused. After cleaning up, of course.
2. The Special referee, I had to see after the lumping shared space in a local community college. He was also an instructor there. Yup, shop immaculate. unlike mine at present.
3. Well, the Community Colleges have a plethora of free labor to clean up!
4. Way back when, I worked n a small service station. An old professional mechanic had a shop that adjoined it. At the end of each day, his apprentice was tasked with cleaning all the tools, putting them back on the tool board and sweeping out.
I am now at midpoint of fixing my cars start ignition issue. Time to clean up the shop, before embarking on fixing the odds and ends that didn't come out right.
5. Yeah, pain or not, I'd pull those "freeze" plugs and the block heater plug if possible. There ma8ight well be crud in there, in spite of good coolant maintenance.
those plugs will rust out. Much easier to fix now, than later in situ!!!
If you look at those core plugs the back face is pretty flat, but they come with it dished, and you have to whallop the back pretty hard to get them to spread out and seal. Ideally one uses a piece of round steel bar the diameter of the plug, but I just used an old socket at the wrench end and ruined the working end ! I put some gasket seal on, and they never leaked. Jaguar probably used a lovely and expensive hydraulic press tool. When I flushed out my new-old uncracked block, (a 7L by the way), lots of crud came out at the back of the block. The front passages were pretty clean.
I took most of the rest of the engine apart. Things look good. I may be able to get away with replacing main/rod bearings and piston rings. Still need to pop the crankshaft out and clean the block as best as I can
I don't know whether they had it on the later engines, but advice was always to pull out the little conical filter where the oil supply comes out to the lower cam-chain hydraulic tensioner, as they do clog up.
Other thing is to remove and clean out the sludge traps in the crankshaft. These are seen as plugs with an Allen screw type socket, staked to prevent loosening. When mine were removed, the amount of sludge was astonishing, and eventually it almost clogs up and reduces the oil supply. There is no alternative to biting the bullet on this one. However, don't remove the plugs until new ones are to hand, as it is so difficult to remove the old ones, they may be destroyed in the process.

 01-30-2015, 08:06 PM