What did you do to or buy for your XJ-S/XJS today?
#221
 04-01-2015, 10:48 PM


Veteran Member
Today, I spent about 2 hours struggling to remove the rear hard top and install the soft top, which hans't been done for at least 20yrs. Pro tip of the day.. Canvas shrinks over 2 decades! Haha.
It doesn't fit perfectly, but I'm content. I think it will be awhile before the hard top goes back on..
For anyone not familiar with the Cabriolet, this process involves 2 people, about 8 feet of velcro, 12 snaps, 10 bolts, WD-40, pliers and a hammer.
It doesn't fit perfectly, but I'm content. I think it will be awhile before the hard top goes back on..
For anyone not familiar with the Cabriolet, this process involves 2 people, about 8 feet of velcro, 12 snaps, 10 bolts, WD-40, pliers and a hammer.
Last edited by 01Silverstone; 04-01-2015 at 10:52 PM.
The following 2 users liked this post by 01Silverstone:
Flint Ironstag (04-02-2015),
xjsv12 (07-06-2016)
#222
04-02-2015, 02:57 PM

Veteran Member
The following users liked this post:
01Silverstone (04-02-2015)
#223
04-02-2015, 09:51 PM
Veteran Member
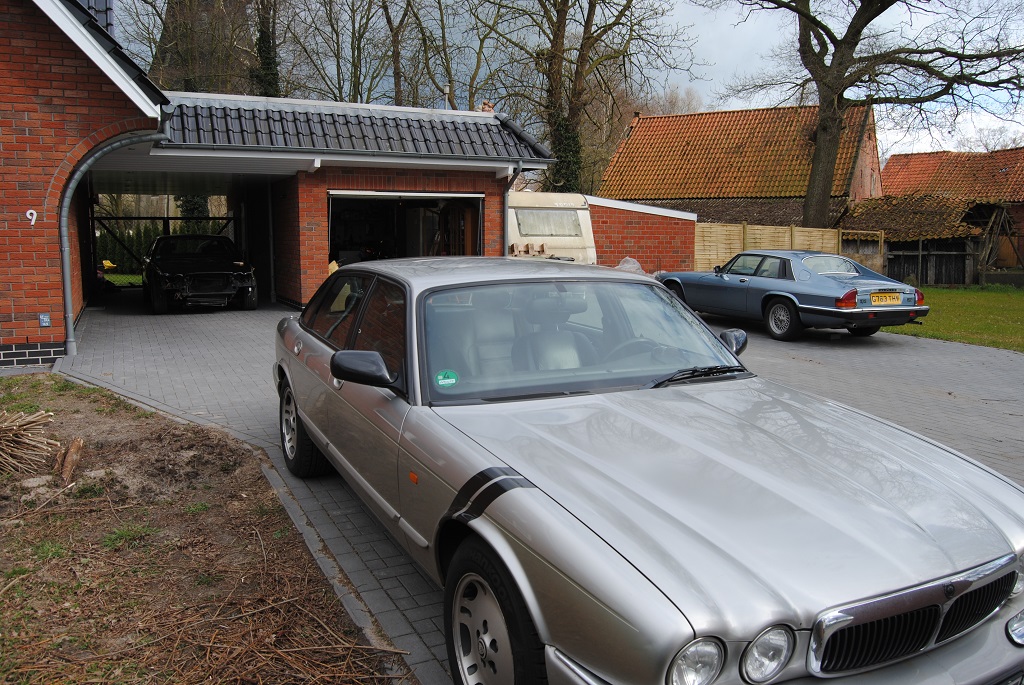
Thanks! It's nice to see some people who appreciate the Cabriolet- many just seem to view it as the failed precursor to the convertible. I just fell in love with the lines of the car when I first saw one. Plus, you hardly see them, so its fun to tell people about it. Mine is one of about 200 in the black/magnolia color combination. Here's a few more pics..
The following users liked this post:
Flint Ironstag (04-05-2015)
#224
04-04-2015, 11:34 AM
The following users liked this post:
Flint Ironstag (04-05-2015)
#225
04-04-2015, 03:47 PM

Senior Member
Just did the bootstrap bypass mod, removed a stripped screw from the radio, and tried to bring life back to my power mirror switches... with mixed success.
There was a thread somewhere, maybe this very board, that detailed taking them apart and cleaning the interior (which had become packed with all sorts of corrosion) and I couldn't find the blasted thing. Not even in my browser history!
At any rate, I wasn't able to finesse the units apart so instead just sprayed electrical contact cleaner inside and was able to restore only one function - the right side mirror now goes down and left... intermittently.
About to fill in the missing entries in the logbook. May or may not also go and replace the green LEDs in the cluster with white LEDs when I'm done.
#227
04-04-2015, 09:49 PM

Senior Member
havent posted here in a bit...
because the cat has been on ice as long as there has been ice on the roads.
anyway... today i fixed a failing electrical connection to the electrical fan and inflated the tires to the correct psi.
haven't driven her more than around the block since before christmas.
awwww... i missed her.
because the cat has been on ice as long as there has been ice on the roads.
anyway... today i fixed a failing electrical connection to the electrical fan and inflated the tires to the correct psi.
haven't driven her more than around the block since before christmas.
awwww... i missed her.
#229
04-05-2015, 11:17 AM
Veteran Member
Daim, nice collection! You still have the sedan that was in an accident (in the garage)? Or is that a new project? Never seen those stripes on a sedan - I think a special edition Corvette had something similar in the 90s.
#230
04-05-2015, 11:18 AM
Veteran Member
#231
04-05-2015, 11:52 AM
 Will be out tomorrow.
 The stripes were something I thought would look neat on the XJ8... Suits the car quite well if you ask me
Same as the same colour mirror caps. A lot more to come from that car though yet! 
#232
04-05-2015, 06:29 PM
Veteran Member
Bought myself some interesting Spanners
Open ended one end and ratchet rings on the other 8mm 10mm 13mm 14mm 17mm for only �8 (uk) Bargain!
Absolutely amazing! great quality as well and now I am kicking myself for not buying two sets.
No more in stock at the moment, not surprised!
I really could have done with these, when I was fixing the XJS exhaust.

Last edited by orangeblossom; 04-05-2015 at 06:31 PM.
#234
04-05-2015, 06:56 PM
Senior Member
#235
04-05-2015, 06:57 PM
Bought myself some interesting Spanners Open ended one end and ratchet rings on the other 8mm 10mm 13mm 14mm 17mm for only �8 (uk) Bargain! Absolutely amazing! great quality as well and now I am kicking myself for not buying two sets. No more in stock at the moment, not surprised! I really could have done with these, when I was fixing the XJS exhaust.
The following users liked this post:
orangeblossom (04-05-2015)
#236
04-09-2015, 11:17 AM
Senior Member
Join Date: Apr 2014
Location: Comox Valley, British Columbia
Posts: 816
Received 222 Likes
on
170 Posts
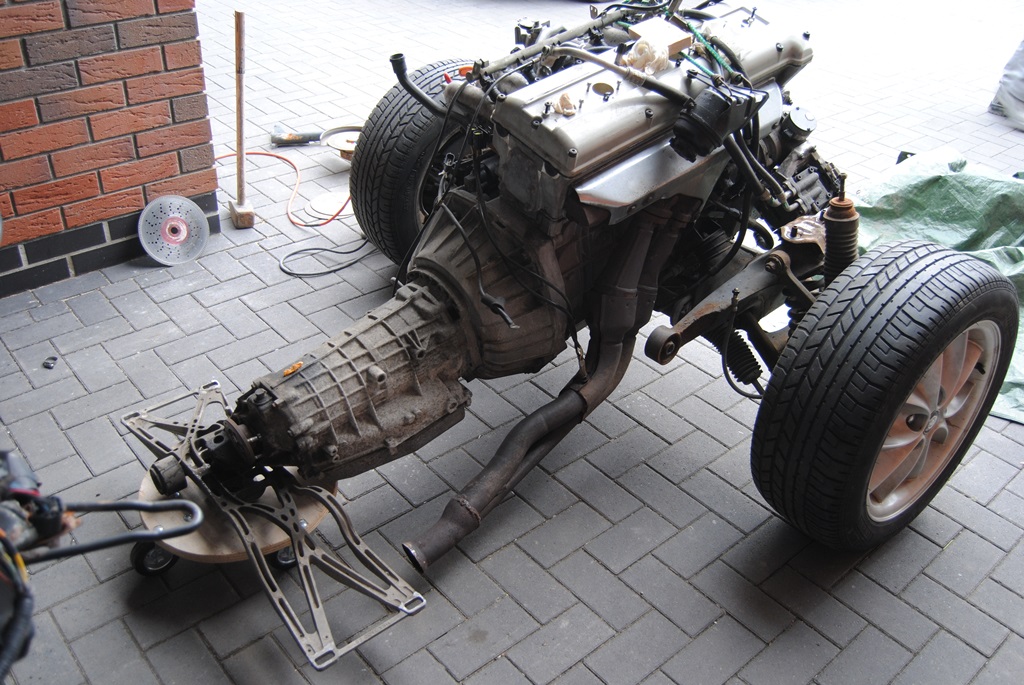
I'm guessing about 375hp+ and about 400ftlb+ torque. Not to practical for the car. Still have 1400 stall converter. I'm A bit afraid that I might tear the rearend out of it. Don't know how much torque it can handle. It does do great burnouts and second gear scratch.
#237
04-09-2015, 11:48 AM


#238
04-27-2015, 11:48 AM
Veteran Member
#239
04-28-2015, 12:05 PM

Veteran Member
OK guys with GM400 gearboxes on your V12s, read on and weep!
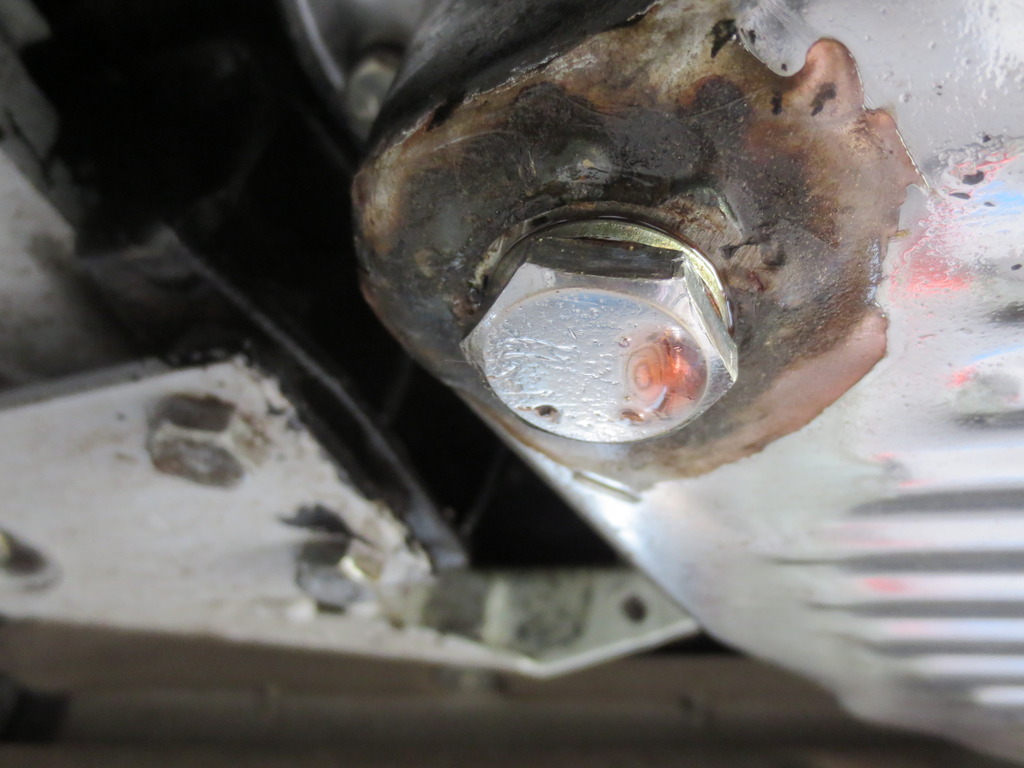
When I rebuilt the car I swapped out the OEM autobox pan for a B&M deep pan with a drain plug. However, the drain plug leaked and I had to remove the pan and weld it up and fit a far better sealing washer. Better, but not perfect. Also, the drain plug was at the wrong end of the pan, so it did not drain the last quart out either, as the box slopes slightly down towards the front. Mean while, I had always lusted after a genuine Moroso tig welded (NOT cast) aluminium deep pan with twin magnetic drain plugs at the front end; but they were too dear for my budget.
Then an old mate I had lent some money to years ago amazingly repaid me. So it was on, helped by the fact that someone on USA Ebay was selling them 40% off, which paid for the freight over the pond.
Then my chores having been done on the everyday cars spring servicing, tractor engine rebuilt and running, the moment long awaited arrived when I could fit the new pan to the XJS.
Herewith some pics:
Old pan still weeping a touch at the welded up plug:
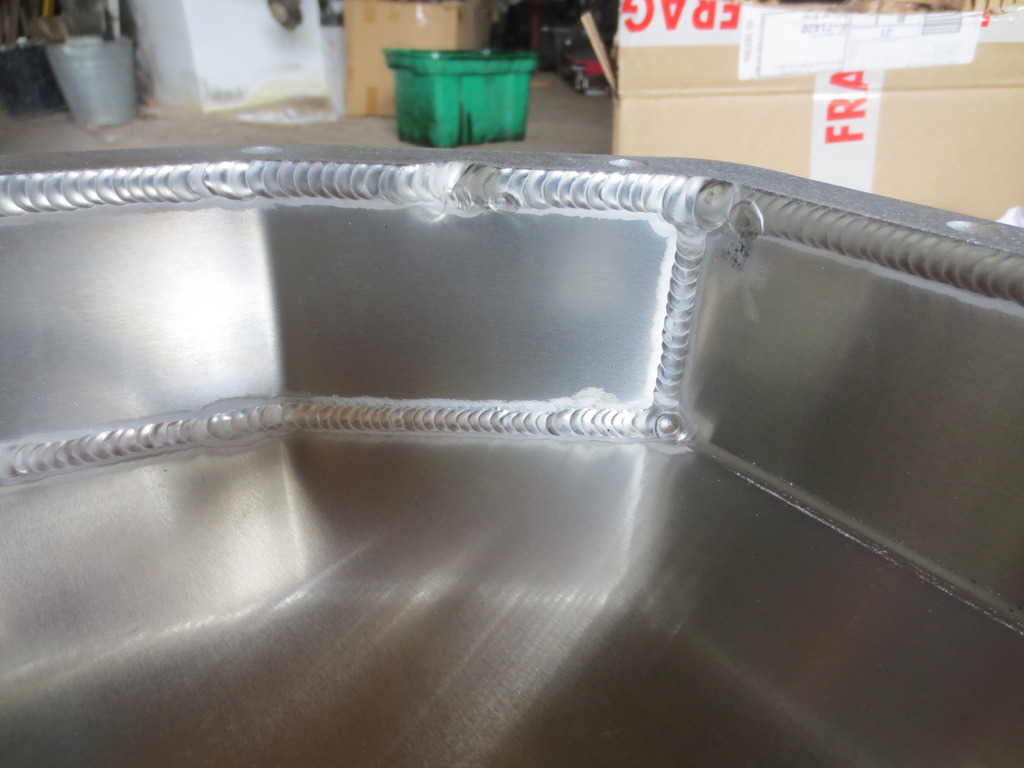
View of inside of tig welded new pan, note billet top rail for (we will see!) leak free joint:
New pan showing magnetic plugs at the downhill end:
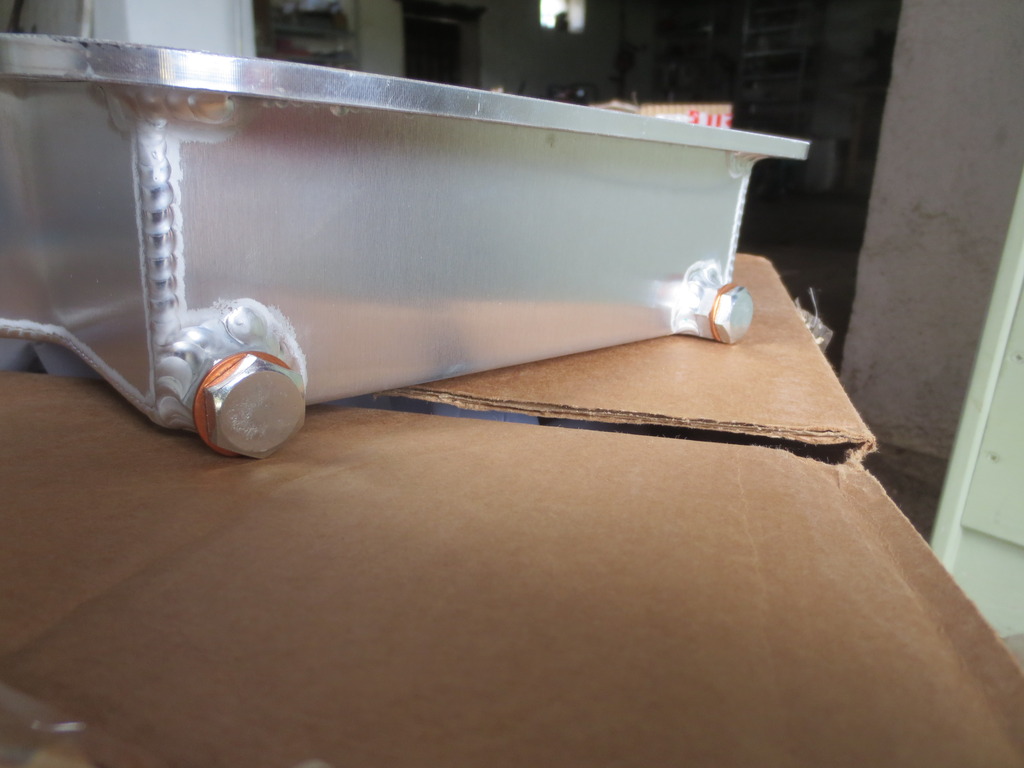
New pan view:
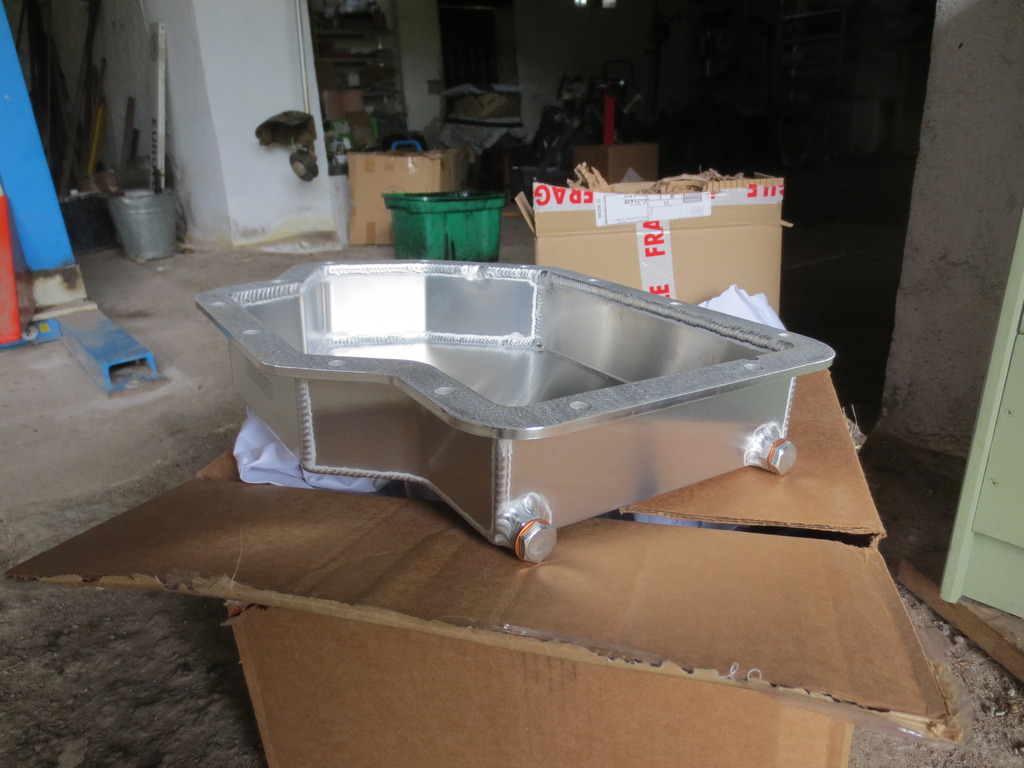
Installed and gunked up for I hope a leak free future:
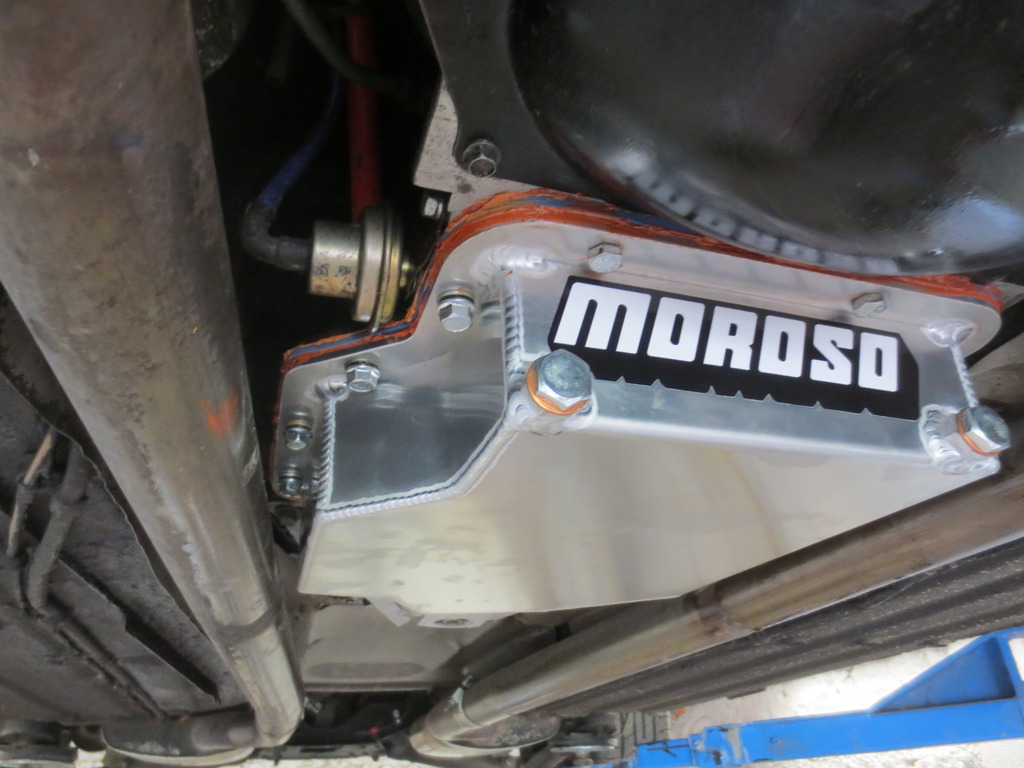
I re-used the Moroso rubber/metal sandwich gasket I had used before, which did not leak once I had gunked it both sides. The stuff set like concrete though, so getting the old pan off, once the bolts were undone, was a real job of levering it off. I am leaving it (as advised by the Great XJS Prophet, Grant Francis) just a bit nipped up, overnight, and will then tighten a touch more tomorrow, and add the ATF. The stuff I drained was very clean and shiny red, so that is a good sign, I believe. Just a very fine layer of grey on the old pan bottom, so no nasties that I could see, either.
Bling bling bling !!!
Greg
When I rebuilt the car I swapped out the OEM autobox pan for a B&M deep pan with a drain plug. However, the drain plug leaked and I had to remove the pan and weld it up and fit a far better sealing washer. Better, but not perfect. Also, the drain plug was at the wrong end of the pan, so it did not drain the last quart out either, as the box slopes slightly down towards the front. Mean while, I had always lusted after a genuine Moroso tig welded (NOT cast) aluminium deep pan with twin magnetic drain plugs at the front end; but they were too dear for my budget.
Then an old mate I had lent some money to years ago amazingly repaid me. So it was on, helped by the fact that someone on USA Ebay was selling them 40% off, which paid for the freight over the pond.
Then my chores having been done on the everyday cars spring servicing, tractor engine rebuilt and running, the moment long awaited arrived when I could fit the new pan to the XJS.
Herewith some pics:
Old pan still weeping a touch at the welded up plug:

View of inside of tig welded new pan, note billet top rail for (we will see!) leak free joint:

New pan showing magnetic plugs at the downhill end:

New pan view:

Installed and gunked up for I hope a leak free future:

I re-used the Moroso rubber/metal sandwich gasket I had used before, which did not leak once I had gunked it both sides. The stuff set like concrete though, so getting the old pan off, once the bolts were undone, was a real job of levering it off. I am leaving it (as advised by the Great XJS Prophet, Grant Francis) just a bit nipped up, overnight, and will then tighten a touch more tomorrow, and add the ATF. The stuff I drained was very clean and shiny red, so that is a good sign, I believe. Just a very fine layer of grey on the old pan bottom, so no nasties that I could see, either.
Bling bling bling !!!
Greg
Last edited by Greg in France; 04-28-2015 at 12:07 PM.