When you click on links to various merchants on this site and make a purchase, this can result in this site earning a commission. Affiliate programs and affiliations include, but are not limited to, the eBay Partner Network.
I was asked by a member to describe the process to install the Transgo pressure regulator upgrade. It takes about an hour to do the upgrade and the best time to do the upgrade is when you do a transmission fluid and filter change. The reason for the upgrade is to help prevent the failure of the A drum. It is believed that the worn pressure regulator will spike the oil pressure to the A drum causing an already weak designed drum to fail. For this post I already had a valve body removed from the transmission. The entire valve body doesn't need to be removed just the lower front half.
USE A T-27 TO REMOVE THE PAN AND THE VALVE BODY BOLTS!!!!!
I think this is where a lot of people have trouble removing the pan. The T-25 will fit but the bolts will strip if the bolt is a little stubborn.
Don't use a rag or paper towels to clean valve body. Lint in the transmission is not a good thing. If I do any cleaning it is with air.
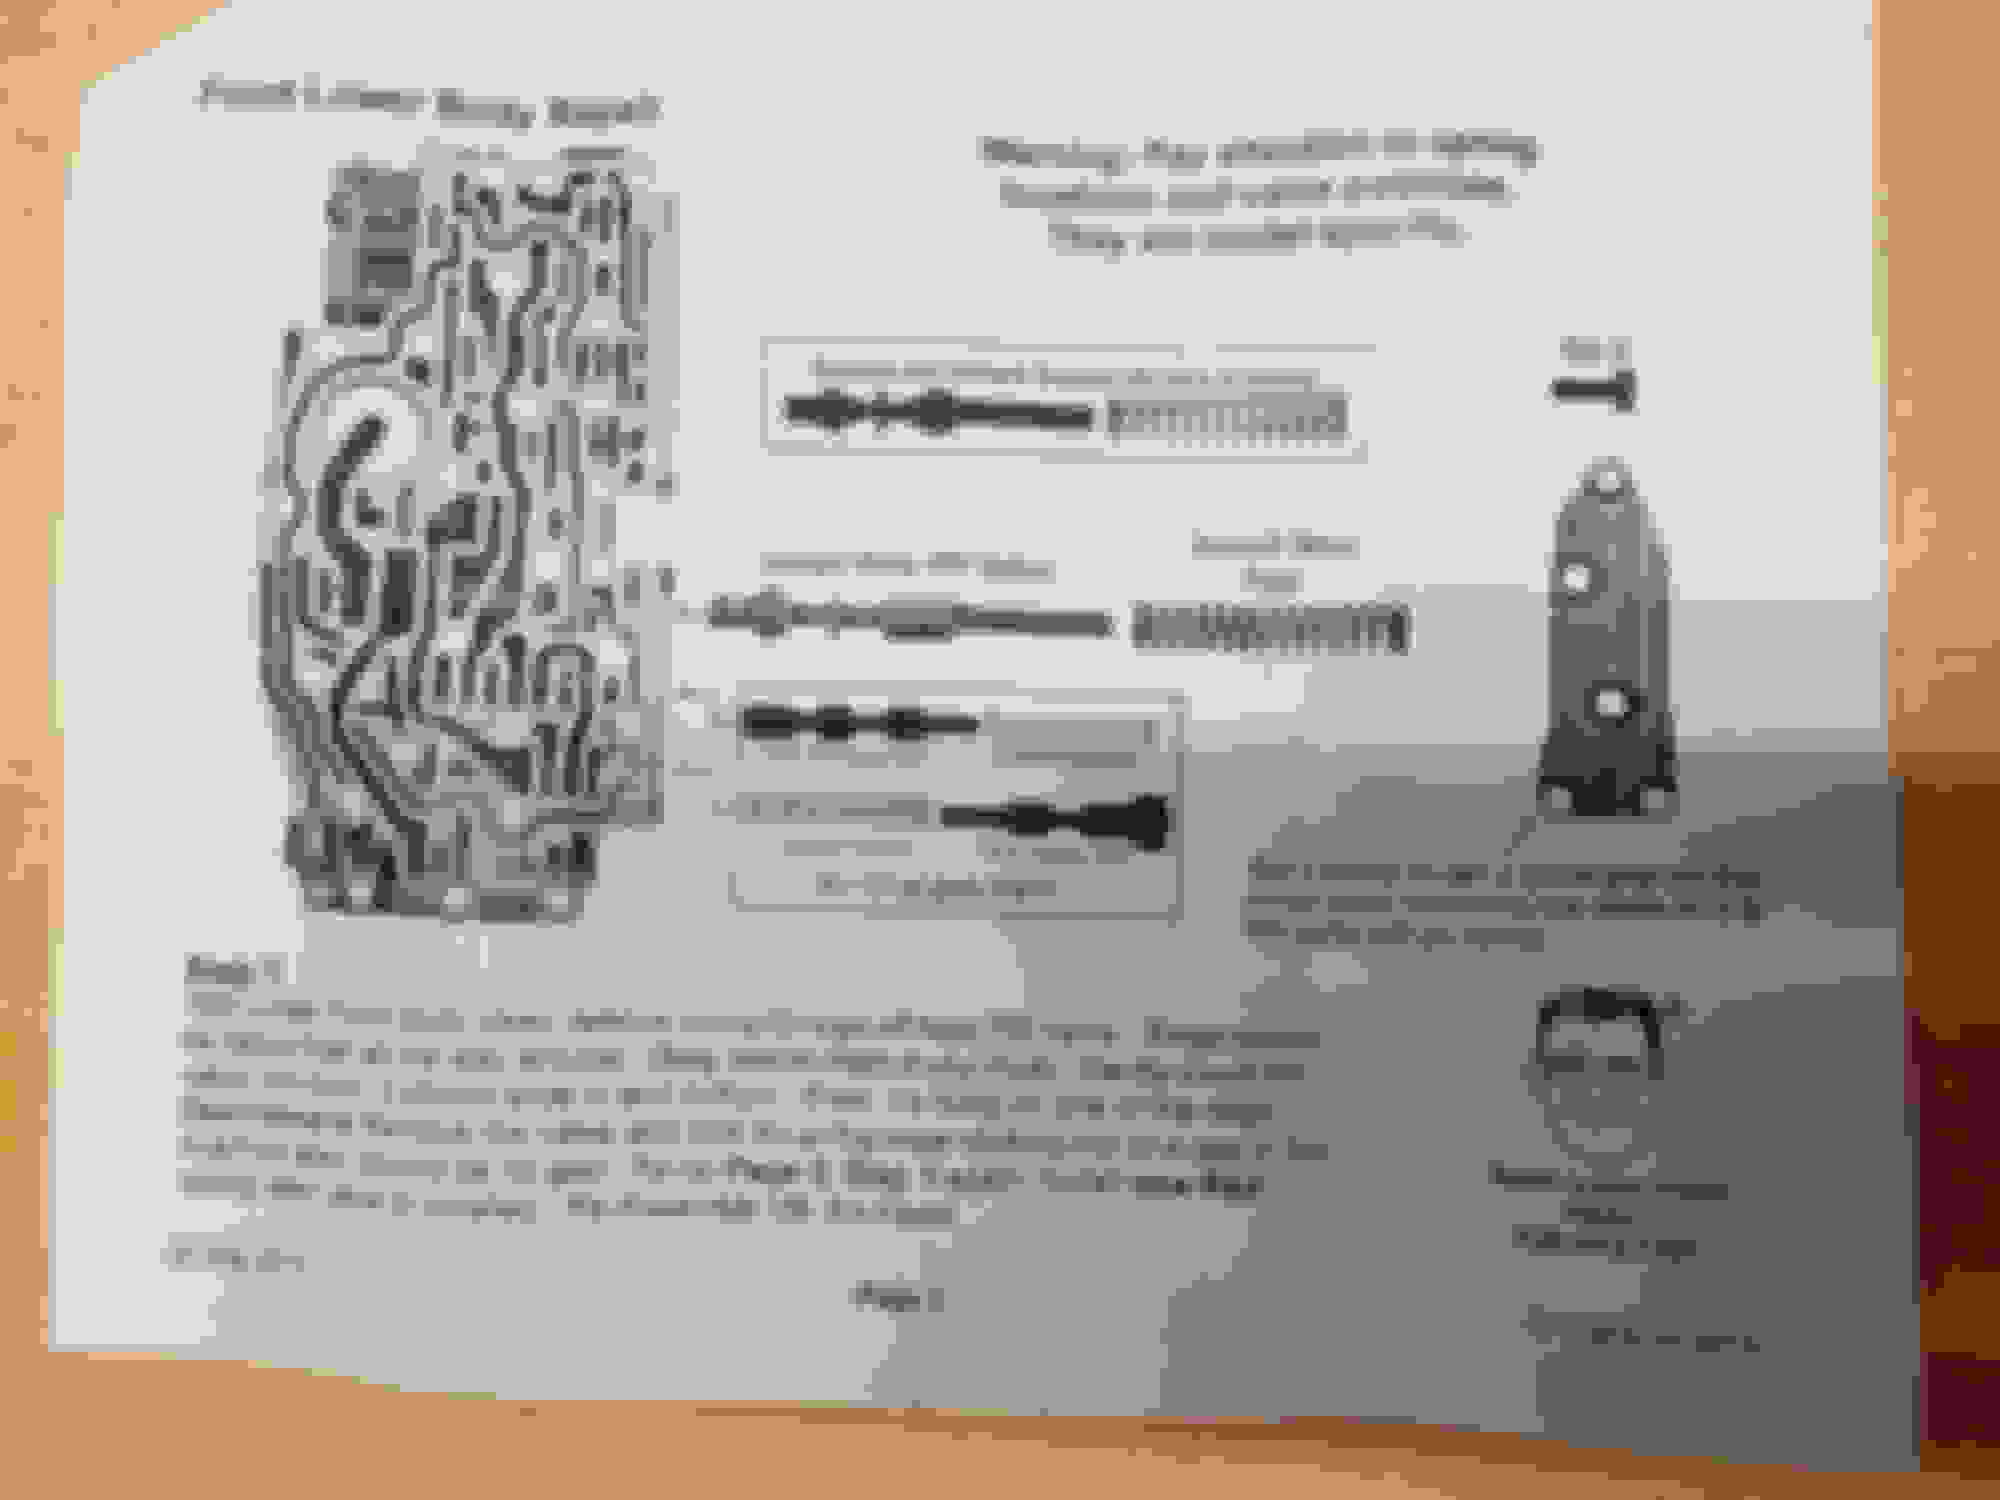
This is the relevant part of the instructions included with the kit. They describe the process very well, evev I could understand them.
EDIT:
Johnken was nice to post the entire Transgo instructions in pdf formant in post #3.
The night before I put the new split rings on the new valve. Use a little assembly grease before installing the split rings. Then put the o rings over the split rings to compress them. Put it in a clean baggie and put it in the freezer. Next morning take it out and I put it in a cup of ice to keep it cold because I don't have a freezer at my shop
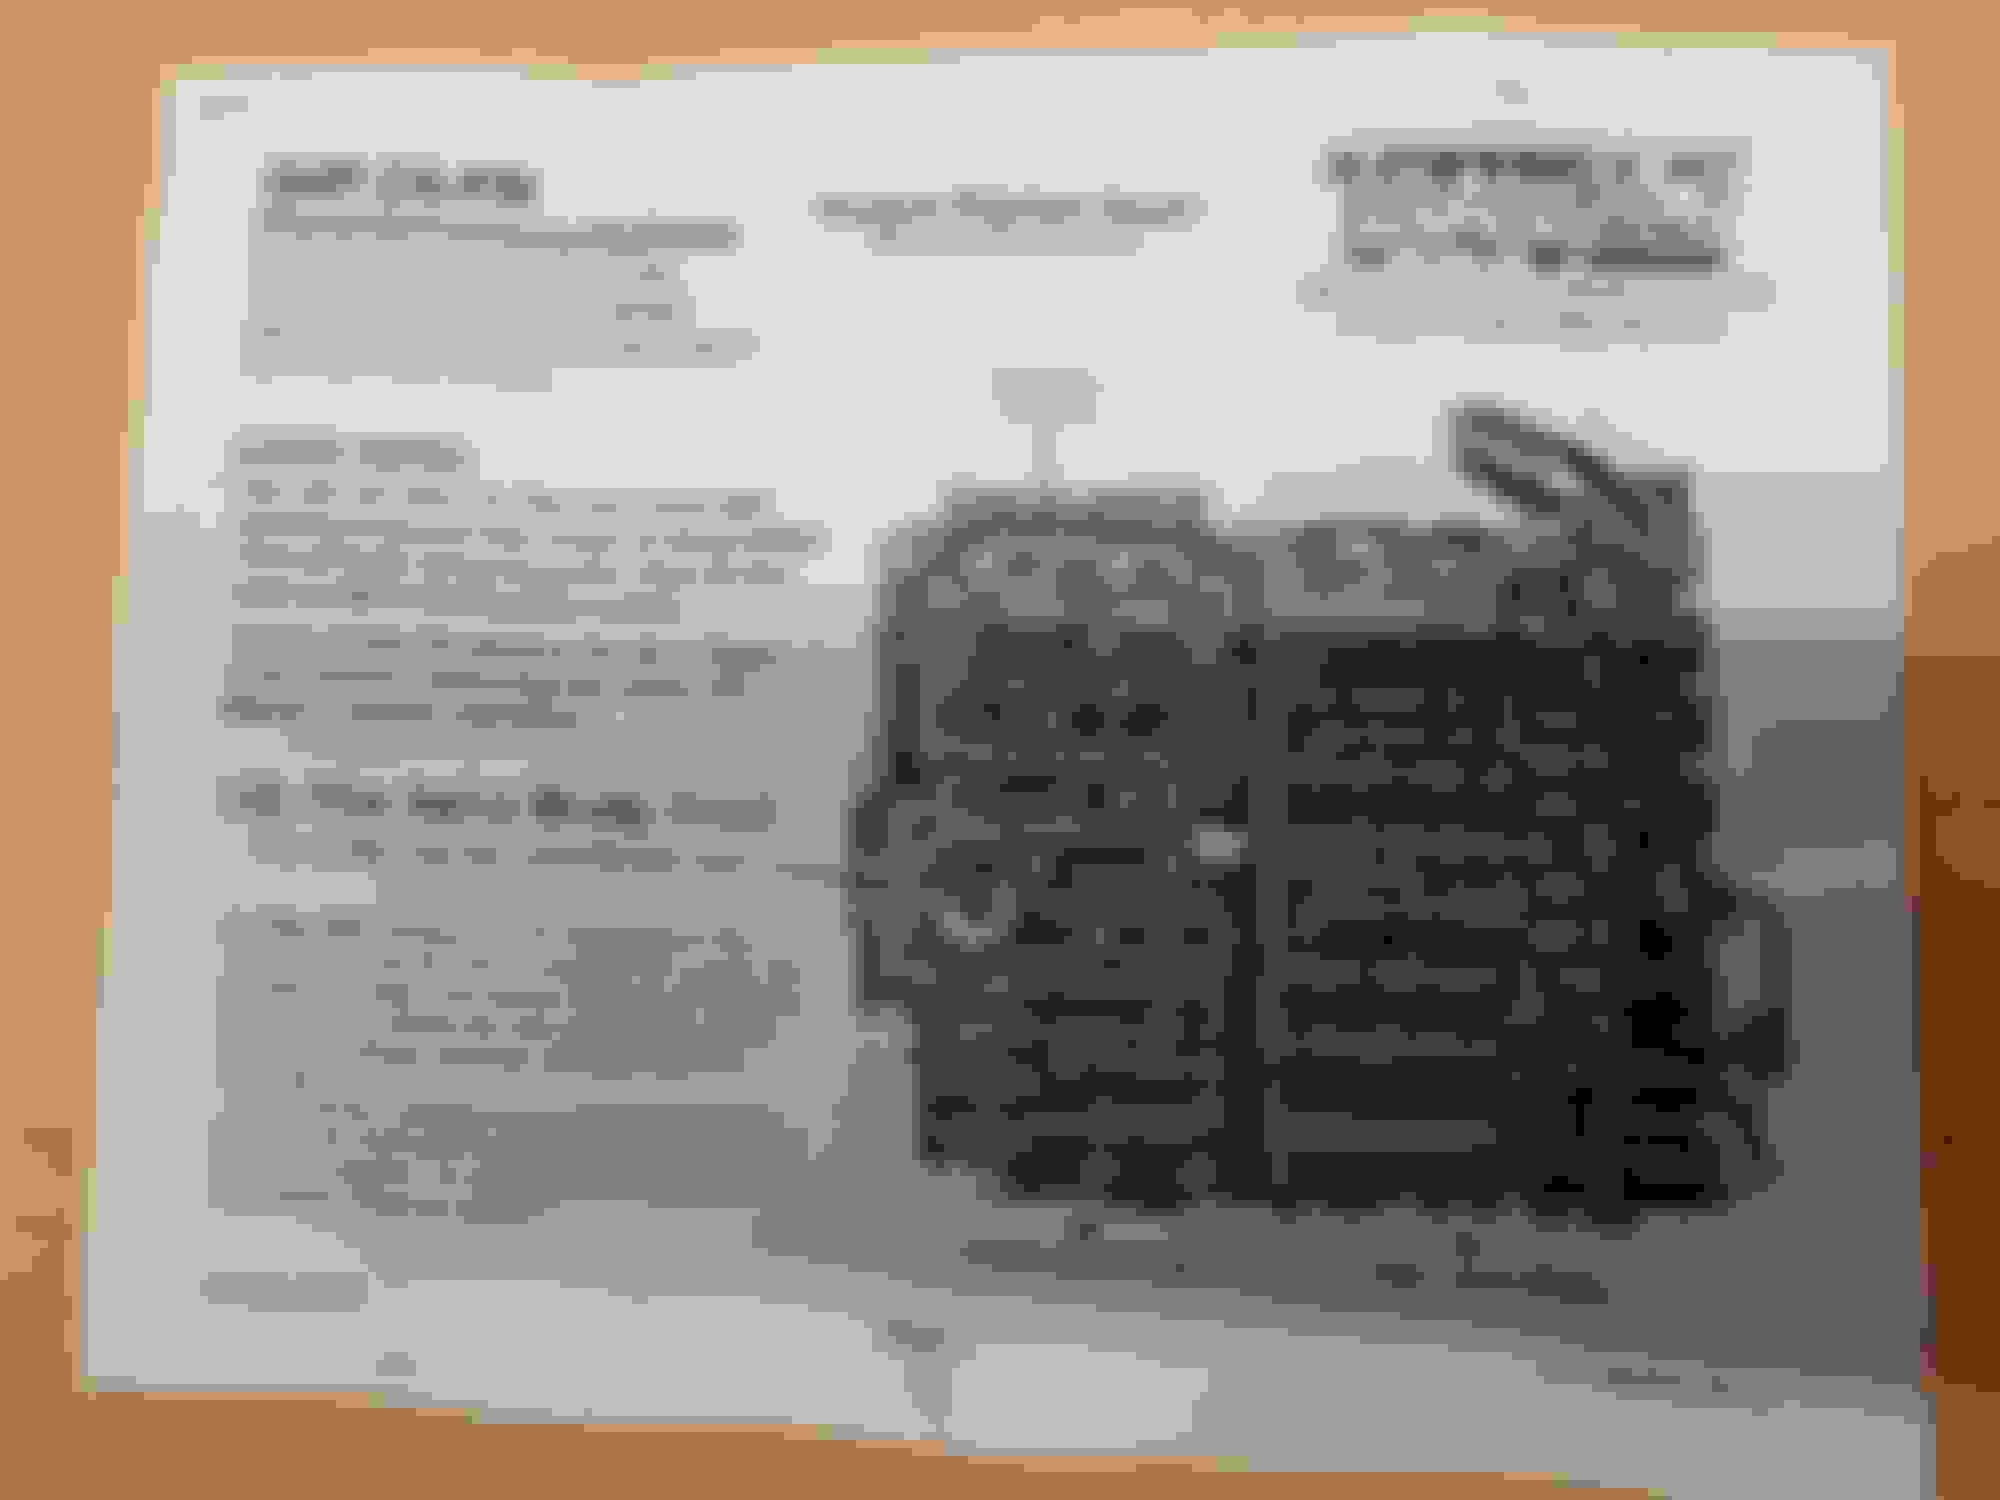
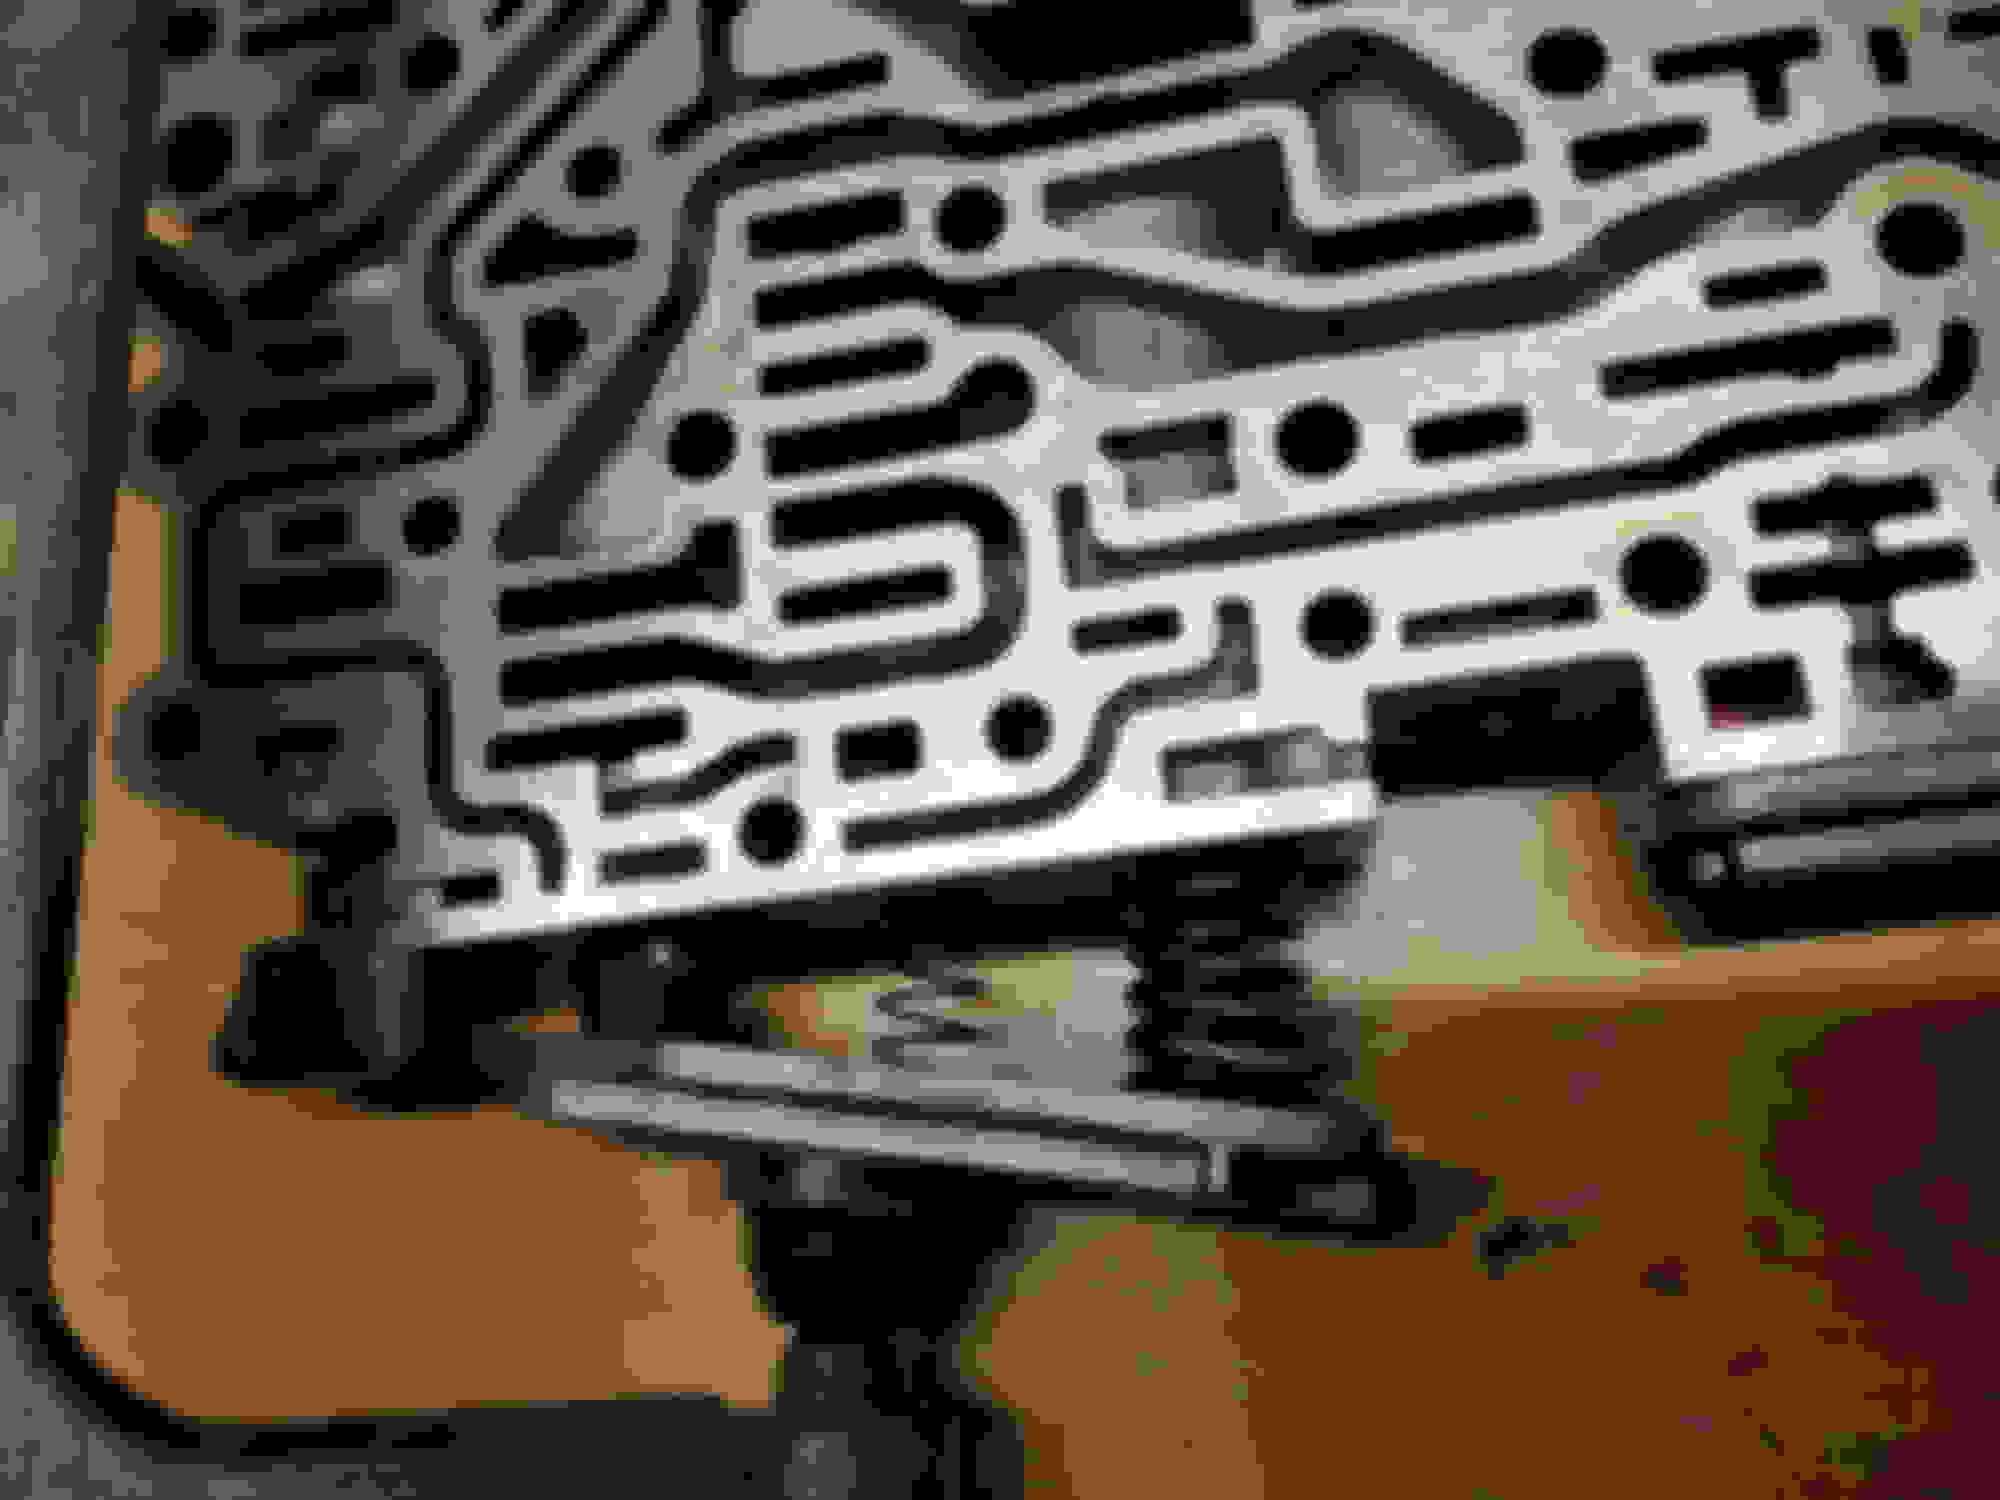
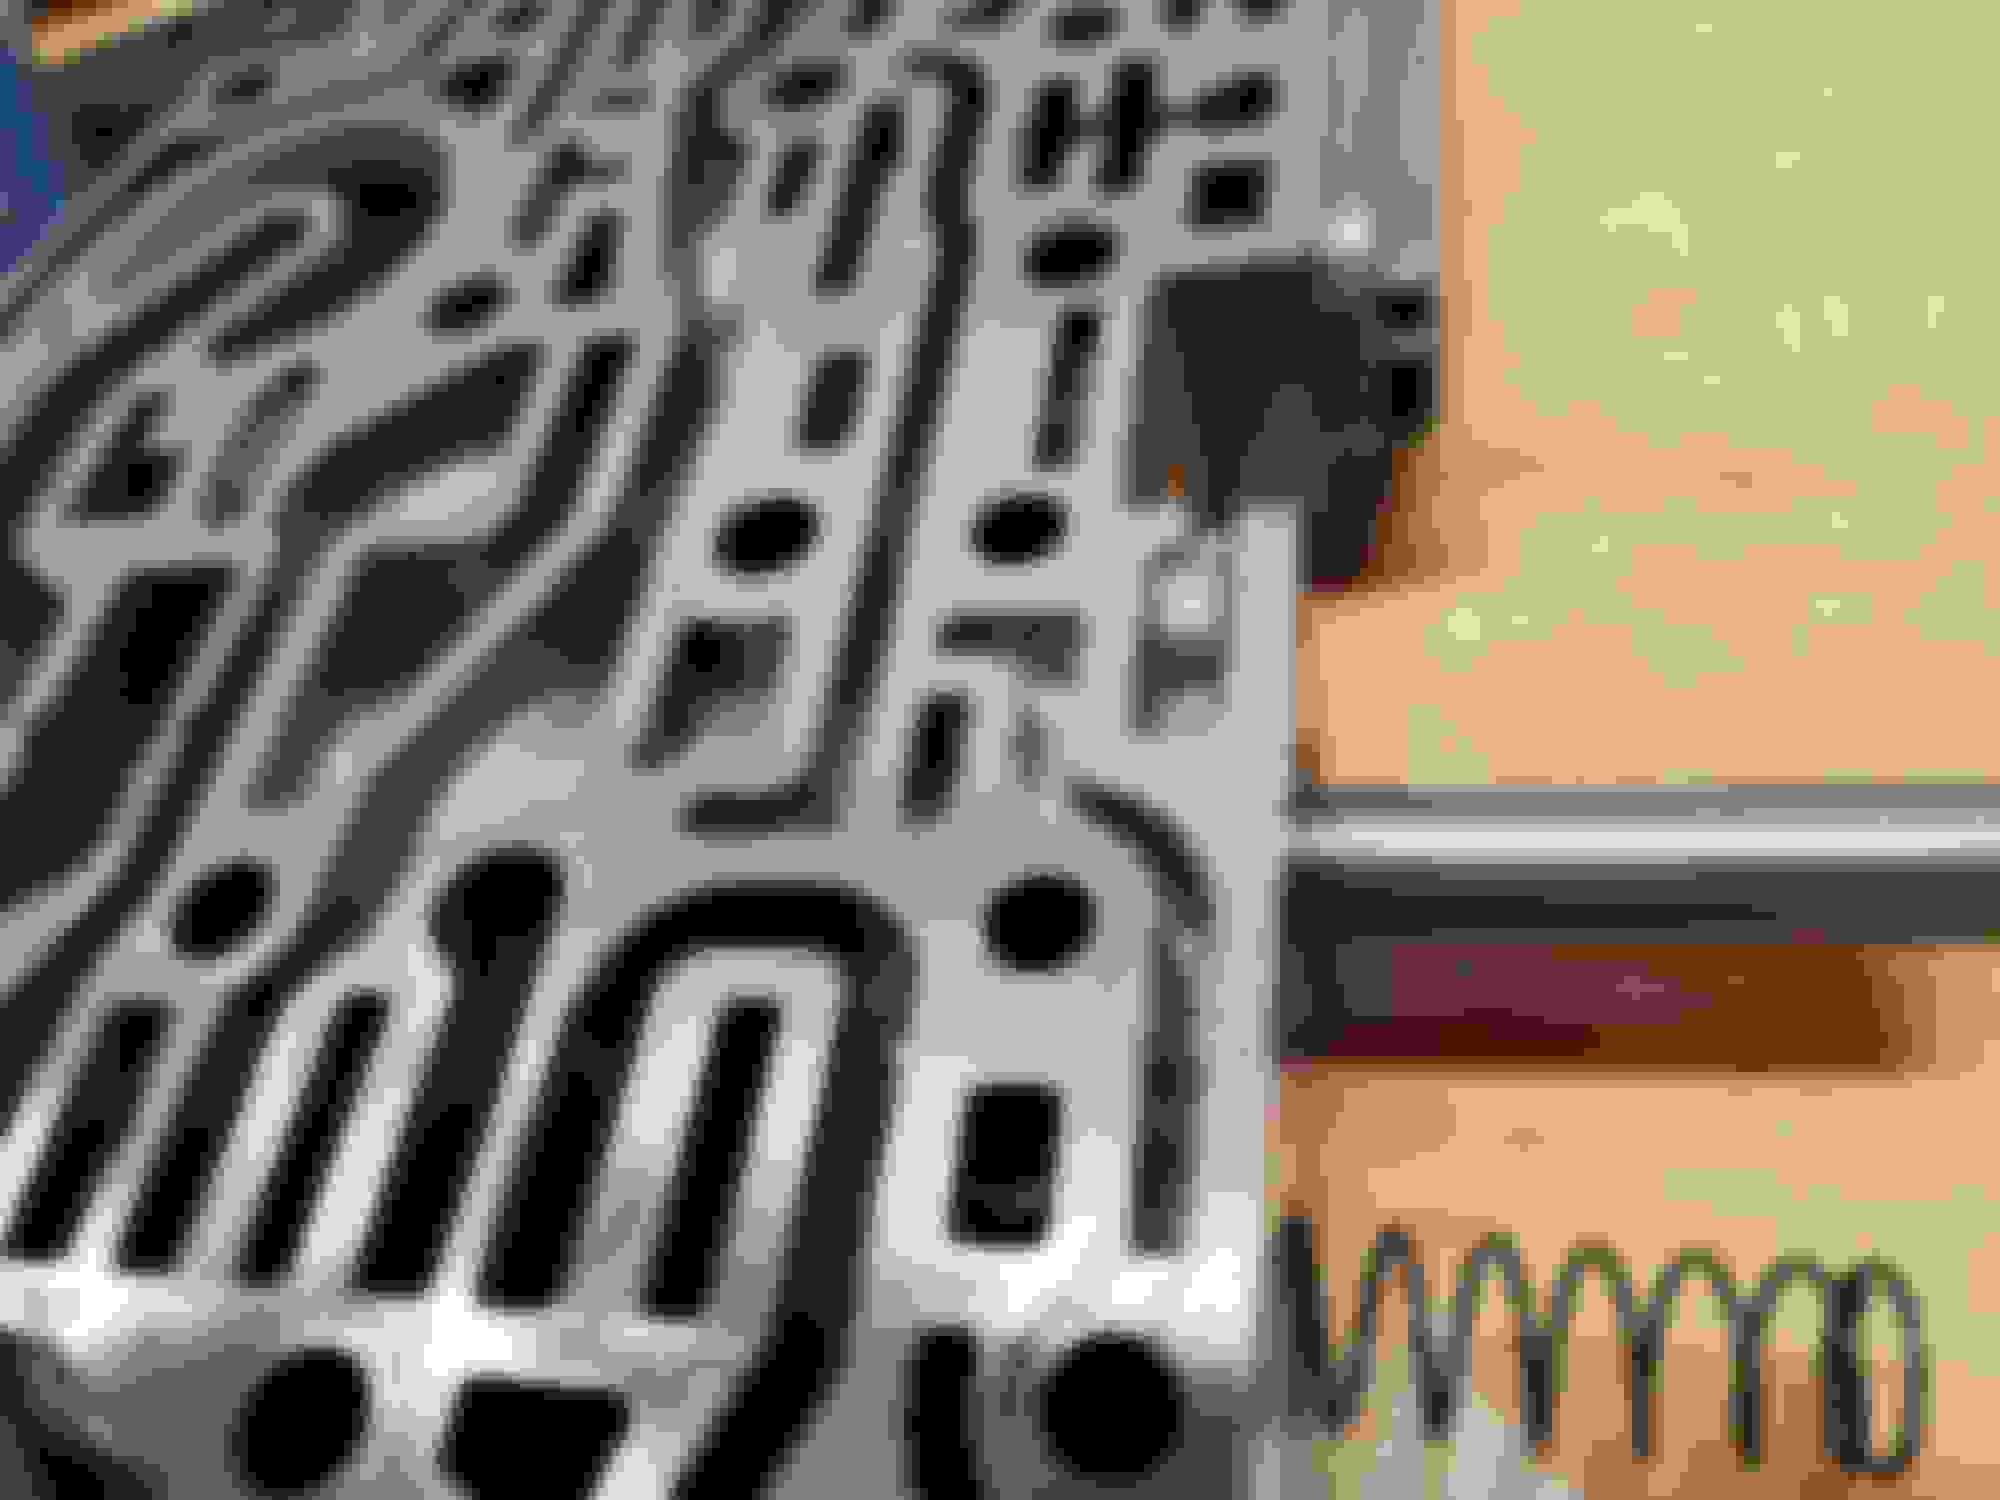
Front half of valve body. Notice the A bolts, valve body to case, are already out because this entire valve body was previously removed from the transmission.
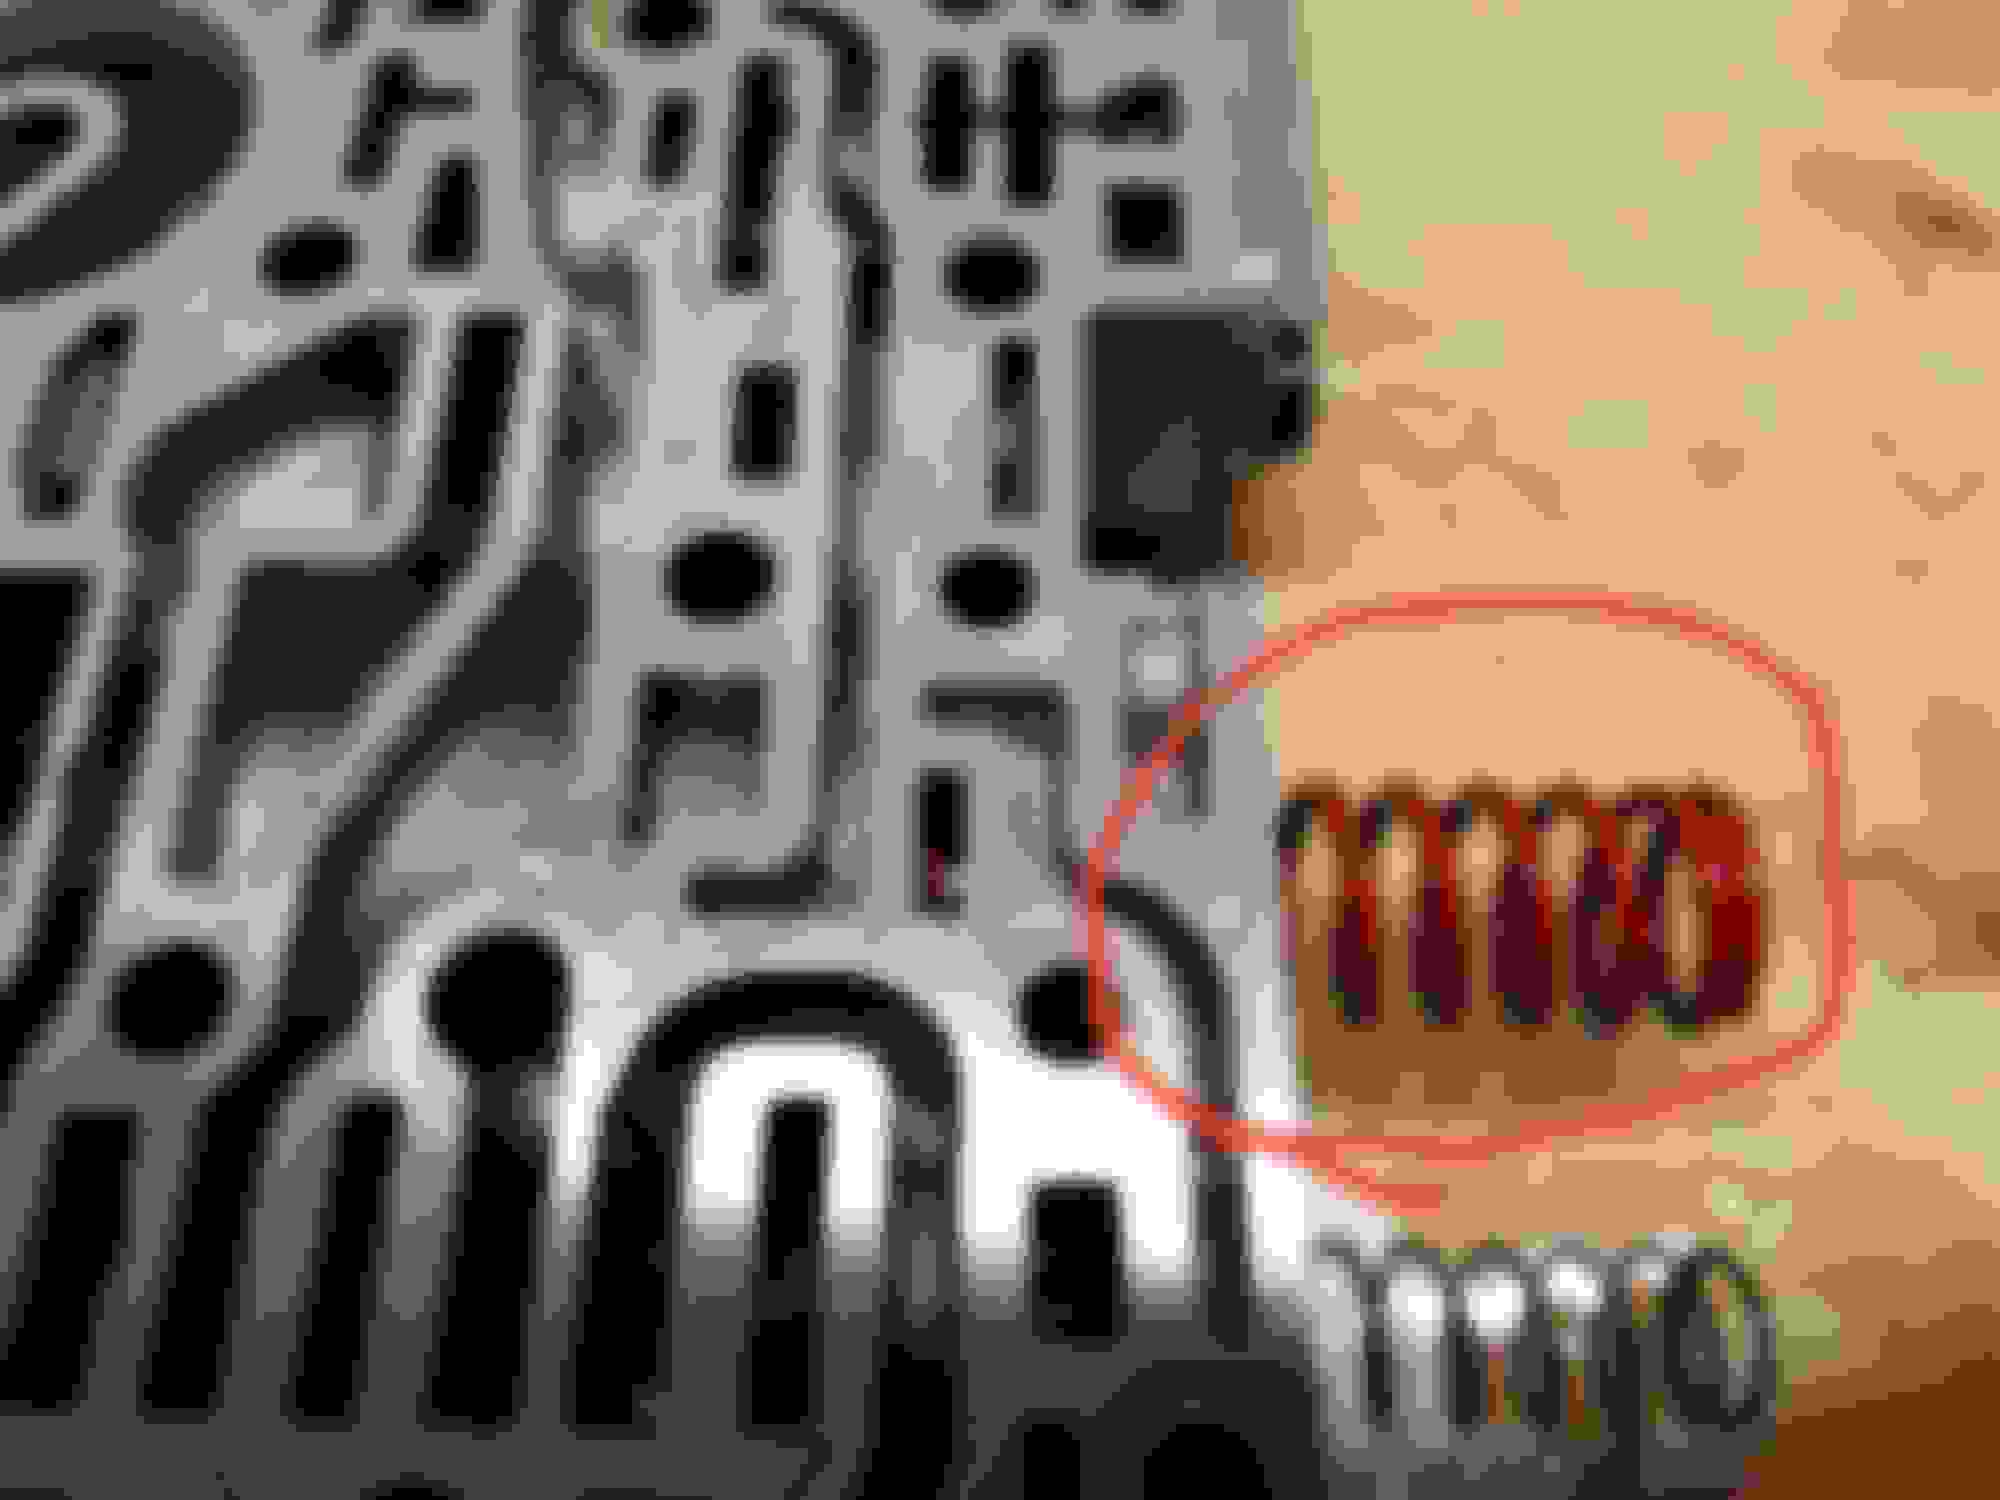
The pressure regulator is under this plate on the right side of the plate. DO NOT JUST REMOVE THE BOLTS WITHOUT HELP OR I USE A C CLAMP!!! There are springs that put pressure on the plate. It's not that extreme that you can't hold it, but it's hard to hold it and remove the bolts at the same time. The third hand comes in handy.
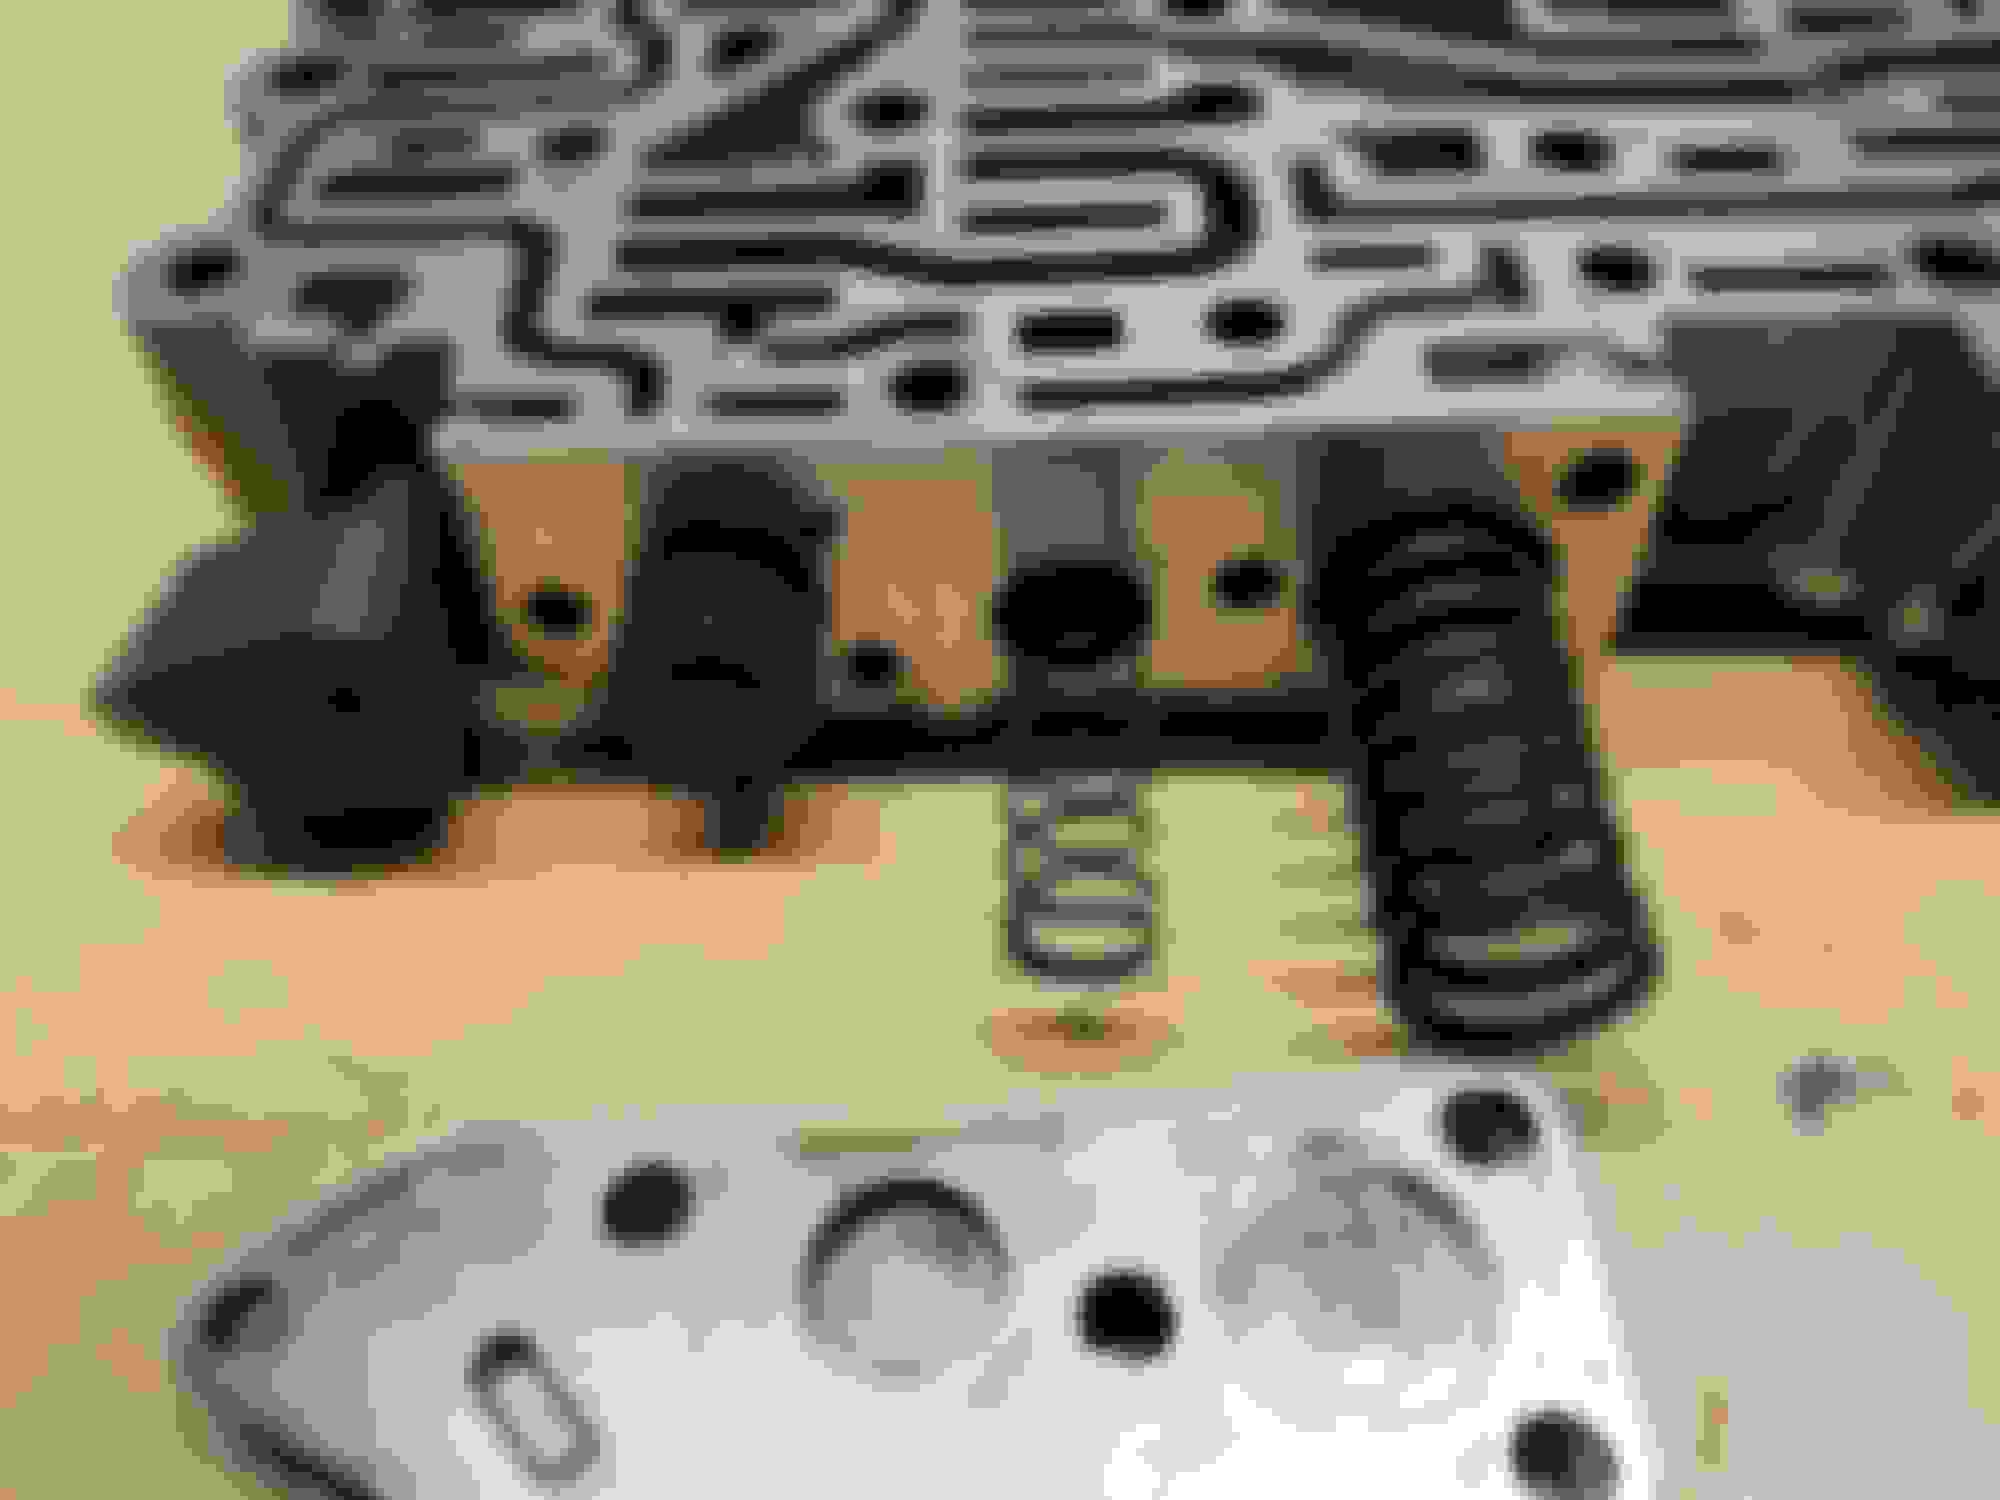
Remove the 3 middle bolts leaving the 2 outer bolts in. I didn't have any help so I used a C clamp as my extra hand. Becareful placing the clamp not to damage the valve body. You don't need to clamp it tight.
Slowly release the clamp. I have my hands also holding the plate as I release the clamp but I took them off temporarily to take this photo.
Plate off.
Remove the pressure regulator spring.
Remove the valve. I used a screwdriver to get it out. Be very careful to only put the screwdriver on the valve and don't touch the valve body. It will slide out easily.
Now take your nice and cold new valve out of the bag. Remove the o rings. I usally put a little clean transmission fluid on the valve before installing.
Slowly install the valve. DON'T FORCE IT. It should slide in easily. If for some reason it catches on the split rings redo the freezing process. If you break the rings you will need to order a new valve.
You can see the new valve in the valve body.
Install the new Transgo spring
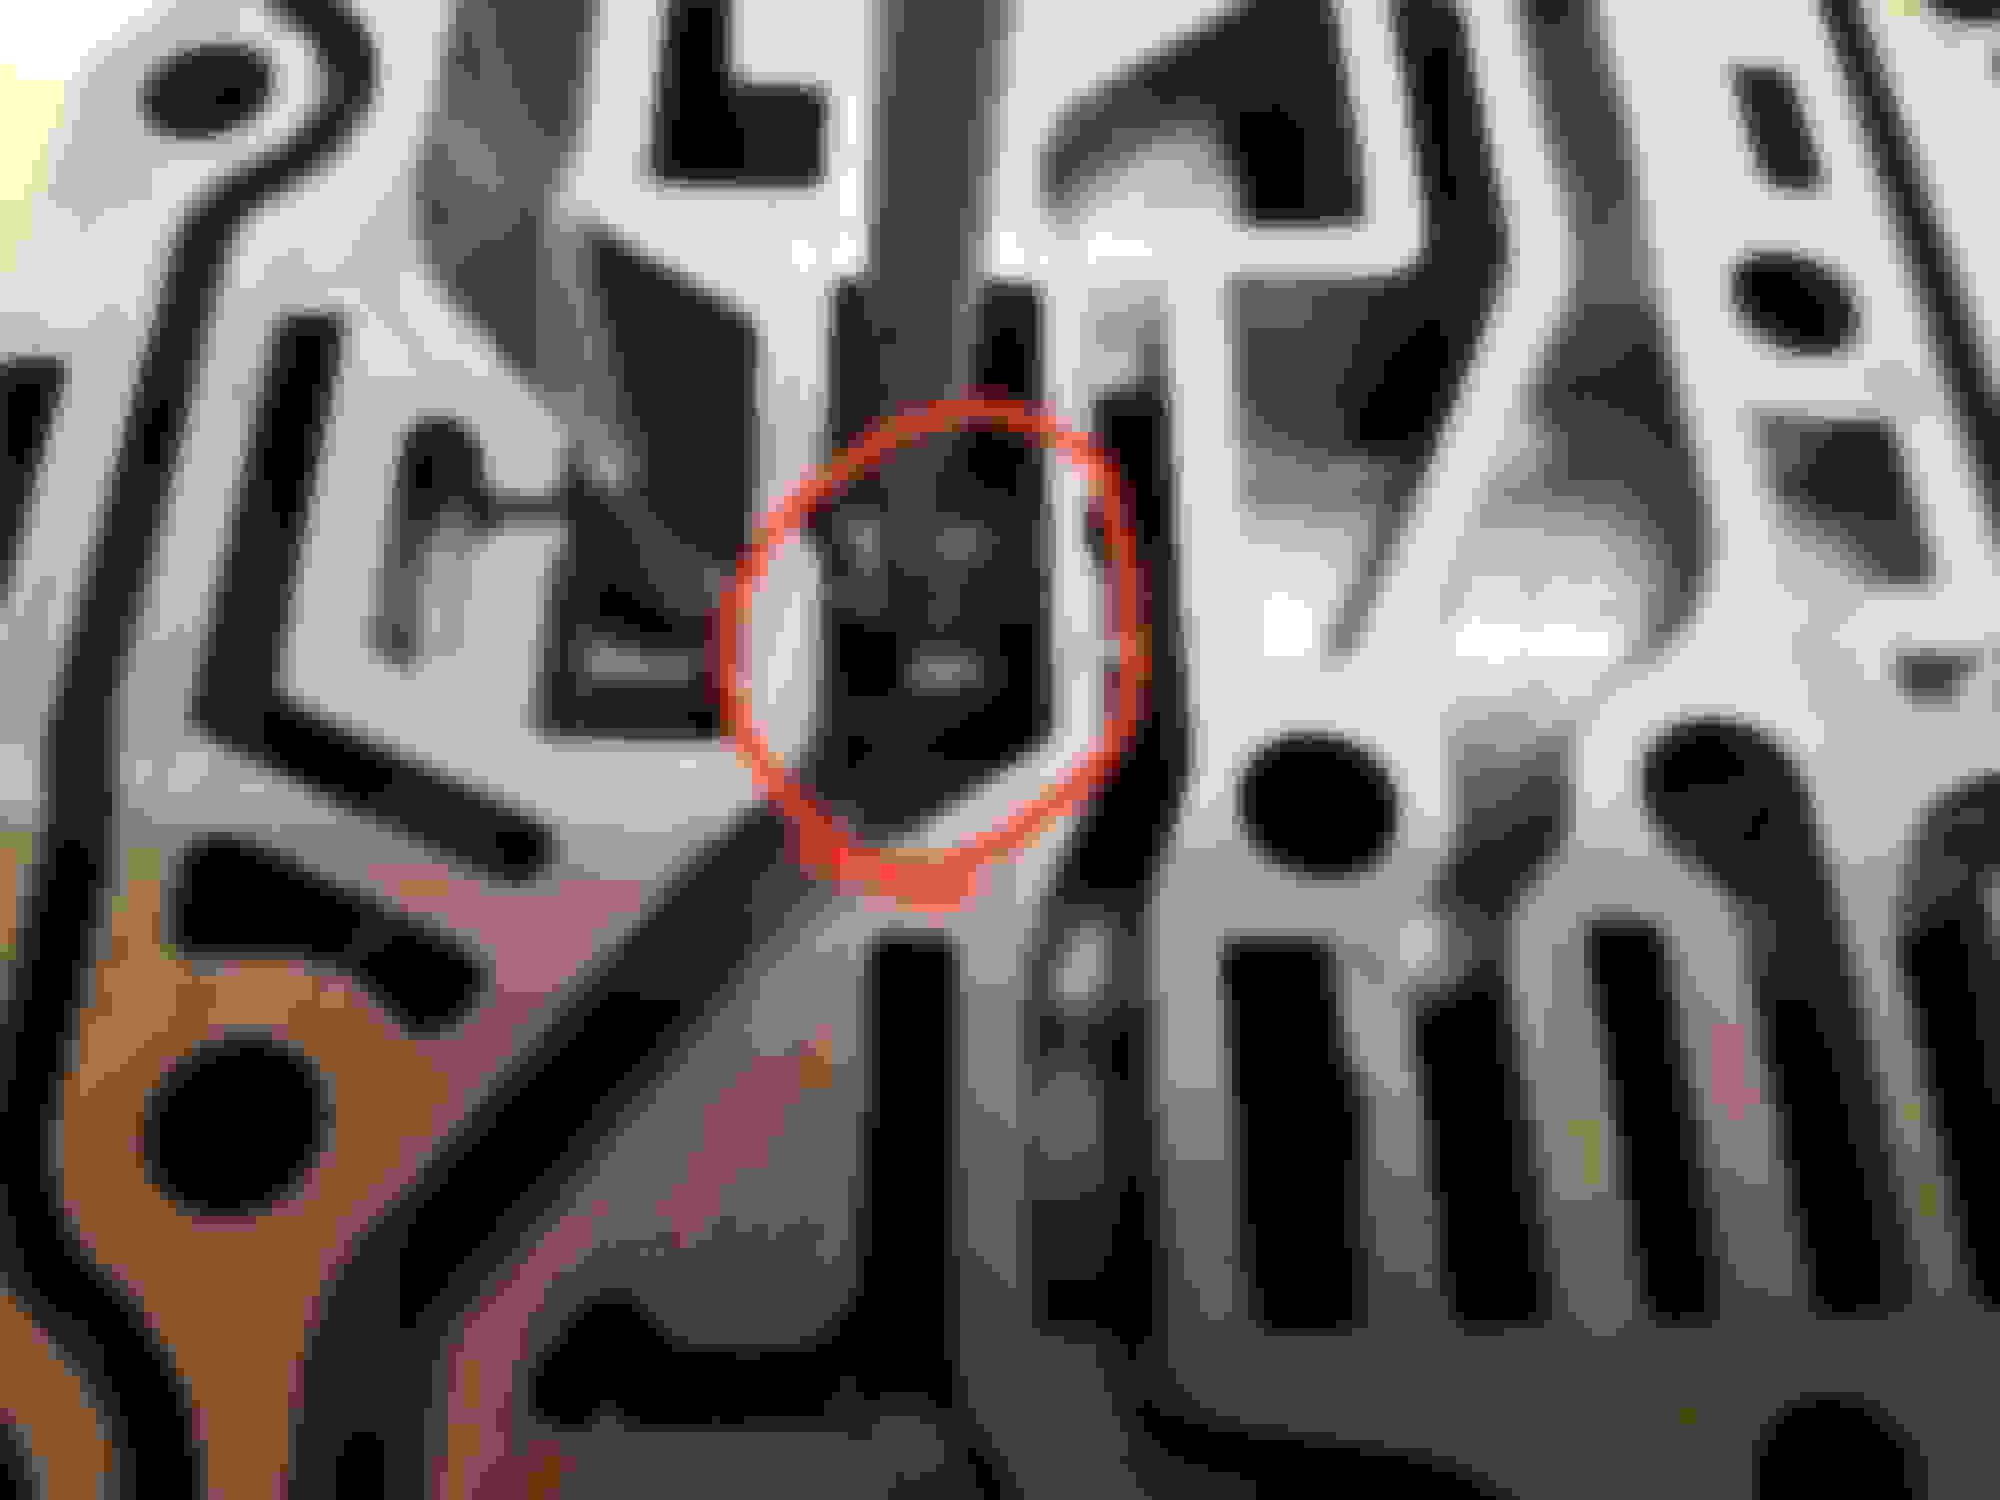
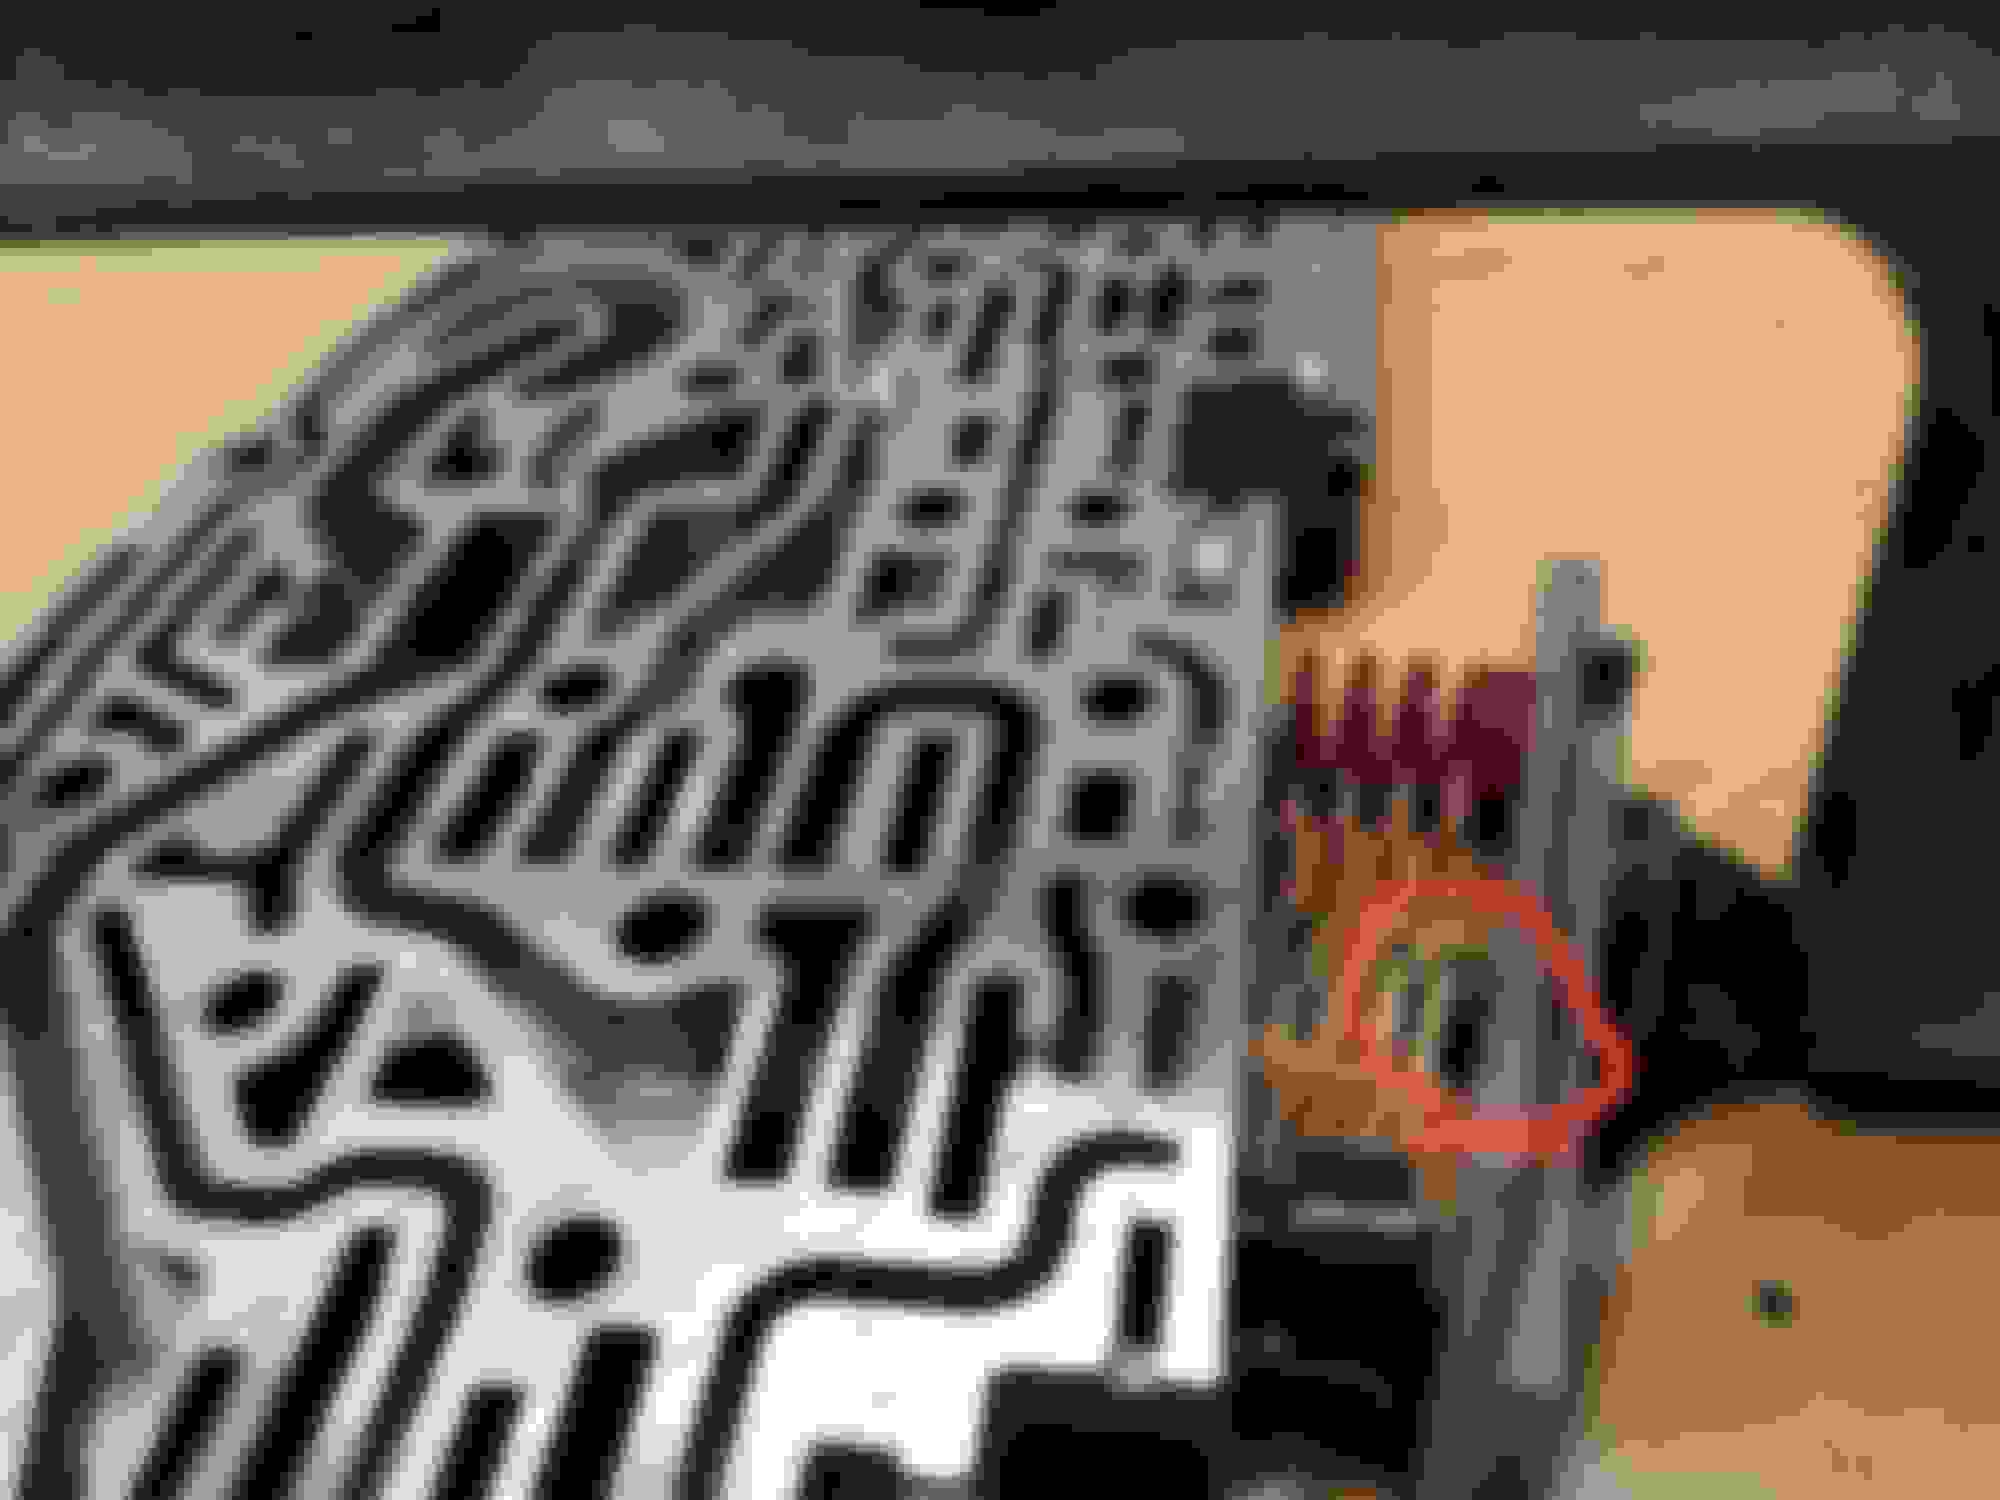
Now the fun part. Install the plate. If you have a helper have them hold the plate in place while you get the screws started. I used a C clamp and slowly compressed the springs. Notice the circled area, that spring fits in a little indent on the plate. Also make sure the valve below it slides in correctly.
All back together. Install back on transmission. I torque the plate and valve body bolts at 8nm. The pan calls for 10nm.
I hope this helps.
Just a note it took me 25 minutes to install the valve and take pictures. It took me 3 hours to make this post. It gives me more admiration of Gus and his website jagrepair.com for the amount of time he has put in it.
Last edited by BobRoy; 03-29-2017 at 03:26 PM.
Reason: Adding John's pdf file
No it is not a guarantee that the A drum won't fail but it will reduce the chances of the drum failing. If you're a do it yourselfer it will cost about $45 for the valve and it will take about an hour time for putting the odds more in your favor.
I too installed the Transgo Pressure Regulator Valve and I am happy with the results. The instructions states this valve will help prevent/correct or reduce harsh bang down shifts. I installed the regulator valve after a teeth shattering 1st gear launch. Black marks in the pavement to prove it. A bit after the " incident" I've had the pan down twice. Once to service, 2nd to install valve. About to flush pan again. At no times did I find metallic filings or drum parts.( yet) The valve update has removed any hard take off starts and has enable me to drive my xK8 as long as I am not harsh on the go pedal for over a year. I suspect a complete overhaul is in my future. Good luck. I do endorse the Transgo regulator valve a good idea to prevent inevitable transmission problems. Rich
When I replaced the valve in my car the transgo was not available and I used the ZF upgrade valve. The valve body showed no evidence of cracks or wear and there was no shifting problem, so it was just a preventative measure.
I want to add my heartfelt thanks to Bob for his excellent post and photos. They are a tremendous supplement to the Transgo instructions which are not always as clear as they could be. I completed the job on our 2003 XJ8 yesterday and Bob's photos and tips made all the difference.
The reason I installed the Transgo pressure control valve was to see if it would resolve an occasional slip-then-bang shift when slowing to a near stop then accelerating again.
Overall the job was just as easy as Bob described, but there were a couple of issues and tips I thought I should add to this thread in case they may be helpful to others who still haven't done the Transgo upgrade.
First of all, some of the instructions I read for removing the transmission pan said to remove all the screws except the center rear and center forward ones. This leaves you with the awkward job of holding the pan with one hand, removing those two last screws, then trying to handle the pan without spilling the fluid that remains in the bottom of the pan because the drain plug is not the lowest point in the stamping. So with the drain plug out, I removed all the screws except the ones at the two rear corners and allowed the pan to tilt down at its front end so the remaining fluid would drain into the catch pan:
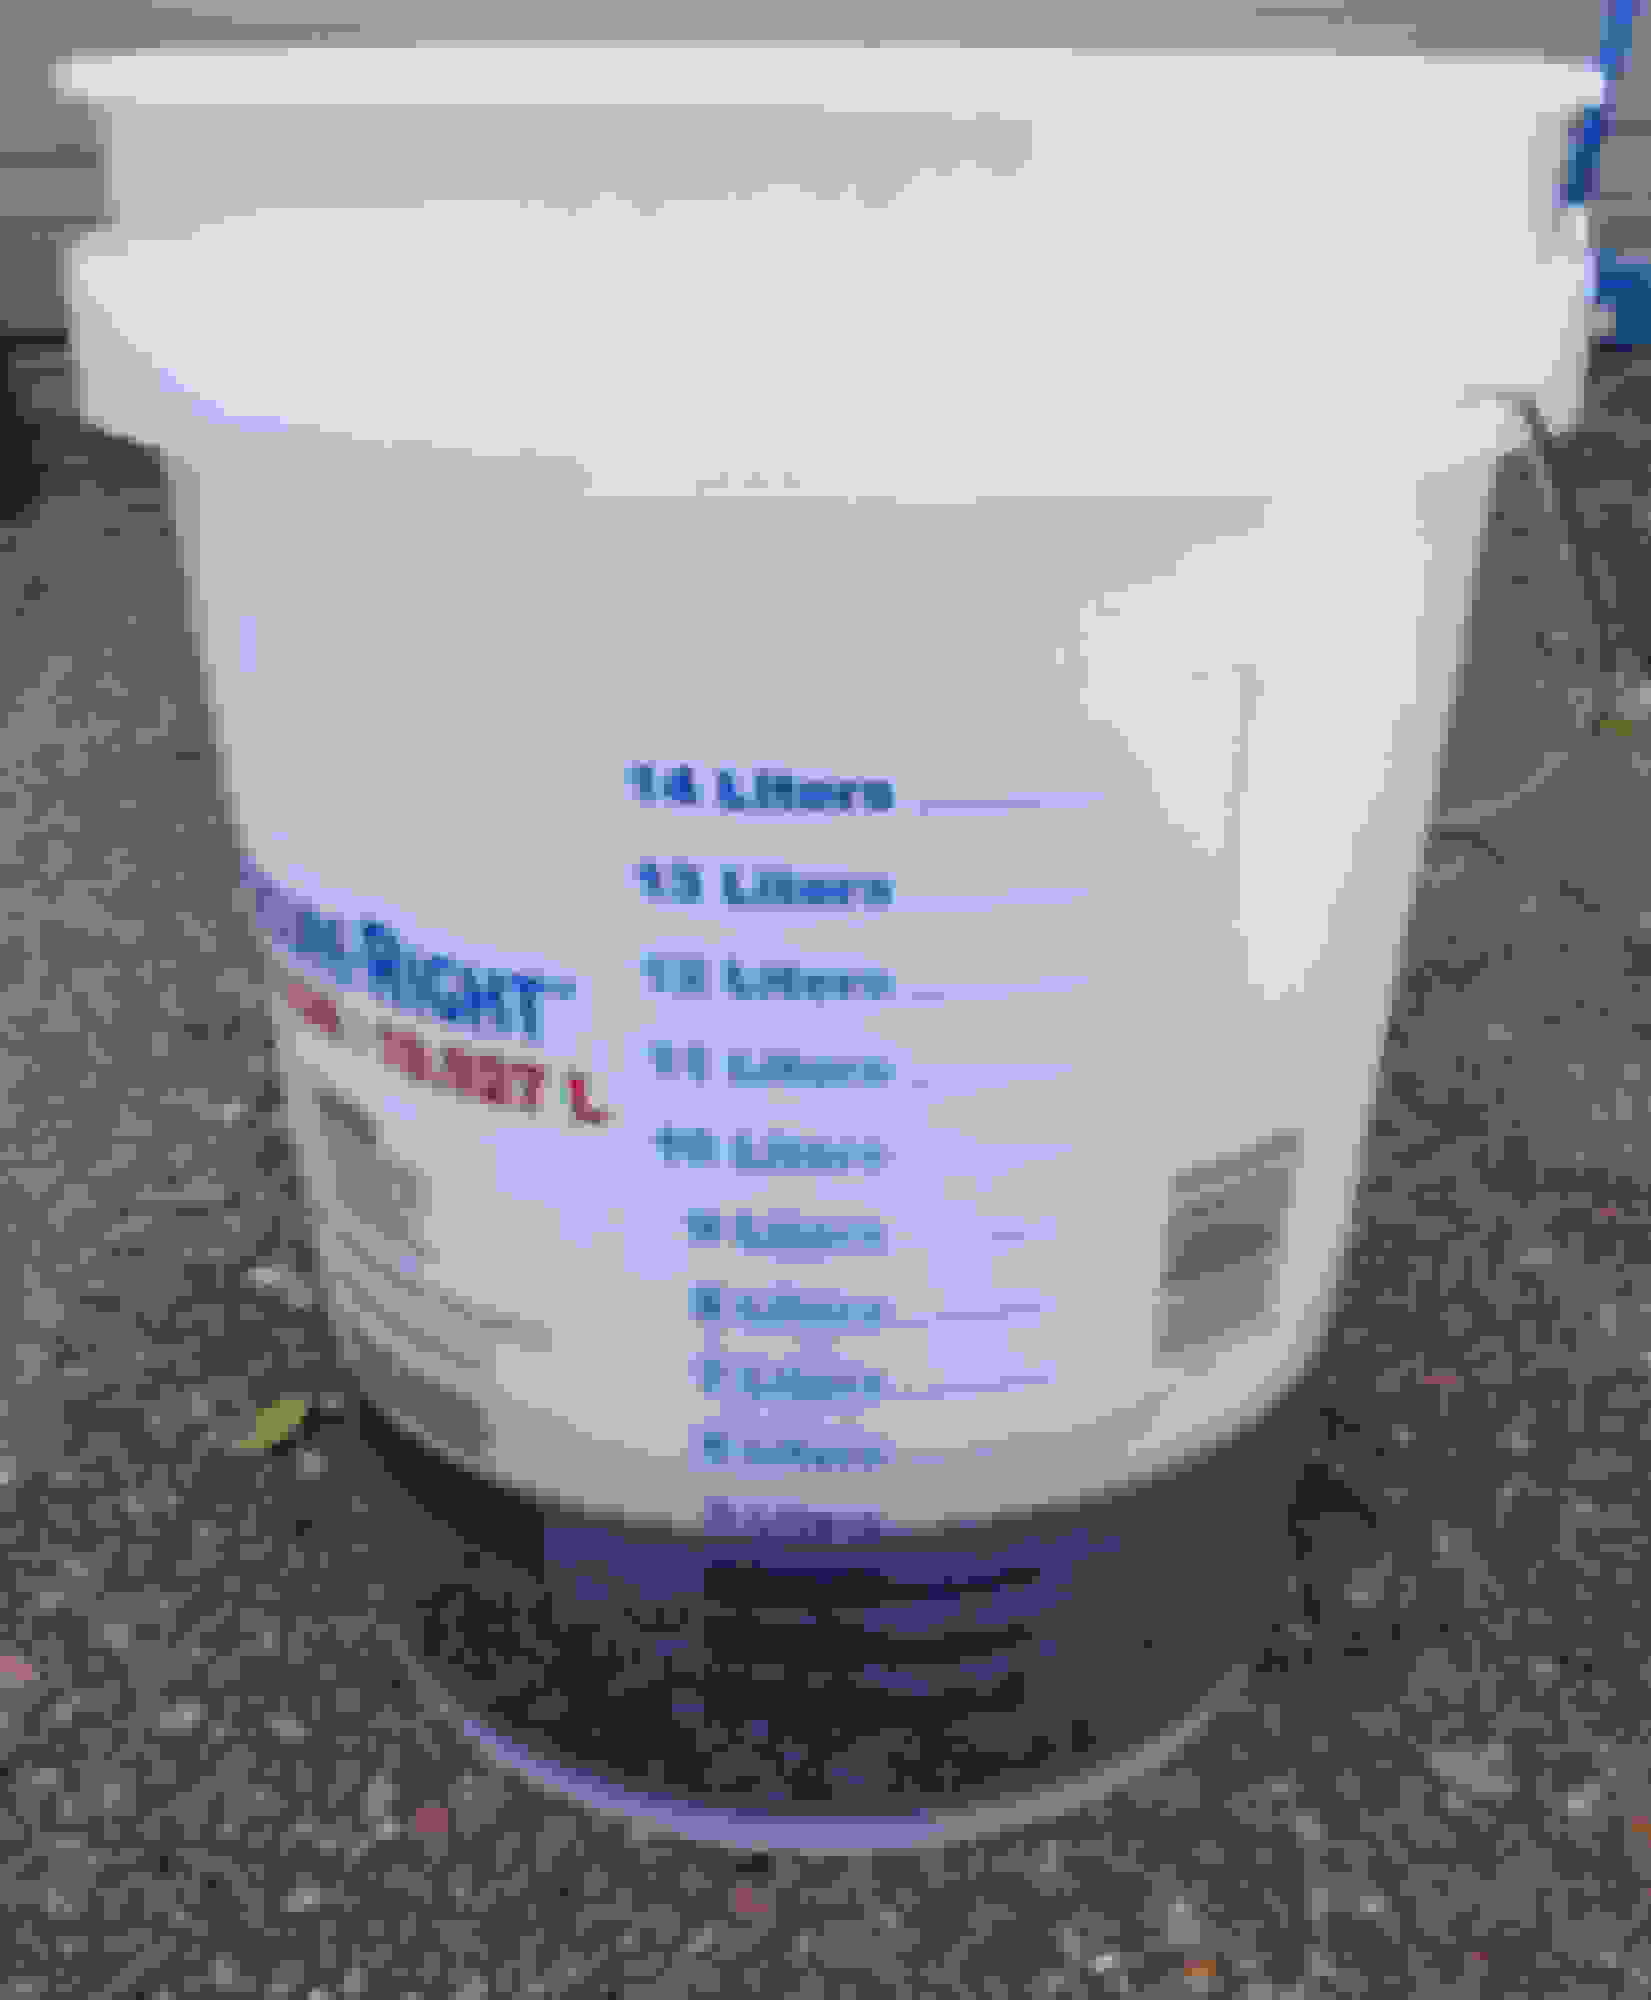
I got this graduated bucket for a few dollars in the paint department at Lowes. It makes it easy to see how much fluid was drained so I have an idea of how much new fluid I'll need to add back. It's too tall to fit under the car with my jack stands at their highest position, so I use a shallow catch pan then pour the fluid into this bucket for measurement:
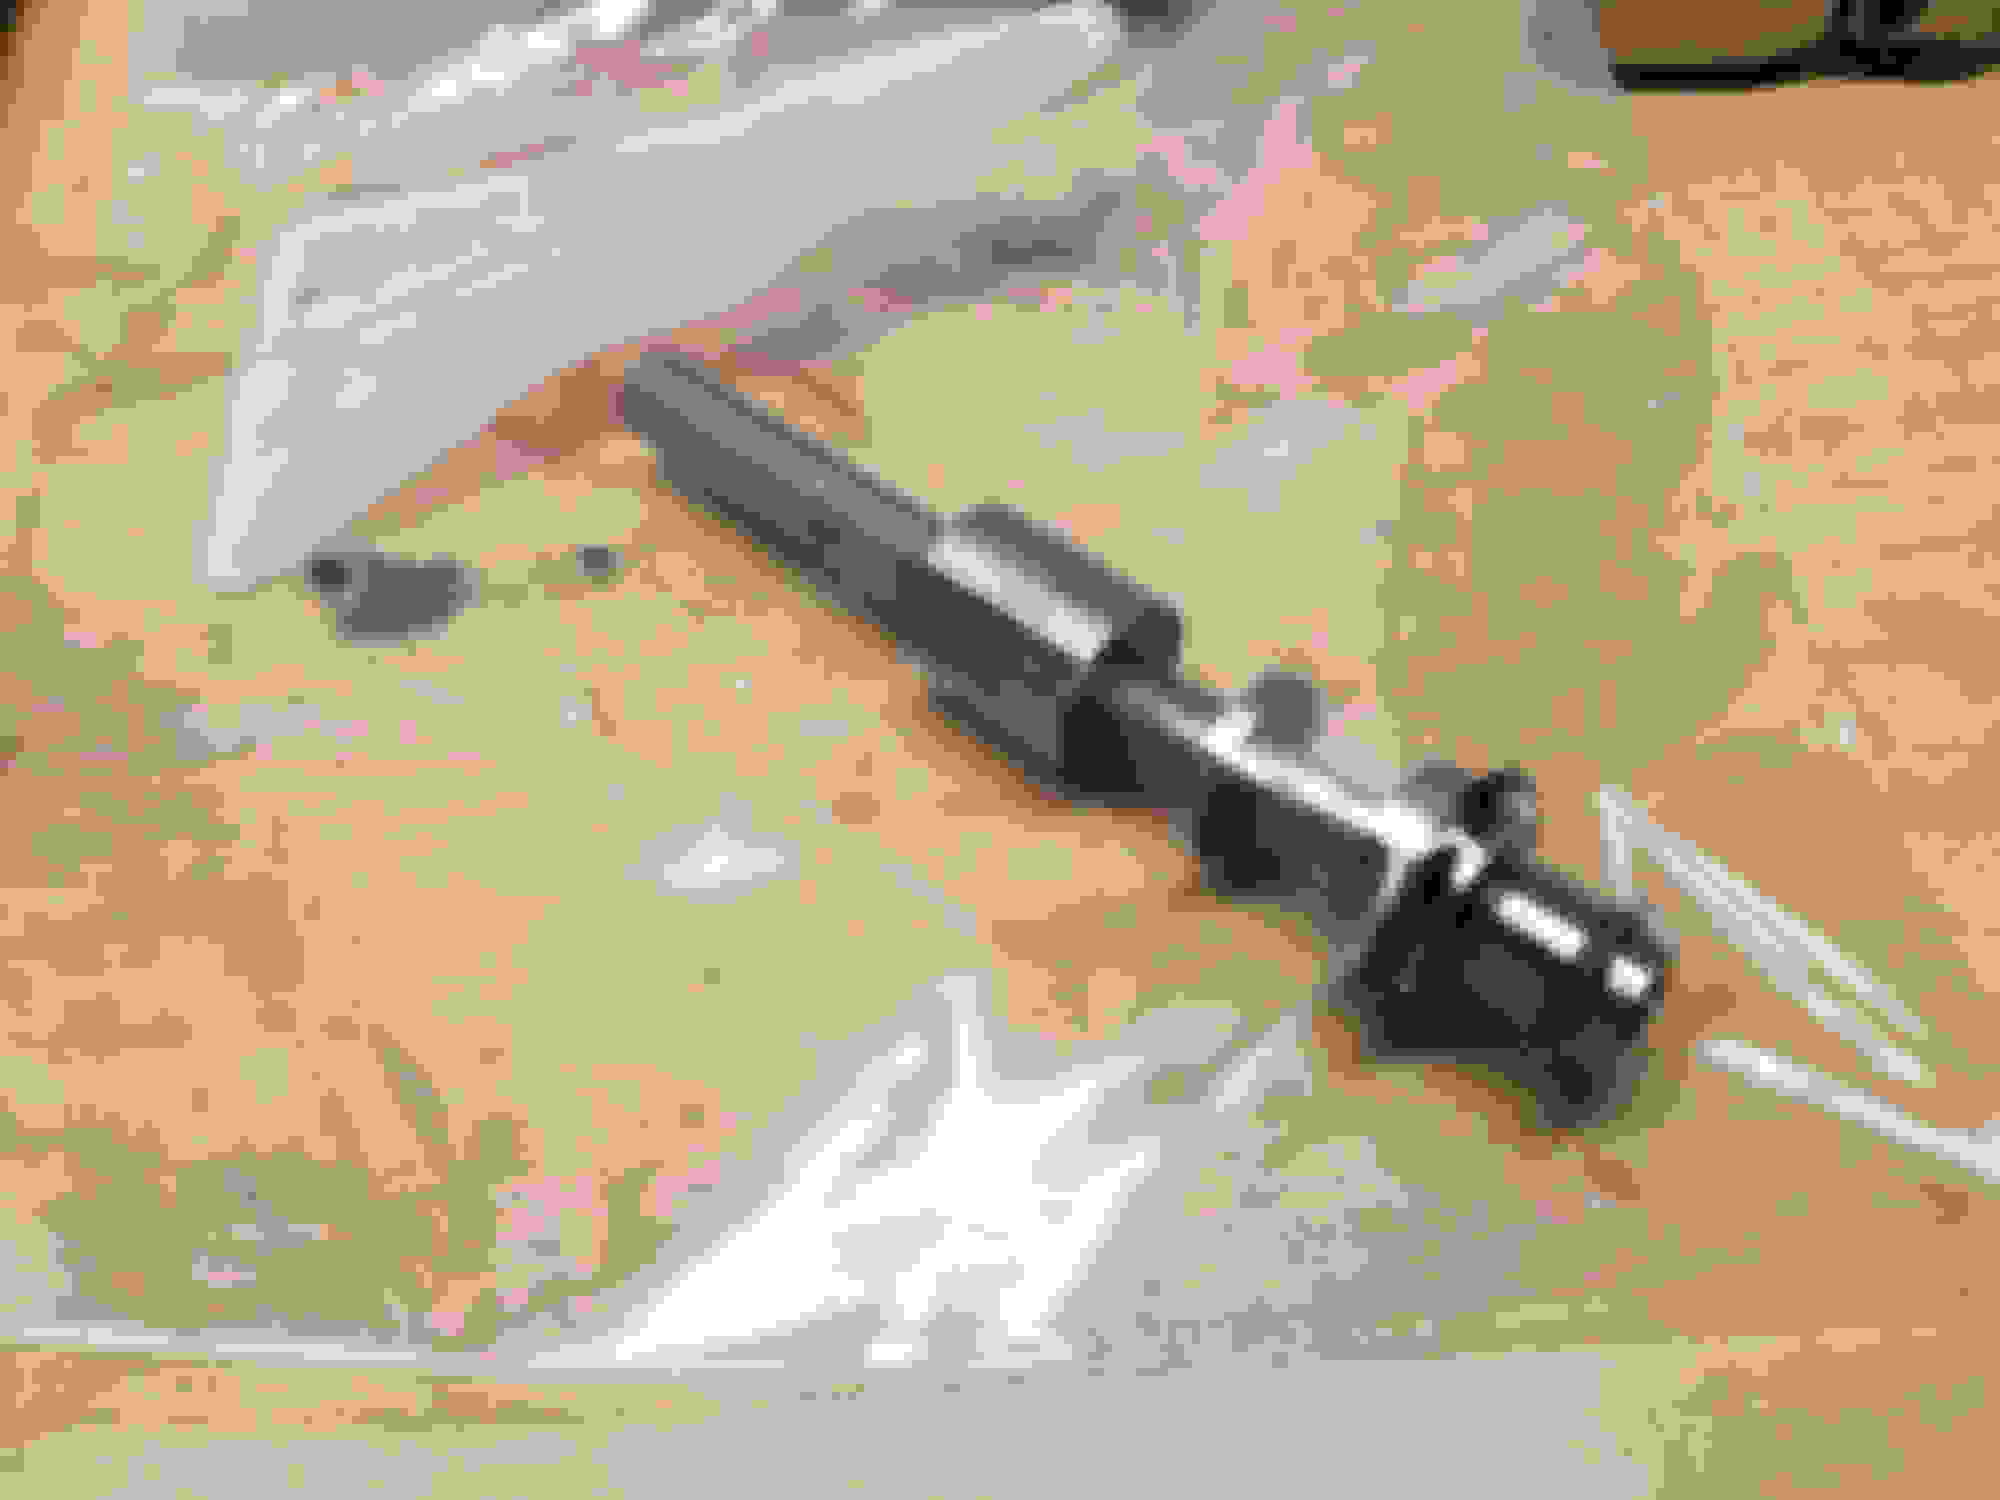
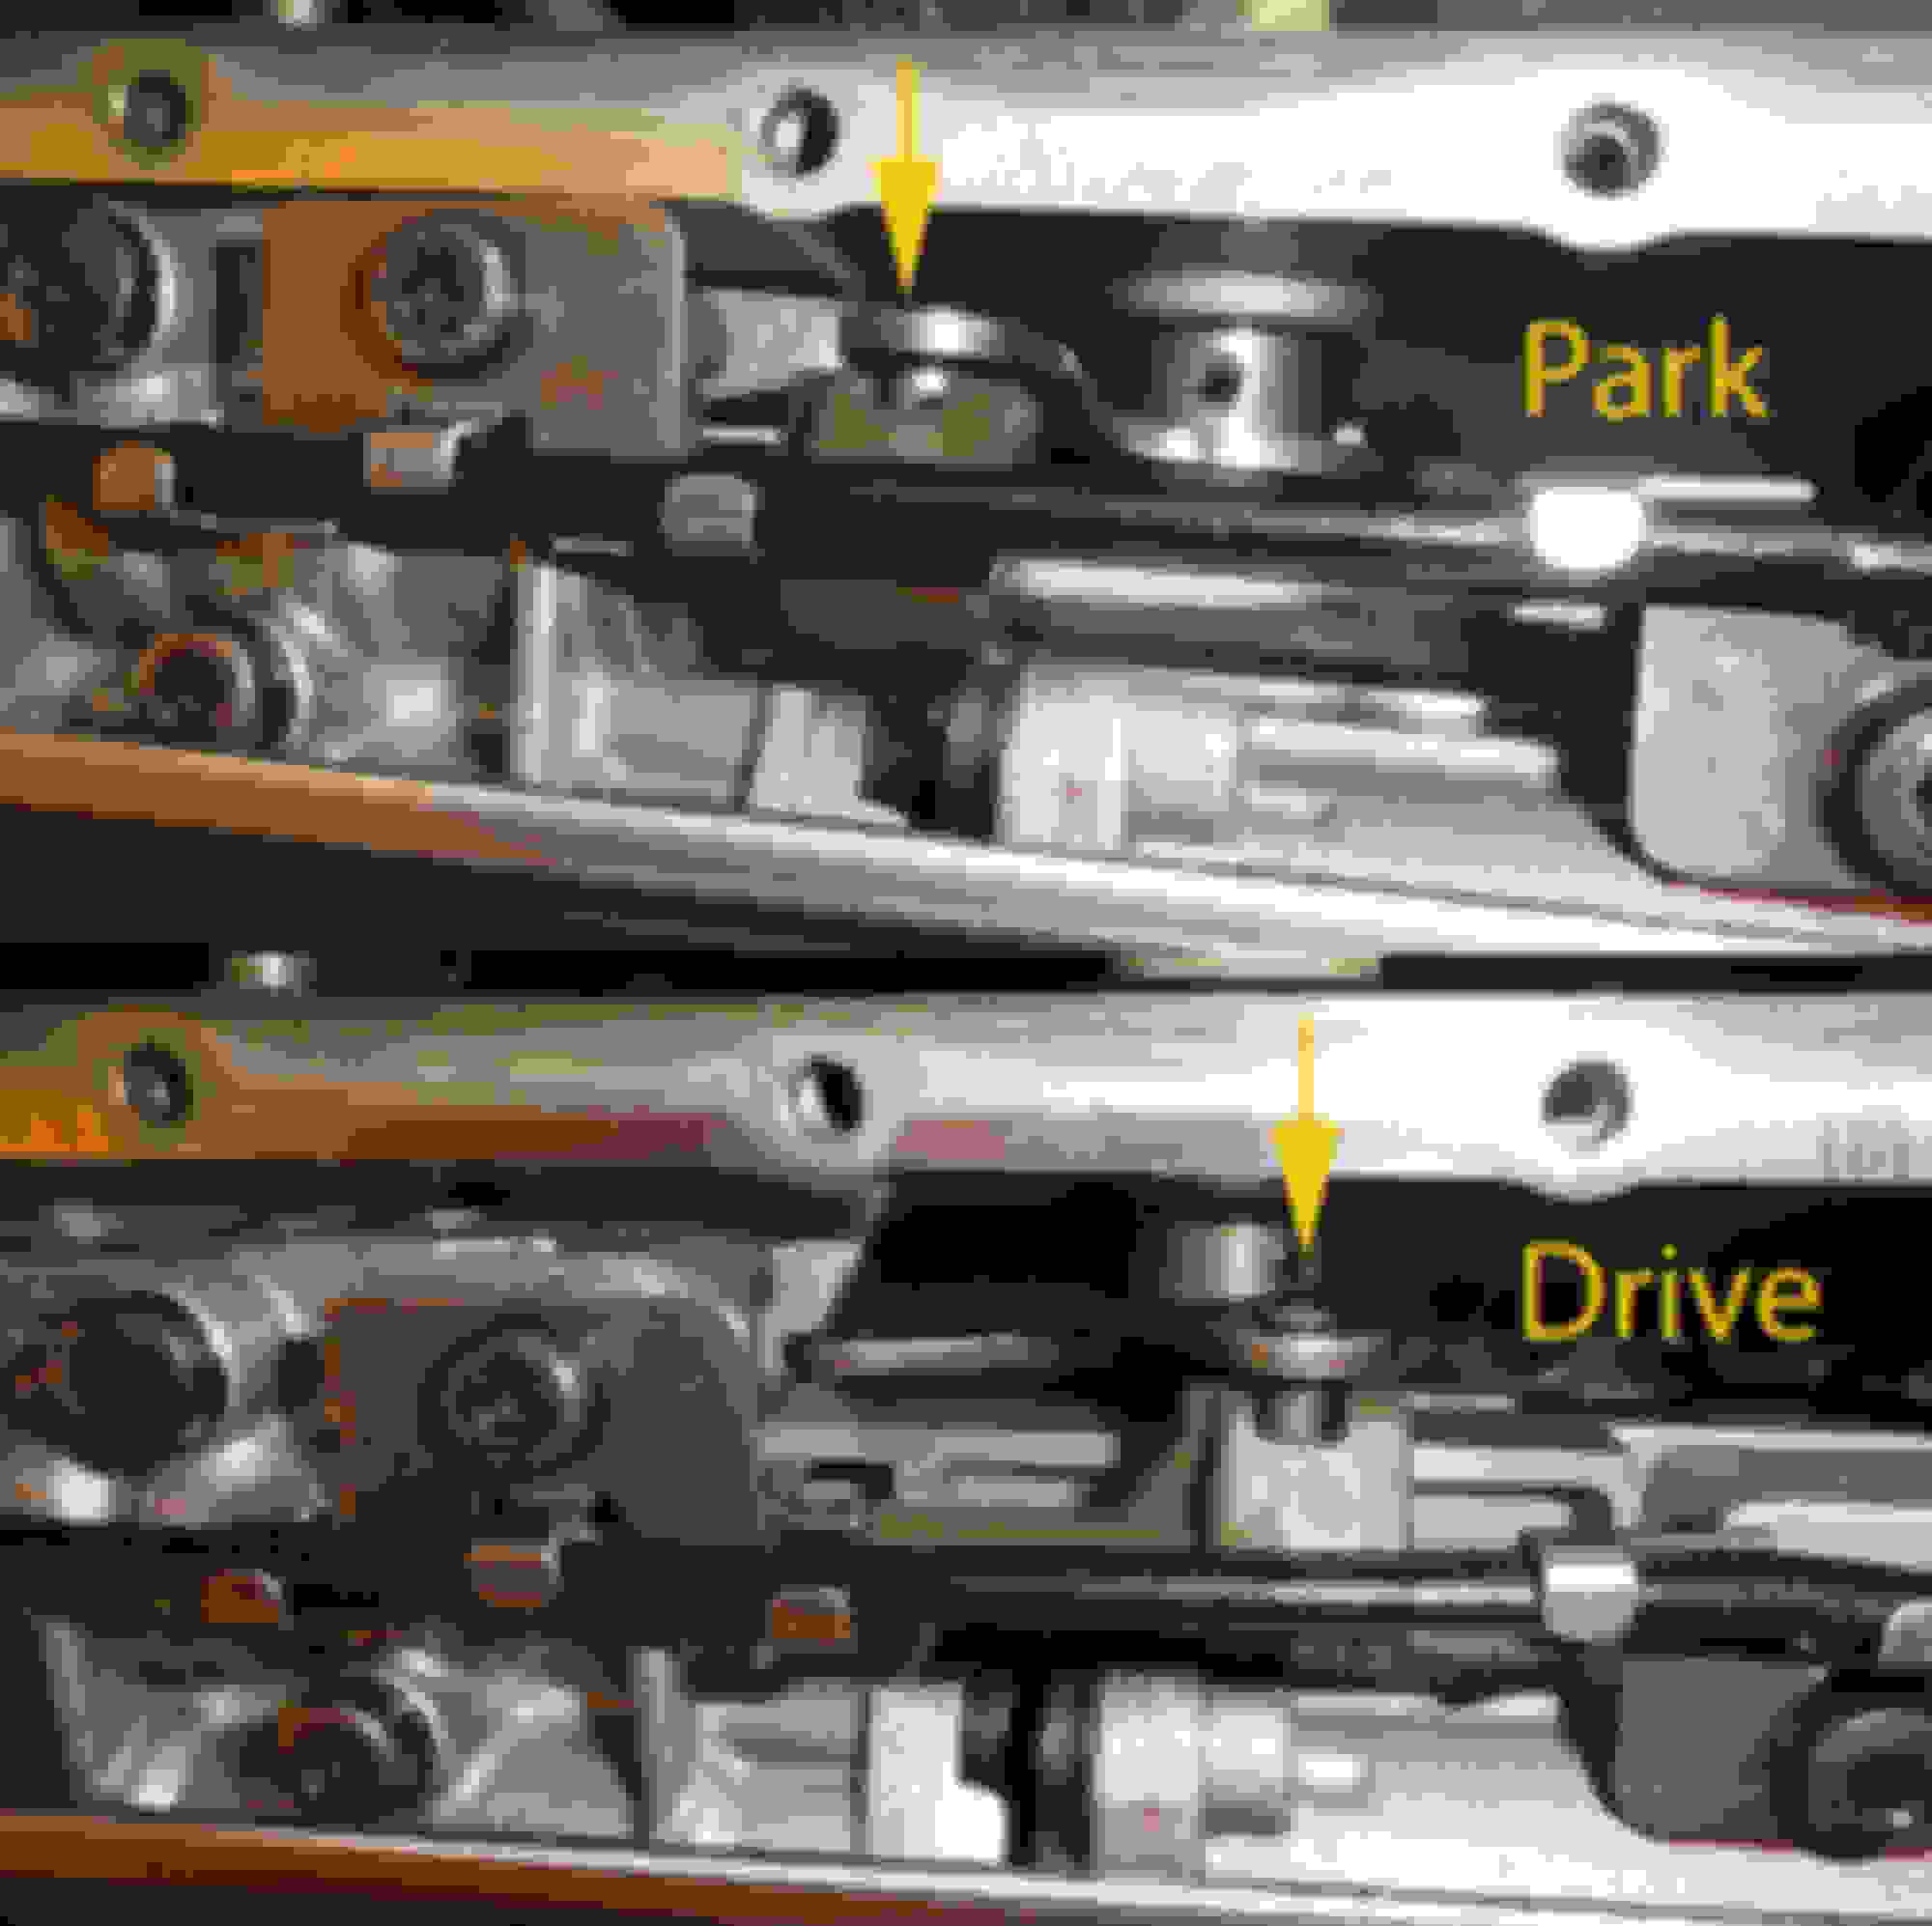
None of the instructions I read mentioned that the manual gear selector shift valve might fall out as I carried the lower front valve body to the workbench, but mine almost did. The valve moves very freely and mine had come about halfway out of the body when I noticed it. Take care not to let yours drop to the floor. The photos below show how the groove in the head of the valve engages a pin on a lever so the valve slides in and out in response to movements of the gear selector lever. When you reinstall the front lower valve body, ensure this groove is properly fitted over the pin before you tighten all the screws:
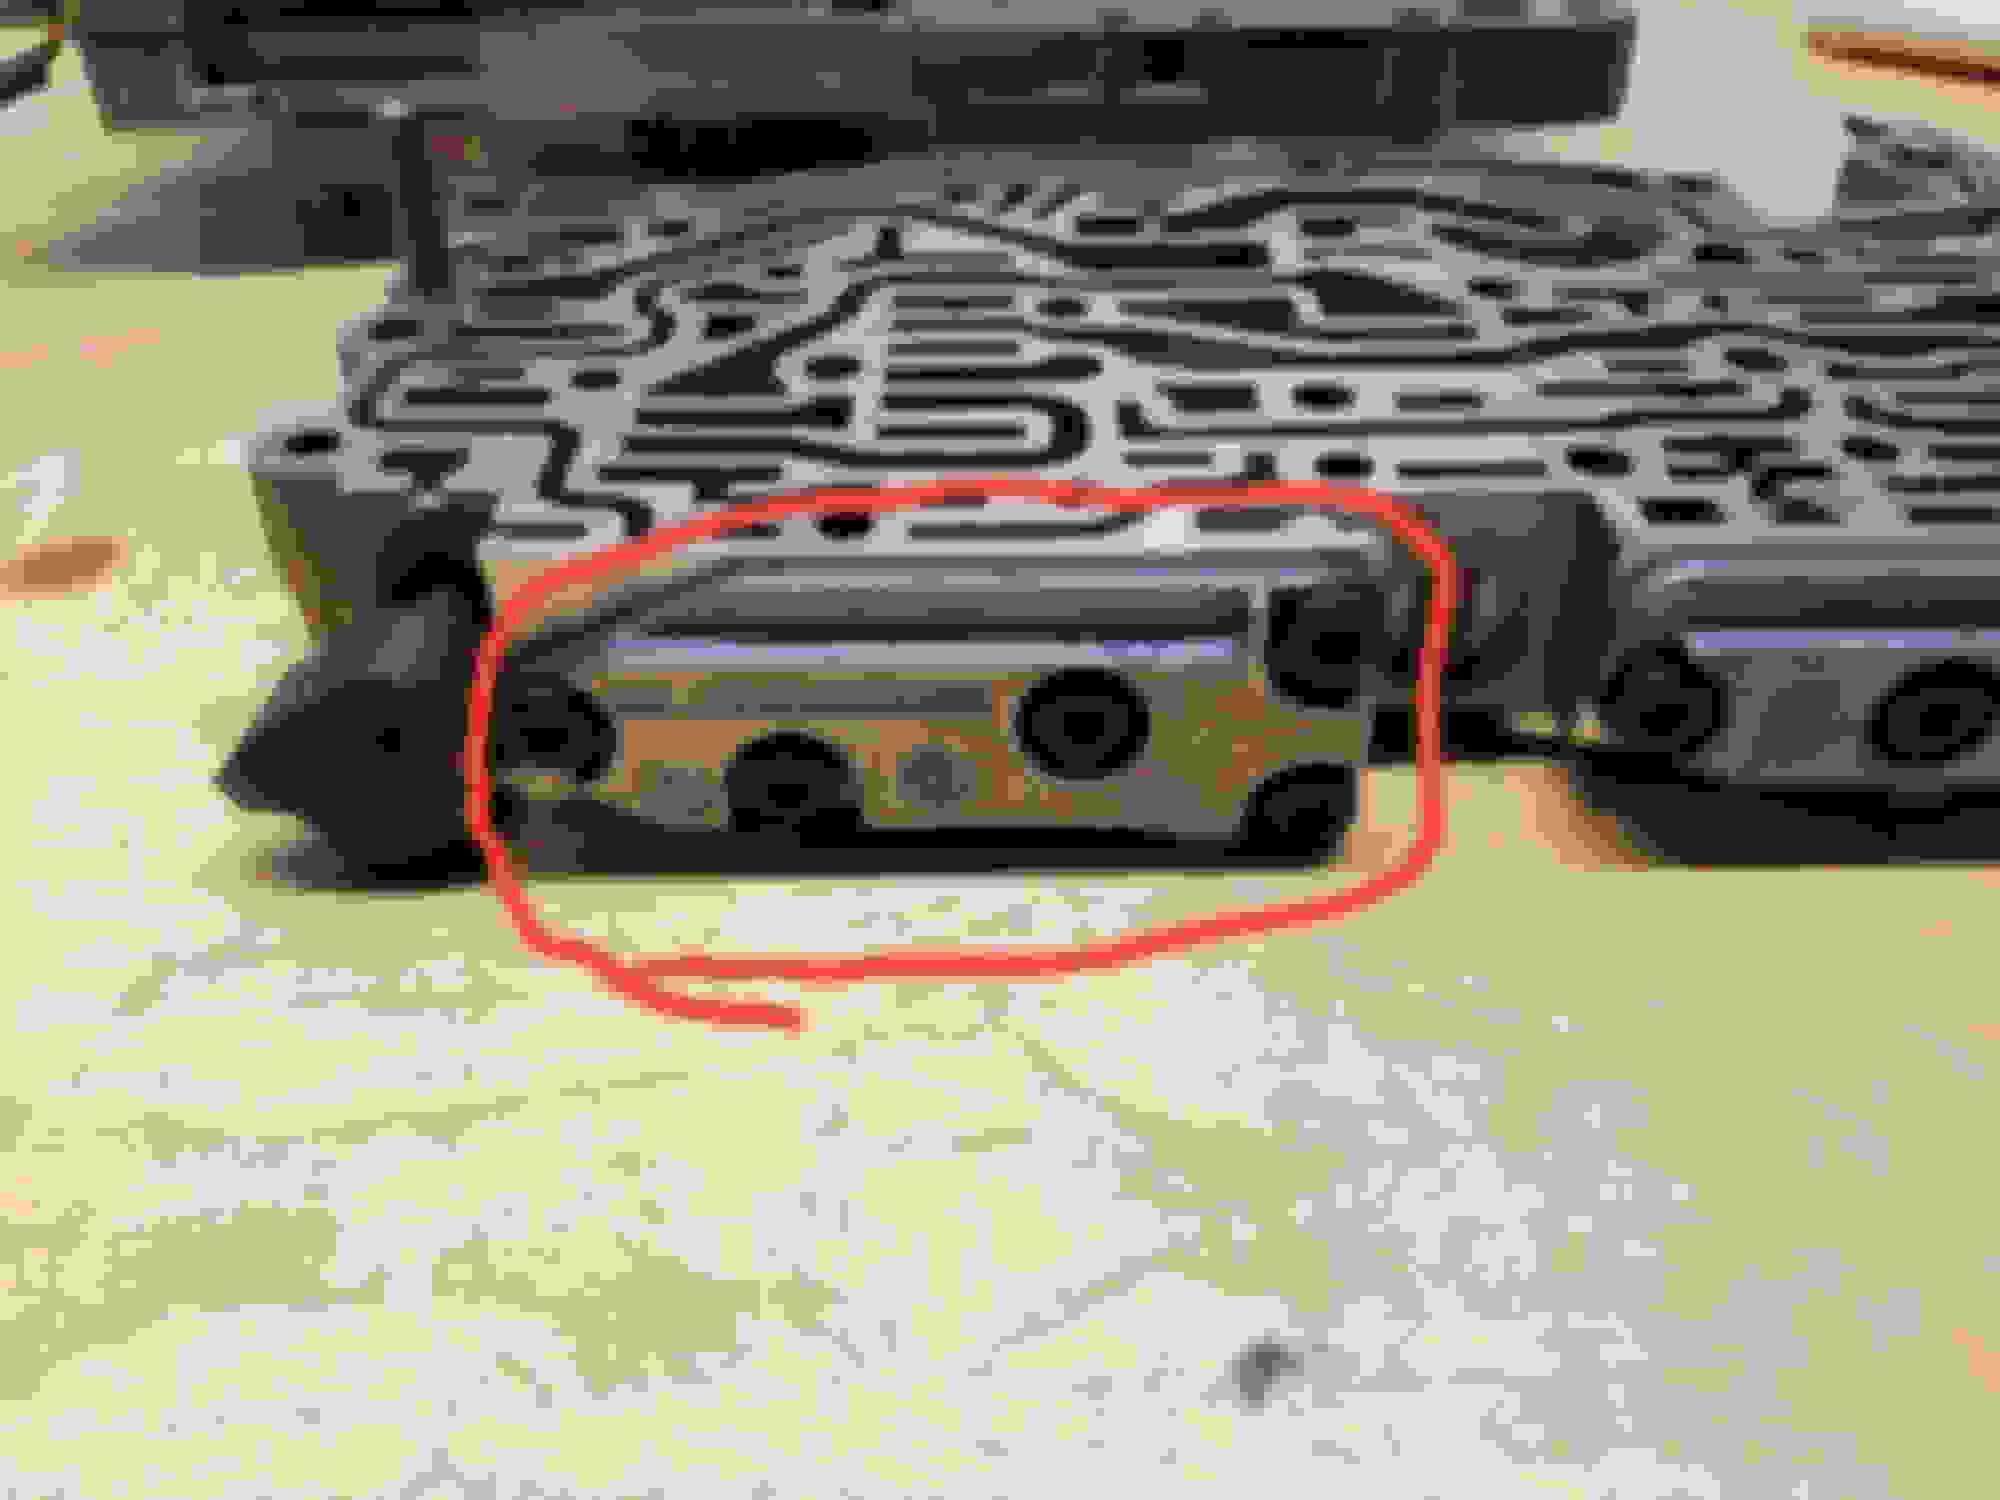
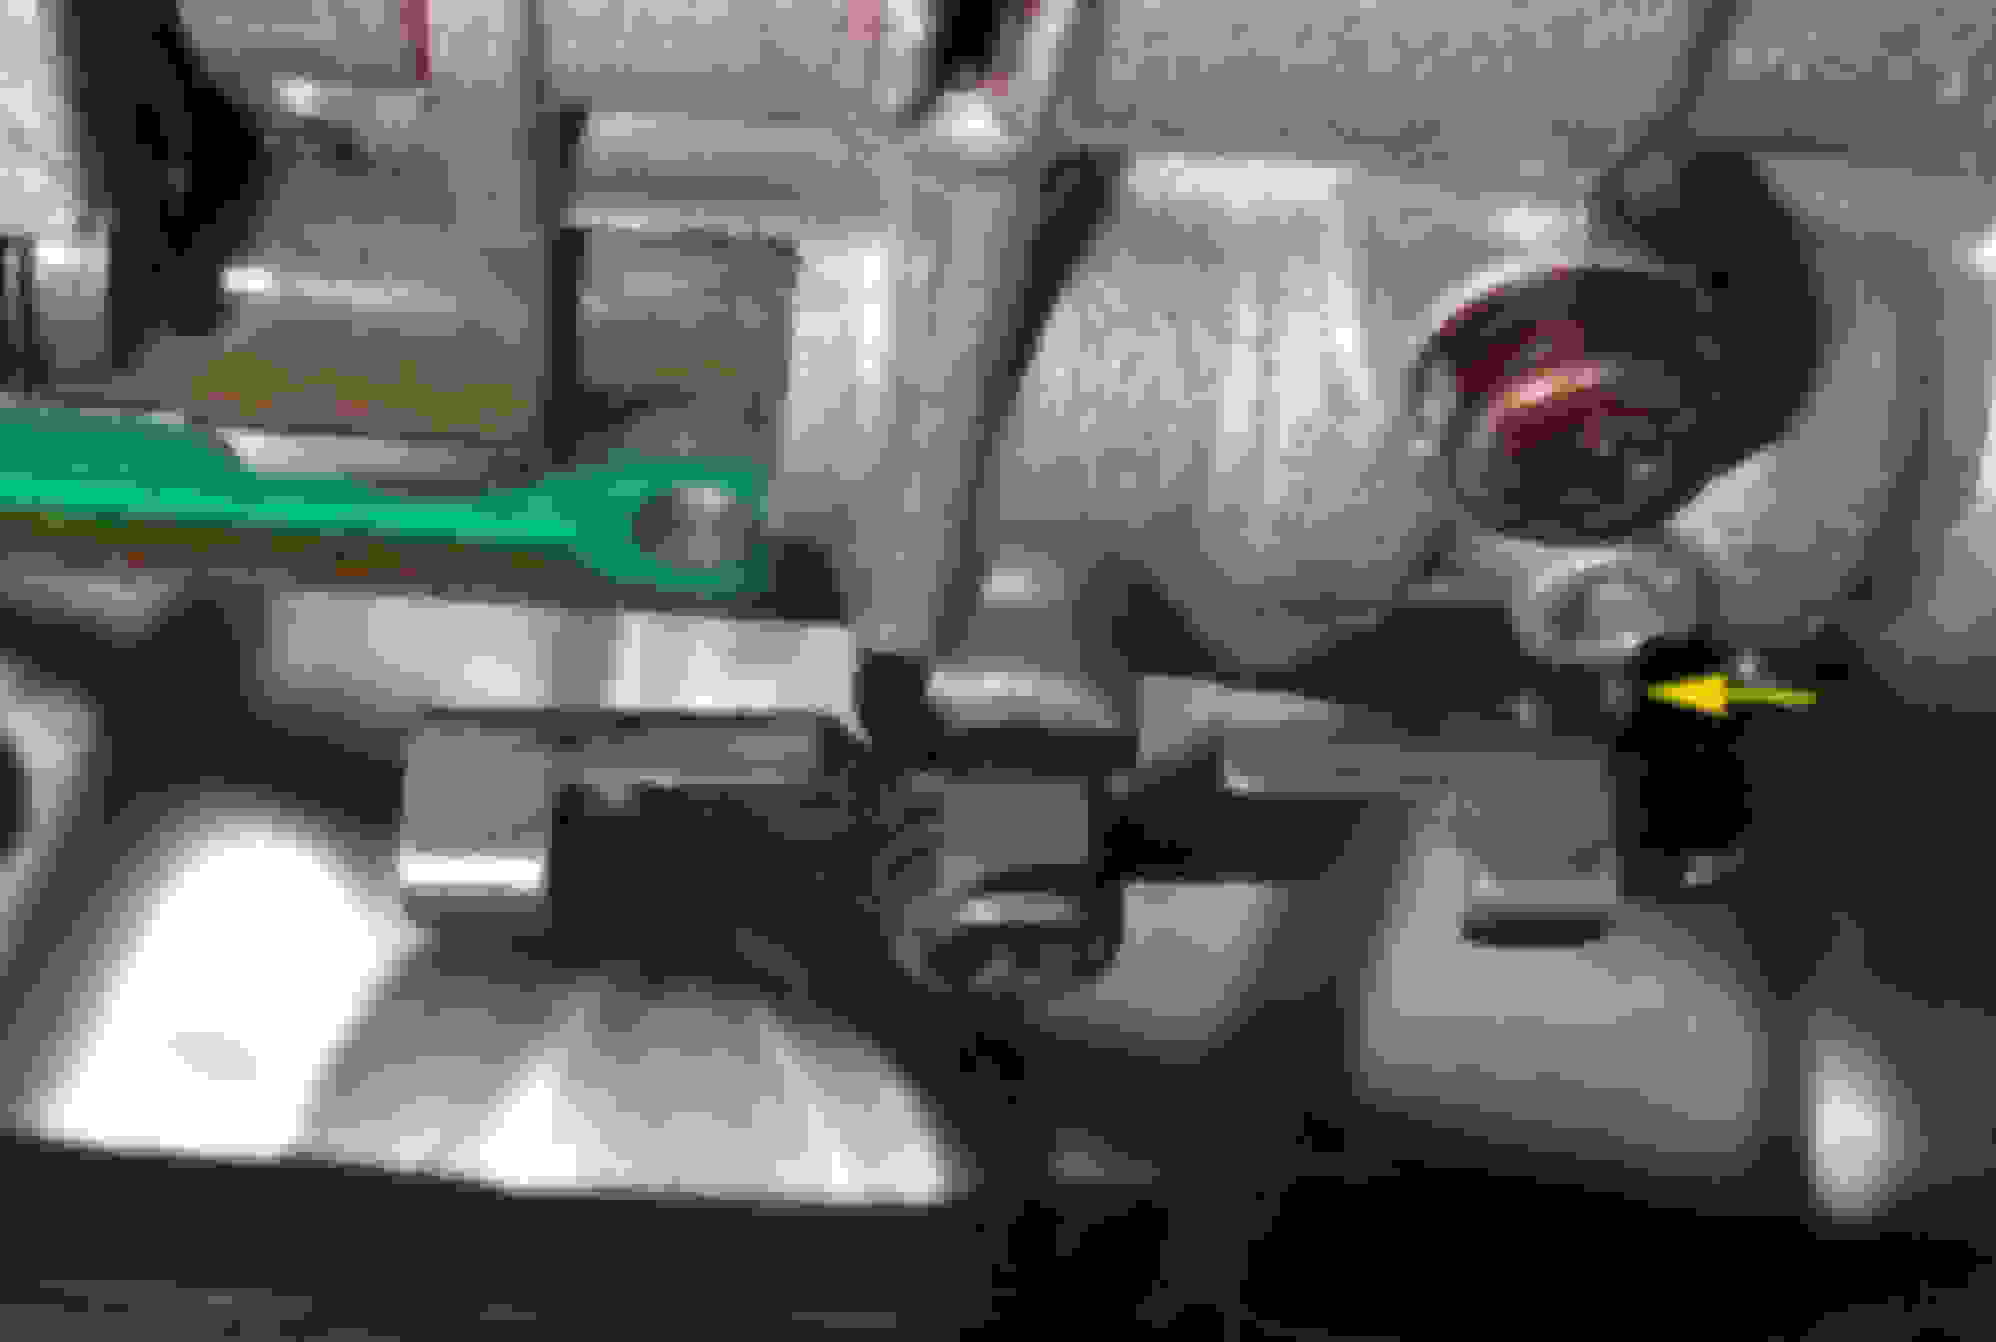
Near the manual gear selector shift valve a wiring harness bracket is attached by one of the screws. Note the position of this bracket before you remove all the screws so you can replace it in its proper position. Note the small alignment tab on the bracket that fits into a corresponding hole in the valve body (arrow):
We drove 350 miles last night and so far the Transgo seems to have completely resolved our harsh shift issue. Hopefully it will also prevent the dreaded A-drum failure.
Thank you Don for the kind words. Your additional photos and remarks are great addition to this thread. As I mentioned I used a valve body that was already out of the car so I didn't deal with the shift valve. The shift valve can be a problem. I had a little trouble with it my first time installing the pressure valve.
Nobody mentions stubborn oil pan, mine did't drop due to exhaust pipes blocking its way out, no amount of wiggling would help, i ended up changing the filter with the pan suspended as on Don photo, now that i will go for transgo upgrade i'm wondering how to remove the pan without dropping the exhaust first, anybody had the same issue?
Nobody mentions stubborn oil pan, mine did't drop due to exhaust pipes blocking its way out, no amount of wiggling would help, i ended up changing the filter with the pan suspended as on Don photo, now that i will go for transgo upgrade i'm wondering how to remove the pan without dropping the exhaust first, anybody had the same issue?
Can you post a picture of your problem. I don't recall having an issue of getting the pan off, except for stubborn pan bolts.
In Don's photo it looks like he has room to get the pan off but possibly has it hanging like this to get most of the oil out of the pan before removal.
Haha, Oh God, i didn't even notice i'm on XK subforum, mine is XJ8, obviously it differs, instead of trying to wrap my head around pan removal i will get myself pair of new gaskets and drop the pipes, more i look at the photo more i'm sure there is no other way
I was asked by a member to describe the process to install the Transgo pressure regulator upgrade. It takes about an hour to do the upgrade and the best time to do the upgrade is when you do a transmission fluid and filter change. The reason for the upgrade is to help prevent the failure of the A drum. It is believed that the worn pressure regulator will spike the oil pressure to the A drum causing an already weak designed drum to fail. For this post I already had a valve body removed from the transmission. The entire valve body doesn't need to be removed just the lower front half.
USE A T-27 TO REMOVE THE PAN AND THE VALVE BODY BOLTS!!!!!
I think this is where a lot of people have trouble removing the pan. The T-25 will fit but the bolts will strip if the bolt is a little stubborn.
Don't use a rag or paper towels to clean valve body. Lint in the transmission is not a good thing. If I do any cleaning it is with air.
This is the relevant part of the instructions included with the kit. They describe the process very well, evev I could understand them.
EDIT:
Johnken was nice to post the entire Transgo instructions in pdf formant in post #3.
The night before I put the new split rings on the new valve. Use a little assembly grease before installing the split rings. Then put the o rings over the split rings to compress them. Put it in a clean baggie and put it in the freezer. Next morning take it out and I put it in a cup of ice to keep it cold because I don't have a freezer at my shop
Front half of valve body. Notice the A bolts, valve body to case, are already out because this entire valve body was previously removed from the transmission.
The pressure regulator is under this plate on the right side of the plate. DO NOT JUST REMOVE THE BOLTS WITHOUT HELP OR I USE A C CLAMP!!! There are springs that put pressure on the plate. It's not that extreme that you can't hold it, but it's hard to hold it and remove the bolts at the same time. The third hand comes in handy.
Remove the 3 middle bolts leaving the 2 outer bolts in. I didn't have any help so I used a C clamp as my extra hand. Becareful placing the clamp not to damage the valve body. You don't need to clamp it tight.
Slowly release the clamp. I have my hands also holding the plate as I release the clamp but I took them off temporarily to take this photo.
Plate off.
Remove the pressure regulator spring.
Remove the valve. I used a screwdriver to get it out. Be very careful to only put the screwdriver on the valve and don't touch the valve body. It will slide out easily.
Now take your nice and cold new valve out of the bag. Remove the o rings. I usally put a little clean transmission fluid on the valve before installing.
Slowly install the valve. DON'T FORCE IT. It should slide in easily. If for some reason it catches on the split rings redo the freezing process. If you break the rings you will need to order a new valve.
You can see the new valve in the valve body.
Install the new Transgo spring
Now the fun part. Install the plate. If you have a helper have them hold the plate in place while you get the screws started. I used a C clamp and slowly compressed the springs. Notice the circled area, that spring fits in a little indent on the plate. Also make sure the valve below it slides in correctly.
All back together. Install back on transmission. I torque the plate and valve body bolts at 8nm. The pan calls for 10nm.
I hope this helps.
Just a note it took me 25 minutes to install the valve and take pictures. It took me 3 hours to make this post. It gives me more admiration of Gus and his website jagrepair.com for the amount of time he has put in it.
Sorry... Maybe this is a stupid question...but
When you unbolt and lower the front or forward section of the VB is there a danger of a bunch of little bits and pieces FALLING OUT of the channels, groves and slots in the top of the VBody? The idea horrifies me...

 03-29-2017, 10:24 AM