

Installing Steering Wheel Control Module for Aftermarket Stereo

I just bought a 2003 Jaguar S-Type 3.0 with 84,000 miles and I have replaced the factory stereo with a new double din touchscreen Pioneer DVD player. I have purchased a PAC SWI-RC to integrate the steering wheel controls into the new head unit. I am going to go do the install, take pictures, and then do a write-up about the process. I will throw in some images of the head unit, sub woofer, and amp installations as well.
Find the steering wheel control that will work with your vehicle and aftermarket stereo here: Pac-Audio.com Product Details | iPod Integration for your car and More by Pac-Audio - Connecting you to the future
This is the link to the one that I found to work with my 2003 Jaguar S-Type 3.0 with my Pioneer DVD player:
I started with the center console by removing the trim around the gear shift and parking brake. Just open the ashtray and pry the trim piece up.
Next I used the size 20 Torx screw driver to remove the two screws in opposite corners of the console liner.

You can see the one under the arm rest portion without having to remove any other pieces, and the other one is under the cup holder that simply pulls straight up.
Once you have removed the screws you can lift the console liner out of the way.

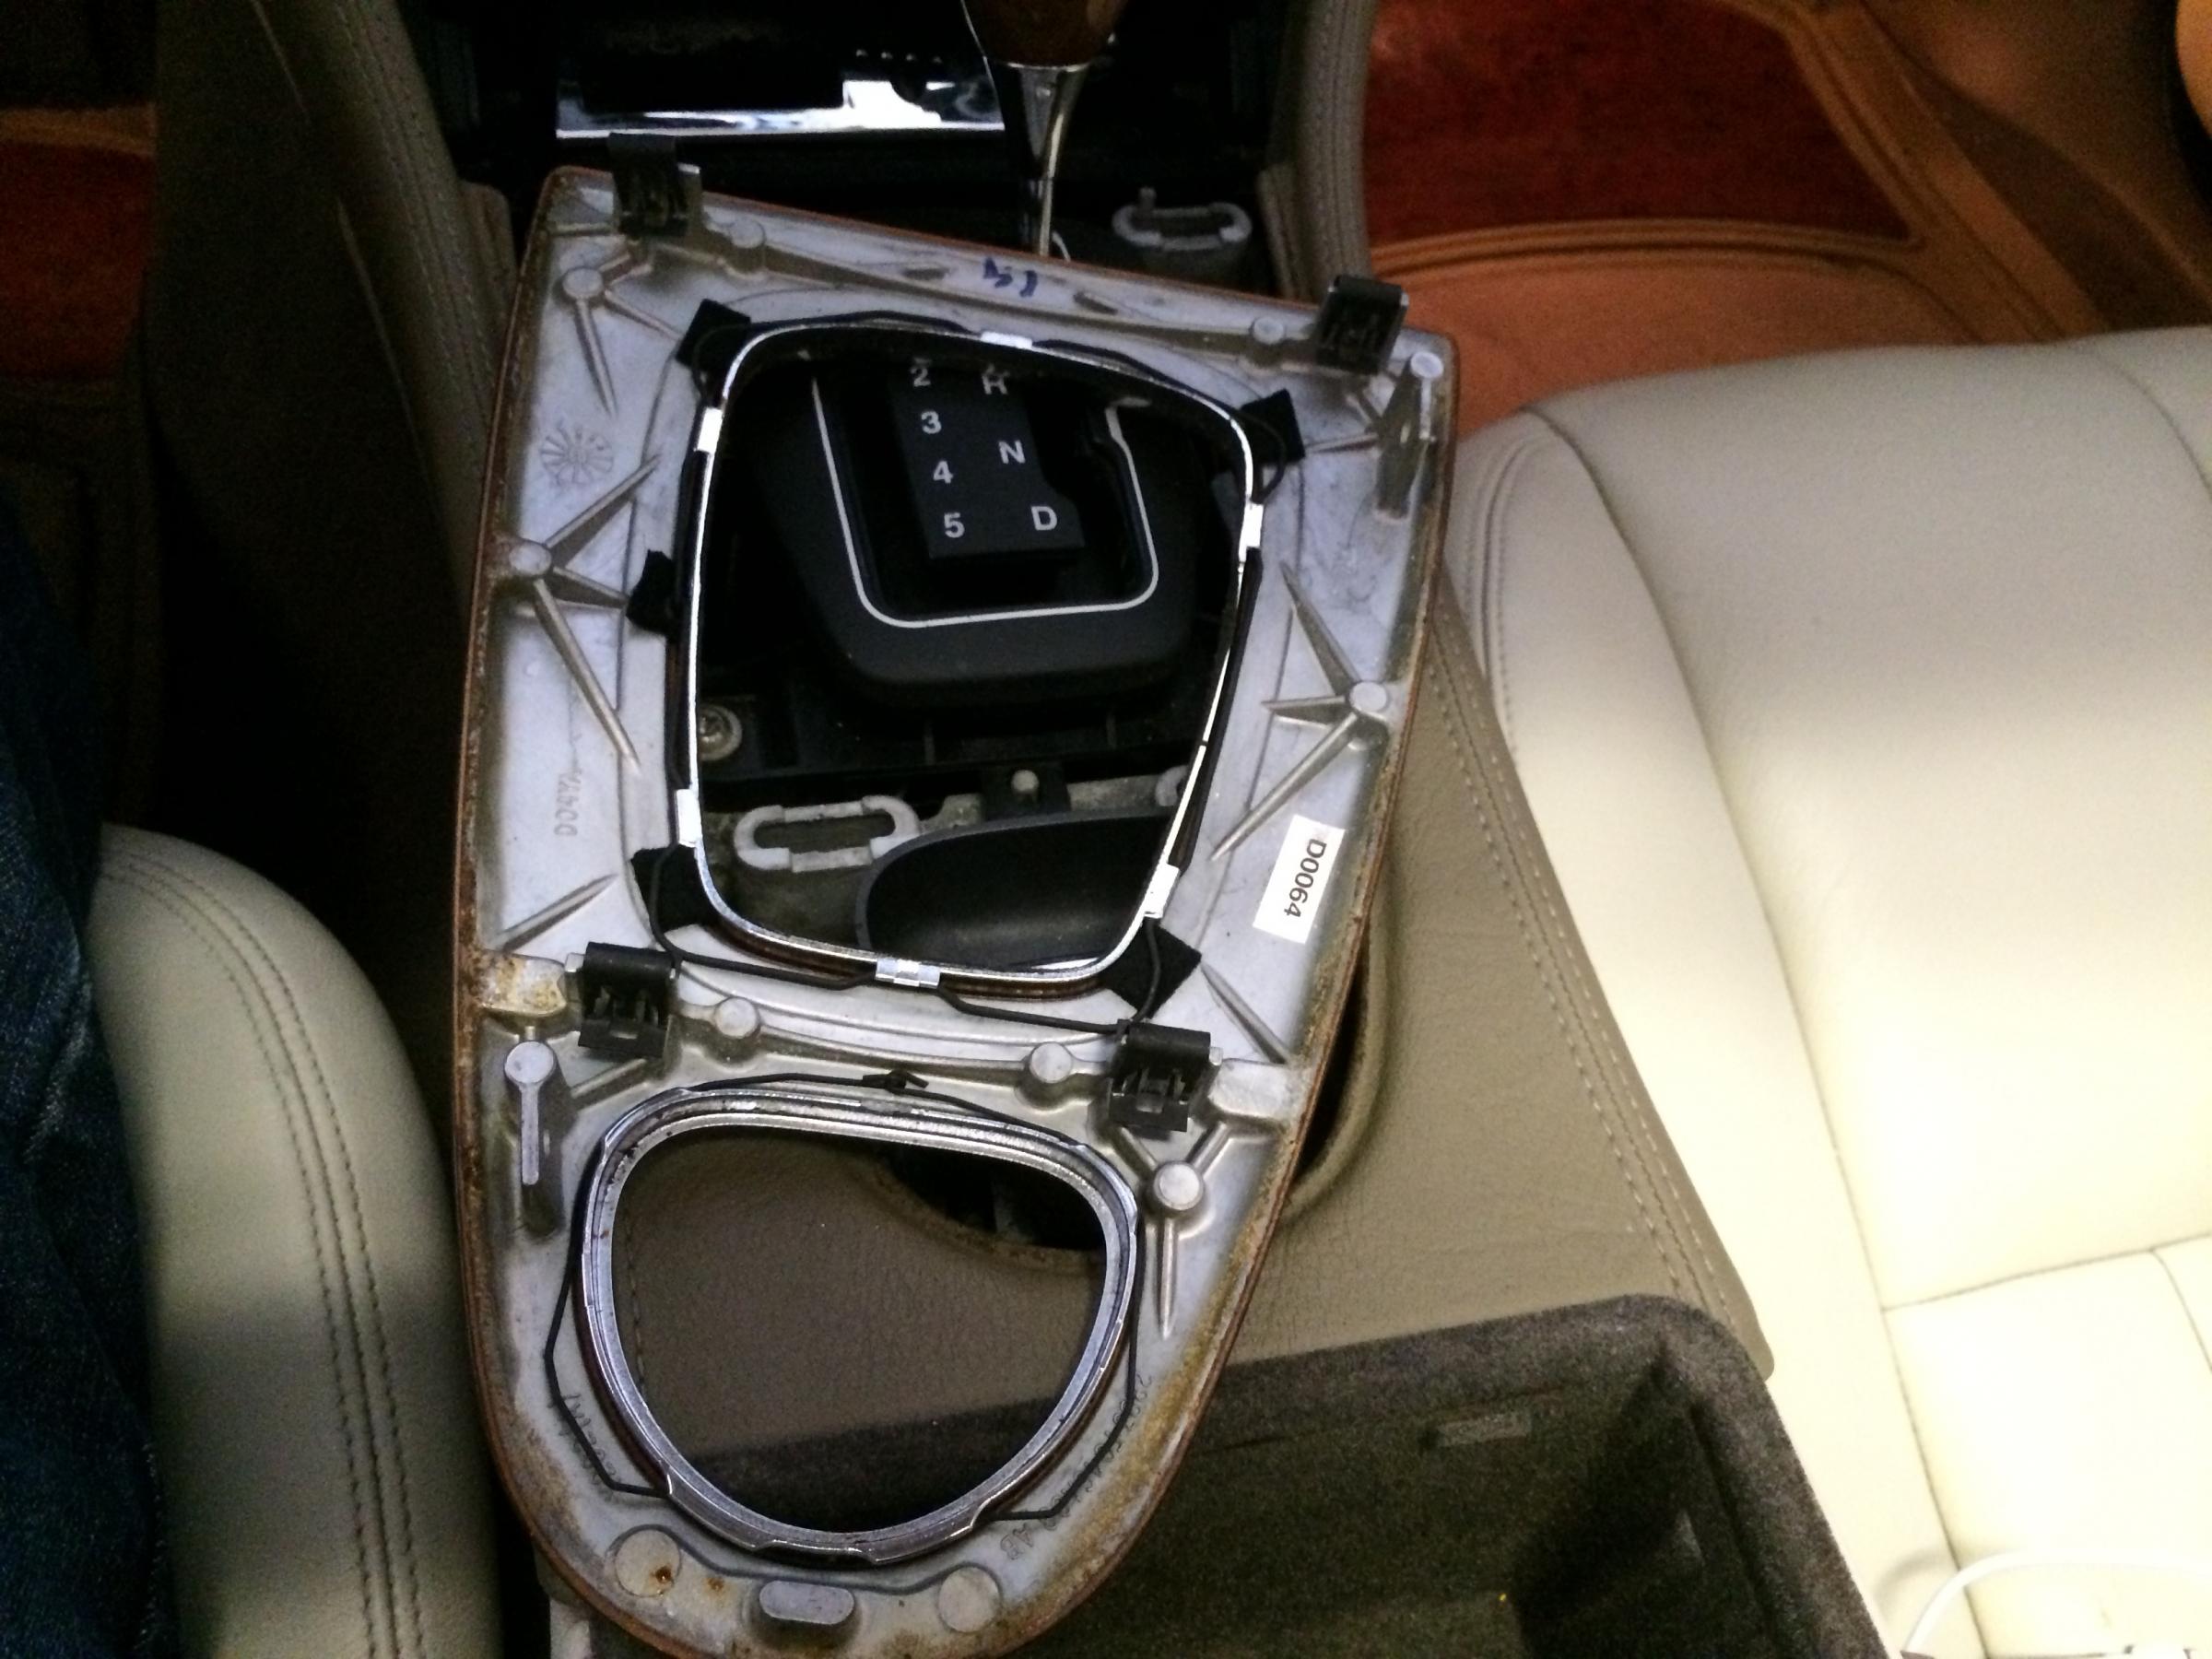
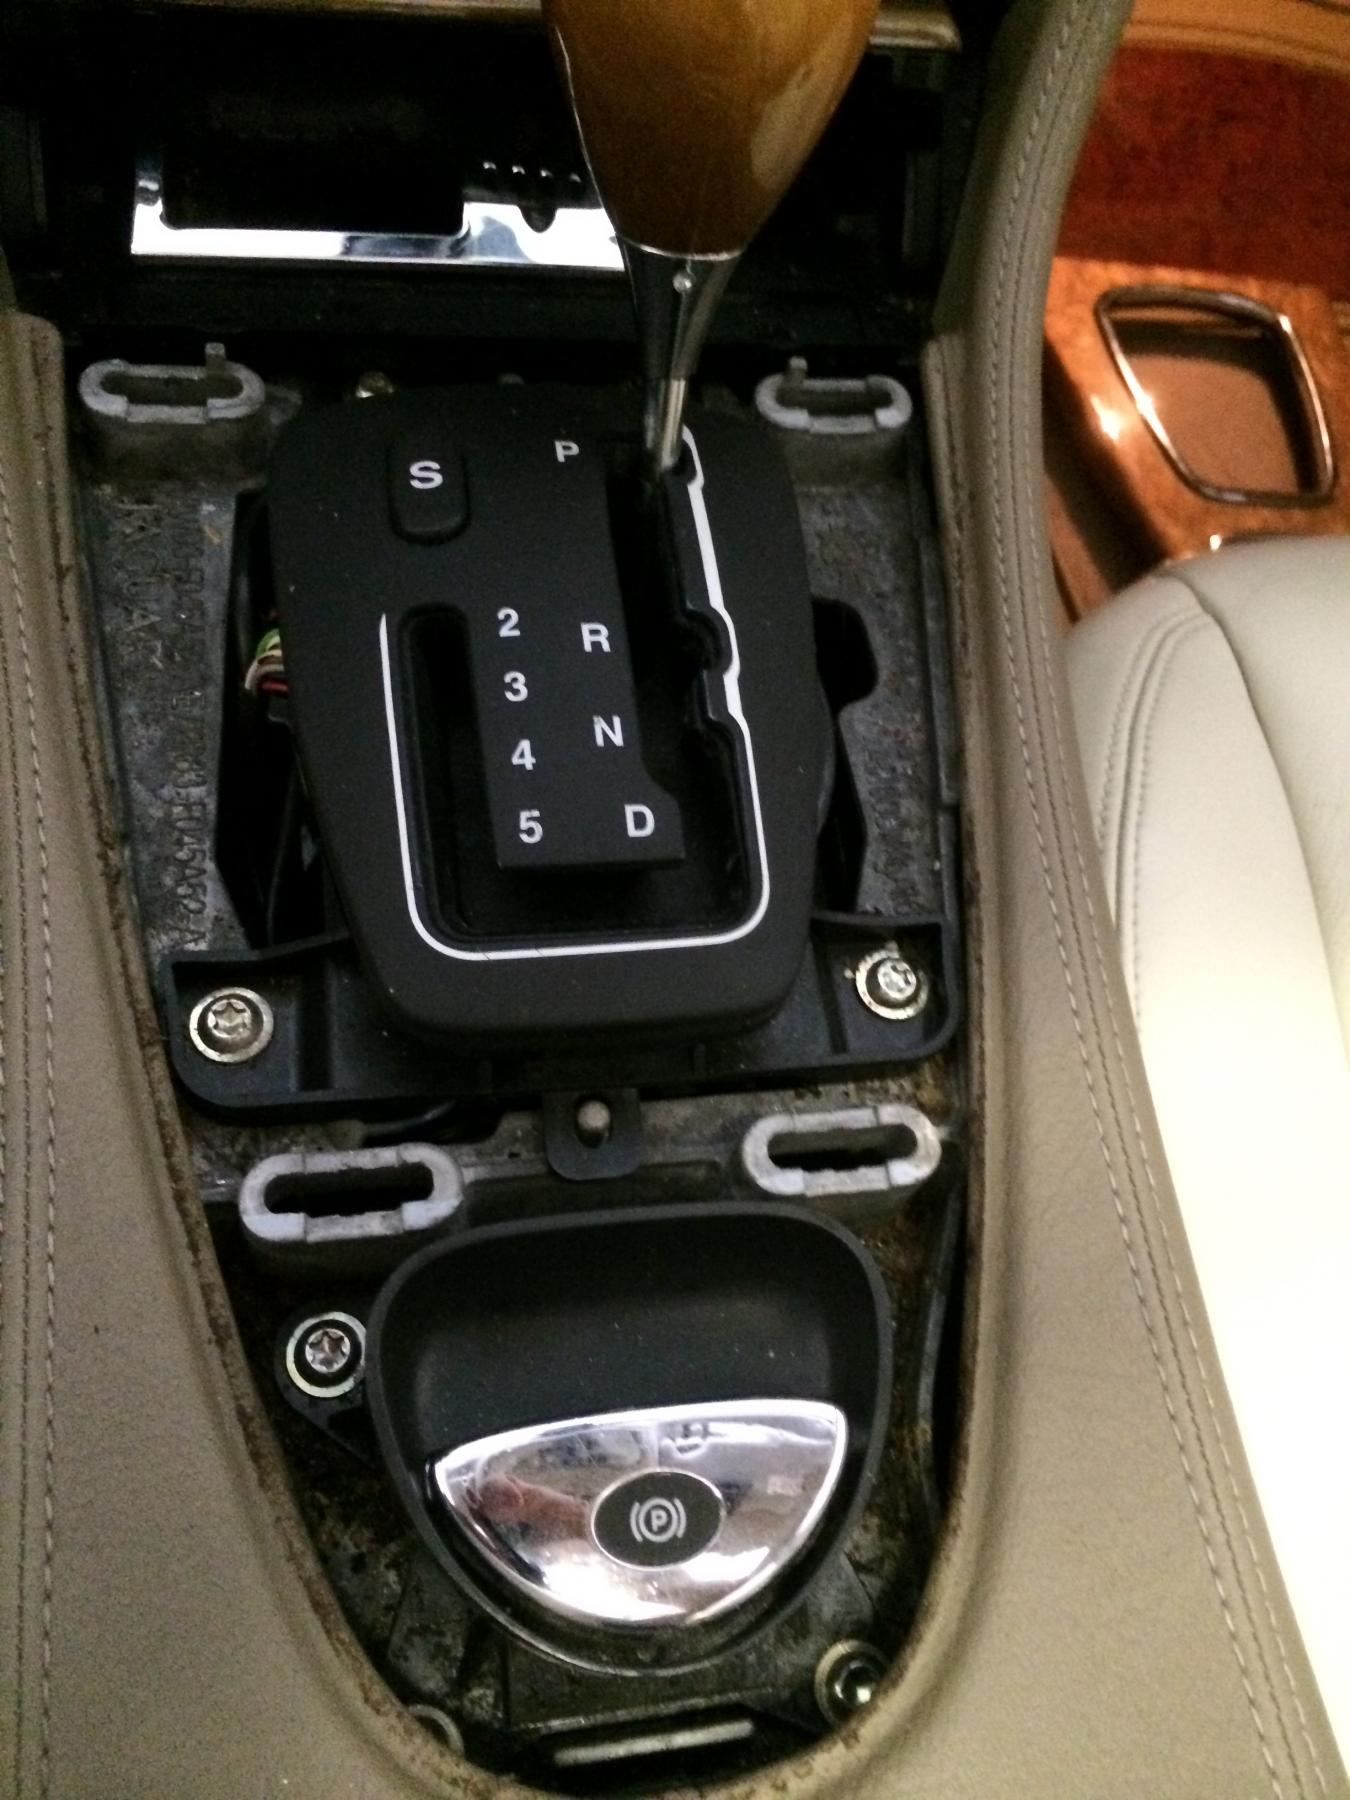
Then you can pry off the console trim ring that goes around the climate controls, radio, and gear selector. This has been easy to pry off by just moving slowly from the bottom rear towards the top.

Next use the same size 20 Torx driver to remove the lower button group from the climate control/radio chassis. There is one screw on either side to remove and then the buttons will pop out and out of the way to make removing the radio chassis easier.

Next, use a 7mm nut driver or socket with an extension to remove the four bolts holding in the radio chassis.

Once you have removed the four bolts then you can get to the wires behind the radio.
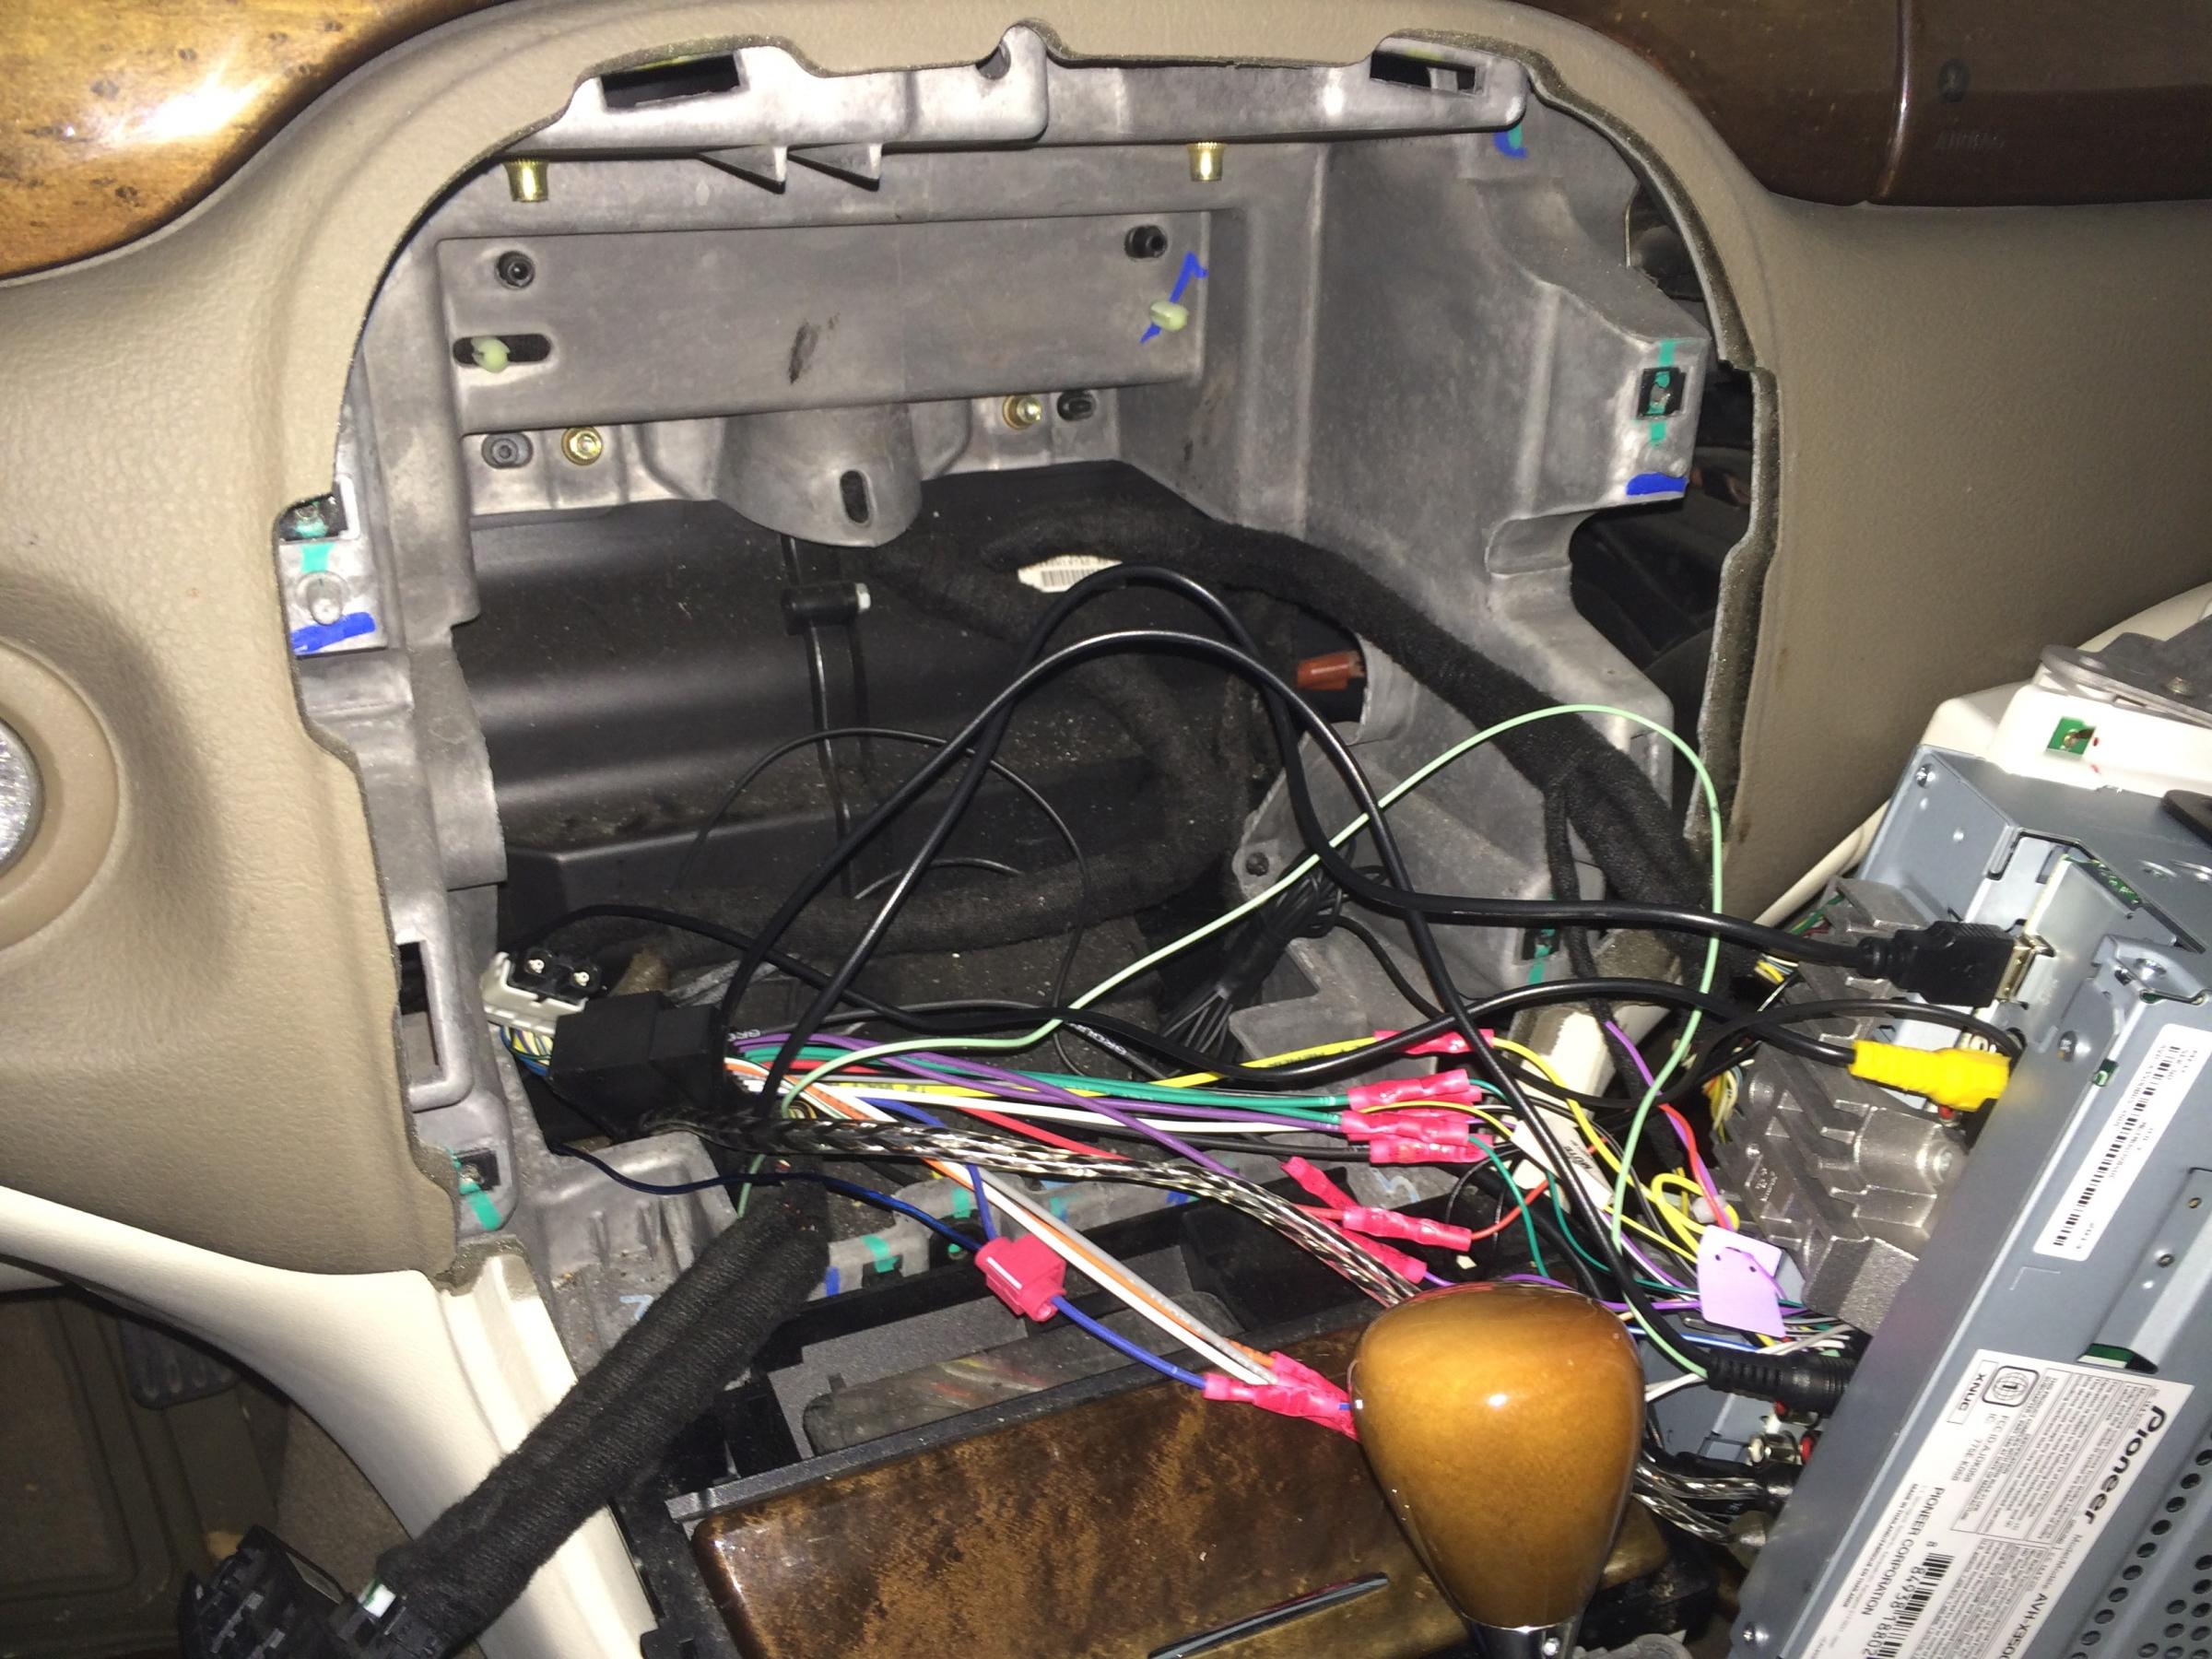
This is the control module to tie the steering wheel controls into the new radio. There are custom instructions on the manufacturer's website with details about the installation for your vehicle and radio type at: iPod Integration for your car and More by Pac-Audio - Connecting you to the future

Three wires tied into the existing radio harness later and it is installed and ready to be programmed which is a pretty simple procedure. It took a few times running through the programming to fine tune the results for my radio but overall was very quick to accomplish.

Once I was done it was just a matter of reversing the removal to put it all back together. In a few minutes I had it all back in place looking like I had never even removed anything.

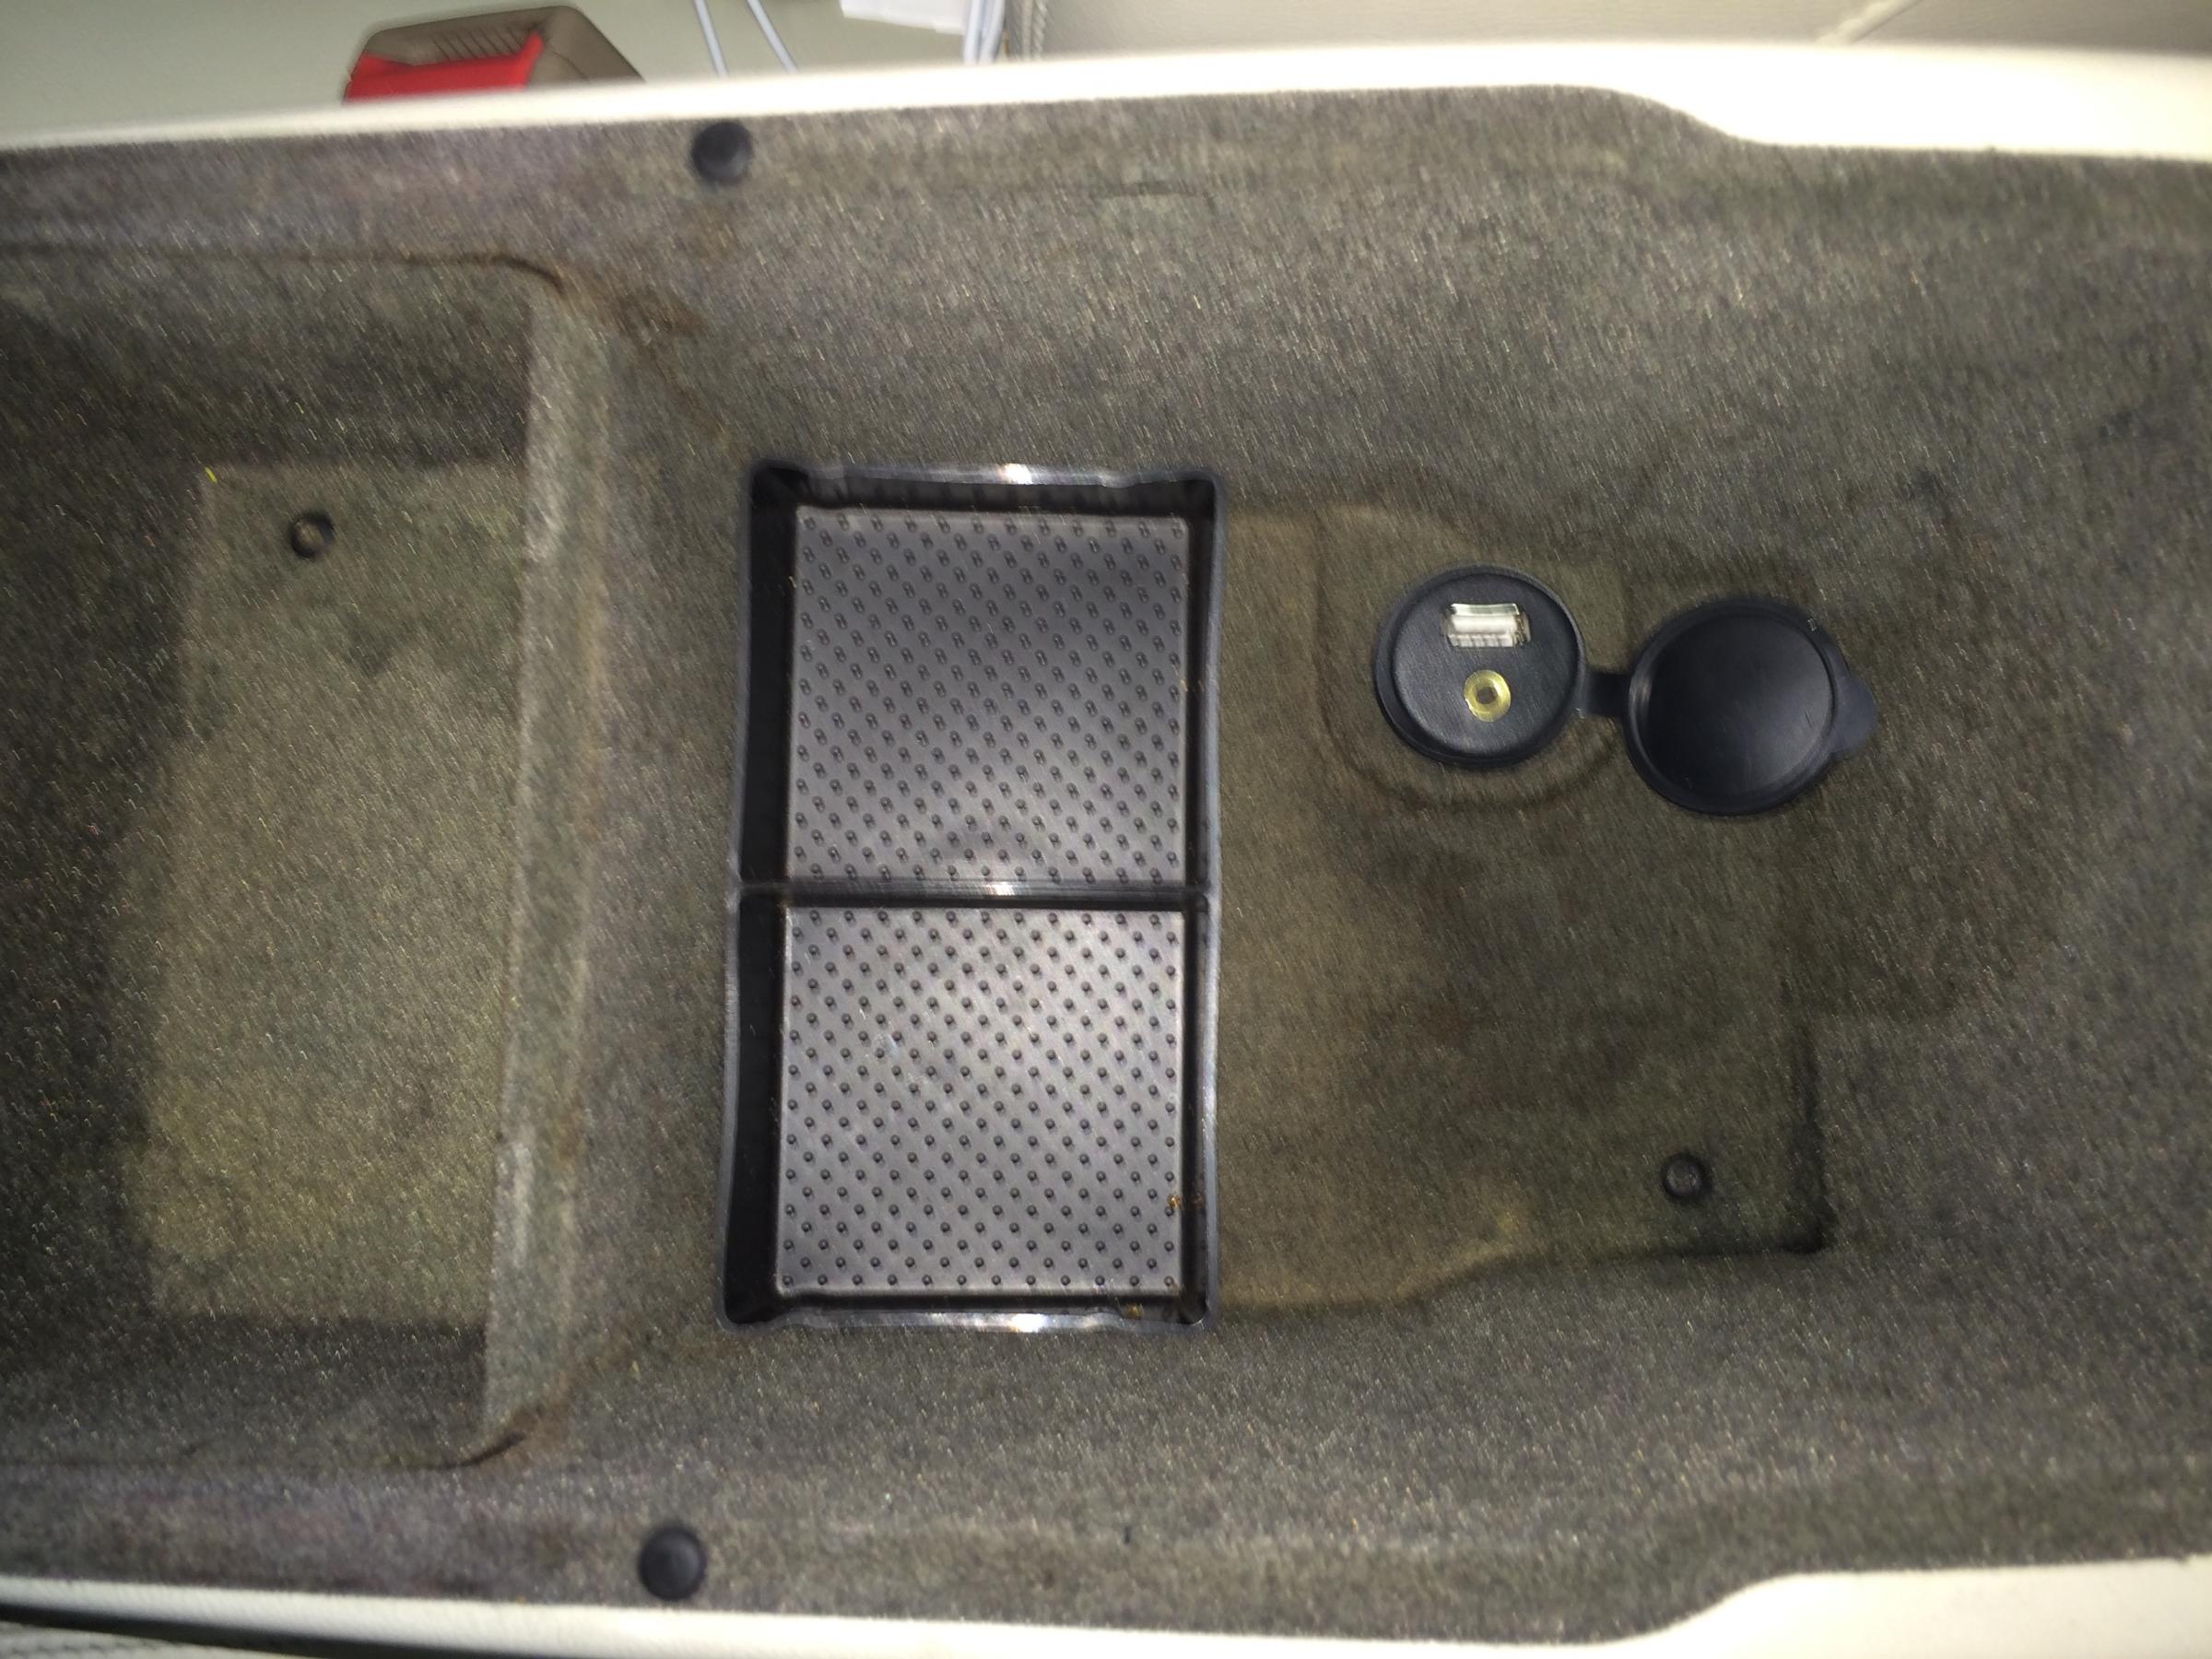
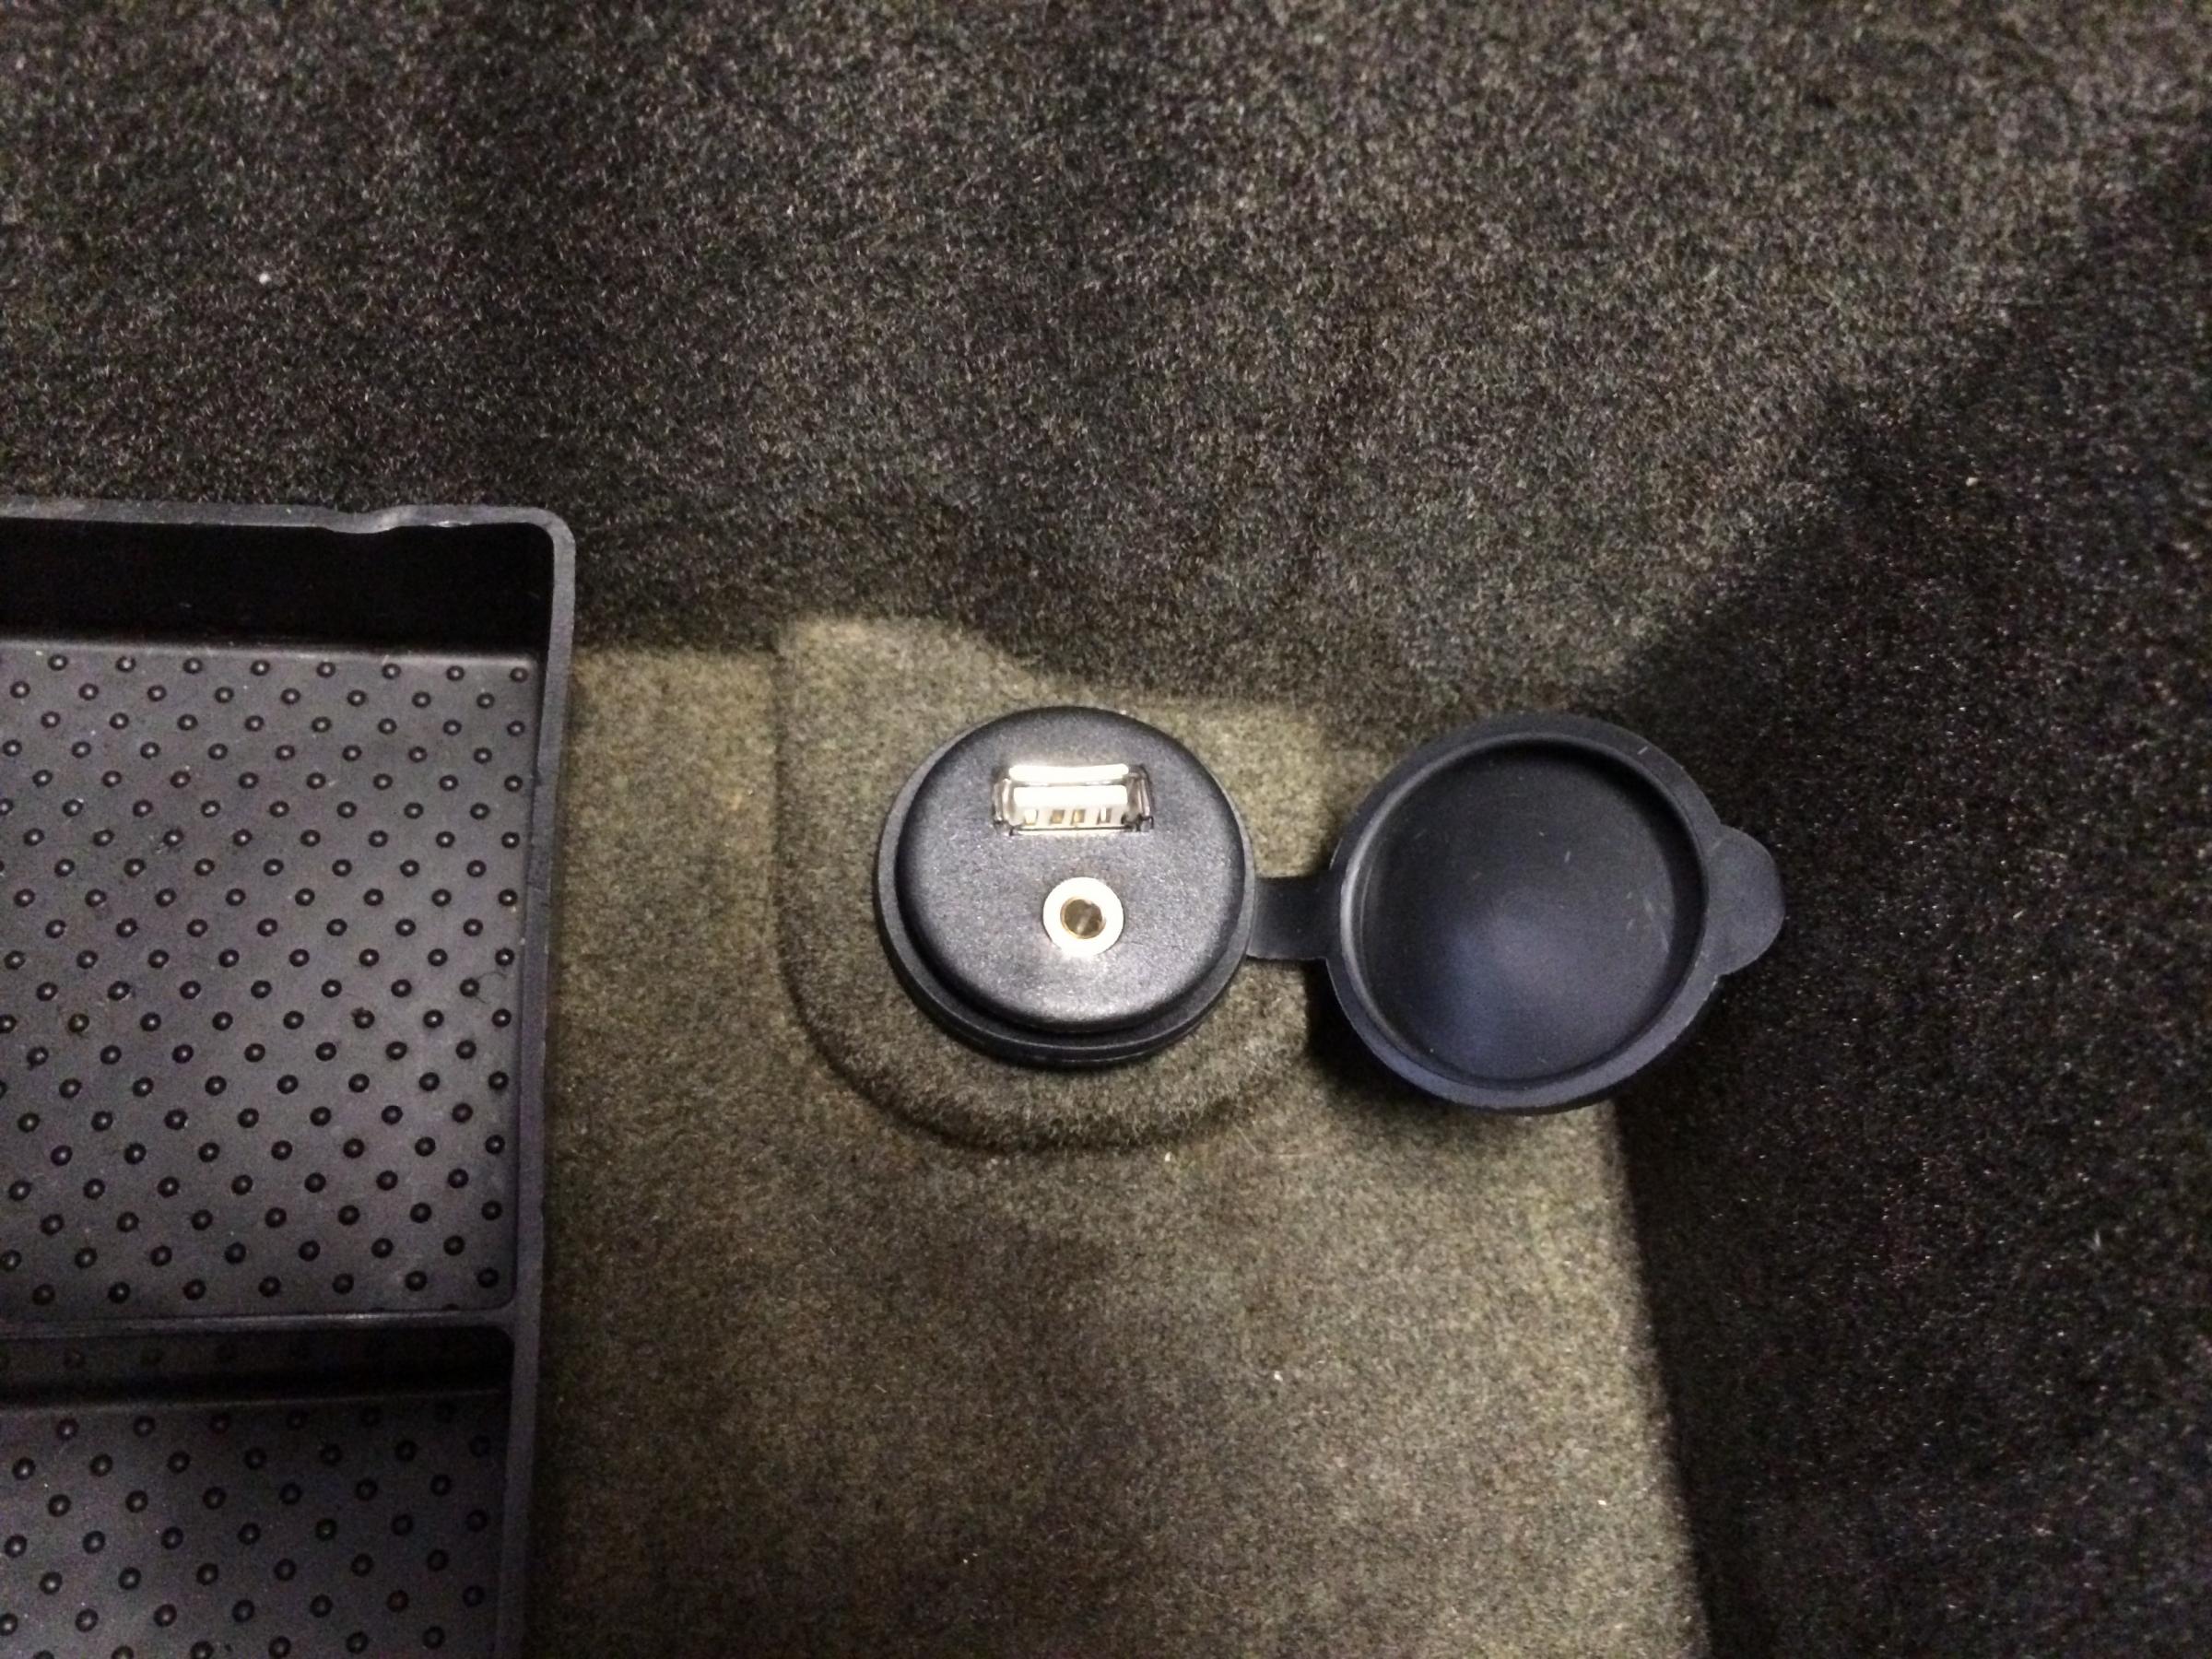
I also installed a USB and auxiliary line input where the 12volt power port was in the center console. The port was not working correctly even though the power was coming into it just fine, so I removed it and just used the spot to put my new port in its place. Both lines tie into my radio directly and I found it at Amazon.com at:
I will post more about the rest of the radio, sub, and amp install later.
This is the link to the one that I found to work with my 2003 Jaguar S-Type 3.0 with my Pioneer DVD player:
I started with the center console by removing the trim around the gear shift and parking brake. Just open the ashtray and pry the trim piece up.
Next I used the size 20 Torx screw driver to remove the two screws in opposite corners of the console liner.
You can see the one under the arm rest portion without having to remove any other pieces, and the other one is under the cup holder that simply pulls straight up.
Once you have removed the screws you can lift the console liner out of the way.
Then you can pry off the console trim ring that goes around the climate controls, radio, and gear selector. This has been easy to pry off by just moving slowly from the bottom rear towards the top.
Next use the same size 20 Torx driver to remove the lower button group from the climate control/radio chassis. There is one screw on either side to remove and then the buttons will pop out and out of the way to make removing the radio chassis easier.
Next, use a 7mm nut driver or socket with an extension to remove the four bolts holding in the radio chassis.
Once you have removed the four bolts then you can get to the wires behind the radio.
This is the control module to tie the steering wheel controls into the new radio. There are custom instructions on the manufacturer's website with details about the installation for your vehicle and radio type at: iPod Integration for your car and More by Pac-Audio - Connecting you to the future
Three wires tied into the existing radio harness later and it is installed and ready to be programmed which is a pretty simple procedure. It took a few times running through the programming to fine tune the results for my radio but overall was very quick to accomplish.
Once I was done it was just a matter of reversing the removal to put it all back together. In a few minutes I had it all back in place looking like I had never even removed anything.
I also installed a USB and auxiliary line input where the 12volt power port was in the center console. The port was not working correctly even though the power was coming into it just fine, so I removed it and just used the spot to put my new port in its place. Both lines tie into my radio directly and I found it at Amazon.com at:
I will post more about the rest of the radio, sub, and amp install later.
Veteran Member
Joined: Mar 2013
Posts: 3,018
Likes: 182
From: Pawleys Island, SC USA (formerly from Tabernacle, NJ USA)
Great write-up and pics. I'm planning to do this with my '03 as well. You're post has given me the confidence to know I can do this project without (hopefully) breaking something. Now all I need is some warm weather!
Thanks so much,
Steve
Thanks so much,
Steve
Veteran Member
Joined: Mar 2013
Posts: 3,018
Likes: 182
From: Pawleys Island, SC USA (formerly from Tabernacle, NJ USA)
I do have a few questions now...
How exactly do the USB/3.5mm AUX extension cable plugs connect to your new radio? Are there dedicated jacks on back of the radio into which these plug, or do they somehow go into the wiring harness? I'm a skeptic of anything that looks simple, esp when it comes to cars.
Also, may I ask where you bought the new Pioneer? I'm assuming you shopped around a bit, right?
Last edited by Jumpin' Jag Flash; Jan 12, 2014 at 02:56 PM. Reason: incomplete post
I did shop around a bit and I bought the radio from Crutchfield.com at:
Pioneer AVH-X3500BHS DVD receiver at Crutchfield.com
The best part about buying from Crutchfield is that they give you all the extras you need to install the radio in your car for free. You get the dash insert that fits your specific car and the radio you choose. They also give you the wiring harness that matches your car so you can just plug into the existing factory wiring. They provide the Euro antenna conversion wire. Finally, they provide directions about removing the old radio and installing the new radio as well as giving you lifetime tech support. All of that is free!
The wiring harness that matches the factory plug is wired to the radio harness that comes with the radio. Most of the wires match up color to color but the instructions help you figure it out. That can be done while sitting in your living room and when it comes time to plug everything in, it will plug directly into the car harness and the radio.
The USB/3.5mm jack was very simple to install because it does simply plug into the back of the radio. There is a USB input and an auxiliary input on the back of the head unit that the wires just plug into without having to splice anything together. There are also inputs for the steering wheel control module and a microphone (that comes with the radio) to answer phone calls when you have your phone connected via Bluetooth. There is also an input for another video source like a Blu-ray player or a backup camera (which is what I am doing). There are outputs to run video from the DVD player to rear screens if you would like to install them. Finally, there are outputs to run to an amp and sub woofer if you need a little more bass. Overall, I am very pleased with the head unit so far.
Hopefully that answers your questions and gives you a little more confidence about tackling the project.
Senior Member
Joined: Dec 2013
Posts: 190
Likes: 12
From: Lubbock Texas
That is a good write up and picture detail. I am in the future going to put in an Alpine system, I am going to archive this thead.
Trending Topics
Veteran Member
Joined: Mar 2013
Posts: 3,018
Likes: 182
From: Pawleys Island, SC USA (formerly from Tabernacle, NJ USA)
I did shop around a bit and I bought the radio from Crutchfield.com at:
Pioneer AVH-X3500BHS DVD receiver at Crutchfield.com
Hopefully that answers your questions and gives you a little more confidence about tackling the project.
Pioneer AVH-X3500BHS DVD receiver at Crutchfield.com
Hopefully that answers your questions and gives you a little more confidence about tackling the project.
I too am a huge fan of Crutchfield, having purchased from them in the past. As you said, they provide lots of freebies, advice and support if/when you need it. Buying from them is a no-brainer. Your comments sealed the deal for me as that is where I will purchase my next radio (again).
Again, many thanks!
Steve
I put the new stereo system install with pictures in a new thread here: https://www.jaguarforums.com/forum/s...-wires-109893/ if anyone is interested.

Junior Member
Joined: Oct 2013
Posts: 29
Likes: 7
From: Colorado
Nice writeup. Recently put in a head unit myself. I used an Axess universal steering wheel control module, works pretty good. I took a look at your other thread on running wires to the trunk, but the pic links were broken. I definitely want to add a sub, and would love to see how you did the wiring.
Last edited by msljag; Jan 18, 2014 at 09:57 PM.
Junior Member
Joined: Oct 2013
Posts: 29
Likes: 7
From: Colorado
Must be me I guess, but I tried it in a couple of different browsers. Chrome says "Invalid Attachment specified. If you followed a valid link, please notify the administrator", Firefox spins forever when I click on the picture links.

Member
Joined: Mar 2016
Posts: 82
Likes: 11
From: Perth
nice details and info well done, I just installed aftermarket head unit and have not figured the steering wheel controls yet so just installed without that function, my stereo has a dedicated plug coming out with three wires for the steering but I could not find which wires on the original plug controlled the steering.
not a well known name like pioneer but seller has been very helpful, this is the unit Free Camera 6 2'' CAR Stereo DVD Player Head Unit GPS Radio Bluetooth Navigation | eBay
not a well known name like pioneer but seller has been very helpful, this is the unit Free Camera 6 2'' CAR Stereo DVD Player Head Unit GPS Radio Bluetooth Navigation | eBay

Member
Joined: Mar 2016
Posts: 82
Likes: 11
From: Perth
In the courtesy light between shades there are little vent looking pieces either side of light, I drilled a small hole through the drivers side one then ran the wire through head lining, down drivers side A post trim under dash over steering wheel to radio.
I also tried connecting steering wheel controls to terminal 18 of original radio block connector and tried to configure switches via radio setup but it was having none of it so still no go with steering wheel controls
I also tried connecting steering wheel controls to terminal 18 of original radio block connector and tried to configure switches via radio setup but it was having none of it so still no go with steering wheel controls

