XJS Shooting Brake!! (pics)


#82
 07-21-2015, 07:44 PM

The following users liked this post:
bullittandy (07-22-2015)
#83
07-21-2015, 10:44 PM
Senior Member
The following users liked this post:
bullittandy (07-26-2015)
#84
07-22-2015, 03:38 AM

#87
07-24-2015, 12:41 AM
Veteran Member
If you're looking for a new Business Venture, why don't you Serialize your Build in one of those Custom Car Magazines.
They would probably pay good money for something like that and in any event you are sure to get a free Subscription.
An amazing job you've done by the way, as even with those step by step instructions, I am not sure that many of us, would be brave enough to give it a go.
They would probably pay good money for something like that and in any event you are sure to get a free Subscription.
An amazing job you've done by the way, as even with those step by step instructions, I am not sure that many of us, would be brave enough to give it a go.
#88
07-24-2015, 04:29 AM
I've completed a couple of car restorations in the past and in the last few years have gotten more experience painting cars. (I'm a psychologist during the day)
What's been amazing about this project is how much slower and harder everything is. With a restoration you're replacing parts or sanding and painting and it's straightforward (usually- lol).
But this project is so much more complicated. Take for example, the rear hatch seal. I have to blend the upper hand of the stock 280Z seal with the bottom portion of the stock XJS seal which means grinding the lip of the hatch at different heights and testing the seal for fit. And all this on two pieces of metal from two different cars that I welded together. Finishing the top side of the bodywork for paint, and the bottom side for fit with the seal.
#89
07-24-2015, 04:31 AM
If you're looking for a new Business Venture, why don't you Serialize your Build in one of those Custom Car Magazines.
They would probably pay good money for something like that and in any event you are sure to get a free Subscription.
An amazing job you've done by the way, as even with those step by step instructions, I am not sure that many of us, would be brave enough to give it a go.
They would probably pay good money for something like that and in any event you are sure to get a free Subscription.
An amazing job you've done by the way, as even with those step by step instructions, I am not sure that many of us, would be brave enough to give it a go.
#90
07-24-2015, 09:06 PM
I've been doing my resto/ drivetrain swap for two years now, I initially thought 12 months tops! I still have an easy year left.
Working for money gets in the way of fun every time.
So yeah, it's amazing how much time these things take, especially if you try to do it right. That's why I always laugh when people say they've painted their own car in blogs, and the paint timeline is 2-3 weeks....no way, you farmed the painting out!
Fit and finish is what takes the time, it's quick to get 90% of the way there, but as you know, the last 10% with fitting door gaps, seals etc is the killer.
I've completed a couple of car restorations in the past and in the last few years have gotten more experience painting cars. (I'm a psychologist during the day)
What's been amazing about this project is how much slower and harder everything is. With a restoration you're replacing parts or sanding and painting and it's straightforward (usually- lol).
But this project is so much more complicated. Take for example, the rear hatch seal. I have to blend the upper hand of the stock 280Z seal with the bottom portion of the stock XJS seal which means grinding the lip of the hatch at different heights and testing the seal for fit. And all this on two pieces of metal from two different cars that I welded together. Finishing the top side of the bodywork for paint, and the bottom side for fit with the seal.
What's been amazing about this project is how much slower and harder everything is. With a restoration you're replacing parts or sanding and painting and it's straightforward (usually- lol).
But this project is so much more complicated. Take for example, the rear hatch seal. I have to blend the upper hand of the stock 280Z seal with the bottom portion of the stock XJS seal which means grinding the lip of the hatch at different heights and testing the seal for fit. And all this on two pieces of metal from two different cars that I welded together. Finishing the top side of the bodywork for paint, and the bottom side for fit with the seal.

#92
07-26-2015, 06:34 PM
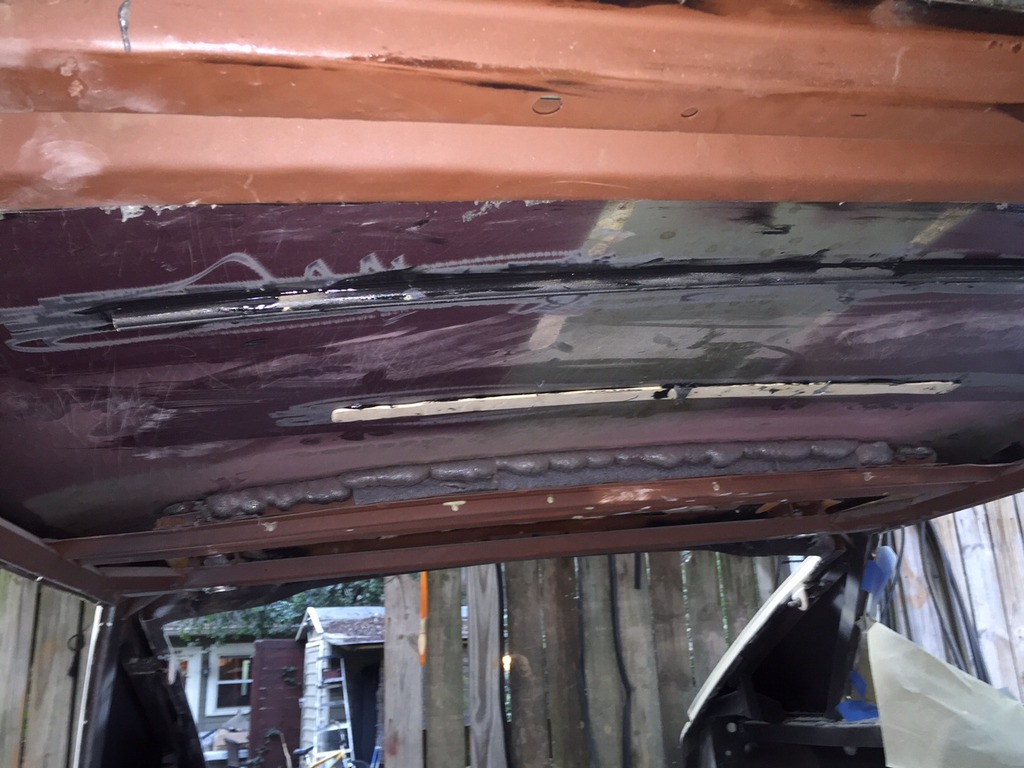
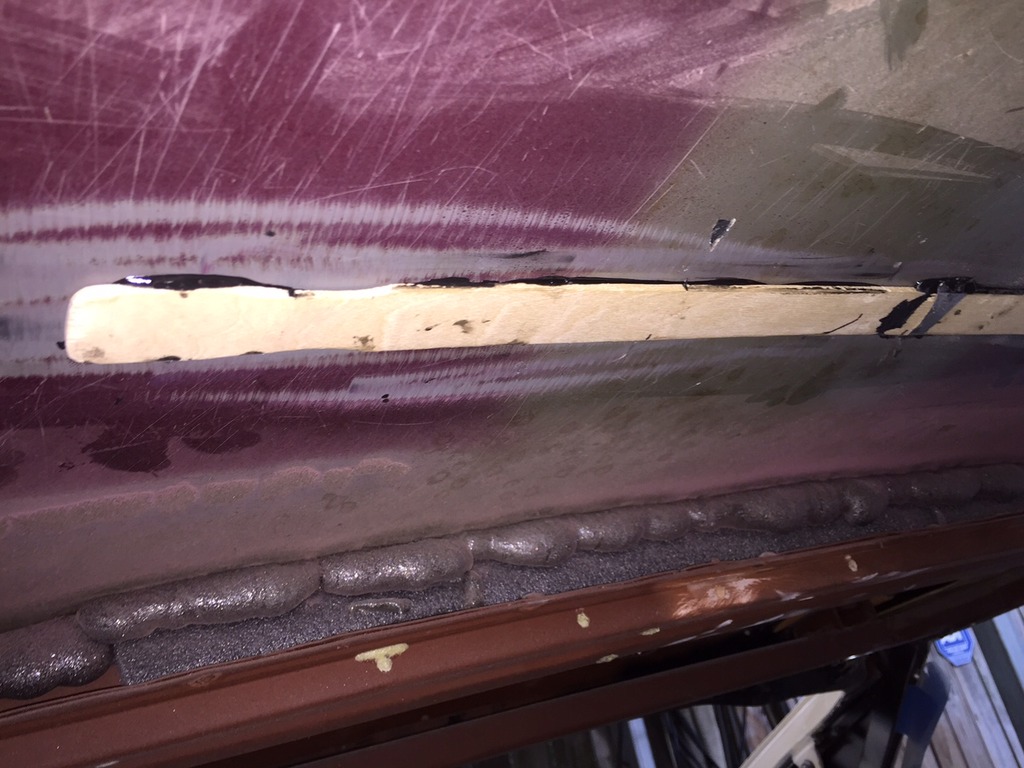
I had some problems with the Chevy truck roof oil canning on me when I was sanding it so I reinforced it by gluing some wood strips underneath. Used paint stirrers for one strip and some generic wood trim I had in the basement for the other strip (Not elegant I know but it was an experiment). Used the 3M 8115 panel adhesive again.
The 8115 is amazing, with that and those thin wood strips the roof was significantly reinforced but also retains enough flexibility to keep it from creasing when flexed.
The 8115 is amazing, with that and those thin wood strips the roof was significantly reinforced but also retains enough flexibility to keep it from creasing when flexed.


#93
07-26-2015, 07:00 PM

#94
07-28-2015, 10:12 AM

Veteran Member
The following users liked this post:
bullittandy (08-16-2015)
#95
07-28-2015, 06:37 PM
#96
07-28-2015, 06:54 PM
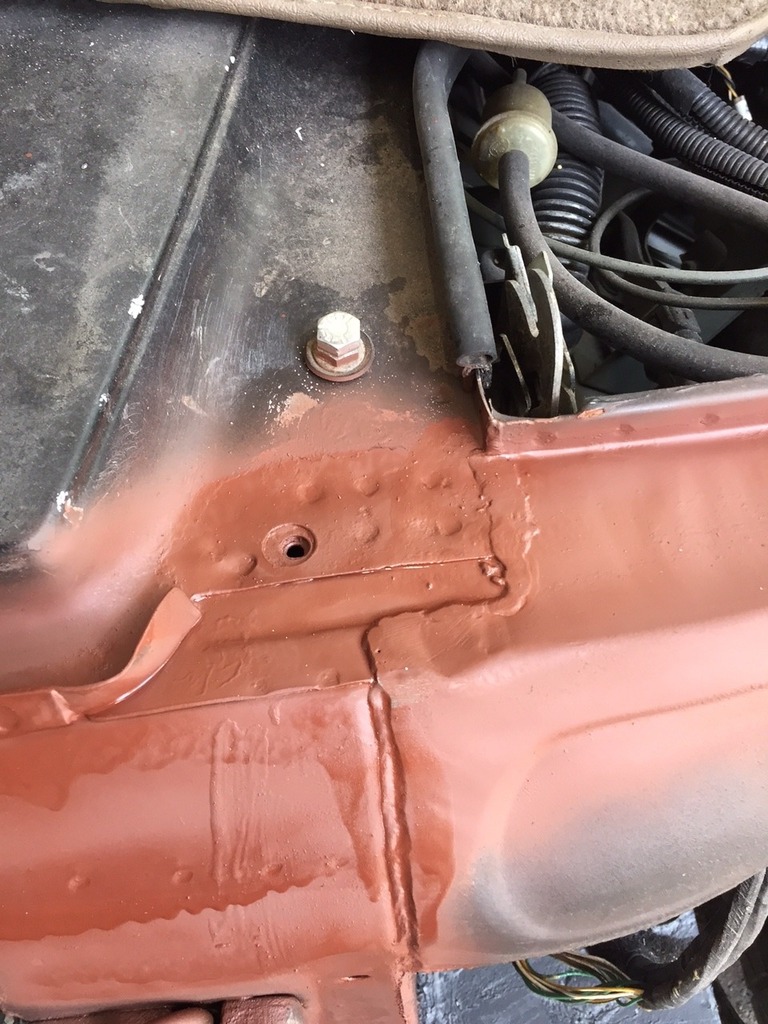
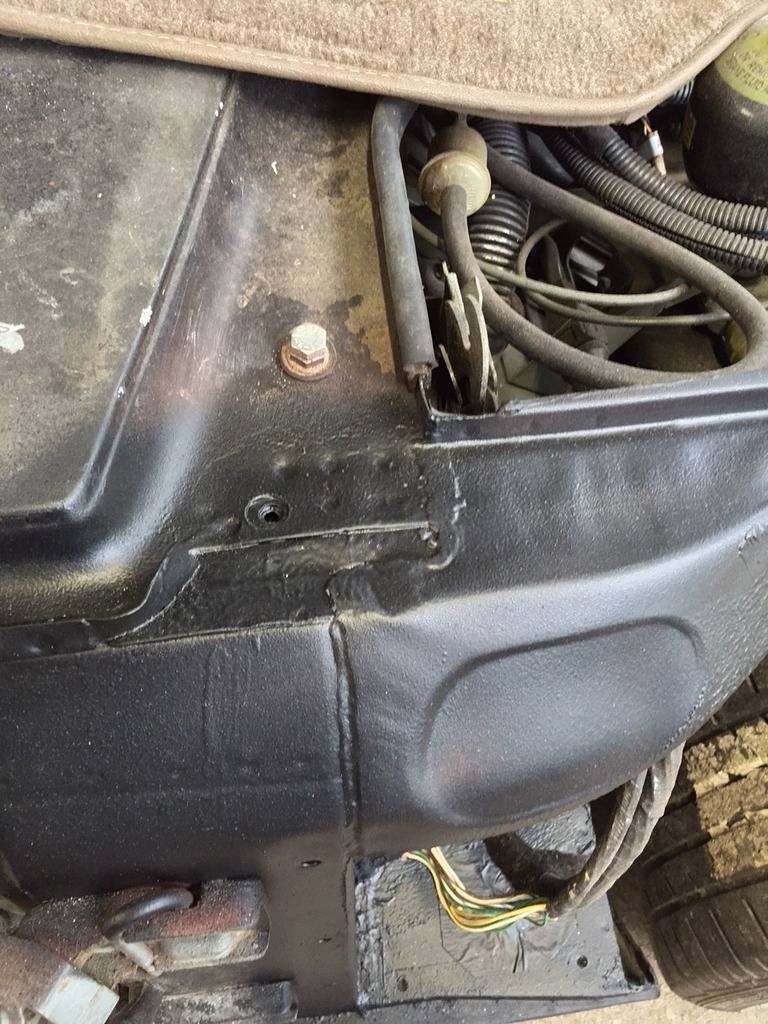
Detour from shooting brake bodywork.
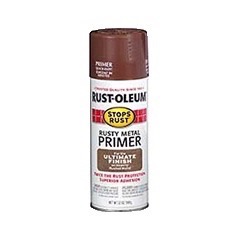
Scuffed up the rust on the front frame rails, sprayed Krud Kutter rust remover to address the rust and then sprayed Rustoleum heavy rust primer. (I love this stuff!!) Then sprayed truck bed coating.
Eastwood sells an "Internal Frame Coating" that is meant to coat the inside of parts inaccessible to regular paint. I liked the Eastwood paint but then discovered the Rustoleum paint, cheaper and seems to coat just as well. (I use the Eastwood tubing and brass 360 degree fitting attached to the Rustoleum paint).
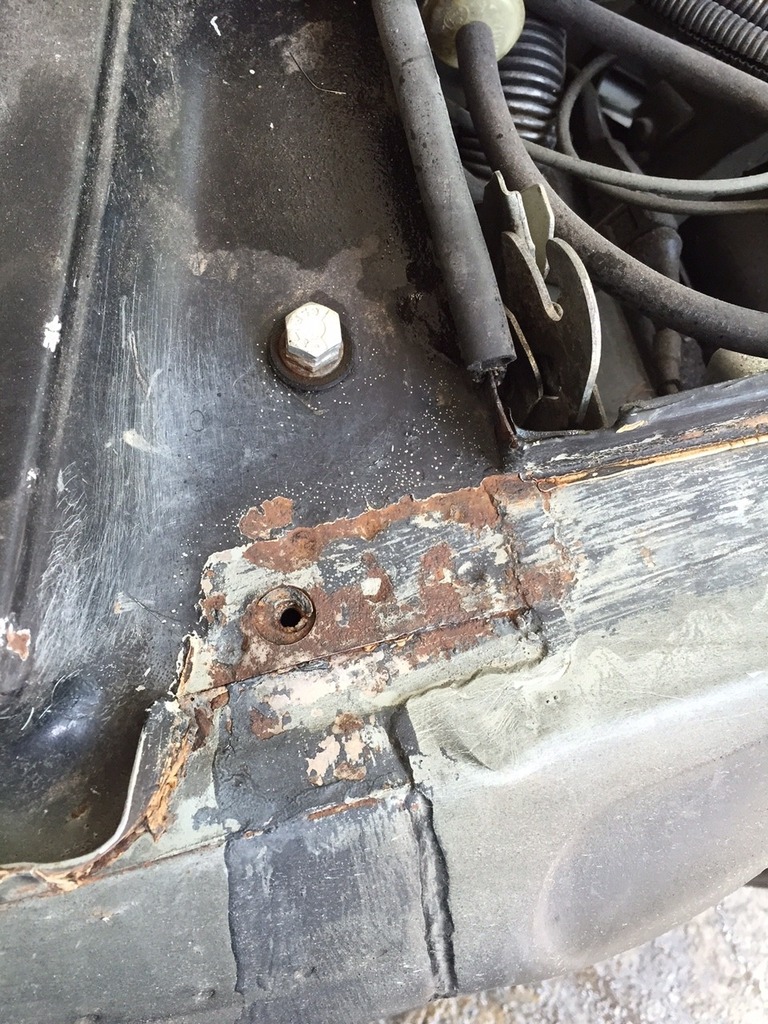
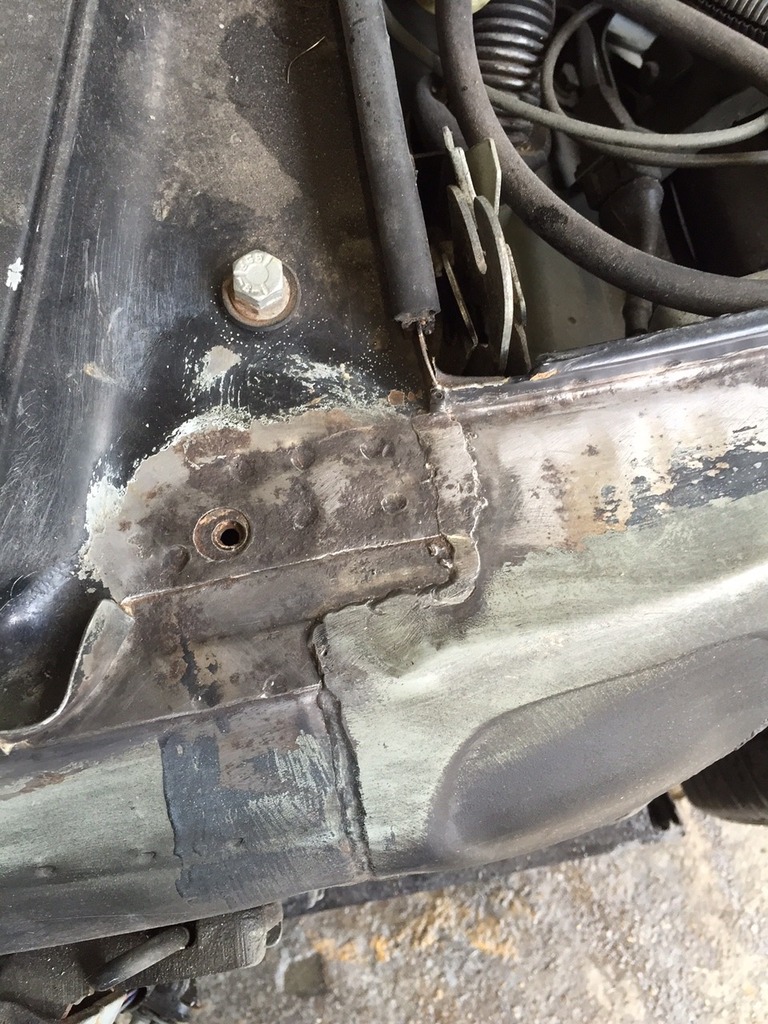


The following users liked this post:
orangeblossom (07-29-2015)
#97
07-29-2015, 12:32 AM
Veteran Member
#98
07-29-2015, 03:55 AM
I love it! makes huge difference in being able to work outside.
The following users liked this post:
orangeblossom (07-29-2015)
#99
07-29-2015, 10:46 AM

Veteran Member
Join Date: Jul 2012
Location: Walnut Creek, California
Posts: 6,796
Received 2,399 Likes
on
1,880 Posts
Great work. Building and car!!!
My son had a similar need for shelter on his and her Sierra Nevada property. Found two GI surplus squad tents on Craigs List. Created end trusses for support in lieu of missing posts. One done. Four cars stored. Ancient Case tractor assisted in toque and anchor functions. One more squad tent to go. Lessons learned should go easier.
Way back when, school chum and I created A west Texas version of a "shooting brake". 29 Ford A coupe off a used car lots back row. Sixth bucks. Ran fairly well.
scroungy and "bodged" in places!!! Two kids transformed it, Redid the engine and running gear. Off with the top and fenders. Added 15" wheels and used sorta slick used tires. Off to the desert to "jack light" rabbits. One kid drives and the other stnds and shoots over the windshield.
Before that, the Ag class in high school did their version. Somewhat tired 34 Ford sedan. off wit the fenders. Same with cloth and wood top insert. One kid drives and room for three kids to shoot.
When WII came around west Texas kids could already shoot really well.
Carl
The following 2 users liked this post by JagCad:
bullittandy (07-29-2015),
texasscot (07-29-2015)
#100
07-29-2015, 06:01 PM
Great work. Building and car!!!
My son had a similar need for shelter on his and her Sierra Nevada property. Found two GI surplus squad tents on Craigs List. Created end trusses for support in lieu of missing posts. One done. Four cars stored. Ancient Case tractor assisted in toque and anchor functions. One more squad tent to go. Lessons learned should go easier.
Way back when, school chum and I created A west Texas version of a "shooting brake". 29 Ford A coupe off a used car lots back row. Sixth bucks. Ran fairly well.
scroungy and "bodged" in places!!! Two kids transformed it, Redid the engine and running gear. Off with the top and fenders. Added 15" wheels and used sorta slick used tires. Off to the desert to "jack light" rabbits. One kid drives and the other stnds and shoots over the windshield.
Before that, the Ag class in high school did their version. Somewhat tired 34 Ford sedan. off wit the fenders. Same with cloth and wood top insert. One kid drives and room for three kids to shoot.
When WII came around west Texas kids could already shoot really well.
Carl
My son had a similar need for shelter on his and her Sierra Nevada property. Found two GI surplus squad tents on Craigs List. Created end trusses for support in lieu of missing posts. One done. Four cars stored. Ancient Case tractor assisted in toque and anchor functions. One more squad tent to go. Lessons learned should go easier.
Way back when, school chum and I created A west Texas version of a "shooting brake". 29 Ford A coupe off a used car lots back row. Sixth bucks. Ran fairly well.
scroungy and "bodged" in places!!! Two kids transformed it, Redid the engine and running gear. Off with the top and fenders. Added 15" wheels and used sorta slick used tires. Off to the desert to "jack light" rabbits. One kid drives and the other stnds and shoots over the windshield.
Before that, the Ag class in high school did their version. Somewhat tired 34 Ford sedan. off wit the fenders. Same with cloth and wood top insert. One kid drives and room for three kids to shoot.
When WII came around west Texas kids could already shoot really well.
Carl