

Watch me try out a leather repair kit.

Thread Starter
|
Senior Member
Joined: Aug 2009
Posts: 504
Likes: 28
From: Scotland
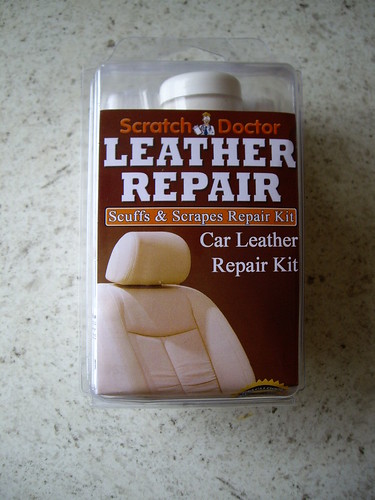
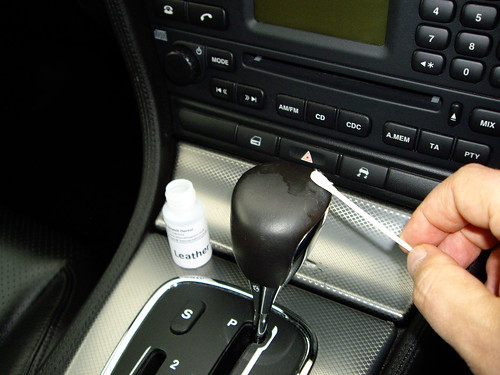
I am going to attempt to repair some damage to the leather interior of my S-Type with a leather repair kit I have bought off ebay for �17.90. Here is the kit......
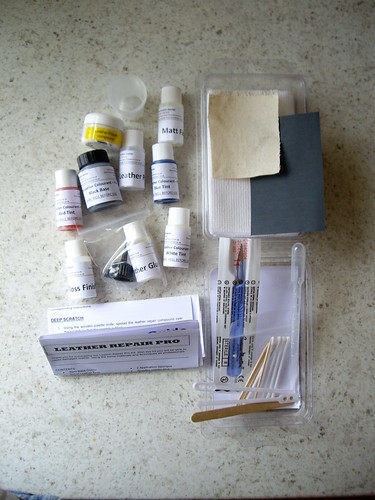
...and here is what I need to complete the repairs......
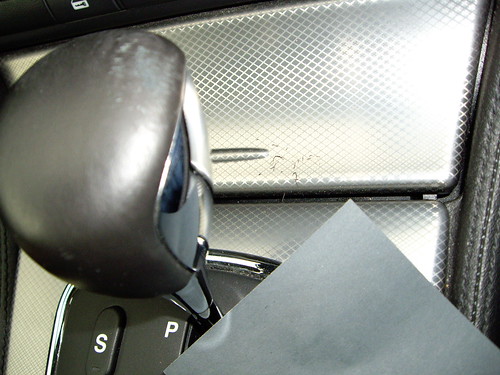
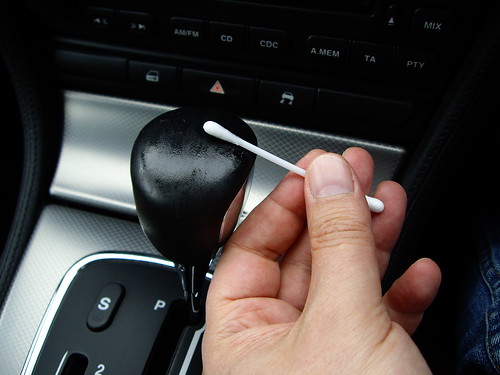
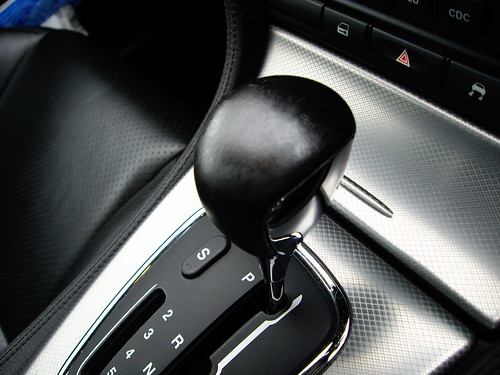
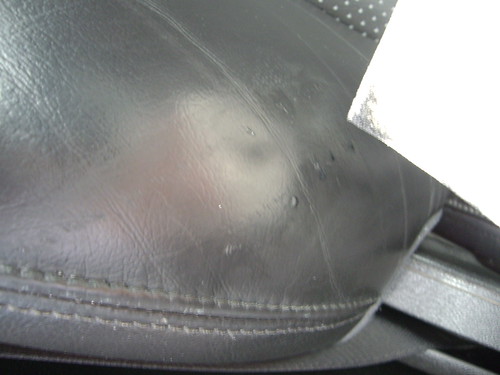
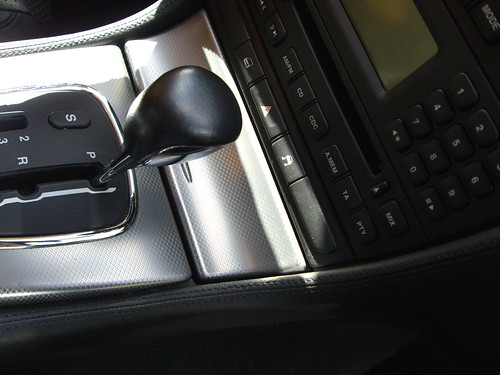
The first repair should just involve a light sand and then using the cotton bud cover the damage with the dye and then the finishing gloss. I guess that the previous owner had a ring and that is what rubbed the leather on the gear knob.

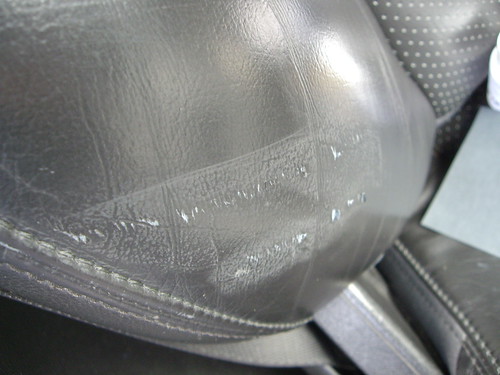
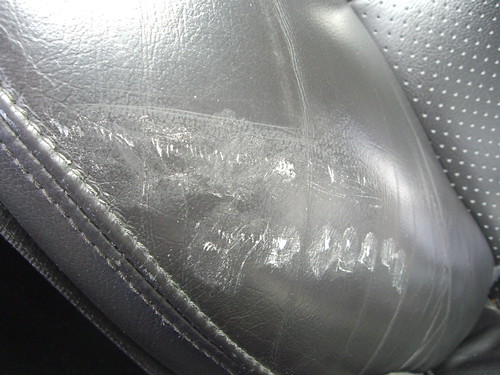
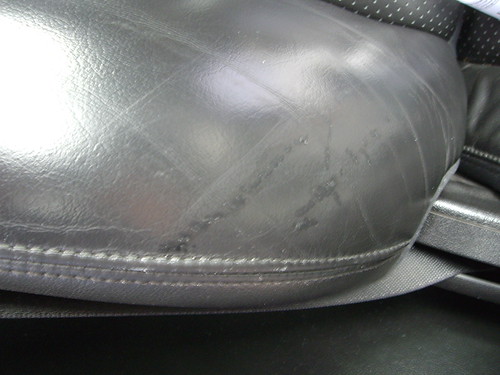
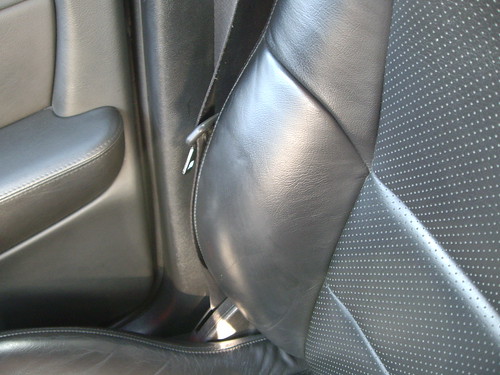
The second repair is where my wife got into the car with her new jeans on and some studs scored the seat as you can see.....
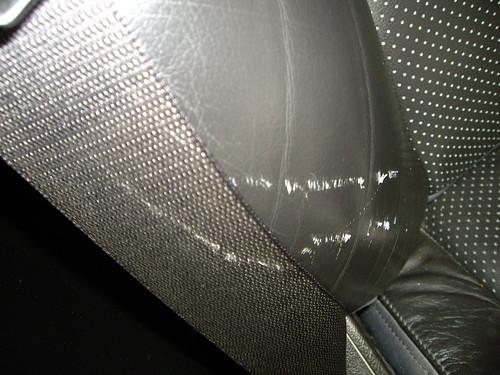
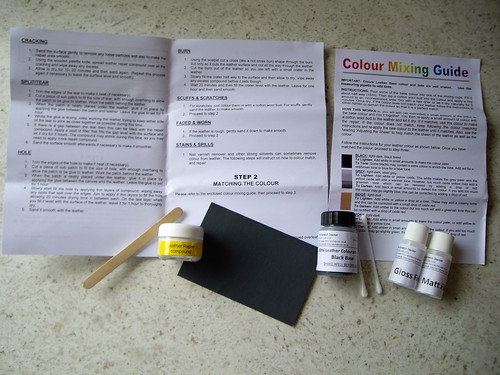
For that the kit provides sand paper, leather repair, the dye and gloss. The instructions are clear about how to deal with scratches, scuffs and holes, tears and burns. Additional colours are provided and how to mix them. But my interior is black, so thankfully I don't have to mix and try and get a colour match.
The first job will be to give the leather a really good clean.
...and here is what I need to complete the repairs......
The first repair should just involve a light sand and then using the cotton bud cover the damage with the dye and then the finishing gloss. I guess that the previous owner had a ring and that is what rubbed the leather on the gear knob.
The second repair is where my wife got into the car with her new jeans on and some studs scored the seat as you can see.....
For that the kit provides sand paper, leather repair, the dye and gloss. The instructions are clear about how to deal with scratches, scuffs and holes, tears and burns. Additional colours are provided and how to mix them. But my interior is black, so thankfully I don't have to mix and try and get a colour match.
The first job will be to give the leather a really good clean.
Last edited by Delta66; Sep 26, 2009 at 12:08 PM.

Thread Starter
|
Senior Member
Joined: Aug 2009
Posts: 504
Likes: 28
From: Scotland
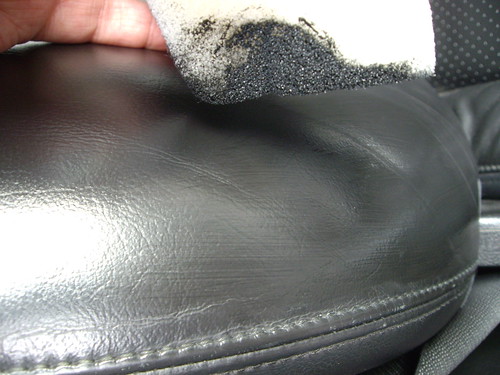
The gear knob first as it is the simpler repair. I gave it a clean (or so I thought) with leather cleaner and a cloth and got nothing off. So the next stage was to use the sandpaper. I applied very light finger pressure and went against the grain of the scuffing to get rid of the small burrs. You can see here the little bits of leather that came away on the ashtray lid....
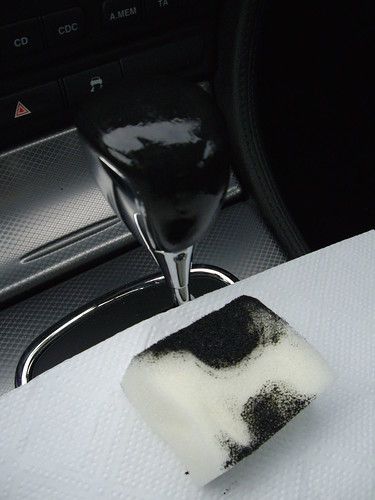
Next I used the Leather Prepare. I thought that the repair was clean, but you should see what came off onto the cotton bud! The instructions warn only to apply it to the damaged area and that is a must. It takes everything off the leather......

There is nothing in the instructions to do with drying times so I left it for an hour. Next came the dye. The instructions suggest using the applicator sponge to put the dye on. There are two square bits of sponge that come with the kit and I had thought it was just packing. When I opened the dye the lid contains a touch up brush, so I just used that, again brushing against the grain to get dye into the leather.....
I put on two thin layers, but the brush marks were obvious so I then used the sponge to dab at it as per the instructions......
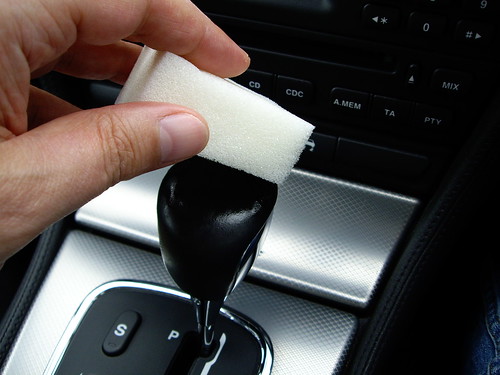
Again the instructions do not say anything about drying time, so I left it for an hour before applying the finish. The kit supplies mat and gloss finish. You can mix the two to get a match for a satin finish. For the gear knob I used gloss as it is a high wear part. Otherwise I would be inclined to mix the two. The kit comes with handy little plastic cups for mixing.
Again I put on the gloss with a cotton bud and then dabbed and feathered in the edges with the sponge. After an hour it was dry......
I had major problems trying to take a decent photo of the finished repair as the leather is now lovely and shiney and black and the scuff marks have more or less gone.
I did not get as smooth a finish as I would have liked and this kit would be difficult to use in the middle of a flat area of leather. But I an chuffed with the result for a complete novice. (EDIT - see further on where I have another attempt at this repair) Next the seat repair.
Next I used the Leather Prepare. I thought that the repair was clean, but you should see what came off onto the cotton bud! The instructions warn only to apply it to the damaged area and that is a must. It takes everything off the leather......
There is nothing in the instructions to do with drying times so I left it for an hour. Next came the dye. The instructions suggest using the applicator sponge to put the dye on. There are two square bits of sponge that come with the kit and I had thought it was just packing. When I opened the dye the lid contains a touch up brush, so I just used that, again brushing against the grain to get dye into the leather.....
I put on two thin layers, but the brush marks were obvious so I then used the sponge to dab at it as per the instructions......
Again the instructions do not say anything about drying time, so I left it for an hour before applying the finish. The kit supplies mat and gloss finish. You can mix the two to get a match for a satin finish. For the gear knob I used gloss as it is a high wear part. Otherwise I would be inclined to mix the two. The kit comes with handy little plastic cups for mixing.
Again I put on the gloss with a cotton bud and then dabbed and feathered in the edges with the sponge. After an hour it was dry......
I had major problems trying to take a decent photo of the finished repair as the leather is now lovely and shiney and black and the scuff marks have more or less gone.
I did not get as smooth a finish as I would have liked and this kit would be difficult to use in the middle of a flat area of leather. But I an chuffed with the result for a complete novice. (EDIT - see further on where I have another attempt at this repair) Next the seat repair.
Last edited by Delta66; Oct 13, 2009 at 02:39 AM.
Thread Starter
|
Senior Member
Joined: Aug 2009
Posts: 504
Likes: 28
From: Scotland
So now to the seat. Finally got a dry day. I started by giving the seat a very thorough clean. Then a light sand. I could not get all of the little burrs off and I did not want to sand to hard. My nails were long enough to very carefully pull at them until they came away. I was very gentle.
I then used the Repair Compound to fill the holes. I was very sparing with it. The instructions said to wipe off any excess, but not what with. I used a dry bit of kitchen towel, but that did nothing, so I then used some damp kitchen towel and that took the whole lot off! A second attempt, where I was very careful not to have any excess was more successful.

I did not need to sand the compound once it had dried. That took about 30 minutes. Next I used the leather preparer and then the dye with the brush applicator. I used more on the damaged bits where the most repair compound was, to cover it.
The instructions suggests using more than one coat, so I did. This time I used the sponge so as to feather in the colour.
The bits that look raised are just where the dye is still wet. The dye is very liquid and runny, so I was very sparing.
I will be leaving it to dry overnight. I have to admit that the photos are my second with the dye. I left my first attempt to dry for an hour, which is what I did with the gear knob, before I put on the gloss. But this time when I put on the gloss, a lot of the dye came off onto the applicator. So I had to wipe it all off and start again.
I then used the Repair Compound to fill the holes. I was very sparing with it. The instructions said to wipe off any excess, but not what with. I used a dry bit of kitchen towel, but that did nothing, so I then used some damp kitchen towel and that took the whole lot off! A second attempt, where I was very careful not to have any excess was more successful.
I did not need to sand the compound once it had dried. That took about 30 minutes. Next I used the leather preparer and then the dye with the brush applicator. I used more on the damaged bits where the most repair compound was, to cover it.
The instructions suggests using more than one coat, so I did. This time I used the sponge so as to feather in the colour.
The bits that look raised are just where the dye is still wet. The dye is very liquid and runny, so I was very sparing.
I will be leaving it to dry overnight. I have to admit that the photos are my second with the dye. I left my first attempt to dry for an hour, which is what I did with the gear knob, before I put on the gloss. But this time when I put on the gloss, a lot of the dye came off onto the applicator. So I had to wipe it all off and start again.
Thread Starter
|
Senior Member
Joined: Aug 2009
Posts: 504
Likes: 28
From: Scotland
I decided to put another coat of dye on the seat before I put on the finish. This time I used a good amount of dye.........
The result is much better coverage to the point where there is no trace of the repair underneath.
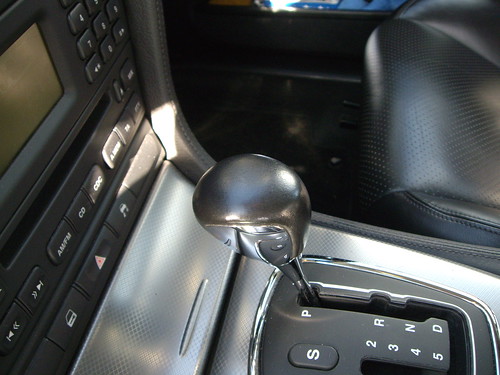
Based on the above I decided to do the same with the gear knob. I was pleased with my repair before. But it did not match in with the rest of the leather on the gear knob. So I gave it a light sand for a key and then applied a lot more dye.......
Both pictures show the dye just on with its wet shine.
The result is much better coverage to the point where there is no trace of the repair underneath.
Based on the above I decided to do the same with the gear knob. I was pleased with my repair before. But it did not match in with the rest of the leather on the gear knob. So I gave it a light sand for a key and then applied a lot more dye.......
Both pictures show the dye just on with its wet shine.
Trending Topics
Thread Starter
|
Senior Member
Joined: Aug 2009
Posts: 504
Likes: 28
From: Scotland
Two coats of the finish have gone on this morning. I used the matt finish this time as the dye had dried shinier than the rest of leather, probably because I had used more this time. I will post pictures and a summary once it is dry.
I have still got loads of the kit left, enough to do a whole seat with the dye. I will keep it just in case of accidents with studded jeans.
I have still got loads of the kit left, enough to do a whole seat with the dye. I will keep it just in case of accidents with studded jeans.
Thread Starter
|
Senior Member
Joined: Aug 2009
Posts: 504
Likes: 28
From: Scotland
So here is the completed job, starting with the gear knob.....
I am far happier with the all over finish than before. Better still is the seat....

You can see by the mark on the seat belt how it has changed from this...

Here are some more views of the repairs.......
I am far happier with the all over finish than before. Better still is the seat....
You can see by the mark on the seat belt how it has changed from this...
Here are some more views of the repairs.......
Thread Starter
|
Senior Member
Joined: Aug 2009
Posts: 504
Likes: 28
From: Scotland
My experience of the kit is that it works. It is not a professional invisible repair, but for a first time you have to know that was damage before you notice the repair. I will post back sometime in the future to comment on how well it wears.
The instructions are clear and accurate. The only thing that is missing is drying times for the dye and finish. It is touch dry after an hour in warmish weather.
My tips would be -
- dont be afraid to use the sand paper to provide a key for the dye. Apply very light pressure. Don't use the sandpaper to try and get rid of burrs. I used my fingernails, a tweezer would also work.
- get as much of the repair compound as possible into any scratches and gouges as it will make for an even repair. Once it is dry wipe off the surrounding excess with a slightly damp cloth, but avoid wiping the repaired parts. Use the sand paper for them.
- apply the leather prep fluid very sparingly and only to the parts to be dyed. It strips away any finish with ease. Use the cotton bud.
- dont use the cotton bud to apply the dye. It is impossible to get an even finish, even for very small repairs. Dab on the dye with one of the sponges. Limit where you dab to where you have sanded. I use three coats in the end because I was too timid with the first coat.
- apply the finish with the other sponge and again dab it on. It will look as if you have put on a thin layer of foam, but it dries fine.
- judge whether you need to put on the gloss or matt, or a mixture of the two finishes once the dye has dried. The first coat of dye I put on was duller than the surrounding leather. The second and third made it shinier.
- have a damp cloth and some kitchen towel on stand-by in case of mistakes. With the exception of the prep fluid you can wipe off any mistake straight away. You can also use the prep fluid to take off the finish if you are not happy with it. Then start again as I did with the gear knob.
So there you go, if I can do it so can anyone else.
Last edited by Delta66; Oct 11, 2009 at 10:49 AM.


Veteran Member
Joined: Jul 2009
Posts: 12,704
Likes: 1,236
From: Brittany France
Great series Delta.
So now your long term preventative maintenance schedule is to require all women with studded jeans to remove them before entering your car.
Simple Solutions Inc.
So now your long term preventative maintenance schedule is to require all women with studded jeans to remove them before entering your car.
Simple Solutions Inc.
Thread Starter
|
Senior Member
Joined: Aug 2009
Posts: 504
Likes: 28
From: Scotland
Thanks for the replies,
Rick, the kit as it comes does not have enough fabric to repair a tear that size. The instructions for repairing a tear - trim any ragged frays with the knife - push the fabric through the tear until it is flat underneath it - use the glue on the fabric and under the leather to stick the leather to the fabric - manipulate the leather as the glue dries to get the edges as close together as possible. Fill any gap left with the compound - sand, dye and finish.
E-mail the ebay seller. The address on the kit is 'The Scratch Doctor', Unit 5 Binns Way, Binns Rd Ind Estate, Liverpool, UK, L13 1EF. There is a postal strike on at the moment, so expect delays if ordering.

Thread Starter
|
Senior Member
Joined: Aug 2009
Posts: 504
Likes: 28
From: Scotland
Thanks russian. The repair has been treated along with all of the seats to some Autoglym leather conditioner. It really makes the seats feel more supple and its as if the leather has got somehow thicker.
But so far so good and after a month there is no sign of deterioration of the work.
But so far so good and after a month there is no sign of deterioration of the work.