When you click on links to various merchants on this site and make a purchase, this can result in this site earning a commission. Affiliate programs and affiliations include, but are not limited to, the eBay Partner Network.
1 AM est : I get urges to do random tasks in the wee hours, some times only clad in boxers shorts & slippers hence the back yard privacy fence to keep my neighbors @ ease lol.
Thank you for not reversing the photo and giving us a selfie.
Picked her up from the shop where she had gotten her hood, both bumpers, the backs of the side mirrors and the door handles surround repainted. She looks amazing! Also purchased some new wheel badges in black and silver to set off her large aggressive tires.
Sanded the areas w/ major failure(the lightest green) & scuffed the surrounding areas for blending
That looks like there is no way back .. and there isn't ....
Take the leaper off the hood, only 5 min work, will spray a critical area much easier.
Any why don't you do the clear coat all the way to the window frames?
Not a specialist here, but I figure that will prevent you from having a very bad edge line straight over your roof, which I doubt you will be able to polish away a full 100%.
Thank you for not reversing the photo and giving us a selfie.
Ehh I've been working on my abs' there sir lol !
Originally Posted by ericjansen
That looks like there is no way back .. and there isn't ....
Take the leaper off the hood, only 5 min work, will spray a critical area much easier.
Any why don't you do the clear coat all the way to the window frames?
Not a specialist here, but I figure that will prevent you from having a very bad edge line straight over your roof, which I doubt you will be able to polish away a full 100%.
That will be scuffed before prime & paint. Yes the leaper's coming off now. It's a learning experience for me, @ worst case scenario it is due in for professional paint in May so if things go awry, it won't go for long lol.
The Crown Royal's soon to flow so,,,,, The point of no return has been breached lol !
Last edited by King Charles; Apr 7, 2017 at 06:34 PM.
Picked her up from the shop where she had gotten her hood, both bumpers, the backs of the side mirrors and the door handles surround repainted. She looks amazing! Also purchased some new wheel badges in black and silver to set off her large aggressive tires
Looking good, and nice to see you bought the original 3-D wheel caps, they are sooo much more beautiful than the modern ones.
today I had the car up on jack stands and did some inspecting. Also marked the exhaust for removal at the shop this week. I'm having the front mufflers removed and then will decide on whether or not I want to do the x-pipe. Will attack the passenger door interior latch tomorrow to see if the cable is bad or the connection to the latch. My wheel bearing replacement is still in great shape and inspected all others for any failure.
For painting/masking those edges a bit softer you could try "backmasking", I personally haven't done it but I've learned a lot about painting from videos from these guys (go to around 5:50 for a demonstration on backmasking):
Well the experiment went awry, lol. After a seemingly successful sand,prime prep stage. The initial spraying went well, yet during the curing/drying stage our make shift paint booth made from 2x4's & plastic, w/ space heaters(done overnight).
Was caught by strong wings due to an erroneously partially left open garage door, causing the beams to fold & render the plastic draping & pulling over still tacky/wet paint. Not a pretty sight @ all & my associate whom is responsible for manning the drying final polish stage is lucky he doesn't have black eyes lol. Leaving the garage door open is unacceptable.
I am doing damage control & cleaning up what paint issues I can with a buffer & carefully used nail polish remover. But it is due for a professional's touch in a matter of weeks, so my misery will be short lived.
I will post pics when I calm down & have zero urges to punch my associate/co-defendant.
Wheel badges installed. They are identical to the OEM ones but a different color background. I think the black looks much sharper then the gray.
Nice ! I'm debating on the green or the black, the seller said it's closer to opalescent green rather than BRG, & my BRG looks black in some lighting so I may go w/ black hmmm.
Edit : Also my paint miscue will be remedied much sooner, my guy had a cancellation, I'm due in 24th of this month !
Last edited by King Charles; Apr 13, 2017 at 01:16 PM.
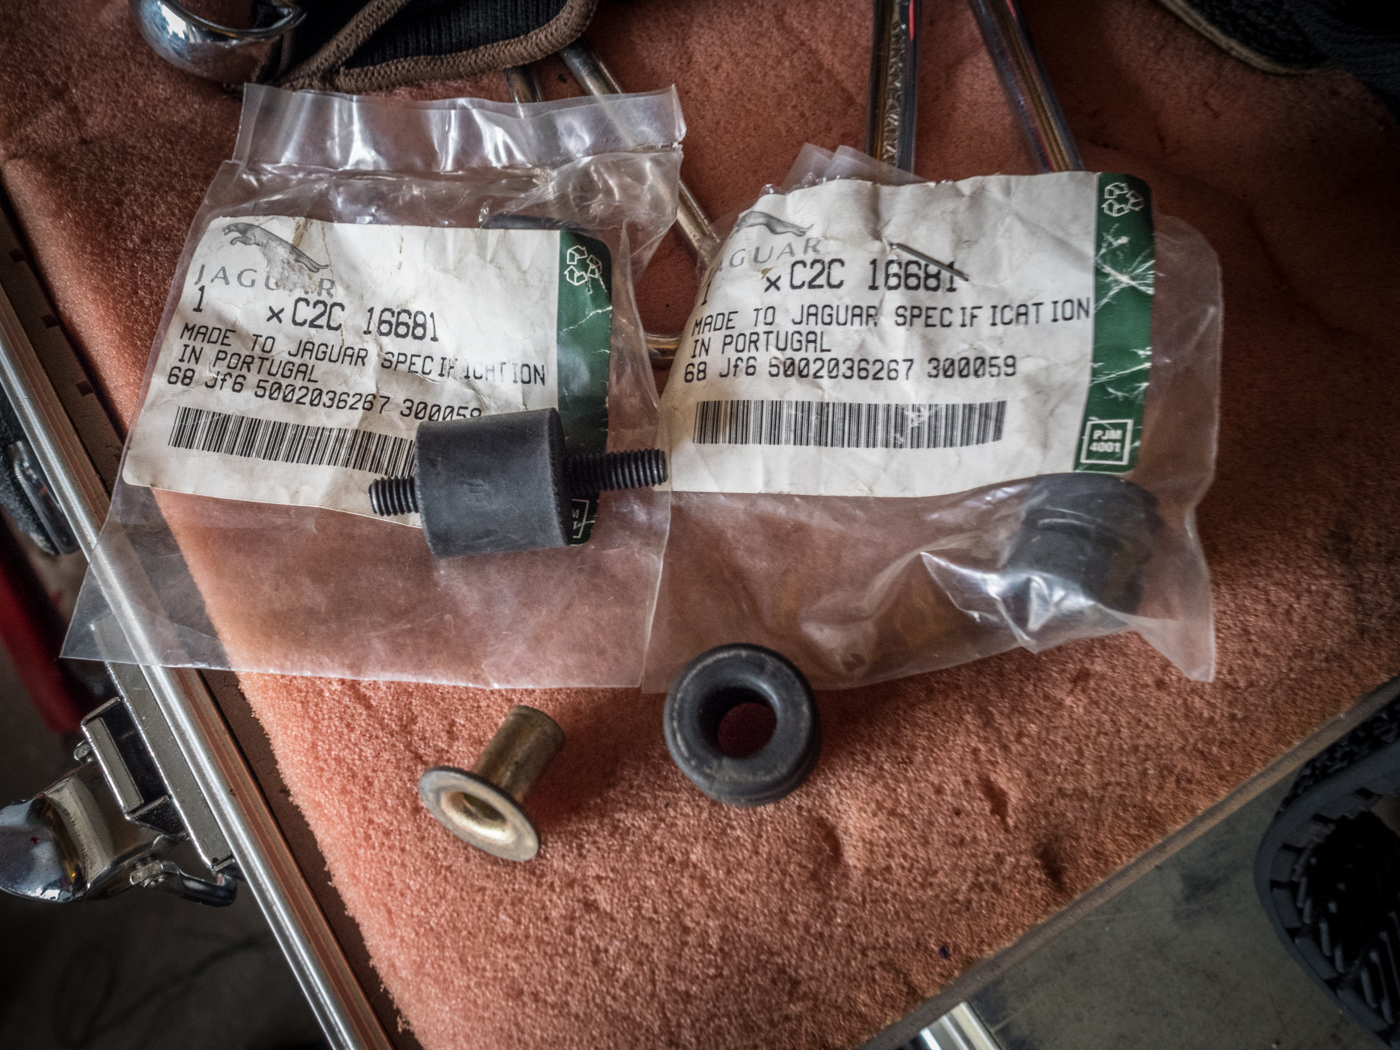
I had noticed the grommets that hold the mounting bracket for the supercharger coolant pump had deteriorated. So I looked them up on my SNG Barratt Catalogue. Part number CBC 8262. Checked with my local Jaguar dealer who confirmed the number and would you believe it stocked two. At a considerable price, Euro 11 each! Still, as maintenance cost for my XJR go, this is peanuts. So I popped over and bought them. But when I got them they looked to big.
Still, took them home. Sure enough by the time I got the old ones off, they were clearly to big. So I did some further digging into various bits of documentation. Appears, this used to pn CAC6426 and has been replaced by CBC8262. However, Jaguar got it wrong. It just won�t fit.
So I went back to the dealer. I went through some parts drawing until I found a few grommets that sort of looked similar to the old ones. Luckily, the guy had those as well.
I had to take the air filter housing off to get at these grommets. Noticed that one of the mounts had completely sheared off! According to my Jaguar parts guy the Jaguar part would cost Euro 75. Really, for a piece of rubber. He suggested I try the landrover one, one Euro 10. I like to keep my cars original, but this is ridiculous. The landrover part did fine!
Here you can see the original grommets:
The new ones:
The air filter with the broken mount:
Jaguar old and broken, replaced by Landrover new and shiny (and cheap!)
The new proper grommets, the new mount for the filter and the spacer that goes into the grommet. I managed to somehow loose one of the spacers. My part guy did not stock it, has to come all the way from the UK. Will take a few days and a few Euro�s only.
Job nearly done.
Why are my pictures showing so small. I�ve used these on different forums and they show much larger?
Thought I had been hearing the "death rattle" coming from the VDP on cold start. No service history on the car before I bought it. Took it into the shop - they were only able to get the RH side valve cover off (afraid to break the rusty dipstick off the LH side of the block) and they reported that the secondary tensioners appeared to be in excellent shape and possibly previously replaced. Is there any chance that upgraded tensioners would still be orange in colour..?
Is there any chance that upgraded tensioners would still be orange in colour..?
I have never seen them for real, and I am not going to take my covers off for you , but I read before the plastic parts turn orange after a while.
I guess it is the oil.
Last edited by ericjansen; Apr 14, 2017 at 04:22 PM.


 .
.