When you click on links to various merchants on this site and make a purchase, this can result in this site earning a commission. Affiliate programs and affiliations include, but are not limited to, the eBay Partner Network.
Hey everyone I wanted to share some customization and include some helpful things and comments for others thinking about customizing. Sorry there isn't the most images I'm one to do things put it all together than think man which i had taking some pics with everything striped out.
Center Console and Stereo
Lets first start off with a double din stereo (for you that don't have the navigation setup)
If you have read up on installing a double din stereo before you will no doubt found out it can be a complete pain in the **** and I can confirm that it is indeed a complete pain in the ****.
Here is what I ended up with and I'll give some pointers for others that want to attempt this.
Center console/Armrest removal
Note: you will need some different star screw to remove most of this (just get a full set of them is best very handy)
I don�t need to give you all the removal instructions since there is a nice youtube video here
to show you
For the arm rest there is a panel on each side of the canter in the foot well. You should see on that panel a screw, just take that off and the rest of the panel is just clips and comes off pretty easy (same for both sides).
Now remove the leather boot from the hand brake it is held in with pretty flimsy plastic clips just pulls out then goes off over the hand brake.
Under the armrest down in the bottom there is a rubber mat, remove that to show 3 screws (that�s all that hold the back down)
Up front now you should see screws on each side holding the rest of the arm rest in place. Once its all lose carful slide the whole lot out and over the handbrake and your done.
Double/Single Din Install KIT
For the double or signal din install you will need the METRA dash kit which you can get off ebay. I suggest you get the one that comes with the wiring harness and antenna adapter because you will need both anyways (save some money).
Find a Stereo
Find the shortest (in depth) double din stereo you can because clearance is a HUGE issue thanks to the air duct bang where a double din would fit nicely. (I would suggest getting a single din unless you love headaches)
The Stereo
The double din stereo I went with (before I knew just about nothing will fit) was a Eonon G2240U, yes that�s right you have never heard of them but this stereo is simply amazing for the price delivered of around $220. It has GPS, DVD, Radio, Bluetooth, AUX in and out, Ipod and USB input. Features a easy learn for steering wheel controls which is another $50 saving right there over buying a clunky control box. You can just press the steering wheel control then tell it what you want that button to do and it will remember it (damn cool). It even can do something called duel zone so you can do GPS in the front while playing a DVD to people in the back (if you have rear LCD setup also). Its not like this feels cheap either its solid and well built.
You can see the people I got the stereo off on ebay here Flip Down DVD Sunvisor LCD, Accessories Cables items in Eonon store on eBay!
Stereo Fitment
I ended up having to angle the stereo upwards along with taking a chunk out the back of the actual stereo (yes no warranty now lol). There is a 1 inch in by 1 inch down cut out the back top of the stereo and the RCA routed out the top rather that back just to get the damn thing to fit and it�s about the standard depth of a double din which is scary to think about. The steering wheel control to my surprise consists of 1 wire so it must send digital/pulse signals or something. The other wires are just like you expect to wire up. Just make sure to wire up the parking brake to the ground that way the stereo thinks you are in park and you can put DVD on while going along. Please don't watch a DVD while driving this is just for the kids in the back seats lol.
Custom Stereo Trim
If you noticed there is a custom made trim piece around the slanted stereo. This I cut and shaped by hand out of something called balsa foam (10lb Type II as it�s a bit harder) You can get 1" thick sheets on ebay
It sands super easy so you have to be careful not to over sand a part of it. Once shaped I then painted it black and covered it in a layer of Envirotex Lite which is an epoxy that won't set so hard that it ends up cracking and it dries perfectly clear. Then just stuck it in place with black silicon sealant and added 2 strips of fake carbon vinyl to the front to blend it in.
Custom Vinyl
Now onto the custom fake carbon vinyl. I thought this was a nice touch and actually still works well next to the wood finish which I am keeping (not a jag without some wood in sight)
Here are some templates I made to print out, sit them on your vinyl, tape the edges and with a very new razor and cut around the perimeter of the gray. This is what I did but you won't have the 20X trial and error and hours of work to get the size and fitment decent. You can pickup enough vinyl from ebay to do this for about $10
Here is what they look like but click the image which should have a link to the full size and save to your desktop. Open it in standard windows paint and print it out (should print the actual size) Each piece will fit on standard Letter or A4 paper.
I suggest printing it out on paper and then cutting the paper out on its own and test fitting before cutting your vinyl. I'm not perfect but these are slightly improved templates from the ones I used on what you see on my console. Remember use a hair dryer to help stick the corners and rounded bits down.
As for the trash/cig lighter cover you can stick that on and cut it by hand easy enough. The same for the gear shift cover but wrapping around the curved part at the front I had to end up cutting it in 2 places and over lapping it which beats having wrinkles in it but isn't perfect by any means.
Rear headrest LCD
The rear headrest LCD I ended up buying pre made ones at a cost of about $100 delivered for both again on ebay. These are not the best quality LCDs but it�s for the kids to watch stuff not to win any car shows. They blend in pretty well even though they are not actual leather. The Xtype headrest is a shape that I couldn�t see fitting a 7� LCD into (I maybe wrong) and the cost for the LCDs alone would have been what I paid for them already done.
Headrest LCD install
The kit I got is fairly simply to install the wires go down one of the metal stems. I took the seats out to install as it made life much easier. You have to feed the wires down into the seat then unhook the bottom of the seat to get your hand up and get the wires. There is a plastic bracket which is hard to remove but you can start at one side with a screw driver where you can see how it hooks together. Pry the 2 parts apart on that side then work across with your fingers and some brute strength to pull the rest apart. Go slowly and take your time and you won�t break anything (its pretty hard to break anyways) I strapped the wires to the heated seat wires that were there already as I know they wouldn�t get caught on anything when the seat moved
For the audio and video wires get some shielded ones and reasonable quality. I ran mine from the stereo down the center and out each side to the seat and strapped them to the electric seat wiring harness that comes up under the seat.
For the power for the LCD I just tapped a ground in the center under the arm rest for both monitors. For the positive I ran a cable up to the fusebox under the driver side and tapped into the cig lighter fuse. I used a proper fuse tap that plugs in and has the fuse holder for the original fuse then another for whatever device you wanted power along with another fues holder for it. Its important to go into the cig fuse because then when you turn off the ignition your monitors will go off also.
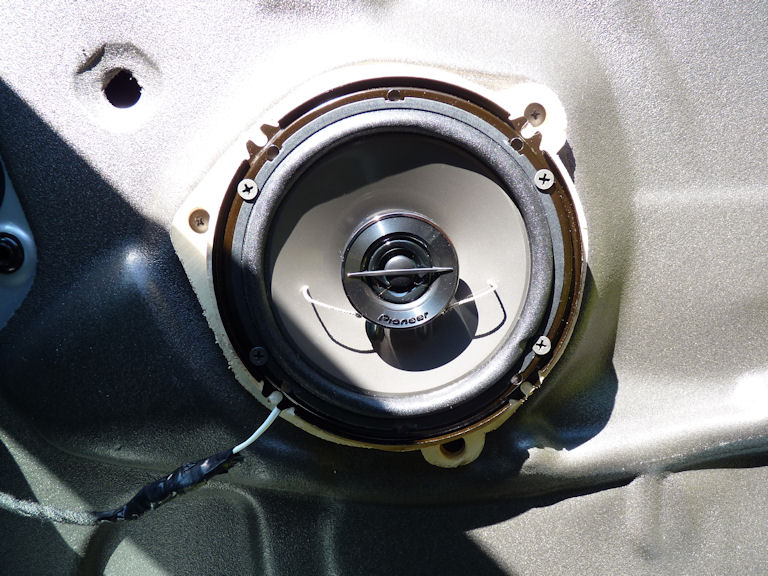
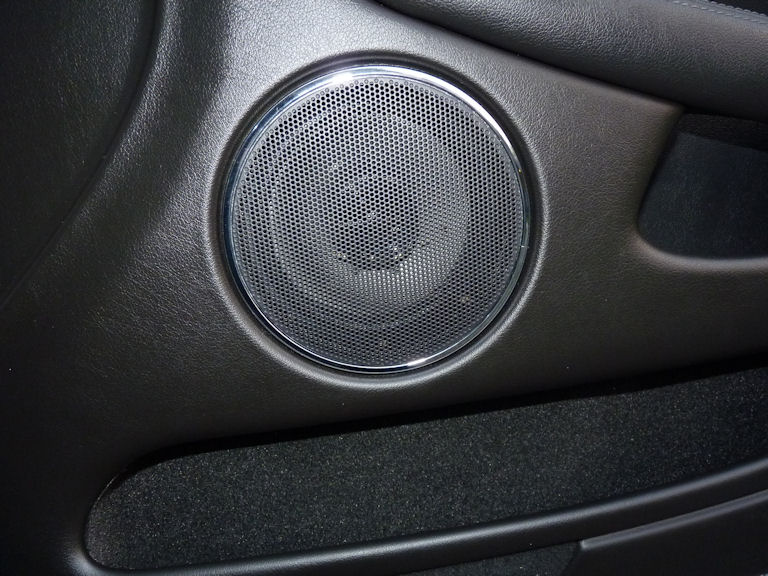
Door Speakers
Installing new door speakers is more time consuming then it is hard. I went with some Pioneer 6.5� speakers TS-G1644R. These have a built in tweeter. You can get a pair at walmart for about $33 but I found some new one ebay for about $25
I already had the front doors with tweeter but the back did not so having the extra tweeters didn�t hurt.
Door panel removal
This has been discussed a few times on this forum but I�ve just gone through doing it so I thought I�d share how I did it.
The front doors you have 2 screws visible from the bottom so remove those. Behind the door pull is a little cover with another screw under that. Now remove the little red reflector on the bottom corner to give you some where to grab. Pull sharply and fast (try not to pull more than about 4 inches out) in the bottom corner where you just removed the reflector. This should pop out probably the bottom and one on the side. Now work around doing the same thing. Always try to pull straight out this will help not to break the tabs. Having said that you will likely break 3-4 tabs on each door so expect to replace those. You can get them on ebay for about $9 for 6 I ended up just getting 3 sets of 6 so I had some to spare after I was done.
Disconnect the wires and the door handle cable and your done.
The back door is pretty similar although slightly harder to get going. There is one visible screw from the bottom and another behind the door pull like the front ones. This time you have no reflector to take out and get a grip so you will have to start at the top back corner. Try and pry your fingers under and again sharp small tug same as with the front. Work your way around till all off then disconnect wires and door handle cable.
I was able to take all panels off without breaking any of the clip holders on the door panel itself. Just the clips themselves broke so I can�t stress enough not to pull on strange angles and only small sharp tugs or it will probably break something you don�t want it to.
Speaker install
Unless you have some stupidly deep speaker you don�t really have to worry about the depth. Some have said on this forum before you can fit without any spaces while this may be true by doing that you are having your speaker sit way back away from the mesh and the sound it going to half be reflected inside your door and not out to you.
I went with 2 layers of � inch ply wood. I used plywood because its strong and screws grip in it well without pulling out unlike MDF.
Here is what they looked like cut out and installed. I used black silicon sealant to seal both bits together. The screws I used on the speakers also went into both layers to make sure fully secure.
Here is what the templates (work for both front and back doors) look like but click the image which should have a link to the full size and save to your desktop. Open it in standard windows paint and print it out (should print the actual size) Each piece will fit on standard Letter or A4 paper. The 1st one should work with any speaker and has a 5� circle in the middle. The 2nd one is a 6.5� circle with a 5� circle in the middle which will work with most speakers but you may have to adapt it to yours.
I suggest printing it out on paper and then cutting the paper out on its own and test fitting before cutting into wood.
Place the template down on the wood draw around the perimeter of the gray onto the wood then use a jigsaw to cut it out. Don�t forget to mark the screw holes.
I cut a channel out of the top layer for the speaker wires to exit from but you could do this from the bottom layer also if you wanted. Wiring the speaker up is self explanatory just check the � and + by plugging the old connector into your original speaker and checking which color wire is going to the +, before hooking up the new speaker.
Door panel fitment
Putting the door panel on is straight forward just line up your clips and hit the door panel all around with your hand. Please do make sure to hook up the door handle cable and wiring before putting the panel on. On the 1st panel I forgot to hook up the door handle pull only to find out that when I couldn�t open the door from inside lol. So before you push that door panel into place just do a mental checklist to make sure you won�t have to pull it off again.
Now with the door panel in place and the 1� spacer you have on your speaker the speaker should be fairly close to the mesh but not close enough to make contact and cause a rattle.
Before any one says I have the screws in the wrong place on the speakers you are correct but I didn�t bend the frame of the speaker tightening them stupidly tight. I also have a small layer of foam around the speaker so it can�t possible rattle.
Amp and sub
This has been covered so much that I don�t need to tell you how to install an amp but I will say a few things.
Use a thicker guage power wire than you think you need (you may want to up the power later and a insufficiently thick cable can cause problems)
Put the fuse as close as possible to your battery terminal (6� or less)
Never run your power and audio lines on the same side of the car!!!
I went with two 8� Boss speakers and a Boss 600W amp. I�m sure some of you will say Boss is crap! From my experience with them I have never had a problem and I�ve used other Boss stuff in the past. They are fairly cheap and good quality. The amp looks nice works great and the speakers give nice bass. I never wanted it to be a �shake the next doors windows� setup. Everything is custom made out of � MDF and car carpet by myself and a bit of Plexiglas over the amp to give it a nice finished look.
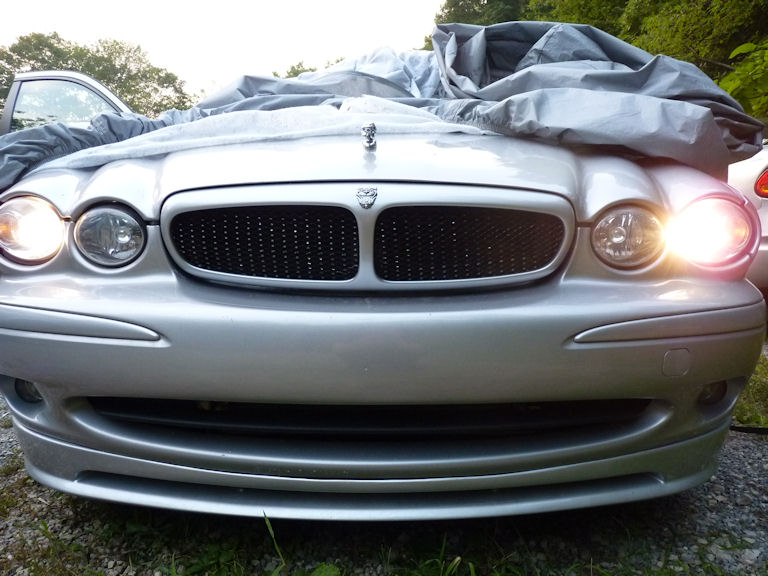
Custom grill
The grill can make or break your car and the stock one that came with mine had those �I�m wearing braces� look which had to go.
I cut the plastic gray pillars all out and then glued in some diamond mesh you can get from eBay, Lowes or some other hardware store. You can cut the mesh with tin snips and watch the cut edges because they are like razor which my fingers found out on about 3 occasions. Make sure its stainless steel or aluminum so it won�t end up rusting. I painted mine black since the car is silver. Here is what it ended up looking like
Here is some pics of the outside of the car.
Sorry this was so long, but hope some parts can help others out.
Last edited by Dr_killer_UK; May 20, 2014 at 04:46 PM.
this writeup is not complete without knowing how to wire the new deck to the speakers, without using the factory amp.
Mine had no Amp apart from the one built into the original stereo.
I thought the optional amp just powered the rear bass speakers which you wouldn't want to keep if you were doing your own amp and bass speakers.
Do you think the car needs an additional level of sound deading or as-is is fine? I am about to have my stereo installed and thinking to add sound deadening to the doors and trunk.
Doors seems fine providing you fit the speakers well. The trunk will get that annoying shake noise with good bass so I'd suggest some work in the trunk to help minimize it. Also make sure your number plate is backed with sponge/rubber cause that makes more noise than anything.
I'm at a dead end with my install. I cannot find any info on how to get to the firewall access port to tap the battery for power. Do I have to pull the dash to do this??
Any guidance is greatly appreciated. Oh, and the speaker install detail really helped me, thank you!
Do you have the left hand drive (USA model) xtype?
Yes, left hand drive. 2002 2.5L base model. I know the firewall port is on the left side, I see it from the engine side. But how did you pull cable through it from the inside?
That looks good. Here is where i took it through. I pushed it from the inside to the outside so you only have to pull 2 foot through the hole that way. Amp wire through firewall Amp wire through firewall