When you click on links to various merchants on this site and make a purchase, this can result in this site earning a commission. Affiliate programs and affiliations include, but are not limited to, the eBay Partner Network.
Reviving an old thread here, but I figured it's good info for anyone interested like I was.
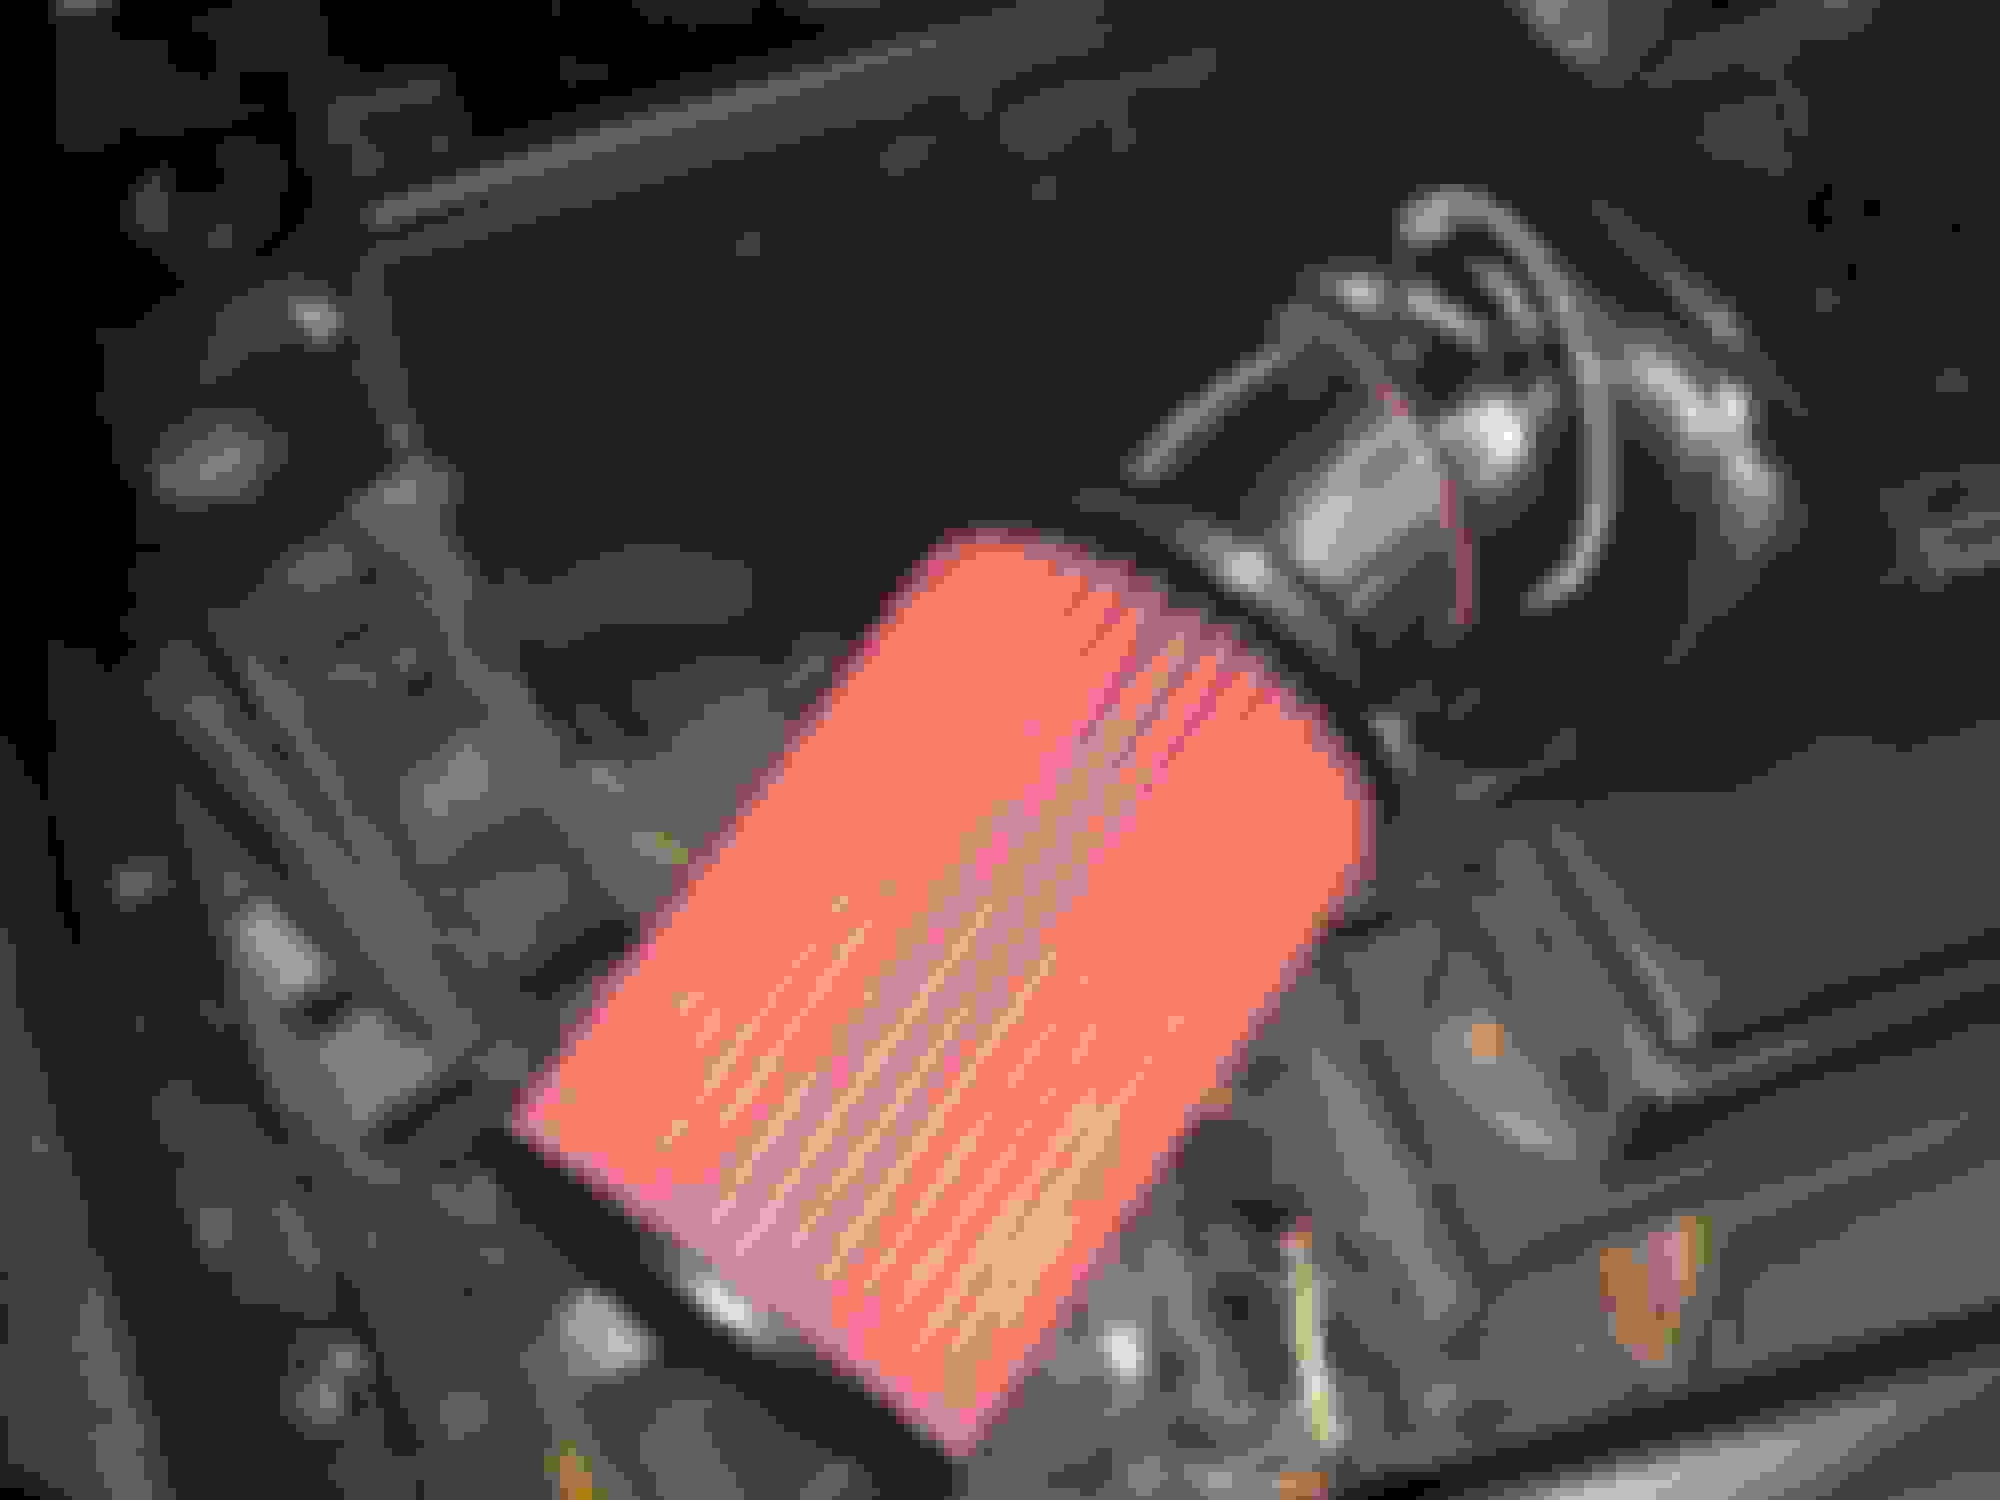
Just finished my intake on the XJR yesterday. I'm quite happy with it. If nothing else, the induction noise is worth it, but I'm hoping to see a bump in MPG as well.
Reviving an old thread here, but I figured it's good info for anyone interested like I was.
Just finished my intake on the XJR yesterday. I'm quite happy with it. If nothing else, the induction noise is worth it, but I'm hoping to see a bump in MPG as well.
Nice job! I like the way you separated it from the hot engine bay.
How did you attach it to the MAF sensor? I'm going to be doing the same job in the spring and I don't want to buy a premade kit from Mina gallery.
Also, how does it sound now? Do you have any recordings of it?
Nice job! I like the way you separated it from the hot engine bay.
How did you attach it to the MAF sensor? I'm going to be doing the same job in the spring and I don't want to buy a premade kit from Mina gallery.
Also, how does it sound now? Do you have any recordings of it?
From what I've read the Mina kit isn't very good. That's why I went this route.
I bought a 89-83mm silicone reducer and attached it directly to the MAF (didn't want to hack up my airbox). The lip on there isn't ideal and 83mm is a slightly larger than the MAF inlet, but it worked and is holding well.
The sound is great! Almost stock during normal driving, but you can really hear the blower whining at WOT. I don't have any clips yet, but I'll upload one when I have a chance.
Please do! I'd love to hear it. I'll be sure to post mine as well come the spring.
Just the GoPro suction cup mount. It's surprisingly sturdy.
Impressive.
So I took it upon myself to try and make my own piping to replace the box and extend a cone filter I found into the proper area... to my surprise, on the bottom of the air box, there's a hose clamped on. Is that for the air pump? How do I properly install it? I jumped the gun after hearing the wonderful sound of your setup.
So I took it upon myself to try and make my own piping to replace the box and extend a cone filter I found into the proper area... to my surprise, on the bottom of the air box, there's a hose clamped on. Is that for the air pump? How do I properly install it? I jumped the gun after hearing the wonderful sound of your setup.
That's the air pump intake hose. You just need a small filter (crankcase breather filter) to go on it. I'm going to remove that hose going across the engine bay and just attach a filter to the pump itself. Ideally, I would like to remove the secondary air injection all together. Can't figure out how to do it yet without throwing a CEL.
Hi, I've been thinking of some intake modifications too, and whilst cone filters look kinda cool, I think I will go down the modified stock air filter box route, haven't decided what yet, will keep you posted.
Hi, I've been thinking of some intake modifications too, and whilst cone filters look kinda cool, I think I will go down the modified stock air filter box route, haven't decided what yet, will keep you posted.
I didn't have the heart to cut mine up. I wanted to be able to revert to stock if need be.
This is a Kind of bump. I have heard this is the way to go and I have also heard stay with stock. I am one that went to the new KLM filter and wondering if I did the right thing. Also for those that have made mods can you show what you have done for a heat shield....if you think it is necessary
I fitted an AEM "Dry Flow" cone filter that doesn't use oil and replaced the stock airbox. The part number is AEM (21-2039BF) and at 9.25 inches long just barely fits after I relocated one relay to an empty location on the front of the bracket and relocated another electrical connector, but it does fit with the use of a trimmed down 45 degree elbow. If you were to get the slightly smaller 21-2038BF (8") it might be a slightly cleaner and more user friendly install. If I had it to do again, I'd probably use the 21-2038BF. I used an old airbox to cut off and donate the intake throat that clips to the front of the MAF so the connection looks somewhat OEM and is supported by the factory stud.
My problem and I can't remember where I got it, but the chrome tube is not long enough to fit the filter down and the same area that you have yours. I guess I need to go to lowes to see if I can find something to extend it further into the bay. I think that I will go ahead and get one of those heat shield that you identified in your link
I picked up a spare airbox cover at the junk yard and simply removed all the flat panel....leaving only what would be required to hold the filter in place.
Reinstalled with the cover behind the lights. Invisible. Sounds nice. Check to see that it didn't get wet in the rain and it hasn't.
I picked up a spare airbox cover at the junk yard and simply removed all the flat panel....leaving only what would be required to hold the filter in place.
Reinstalled with the cover behind the lights. Invisible. Sounds nice. Check to see that it didn't get wet in the rain and it hasn't.