


Driver door waist molding replacement


Thread Starter
|
Senior Member
Joined: Jan 2014
Posts: 129
Likes: 25
From: Boston
 Driver door waist molding replacement
Has anyone out there ever removed and replaced the so called "waist molding" on a 2003 Jag XJR ? This Molding is actually a chrome strip at the bottom of the window which contains the rubber seal for the window. I'm trying to replace mine on the driver door that was damaged by some moron using a snow scraper on the window and damaged the rubber seal. As best I can tell I believe this strip is actually glued on...anyone know ? Not surprising the Dealer cost for this strip is around $175.. Anyone know the correct part # and if it can be found in the aftermarket ? Thanks for any and all replies
Thread Starter
|
Senior Member
Joined: Jan 2014
Posts: 129
Likes: 25
From: Boston
Answered my own question..... "bit the bullet" and purchased what turned out to be the correct part and how its fastened to the all of the X308 body styles ( except the VDP which has a longer rear door) Dissapointed to see tyhat there was no response to my request on this thread. Now I know ...



Thread Starter
|
Senior Member
Joined: Jan 2014
Posts: 129
Likes: 25
From: Boston
and the answer is...........
After a month of no replies to my original post on the X308 door waist moldings, I guess I got frustrated,,,, Anyway after a LOT of internet research and a few calls to my local Jaguar dealer, I finally found the correct part # for an X308 door "waist seal" driver door.
My research revealed how little the classic Lyons body style had changed in the 5 years that the X308 was produced. ...not at all in the case of this part.
I bought the part and if I can figure out the correct way to post pictures of it here , I shall.....any "how to " on picture posting appreciated.
The molding , contrary to my belief that it was glued on to the door was incorrect. In fact ,the molding is quite substantial with built in clips ( embedded in the rubber) at the front and the rear of the molding as the pictures which I hope to post will reveal. When the arctic winter here in Boston finally ends ( if ever) and my 2003 XJR "Black Jack" (my pet name for the car) is recalled to life in April, I shall also post pictures ( assuming I learn how to) of the process to replace this waist seal.
Sorry for being somewhat of a sarcastic "wise guy" in earlier posts
Best to All
My research revealed how little the classic Lyons body style had changed in the 5 years that the X308 was produced. ...not at all in the case of this part.
I bought the part and if I can figure out the correct way to post pictures of it here , I shall.....any "how to " on picture posting appreciated.
The molding , contrary to my belief that it was glued on to the door was incorrect. In fact ,the molding is quite substantial with built in clips ( embedded in the rubber) at the front and the rear of the molding as the pictures which I hope to post will reveal. When the arctic winter here in Boston finally ends ( if ever) and my 2003 XJR "Black Jack" (my pet name for the car) is recalled to life in April, I shall also post pictures ( assuming I learn how to) of the process to replace this waist seal.
Sorry for being somewhat of a sarcastic "wise guy" in earlier posts
Best to All

Veteran Member


Joined: Dec 2010
Posts: 8,836
Likes: 2,924
From: Douglasville Ga.
Trending Topics
Thread Starter
|
Senior Member
Joined: Jan 2014
Posts: 129
Likes: 25
From: Boston
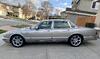
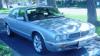
Couple of pics of my"Black Jack"
I'm testing how to post pics before I upload pics of the "waist seal" part. Expand them to full size and have a look. The car is mint except for the waist seal I'm going to replace


Junior Member
Joined: Oct 2008
Posts: 23
Likes: 1
From: Prince Edward Island, Canada
Did you ever get the pictures? Also, do you have a part number and did you find an alternative to the $175 dealer price. My seals are corroded and I need to replace all 4. I may try to take them apart and repair them. Not sure if that is possible or not.
Thread Starter
|
Senior Member
Joined: Jan 2014
Posts: 129
Likes: 25
From: Boston
Reply to TIBOW
I have not installed my driver door waist molding yet but will be doing so within the next week. I have been delaying the project because I'm trying to find out if the entire inner door panel must be removed or just the small triangular piece that covers the drivers door mirror ( same on passenger side) in order to get at the bolt that holds the mirror on to the door.
On an x308 the mirrors must be lifted up and out of the way to remove /install the waist molding, Remember ...on a VDP the lengths are different.
I got the part at www.Parts.com
for the driver door the # is GNA1711AE .Go to the site to get numbers for the other doors. They show good drawings of the doors for the moldings The total price including shipping and handling was $135.45. It is a genuine Jaguar part. I'll try to post pictures of it today and then step by step pictures when I actually install it.
The molding has the chrome top strip and is stiff rubber with two metal spring clips embedded in the rubber. See the pictures when I post them soon
I'll get back to you
Ron
On an x308 the mirrors must be lifted up and out of the way to remove /install the waist molding, Remember ...on a VDP the lengths are different.
I got the part at www.Parts.com
for the driver door the # is GNA1711AE .Go to the site to get numbers for the other doors. They show good drawings of the doors for the moldings The total price including shipping and handling was $135.45. It is a genuine Jaguar part. I'll try to post pictures of it today and then step by step pictures when I actually install it.
The molding has the chrome top strip and is stiff rubber with two metal spring clips embedded in the rubber. See the pictures when I post them soon
I'll get back to you
Ron
Thread Starter
|
Senior Member
Joined: Jan 2014
Posts: 129
Likes: 25
From: Boston
Mission accomplished !!!!!
Here we go :
To replace the waist molding you need to do the following :
First, the door wing mirror needs to be removed and "strung " out of the way.
The interior door panel DOES NOT need to be removed ( whew!)
step one...
At the door handle, pop out the little plastic cover that covers the phillips screw that holds the door escrution ( sp?) cover ( the Brits use some bizzaar terms for stuff, don't they ?. Remove the screw and remove the cover over the door handle.
Step two
Now you can gently pull back the top of the door panel enough to remove the triangular plastic cover that covers the bristol screw that affixes the mirror to the door frame. This little triangular panel is held in place by what I call "sticky goop" ( there are no clips to deal with). As it comes away, I used a knife to help separate this little panel from the door.
Now you'll see the bristol screw that attaches the mirror. Remove it and the mirror comes free from the door. I used a piece of electrical wire to wire it out of the way.
Step three
Place a piece of electrical tape at the front and rear of the molding where it meets the door to protect the paint.
Now using a block of wood and a rubber mallet, gently tap under the molding starting at the rear and it will lift off the door. There are no screws to deal with just the two clips.
Once its off, thouroughly clean the top of the door frame where the replacement will be seated.
Install the replacement seal with particular attention as to how it fits around the rear chrome pillar and the area in front where the mirror is installed.
Re install the mirror and make sure that you DO NOT over tighten the single bristol screw that holds it in place.
Re-install the plastic triangular cover. I used a hair dryer to "re activate" the sticky stuff that holds it in place. Now just re fit the plastic cover for the door handle and then have a cocktail to celebrate your successful "surgery"......I'm going to try to attach some pictures here which when you read the text should be self explanatory....,
To replace the waist molding you need to do the following :
First, the door wing mirror needs to be removed and "strung " out of the way.
The interior door panel DOES NOT need to be removed ( whew!)
step one...
At the door handle, pop out the little plastic cover that covers the phillips screw that holds the door escrution ( sp?) cover ( the Brits use some bizzaar terms for stuff, don't they ?. Remove the screw and remove the cover over the door handle.
Step two
Now you can gently pull back the top of the door panel enough to remove the triangular plastic cover that covers the bristol screw that affixes the mirror to the door frame. This little triangular panel is held in place by what I call "sticky goop" ( there are no clips to deal with). As it comes away, I used a knife to help separate this little panel from the door.
Now you'll see the bristol screw that attaches the mirror. Remove it and the mirror comes free from the door. I used a piece of electrical wire to wire it out of the way.
Step three
Place a piece of electrical tape at the front and rear of the molding where it meets the door to protect the paint.
Now using a block of wood and a rubber mallet, gently tap under the molding starting at the rear and it will lift off the door. There are no screws to deal with just the two clips.
Once its off, thouroughly clean the top of the door frame where the replacement will be seated.
Install the replacement seal with particular attention as to how it fits around the rear chrome pillar and the area in front where the mirror is installed.
Re install the mirror and make sure that you DO NOT over tighten the single bristol screw that holds it in place.
Re-install the plastic triangular cover. I used a hair dryer to "re activate" the sticky stuff that holds it in place. Now just re fit the plastic cover for the door handle and then have a cocktail to celebrate your successful "surgery"......I'm going to try to attach some pictures here which when you read the text should be self explanatory....,

Thread
Thread Starter
Forum
Replies
Last Post
hafren
XJ XJ6 / XJ8 / XJR ( X350 & X358 )
14
Aug 30, 2023 03:42 PM
philwarner
XJ XJ6 / XJ8 / XJR ( X350 & X358 )
13
Dec 6, 2021 07:13 AM
Currently Active Users Viewing This Thread: 1 (0 members and 1 guests)