When you click on links to various merchants on this site and make a purchase, this can result in this site earning a commission. Affiliate programs and affiliations include, but are not limited to, the eBay Partner Network.
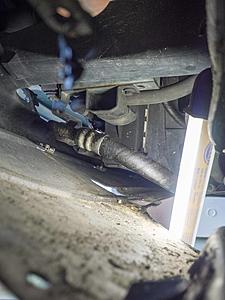
Last weekend I took my 2002 XJR out for a couple of hours. When I came home and had parked the car I noticed some oil leakage at the front. I checked and it appeared as if oil came down the left oil cooler hose.
Today I investigated a bit more. I�m a bit hampered as I can�t move my XJR much. I also have a 1982 W123 Mercedes and I�m working on that too, it�s in the way and I can�t move it at the moment.
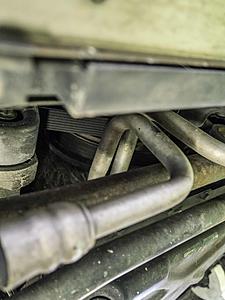
I did manage to put it on a jack on the driver side and lift it up a bit, axle stand and I took off the �plastic� cover at the front of the nose. So I could peak and at least see the hose. Ran the engine and sure enough, oil seaps out from the crimped connector on the hose and the hose itself. So looks like this hose needs replacing.
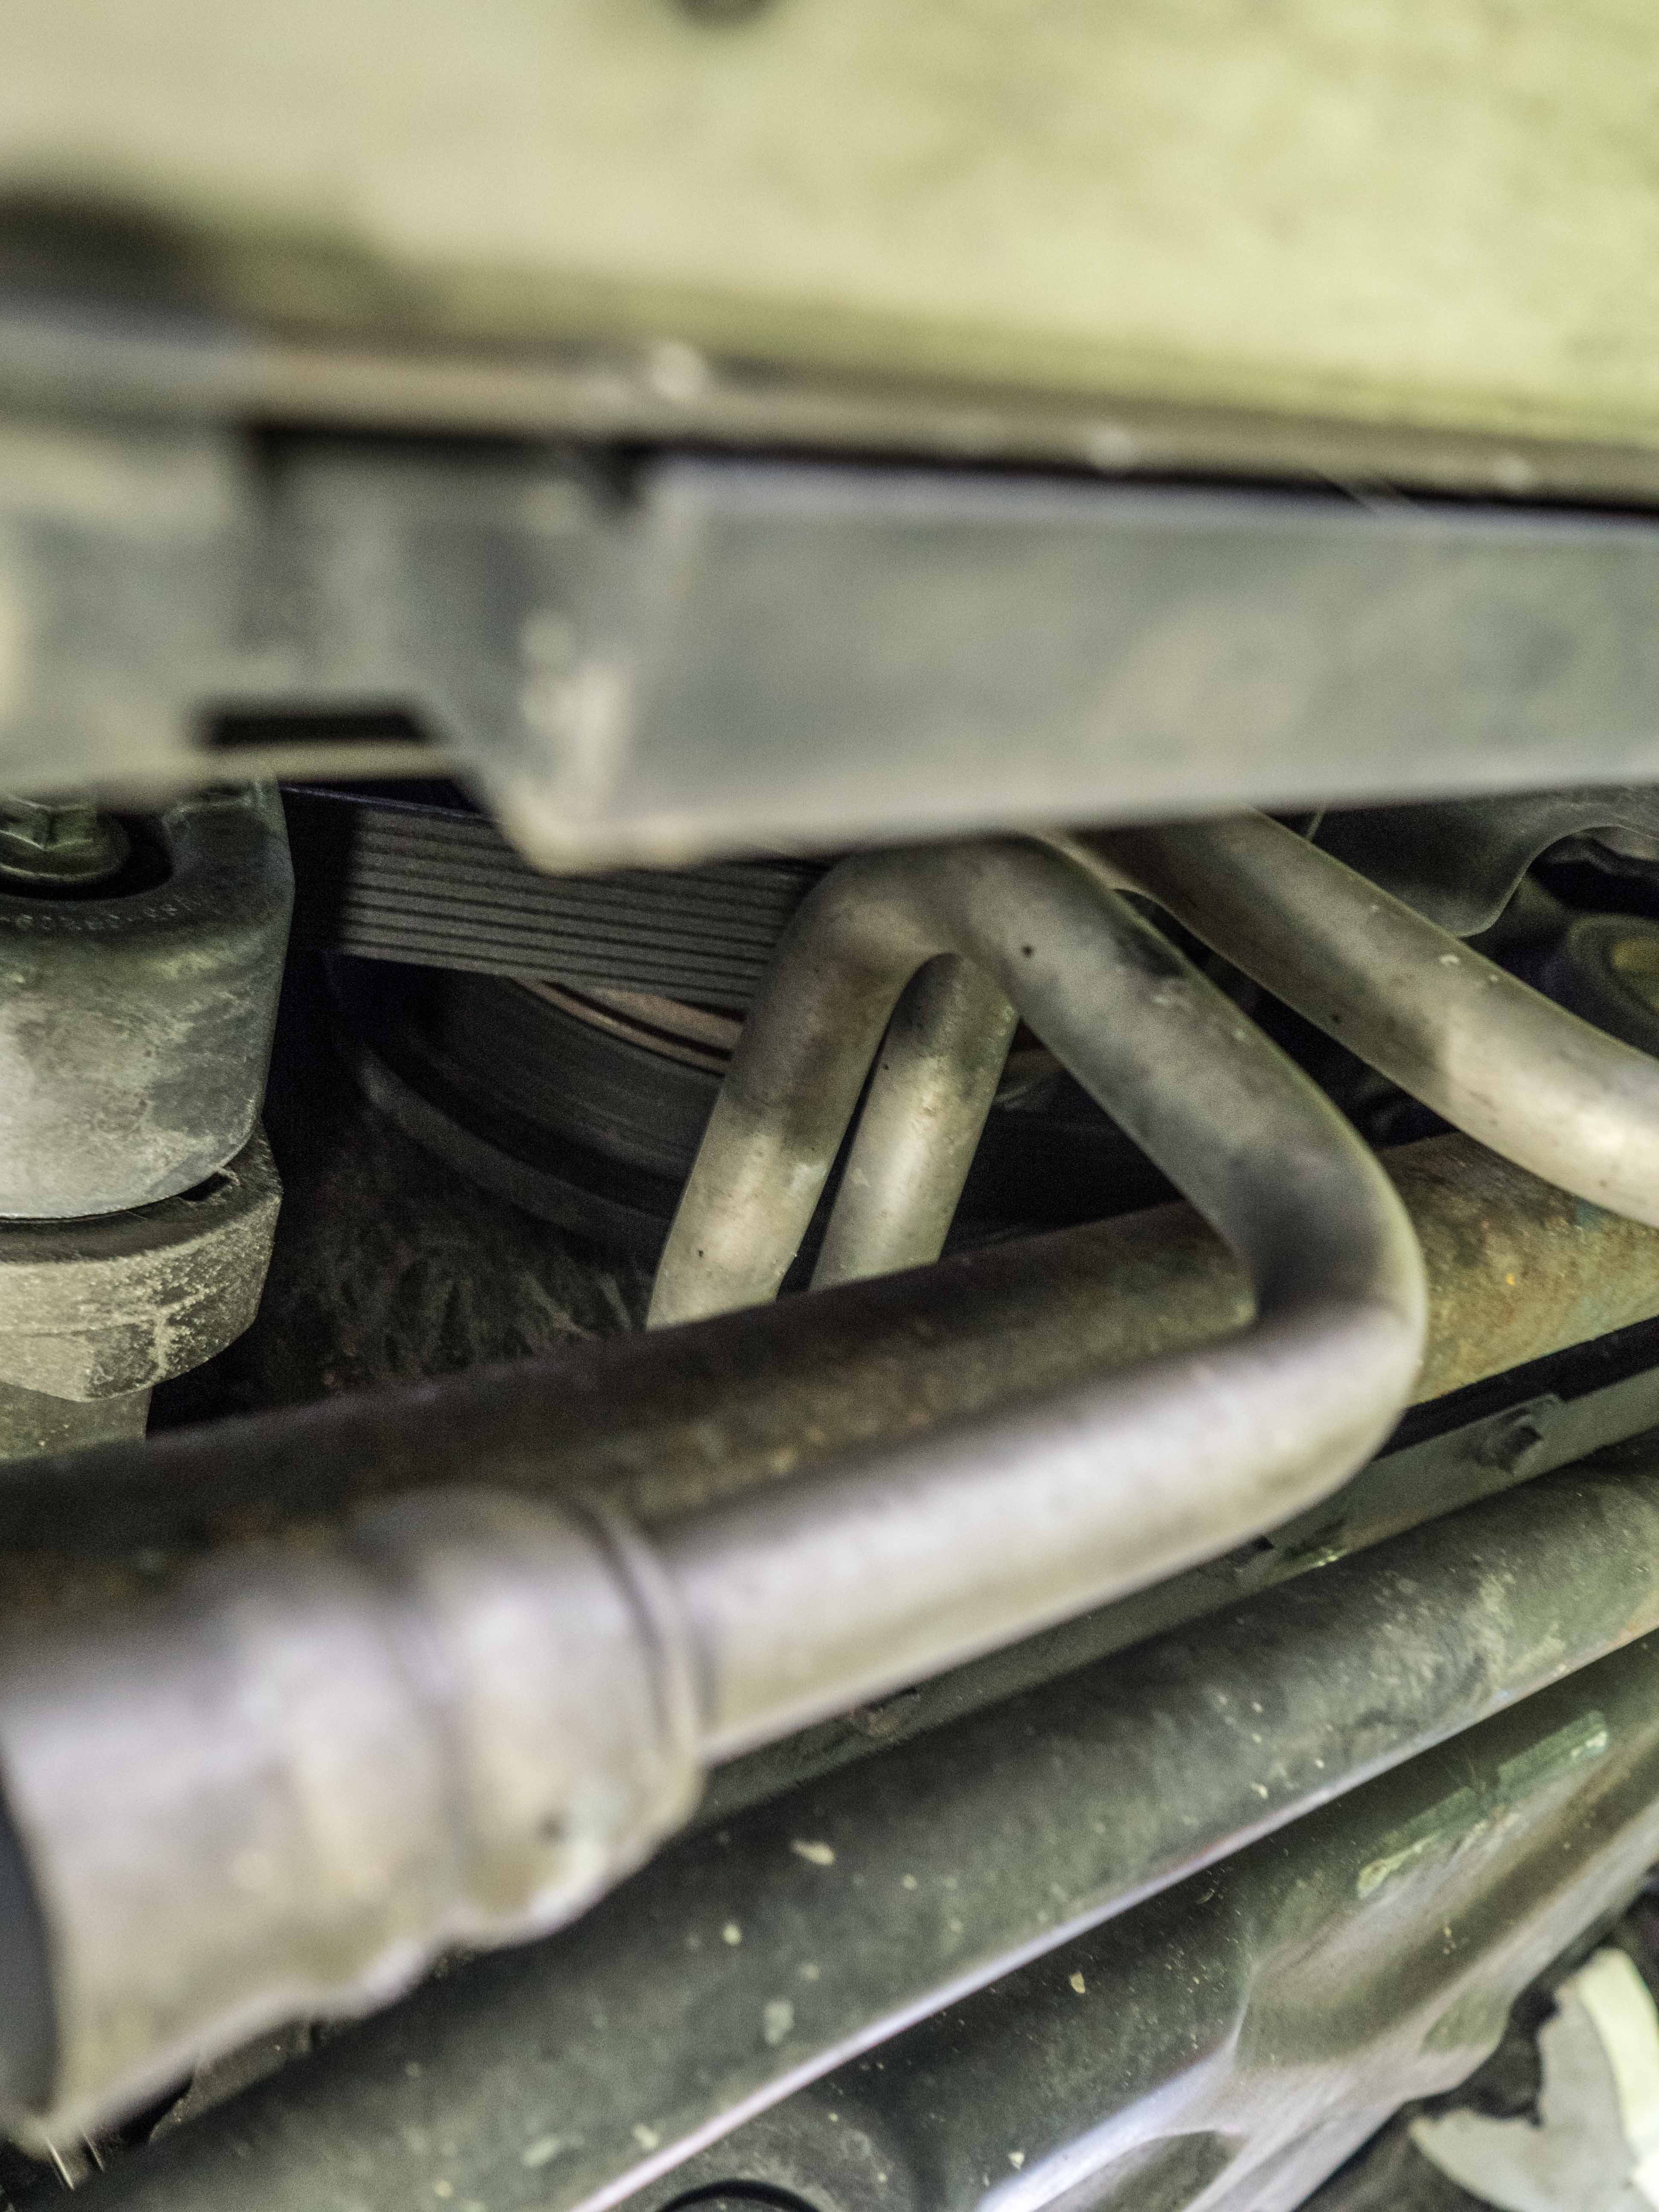
I can�t see how the hose is attached to the engine. I can see the metal part / tube attached to the hose leading through the belts and pulleys somewhere to the engine. As I can�t move the car, I can�t figure out if I can have access to the connection of the engine.
Has anybody ever replaced these hoses? How easy is to get access to the engine side. (From underneath I assume?) Any special tools required.
Also, the return hose is as old as the leaking feeder hose. So maybe I should replace it as well as long as Im at it. The only thing, they are quite expensive. Well over Euro 200.
I'll bet that is a one piece assembly you may have to trace. But in any case here's a place to start...JagRepair.com - Jaguar Repair Information Resource
An item to look up in a search on site here, because its too large for me load, is X308 Workshop, its 2489 pages long. Its a very detailed item for removal/repair of everything from brakes to the motor.
Last edited by Highhorse; Feb 23, 2018 at 08:51 AM.
Over the years have had many hose assemblies fixed -- anyone who works on big trucks would have a source for fixing the hose. Large trucks and construction equipment. They remove the crush clamp replace the hose and install another that slips around the end.
Thanks, I have a lot of documentation myself including the workshop manual. But I havent been able to find a good enough image on how to get to the connections at the front of the engine.
The other thing is I would really like to hear from others how they did it. The hose connection are made of steel and the cooler and engine are aluminium. Not that happiest of combinations, potential corrosion issues. I have read about lots of trouble on other models such as the XJS.
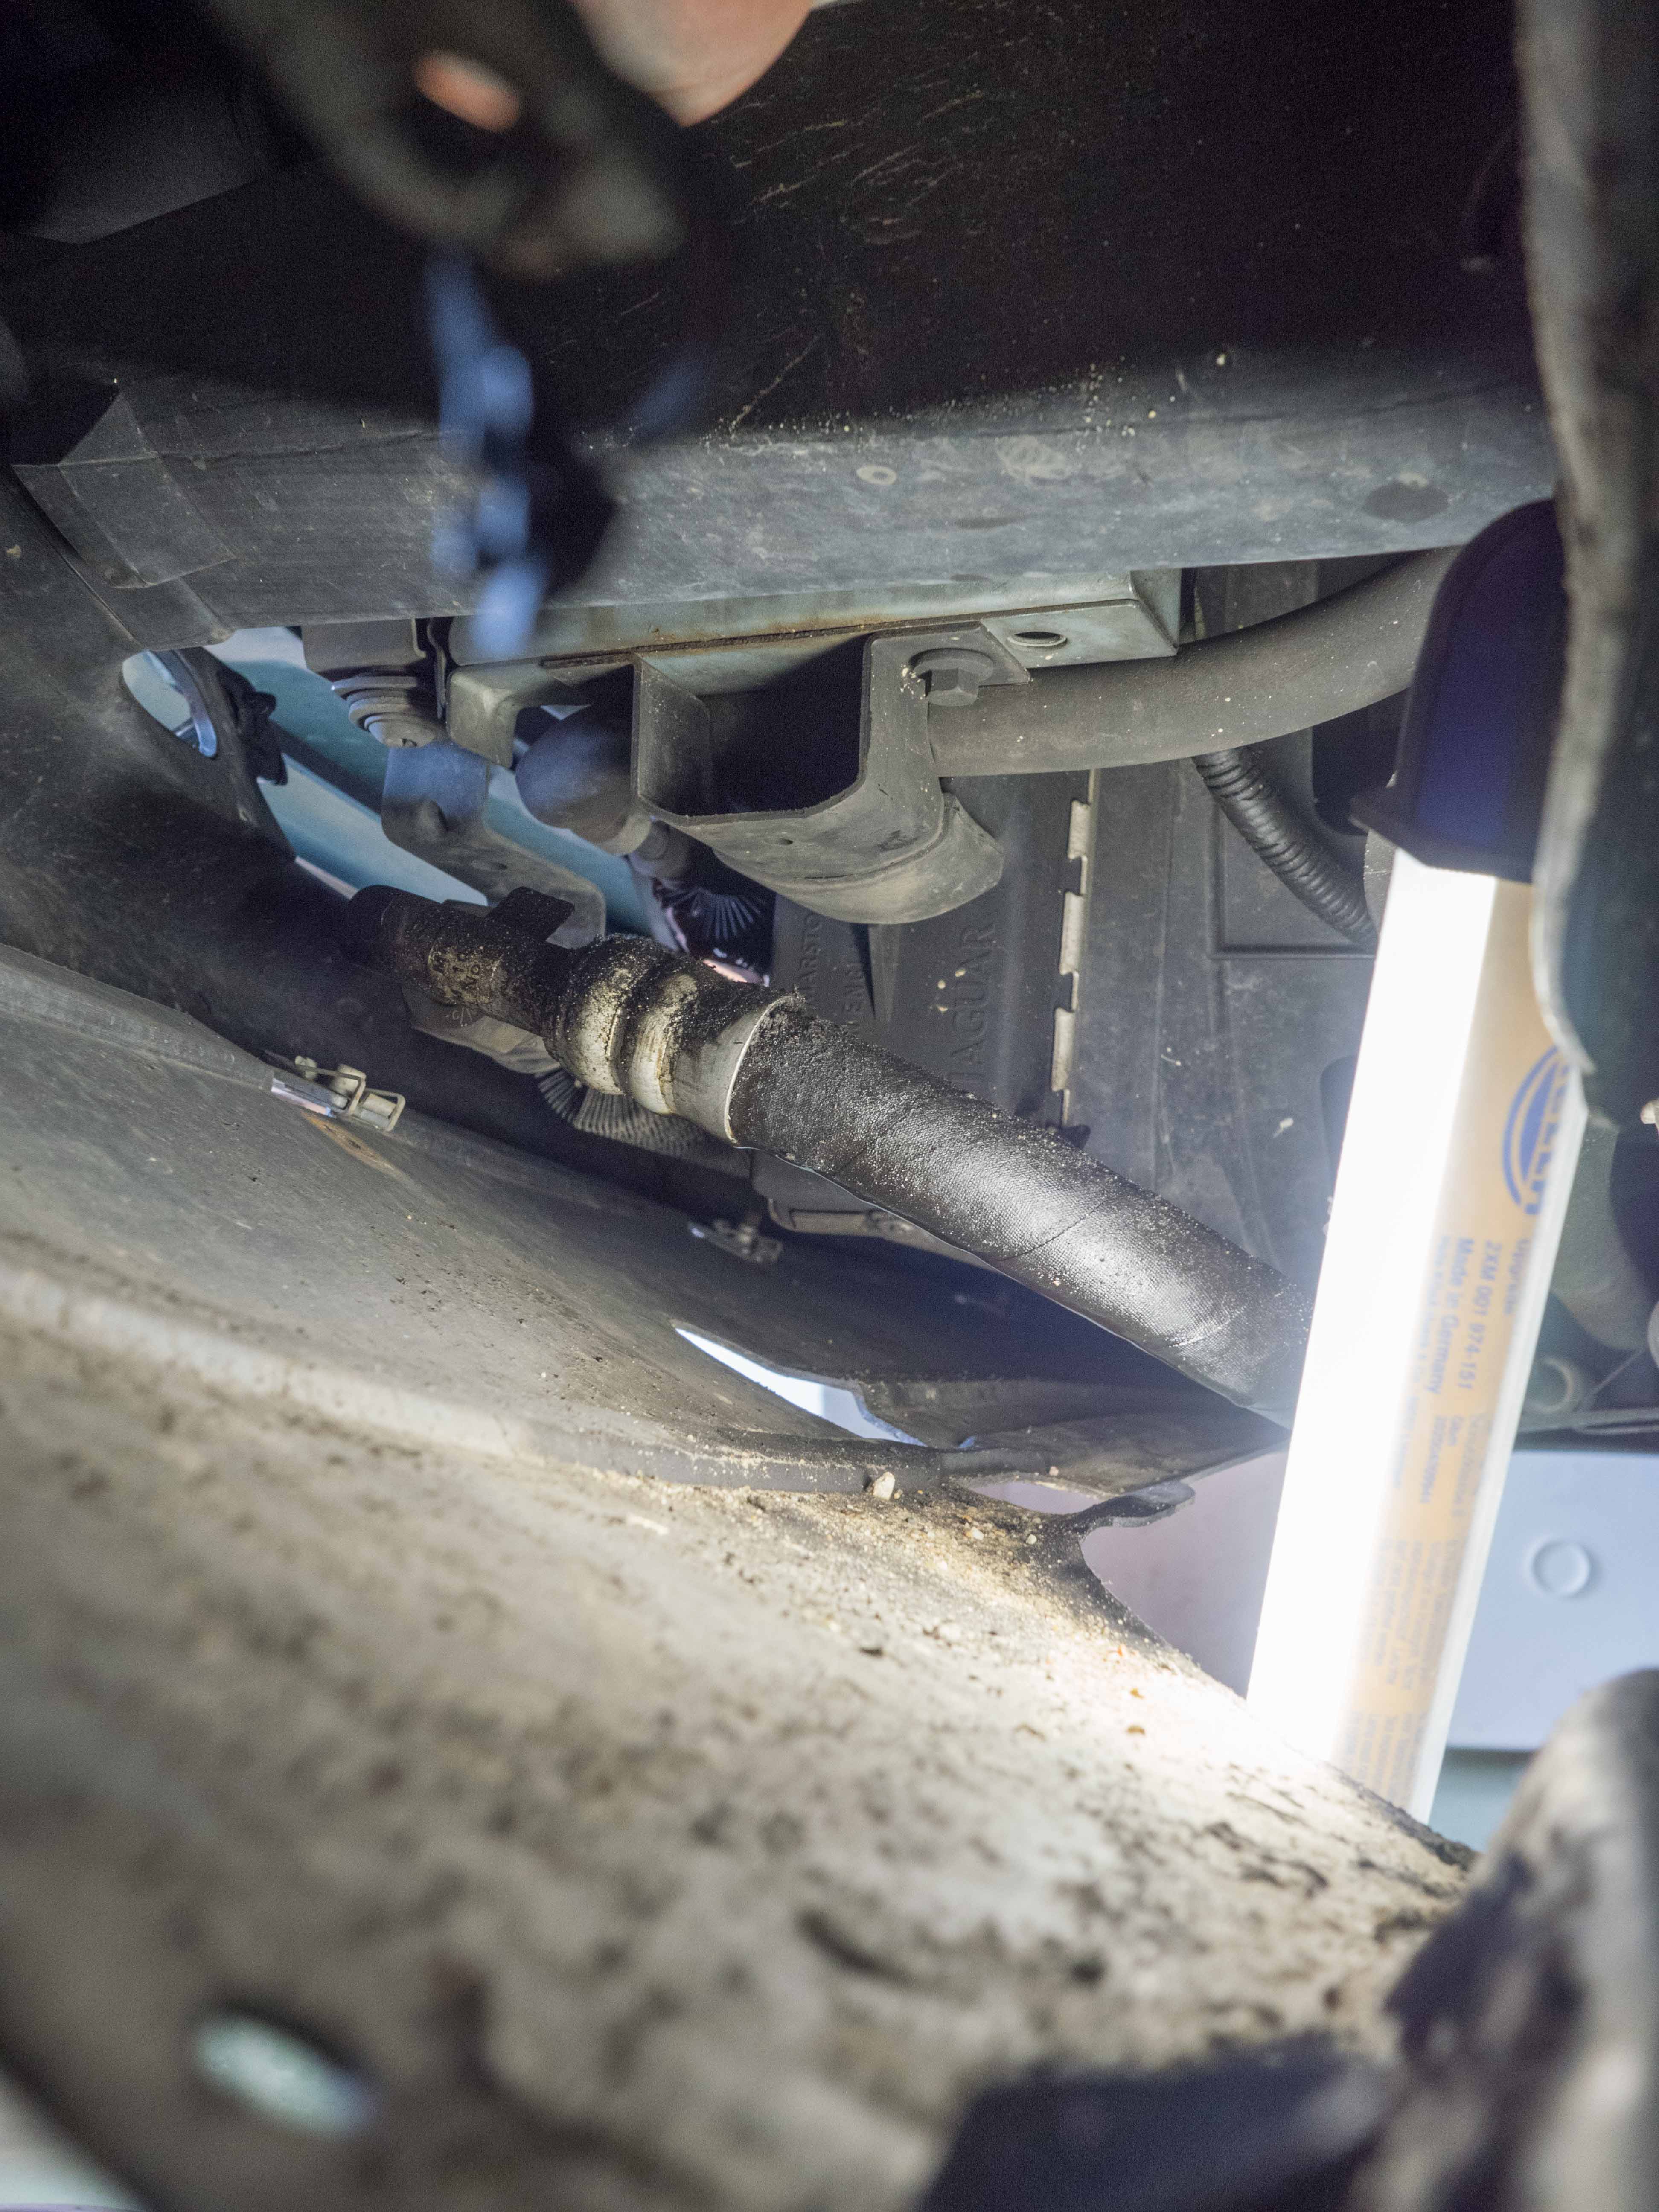
Just to be sure of what we're speaking of. Is this the hosing that is leaking? This is from my tensioner rebuild, ignore the orange loops, they were for another post.
Here's an exploded view I found which should help you in disassembly...
Last edited by Highhorse; Feb 23, 2018 at 05:50 PM.
Reason: Additional illustration added
Just to be sure of what we're speaking of. Is this the hosing that is leaking? This is from my tensioner rebuild, ignore the orange loops, they were for another post.
]
Yes, it�s the one on the driver side. so in your image the right one by the looks.
How easy it is to undo them from the eying. It looks as if both hoses are held together onto the engine with one bracket.
Would I have to drain all the oil prior to removing the hose?
Thanks
Jeroen
I have myself not removed these before. But, two things to take into consideration. When was the last time you changed your oil, so is it due? The other is, even if you have recently done your oil, do you have a clean container to be able to put it back in the motor? Yes, I would drain the oil (how hard is it really) simply for the fact you control where the fluid will go and little to no clean up for just a few extra minutes. Those lines go to a cooler and hold probably a liter if not more.
I bit the bullet and ordered two new hoses plus all the O-rings from SNG Barrett.
I know I could get the old hose repaired at a specialist. But we are going over to the UK in less than two weeks and I need to do a lot of driving, so I want to take my XJR. And I don�t have enough time left to find somebody to fix my hoses.
Ordered both the feed as well as the return hose. Even though there are no problems with the return. But it�s just as old. Once I�m underneath there I rather replace the whole lot. The original did 16 years and 155.000 miles, so that isn�t that bad.
Still can�t move my car, but at least managed to get a good look at the access at the front of the engine where these hoses disappear underneath the various pulleys and belts. Got my little digital camera in there. Should be fairly straight forward with just one nut and a clamping plate (adaptor) that holds both hoses in place as per the drawing.
Hopefully I will get the hoses tomorrow so I can have a go at it this weekend. Thanks for all the advice. I�ll keep you all posted on the repairs
Jeroen, the oil cooler pipes are indeed push fit into the block, once you remove the torx bolt and double clamp plate, a quick squirt of WD40 then gently wiggle the hoses back and forth. They should pop out easily.
Dropping the engine oil prior to this work, installing a new oil filter and engine oil once the new hoses are installed is a job called Done
So I ordered the hoses and the O-rings from SNG Barrett here in the Netherlands. They arrived last Thursday and their office/warehouse is just a 20 minute drive from my office.
I had called them before I ordered. They told me sometimes the hoses have the O-rings on them, but they could not be sure. So I ordered the O-rings, but in the end they were already fitted. When it comes to these sort of things, I would rather be safe than sorry. The last thing you want is to get stuck half way into a job and discover you are short of something like an O-ring.
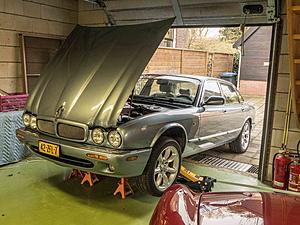
So last Saturday I replaced the hoses. First thing, I jacked up the car, put axle stands underneath. Rock the car back and forth, left and right to make sure its stable.
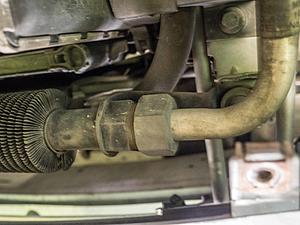
Next undo the nuts on the oil cooler. The right one came off with not to much problems, other than having to use a lot of force.
The two hoses connect to pipes that connect to the oil sump. Impossible to see, you have to do it all by feel and use mirrors and lights. Managed to undo them with no problems whatsoever.
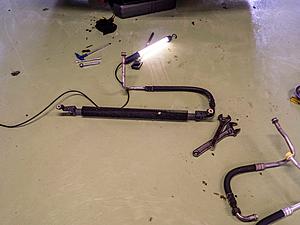
The killer was the nut on the left hose. No matter what I tried it just wouldn�t budge. So in the end I just took the whole oil cooler off the car. It�s held in place by two bolts, so really easy.
So now I could attack this blasted nut properly with the hose/oil cooler assembly on the workbench. I tried every trick in the book, brute force, WD40, heat, impact but it just wouldn�t budge.
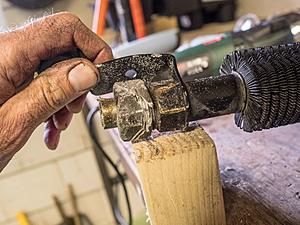
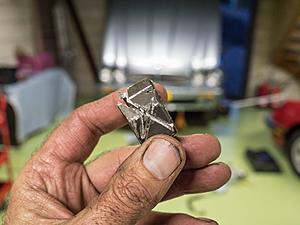
Desperate times calls for desperate measures, so I decided to cut the nut into bits. Had to rush over to the local DIY centre to get myself one of these very nifty electric saws. Very handy, very effective, allows for some very precise cutting, sawing!
When you have a nut that is so stuck, when you start sawing into it, at some point it will literally split open, with an audible pop! Very satisfying! You need to cut/saw carefully so as not to cut into the thread on the connector to the oil cooler.
From here onwards it was plain sailing. Cleaned everything thoroughly and bolted everything back on.
I did not drain the oil from the engine. I had done an oil/filter change less than 3.000km ago. With the car up on the jacks/axle stands less than 1/4 liter of oil came out of the oil cooler and hoses.
Took it for a test drive and everything is clean and dry. Job well done!
Apart from the stuck nut, my biggest problem was the cold. We are going through a bit of a wintery spell here in the Netherlands. I started around 15.00 hours at 2oC, but by the time I had finished it was 19.30 and -2oC. I have put a very nice epoxy coating on my garage floor. Whereas it looks great and allows for easy cleaning it�s not really insulating. I had to spend quite a bit of time on my back under the car on what is essentially a concrete floor!
Not complaining, because at least these days I have my own garage. Until recently I would have had to do this job in front of my house!
Anyway, morale / learning of this story: you never ever have enough tools!! Told the wife as it�s my birthday in less than 10 days and there is still lots of stuff missing from my garage inventory!
So, in 10 days from now I�m taking the Jaguar back to its home country the UK. We�re off for a long weekend and we will be doing a lot of driving!
Looking forward to it. Thanks everybody for their advise and suggestions!
Just a tip with Jaguar ownership....an essential consumable in the garage - both metric and imperial sizes, cost pennies
I have an endless number of these boxes, fuses, bolts, nuts, washers, spacers, springs, clips etc etc. But when I start a job I try to get all the parts, just in case. So then I fill more boxes with parts I did not use.
May I also add, WD40 is not a true lubricant nor penetrate. It is a Water Displacement formula, hence its initials WD and 40 being the 40th formula NASA came up with this with. It easily could had been WD-39.
For penetrating fluids, I'd recommend Liquid Wrench, PB Blaster or whatever your country has. It should list as a penetrating fluid and state a time to allow for penetration.
Overall, I'm quite happy you accomplished this considering your climate conditions. It looks like you've done an admirable job and provided us with some information as well...congrats sir.
Good men, duly noted! I somehow deleted my Sig which includes classic Jags so I use metric and Imperial all the time - on the early XJS they use both, XK MKII & E are imp.
WD40 is the easy and cheap option round my way (England), I've never seen PB Blaster or Liquid Wrench, but I'd guess the closest thing is PlusGas or German product I use that only comes out when things are 'as one' No don't get me wrong, those oil cooler pipes are a light pushfit / held - alloy to alloy. Usually covered in road crud so emptying a can of WD to clear it all out before pipe removal was only a suggestion
Now, replateing the bracket and a bit of copperslip on the back prior to refit makes it the finished article
I have got three racks with just about any bottle, tube, box with all sorts of stuff to fasten, undo, lubricate etc etc etc.
However, as Sean mentioned WD40 is the default choice of just about all DIY mechanics for when it comes to dealing with stuck bolts and nuts this side of the pond. There might be better stuff, but it’s not easily available. In fact, it’s just about the only use I have for it. Never use it to lubricate stuff, because its likely to make it worse over time is my experience. But for unsticking stuff, it can be helpful
Yes, the nuts got a little coating of copperslip when I put them back. I was wondering about that though, as I don’t think I have ever used copper-slip on aluminium before. I’m sure there must be some special compound to prevent aluminium bits getting stuck.
As I said before, you can never have enough tools and aids for your spannering!
Onto the next few jobs, although that is on my Mercedes W123 (leaking exhaust) and replacing the rear shocks on my Alfa Spider. Ah, the joy of owning young timers / classics.
We lived for several years in Delhi, India and I’m still active on an Indian automotive forum. DIY work on your car is rare in India, so members are really interested in what and how I do jobs myself. Sharing the link:
Needed to do the same on my MB wagon a few months ago while replacing the condenser and radiator ... both nuts on the flex hoses connecting the transmission cooling lines were frozen .. had to grind them in 1/2. The lines, fitting and coolers all look to be AL alloy -- I don't know if it's simple oxidation or dissimilar metals ......but, they can be impossible to remove and the tubing can be damaged very easily.
I'm with you on the related parts -- I try and get all the little stuff that may be needed. Fix it once.
Thanks for making the post, Jeroen. I was considering taking my car to a mechanic to have it done, but after reading your post, I decided to do the job myself! I actually ran into the same exact problem with the same stuck nut that attaches the longer hose, so had to take the oil cooler out as well. I tried soaking it with PB Blaster, tapping it to loosen it and soaking some more reapeatedly until I had used about half the can, but that didn't work. I also tried heating it up, brute force with my friend securing the cooler to the bench while I applied almost all 230 lbs of my body weight to the wrench I had on the nut, but it was still stuck.
I ended up taking a similar approach to yours. I used my dremel with one of the heavy duty cutting wheels to cut a slot into the nut that went down to the threads. I then applied more PB Blaster and tapped the nut to help get more of the penetrating oil into the threads. Finally, it loosened with a bit of force!
If it weren't for the time I spent trying to soak that nut, the job would've taken less than an hour! Thanks again for your contribution!
Hi Brian,
Thanks, nice to hear you managed it yourself. No matter what the job is, big or small, I always find it rewarding and interesting to do all these jobs myself.
I’ll be posting about my SuperCharger Coolant pump replacement in a little while. Separate thread on that, with some very useful suggestions from various members.
I have had my XJR for quite a while, but I only stumbled on this forum recently. Great community as most members get their hands dirty and tackle just about any job.
Here�s an update showing how it actually goes into the pan. Just remove the fan shroud and you can see everything, job becomes 0/10 difficulty. Bolt is 10mm on my car.


 No don't get me wrong, those oil cooler pipes are a light pushfit / held - alloy to alloy. Usually covered in road crud so emptying a can of WD to clear it all out before pipe removal was only a suggestion