
1972 Daimler Sovereign Series 1 4.2

Thread Starter
|
Member
Joined: Feb 2015
Posts: 48
Likes: 6
From: The Red Side of Liverpool
Hello gents' I'm Will. I've been lurking in the shadows for a while now and I thought it was about time I showed my face so to speak! These posts are from another forum so I'll write the oate of the original posts at the top. Comments are more than welcome! Enjoy...
Thread Starter
|
Member
Joined: Feb 2015
Posts: 48
Likes: 6
From: The Red Side of Liverpool
17th April 2013
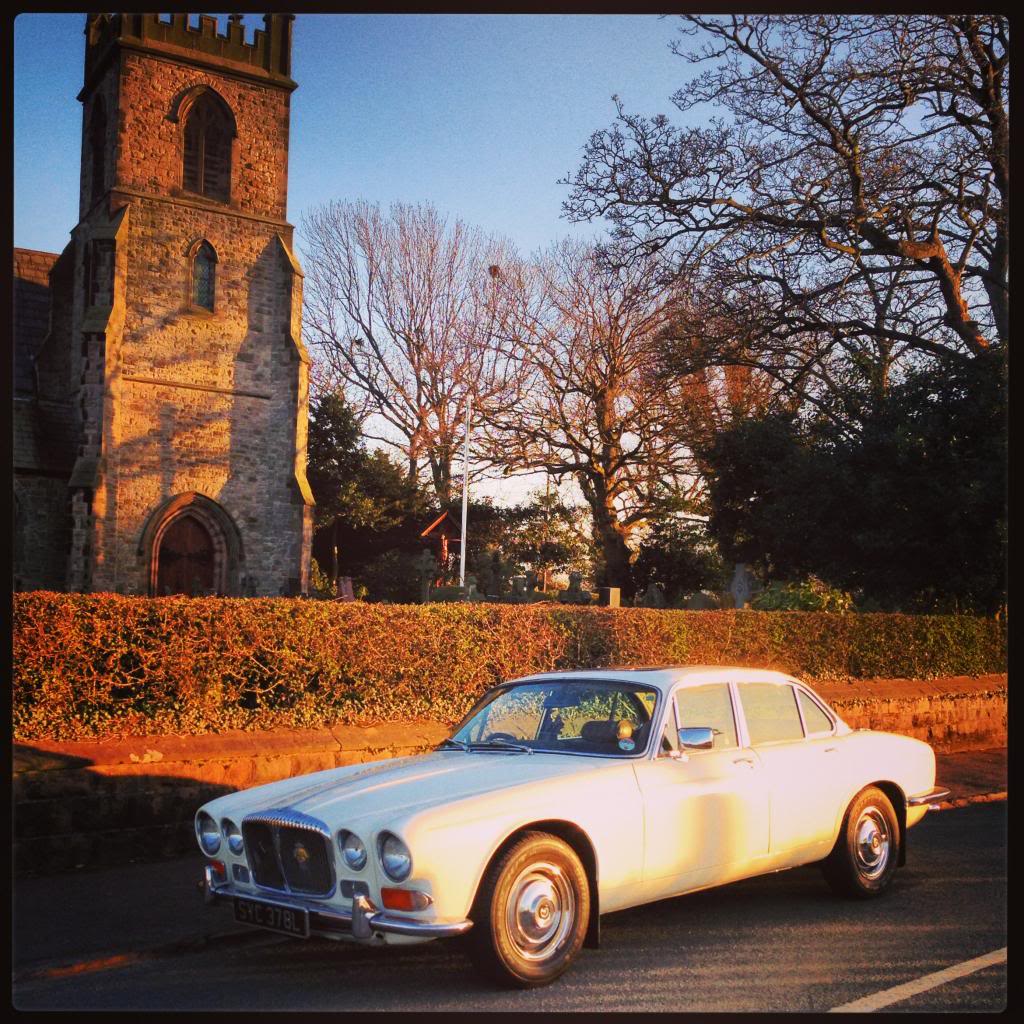
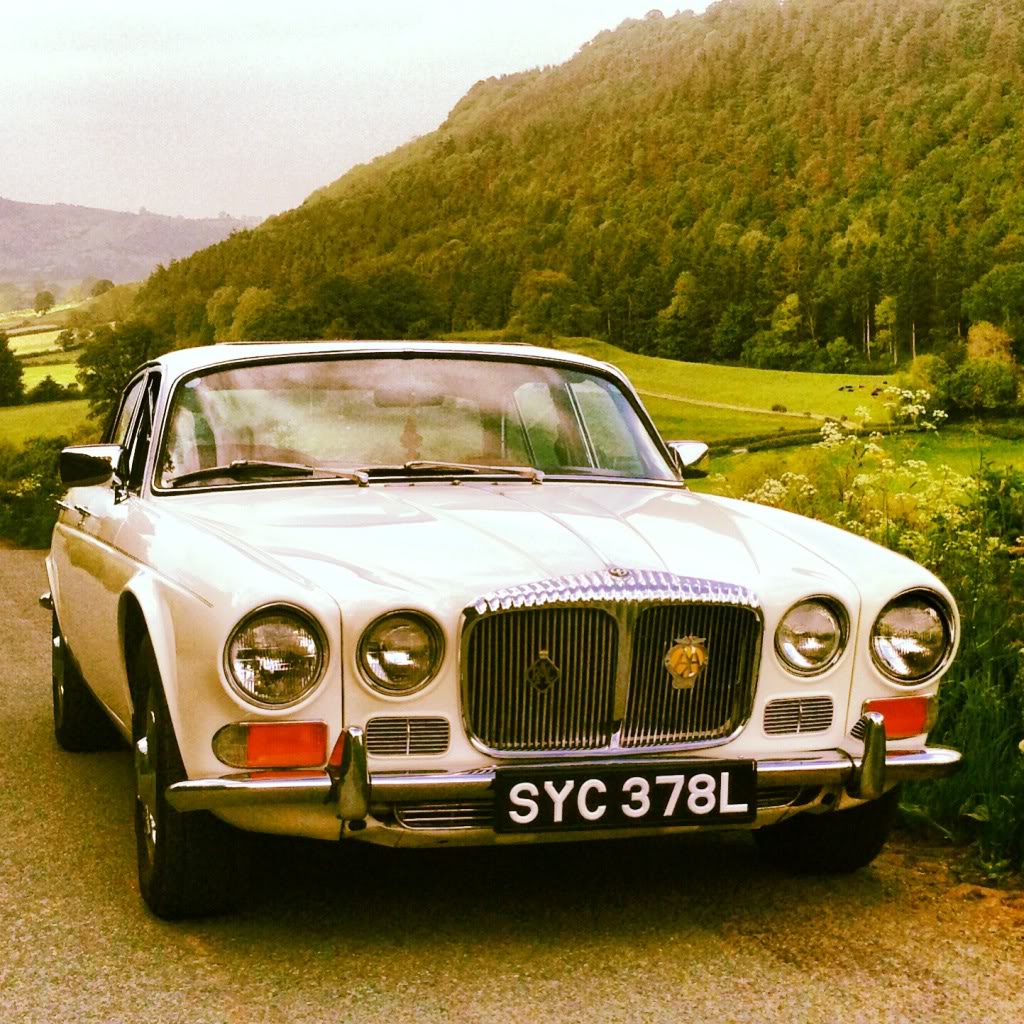
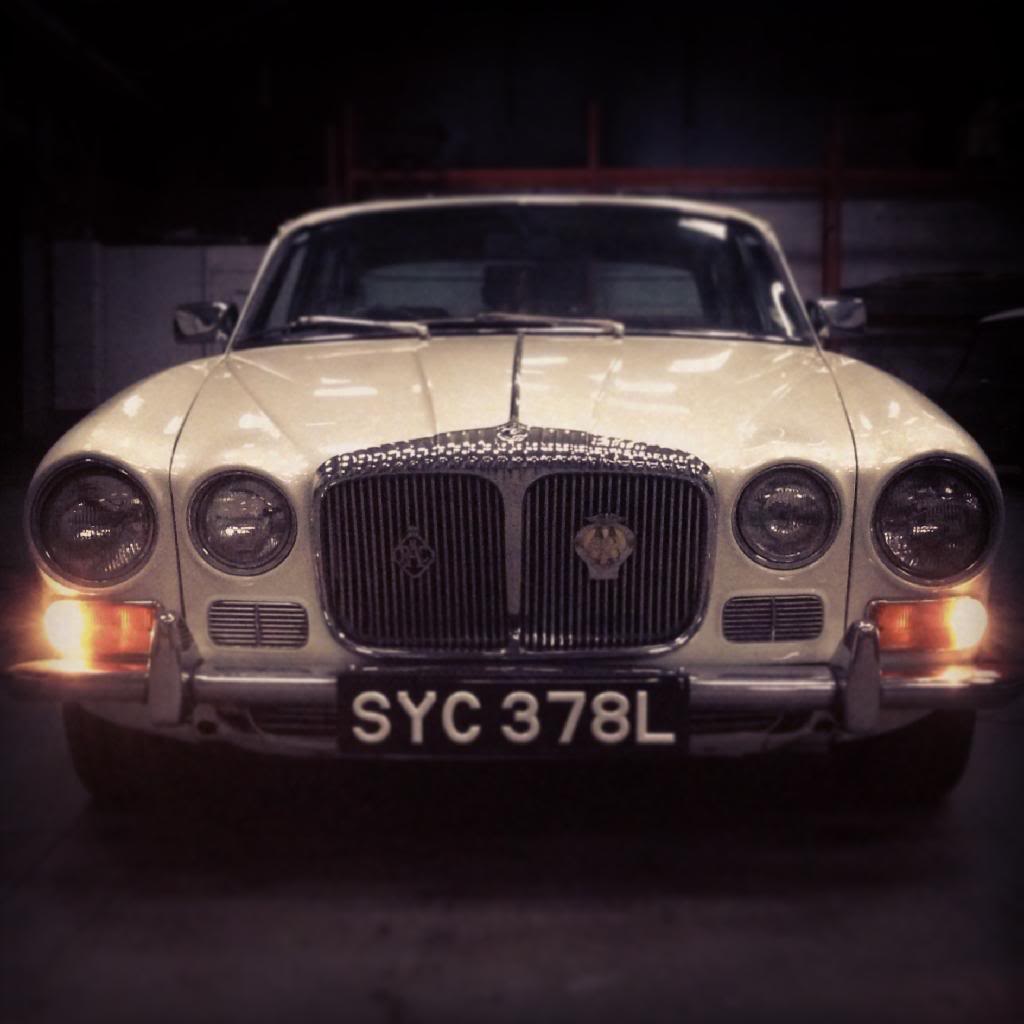
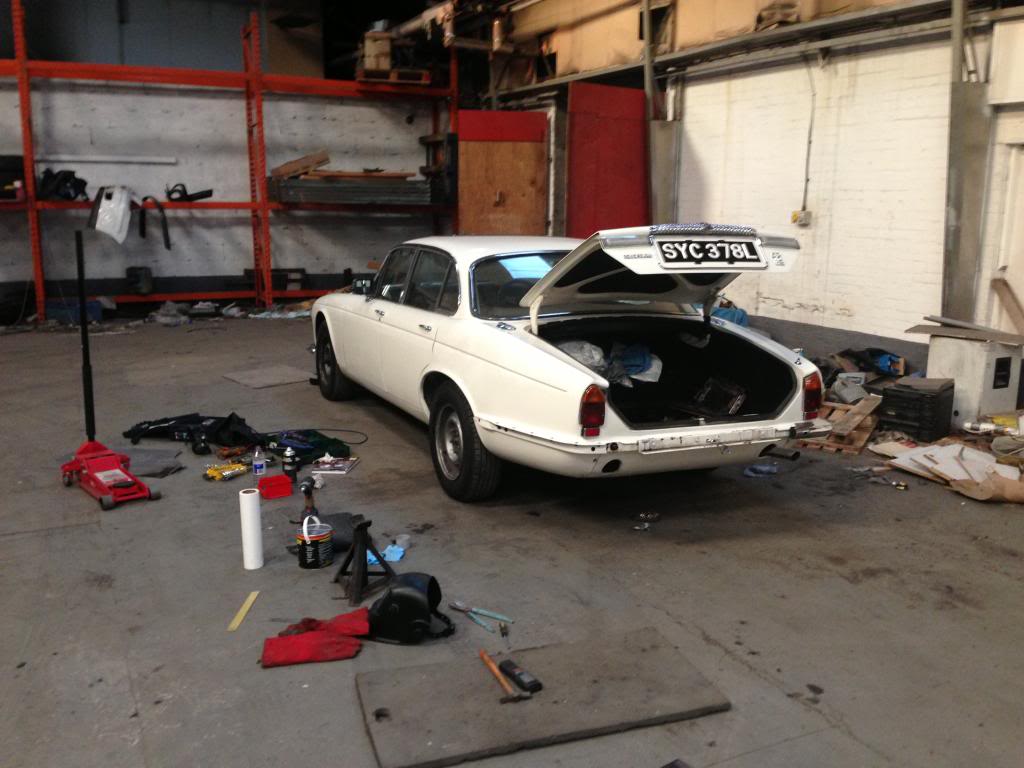
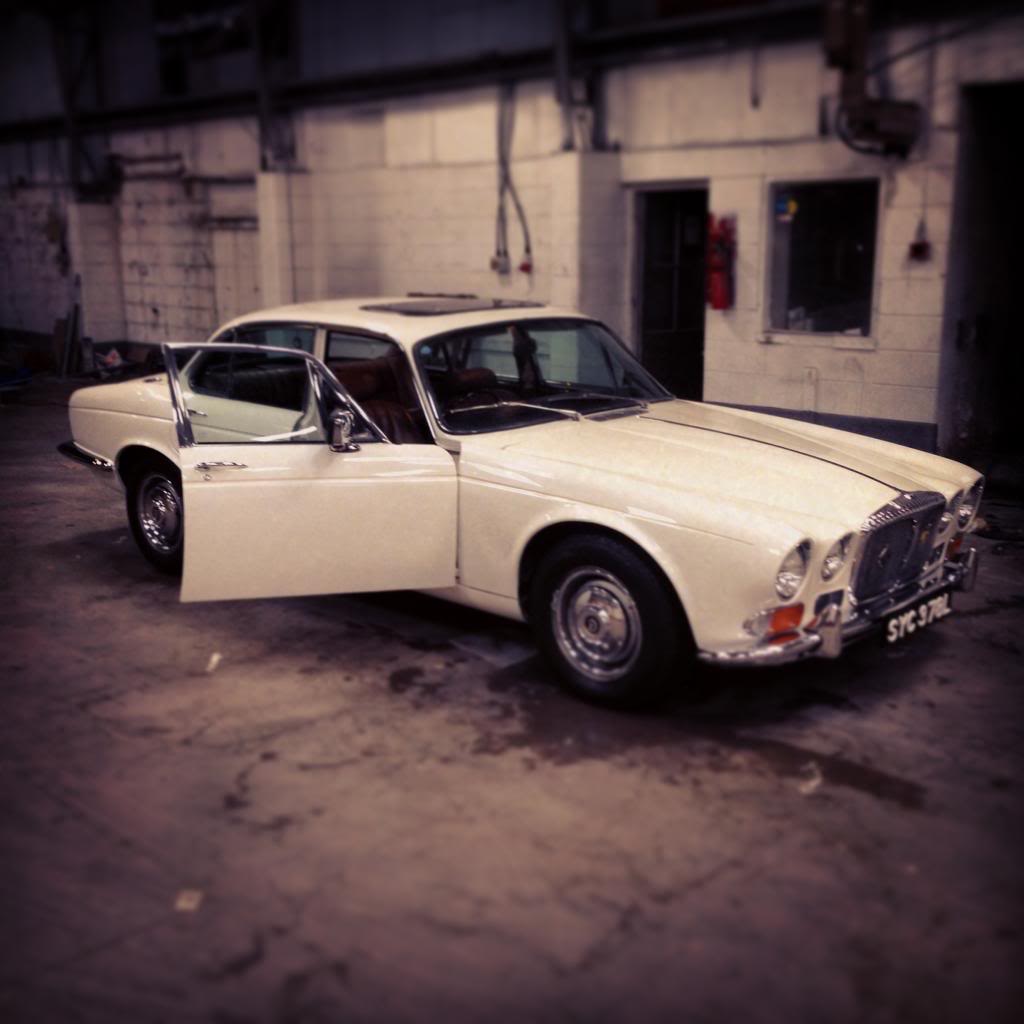
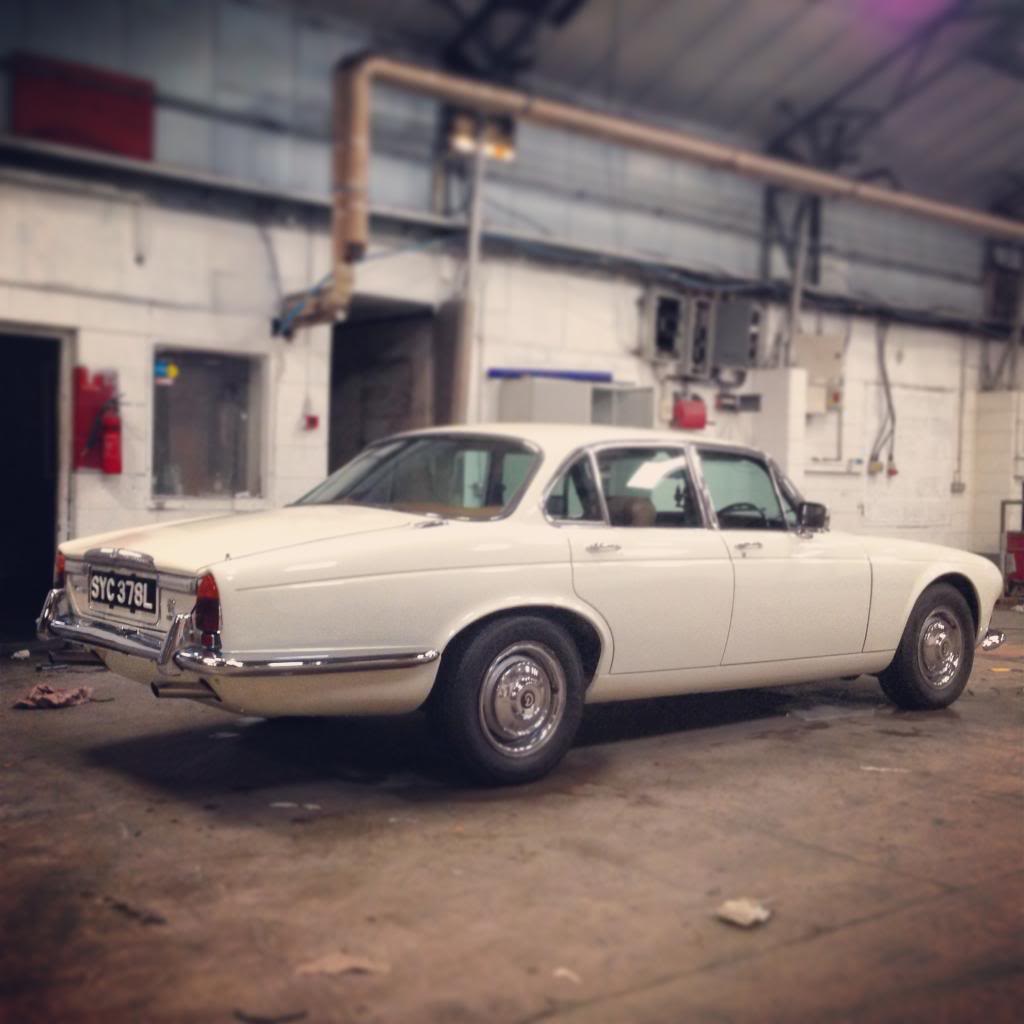
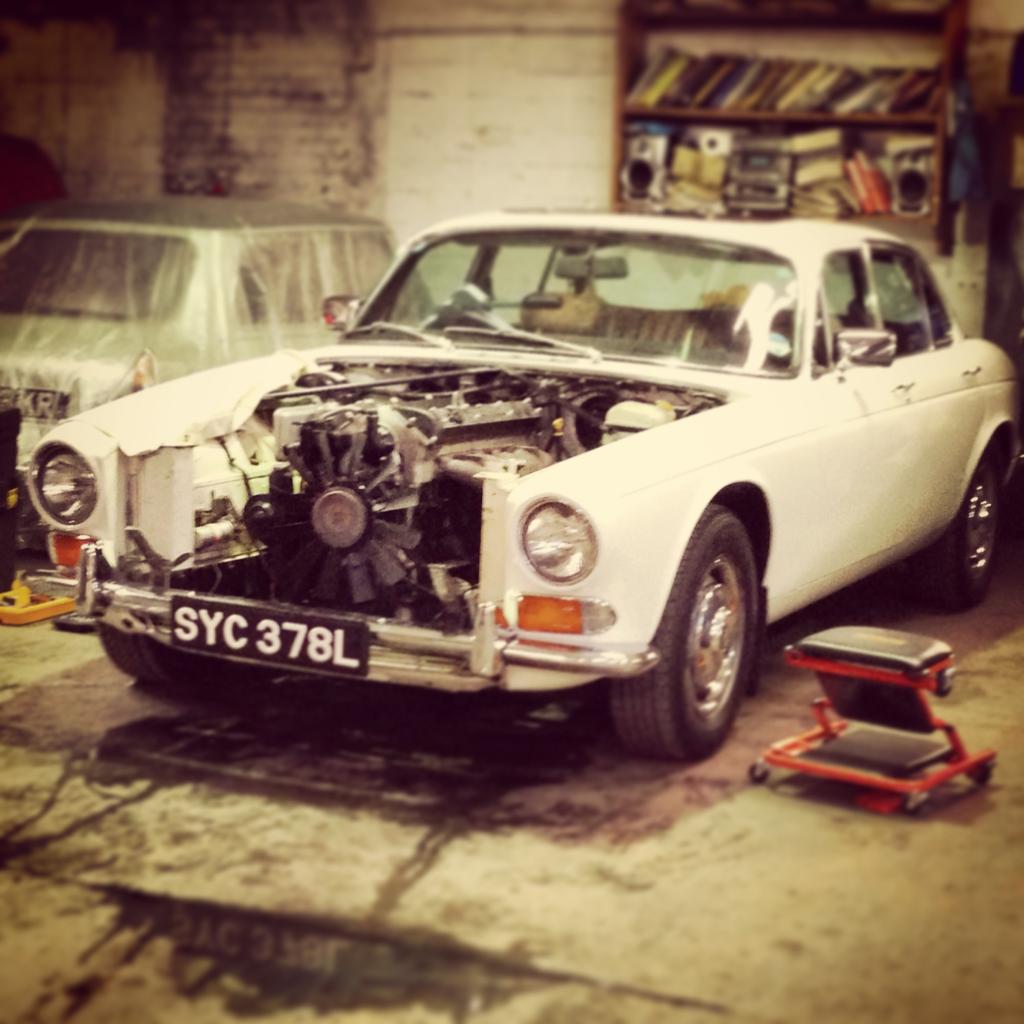
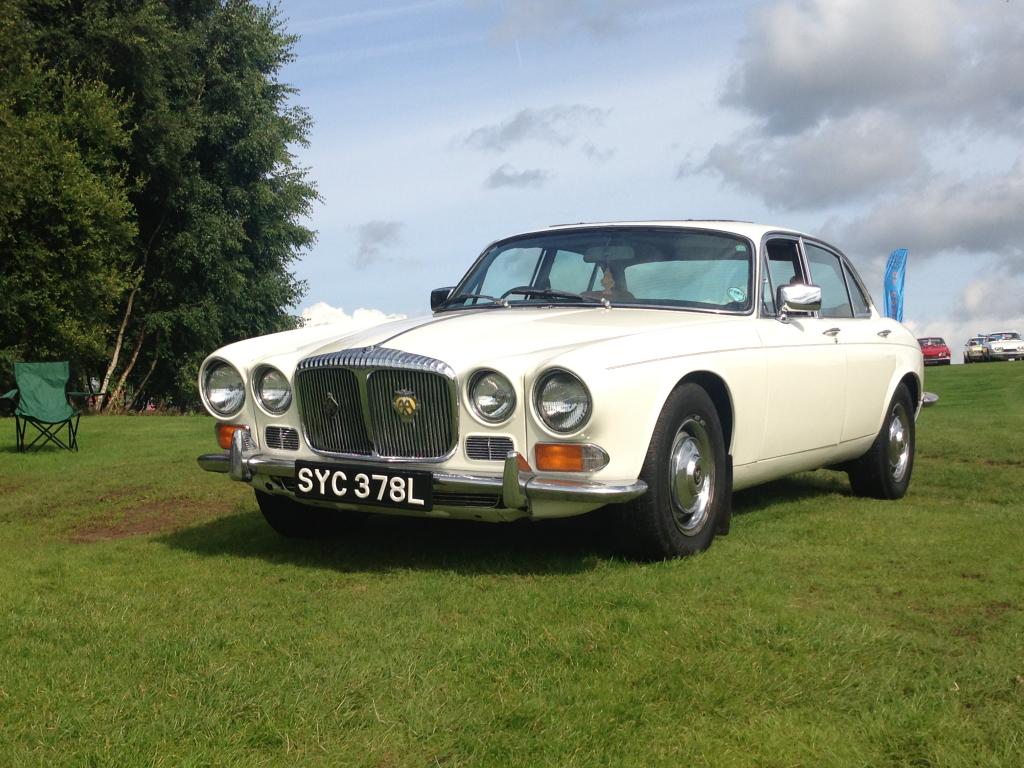
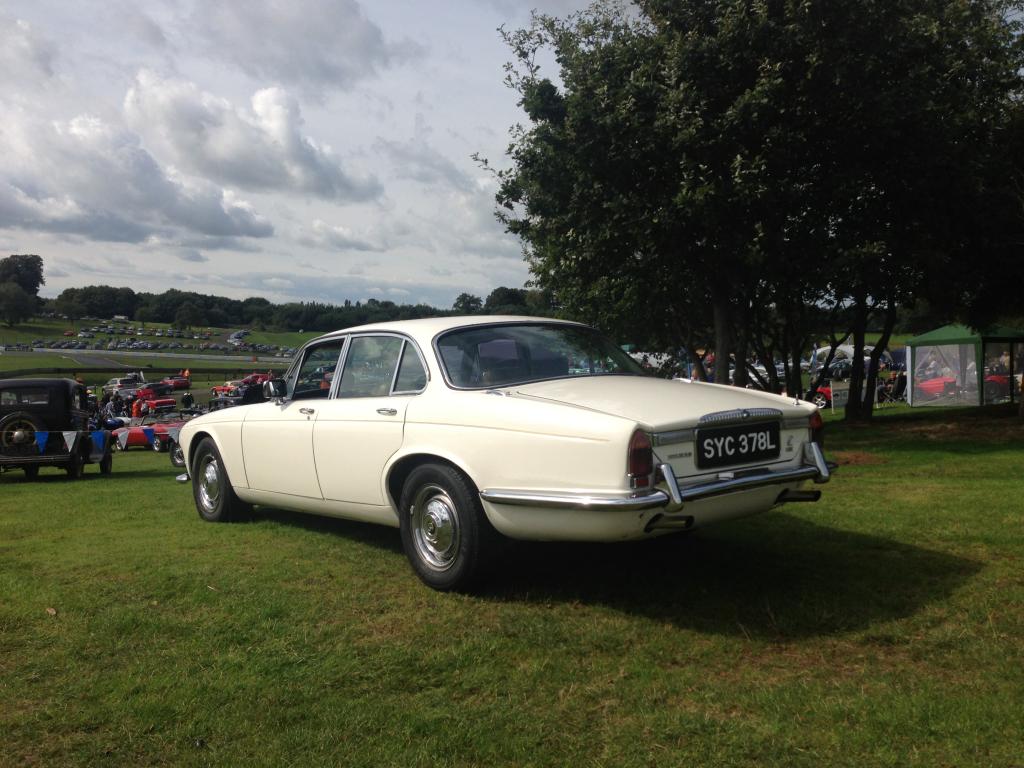
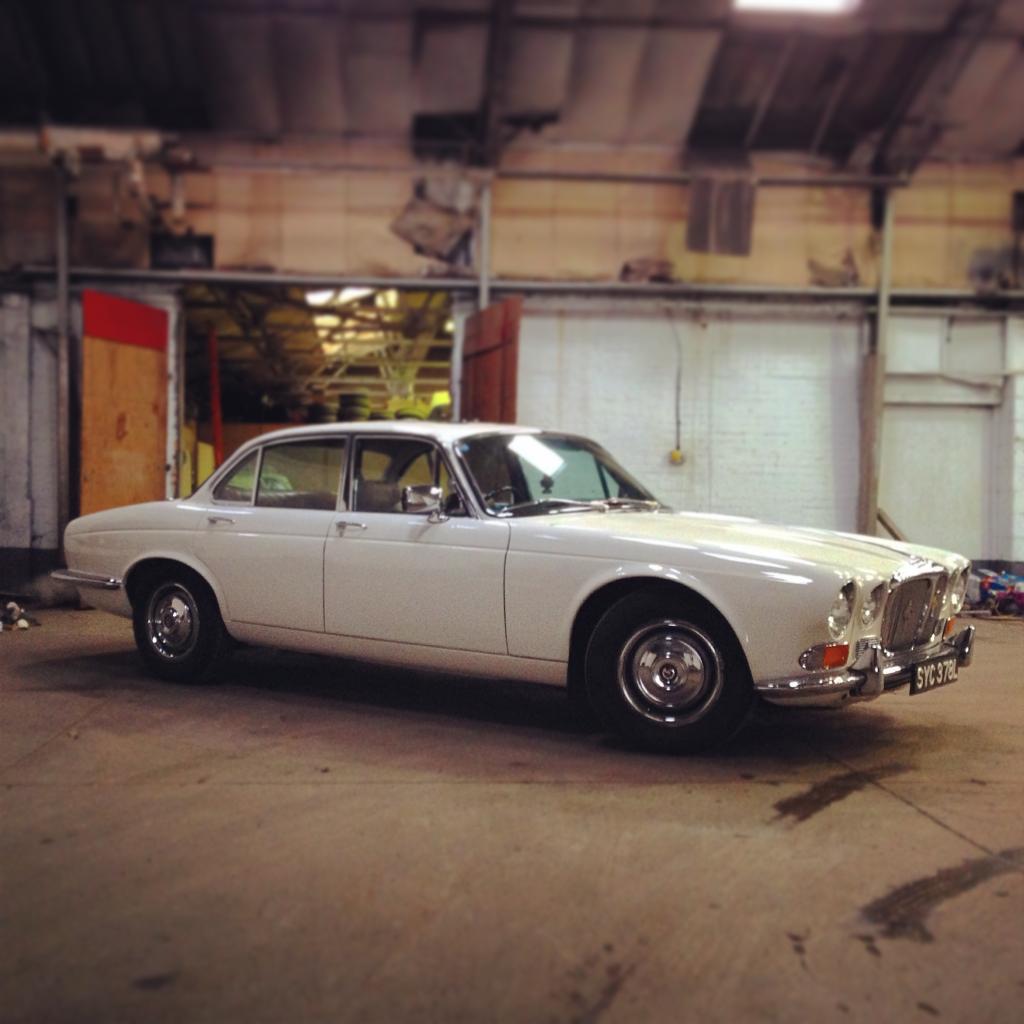
After wanting a Series 1 XJ since Dad had his, (early 80's), the last 6 years i've been half looking for one, the last 8 months seriously. Lots of overtime working away allowed me to seriously consider getting a decent example.
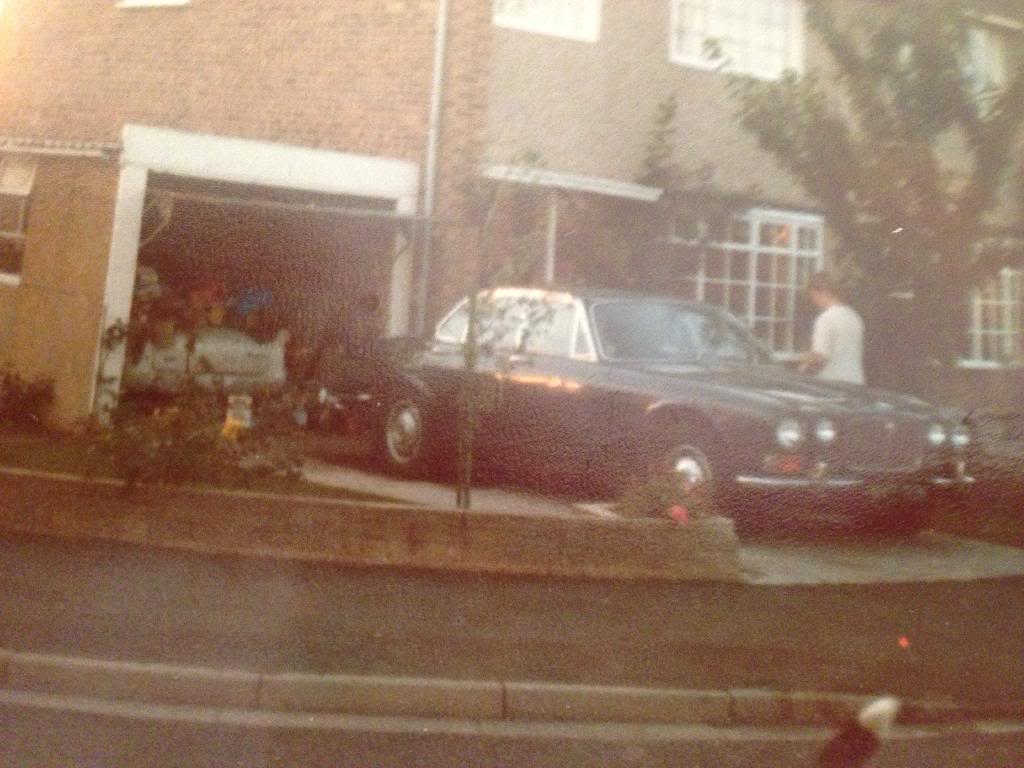
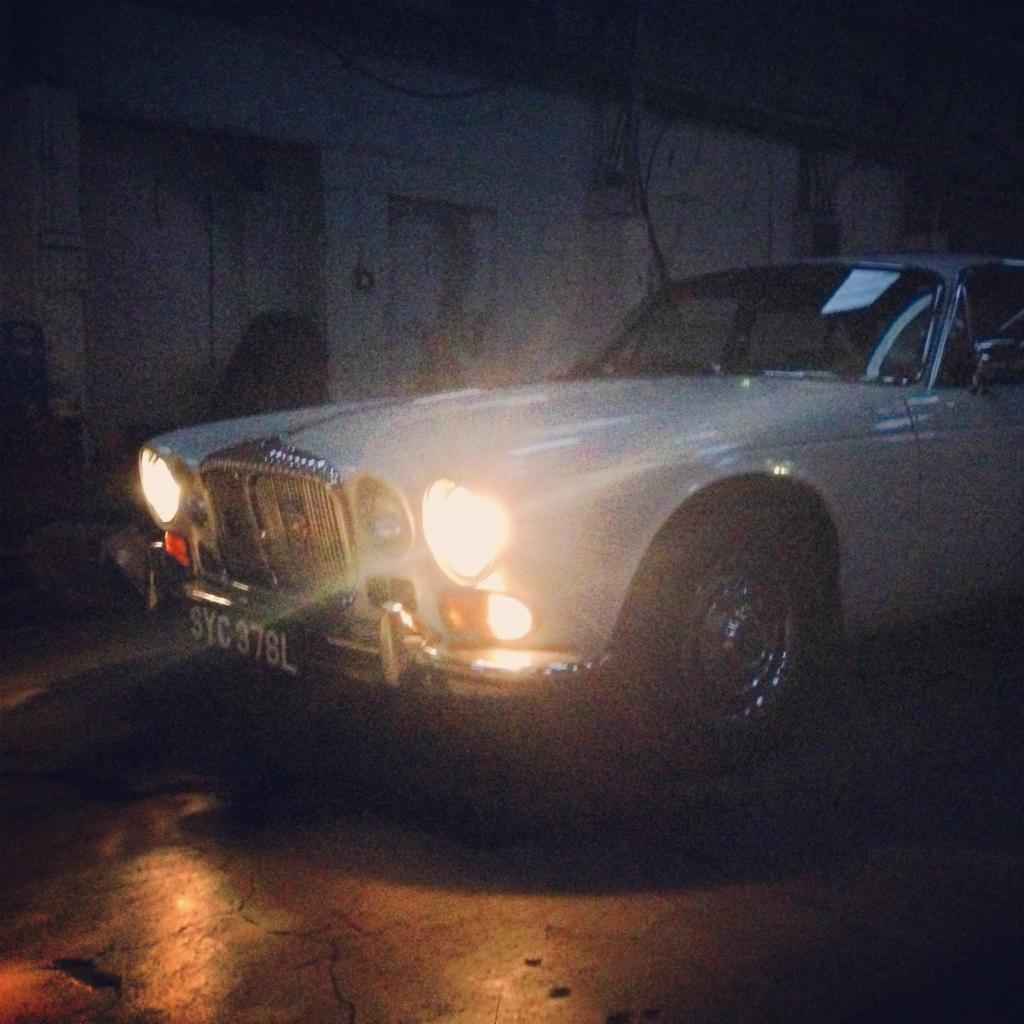
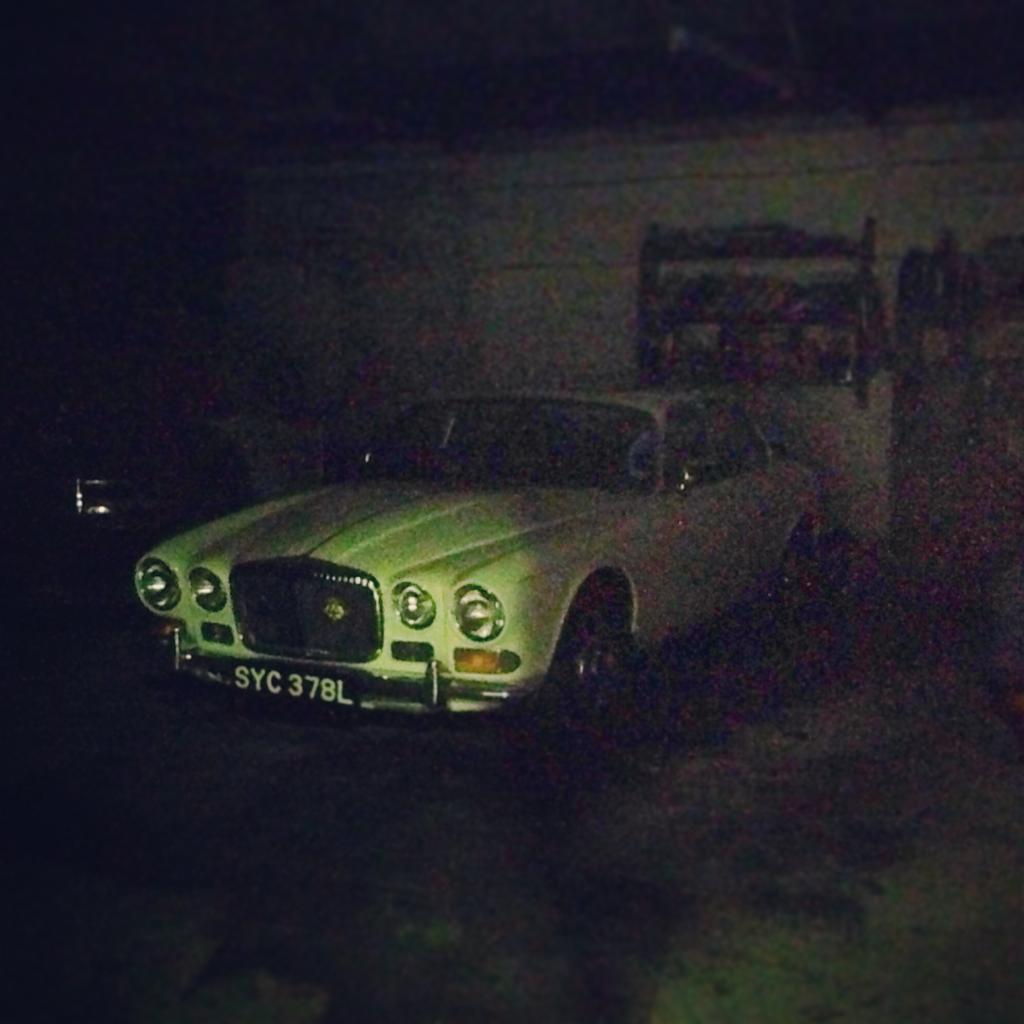
Well, today, I picked it up!! Pictures here.
First stop was the petrol station (where else?!) 200 yards into my journey where it got its first compliment off a young lad who couldn't take his eyes off it! About a mile into my journey, I switched on the wipers and the horn come on and stayed on! Straight under the bonnet to disconnect them.
Other stuff? The speed selector linkage needs adjustment by the symptoms, lever doesn't line up correctly with the gate, car can stall when held in drive at traffic lights, and there is a bad earth somewhere, i've lost the RH rear tail light, the RH interior light, the LH sidelight and the RH front indicator. The horn staying on also points to this too.
However, the way it drives is unbelievable! 41 years old? The only thing that gives the game away is the wind whistling around the mirrors and quarterlights.
In love already!
There are some other jobs that need doing,minor trim issues and the bottom of the doors need stripping back and refinishing as there is surface rust beginning to break through. I'll post some pics when I get a minute.
In the meantime, i'm gonna search high and low for that dodgy earth...
Any help appreciated! :wink:
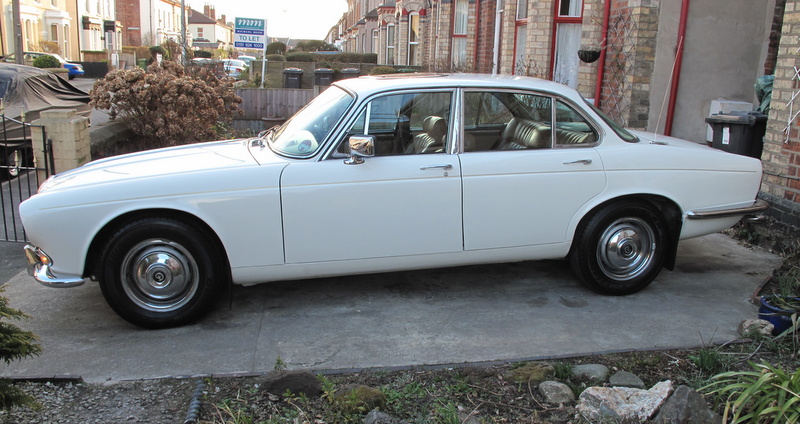
After wanting a Series 1 XJ since Dad had his, (early 80's), the last 6 years i've been half looking for one, the last 8 months seriously. Lots of overtime working away allowed me to seriously consider getting a decent example.
Well, today, I picked it up!! Pictures here.
First stop was the petrol station (where else?!) 200 yards into my journey where it got its first compliment off a young lad who couldn't take his eyes off it! About a mile into my journey, I switched on the wipers and the horn come on and stayed on! Straight under the bonnet to disconnect them.
Other stuff? The speed selector linkage needs adjustment by the symptoms, lever doesn't line up correctly with the gate, car can stall when held in drive at traffic lights, and there is a bad earth somewhere, i've lost the RH rear tail light, the RH interior light, the LH sidelight and the RH front indicator. The horn staying on also points to this too.
However, the way it drives is unbelievable! 41 years old? The only thing that gives the game away is the wind whistling around the mirrors and quarterlights.
In love already!
There are some other jobs that need doing,minor trim issues and the bottom of the doors need stripping back and refinishing as there is surface rust beginning to break through. I'll post some pics when I get a minute.
In the meantime, i'm gonna search high and low for that dodgy earth...
Any help appreciated! :wink:
Thread Starter
|
Member
Joined: Feb 2015
Posts: 48
Likes: 6
From: The Red Side of Liverpool
22nd April 2013
Evening Gents,
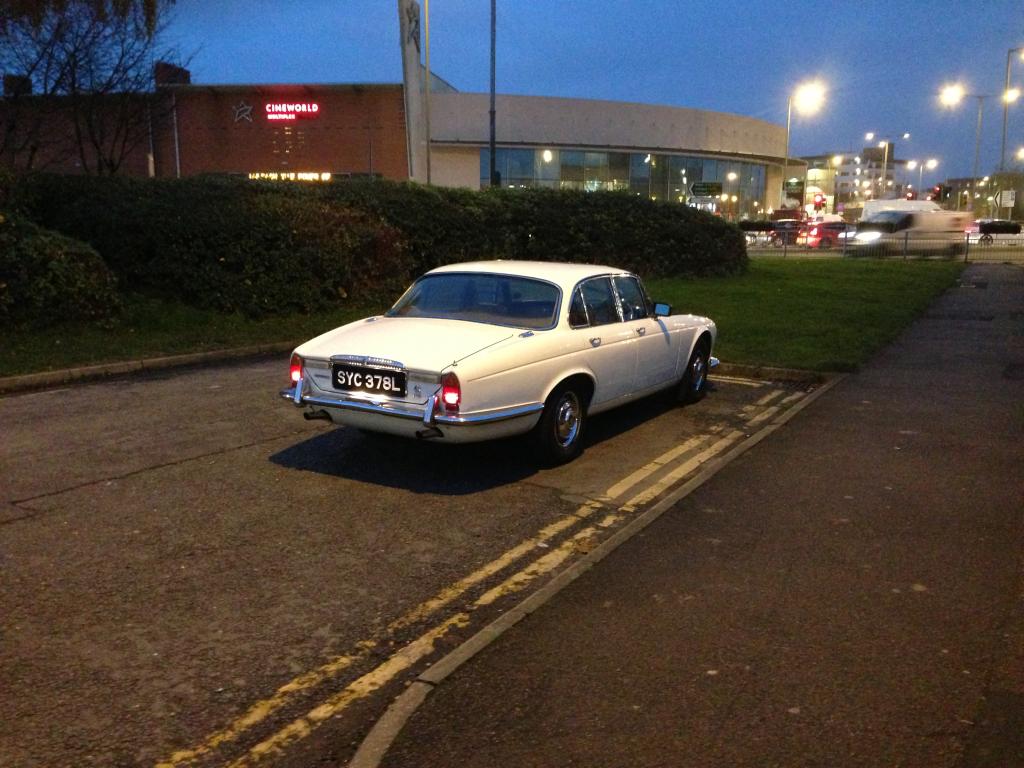
Just a quick update for you, all the electrical issues have been sorted for the meantime, it's been a case of bad connections.
Replaced the cracked right hand rear light lens with one off eBay, two mins to replace. The lighting issues were solved by dropping the middle dash panel down to reveal the fuse box and I removed all the connections and reconnected them. That sorted the sidelight and tail light issue out. The front right indicator appears to have sorted itself out somehow! Started working and has continued to work. The right hand B pillar interior light bulb had blown, replaced and working again.
The horn is a damaged horn push, looks like a sealed unit, I'll find a way in! I also replaced the wiper blades with some new rubber refills.
I lost the electric windows on Friday afternoon, eventually found the control box down in the passenger footwell next to the A pillar. It appears the car has been leaking from the window seal as there was surface rust found in here. The control box itself has seen better days so I'll be on the lookout for a decent second hand replacement.
I'm adding the front and rear screen seals onto the list of jobs needing replacement as they are looking very tired. I got caught in the rain taking her to storage yesterday which confirmed the rear screen seal is indeed leaking.
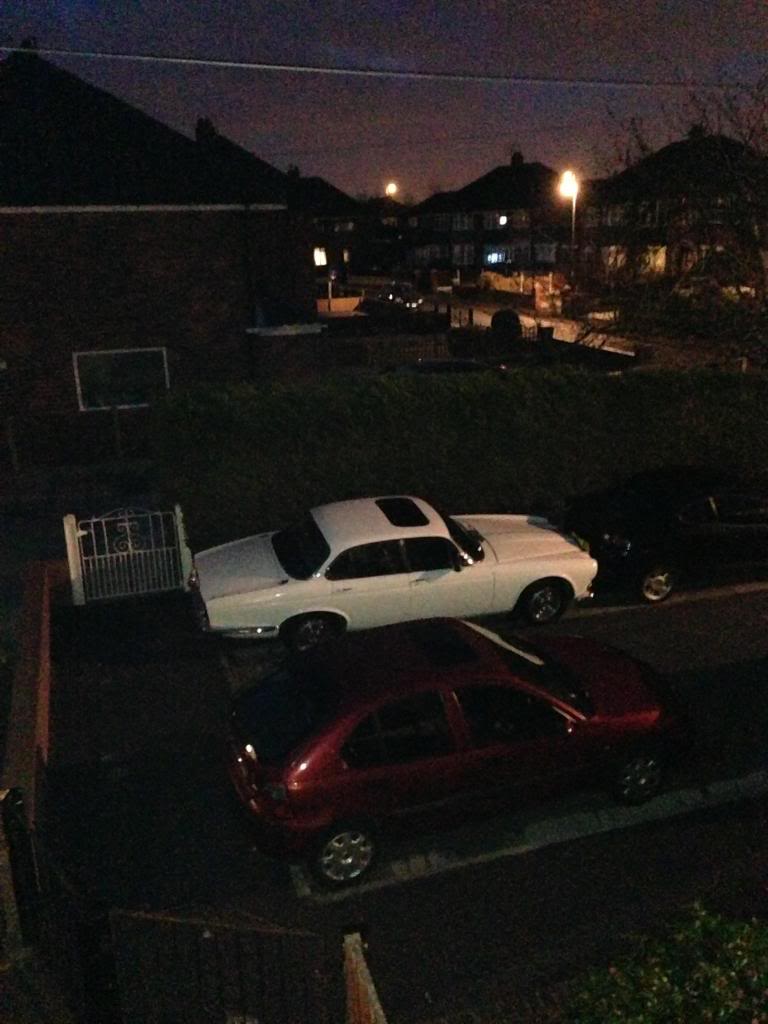
She went into storage yesterday and won't be getting used for a while now but I am going to go to the lock up on Saturday morning (everyone who has a car in there meets up on Saturday morning) with some contact cleaner and clean all the electrical contacts that I can. Astonishingly, she has never seen a drop of Waxoyl either so that will be getting done with one of my spare weekends.
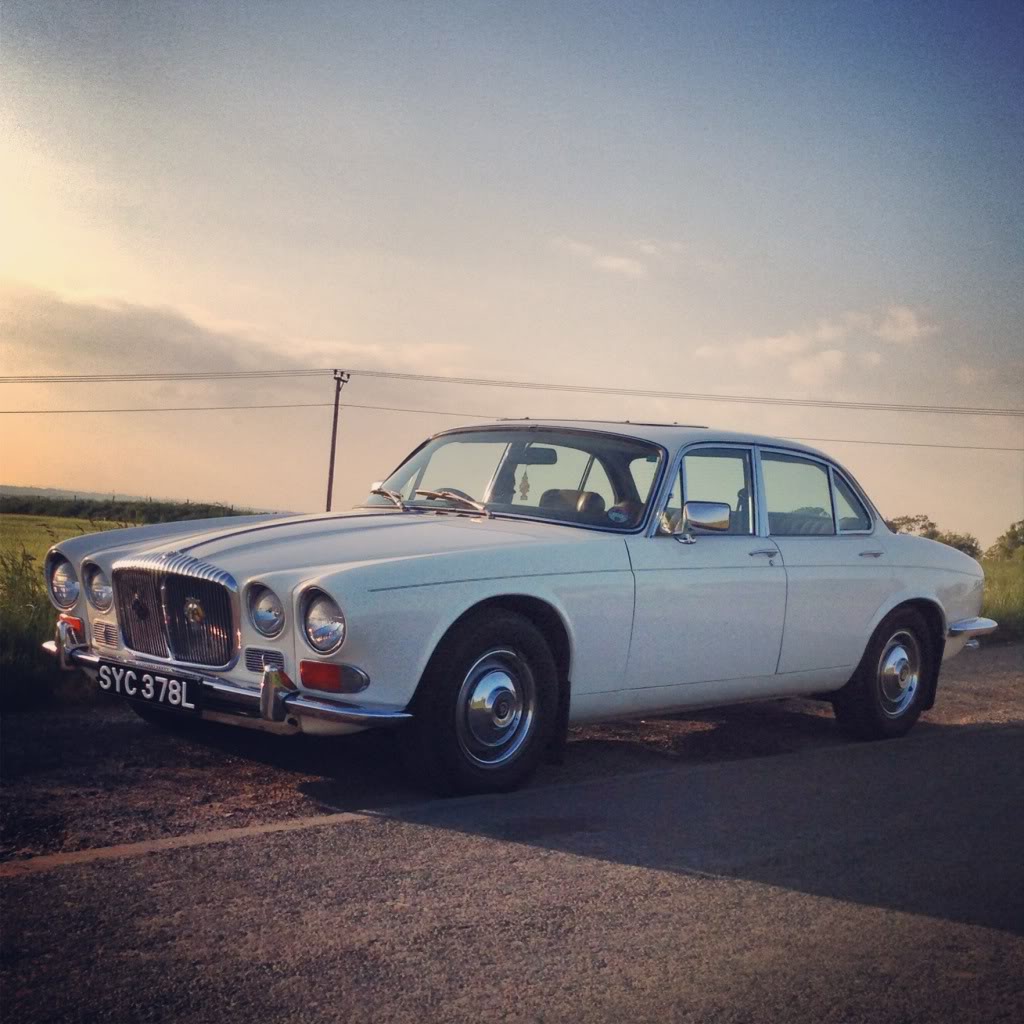
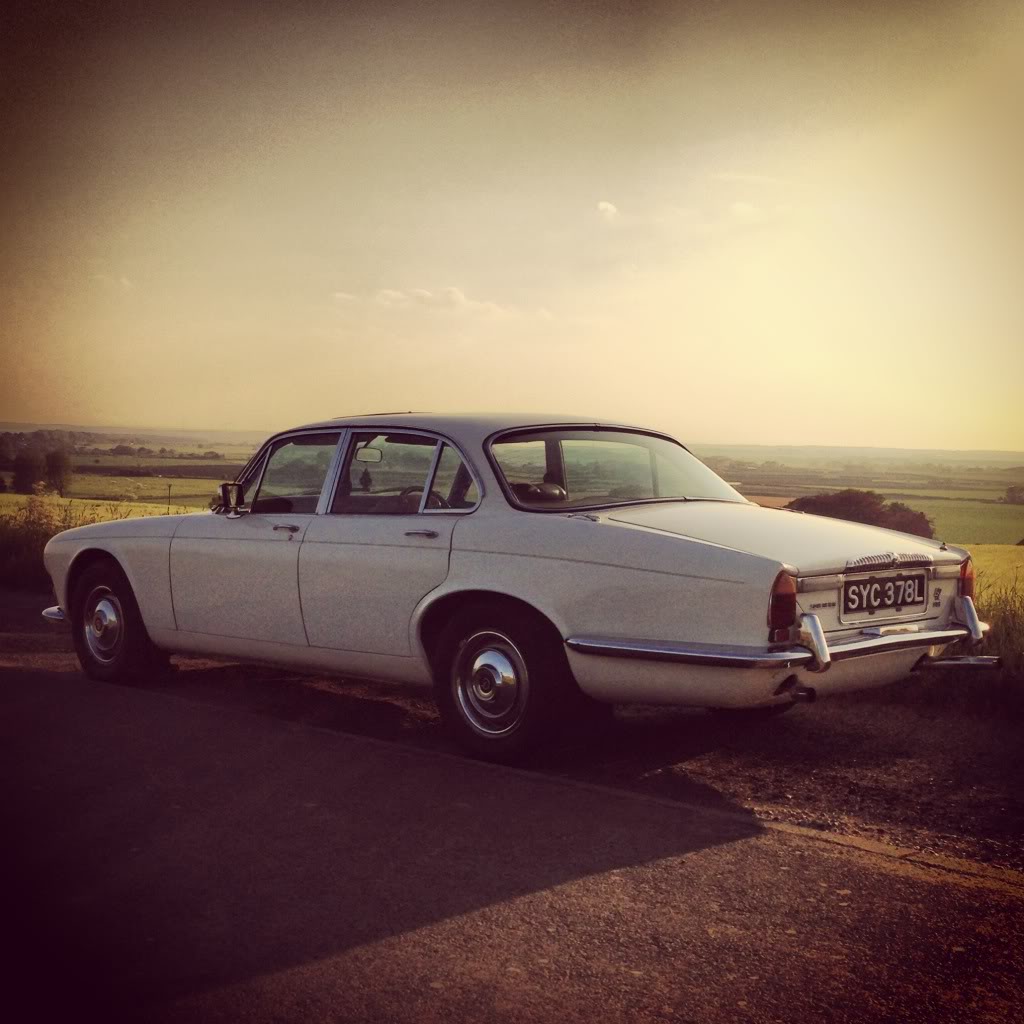
Anyway, a few photos, one of her outside my place the first night I got her, the others I took of her on Friday evening, after I'd fixed the windows!
Evening Gents,
Just a quick update for you, all the electrical issues have been sorted for the meantime, it's been a case of bad connections.
Replaced the cracked right hand rear light lens with one off eBay, two mins to replace. The lighting issues were solved by dropping the middle dash panel down to reveal the fuse box and I removed all the connections and reconnected them. That sorted the sidelight and tail light issue out. The front right indicator appears to have sorted itself out somehow! Started working and has continued to work. The right hand B pillar interior light bulb had blown, replaced and working again.
The horn is a damaged horn push, looks like a sealed unit, I'll find a way in! I also replaced the wiper blades with some new rubber refills.
I lost the electric windows on Friday afternoon, eventually found the control box down in the passenger footwell next to the A pillar. It appears the car has been leaking from the window seal as there was surface rust found in here. The control box itself has seen better days so I'll be on the lookout for a decent second hand replacement.
I'm adding the front and rear screen seals onto the list of jobs needing replacement as they are looking very tired. I got caught in the rain taking her to storage yesterday which confirmed the rear screen seal is indeed leaking.
She went into storage yesterday and won't be getting used for a while now but I am going to go to the lock up on Saturday morning (everyone who has a car in there meets up on Saturday morning) with some contact cleaner and clean all the electrical contacts that I can. Astonishingly, she has never seen a drop of Waxoyl either so that will be getting done with one of my spare weekends.
Anyway, a few photos, one of her outside my place the first night I got her, the others I took of her on Friday evening, after I'd fixed the windows!
Thread Starter
|
Member
Joined: Feb 2015
Posts: 48
Likes: 6
From: The Red Side of Liverpool
21st May 2013
Just a quick update for you, she spat her dummy, not to mention lots of fuel out of the AED overflow pipe on Sunday, a strip down, thorough clean and rebuild of the unit nipped that right in the bud! Running great now as well! I'm going to change the oil and coolant this weekend before heading to Bruntingthorpe for this fantastic event on Sunday, weather permitting of course!
Just a quick update for you, she spat her dummy, not to mention lots of fuel out of the AED overflow pipe on Sunday, a strip down, thorough clean and rebuild of the unit nipped that right in the bud! Running great now as well! I'm going to change the oil and coolant this weekend before heading to Bruntingthorpe for this fantastic event on Sunday, weather permitting of course!
Thread Starter
|
Member
Joined: Feb 2015
Posts: 48
Likes: 6
From: The Red Side of Liverpool
10th July 2013
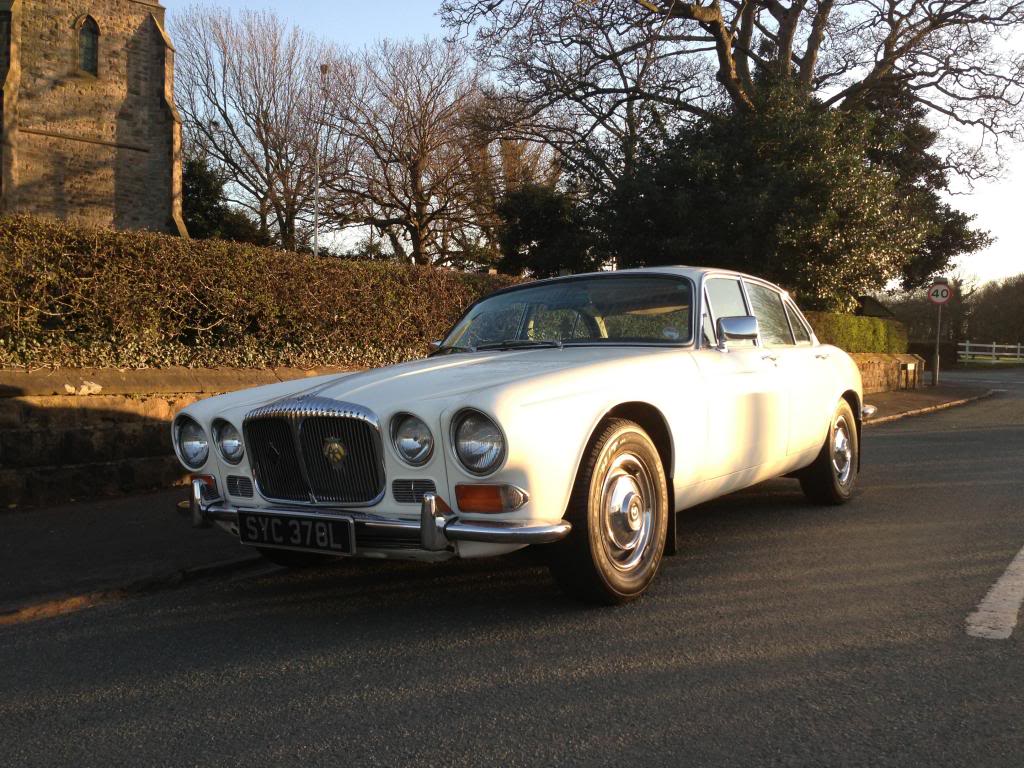
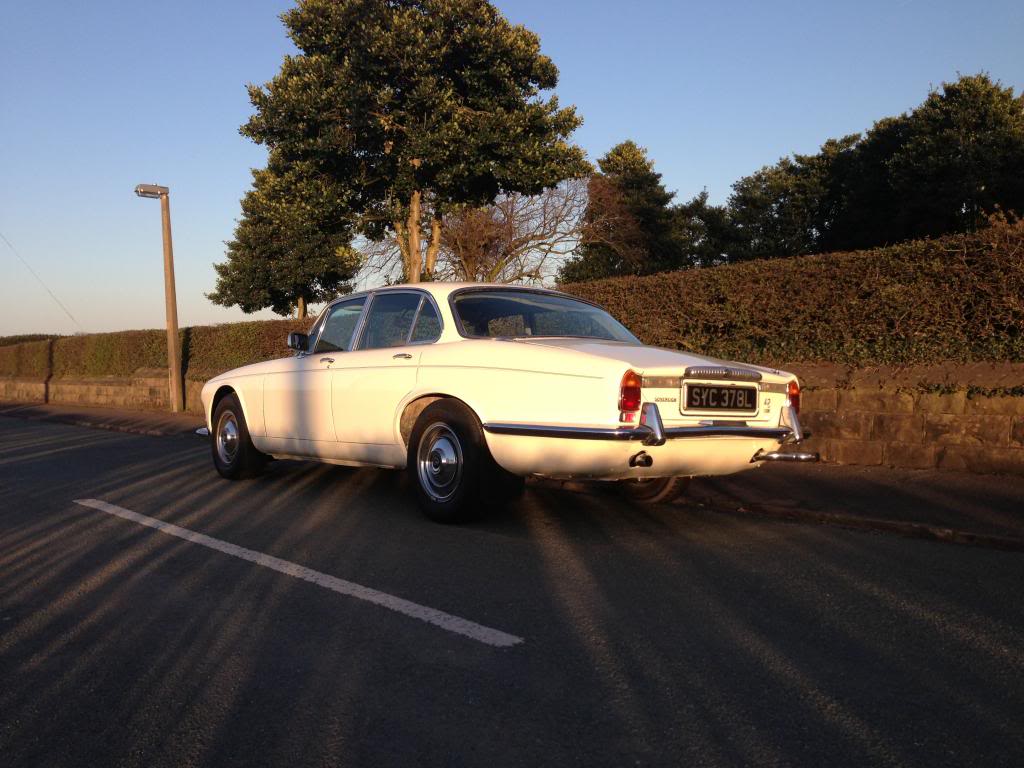
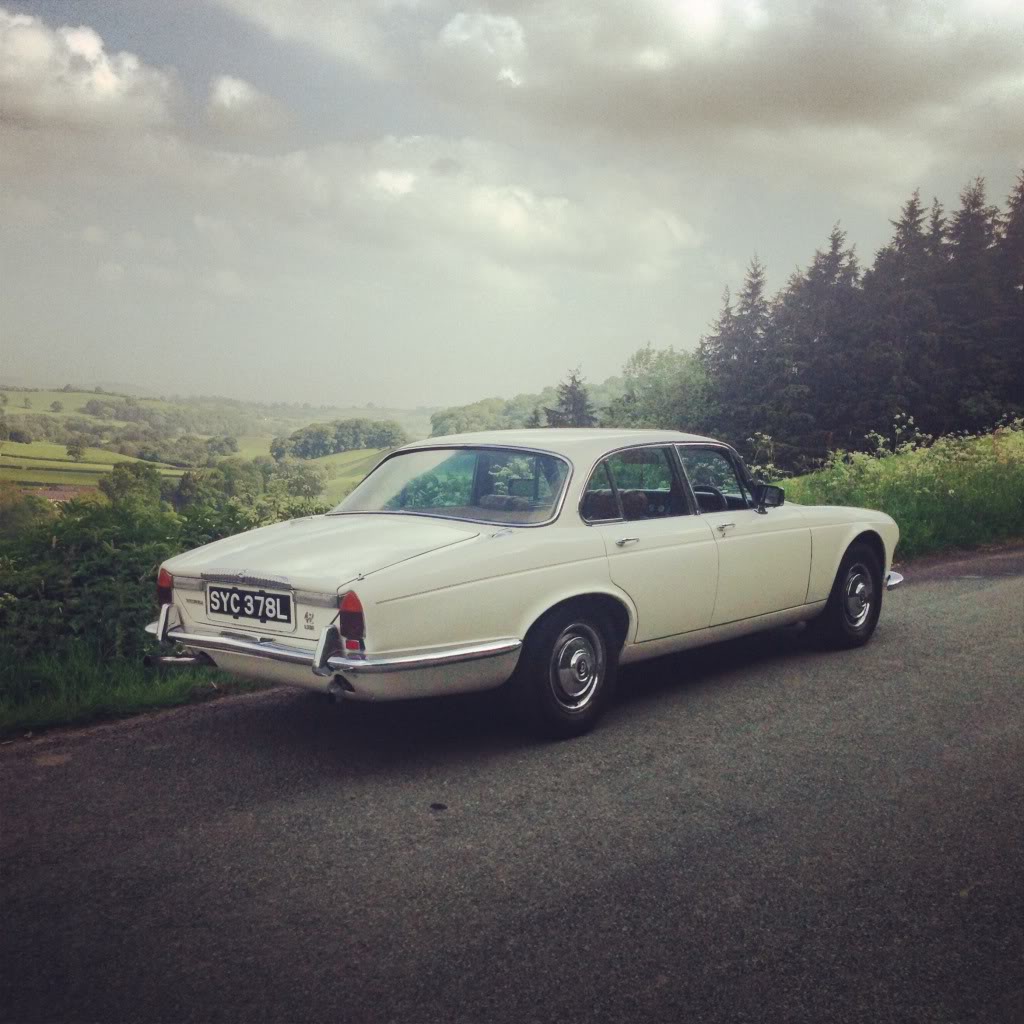
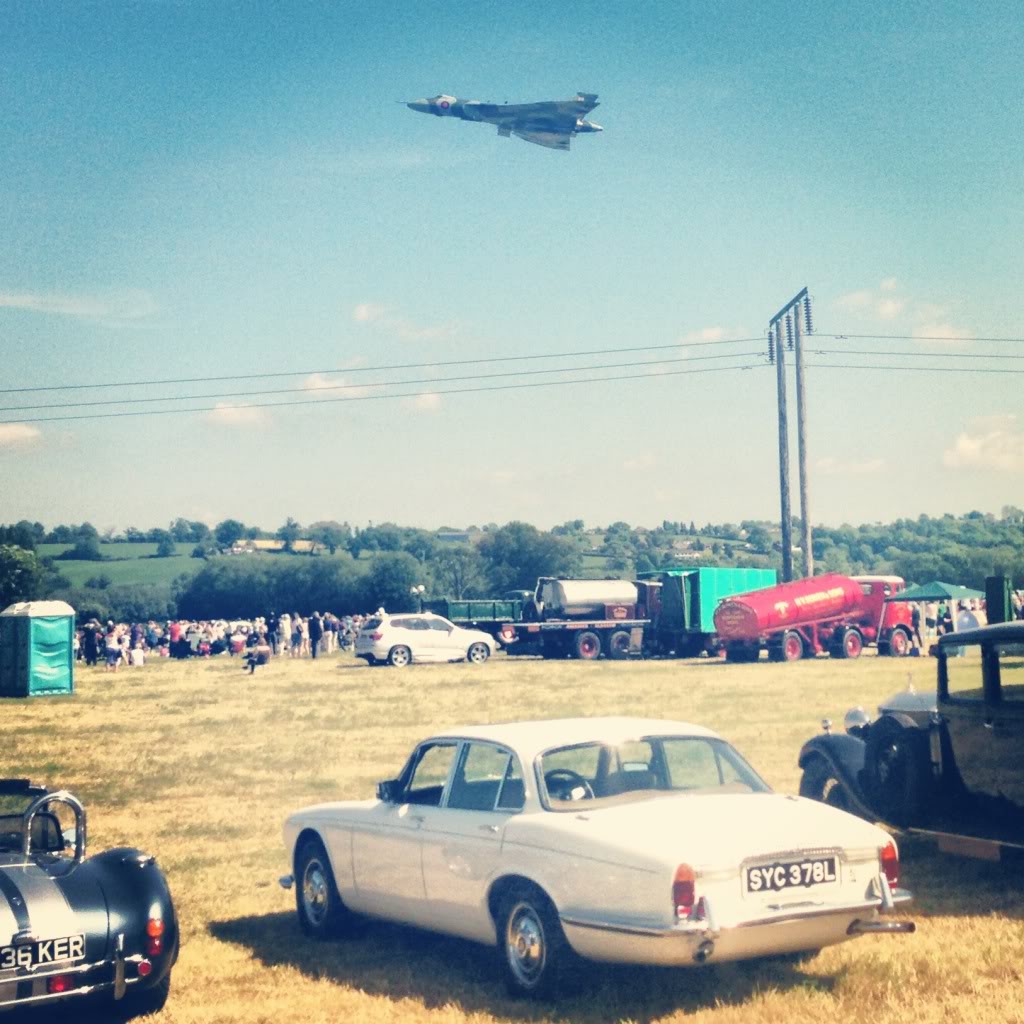
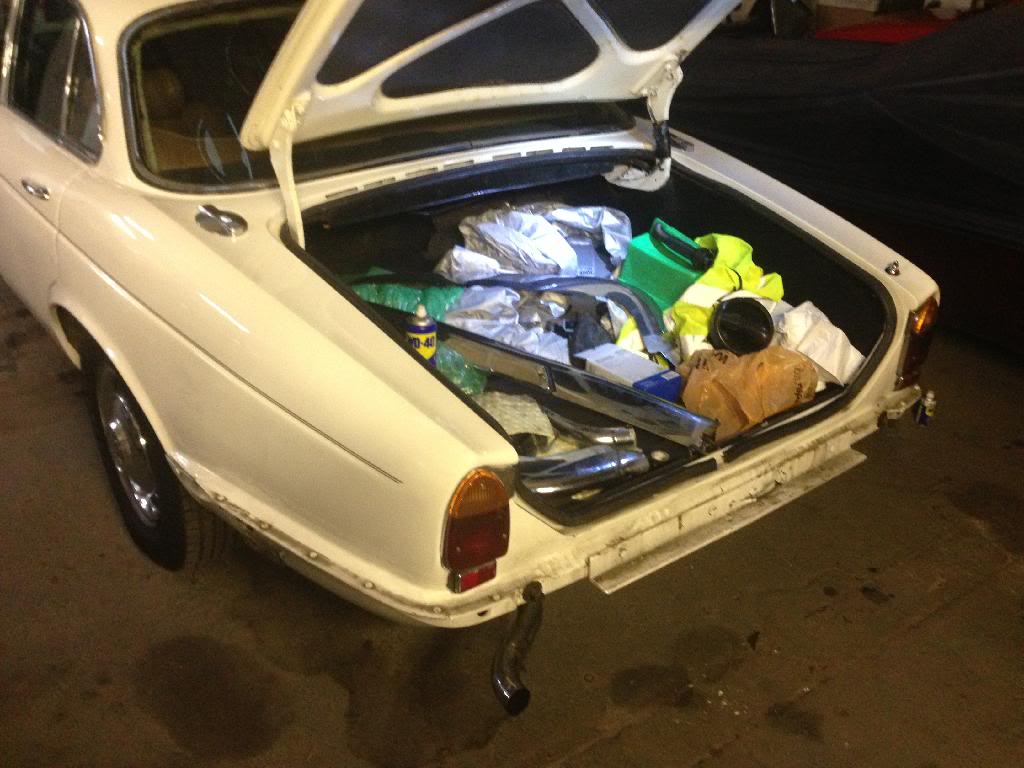
Not much to report really, some initial problems with the AED (auto choke) have been resolved and she's running great! I also found the carbs were hissing to a great extent. Found it was a tap from the inlet manifold drawing air in. I couldn't see any pipes in the vicinity that had come adrift so I went to the Internet for help. A very basic diagram drawn on Microsoft Paint saved the day. It showed a pipe that ran from the back of the engine bay into the AC system (now long gone). Plugged the hose on the inlet and the car has improved immeasurably! Done nearly 1600 miles since I got her, long and short trips, and she has behaved superbly. Don't ask about the fuel bills though! Some areas have been found that will require attention, front and rear screen seals, near side inner rear arch, small section of the floor pan and a rebuild of the handbrake mechanism. Anyway, some pointless photos from a trip to Wales, taken in the middle of nowhere...
Oh, and a pic with XH558, the last flying Vulcan bomber!
Thanks for reading!

Joined: Jan 2014
Posts: 28,386
Likes: 6,340
From: Delaneys Creek,Qld. Australia
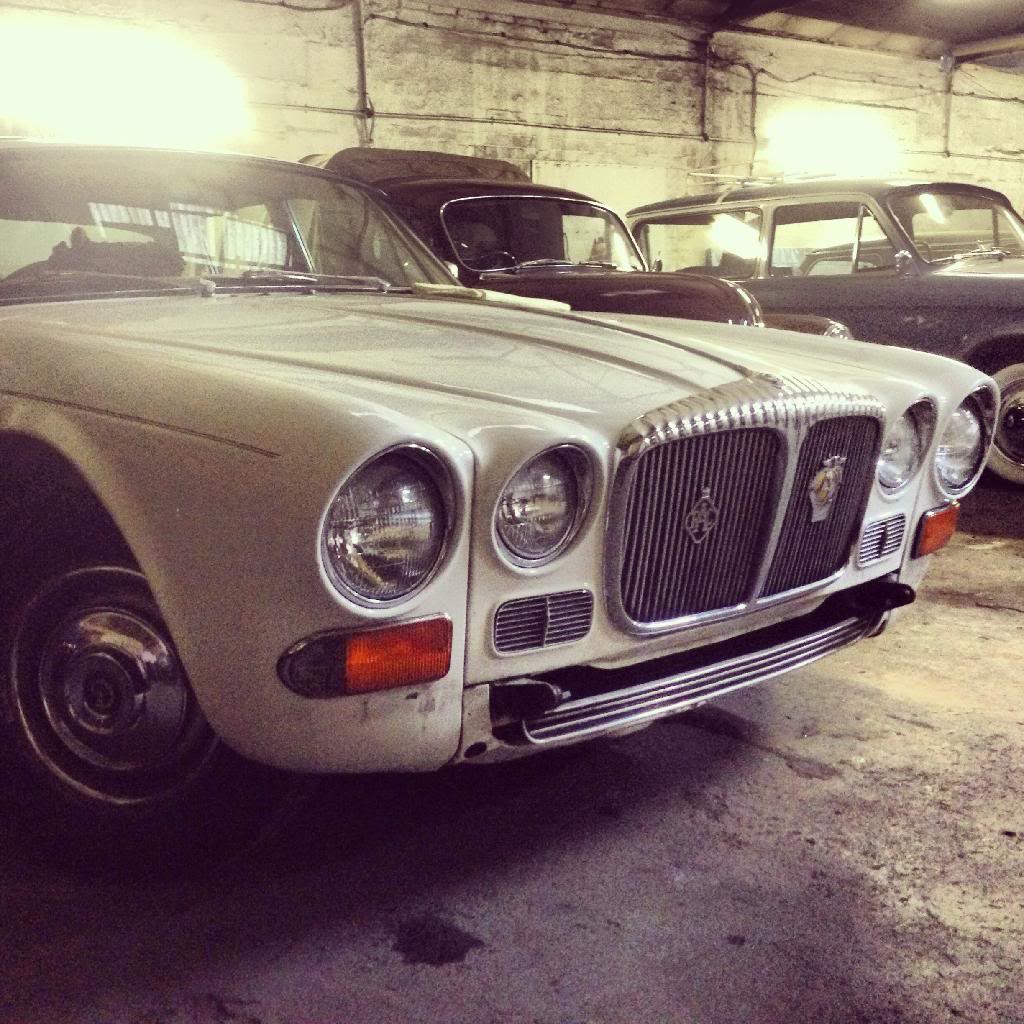
Welcome, what a nice example of a Series 1.
Looking forward to seeing more as you sort your Cat.
Looking forward to seeing more as you sort your Cat.
Trending Topics
Thread Starter
|
Member
Joined: Feb 2015
Posts: 48
Likes: 6
From: The Red Side of Liverpool
6th December 2013
Been away for some time from here so I thought I'd update you on what's been happening with the old girl.

The first 8 months of ownership have so far been very good, just a few minor issues to be expected of any 40 year old!
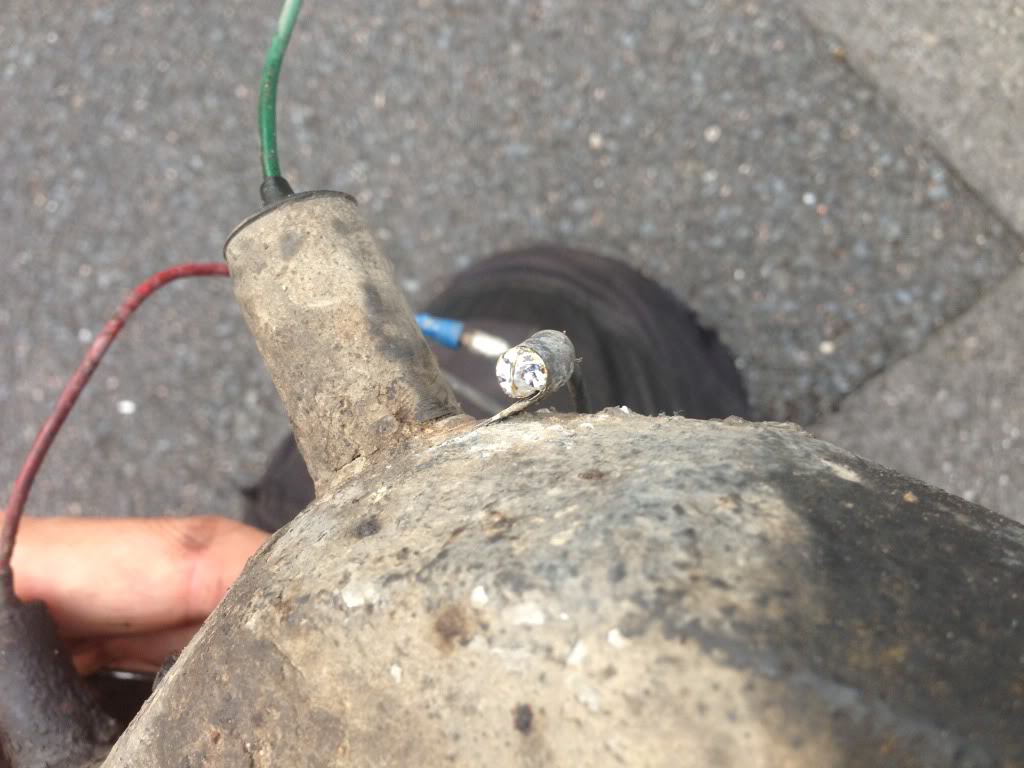
I had an issue with the off side front indicator unit back in July, behaving as if the bulb had blown. Bulb changed and the problem remained. Earth checked which was fine. Wiring connections checked and, again, all good.
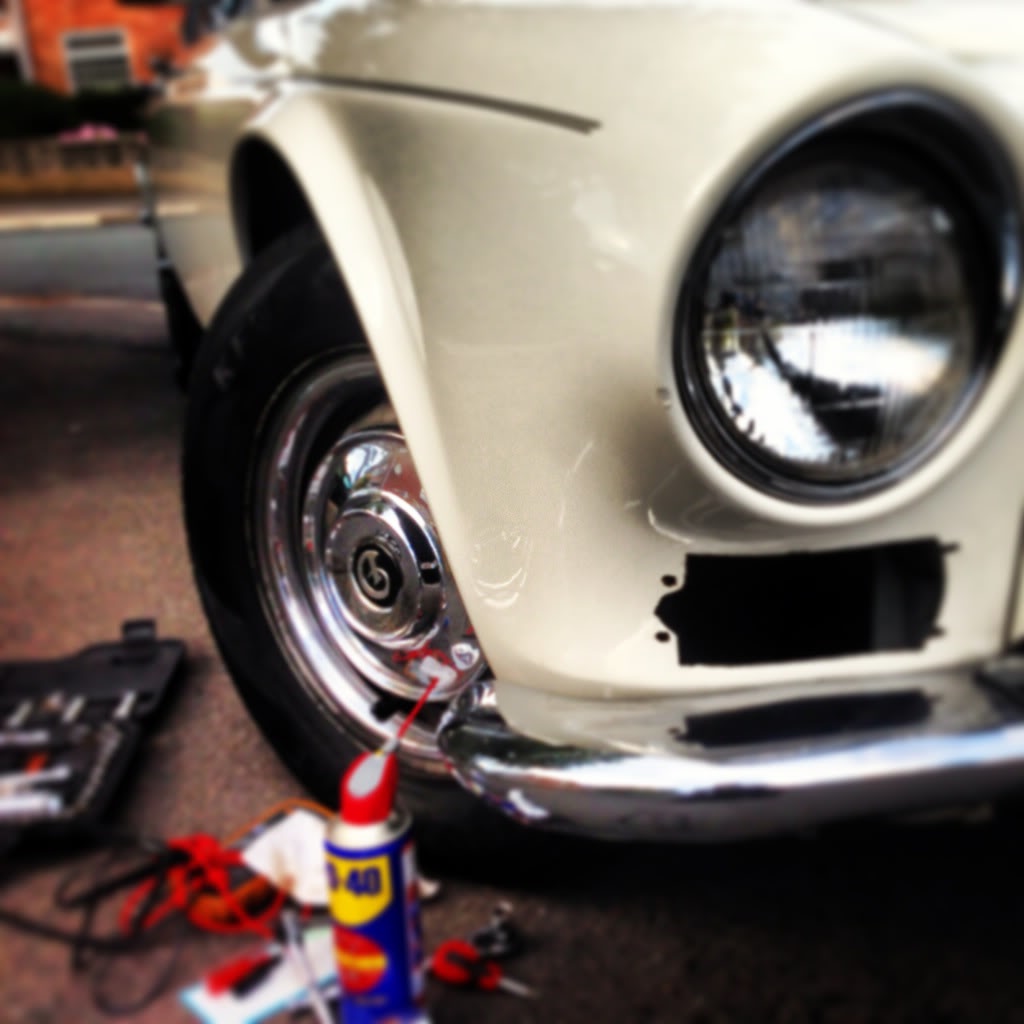
So, multimeter into the socket which indicated it was getting power. I didn't know how much it should be getting however. Long story short, the wiring in the light unit corroded to a pile of green dust when I checked it.
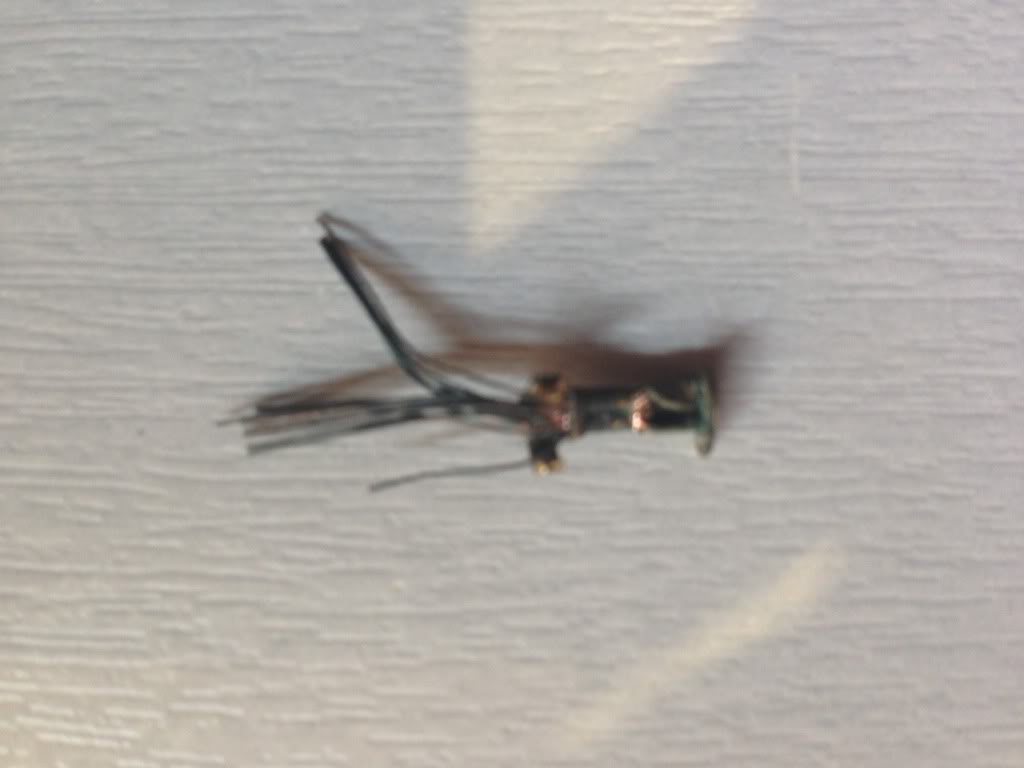
Not wanting to shell out for a new light cluster I soldered a new wire into the back of the connector and we were up and running again. Also cleaned the earths and soldered the wires in as opposed to them being held in by a copper sleeve.

The AED was cleaned out not long after I got the car but soon began its party trick of trying to remove as much fuel from the car via its overflow pipe as it could. In the end, I removed the bi-metallic strip from the top of the unit and its been fine since. You just have to warm the engine for a minute before moving off. Normally, once the temp needle is off its stop, she'll idle. As she won't be leaving her cosy lock up over Winter, I've no real need for a choke anyway.
Anyway, this Winter I plan on removing the front wings and rear lower panels and fuel tanks to give her a bloody good hiding with the Waxoyl stick. It was with great trepidation that I took the inner wheel arch closing panels off expecting it to have a few patches of the dreaded tin cancer. To my eternal surprise, not to mention joy, all seemed good both sides! We'll see if it is the
Same story at the rear...

Been away for some time from here so I thought I'd update you on what's been happening with the old girl.
The first 8 months of ownership have so far been very good, just a few minor issues to be expected of any 40 year old!
I had an issue with the off side front indicator unit back in July, behaving as if the bulb had blown. Bulb changed and the problem remained. Earth checked which was fine. Wiring connections checked and, again, all good.
So, multimeter into the socket which indicated it was getting power. I didn't know how much it should be getting however. Long story short, the wiring in the light unit corroded to a pile of green dust when I checked it.
Not wanting to shell out for a new light cluster I soldered a new wire into the back of the connector and we were up and running again. Also cleaned the earths and soldered the wires in as opposed to them being held in by a copper sleeve.
The AED was cleaned out not long after I got the car but soon began its party trick of trying to remove as much fuel from the car via its overflow pipe as it could. In the end, I removed the bi-metallic strip from the top of the unit and its been fine since. You just have to warm the engine for a minute before moving off. Normally, once the temp needle is off its stop, she'll idle. As she won't be leaving her cosy lock up over Winter, I've no real need for a choke anyway.
Anyway, this Winter I plan on removing the front wings and rear lower panels and fuel tanks to give her a bloody good hiding with the Waxoyl stick. It was with great trepidation that I took the inner wheel arch closing panels off expecting it to have a few patches of the dreaded tin cancer. To my eternal surprise, not to mention joy, all seemed good both sides! We'll see if it is the
Same story at the rear...
Thread Starter
|
Member
Joined: Feb 2015
Posts: 48
Likes: 6
From: The Red Side of Liverpool
8th December 2013
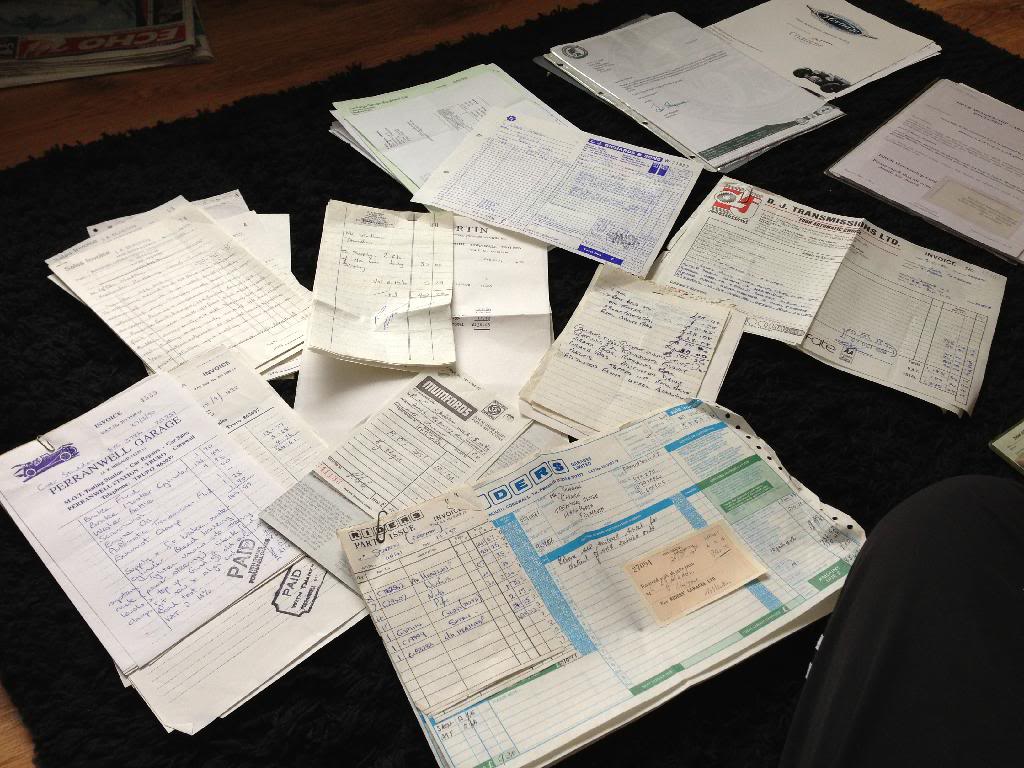
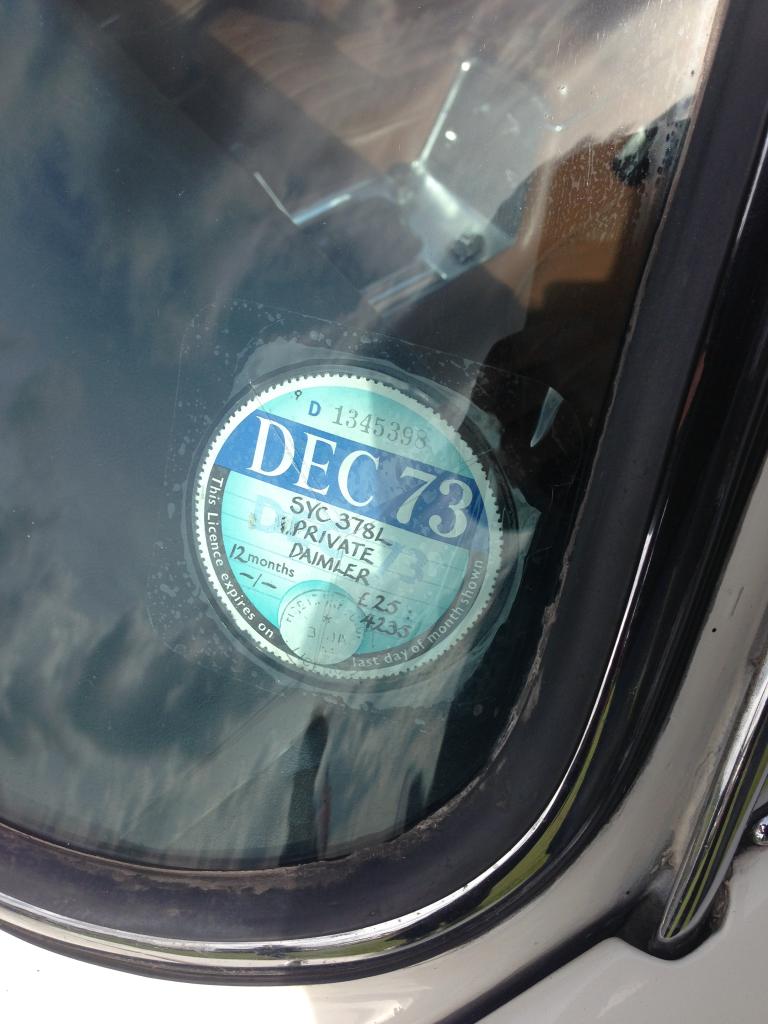
(This is a reply to someone, I thought it was relevant here)She used to be Sable (brown) and she came with a stack of history and bills, restored in the late 80s and she has stood up brilliantly. She was owned by a Commander Steddon in the 80s, he had a lot of work done on her.
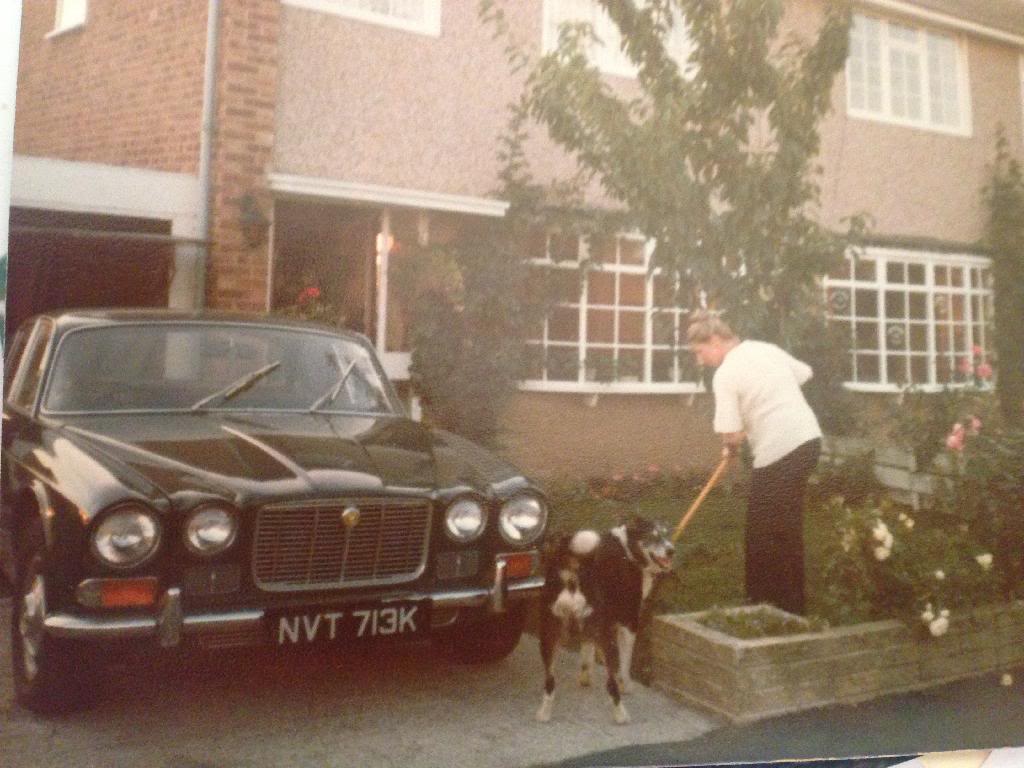
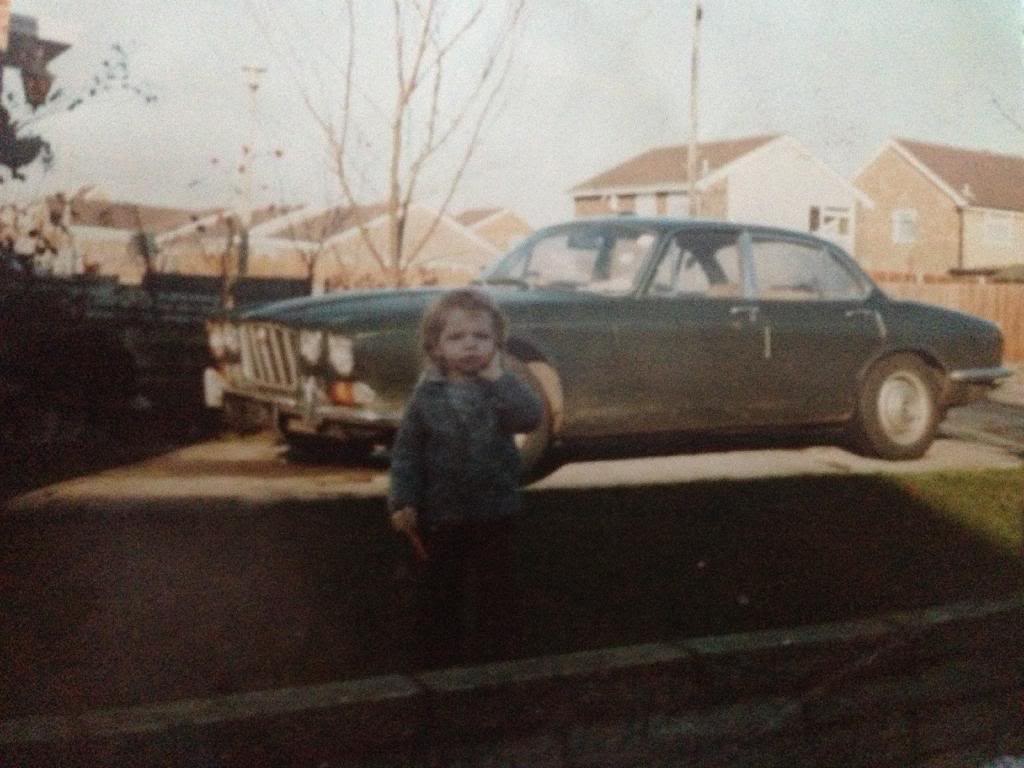
The inspiration for me to have one was my Dad's BRG one back in the late 70s/early 80s. He hadn't had it long when he holed the sump after hitting something in the road, losing all the oil. It languished on our driveway for a bit before my mum sold it for �100! That was around 1983. Sadly, NVT 713K is now long gone. Please disregard my girly locks in the photos!
(This is a reply to someone, I thought it was relevant here)She used to be Sable (brown) and she came with a stack of history and bills, restored in the late 80s and she has stood up brilliantly. She was owned by a Commander Steddon in the 80s, he had a lot of work done on her.
The inspiration for me to have one was my Dad's BRG one back in the late 70s/early 80s. He hadn't had it long when he holed the sump after hitting something in the road, losing all the oil. It languished on our driveway for a bit before my mum sold it for �100! That was around 1983. Sadly, NVT 713K is now long gone. Please disregard my girly locks in the photos!
Thread Starter
|
Member
Joined: Feb 2015
Posts: 48
Likes: 6
From: The Red Side of Liverpool
7th May 2014
Evening gents, thought I'd go for another six monthly update. I had a massive schedule of work I wanted to do to get it to how I want it. Needless to say I couldn't complete everything without not being able to use it do I've done what I can.
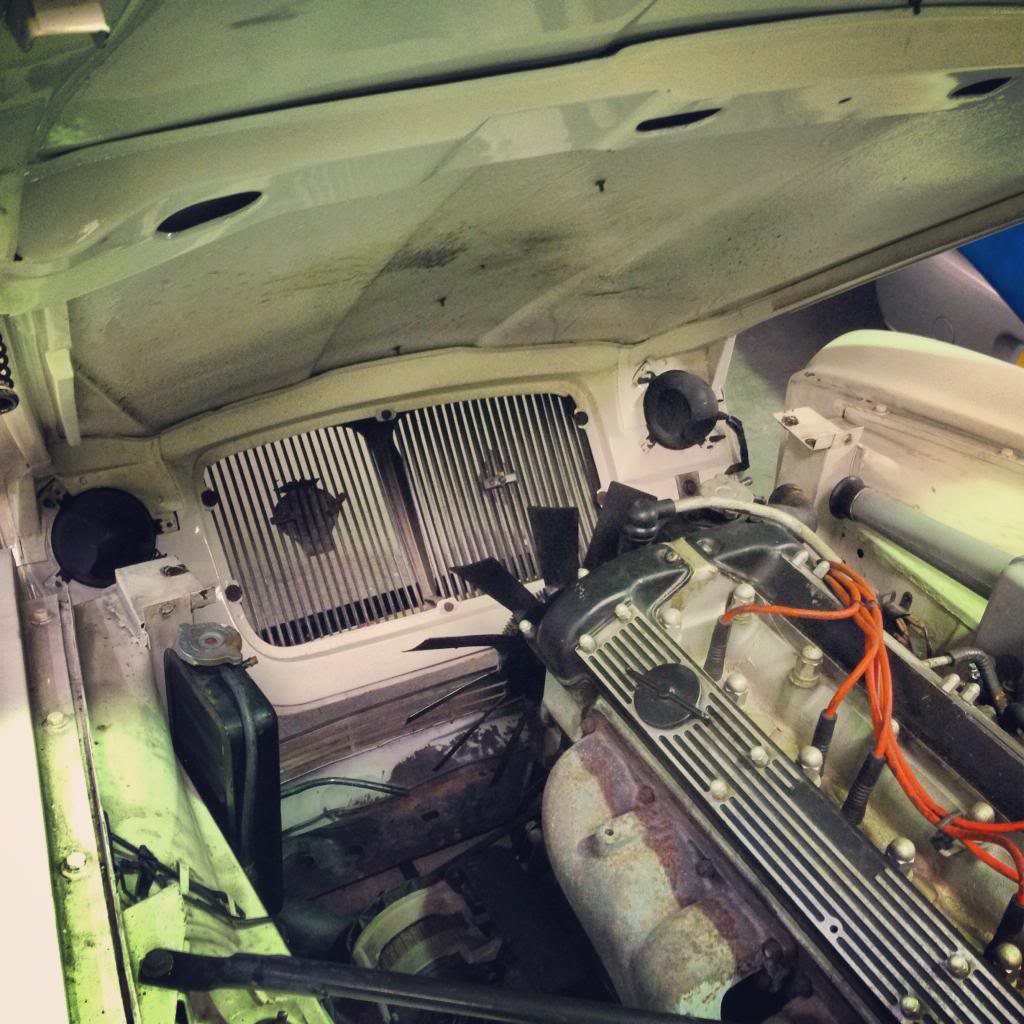
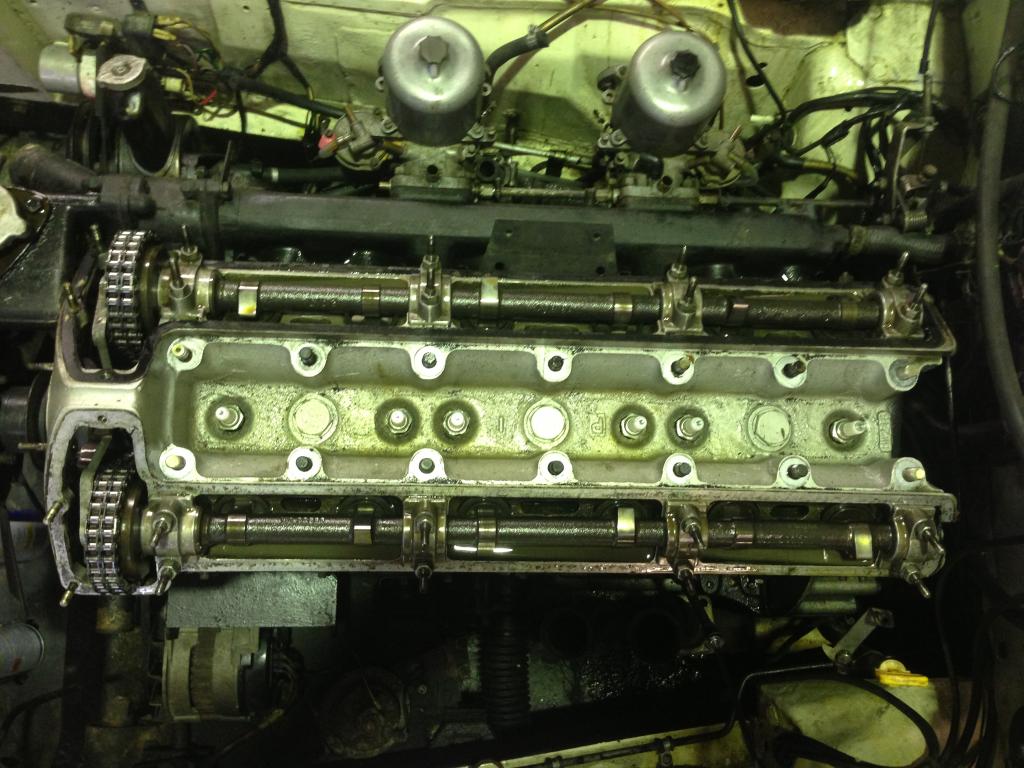
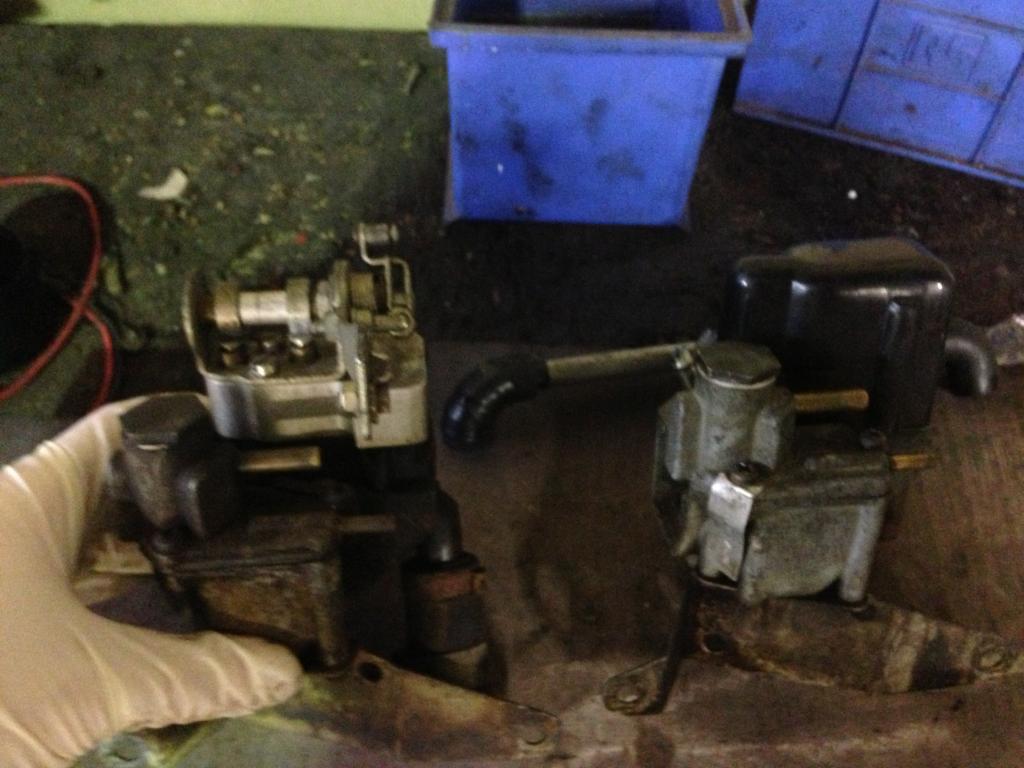
First off, I lagged the AED hot air pipe that draws hot air from the exhaust manifold. The AED was also removed and stripped right down for a thorough cleaning.
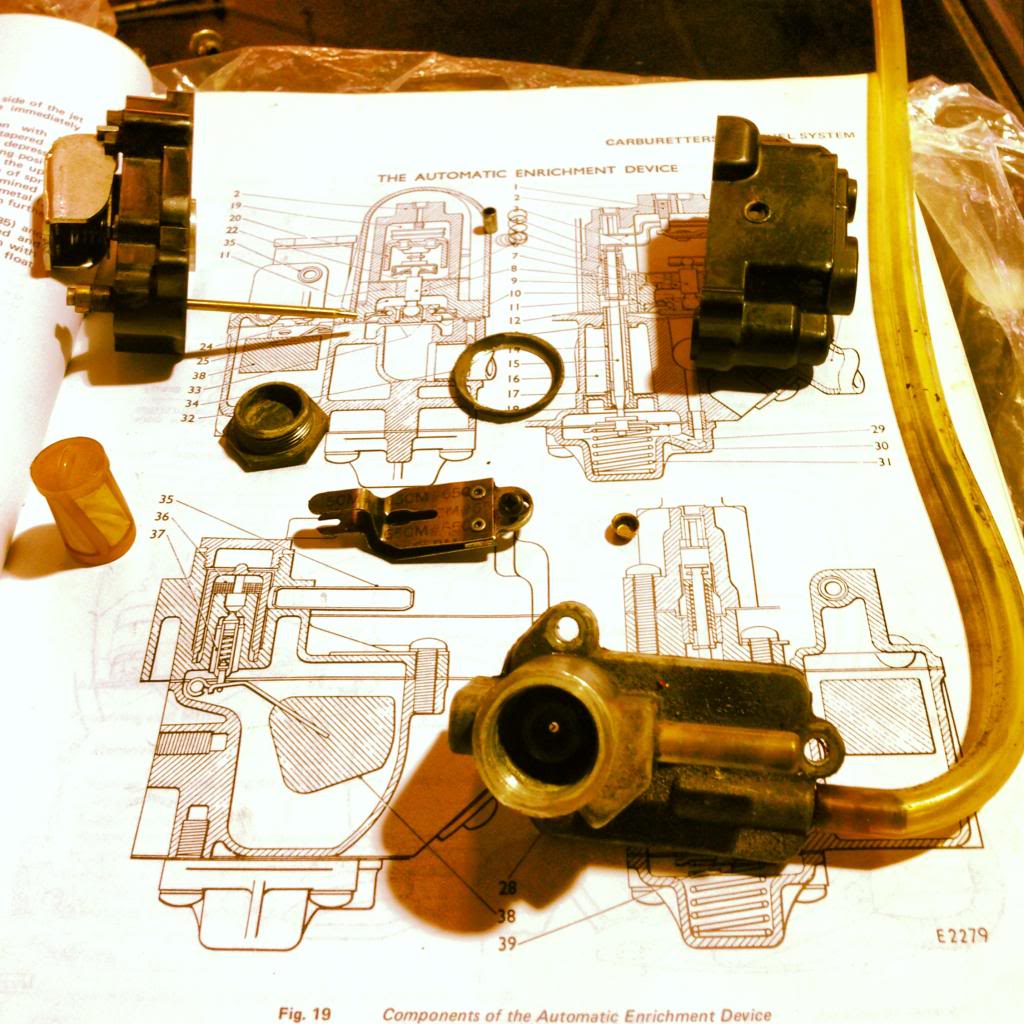
While it was apart I replaced the gaskets, filter and the float, the diaphragm was in good shape so I left it. I also fitted electronic ignition in place of the points and now it's running great.
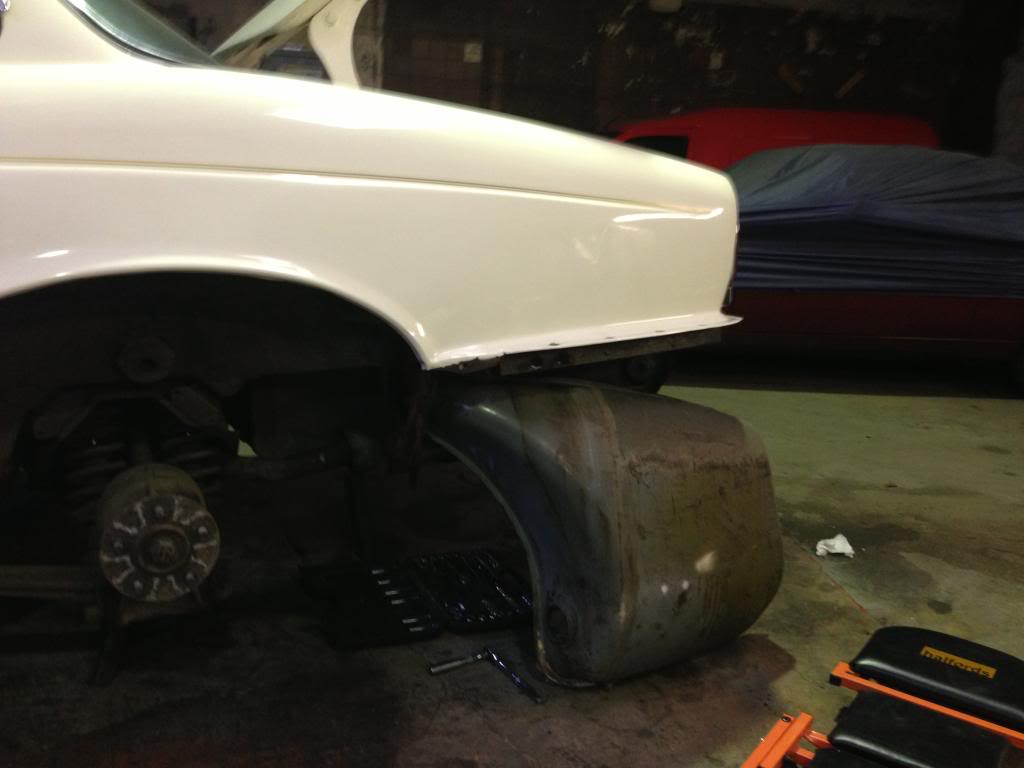
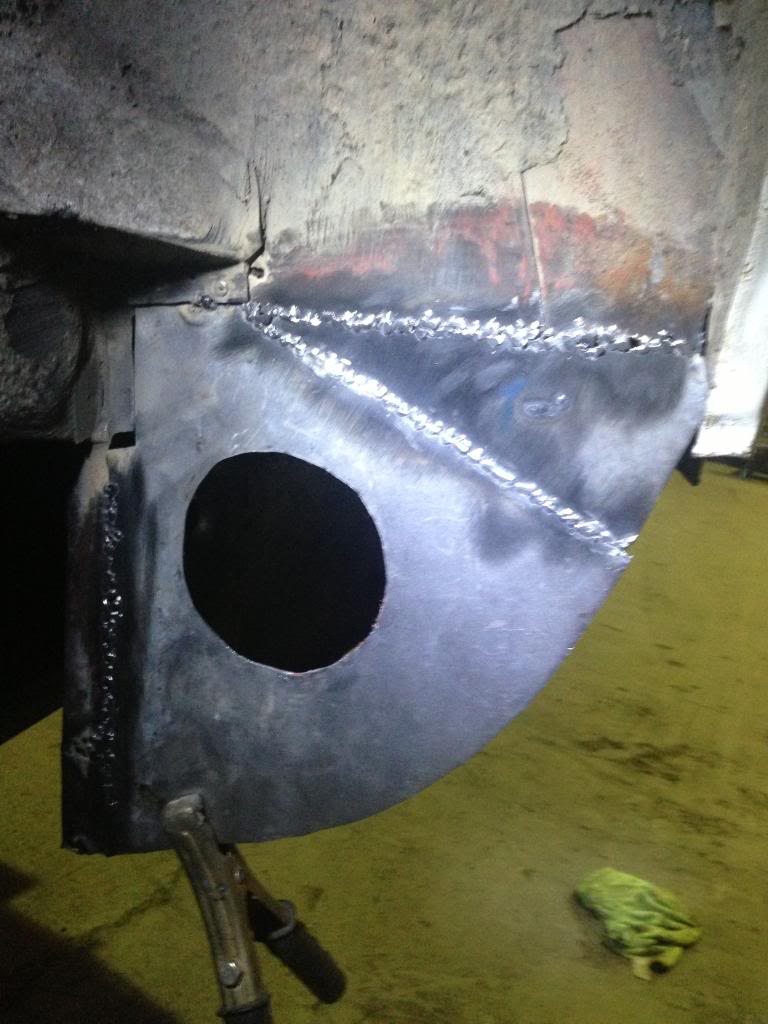
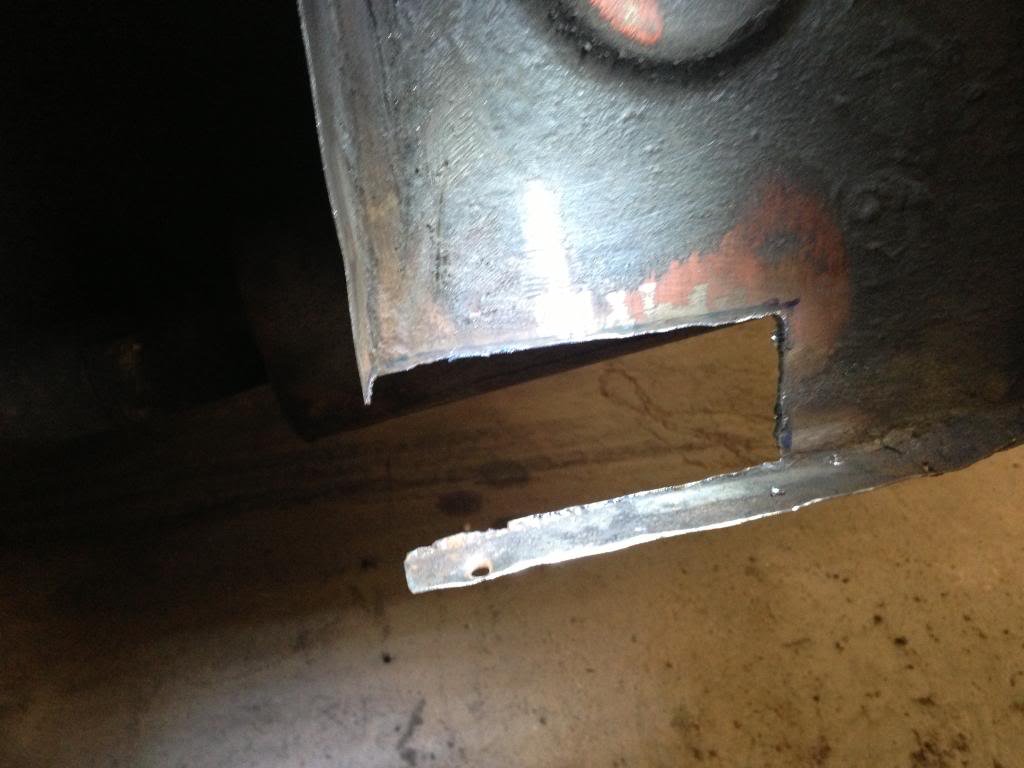
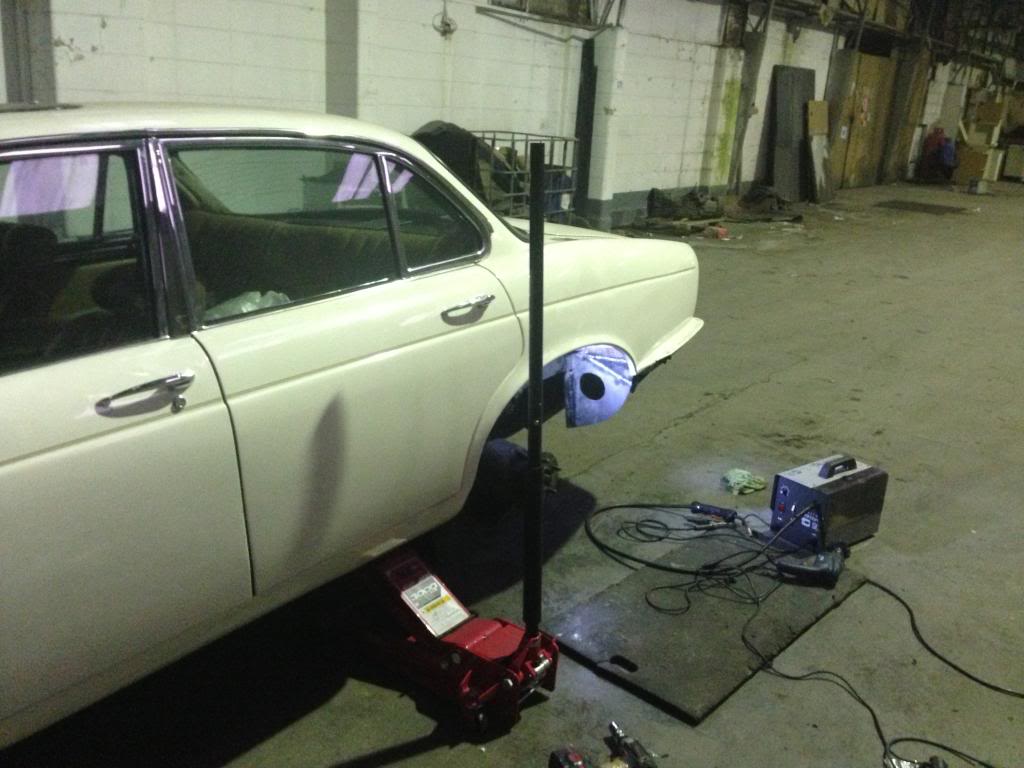
With the body, I knew the inner rear arch panel would be needing work or replacement. So I removed the tank panel and tank and went digging...
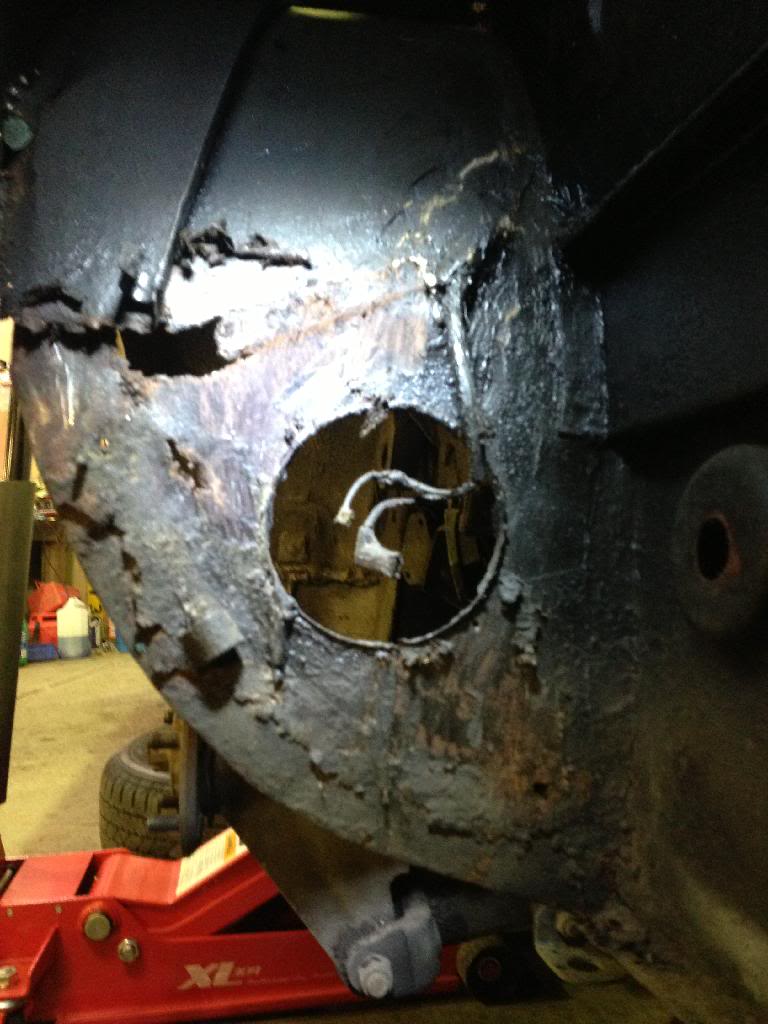
After tearing off all the old under seal I found a couple of holes and a poor previous repair.

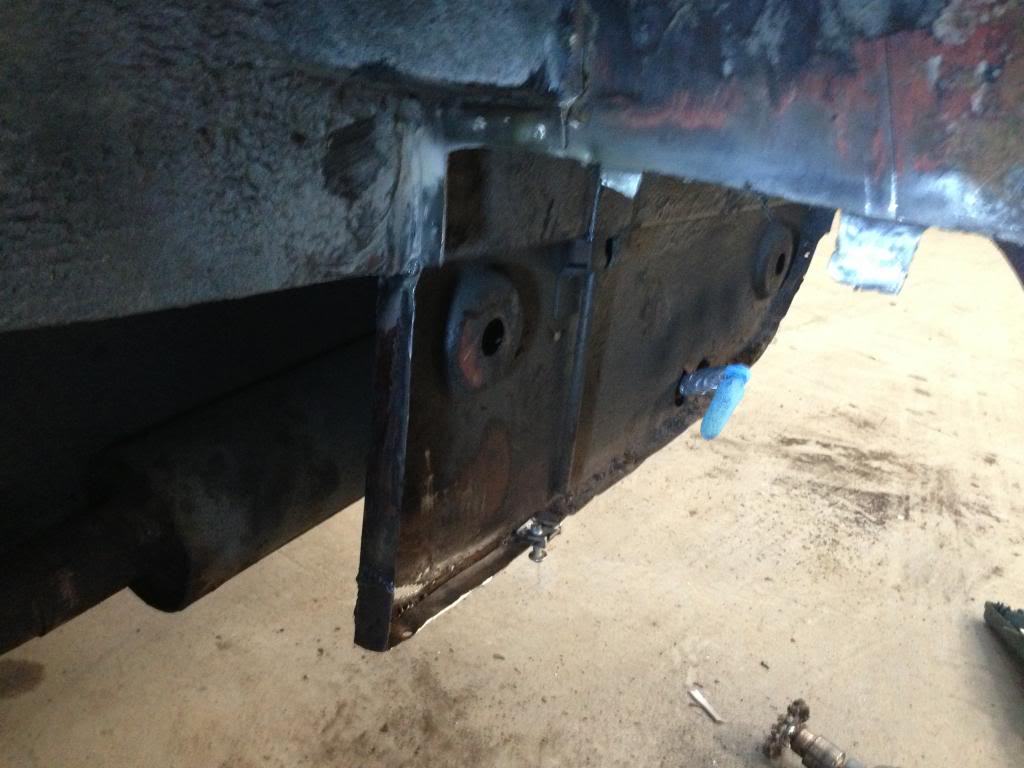
Instead of just patching it I decided to make a template and just cut the lot out.
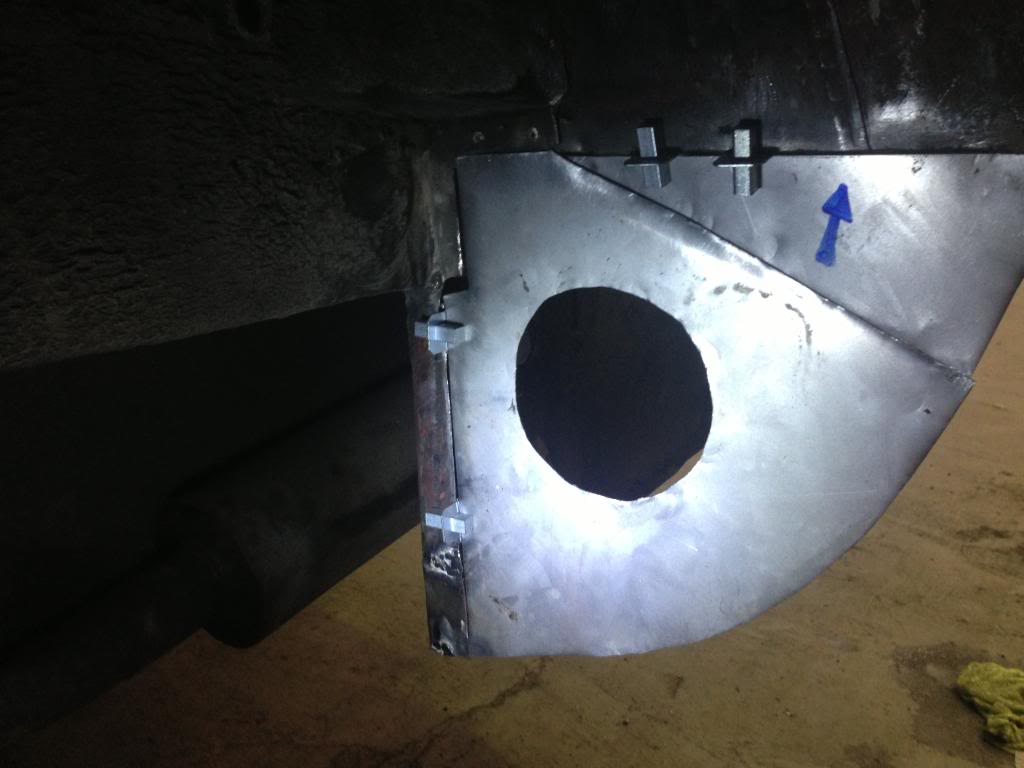
After clamping it all into place using Frost's brilliant panel clamps...
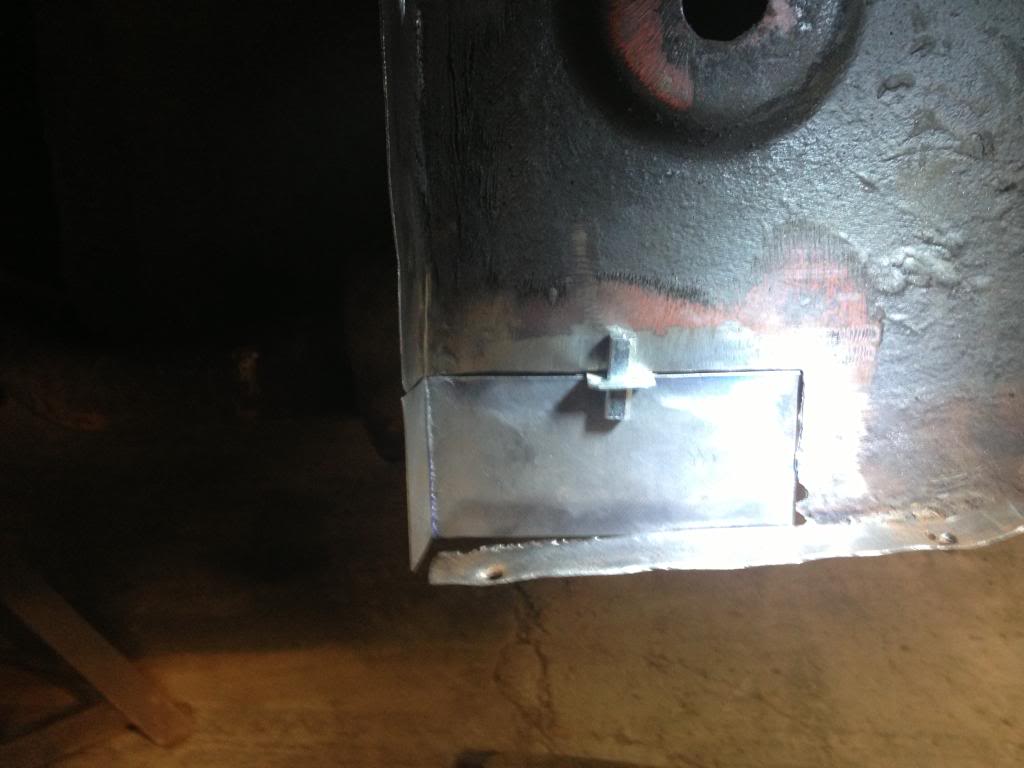
...It was all welded up.
While digging I found this just behind the panel I was replacing...
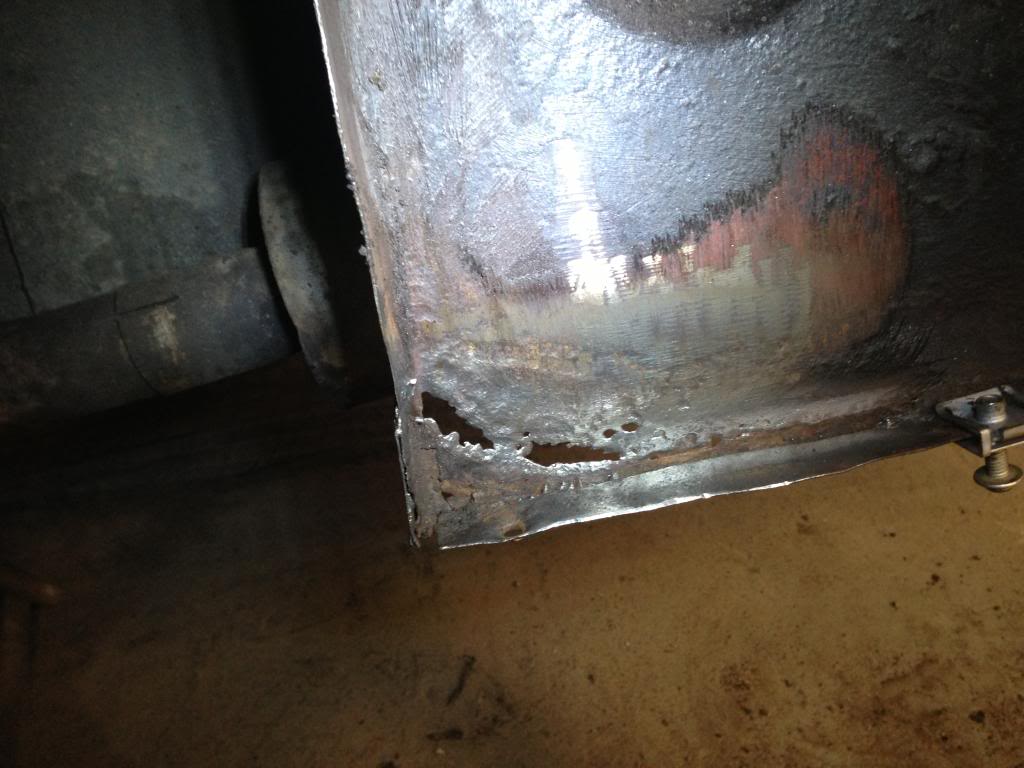
...so that was relieved of its duties as well.
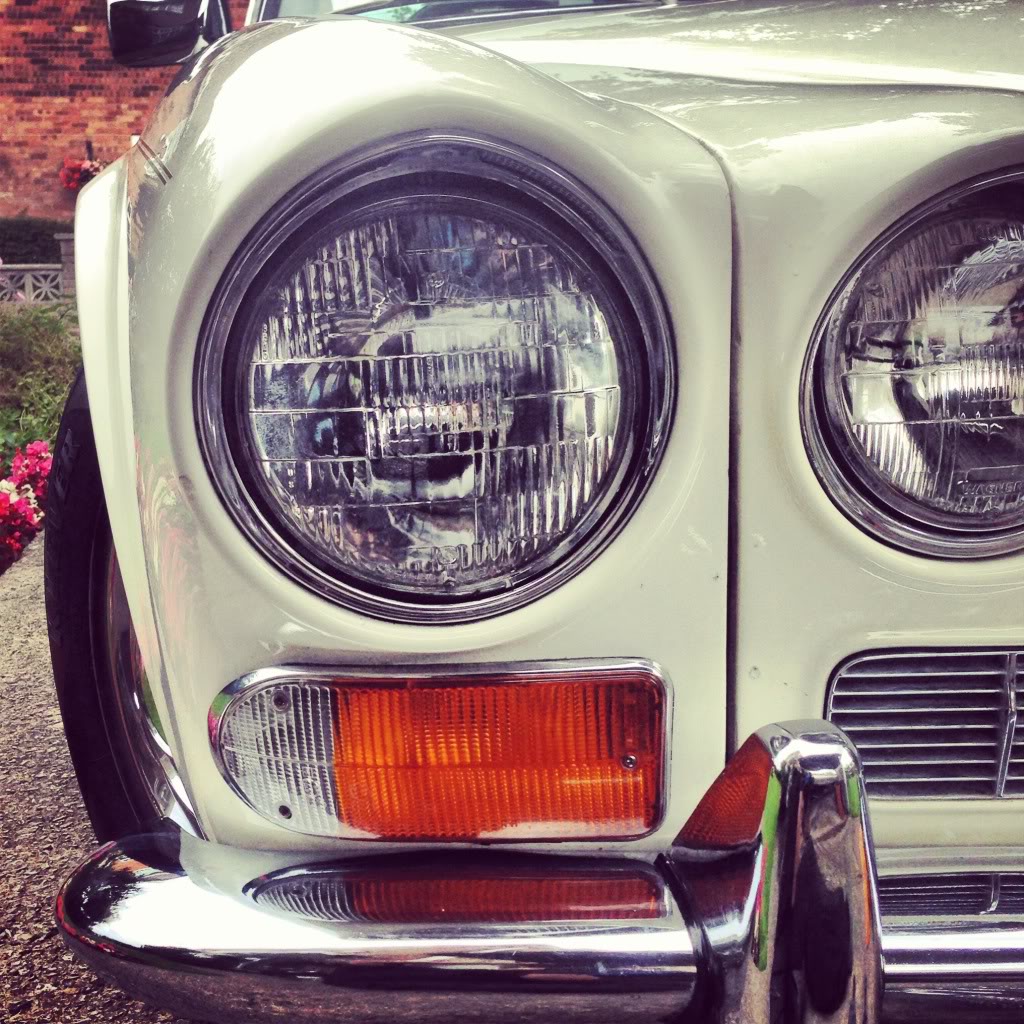
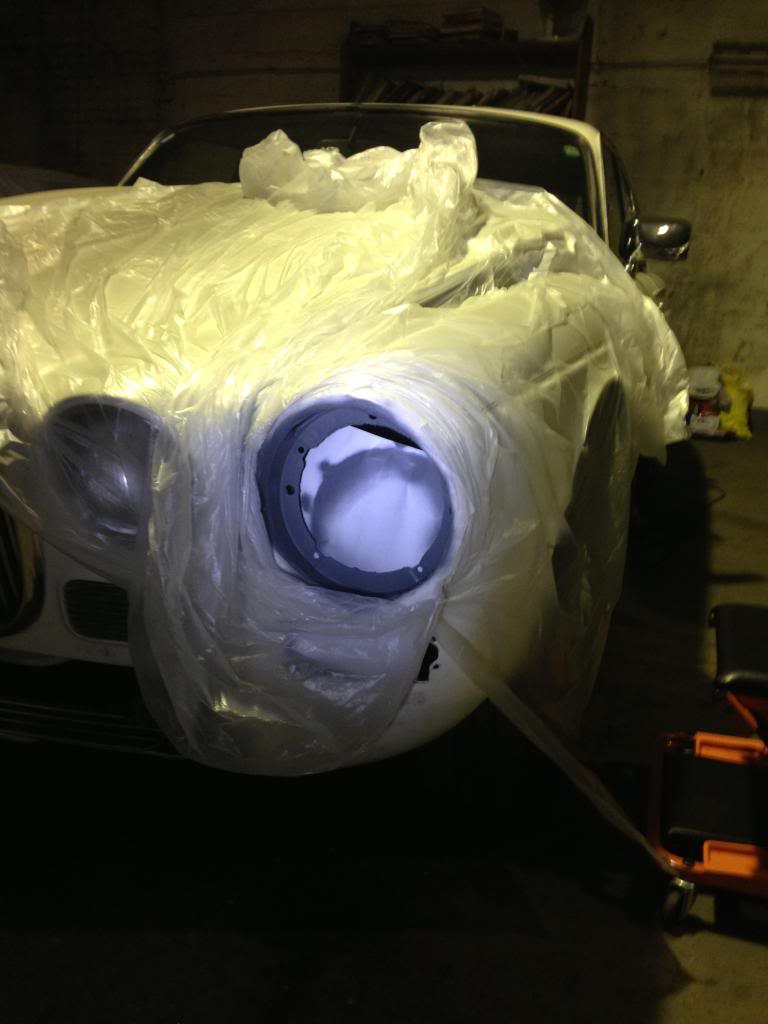
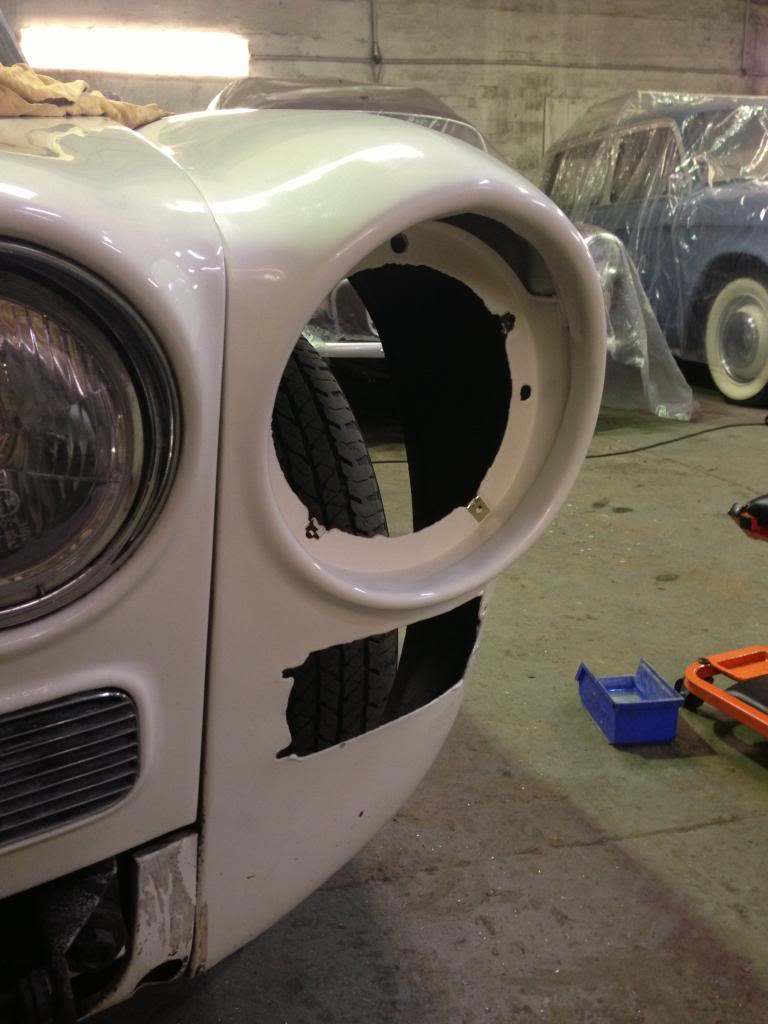
I also found a rust scab in the nearside outer headlight which was ground out, treated, primed and painted.
After all the bodywork was finished it was back to dealing with the details.
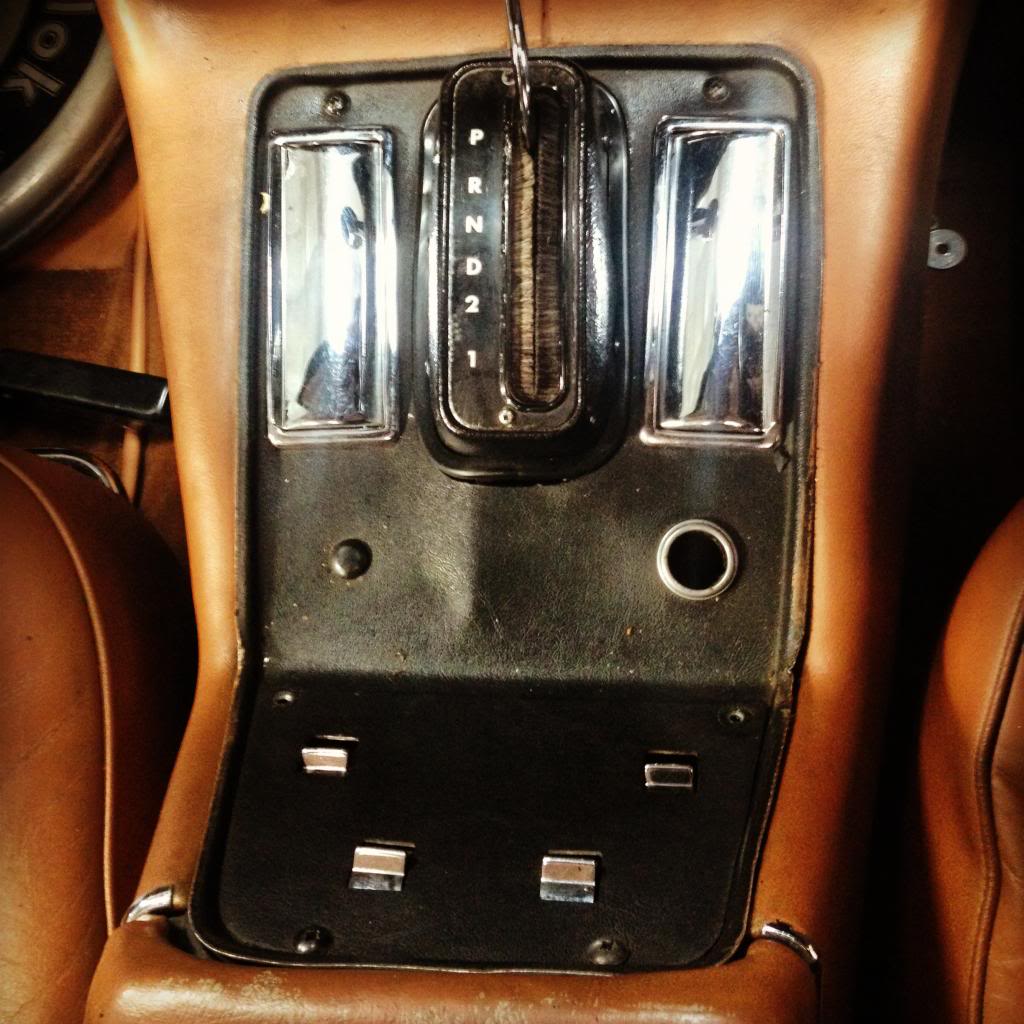
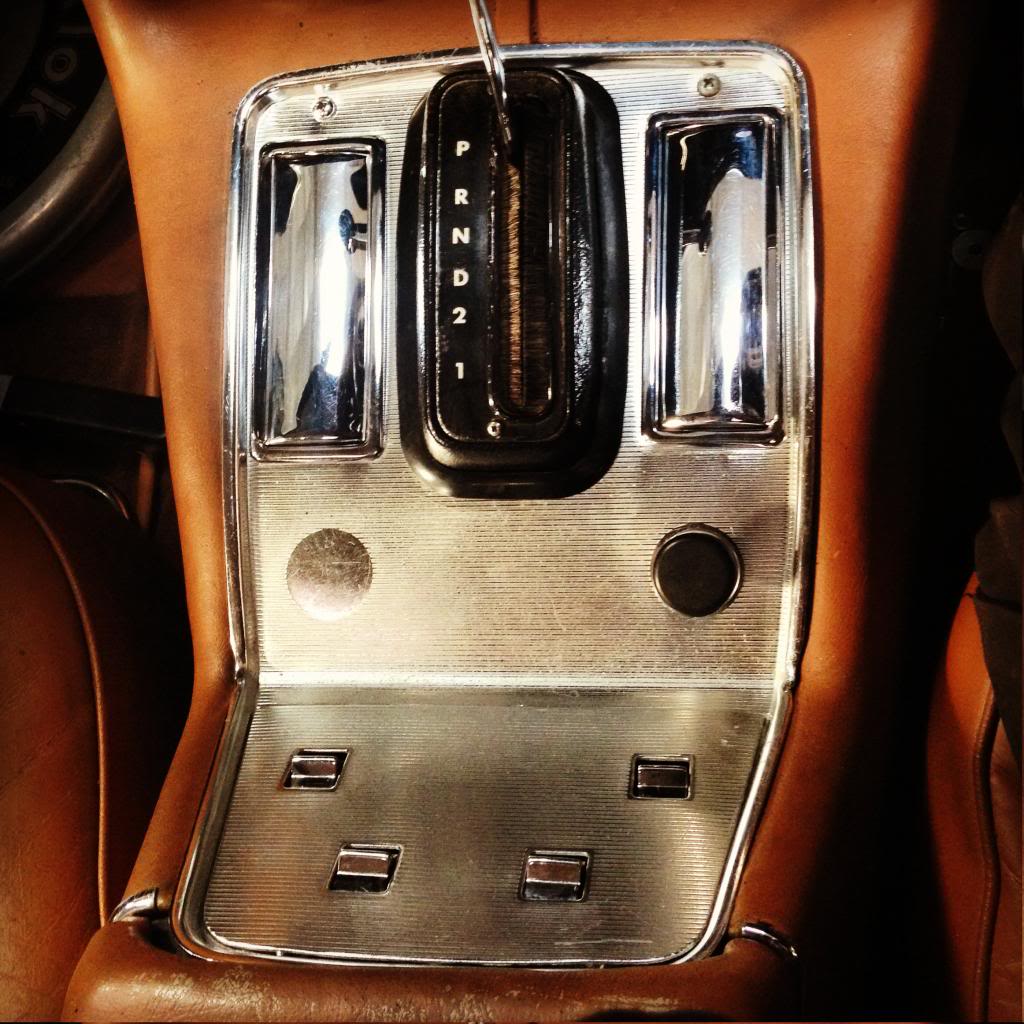
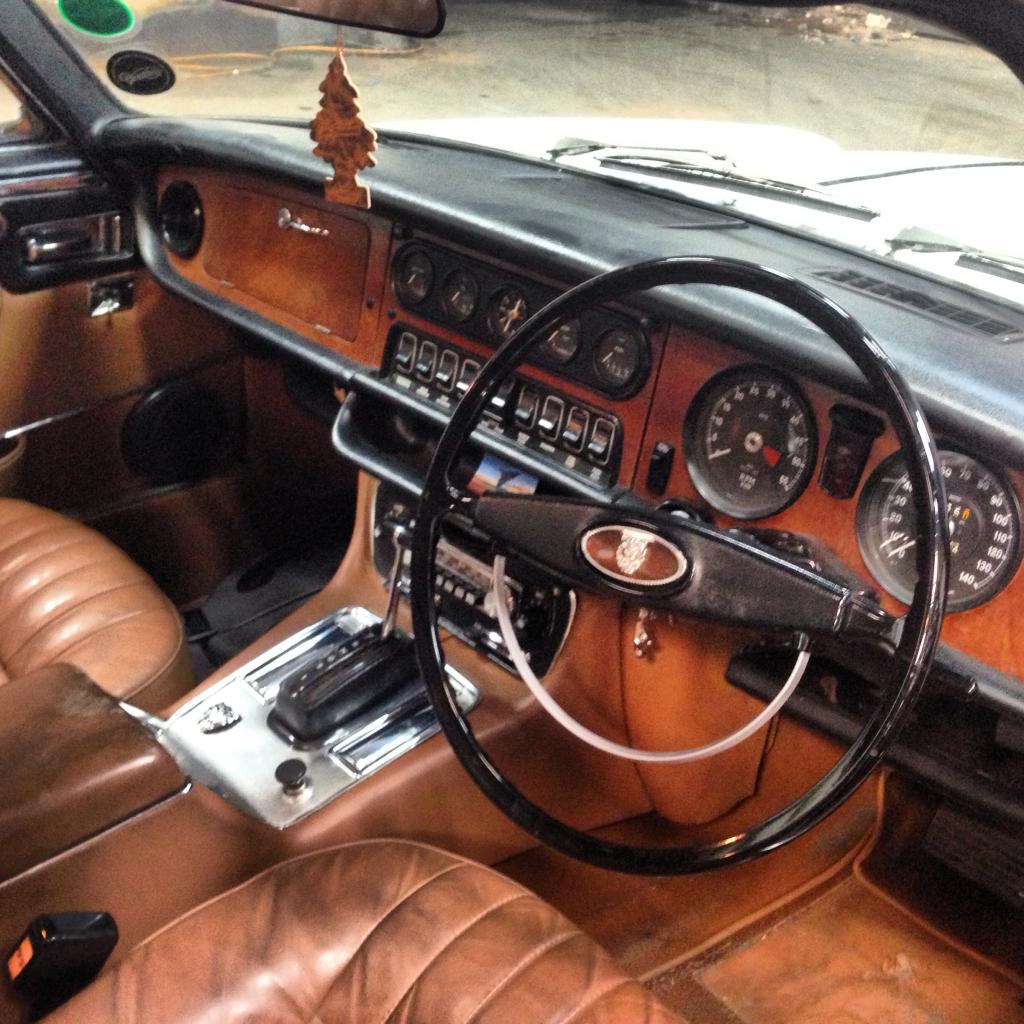
I changed my centre console from my black one which was looking tired to an aluminium one I got from a car being broken not far from me.
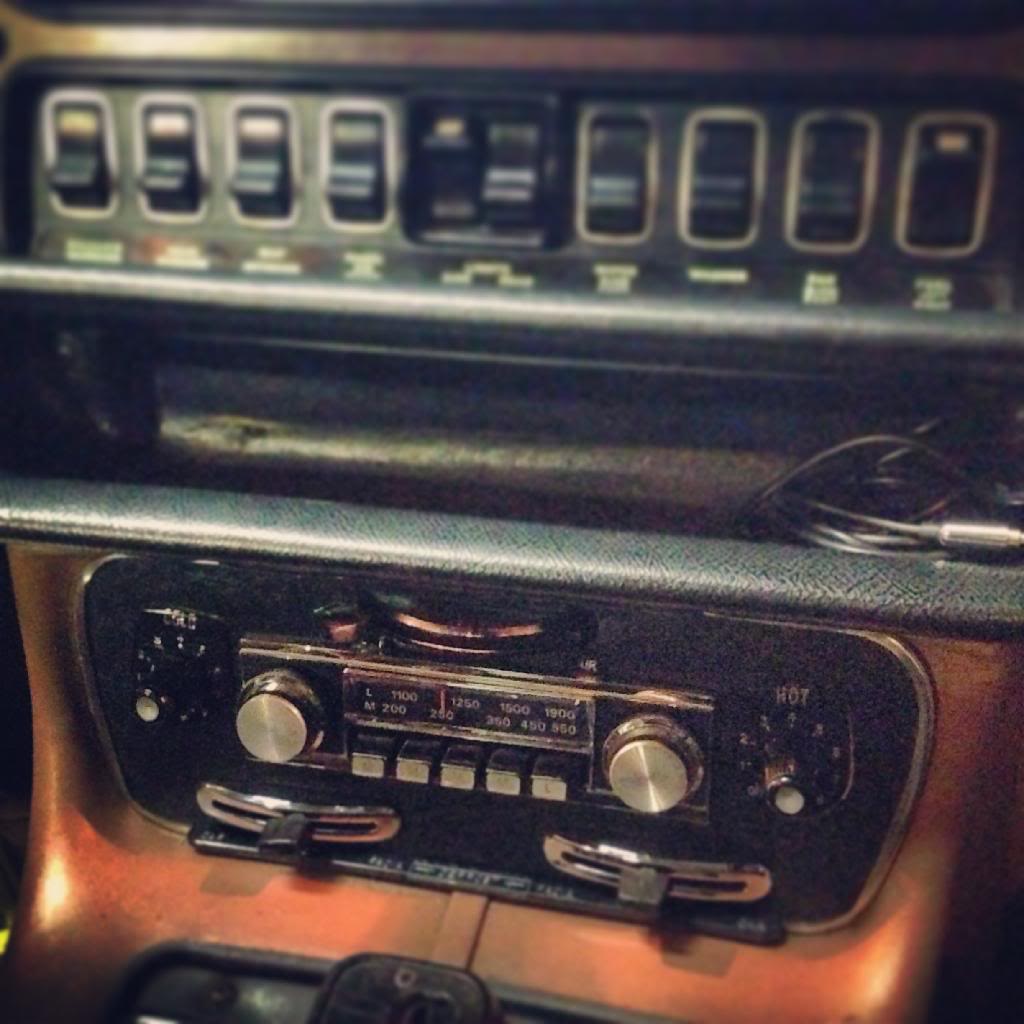
I also sourced a period Radiomobile 1095 with iPod capability to replace the woeful 80's tape deck fitted.
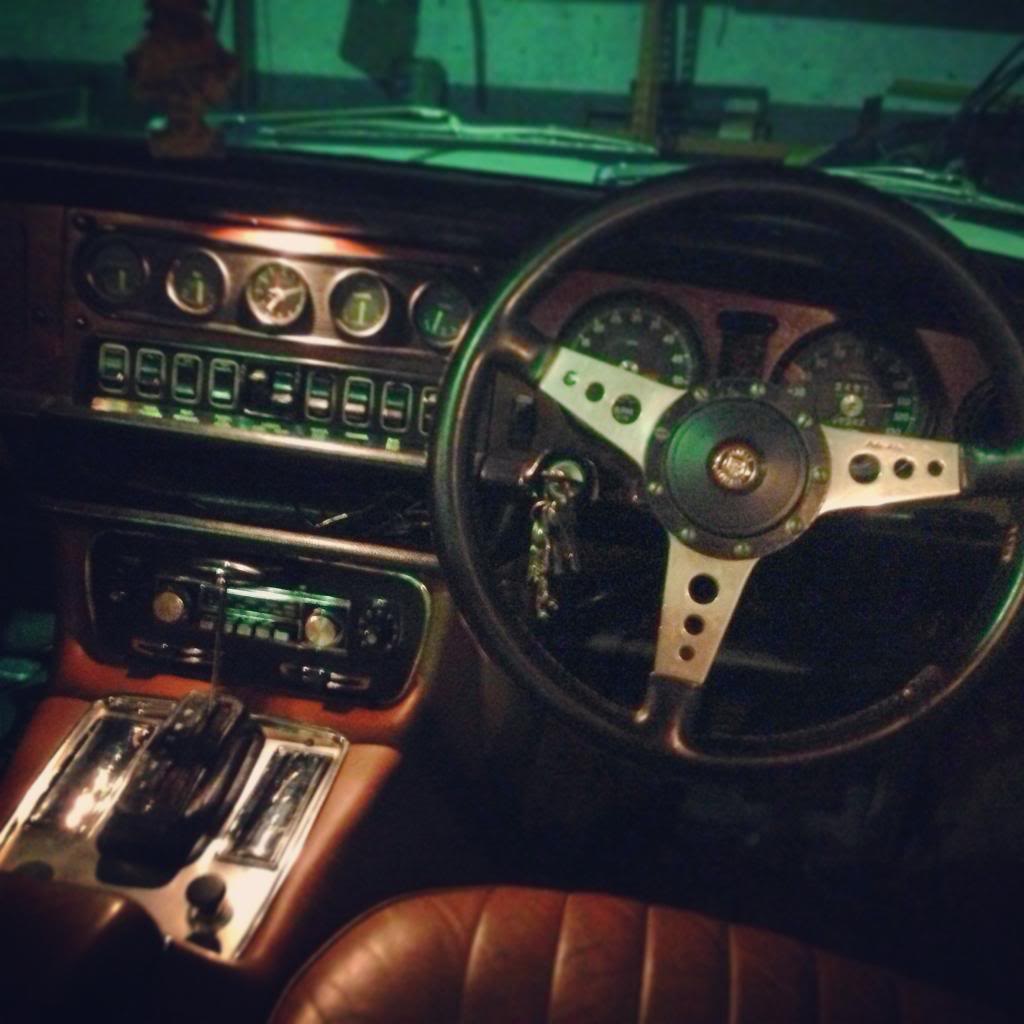
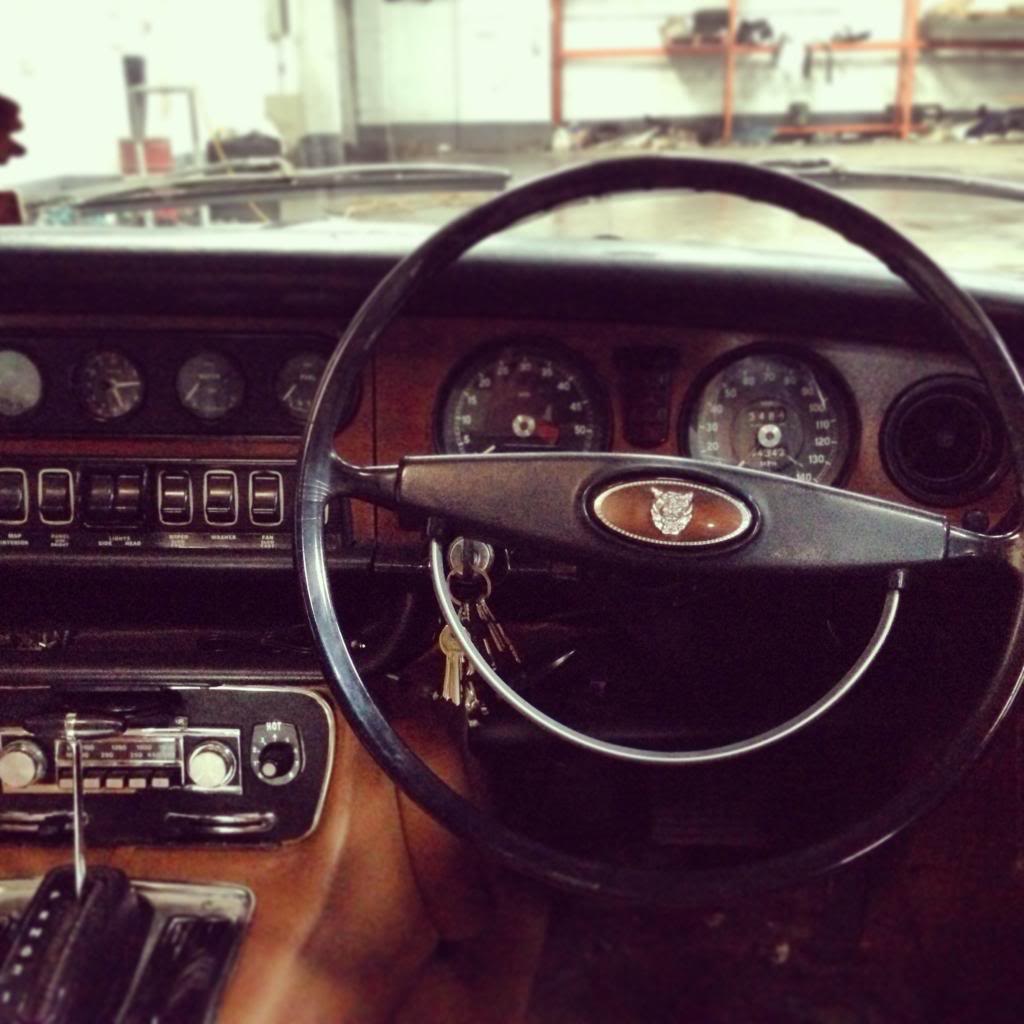
The car had a period Moto Lita 3 spoke wheel fitted which I replaced with a standard wheel, again given up by the Jaguar being broken.
There are still a few jobs to do, since being laid up she has started getting warm in traffic. The rad is getting re-cored and there'll be a Kenlowe fan getting fitted. Also, doing a mod to minimise thermal shocks to the engine block to lessen the risk of cracking the block, which they're famous for!
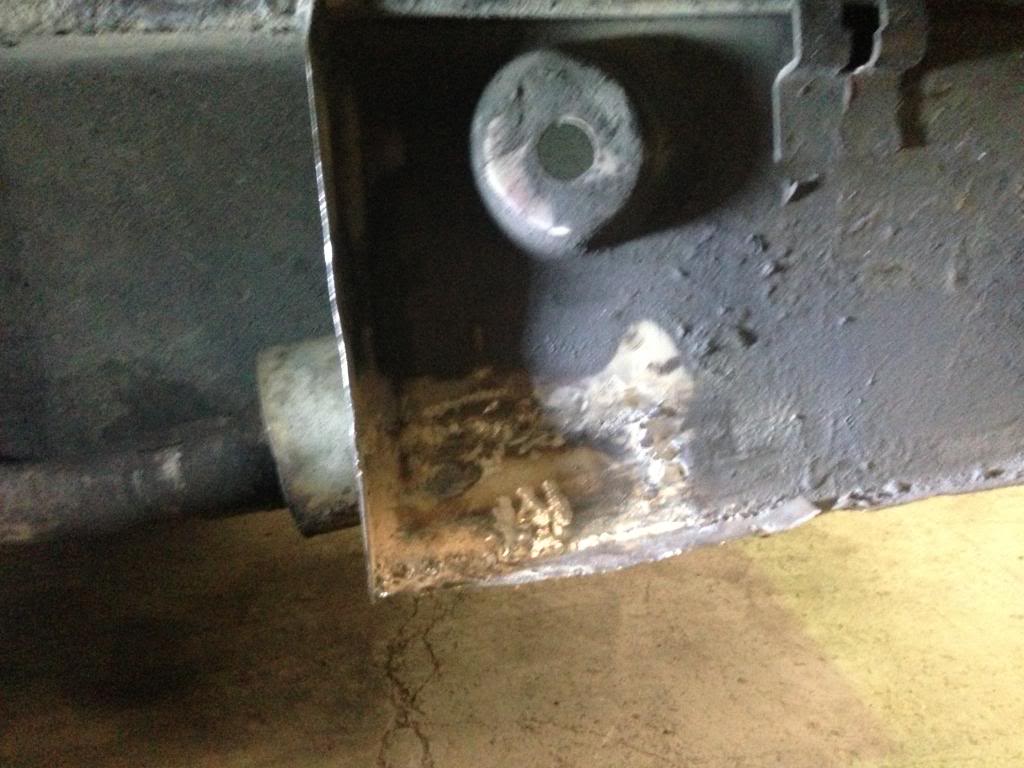
Changed the exhausts from curved to straight too, I think it looks much better...
Evening gents, thought I'd go for another six monthly update. I had a massive schedule of work I wanted to do to get it to how I want it. Needless to say I couldn't complete everything without not being able to use it do I've done what I can.
First off, I lagged the AED hot air pipe that draws hot air from the exhaust manifold. The AED was also removed and stripped right down for a thorough cleaning.

While it was apart I replaced the gaskets, filter and the float, the diaphragm was in good shape so I left it. I also fitted electronic ignition in place of the points and now it's running great.

With the body, I knew the inner rear arch panel would be needing work or replacement. So I removed the tank panel and tank and went digging...

After tearing off all the old under seal I found a couple of holes and a poor previous repair.


Instead of just patching it I decided to make a template and just cut the lot out.

After clamping it all into place using Frost's brilliant panel clamps...

...It was all welded up.

While digging I found this just behind the panel I was replacing...

...so that was relieved of its duties as well.


I also found a rust scab in the nearside outer headlight which was ground out, treated, primed and painted.


After all the bodywork was finished it was back to dealing with the details.

I changed my centre console from my black one which was looking tired to an aluminium one I got from a car being broken not far from me.


I also sourced a period Radiomobile 1095 with iPod capability to replace the woeful 80's tape deck fitted.

The car had a period Moto Lita 3 spoke wheel fitted which I replaced with a standard wheel, again given up by the Jaguar being broken.


There are still a few jobs to do, since being laid up she has started getting warm in traffic. The rad is getting re-cored and there'll be a Kenlowe fan getting fitted. Also, doing a mod to minimise thermal shocks to the engine block to lessen the risk of cracking the block, which they're famous for!

Changed the exhausts from curved to straight too, I think it looks much better...


Thread Starter
|
Member
Joined: Feb 2015
Posts: 48
Likes: 6
From: The Red Side of Liverpool
7th August 2014
You may recall me saying this in my last update?
Well, I had the radiator re-cored, an excellent job done as well.
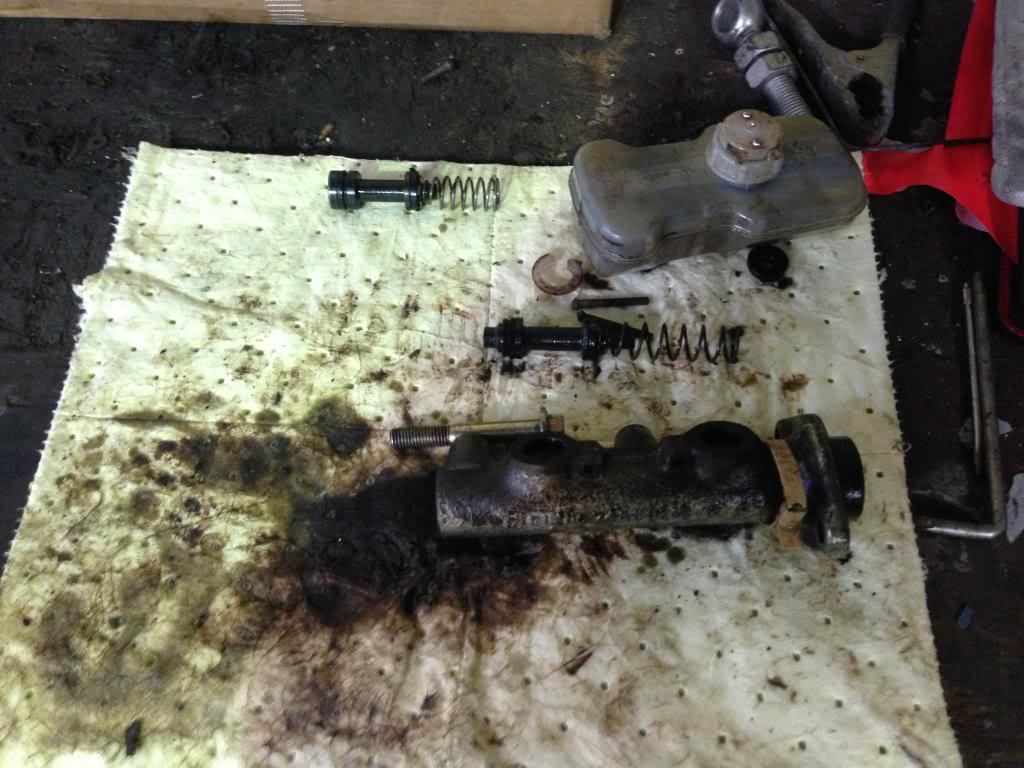
After coming back from Tatton Park, I stopped at a shop, got back in and when I started up I was treated to clouds of white smoke that rapidly dissipated. I went under the bonnet for a quick check and found the breather for the brake servo on the inlet manifold soaking wet with brake fluid. So next day I pulled the master cylinder to find a substantial leak into the servo.

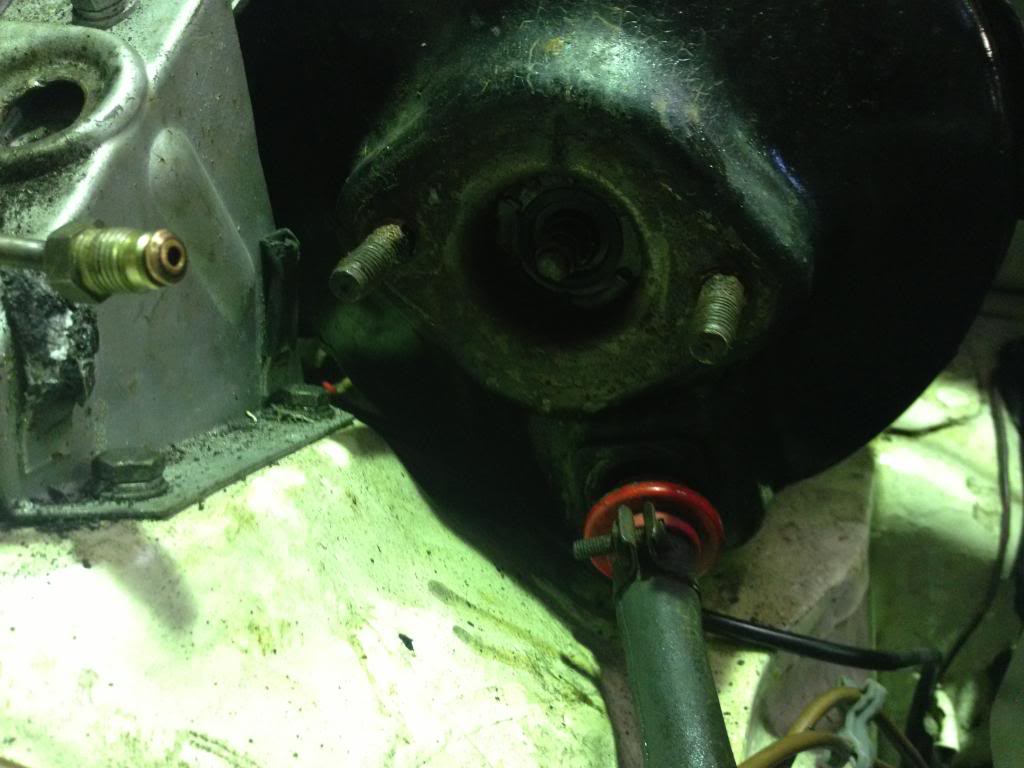
After fitting a rebuild kit to the master cylinder and a new servo valve, I reassembled it all and started up to let the excess fluid burn off. After 15 minutes of white smoke (!!) the exhausts returned to normal.
I noticed that every time I started the car I'd get white smoke. Not as heavy but enough to cause concern. She wasn't overheating but was using a small amount of coolant. The oil seemed ok until I took the engine breather off...
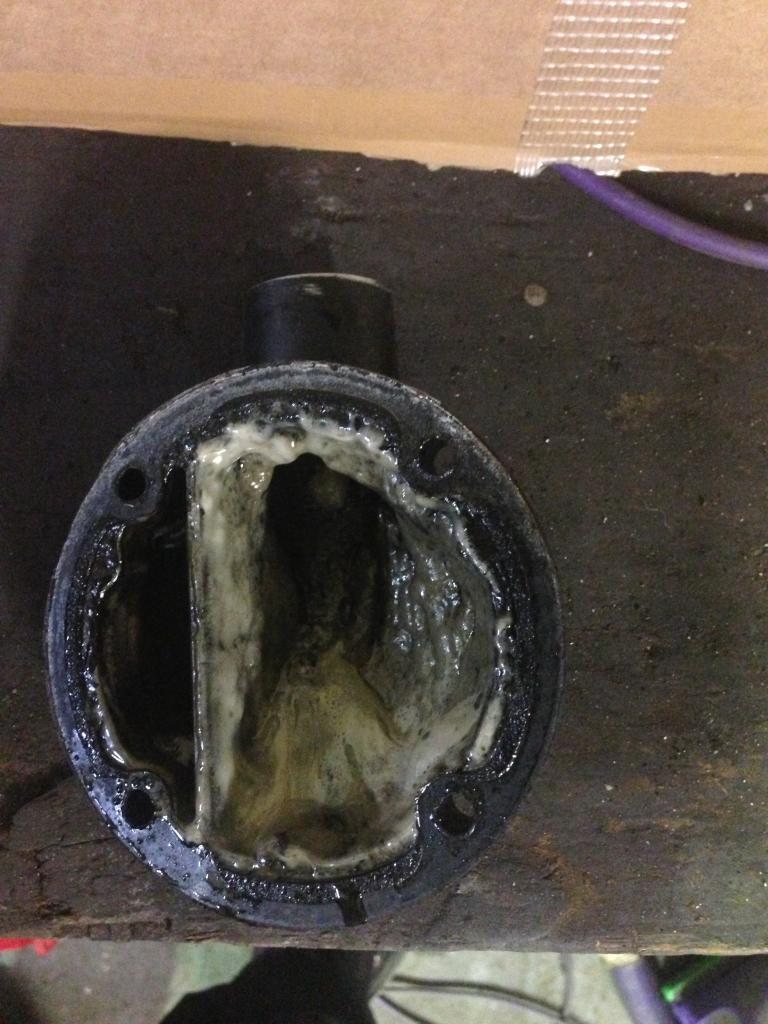
This had also bunged up the pipes where they enter the carbs causing the crankcase to over pressurise and blow the dipstick out along with lots of oil!
I did a compression test getting an average of 130psi on 1,2,3 and 6. 4 and 5 were at around 150psi, the cause of the higher readings confirmed when looking down the plug holes to see lots of water!
So, the job I was dreading having to do since buying the car, failed head gasket!
Anyway, not thinking about it too much, I decided to adopt a confident approach...
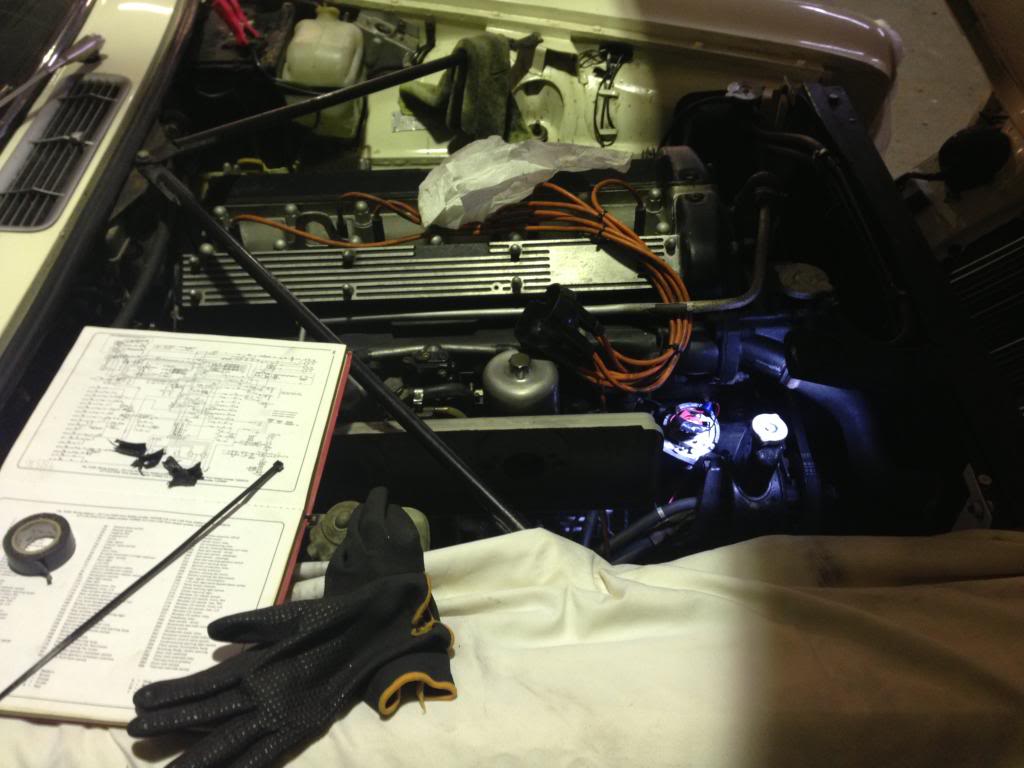
Anyone who has done a head gasket on these 'long stud' XK engines fitted to the XJ will be fully aware of the common practice of the head corroding itself to the head studs with spectacular results if the antifreeze isn't regularly replaced. With this in mind, I removed all the head nuts and blasted them with PlusGas and WD40 for a week while I removed all the other ancillaries.

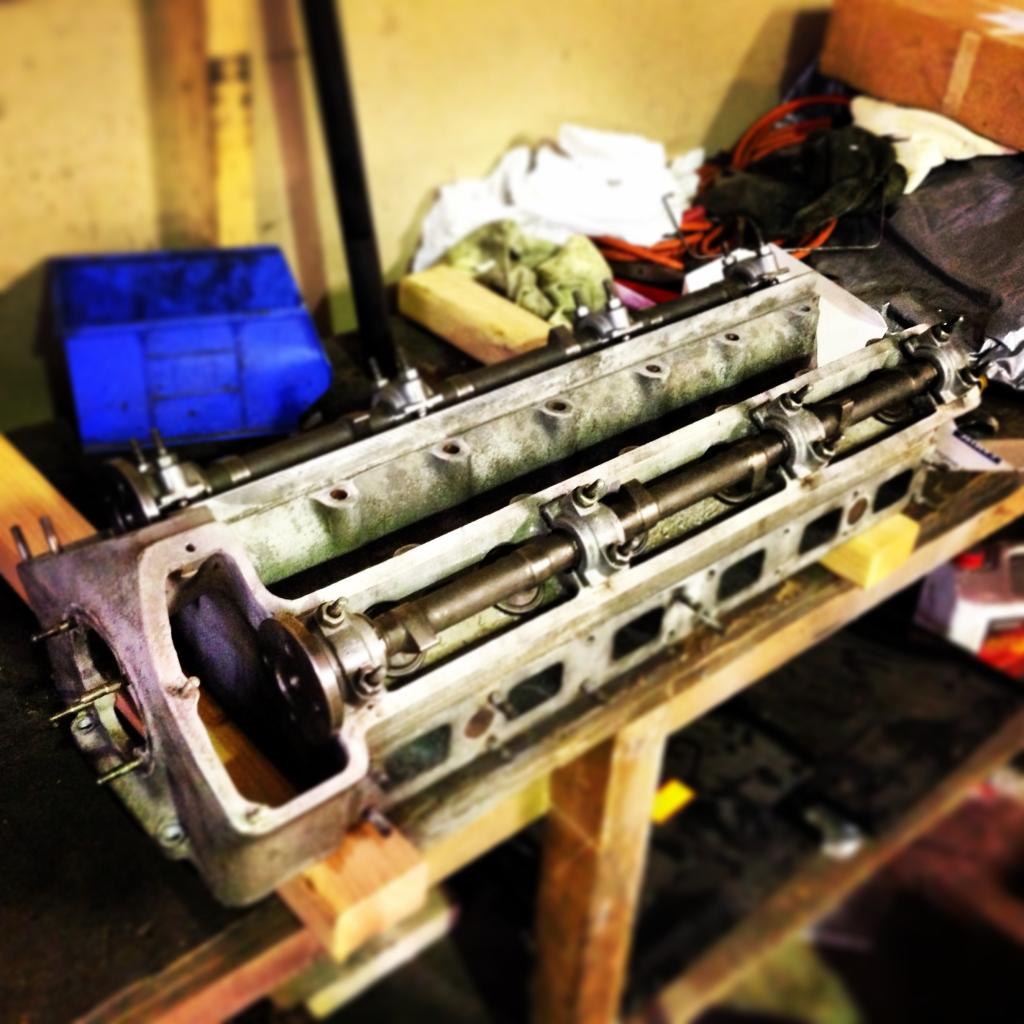
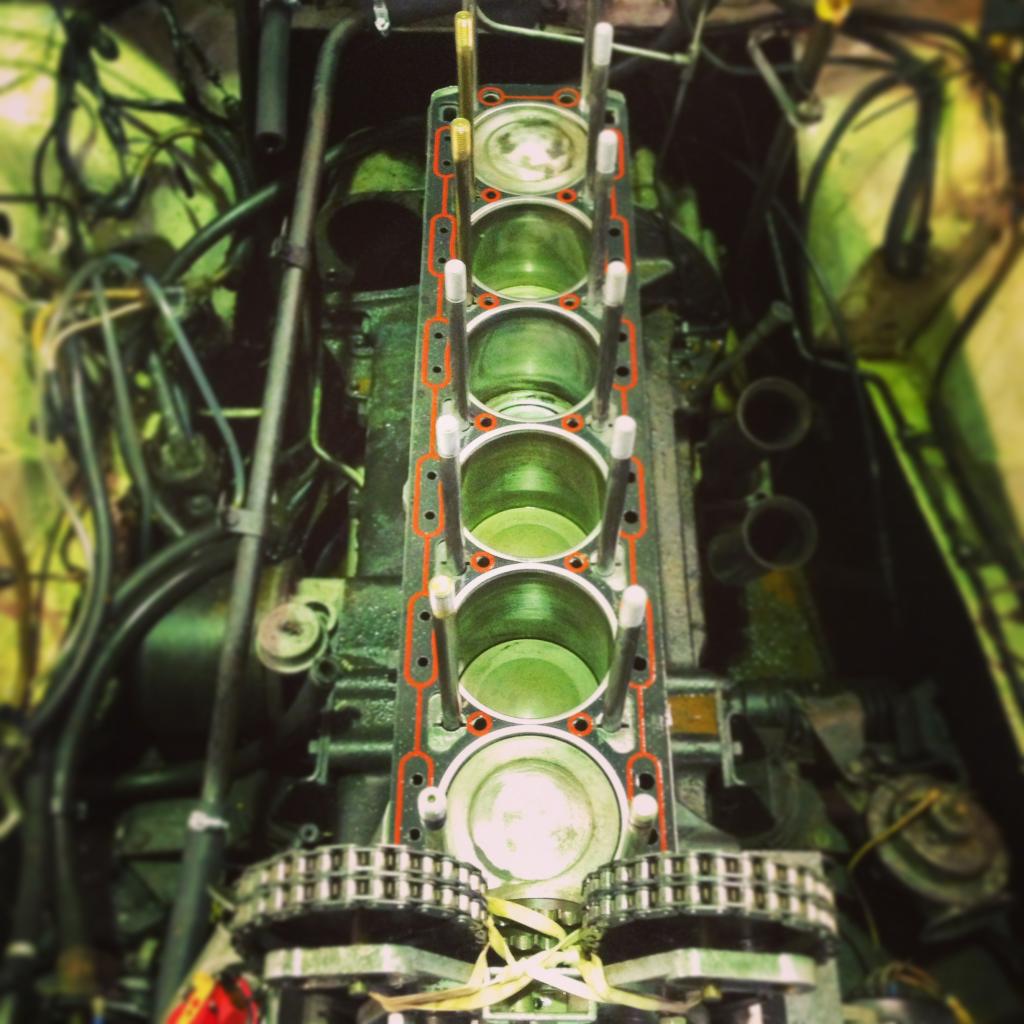
While trying to remove the stubborn Inlet manifold, the head cracked free from the block so I decided to take it all in one go. After putting a bottle jack in between the cylinder head flange and cylinder block flange, the head was free.
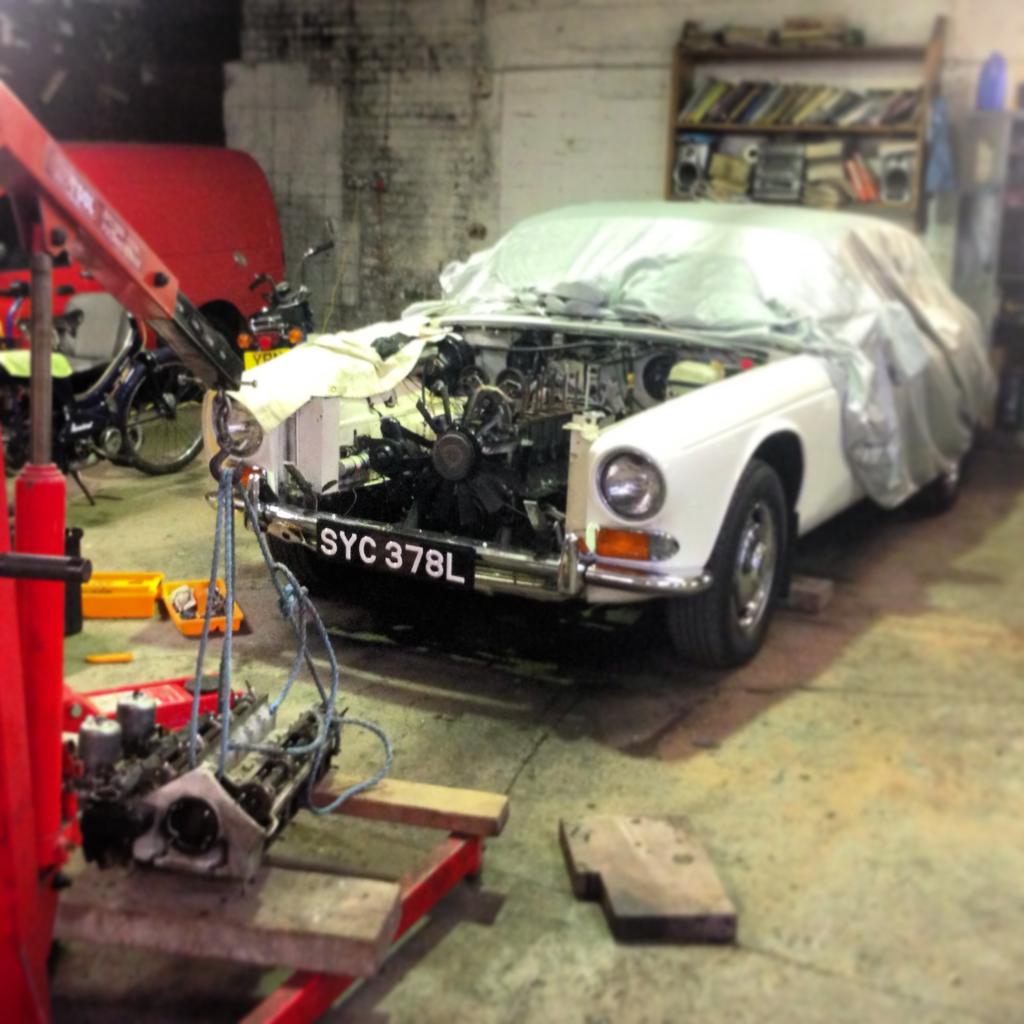
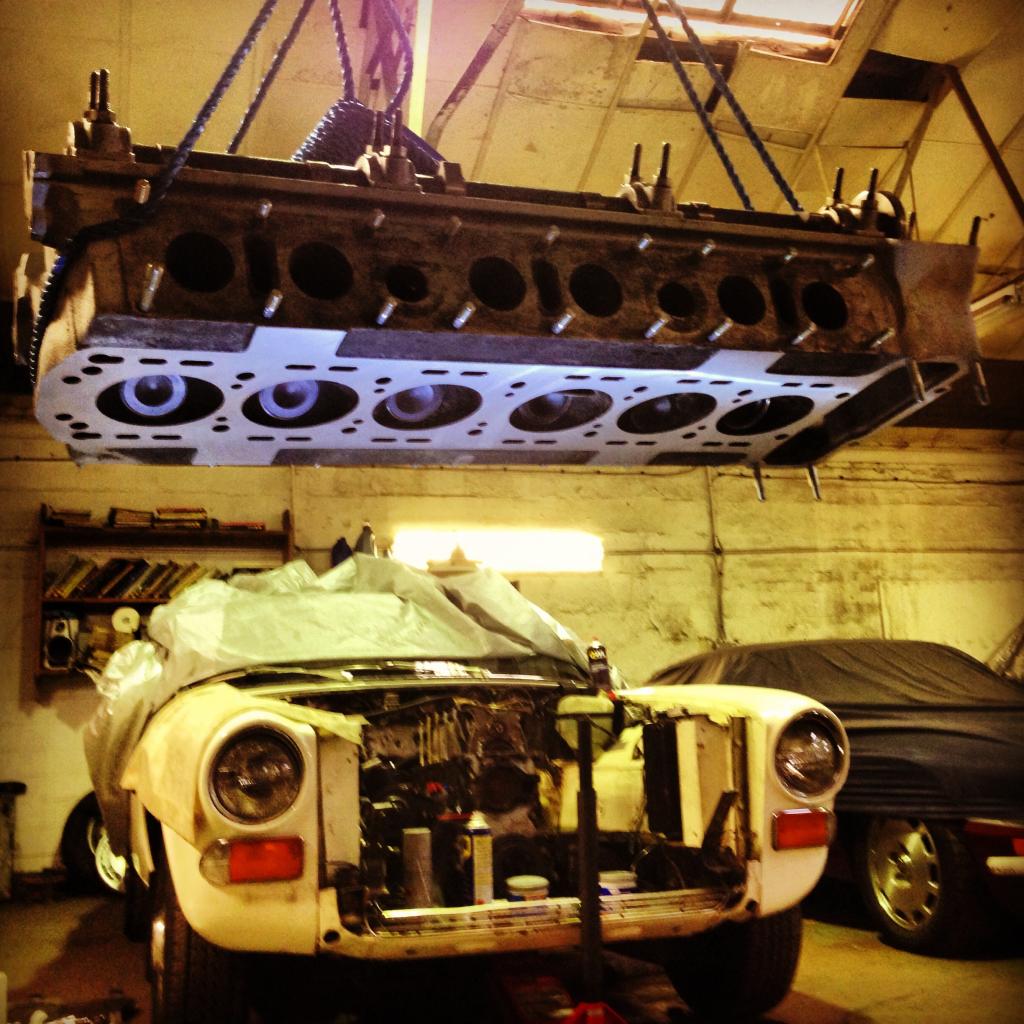
I was going to strip the head myself but I decided to sent it to a local engineering firm as while it was off for a top end rebuild on account of the rubbish compressions.
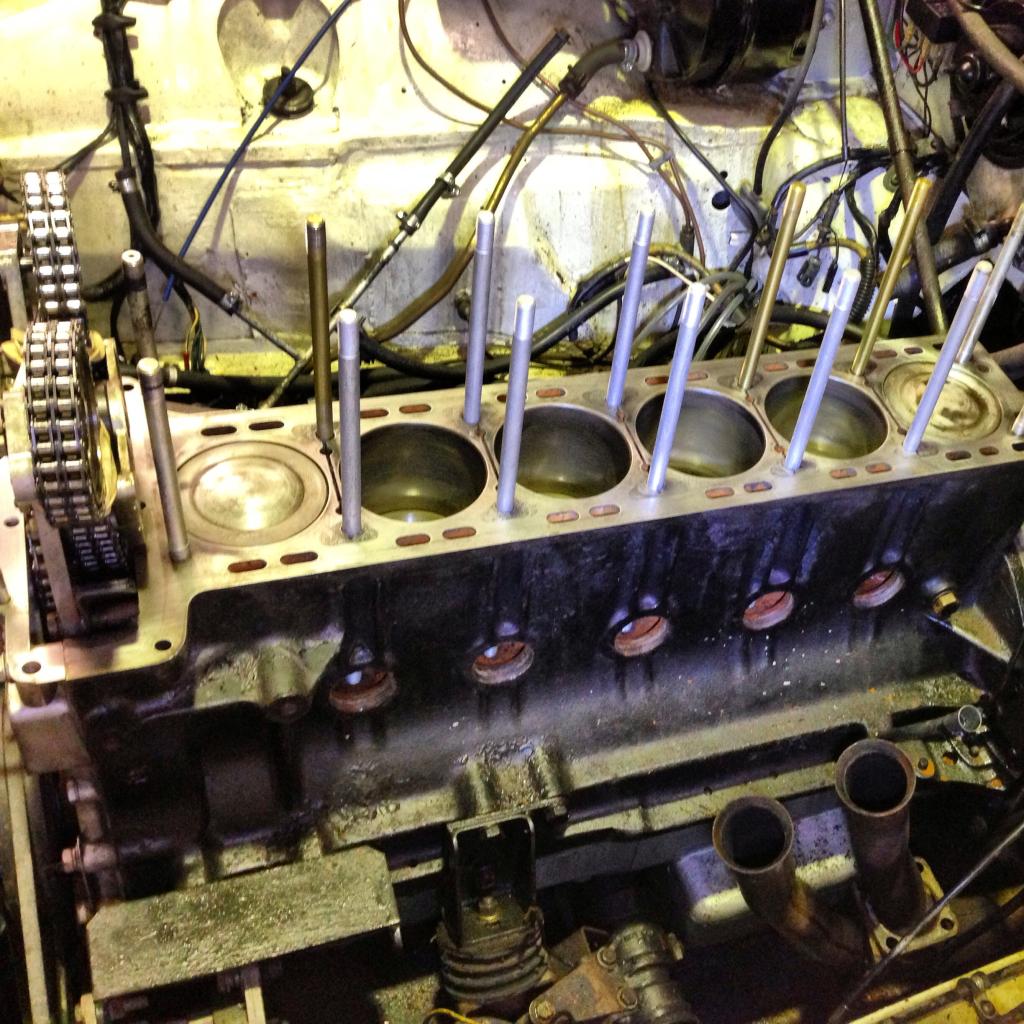
With the head away, I knocked out the core plugs to clean the block and to assess the head studs. The horror stories I'd heard with regards to the studs snapping when re-torquing convinced me to replace them all.
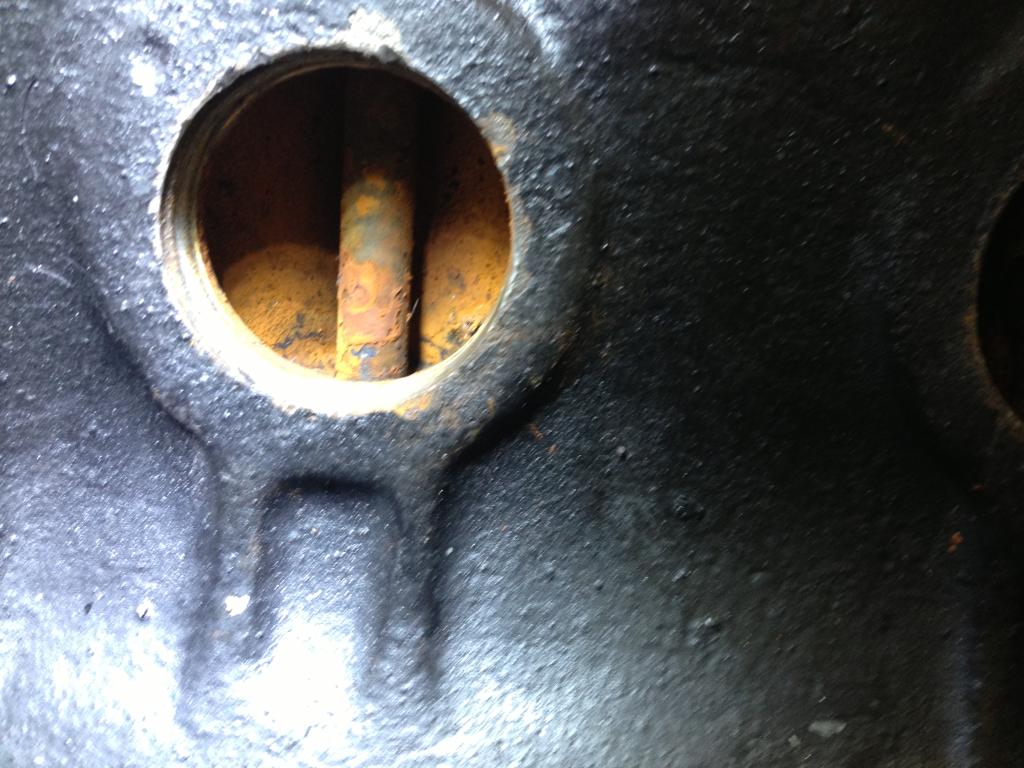
After another 6,000 gallons of WD40 to the base of the studs, they let go with a crack. While they were out I decoked the piston tops and cleaned up the block before replacing the studs.
The head came back on Friday with new seats valves and head refaced and the tappers shimmed up. It'll be getting a lock of paint before being refitted towards the end of the week.
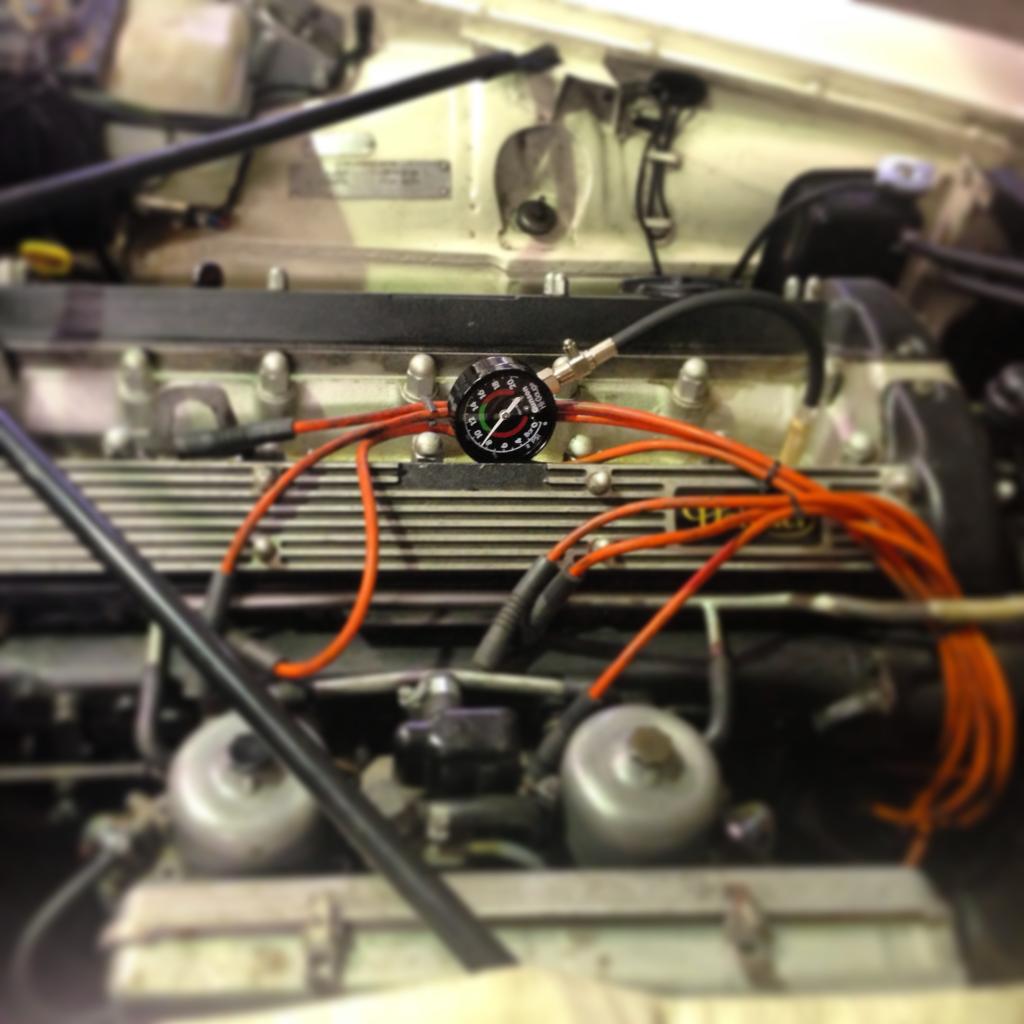
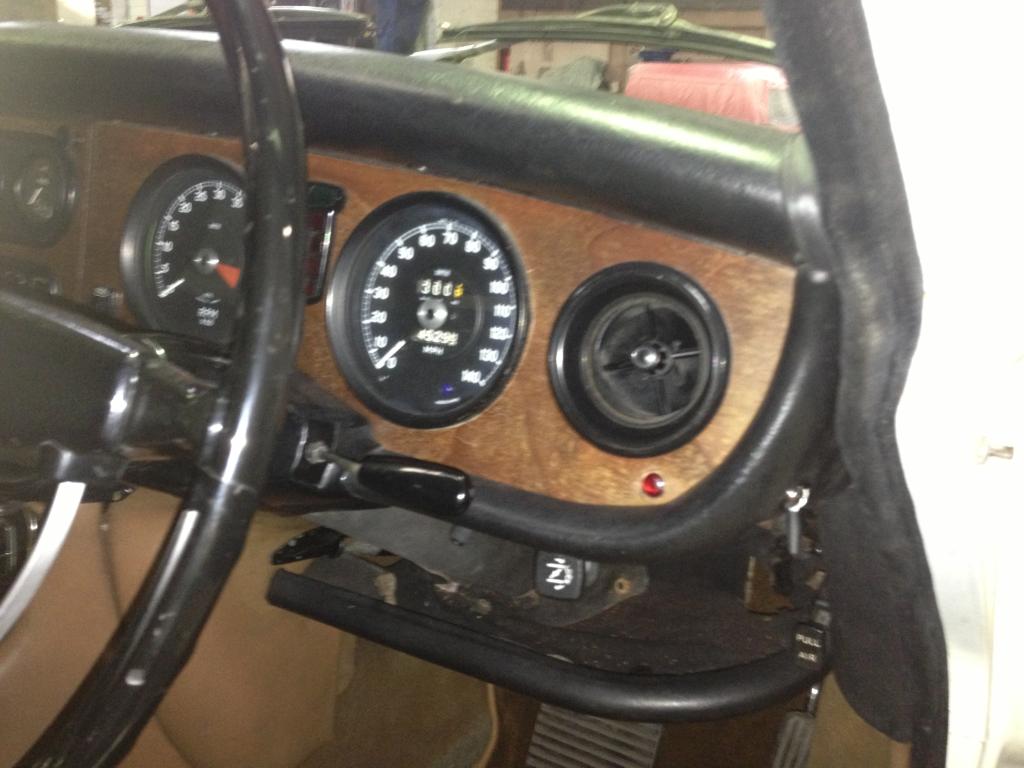
In other news, I managed to find a manual choke conversion for the AED. It hasn't given any trouble since its rebuild but I see it as a worthwhile upgrade. I need to change the choke handle though, I hate it! I've also fitted the Kenlowe fan. I wasn't a fan of the aftermarket switch with its integral light so I obtained a sixties style warning light that I fitted to the bottom right of the dash and a Lucas toggle switch on the side between the dash and the door.
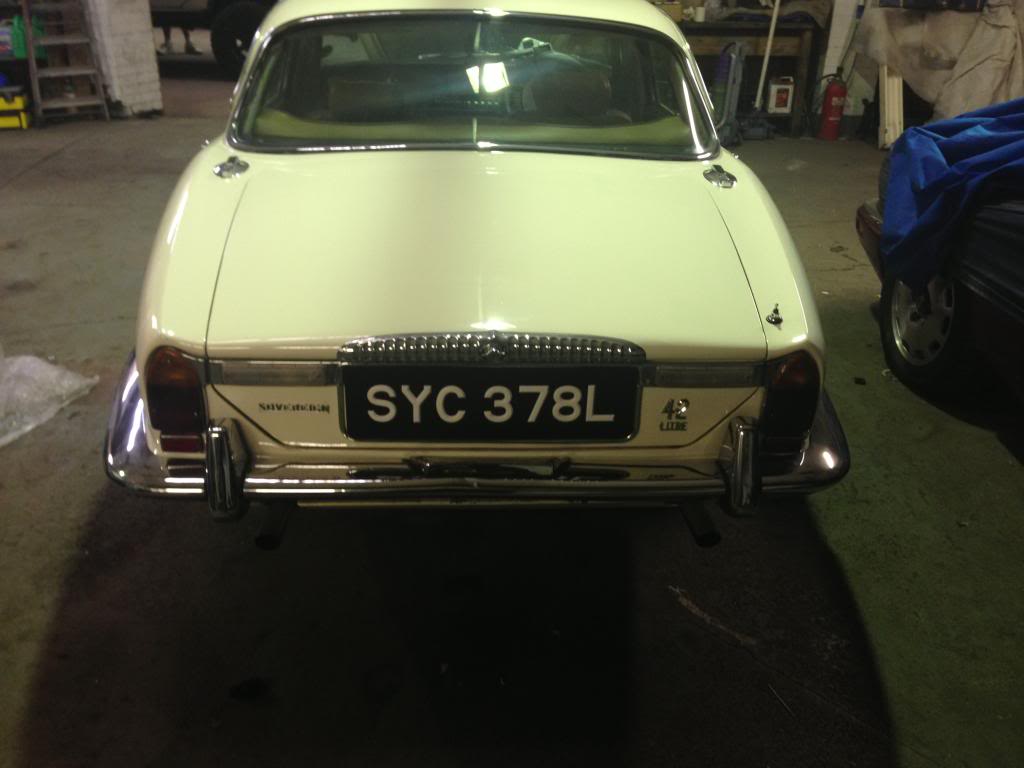
I've also, at last, sorted a full size rear plate.
Thanks for reading, more news as it goes back together...
There are still a few jobs to do, since being laid up she has started getting warm in traffic. The rad is getting re-cored and there'll be a Kenlowe fan getting fitted.
Well, I had the radiator re-cored, an excellent job done as well.


After coming back from Tatton Park, I stopped at a shop, got back in and when I started up I was treated to clouds of white smoke that rapidly dissipated. I went under the bonnet for a quick check and found the breather for the brake servo on the inlet manifold soaking wet with brake fluid. So next day I pulled the master cylinder to find a substantial leak into the servo.


After fitting a rebuild kit to the master cylinder and a new servo valve, I reassembled it all and started up to let the excess fluid burn off. After 15 minutes of white smoke (!!) the exhausts returned to normal.

I noticed that every time I started the car I'd get white smoke. Not as heavy but enough to cause concern. She wasn't overheating but was using a small amount of coolant. The oil seemed ok until I took the engine breather off...

This had also bunged up the pipes where they enter the carbs causing the crankcase to over pressurise and blow the dipstick out along with lots of oil!
I did a compression test getting an average of 130psi on 1,2,3 and 6. 4 and 5 were at around 150psi, the cause of the higher readings confirmed when looking down the plug holes to see lots of water!

So, the job I was dreading having to do since buying the car, failed head gasket!
Anyway, not thinking about it too much, I decided to adopt a confident approach...

Anyone who has done a head gasket on these 'long stud' XK engines fitted to the XJ will be fully aware of the common practice of the head corroding itself to the head studs with spectacular results if the antifreeze isn't regularly replaced. With this in mind, I removed all the head nuts and blasted them with PlusGas and WD40 for a week while I removed all the other ancillaries.


While trying to remove the stubborn Inlet manifold, the head cracked free from the block so I decided to take it all in one go. After putting a bottle jack in between the cylinder head flange and cylinder block flange, the head was free.


I was going to strip the head myself but I decided to sent it to a local engineering firm as while it was off for a top end rebuild on account of the rubbish compressions.
With the head away, I knocked out the core plugs to clean the block and to assess the head studs. The horror stories I'd heard with regards to the studs snapping when re-torquing convinced me to replace them all.

After another 6,000 gallons of WD40 to the base of the studs, they let go with a crack. While they were out I decoked the piston tops and cleaned up the block before replacing the studs.

The head came back on Friday with new seats valves and head refaced and the tappers shimmed up. It'll be getting a lock of paint before being refitted towards the end of the week.

In other news, I managed to find a manual choke conversion for the AED. It hasn't given any trouble since its rebuild but I see it as a worthwhile upgrade. I need to change the choke handle though, I hate it! I've also fitted the Kenlowe fan. I wasn't a fan of the aftermarket switch with its integral light so I obtained a sixties style warning light that I fitted to the bottom right of the dash and a Lucas toggle switch on the side between the dash and the door.


I've also, at last, sorted a full size rear plate.

Thanks for reading, more news as it goes back together...


Thread Starter
|
Member
Joined: Feb 2015
Posts: 48
Likes: 6
From: The Red Side of Liverpool
14th August 2014
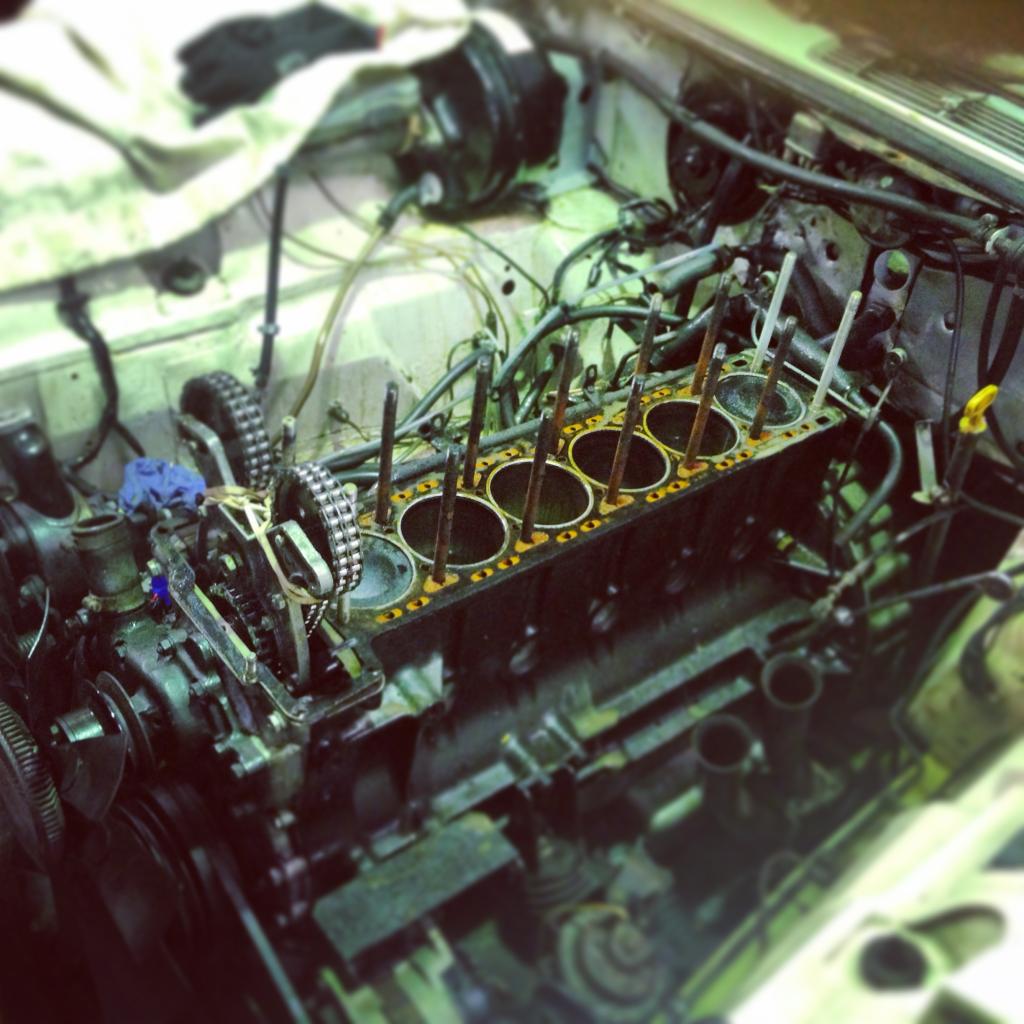
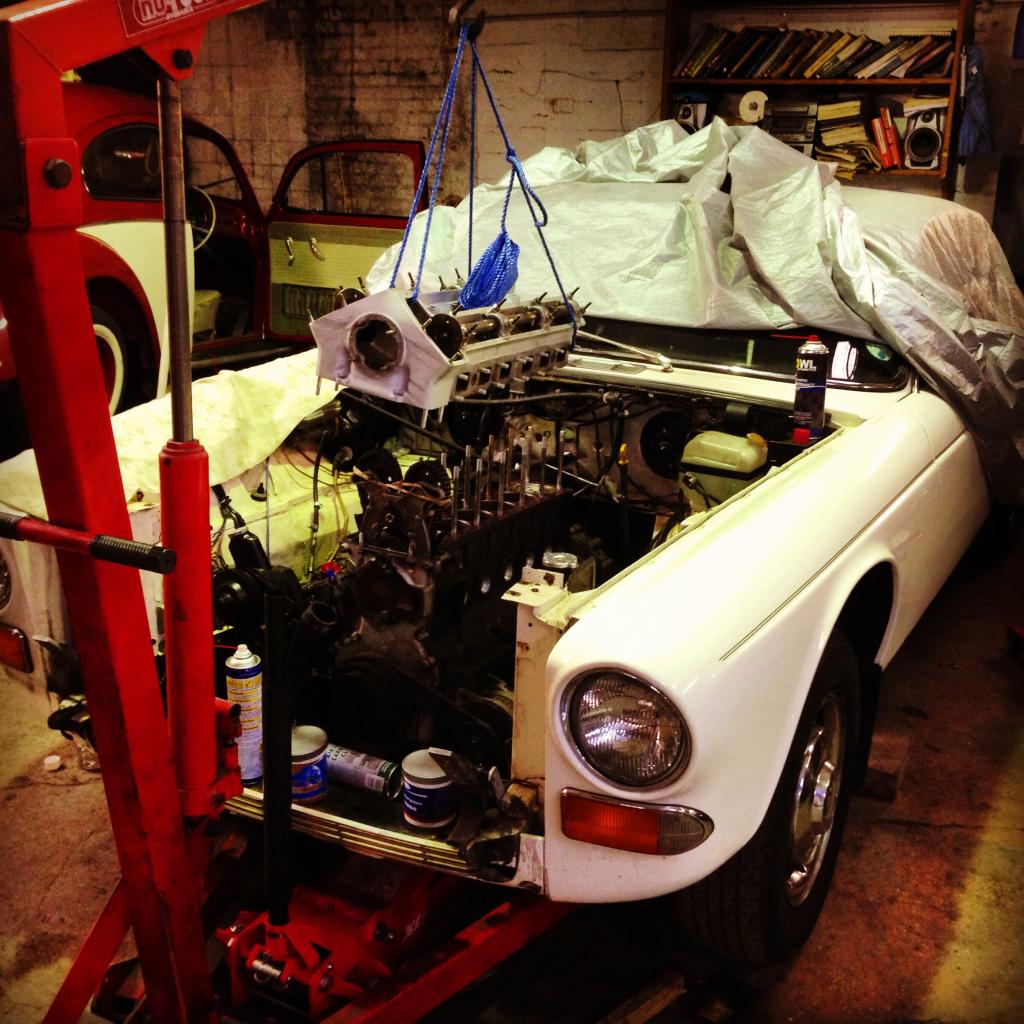
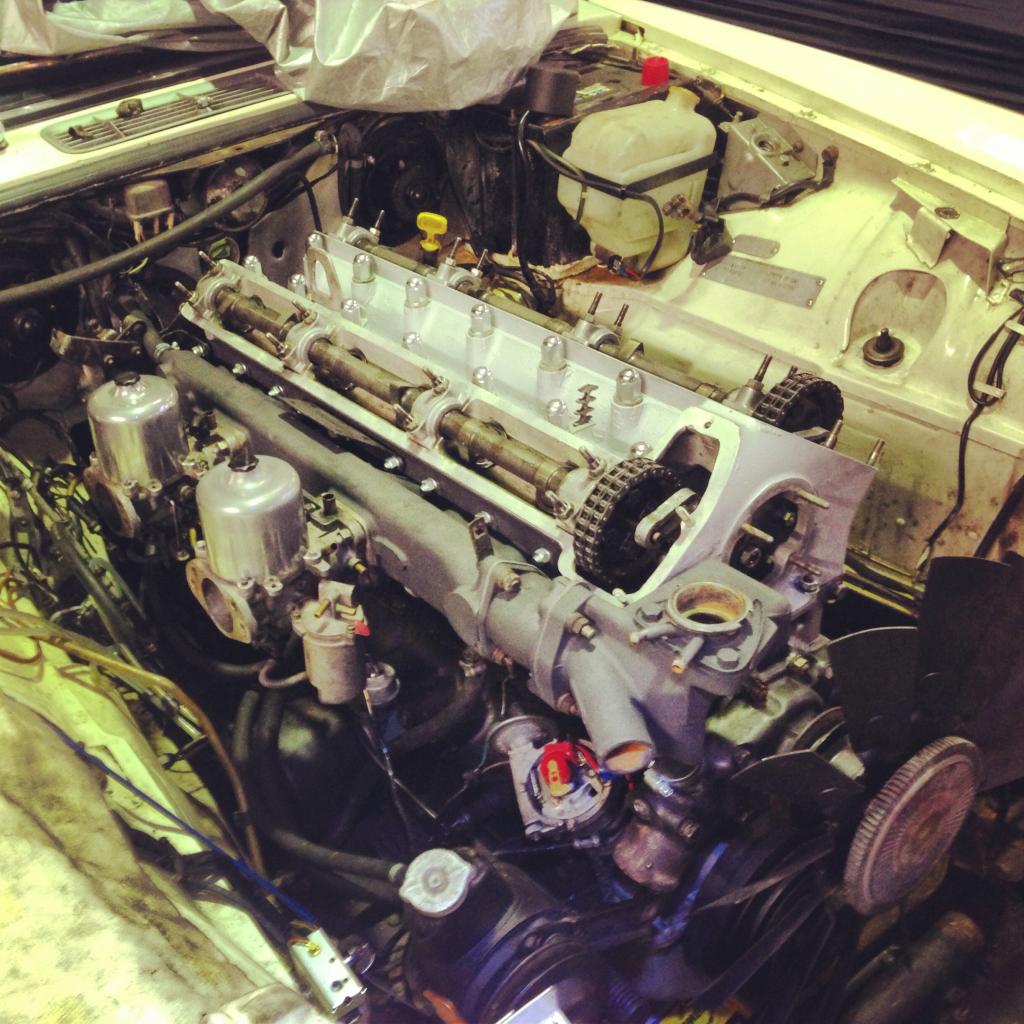
Just a quick update, managed to paint the head yesterday, all ready to be fitted back on today. I got this composite head gasket, the original was metal, from Jaguar Classic Spares, highly recommended. I applied a very light coating of copper slip to the long head studs to prevent corrosion.
Then I got the head ready with new manifold studs for inlet and exhaust and a final wipe over with white spirit...
Before lowering slowly onto the block...
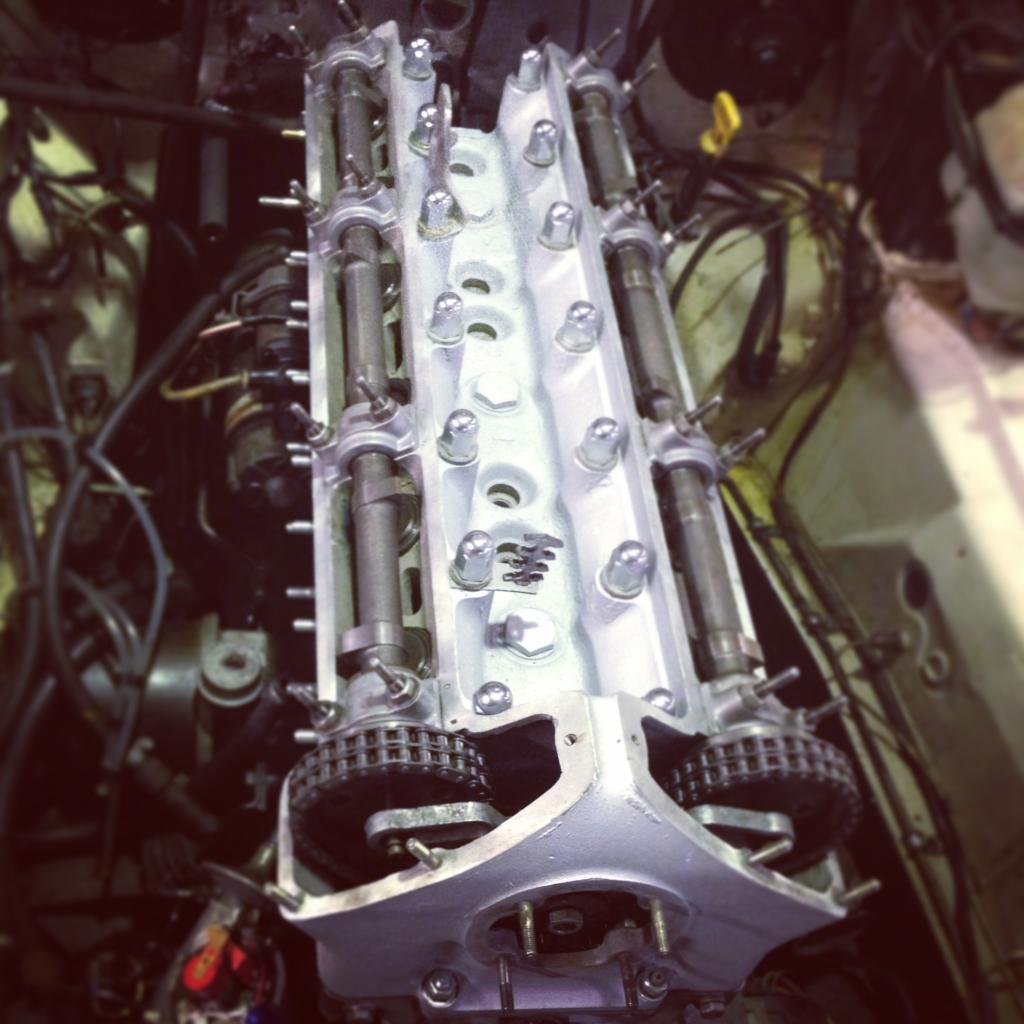
And there we are! Also replaced the cylinder head dome nuts for some shinier numbers.
More soon.
Just a quick update, managed to paint the head yesterday, all ready to be fitted back on today. I got this composite head gasket, the original was metal, from Jaguar Classic Spares, highly recommended. I applied a very light coating of copper slip to the long head studs to prevent corrosion.

Then I got the head ready with new manifold studs for inlet and exhaust and a final wipe over with white spirit...

Before lowering slowly onto the block...

And there we are! Also replaced the cylinder head dome nuts for some shinier numbers.

More soon.
Thread Starter
|
Member
Joined: Feb 2015
Posts: 48
Likes: 6
From: The Red Side of Liverpool
16th August 2014
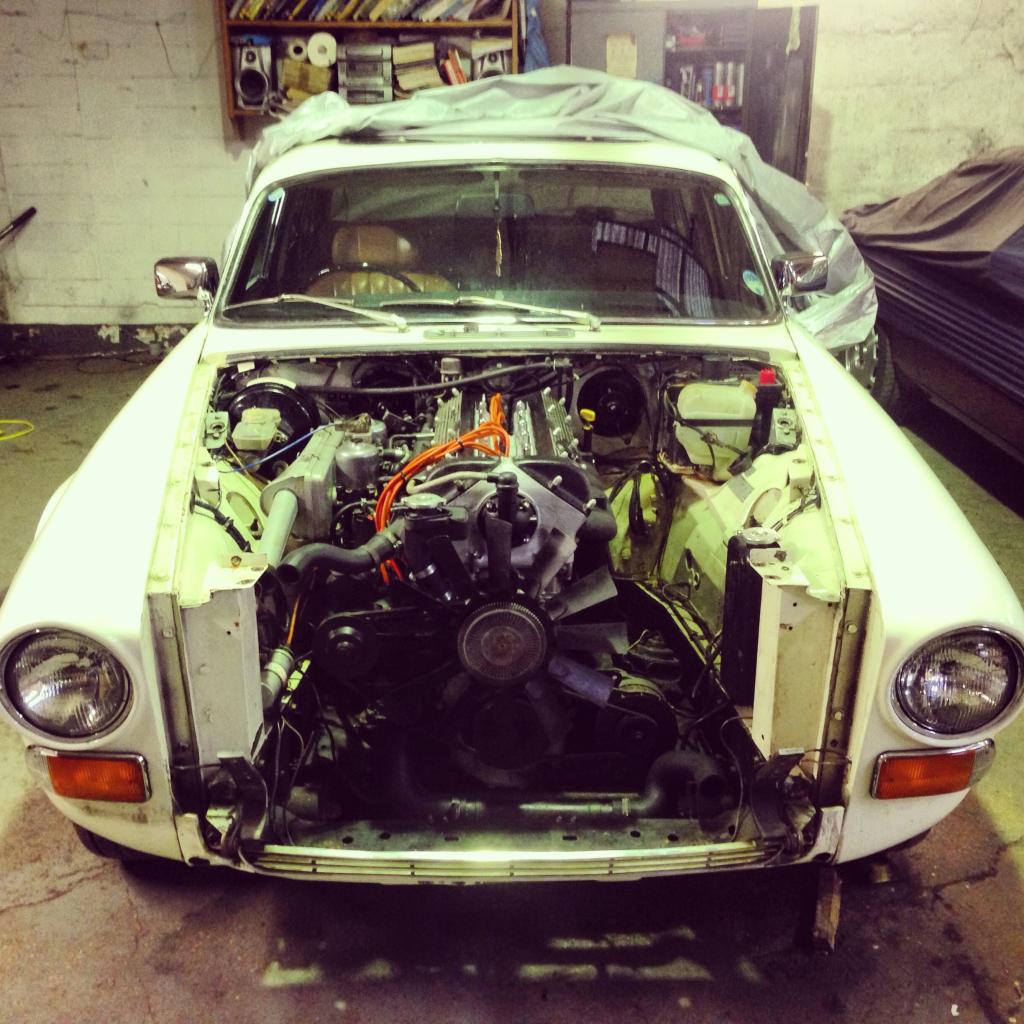
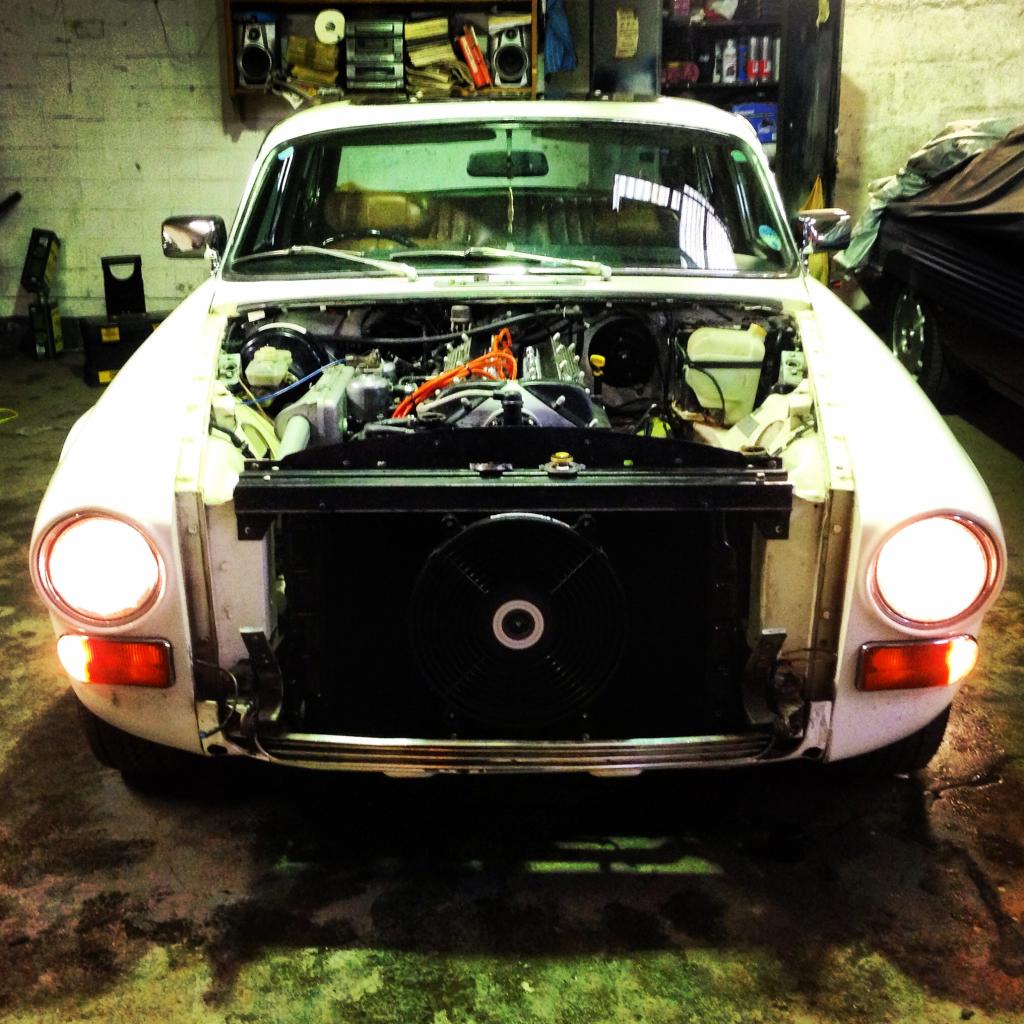
Had a good day today, pretty much everything refitted now. Only a few things left to do. The radiator not going back in was down to, annoyingly, the lack of 2x 10mm nuts for the new Kenlowe fan. I also need a new throttle cable and to secure the exhaust down pipes to the manifolds. After that it's oil, coolant and then a week of running her before changing the oil and filter again to get the last of all the crud out of the oil ways.
I'm going to change the cam cover nuts for some nice, shiny chrome jobbies as well, they look rubbish with the new head nuts.
Some pics:

Finish line now in sight!
Had a good day today, pretty much everything refitted now. Only a few things left to do. The radiator not going back in was down to, annoyingly, the lack of 2x 10mm nuts for the new Kenlowe fan. I also need a new throttle cable and to secure the exhaust down pipes to the manifolds. After that it's oil, coolant and then a week of running her before changing the oil and filter again to get the last of all the crud out of the oil ways.
I'm going to change the cam cover nuts for some nice, shiny chrome jobbies as well, they look rubbish with the new head nuts.
Some pics:


Finish line now in sight!

Thread Starter
|
Member
Joined: Feb 2015
Posts: 48
Likes: 6
From: The Red Side of Liverpool
25th August 2014
It's alive!!!
Managed to get her started on the choke pretty much first time. With the auto choke (AED) on these there is a pipe that runs from the rear exhaust manifold, around the block and into the AED. Having replaced the auto part of the choke with a manual conversion I left the pipe off altogether. No issue at the manifold end but the AED has a pipe drawing air in. I stuck a crankcase breather filter on this and adjusted the cams on top of the plungers on the choke to close the choke off completely when warm, the whole idea of losing the rubbish auto choke. I retuned the carbs when warm, took her out and......stuttered and spluttered around the test route at about 5mph, fuel starvation and/or blockage. At this point, after all the time, work and money spent, I felt like this:

As I crawled back to the lock up, swearing and considering washing it in petrol and drying it with a match, the old girl must have heard me and took heed. The blockage cleared and she took off like a stabbed rat! I decided to go back, grab some tools and go out for a run to see if it would come back. 60 miles and lots of juice later and she was running sweet as a nut! I had wired the Kenlowe fan up to the Headlights though...
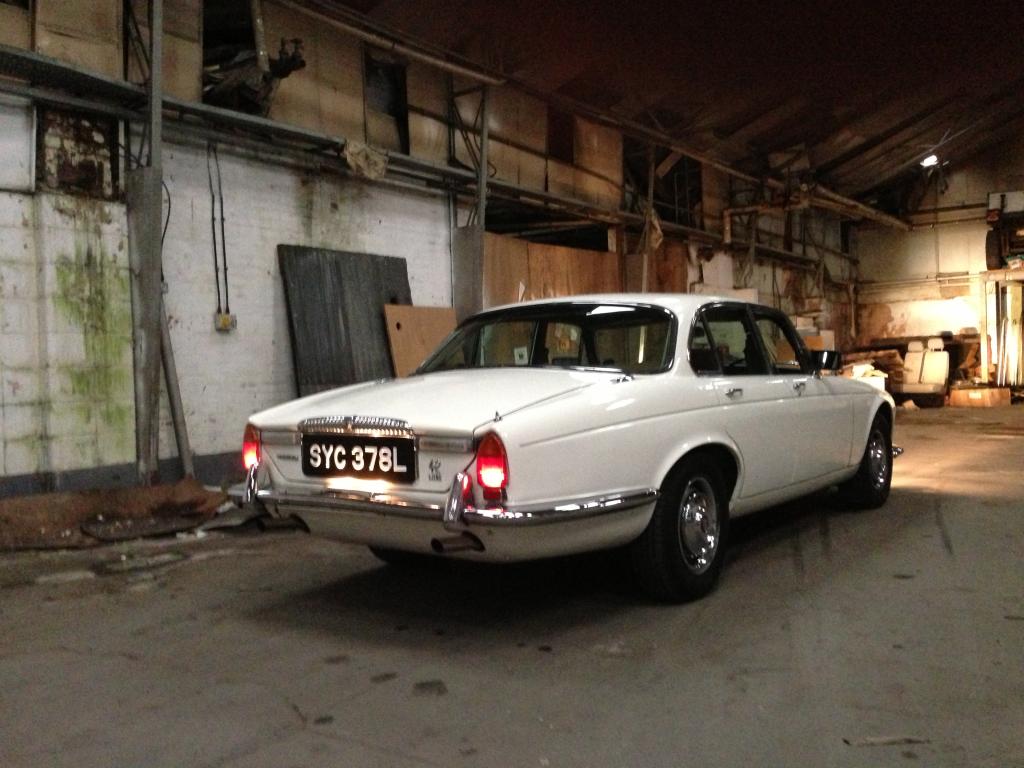
So, needless to say, Oulton Park yesterday and despite my nerves, she never missed a beat. Did 160 miles in it, didn't want to put it away!
Got myself one of these too...

And all tucked up. What a shame Summer is nearly over!
It's alive!!!

Managed to get her started on the choke pretty much first time. With the auto choke (AED) on these there is a pipe that runs from the rear exhaust manifold, around the block and into the AED. Having replaced the auto part of the choke with a manual conversion I left the pipe off altogether. No issue at the manifold end but the AED has a pipe drawing air in. I stuck a crankcase breather filter on this and adjusted the cams on top of the plungers on the choke to close the choke off completely when warm, the whole idea of losing the rubbish auto choke. I retuned the carbs when warm, took her out and......stuttered and spluttered around the test route at about 5mph, fuel starvation and/or blockage. At this point, after all the time, work and money spent, I felt like this:

As I crawled back to the lock up, swearing and considering washing it in petrol and drying it with a match, the old girl must have heard me and took heed. The blockage cleared and she took off like a stabbed rat! I decided to go back, grab some tools and go out for a run to see if it would come back. 60 miles and lots of juice later and she was running sweet as a nut! I had wired the Kenlowe fan up to the Headlights though...


So, needless to say, Oulton Park yesterday and despite my nerves, she never missed a beat. Did 160 miles in it, didn't want to put it away!


Got myself one of these too...


And all tucked up. What a shame Summer is nearly over!

Thread Starter
|
Member
Joined: Feb 2015
Posts: 48
Likes: 6
From: The Red Side of Liverpool
30th January 2015
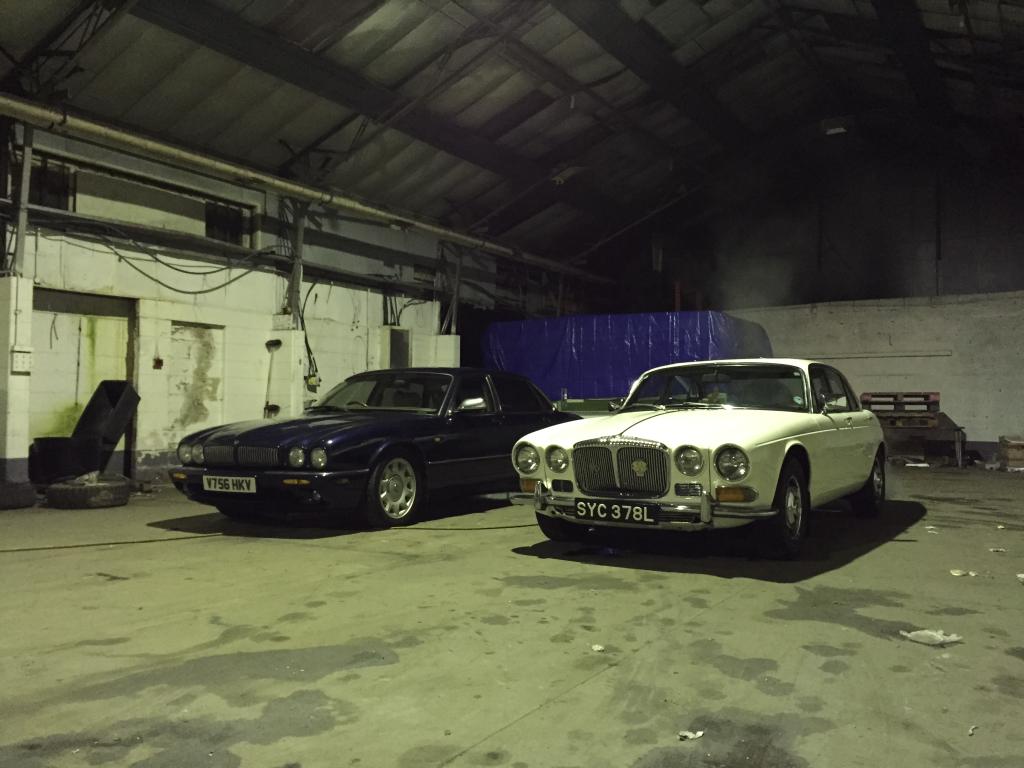
Time for another update. Car has ran great since the head work was done, sadly didn't get as many miles on it as I'd have liked last year, except for a trip to Chesterfield to buy another XJ, but hopefully I'll make up for it this year. Managed to keep driving her right up til the end of November this year with the mild weather before she went into hibernation.
Winter is always a good time to work through the list of faults and this had some minor bits and pieces. There was a strong vibration from the transmission tunnel on left turns(??), a knock from the front and wooly steering.
The knock from the tunnel was the rubber cotton reel in the gearbox mount, the rubber having turned into what can only be described as some sort of crumbly cake. Easily sorted.
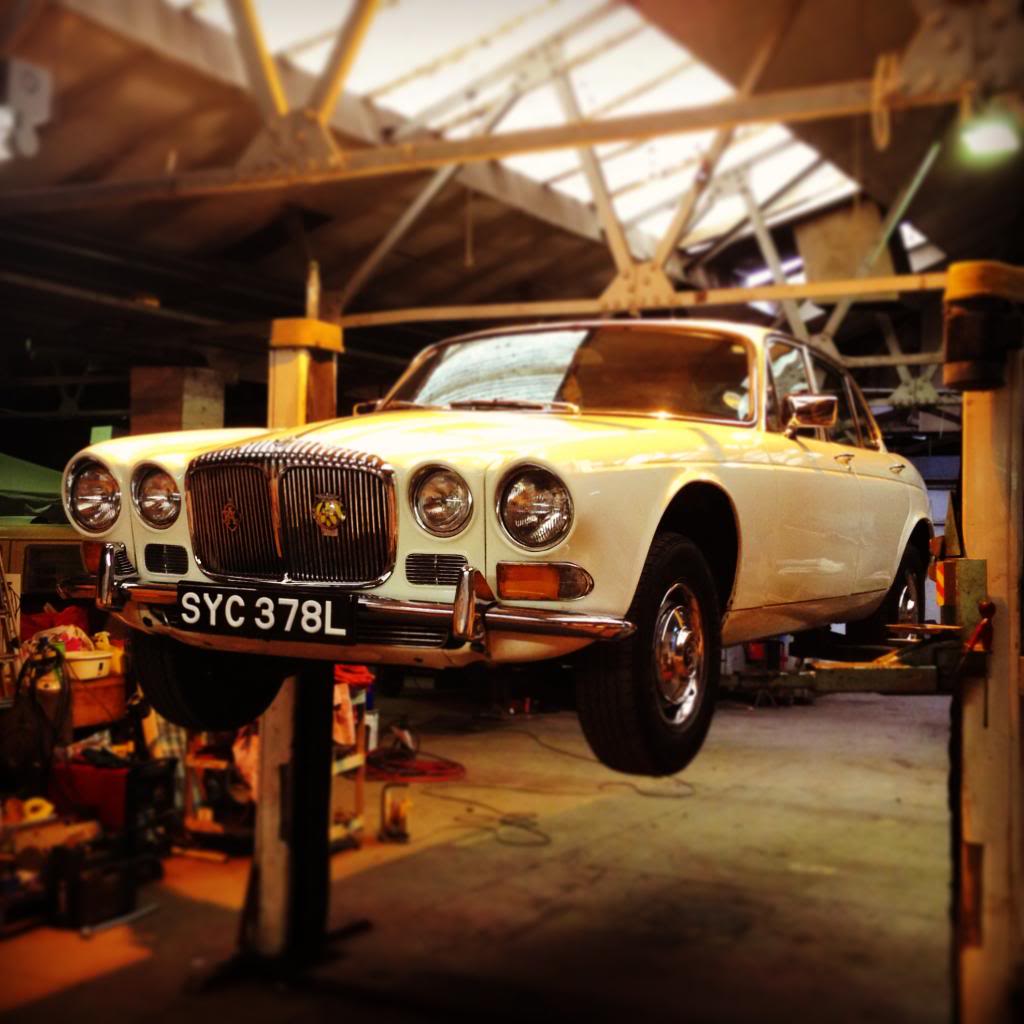
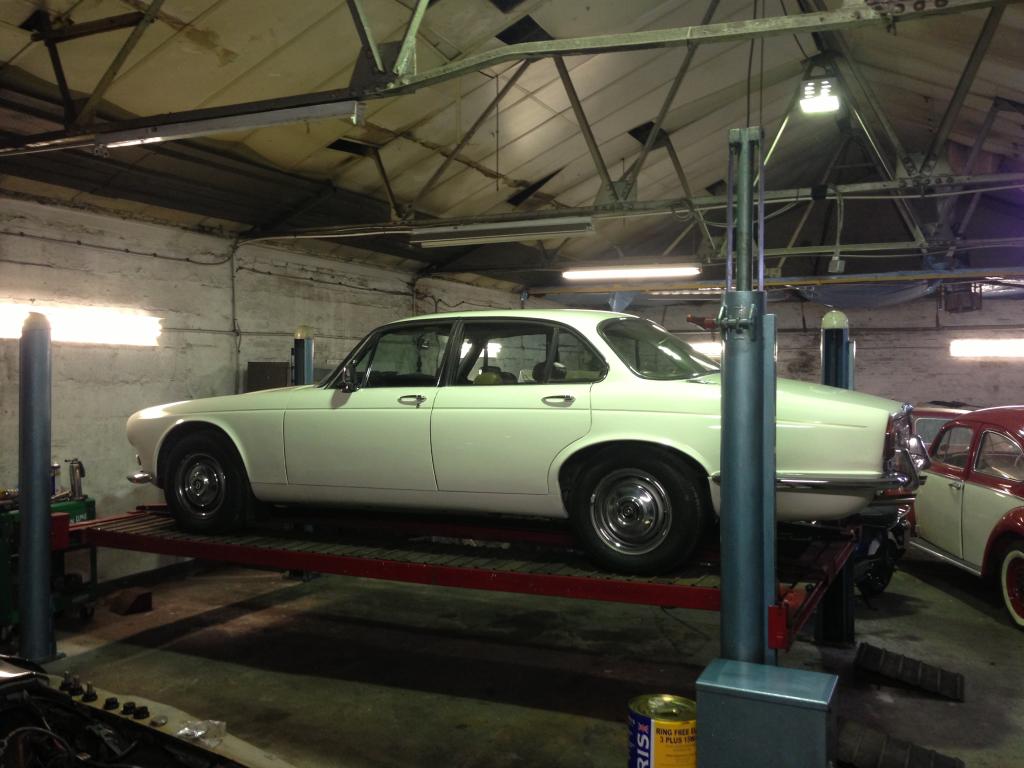
Me and a few of the other lads decided to get ourselves an early Xmas present, I'd have preferred a two post but it'll still make life a lot easier.

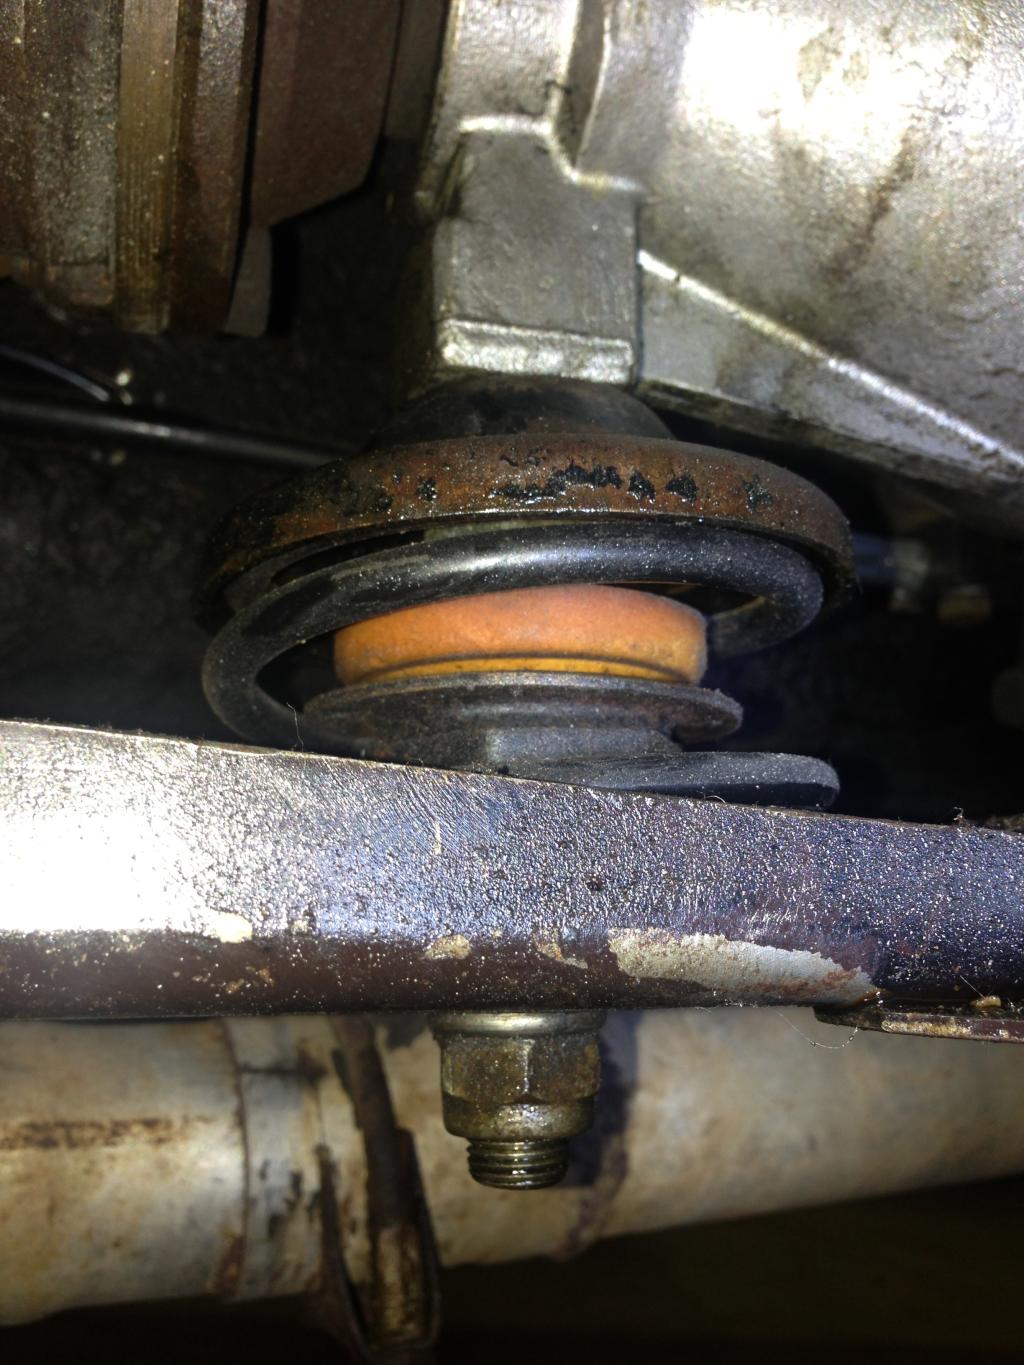
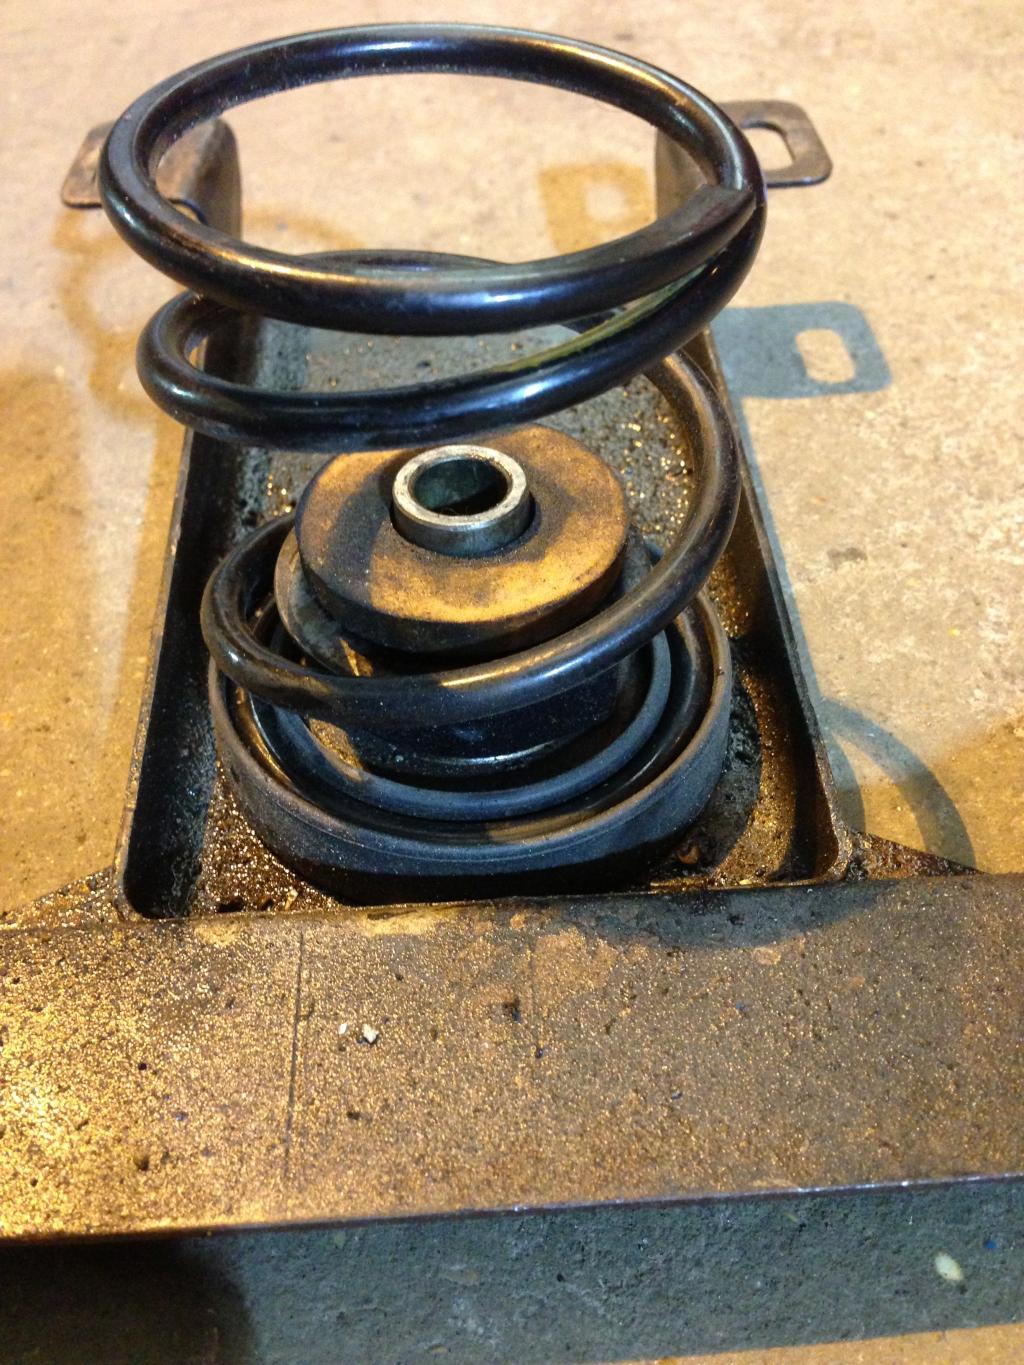
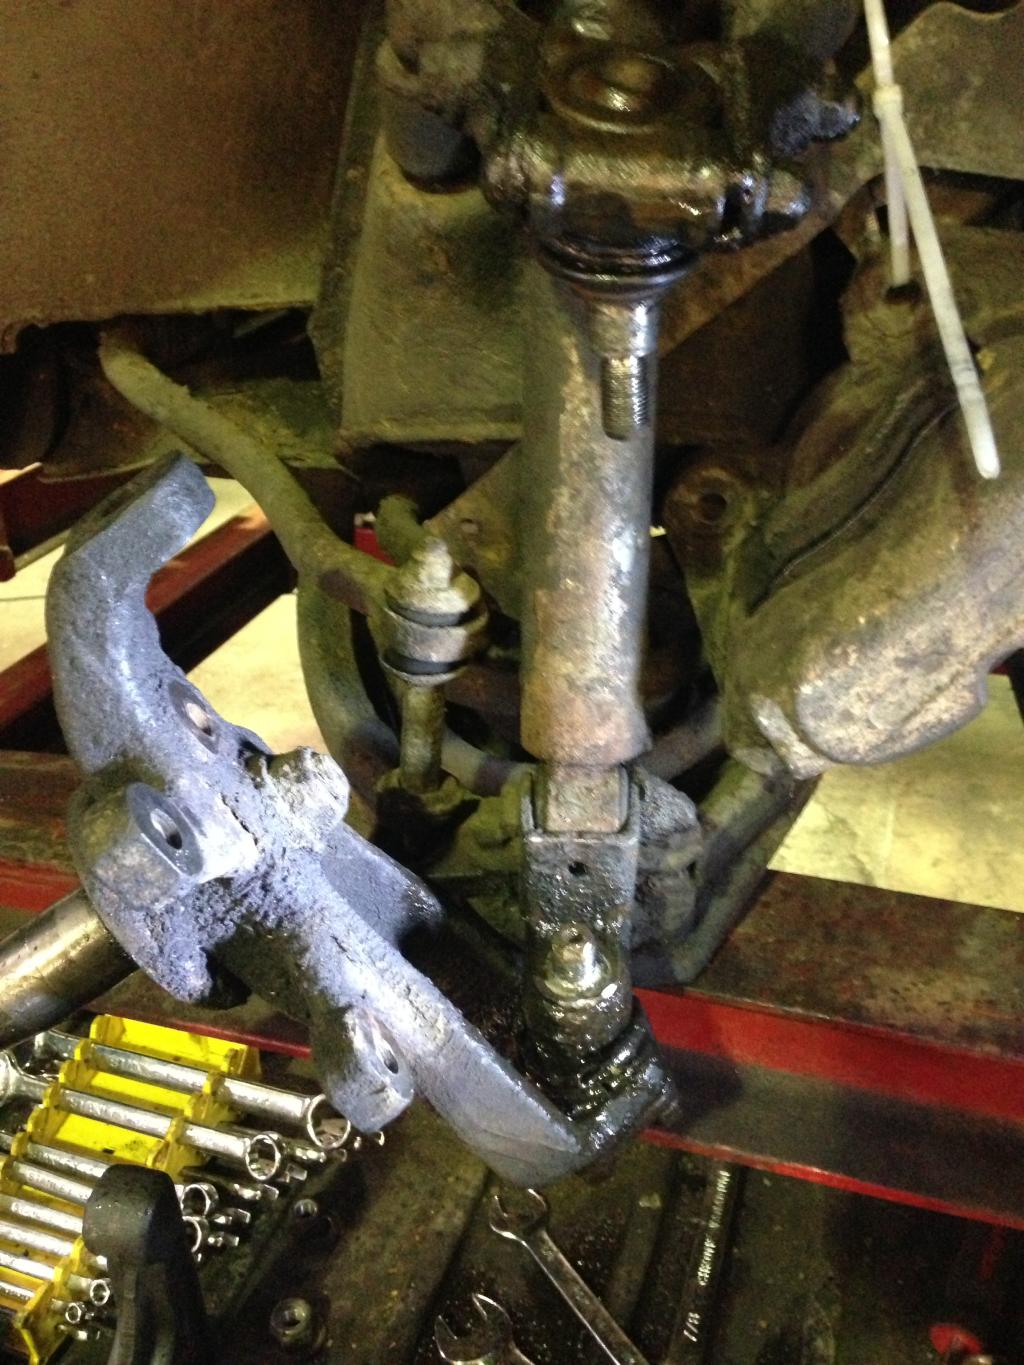
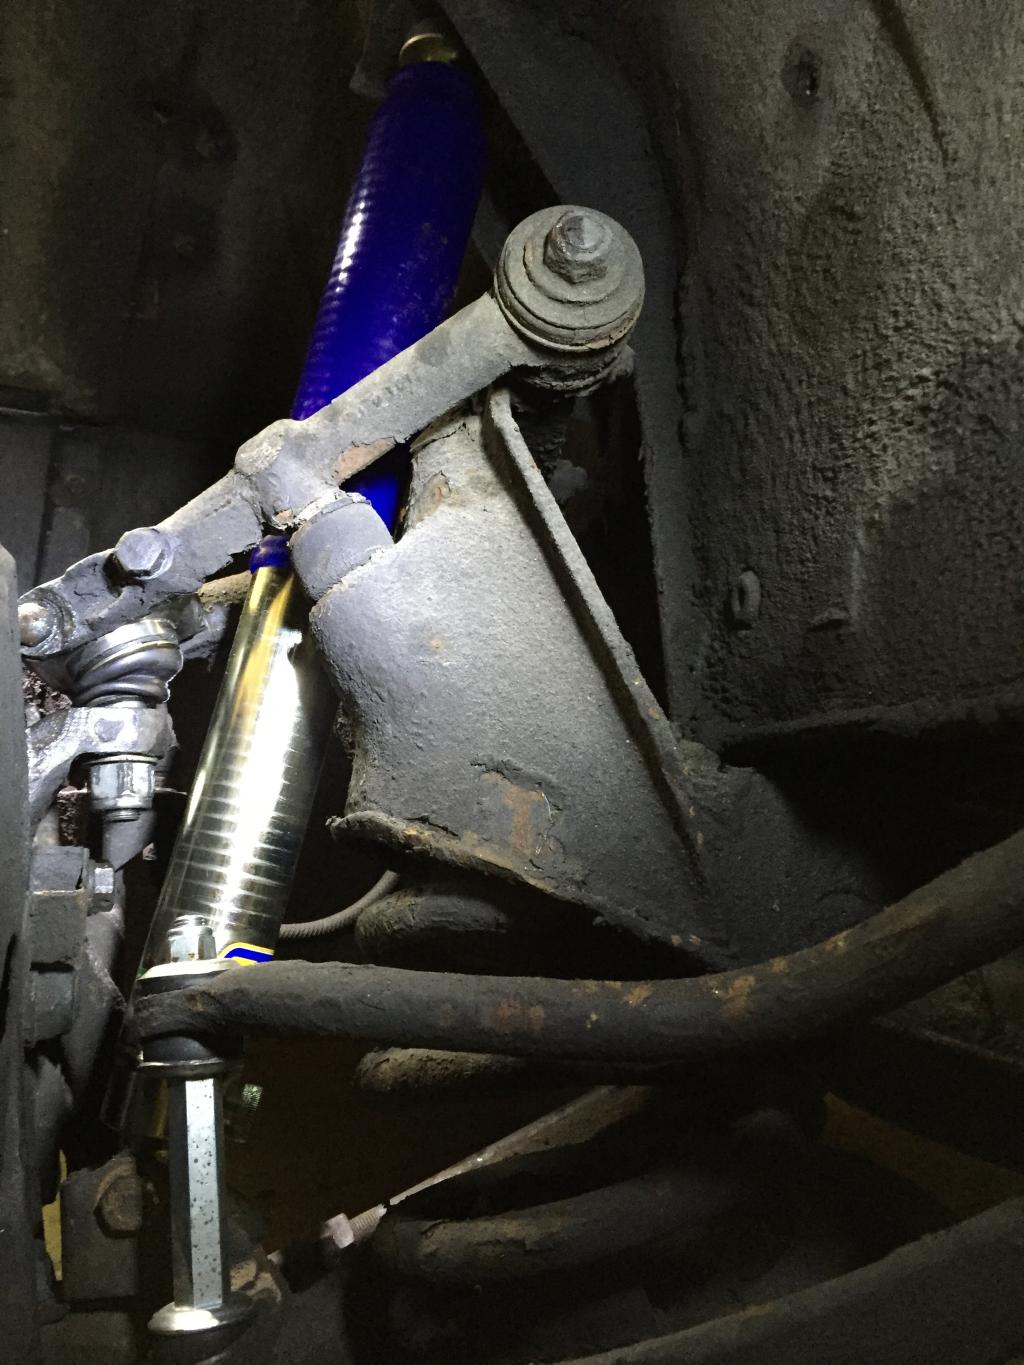
The next job to tackle with our new toy in place was the steering rack bushes. They lead a hard life on the XJ as oil leaks invariably destroy the rubber bushes and the steering feel becomes vague and sloppy. In light of this I decided to replace the bushes with a nice set of Superflex Polyurethane bushes from Jaguar Classic Spares and, wow, the difference! Well worth fitting these to your XJ, especially if you like to 'press on'.
These XJ's ride so well that it can hide the worn stuff quite well unless you go looking or drive a good one. I was truly disgusted at the state of the bottom ball joints and the anti-roll bar drop links, these were next for the chop. I went for 'sealed for life' ball joints and I was advised to stick with the standard bushes for the drop links as the Poly bushes for these are a bit on the harsh side.
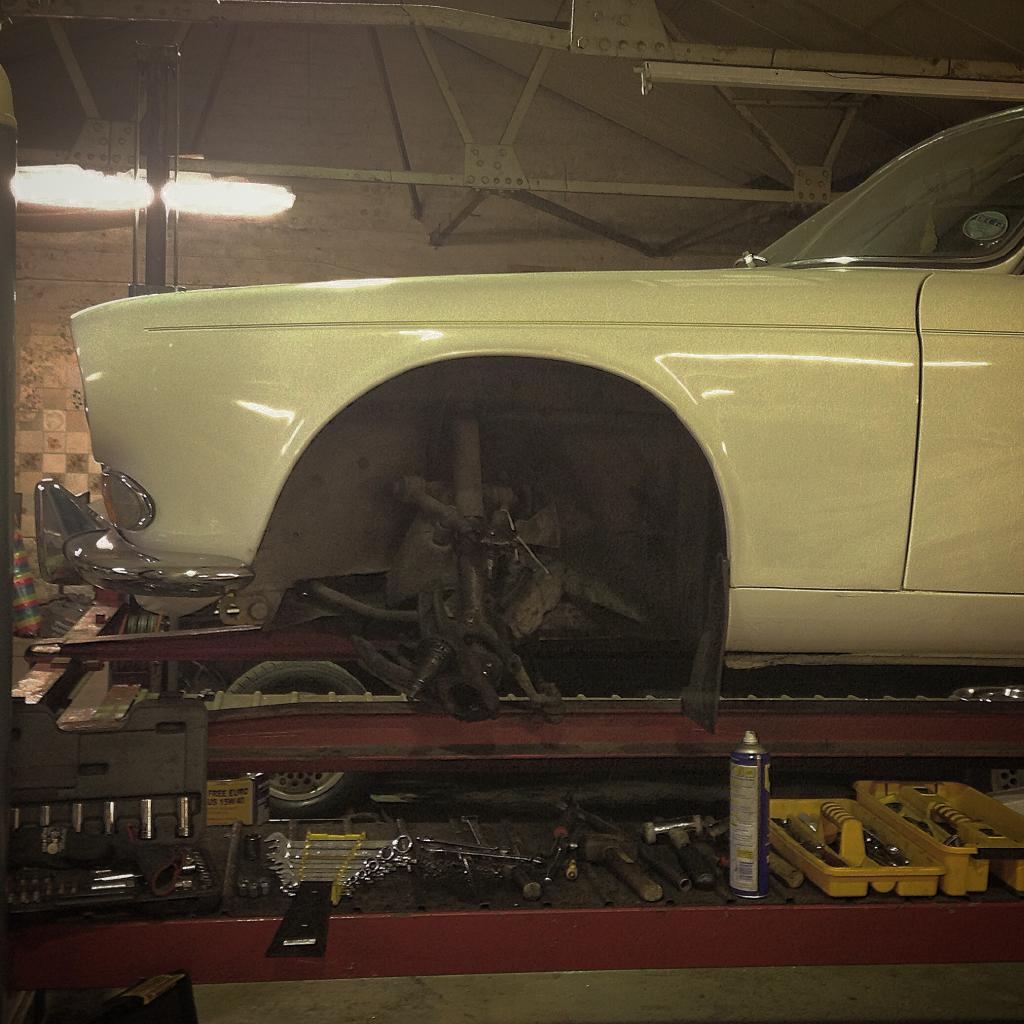
The ramp makes these jobs so much easier!
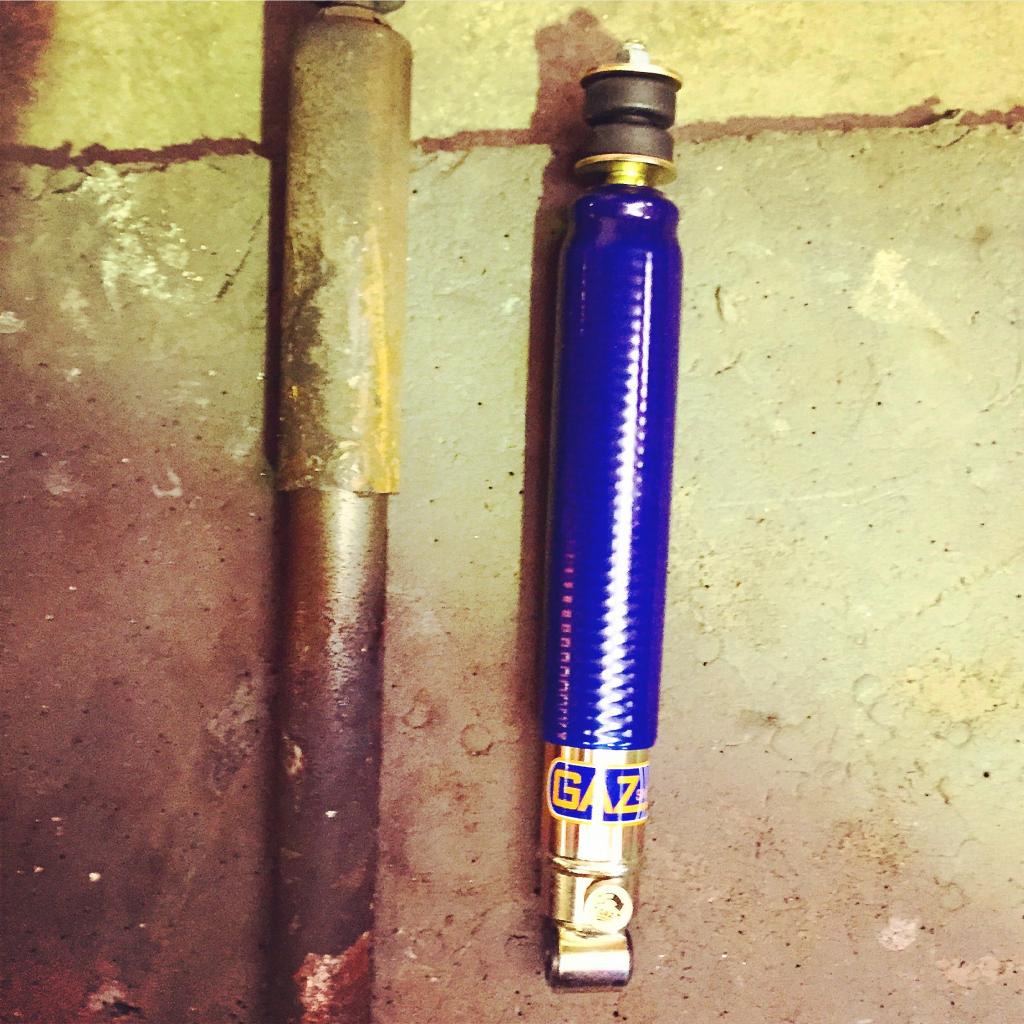
The front shockers had also seen better days, well overdue replacing. I've decided to go for a pair of Gaz adjustables, again through Jaguar Classic Spares. Only fitted them yesterday, I'll have to wait for the weather to sort itself out before I try them out.
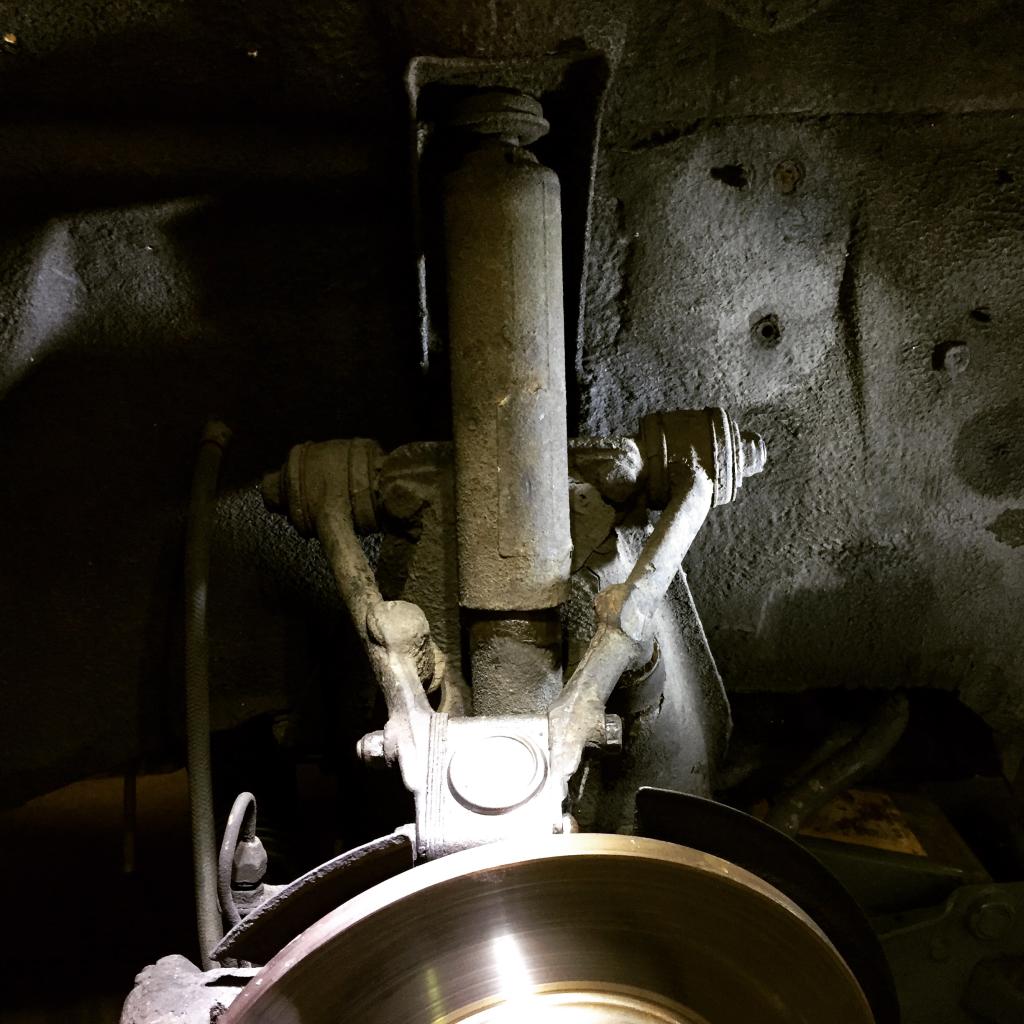
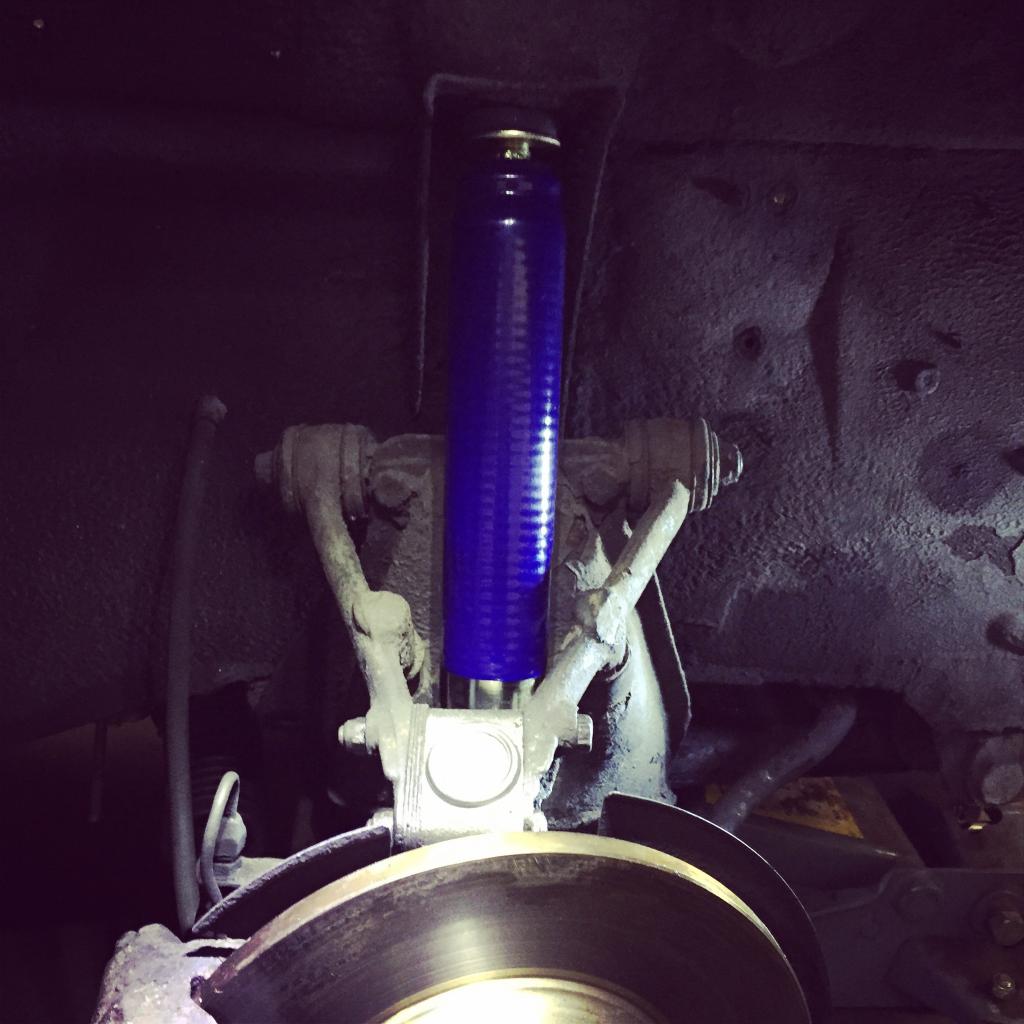
Deffo overdue changing!
So hopefully the old girl will be a fair bit sharper at the front end now. Set correctly, there is apparently no difference in ride quality.
Few things to do before Spring, the Kenlowe fan packed up just before she was put into hibernation, traced to a faulty Thermal Switch and thankfully not my wiring! I got a new thermal switch sent out under warranty, that should be fitted Saturday, new Rear Wheel Bearings for both sides, spare Brake Master Cylinder to rebuild, Auto box oil & filter change and other small bits and bobs. Few pics from last week with my mate's Supercharged Daimler Super V8.
I'm also on the look out for a rear seat in Tan (believe Jag called it Cinnamon) as mine is too far gone. Id consider a whole interior if need be?
Thanks for reading. I know it's not the most interesting thread, more a visual work diary for if I ever have to sell the old girl (God forbid!!)
Time for another update. Car has ran great since the head work was done, sadly didn't get as many miles on it as I'd have liked last year, except for a trip to Chesterfield to buy another XJ, but hopefully I'll make up for it this year. Managed to keep driving her right up til the end of November this year with the mild weather before she went into hibernation.

Winter is always a good time to work through the list of faults and this had some minor bits and pieces. There was a strong vibration from the transmission tunnel on left turns(??), a knock from the front and wooly steering.
The knock from the tunnel was the rubber cotton reel in the gearbox mount, the rubber having turned into what can only be described as some sort of crumbly cake. Easily sorted.


Me and a few of the other lads decided to get ourselves an early Xmas present, I'd have preferred a two post but it'll still make life a lot easier.


The next job to tackle with our new toy in place was the steering rack bushes. They lead a hard life on the XJ as oil leaks invariably destroy the rubber bushes and the steering feel becomes vague and sloppy. In light of this I decided to replace the bushes with a nice set of Superflex Polyurethane bushes from Jaguar Classic Spares and, wow, the difference! Well worth fitting these to your XJ, especially if you like to 'press on'.
These XJ's ride so well that it can hide the worn stuff quite well unless you go looking or drive a good one. I was truly disgusted at the state of the bottom ball joints and the anti-roll bar drop links, these were next for the chop. I went for 'sealed for life' ball joints and I was advised to stick with the standard bushes for the drop links as the Poly bushes for these are a bit on the harsh side.

The ramp makes these jobs so much easier!

The front shockers had also seen better days, well overdue replacing. I've decided to go for a pair of Gaz adjustables, again through Jaguar Classic Spares. Only fitted them yesterday, I'll have to wait for the weather to sort itself out before I try them out.


Deffo overdue changing!

So hopefully the old girl will be a fair bit sharper at the front end now. Set correctly, there is apparently no difference in ride quality.

Few things to do before Spring, the Kenlowe fan packed up just before she was put into hibernation, traced to a faulty Thermal Switch and thankfully not my wiring! I got a new thermal switch sent out under warranty, that should be fitted Saturday, new Rear Wheel Bearings for both sides, spare Brake Master Cylinder to rebuild, Auto box oil & filter change and other small bits and bobs. Few pics from last week with my mate's Supercharged Daimler Super V8.


I'm also on the look out for a rear seat in Tan (believe Jag called it Cinnamon) as mine is too far gone. Id consider a whole interior if need be?

Thanks for reading. I know it's not the most interesting thread, more a visual work diary for if I ever have to sell the old girl (God forbid!!)
Thread Starter
|
Member
Joined: Feb 2015
Posts: 48
Likes: 6
From: The Red Side of Liverpool
Lovely Series 2 you have there...

Thread Starter
|
Member
Joined: Feb 2015
Posts: 48
Likes: 6
From: The Red Side of Liverpool
I read your thread on your S1 last night, great work there pal! I'm doing the AJ6 swap with my S3.
Thread Starter
|
Member
Joined: Feb 2015
Posts: 48
Likes: 6
From: The Red Side of Liverpool
Thank you Clarke. Interesting thread on yours there, yo were lucky weren't you! Beautiful car pal, love the colour! 😉