
Seal replacement for taillamp lenses

Thread Starter
|
Veteran Member


Joined: Mar 2007
Posts: 9,142
Likes: 2,664
From: Florida
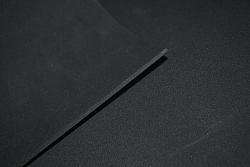
if the factory Seal for the tail lamp lenses is non-existent or has deteriorated, you can use Window Screen beading as a replacement.
this beading material is sold at places like HomeDepot or Lowe's in their Window Screen Repair display. This "bead" is what is used to stretch and lock the screen around the frame channel of the screen. Works better for Jaguar tail lamps than for window screens.
this beading material is sold at places like HomeDepot or Lowe's in their Window Screen Repair display. This "bead" is what is used to stretch and lock the screen around the frame channel of the screen. Works better for Jaguar tail lamps than for window screens.
Last edited by Jose; Aug 3, 2015 at 09:18 AM.

Veteran Member
Joined: Jun 2012
Posts: 1,336
Likes: 344
From: Glendora, CA USA
I purchased .125 and tried many ways to use it... joined the ends together with a piece of wire..
Could never get it installed.. would have to use some type of adhesive to
hold it on the lens... keeps falling off one place or another.
Went back to my broken Jag seal..
Could never get it installed.. would have to use some type of adhesive to
hold it on the lens... keeps falling off one place or another.
Went back to my broken Jag seal..

Joined: Jan 2014
Posts: 28,386
Likes: 6,340
From: Delaneys Creek,Qld. Australia
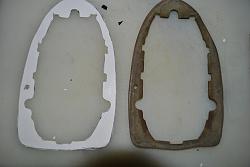
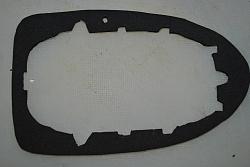
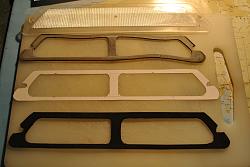
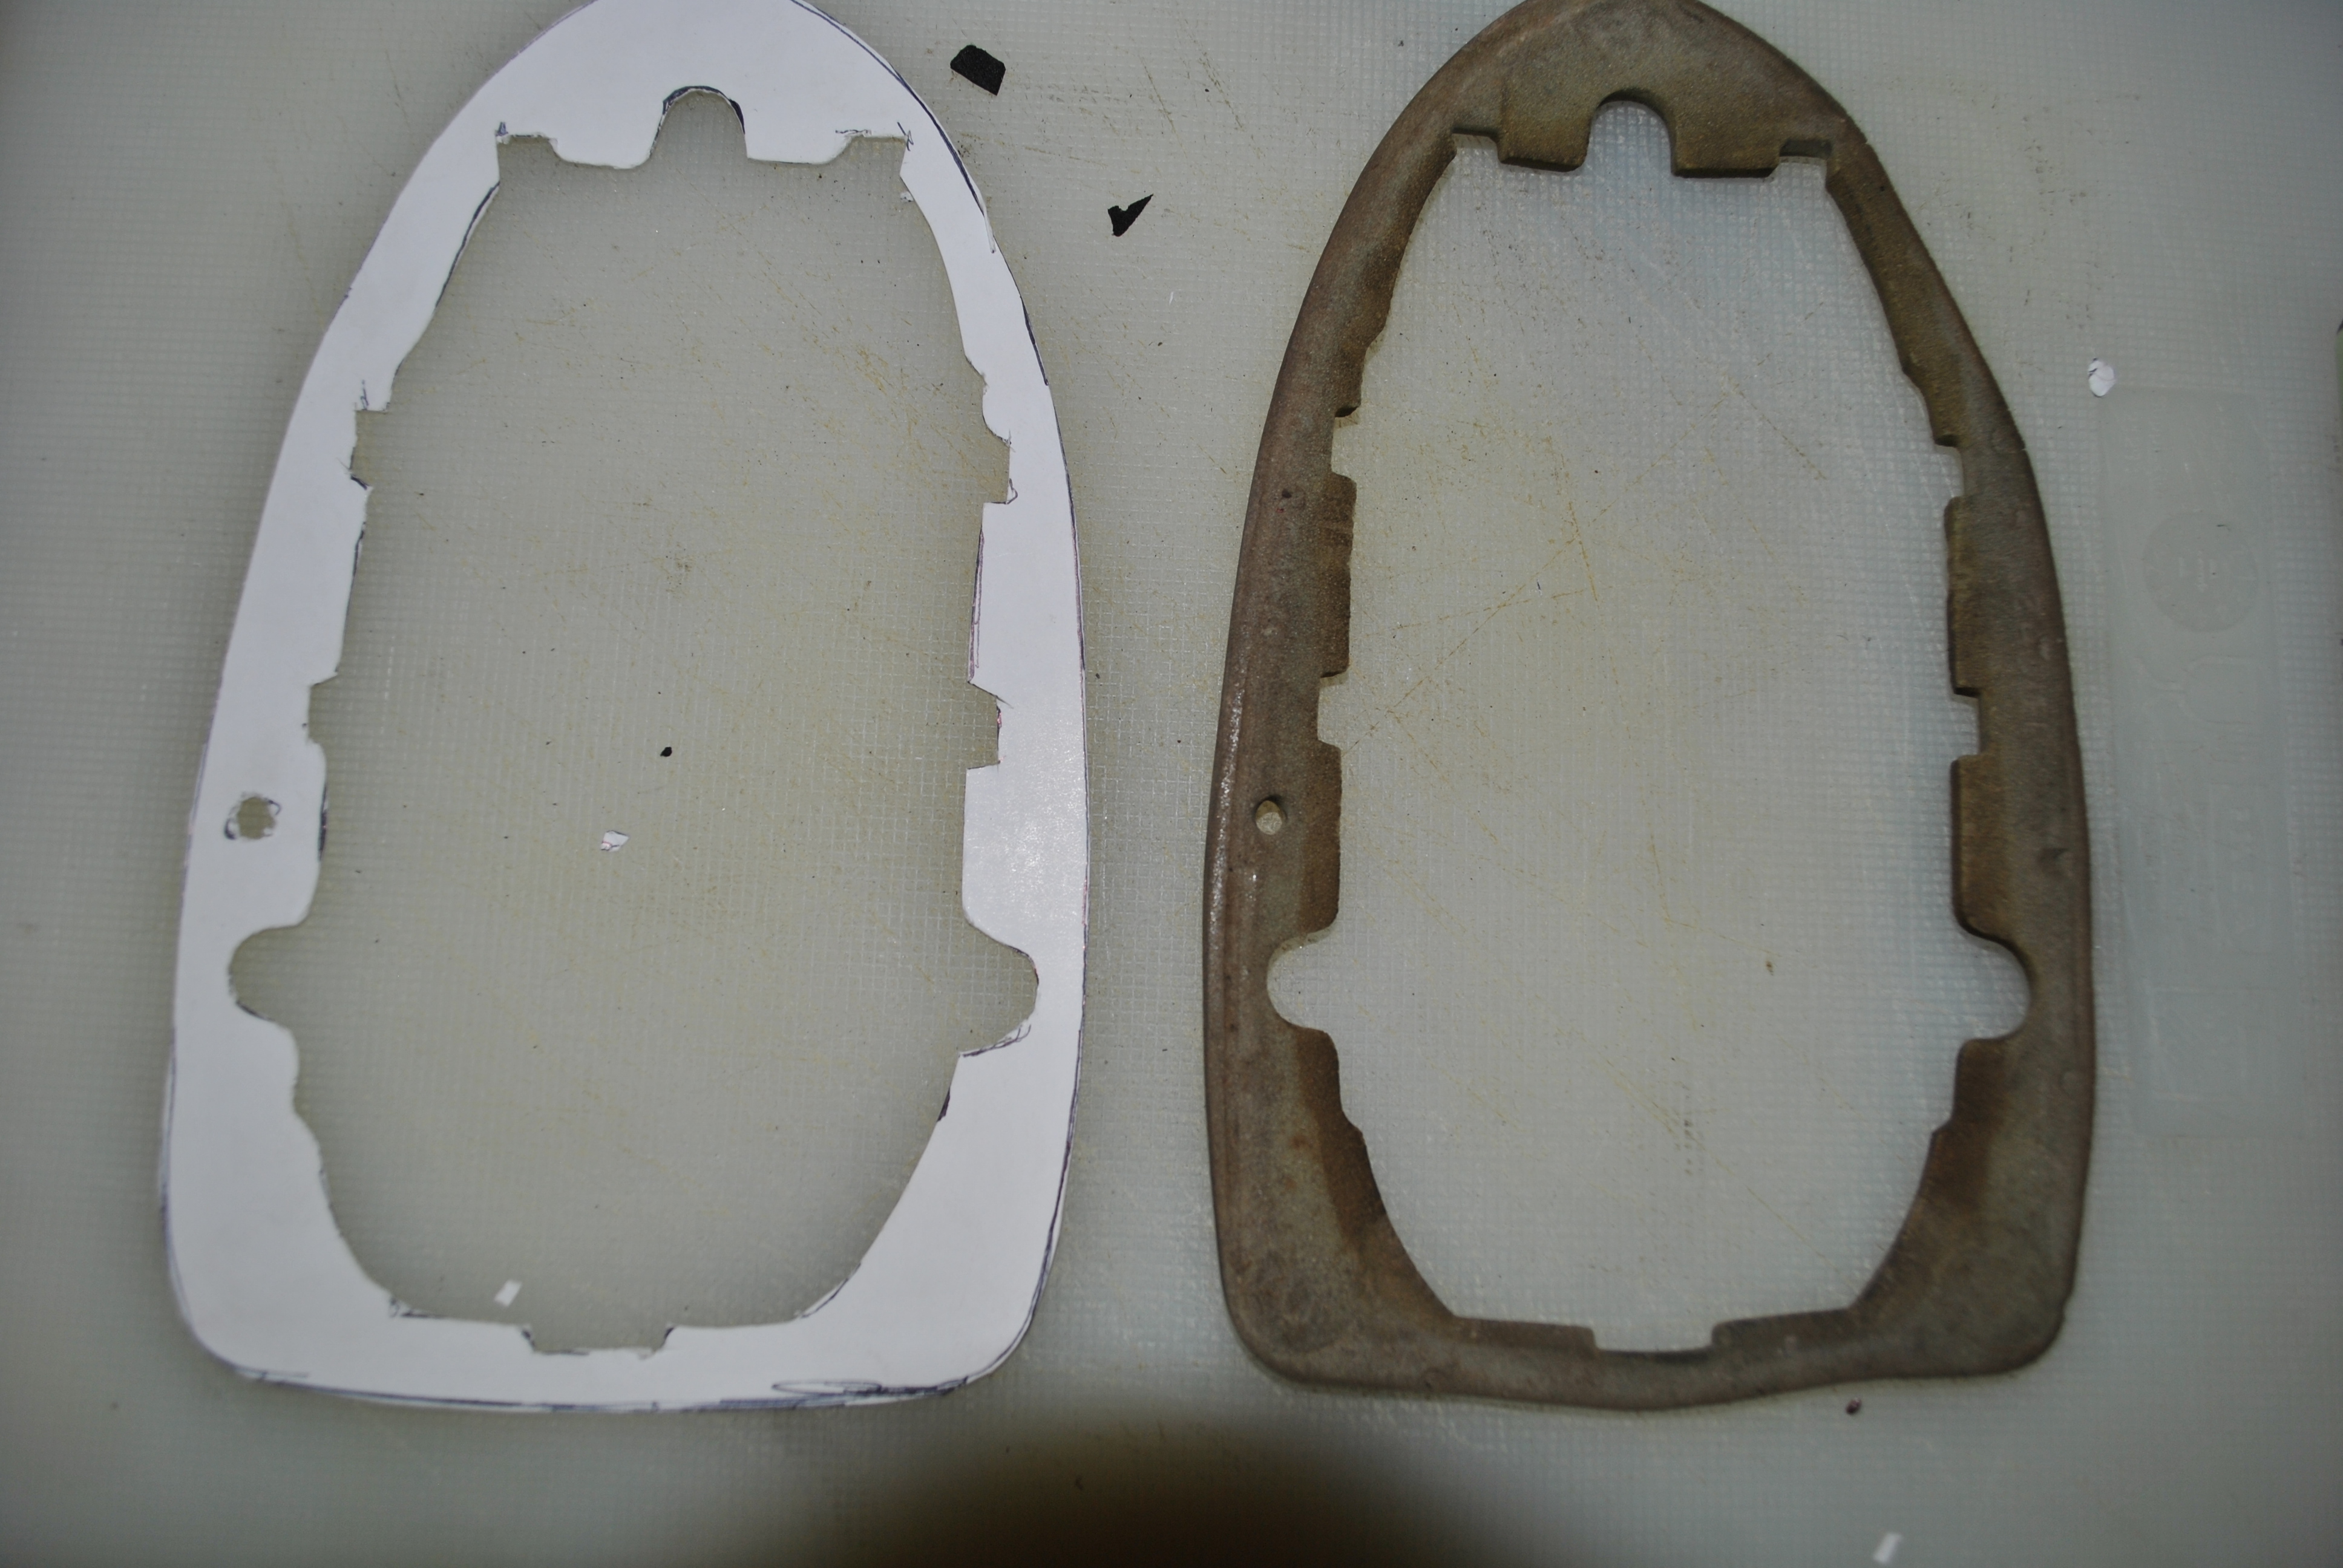
While I had all my lights removed for painting I worked out how much I would need by making cardboard templates from the original gaskets and went to a local Rubber/foam supplier Clark Rubber - Leaders in Foam, Rubber and Swimming Pools and bought offcuts of high density foam sheeting. 3mm for lens gaskets, and 6mm for the lights to the body.
I use these products at work for low pressure gaskets for oil areas with chilled water where condensation builds up.
Cut new ones from the templates and refitted lights. That was 6 months ago, they have showed no sign of leaking even when using the gerni on the car.
I did front indicators,tail lights, rego plate light and reversing lights.


Thread Starter
|
Veteran Member
Joined: Mar 2007
Posts: 9,142
Likes: 2,664
From: Florida
to clarify:
the string seal shown above is for use in Series 3 XJ tail lamps..
The previous Series 1 and 2 tail lamp lenses use a shaped foam gasket.
if the string seal falls off the channel it is obviously too thin, I will measure mine with a caliper to let you know, it should go in sort of tight, you push it in place with a screwdriver, so it stays in place, then you place the Lens in place and tighten it, keeps the inside of the taillamp dry.
if you want to cut your own Foam Gaskets for Series 1 and 2 XJ, go to any Joann's Fabrics and you can buy foam sheets of different thickness and different colors. Just don't use the Hot Pink color please, unless your car is Pink.
Trending Topics
Thread Starter
|
Veteran Member
Joined: Mar 2007
Posts: 9,142
Likes: 2,664
From: Florida
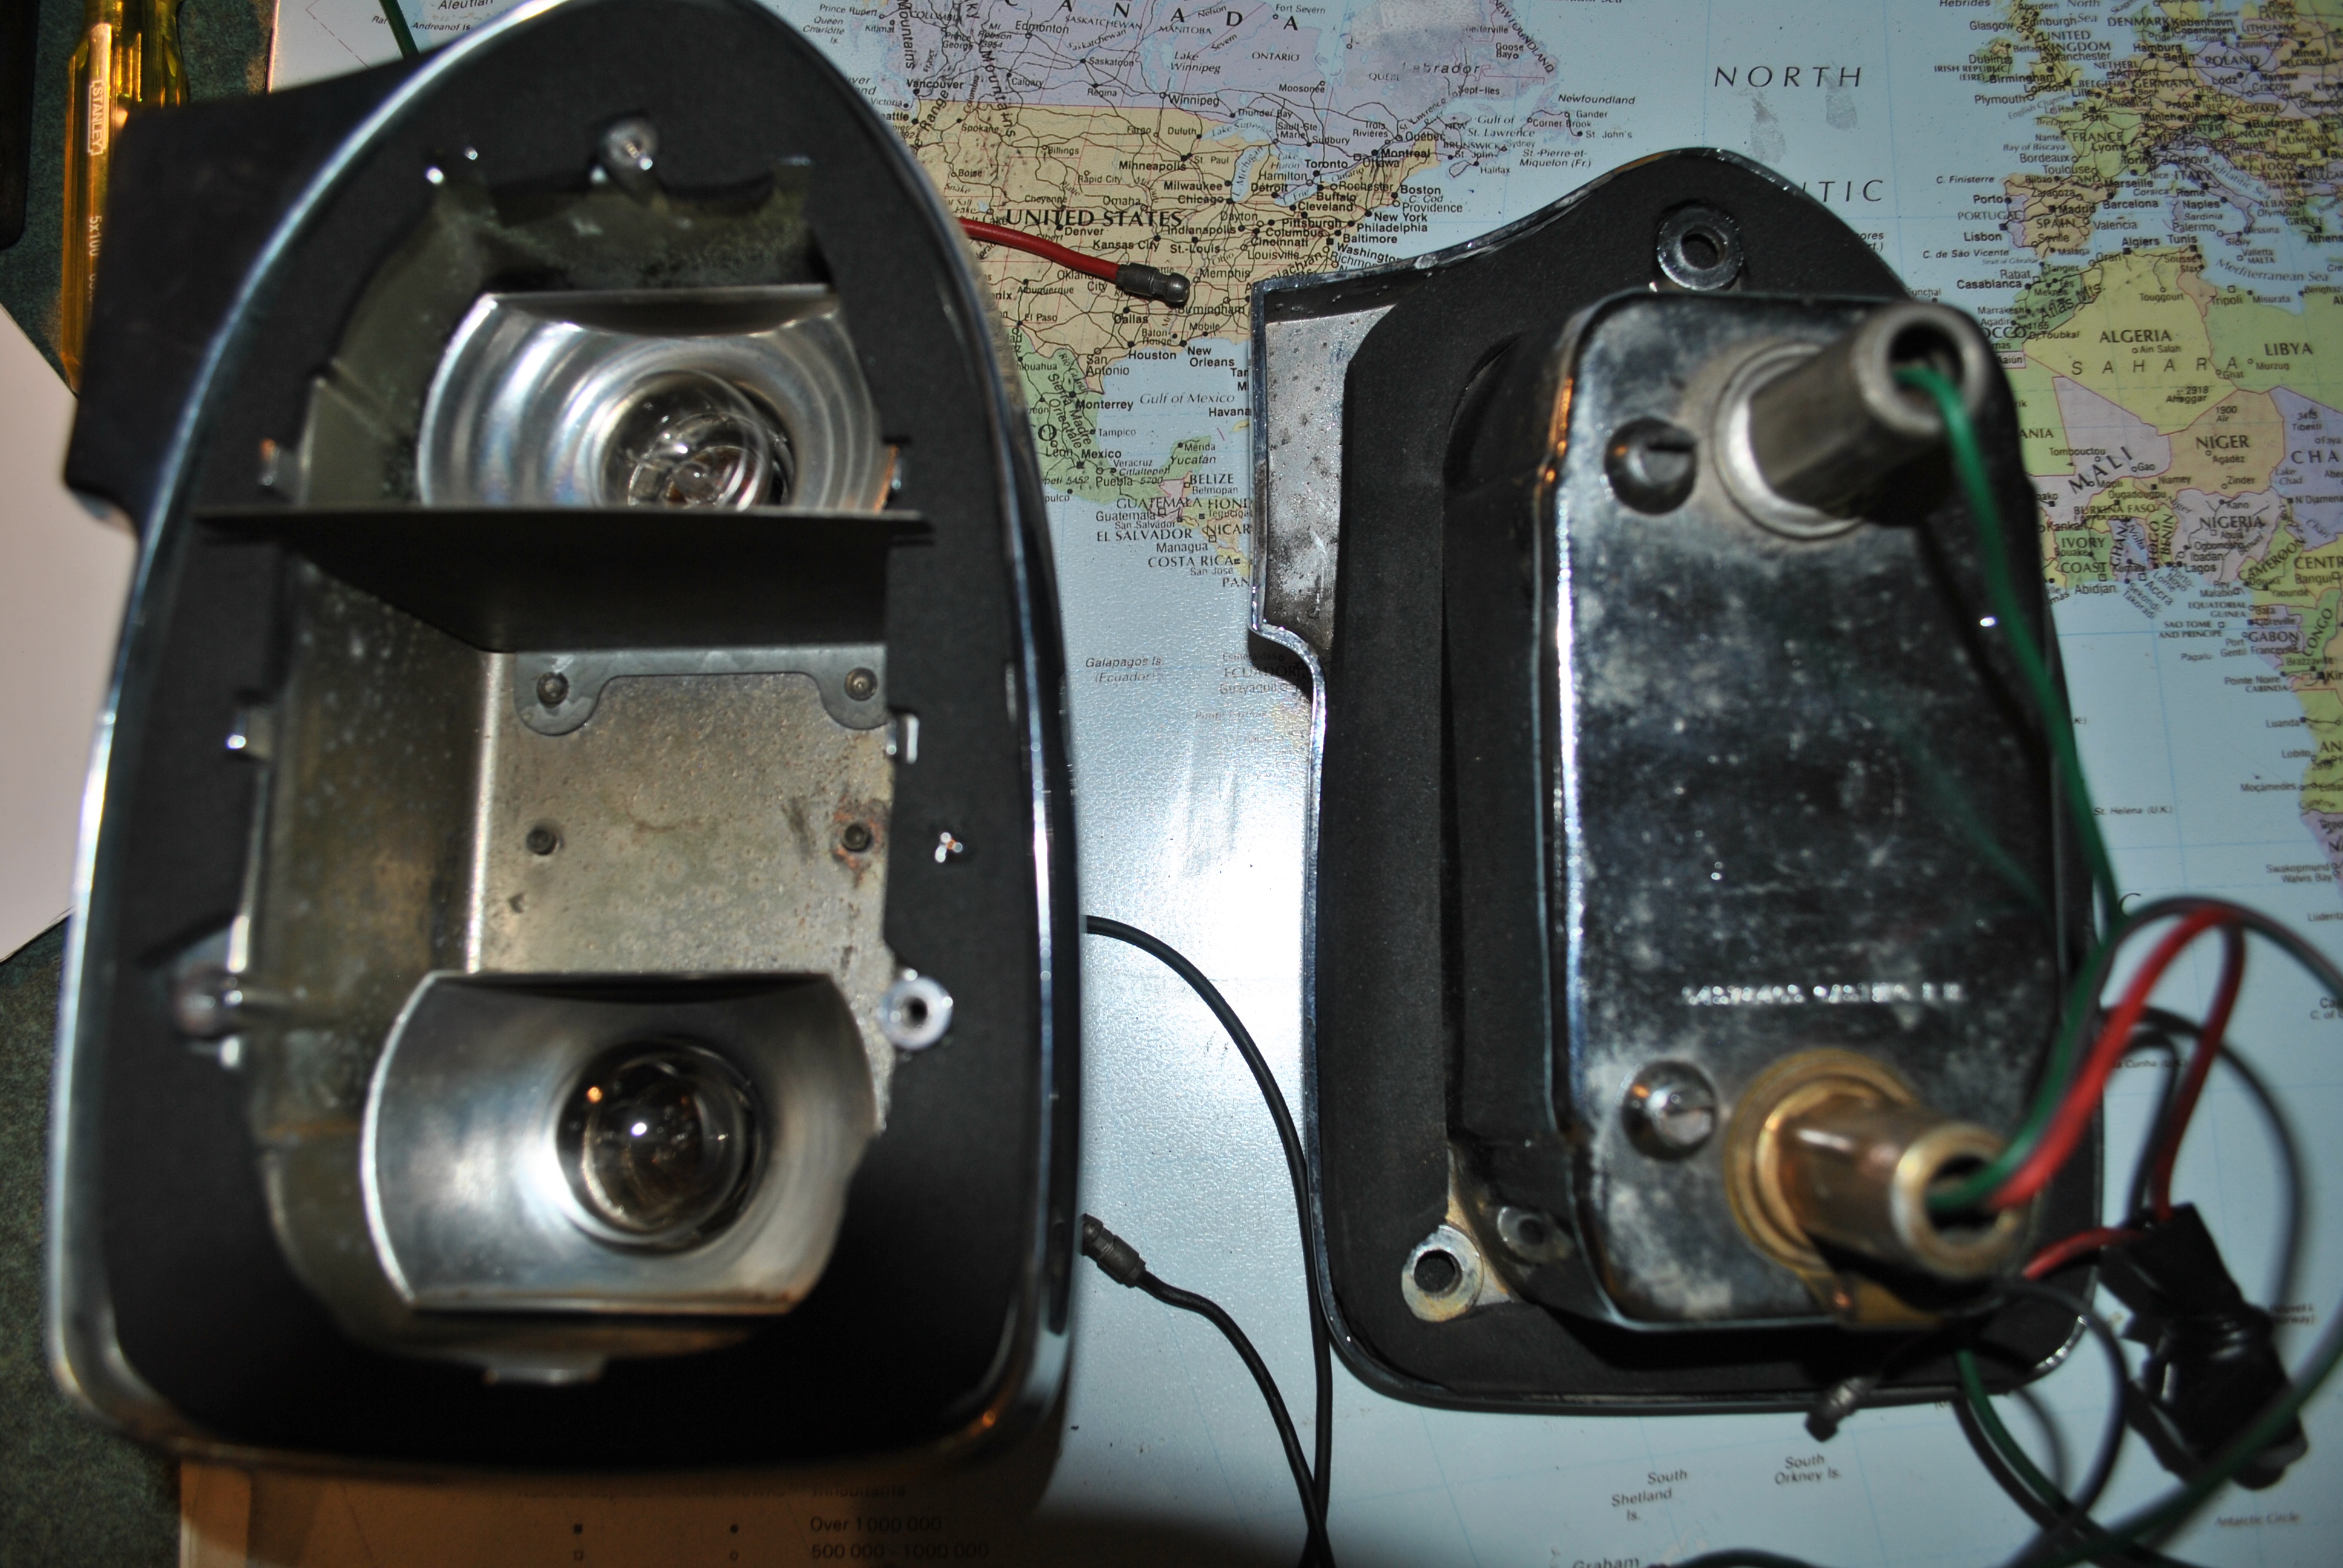
to answer questions and clarify the taillight Lens Seal tip:
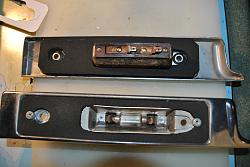
1) the seal I am referring to is the Lens-to-Housing seal, not the rear Housing-to-body foam Gasket.
2) the thickness is approximately 1/4", basically the standard thickness of the home-screen Beading.
I took pictures to show the residential window screen Beading that can be used as a substitute for the original Lens seal. you can buy packets of this beading at home improvement centers or hardware stores.
Thread Starter
|
Veteran Member
Joined: Mar 2007
Posts: 9,142
Likes: 2,664
From: Florida
I purchased .125 and tried many ways to use it... joined the ends together with a piece of wire..
Could never get it installed.. would have to use some type of adhesive to
hold it on the lens... keeps falling off one place or another. went back to my broken Jag seal..
Could never get it installed.. would have to use some type of adhesive to
hold it on the lens... keeps falling off one place or another. went back to my broken Jag seal..


Veteran Member

Joined: Mar 2014
Posts: 26,790
Likes: 10,320
From: Tehama County, California, USA
I can get my tanks to read *FULL* but I have to work at it (dribble gas in Very Slowly after first burp), as the pump nozzles are so sensitive they shut off at the first drop of gas burping back.
I've done several tests to know just how short of FULL my tanks are at the nozzle shut-off, and as near as I can learn, less than a quart/liter more gas can be 'stuffed' in before overflow happens. This is with a brand new gauge and may depend on pumps at your specific location. There are differences in sensitivity between pumps even at the same station.
If you're dead set on a FULL reading (which will mess with your EMPTY reading; you might find yourself out of gas when your gauge says you still 1/4 tank; and perhaps damage the sending unit) you need to remove the sending unit from the tank (through the tail light) and bend the float rod DOWN. I don't know how far you must bend it, because I enjoy the challenge of filling my tanks Completely.
(';')
Last edited by LnrB; Feb 26, 2018 at 12:10 PM.

Veteran Member
Joined: Jul 2012
Posts: 6,796
Likes: 2,403
From: Walnut Creek, California
1. Way back when former J-L poster Alex Carnara proposed the foam seals.
2. I'm with Elinor. when the auto fill nozzle shuts down, use old tech and squeeze in some more til you get the right "burble", then the tank is full. I still have the technique from my early days of pumping gas in a full service station !
Or just live with not quite full tanks, My usual practice. I've changed my measure from gallons to bucks. Prepay in cash or plastic, $50 or $60 !
Going to "sneak": the Jaguar down and get the tanks up for a later sneak to the SMOG station! DMV appointment ??? A real PITA !!!
Were it not for my kids, I'd be Texas or Nevada bound !! CA has lost a lot of it's former charm.
I checked on Billy, as I usually do at sun up. No sun, drizzly rain ! Smart goat. In his goat shed, looking outwards !
Carl
Last edited by JagCad; Feb 26, 2018 at 11:35 AM. Reason: fixing typos

Veteran Member
Joined: Jun 2015
Posts: 1,514
Likes: 687
From: Florida
A while back I purchased 2 new units from FCP EURO and I have the same problem. With the tanks full, the gauge reads between 3/4 and full. I have learnt to live with it. I am not going to try to adjust them.
What I did notice was that I could drive about 30-40 miles before the gauge starts to move downward.
At least I know when my tank is really empty.
What I did notice was that I could drive about 30-40 miles before the gauge starts to move downward.
At least I know when my tank is really empty.

Junior Member
Joined: Aug 2018
Posts: 1
Likes: 0
From: Memphis
Hi Jose,
Do you still have taillight lens seal beading? Is this OEM or the window screen beading?
Thanks,
Vance