When you click on links to various merchants on this site and make a purchase, this can result in this site earning a commission. Affiliate programs and affiliations include, but are not limited to, the eBay Partner Network.
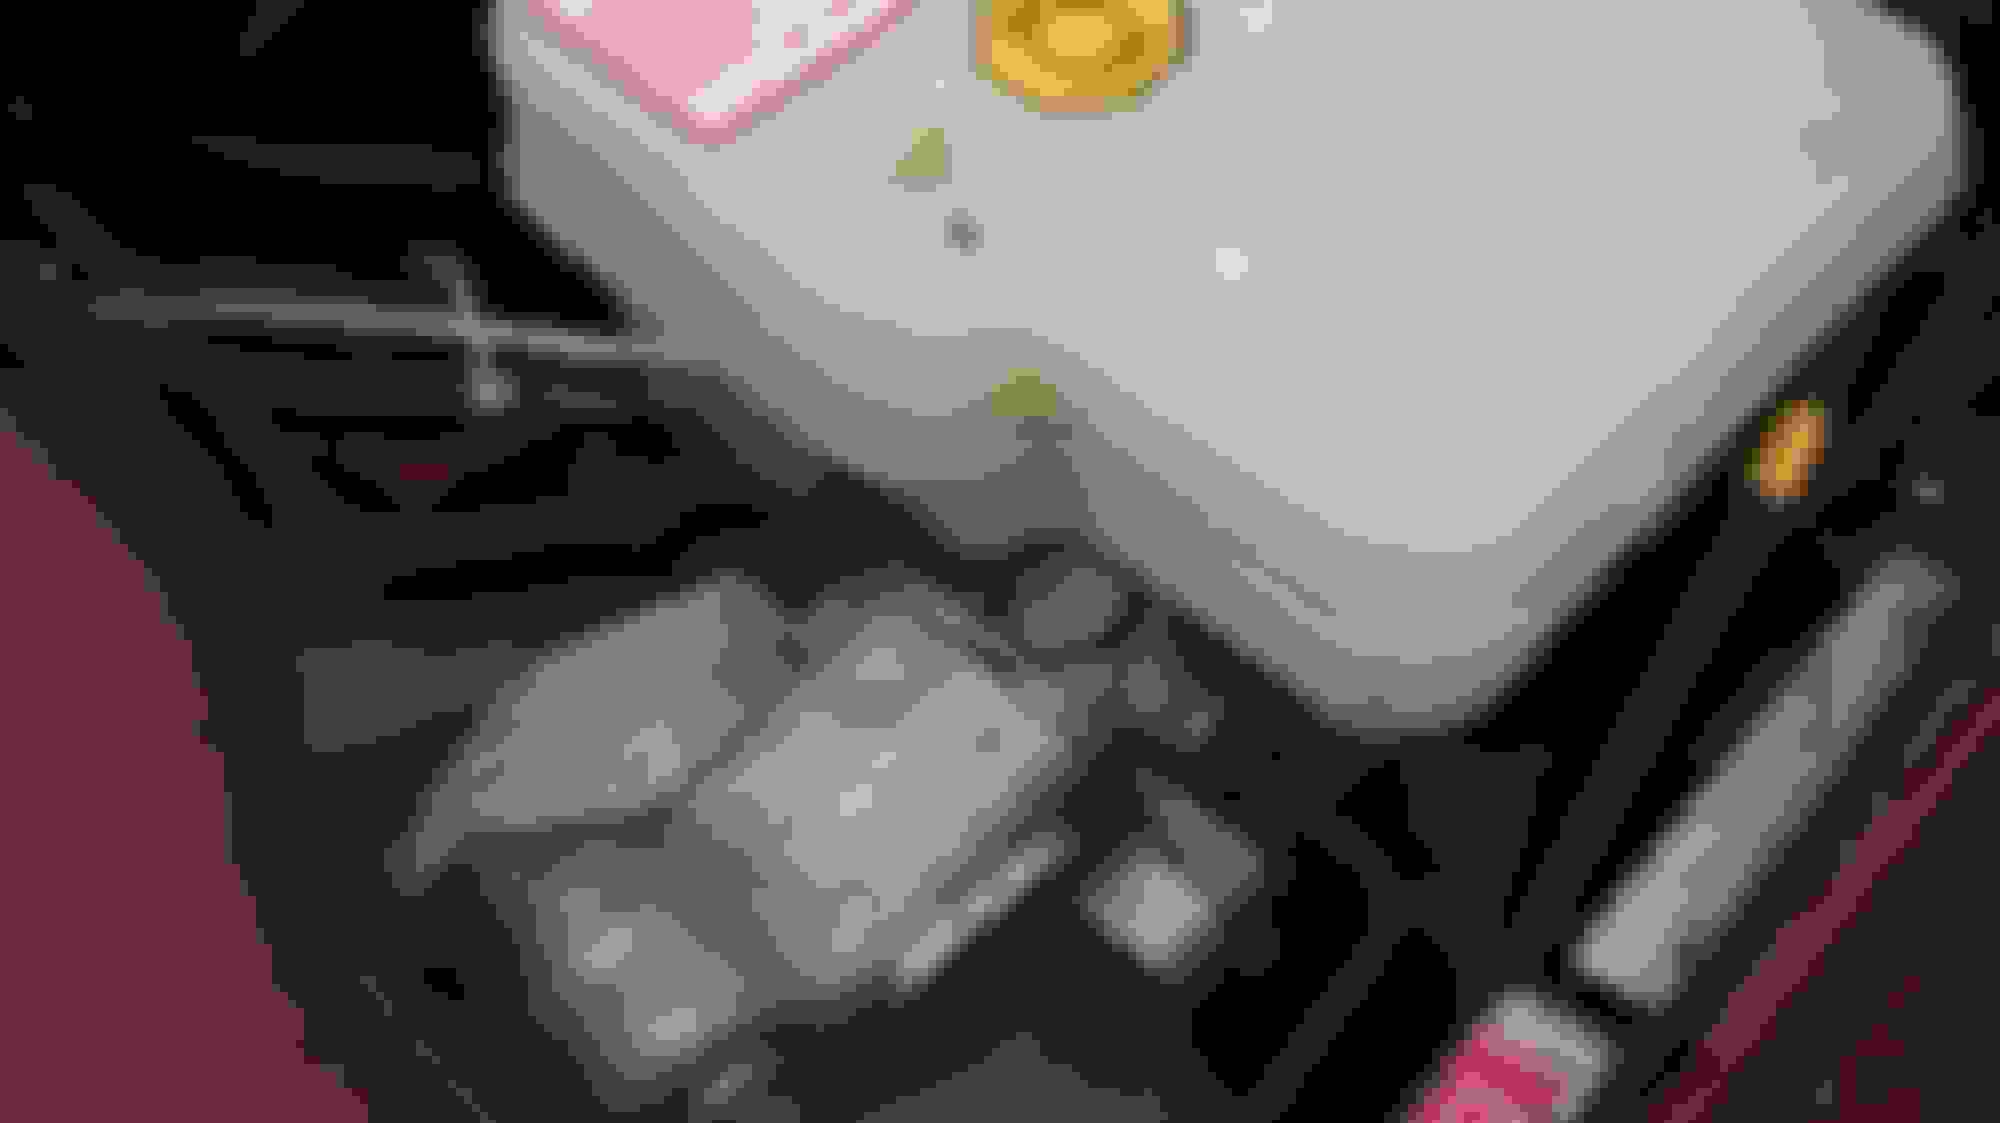
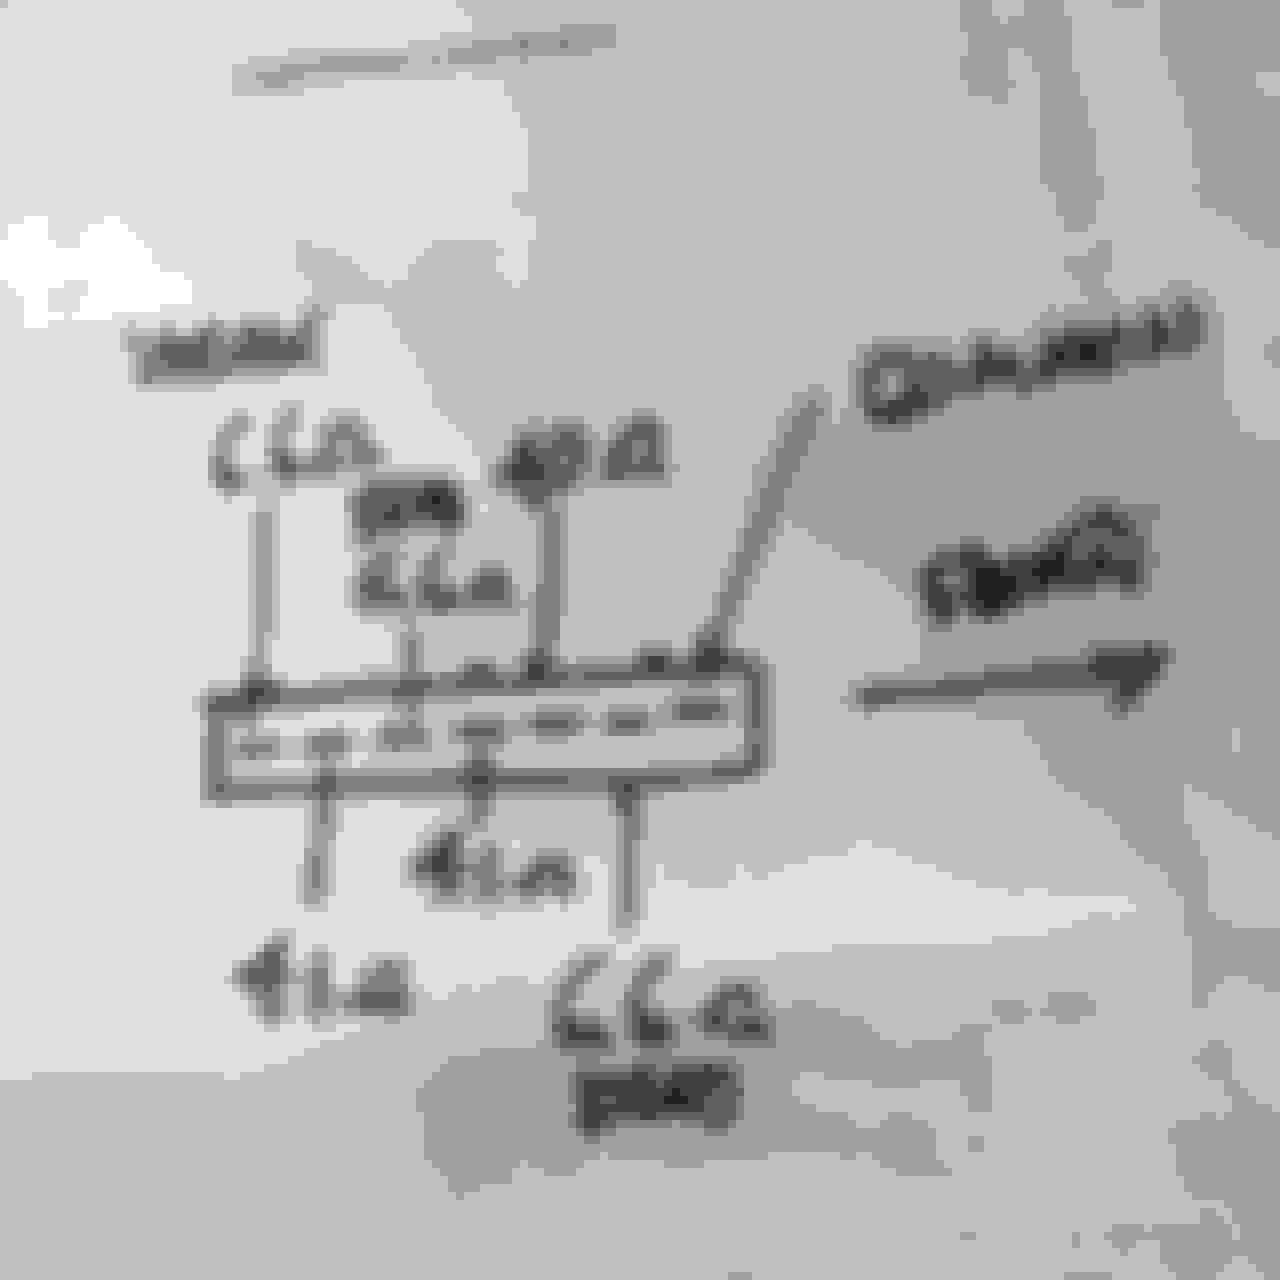
As you have an 89 the same as my Grey XJS then your Master Cylinder Actuator should be the same as mine and look like this.
The Teves Master Cylinder/Actuator as fitted to my 1989 XJS V12.
Keep the image of that Pipe in mind, its part of the High Pressure System that needs to be bled, especially if the Reservoir ever ran dry.
WARNING! That Pipe is full of Brake Fluid that is under High Pressure or at least is going to be in a moment.
When you 'Crack' the Nut on that Pipe, Brake Fluid could squirt out in any direction, so make sure that if that happens it doesn't get on the Paint or it will strip the paint off in a Heartbeat.
Cover all the Paintwork in Towels and have a Bucket of Soapy Water at the ready in case of spills.
Brake Fluid WILL also drip down from underneath that Pipe, so pack plenty of Rag underneath it.
When you 'Crack' this Nut be VERY CAREFUL!
It will contain Brake Fluid under High Pressure!
which could then Squirt out in any direction.
Don't let any Brake Fluid get on the Paint!
Before you start depressurize the System with 20 Pumps on the Brake Pedal.
Then put the correct size Spanner on that Brake Pipe Nut.
Make Sure all the Paintwork is covered up with Towels and Stuff loads of Rag underneath that Pipe as Brake Fluid will drip down from it.
I will just repeat that WARNING! again, DON'T LET ANY BRAKE FLUID GET ON THE PAINT OR IT WILL BE RUINED!
Next drape a Towel over the Top of that Spanner (as an extra precaution)
Then Start to loosen that nut by Holding that Spanner in your Left hand and nudging with the Palm of your Right hand to loosen it off a little bit.
Just so you know you can undo it when the time comes.
Which is Now!
(1) Do the Nut up again to how it was before you loosened it off.
(2) Drape a Towel over the Top of the Spanner
(3) Check all exposed Paintwork is Covered
(4) Get a Mate to turn on the Ignition so the Brake Pump builds up Pressure and then cuts out but DON'T START THE CAR!
(5) Now do the same as you did before and 'nudge' the Spanner on that nut with the Palm of your hand to loosen it off (With the Towel over the Top)
(6) Very Carefully loosen that Brake Pipe Connection a little bit more, at which point you may see Air Bubbles coming out followed by Clear Brake Fluid.
(7) When Clear Brake Fluid starts to drip out, do that Brake Pipe Connection up again and Switch off the ignition.
(8) Hopefully it will be Drama Free with no Brake Fluid Squirting everywhere and you will start to wonder what the fuss was all about.
But you can never be sure! and so it always very wise to take all possible precautions just in case the very worse should happen.
Later I will show you how to bleed the Low Pressure side of the System, which is even more Traumatic that that.
After you have removed the Air from the Master Cylinder/Actuator, as outlined above you can then move on to Bleeding the Low Pressure Side.
All that this consists of is a feed from the ABS Reservoir to the Brake Pump which is Gravity Fed from the Reservoir.
On the face of it a dead easy job, except for one big 'Bear Trap' more on that in a moment.
But one thing you need to bear in mind, is that this is going to make one hell of a mess with Brake Fluid going everywhere.
So as before you need to take Care to cover up all Paintwork but this time also inside the Engine Compartment.
Which means that you need to Stuff Rags all around the Brake Pump and anywhere else where Brake Fluid might flow.
You might even want to do what I did and make a makeshift Chanel out of some Tin Foil to Flow it out from the Engine Compartment and then catch it in a Container placed underneath the Car.
Do not attempt to reuse it, as it will be Contaminated with Microscopic Particles of Crud.
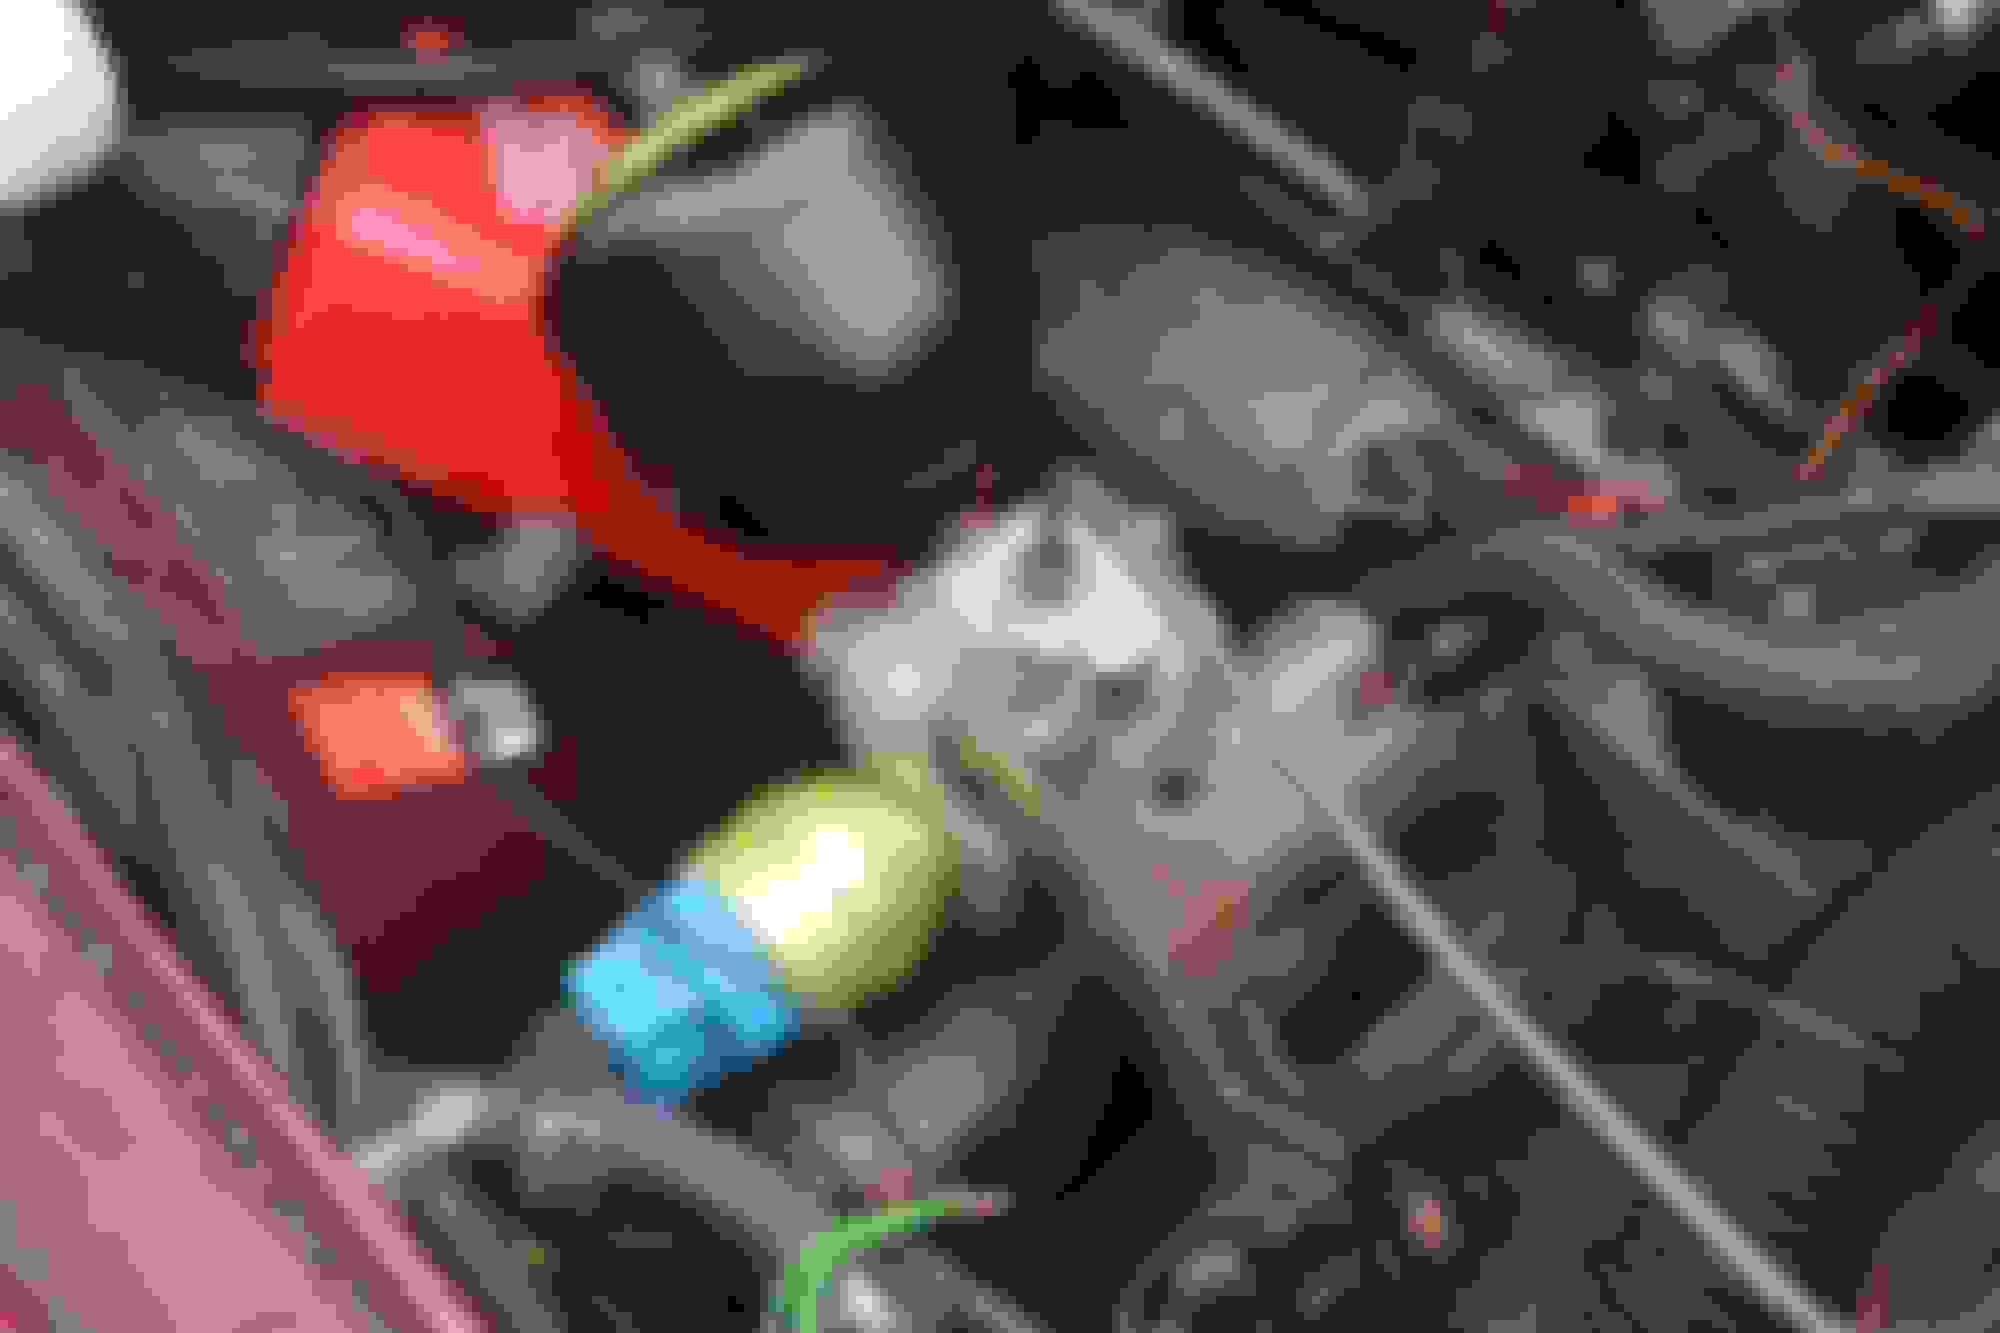
Now take a look at this Photo.
The Brake Pump on a 1989 XJS V12
The Braided Pipe is the Brake Fluid Feed into the Brake Pump from the Reservoir.
On the end of that Braided Pipe is a Right Angled Elbow that is held in with a Pin (Where the Red Paint is)
In order to Pull the Elbow out, you first need to Pull out that Pin (The Easy Bit)
Now for 'The Bear Trap'
That Right Angled Elbow is made of Plastic but there is a Problem! (A big Problem!)
Because on the end of that Plastic Elbow that goes into the Brake Pump is an 'O' ring.
Which Seals it into the Brake Pump and is held in place by the Pin you just pulled out.
In order to get the Elbow out of the Brake Pump it needs a Straight Pull but as it has probably not been moved for over 25 Years it will be very difficult to pull out.
In case that doesn't sound bad enough, that Plastic Elbow is EXTREMELY FRAGILE and as such EASILY BROKEN.
If you break it finding another one may not be that easy.
So extreme care must be taken to remove it. (Or you will break it for Sure)
In order to try not to break it, you need to try and loosen it up before you pull it out, which involves some very minimal twisting back and forth.
Then (if or when) you are able to twist it back and forth a little bit more.
You want to Twist it back and Forth as you Try and pull it out of the Brake Pump.
Which must be a very careful straight pull, or you will break it.
All things being equal, it could be a real 'Bar Steward' to get out.
But if or when you get it out, Brake Fluid will start Pouring out of it. (All over the place!)
At which point you let the Fluid run for about 3 Seconds until it runs clear with No Air Bubbles and then you can push it back in the Brake Pump again and put back the Pin.
In other words you do the whole thing live.
Do NOT turn on the ignition or attempt to start the Car.
Do NOT allow the Reservoir to run out of Brake Fluid.
Do NOT let any Brake Fluid get on the Paintwork.
Pull any Brake Fluid soaked Rags out from under the Car
Wash down any Spills with Soapy Water (avoiding the electrics)
Then Bleed the Brakes with the Correct procedure, which you already know.
If that doesn't solve the Problem then it could mean rebuilding the Valve Block on the ABS Master Cylinder Actuator.
Which could well be easier than Pulling that Plastic Elbow out of the Brake Pump.
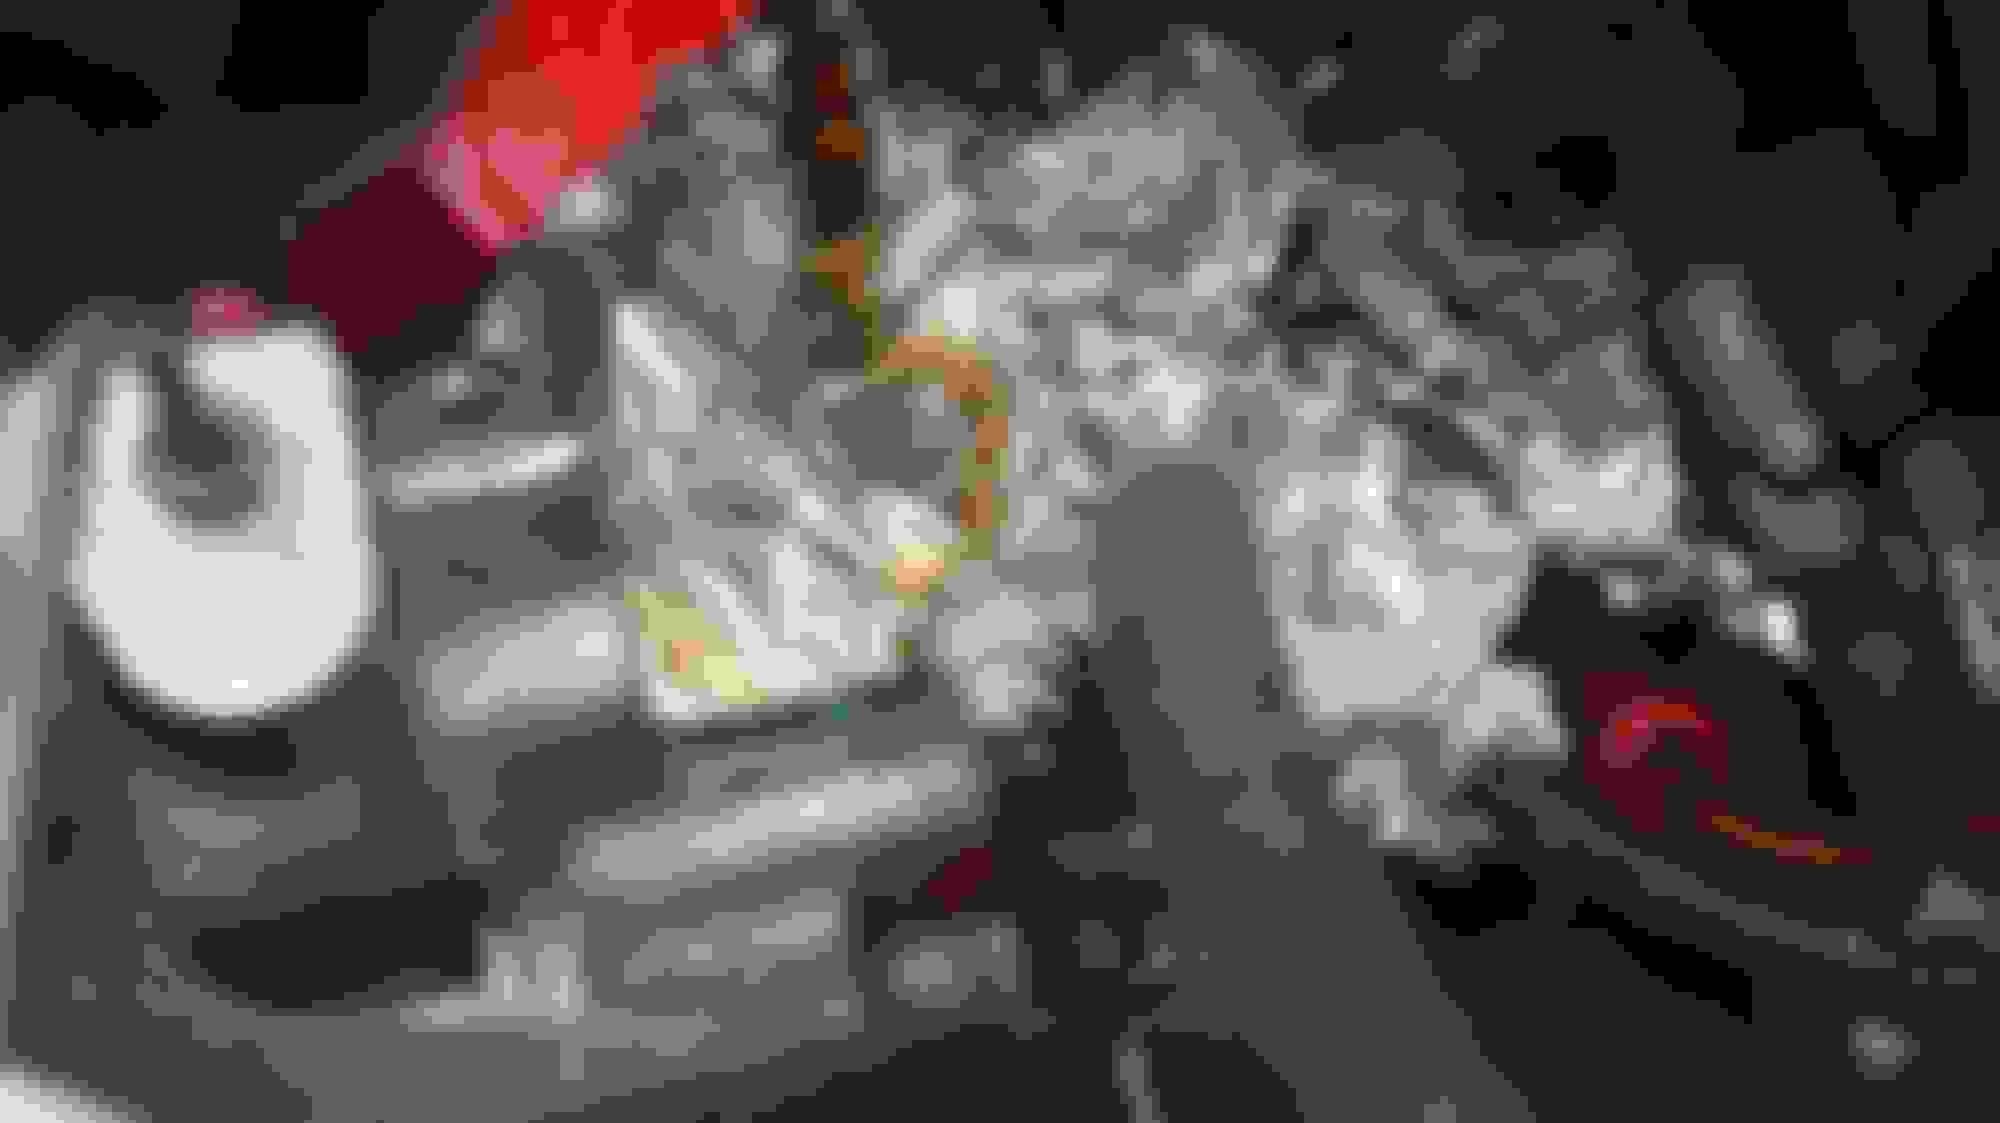
Tin Foil Channel to Flow Spilled Brake Fluid out to underneath the Car into a Container
On the end of the Braided Pipe you can see the Plastic Elbow which needs to be pulled out
Plastic Elbow Out at last let the Brake Fluid flow for about 3 Seconds until the Air Bubbles are out then push it back in and reinsert the Pin
That Elbow marked by the Spanner will need a Straight Pull out.
Twist it back and forth as you pull it, like a Dentist Pulling out a Tooth
If that doesn't fix the Problem after the Brakes have been Bled
Then you may have to rebuild the Valve Block on the side of the Master Cylinder Actuator.
Which is very easy and will only cost a Few dollars.
I would suggest that you need to go through a fairly detailed diagnosis before you start pulling apart the valve block or buying any new parts.
First of all, try and ensure that you have fluid and no air throughout the system. To do this you first bleed the low pressure side of the system. Just to be clear, this is not the low pressure side of the Actuator. The low pressure side of the actuator is a direct fluid feed from the reservoir above and doesn't need bleeding.
Bleeding the Low Pressure side of the system means ensuring that there is no air in the feed from the reservoir to the pump. It's a very simple operation and is shown in OB's pictures above. First of all ensure that the reservoir has plenty of clean fluid. Then look for the pipe that goes across the car from the reservoir to the pump. At the pump end you will see it as a fabric-covered rubber hose. There is a small clip that retains it to the pump housing. Be careful on removing the clip. As you remove it, then remove the pipe, fluid should flow out of the pipe so ensure you have some rags underneath. You need to ensure that fluid is flowing cleanly and then quickly connect the pipe back the housing. That's the low pressure side completed.
Now bleed the brake circuits. But do it the Teves way rather than the way in the Jaguar workshop manual. Remember this is not a conventional system, the rear brakes are driven by pump pressure not pedal pressure.
If the brakes are bled ok, do it again! Then do it again! Seriously!
Now if you still have problems, run through the 32 ABS diagnostic tests as described in the workshop manual. This is the easiest way to test circuit continuity and integrity across all the ABS electric circuits.
If all the tests work out ok and you still have a wheel or more that won't bleed, start by disconnecting the front caliper pipe and trying the front wheel bleeding sequence using that open flexi-pipe. If that won't work go back one joint to the fixed pipe. If that won't work, go back one more step to the ABS valve block. Only if that won't work, should you then assume that you have a jammed valve in the block.
I hope that all makes sense. Do post back if you want anything clarified.
Hello, I had a chance to do some testing today. After reading about the TEVES testing and OB's ABS problems, I decided to perform some electrical testing before opening up the system and making a mess. I tested at the 7 pin connector as described. 3 of the valves tested at 4.0-4.4 ohms, 3 tested 6.6-6.9 ohms. Then I used my "Power Probe" ( a must have for electrical testing). applying voltage to the valves tested at 4.0-4.4 ohms produced and audible "click", 2 of the others were totally dead and one made just a faint noise. At this point I believe it is obvious I need to take the unit apart and clean/repair the unit. I must thank all of you, I am a professional mechanic and shop owner and this forum is the most thorough, detailed and professional I have ever used.
There is no guarantee it is going to work, it really all depends how bad the Valves are but the chances of success are very high.
Before you pull the Valve Block apart, bear in mind that Spare Parts are NLA and so be careful not to lose anything.
If you could buy a New ABS Master Cylinder Actuator, you would be looking at $1,500 but seeing as they are NLA you will have to rebuilt it yourself.
First remove the Valve Block from the ABS Master Cylinder being very careful not to lose or damage the 'O' rings.
Then before you take the Cover off the Valve Block, be extremely Careful as the Valves inside are heavy enough to fall out on their own.
This is something you want to avoid as the Valves are connected together with Ribbon Connectors, which are VERY FRAGILE and will break just by looking at them.
In view of the Test that you have done, I would say there is a 99.9% Chance that two of those Ribbons have already broken.
Even with one of them Broken, it will Violently have your Car pull to the right and try and ****** the Wheel out of your hand.
Don't bother with repairing the Ribbons, instead rewire all the Valves with High Temp Silicone Wire, which is only going to cost you a few dollars.
Which is why you need all the Ribbons and the Valves intact, so you can make a drawing of how they are wired.
Once you've got that bit out of the way, you can pull the Valves out of the Valve Block with your fingers, or a pair of pliers with the Jaws padded. (so the valves are not damaged)
Each of those Valve has a little mesh filter inside, which you have to hook out with a miniature Screwdriver (Watchmakers Screwdriver)
Before reassembly these Valves need to be Cleaned but don't start pricking the holes with a pin or they will be totally ruined.
They need to be Cleaned in an Ultrasonic Cleaner, as used by Dentists and Jewelers.
The DIY ones won't be up to the Job, so best to give a Jewelers a few Bucks to do this for you.
It really goes without saying that you need to be an EXPERT when it comes to Soldering or if you get a dry joint then bad things can happen!
So I would Strongly recommend you have the wiring on the Valves done by a Professional Shop.
unless you know that you can do this to the highest standard.
Then it just a question of a final Test before you go and put it all back together, where with the rewiring it should be better and more reliable than when it was New.
Bear in mind you will have to Bleed the Low Pressure Side all over again and then Bleed the Brakes according to the Special Procedure which you already know.
What causes the most problems with the Valve Block, is not changing Brake Fluid on a regular Basis.
But most of all when fitting New Brake Pads, where you must NEVER lever the Caliper Pistons back unless you have the Bleed Nipple open.
As if Brake Fluid is pushed back up to the Master Cylinder Actuator, then it can destroy it in a heartbeat.
Good Luck although I'm sure that you won't need it.
Juat a side indormation... I was reading Jaguar's diagnostic measures regarding a hard pedal. This is, according to the book, a sign of a failed rear brake circuit. As the rears aren't directly operated by the master cylinder, the pedal will get firm and have little travel. If the fronts fail, the pedal will get a longer travel.
Good Day, Well, removing the assembly went smoothly, however when it came time to wiggle the solenoids out they went a bit stubborn and when the first one popped out it promptly broken the fragile ribbon wiring. So, I will clean and test the solenoids and look for replacement parts or a more talented than I chap to solder in new wires. Will keep you updated. Thank you all for your help.
These ABS posts make me happy mine is older. Not to mention that no one knows what cars used to do when you lock one down. Had an Uber driver whip right out of an apartment a few days ago fully intending to put his car where mine was. Like I was invisible in my red car. Squalling locked brakes wakes everyone up!
Juat a side indormation... I was reading Jaguar's diagnostic measures regarding a hard pedal. This is, according to the book, a sign of a failed rear brake circuit. As the rears aren't directly operated by the master cylinder, the pedal will get firm and have little travel. If the fronts fail, the pedal will get a longer travel.
- long travel, fronts
- hard pedal, rears
Just some 'T M Y K' stuff
Hi Daim
Talk about Perfect Timing!
That's the very Problem that I've got with 'Cherry Blossom' Long Travel on the Pedal, which I've just written up on my 'Cherry Blossom' Restoration Thread.
But do you know what I need to do to fix it?
If you could answer on the 'Thread' that might be better than doing it here to keep it together.
Hello, Thanks you all for your guidance. I ended up purchasing a used but tested good complete assembly. Installed and bled per procedures recommended here. I now have functioning brakes, though it seems the rear could be better. I bled and bled and bled them and there are working but when I hit the brakes hard the ABS and brake light still come on momentarily. The car now stops straight with no pulling but I now have a new problem and will be starting a new thread after searching the forum. I pulled the car out of the garage this morning and while idling just shut off. Cranks but no start. It did this to me last year and after looking at the plugs, wires, and dist cap and rotor, put it back together and fixed itself until today : (
If you installed another Brake Master Cylinder/Actuator, did you 'crack' and bleed the 3 Pipes that were coming out of it, (That go to the Brakes)
Also did you re-bleed the 'Low Pressure Side' of the System.
That could be your problem right there.
There is also a High Pressure Brake Pipe on the Top of the Master Cylinder Actuator, that you could try CAREFULLY 'cracking' with the Ignition ON.
I've got Air Bubbles out of there a few times.
But DO BE EXTREMELY CAREFUL if you do this, as BRAKE FLUID UNDER PRESSURE COULD COME SQUIRTING OUT!
Always Best to do this with a Towel draped over the Spanner as well as your hands and COVER ALL THE PAINTWORK just in case the worse should
happen and have a Bucket and Sponge standing by just in case to mop up any spills.
But if you are really CAREFUL and just 'crack' the Pipe Connection the very minimum amount, then it should be hopefully drama free.
Though have plenty of rag stuffed everywhere as you WILL get some drips of Brake Fluid at the very least.
DON'T LET ANY BRAKE FLUID GET ONTO THE PAINT WORK OR IT WILL STRIP IT OFF IN AN INSTANT (As I'm sure you know)
High Pressure Brake Pipe to the Brake Master Cylinder/Actuator.
If you 'Crack' this Connection be EXTREMELY CAREFUL as Brake Fluid Under Pressure could come squirting out in any direction, so cover the Spanner and Hands with a Towel just in case and also Cover all Paintwork.
DO NOT LET ANY BRAKE FLUID GET ON THE PAINTWORK OR IT WILL STRIP IT IN AN INSTANT (So be VERY CAREFUL!)
Last edited by orangeblossom; 09-04-2017 at 05:42 PM.
 08-13-2017, 07:01 PM