
My New Exterior Mods..Pics Inside


Thread Starter
|
Member
Joined: Sep 2011
Posts: 92
Likes: 9
From: Ft. Lauderdale, FL
I've been wanting to do this for a while. Took on this little project for the past three days. I did the rims, side louvers, front upper/lower grilles, hood vents, rear trunk blade and the XK/R badges. What do you guys/gals think? Debating on whether to do the piece around the window trim black as well. Next little project is changing out all of the yellow interior lights for LED which are already in the mail.
Veteran Member


Joined: Dec 2011
Posts: 3,453
Likes: 882
From: Pacific Northwest
Have to say I like it! Well done!
Not sure I would do the glass trim, but it is a popular mod with the younger crowd. The chrome is so light, it just really sets off the cats curvacious lines without making itself overly stated.
The full "murdered" look in my neck of the woods seems to belong to the tweekers and street racers that like to slip in and out unseen at night so I'm not one that likes to see cars like that out late in the evening. Not the crowd I want to hang or be associated with, but that's just an old mans opinion.
I do like what I see right now and would encourage you to pause for a while and reflect on the great work you've already done. It is a real attention getter.
V
- sorry, just noted your car was blue, not black (looks black in pics) so trim may look ok in black as well... Would have to see with better color saturation first.
PS - I want your driveway!
Last edited by CleverName; Feb 9, 2013 at 12:34 AM.

Senior Member
Joined: Jan 2008
Posts: 806
Likes: 109
From: U.S.A.
That looks like Pasti Dip. Saw Youtube vids of guys painting their entire cars with this stuff (Plasti Dip). Looks pretty interesting in the Youtube vids. A few years ago I also blacked out the sliver plastic pieces but painted them instead to match the color of the car except for the hood louvers. I personally like the window trim blacked out similar to the XKR75, XKR175, XKR Speed Pack and XKRS which looks more sporty IMO but it's personal taste. I had the windows trim vinyl wrapped black.
Nice on the interior LEDs. Very easy to install as the overhead consol just use your fingers to pull down and the footwell bulbs are exposed. While you're at it, you might want to also consider changer your amber city and turn signals. I changed my city bulbs to LEDs and turn signal to chromium.
Nice on the interior LEDs. Very easy to install as the overhead consol just use your fingers to pull down and the footwell bulbs are exposed. While you're at it, you might want to also consider changer your amber city and turn signals. I changed my city bulbs to LEDs and turn signal to chromium.
Last edited by GhostriderXKR08; Feb 9, 2013 at 01:26 AM.
Thread Starter
|
Member
Joined: Sep 2011
Posts: 92
Likes: 9
From: Ft. Lauderdale, FL
Lol, ding ding! I was waiting to see if someone took notice or knew what that stuff was all about. I just learned about the plasti dip this week and decided to give it a try. I have to say its awesome stuff and pretty fool proof. I watched a lot of videos on youtube (dipyourcar.com)...pretty cool! The beautiful thing about it is if I don't like it I can take it right off at any time with no ill effects to the paint! If you do it right it (4-5 coats) it doesn't look cheap or crappy. Just have to mask off the areas you don't want sprayed...like calipers and rotors. I bought the black (matte/flat look) as well as the glossifier (for the rims) but didn't use the glossifier just yet. Finding out about this stuff made me really happy as I don't have to spend the extra coin for these mods now which it probably would have taking me forever to get around too.
Thread Starter
|
Member
Joined: Sep 2011
Posts: 92
Likes: 9
From: Ft. Lauderdale, FL
Nice on the interior LEDs. Very easy to install as the overhead consol just use your fingers to pull down and the footwell bulbs are exposed. While you're at it, you might want to also consider changer your amber city and turn signals. I changed my city bulbs to LEDs and turn signal to chromium.
Which bulbs on our car are considered the "city bulbs? If you still know/remember what exact bulbs (#/brand) did you buy for the turn signals as well as the city bulbs? Also, how easy it to access the headlight unit for bulb swaps? Did you ever change out the side repeater lights? Would like to swap them to LED as well but I dont what bulb it takes. Thanks in advance for your answers!! Now I have the mod bug! Lol.
Trending Topics

Senior Member
Joined: Oct 2012
Posts: 166
Likes: 34
From: Canada
I did mine 8 months ago and it still looks great. There is nothing you can't do with plasti dip. Nice job on yours btw, looks really good. I would do the window trim but I'm not sure about the rims. In my neck of the woods, when you see a car with blacked out matte wheels, you always think of winter rims when they are spinning because you lose all the detail in black. It might be just me but I hate all black rims. Love the car in blue though.
Senior Member
Joined: Sep 2011
Posts: 500
Likes: 59
From: Dallas, TX
Looks great but not at its full potential. Black wheels are very sinister and mean. So they either look like a wheel that vanishes to the eye and seems cheaper to the average person... OR... they make the car look nasty (in a good way and sinister).
If you lower the car and add spacers the black wheels will achieve the desired effect in my humble opinion. Otherwise it looks like an afterthought or a failed attempt at looking the business.
But I am impressed by the Plastidip. How long did it take you to mask and shoot all 5 coats? I may give it a try.

Senior Member
Joined: Oct 2012
Posts: 166
Likes: 34
From: Canada
Looks great but not at its full potential. Black wheels are very sinister and mean. So they either look like a wheel that vanishes to the eye and seems cheaper to the average person... OR... they make the car look nasty (in a good way and sinister).
If you lower the car and add spacers the black wheels will achieve the desired effect in my humble opinion. Otherwise it looks like an afterthought or a failed attempt at looking the business.
But I am impressed by the Plastidip. How long did it take you to mask and shoot all 5 coats? I may give it a try.
If you lower the car and add spacers the black wheels will achieve the desired effect in my humble opinion. Otherwise it looks like an afterthought or a failed attempt at looking the business.
But I am impressed by the Plastidip. How long did it take you to mask and shoot all 5 coats? I may give it a try.

Thread Starter
|
Member
Joined: Sep 2011
Posts: 92
Likes: 9
From: Ft. Lauderdale, FL
Like DJ said it takes about 2 hours or so. The plasti-dip dries super fast too. I did it with my rims on the car. I just masked off (trash bags) the rotors and calipers but if you do it that way make sure none of the bags are touching the rims. First coat you only spray to about 50-60% transparency (don't overdue it) and you let it dry depending on the weather 10-20 minutes and repeat til' about 5 coats. Also make sure you spray from different angles to catch all the different curves of the rims. You also don't want to spray too close or too far away, I did it at about roughly 6 inches away. The best part is if you don't like it you can easily remove it! You can buy the plasti-dip at your local Home Depot/lowes. It's called Performix plasti-dip and only runs about $6 a can. If you do it with your rims on the car just mask off the immediate surrounding areas as I got some light dusting of the plasti on the paint. It's comes off no problem but more of a hassle especially when there aren't enough layers of it to just peel off. Check out youtube if you wish...search dipyourcar.com on there and you'll say a ton of videos of the stuff. Let us know if you decide to tackle this project. And I just might take your advice on lowering the car. Cheers!
Senior Member
Joined: Jan 2008
Posts: 806
Likes: 109
From: U.S.A.
Ghost,
Which bulbs on our car are considered the "city bulbs? If you still know/remember what exact bulbs (#/brand) did you buy for the turn signals as well as the city bulbs? Also, how easy it to access the headlight unit for bulb swaps? Did you ever change out the side repeater lights? Would like to swap them to LED as well but I dont what bulb it takes. Thanks in advance for your answers!! Now I have the mod bug! Lol.
Which bulbs on our car are considered the "city bulbs? If you still know/remember what exact bulbs (#/brand) did you buy for the turn signals as well as the city bulbs? Also, how easy it to access the headlight unit for bulb swaps? Did you ever change out the side repeater lights? Would like to swap them to LED as well but I dont what bulb it takes. Thanks in advance for your answers!! Now I have the mod bug! Lol.

Last edited by GhostriderXKR08; Feb 9, 2013 at 03:39 PM.
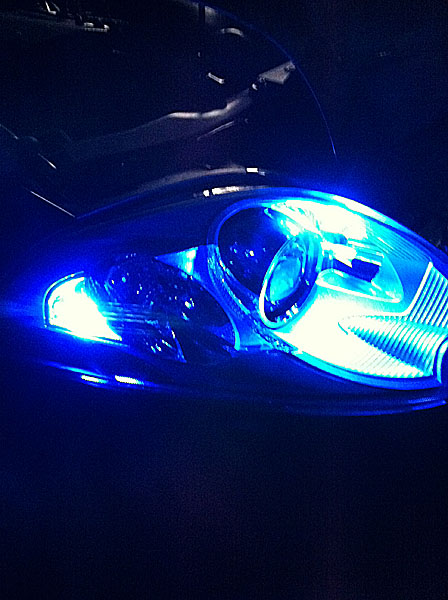
I usualy call the bulb on the very end the city bulbs from my mercedes days. Some call it the parking lights. I put an arrow where I switched the "City Bulb" to LED. I'm not 100% sure where I got them as it has been a few years back but I'm pretty sure it was either autoluminations.com or vleds.com (leaning towards autoluminations).

Senior Member
Joined: Jan 2008
Posts: 806
Likes: 109
From: U.S.A.
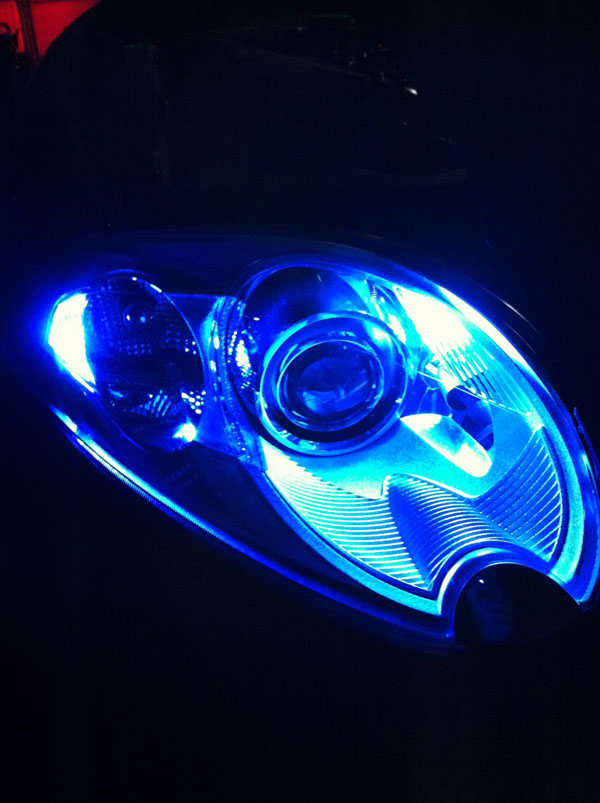
Here are pics of the 2 city bulbs. One is blue bulbs which I experiment with first but ended up with the white LED bulbs (3nd pic).

Senior Member
Joined: Jan 2008
Posts: 806
Likes: 109
From: U.S.A.

Last edited by GhostriderXKR08; Feb 10, 2013 at 12:10 AM.
Senior Member
Joined: Oct 2012
Posts: 166
Likes: 34
From: Canada
Just be careful when ordering bulbs, the center parking bulb has less room to fit. I bought two longish LED bulbs and the center one didn't fit. Really changes the look of the car. I also tried putting in 25000K D1R bulbs for my headlights but it was REALLY hard to see at night and maybe way too pink