
New XK Owner Adventures - All My "Mods" Written Up...Complete with pics!


Thread Starter
|
Senior Member
Joined: Jun 2011
Posts: 355
Likes: 112
From: Vancouver
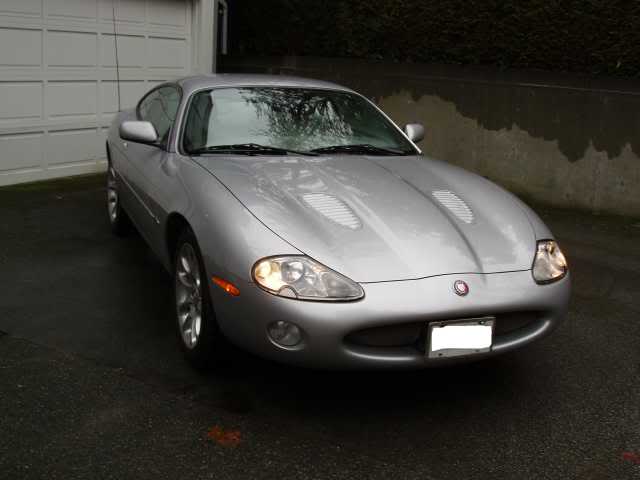
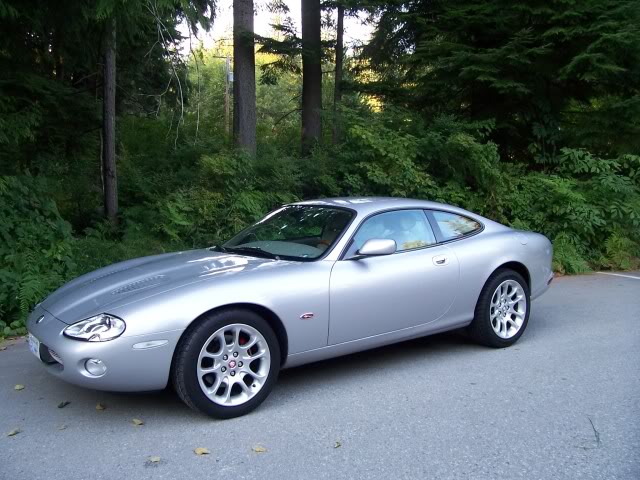
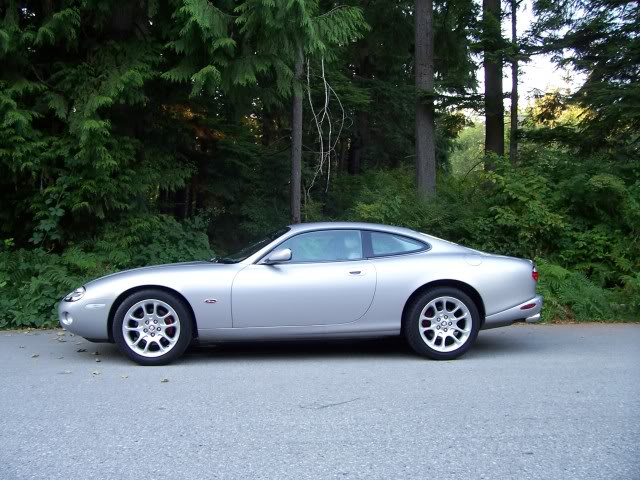
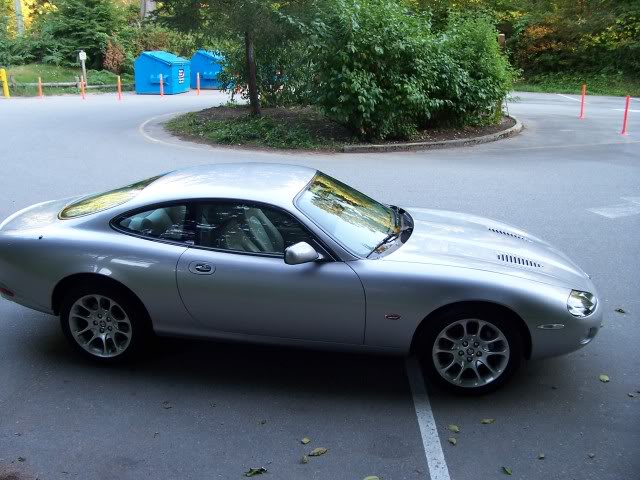
I recently bought an 02 XKR coupe. I too fell for the design and style of this new(ish) british GT, but in all honesty the car was starting to show it's age with certain things that needed adressing. I had some time off this summer, so I took a week with a goal in mind to get her back to 100% - as close to (or better) than she rolled off the showroom floor. Here's a little summary of what I did - for other XK owners, or even those potentially thinking of getting one of these timeless jags for themselves!
Part 1: Exterior
The XK has a classy design, no doubt, but in my opinion with a few tweaks can be made a bit more "modern" in a tasteful way.
Before:
Removed side molding
Time: ~2 hours
Cost: ~$10
Needed: Old credit card, 3M Automotive adhesive remover
The old molding is held on by 3m double sides tape. Gently pry away the molding, and "cut" the foam underneath with an old credit card or hard plastic. Then, remove the old foam tape - the 3m adhesive remover works great.
I noticed no difference in paint shades underneath, and any residual date was removed with a detailing clay bar, and buffed with a porter cable and mild cut polisher.
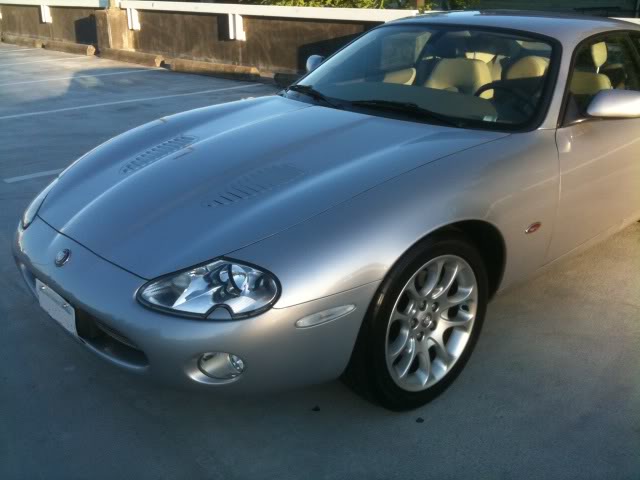
Clear Corner Turn signals
Time: ~1 hour
Cost: ~$40 from UK seller (ebay)
Needed: Heat gun, putty knife, new clear corners, glue, silicone sealant
Remove the orange turn signals in the front bumper, they are just clicked in place. Bulb removes easily from assembly by a 90* turn.
Use the heat gun to heat up the edges of the signal assemblies, pry the lens from the assembly with a putty knife, clear away old glue, and glue on the new "clear" lens. Then, use a bit of silicone sealant around the edge to make sure everything is sealed properly. Reinstall.
Antenna - unplugged
Time: 10min
Cost: $0
Needed: -
I don't like the look of a big "RC" type antenna on the back, so I unplugged the cable lead to the power antenna in the boot. Surprisingly, my radio still works perfectly well, and I haven't noticed any issues with the radio. Simple, easy.
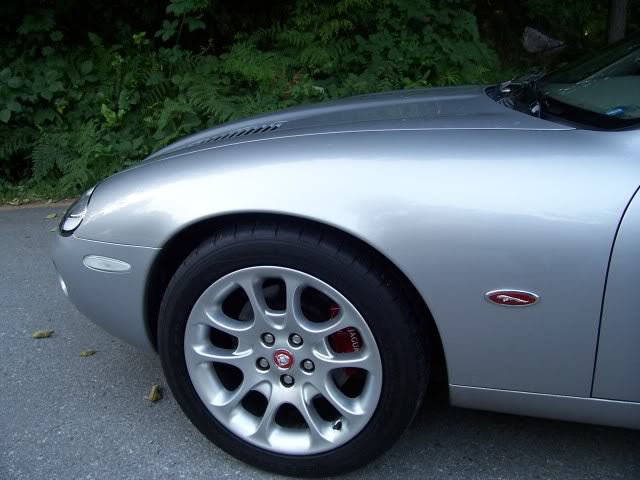
Part 2: Wheels & Brakes
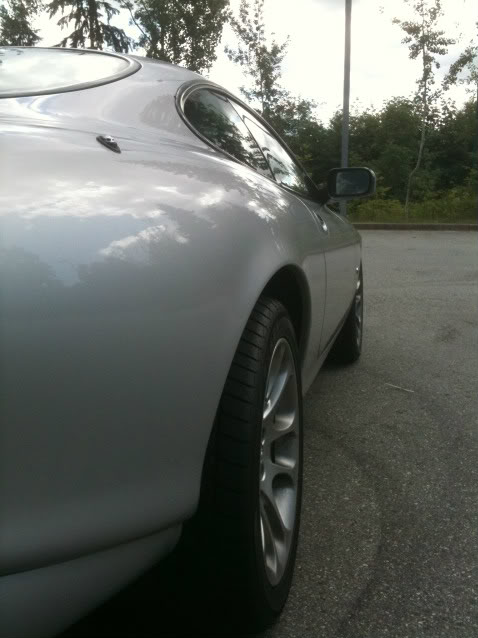
Wheel Spacers
Time: ~1 hour
Cost: ~$300 (ebay)
Needed: Spacers, jack and tire iron
Wheel spacers are a great way to make your stock wheels look great, in my opinion. This by bringing out the offset a bit to sit closer to "flush" with the wheel wells, like most modern vehicles (and on the XK, the same look that the pricier 20'' wheels have).
Cheap spacers can lead to vibrations. I actually purchased "no name" spacers and had two of the studs break on me, which was caught due to the increased vibration. I used the following:
H&R WHEEL SPACER 5X120.65 pattern 73.8 hub 25mm offset.
I purchased on ebay from a seller "kurumamotoring" who was very helpful and shipped fast. Absolutely zero issues with the spacers, and they look great!
Painted Calipers
Time: ~1 hour + 12 hours drying time
Cost: ~$50 G2 paint kit, vinyl JAG lettering, high temp clear coat
Needed: paint, jack and tire iron
OK, some don't like this modification, but I with the correct materials I think it's a great alternative to spending thousands on a Brembo kit. Also, I was pretty happy with the stock brakes, and saw no need to upgrade.
This is pretty straightforward, remove wheels, remove calipers (two allan style bolts covered by black plastic caps on the back of the calipers), support on the side. Remove old pads and metal clips. Clean off with a spray brake cleaner and scrub pad. Then, mask off the rotors, any rubber parts, and any moving parts (and bleeder screws). Mix the G2 paint and hardener, and start painting - you should have enough for about 3 coats on each caliper.
Let it dry overnight. Then apply vinyl lettering, I bought white for a nice contrast on the red paint.
Then, spray a few coats of high temp clear coat and again a few hours to dry. This is the key - few coats of high temp clear coat will not only preserve the paint underneath and make it "pop", but the slick smooth finish will also make the calipers super easy to clean and maintain that wet finish look for years to come.
I also installed new pads at the time, and painted the backside of the pads to match the calipers before I installed. Paint only the stationary pads, the ones held outside the pad that remain motionless through the action of the caliper piston.

Wider rear tires - 275 40 18's
Time: installed by shop
Cost: $250 for two falken 452's at a local shop
Needed: -
Wider, more aggresive stance than the stock 255's. No rubbing issues. Improved handling, noticeably more grips from stand still - looking forward to trying them at the track!
Akebono pads - ceramic premium pads - zero brake dust!
Time: ~1-2 hours
Cost: about $150 for the set
Needed: jack for car, c clamp to push the caliper piston in, bleeder kit
See any brake pad writeup on the net, pretty straightforwards. I'm very happy with the akebonos - zero dust (no more pain of cleaning wheels, they ALWAYS look like new), no squeaks. Pedal feel is a bit more spongy, which is perfectly fine for the city, but not for the track. That said, performance wise these are perfectly fine for the street. Very recommended.
Part 3: Engine & Mechanical
2ndary tensioners
Time: ~6 hours. Biggest part is taking the valve covers off, and putting them back on
Cost: ~$200 for tensioners, ~$100 for gasket kit, $125 for tool rental.
Needed: Tensioners, gasket set, tools. Socket sets & other tools.
There is plenty of material on here on tensioner changes, so I'll just give a few highlights:
- this is definitely a DIY project, very doable, even for those without heavy experience
- I recommend renting the lockdown tool set with two cam lockdown tools. These make the repair very easy, and basically negate any chance of you messing anything up I rented the tools from another member on here for $250 shipped, with $125 refundable upon return.
- My 2002 XKR had 75k miles. I was considering waiting and not changing the tensioners. I'm GLAD I DIDN'T WAIT, because even for this last year of the 4.0's, and low miles, and full synthetic changes, I had cracks in present in the stock plastic tensioners.
- Download the JTIS jag CD from the FAQ on jaguarforums.com
- Get a torque wrench, and torque the valve covers to specs, in order. Don't overtighten. I had leaks from my covers which have now been fixed with the new gaskets and proper tightening!
- I didn't do the primary tensioners, as I didn't want to dig that far into the motor, and the general knowledge seems to be their failures are fairly uncommon.
- Motor parts including gaskets for the 4.0 are interchangeable with the 2000-2002(?) Lincoln LS 3.9L.
- Paint the valve covers if they're already off!
- Get new spark plug seals while at it
- Clear the old gaskets off the old heads well, to make sure you get a good seal with the new gaskets. I recommend spraying a bit of a "gasket remover" on a rag, and rubbing around the mating surfaces with that.
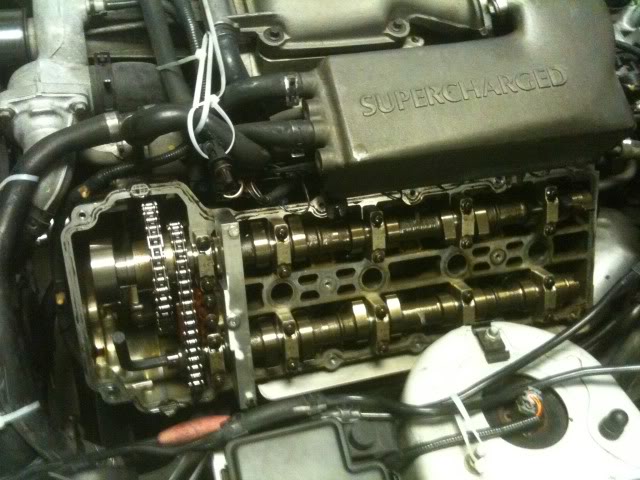
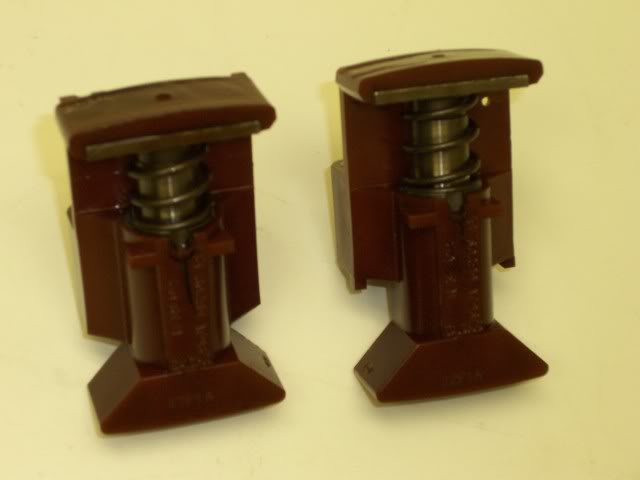
Pics of the replaced old plastic tensioners, 2002 @75k miles, showing cracks:
Supercharger pulley!
Time: ~10 hours (mainly tedious filing of snout)
Cost: ~$200 for the 3 psi (2.6'') pulley. I purchased the pulley from powerhouseautomotive.co.uk which generously offers a discounted price to any jag specific forum members. They also offer the stainless pulley, which my understanding is higher quality and slips less than the aluminum ones.
$50 for special puller tool kit from WhiteXKR (the jag wrangler) - who was also great help with any questions I had with this mod.
Needed: pulley, pulley kit, general tools.
Please take a look at the other threads around here for the pros/cons of the SC pulley. Basically, for FI cars an SC pulley is about the best hp/$ mod you can do.
I decided to go with the +3psi pulley. I'm glad I did - the power is CLEARLY noticeable (differing reports on people running 1.5lbs pulley). I was personally worried about 2 things - overheating, fueling & lean conditions, and overheating. So, my thoughts:
- Go 3 psi. Power is clearly noticeable and the cat GROWLS! The SC engages earlier on so the motor is smoother, and the kick is just....awesome.
- The stock PCM can handle the extra 3 psi. Several jag gurus running even more boost confirmed this, and I hear no pinging and have noticed no adverse effects from the pulley.
- Fuel consumption has gone....unchanged. I get the the same mileage around city now (~16l/100km in traffic, driving spiritedly) as I did before.
- The operating temperatures have gone.....unchanged. I was expecting needing to upgrade the intercooler, or address cooling further...but coolant temps remain constant so, for at least my lightly spirited driving around town (and its even the summer!) the stock system seems fine.
Overall, it seems like most people I've talked to about this are worried about the effects of the 3 psi pulley, but I've seen none other than alot more power and a bigger lead foot on my part.
- On an interesting note, the growl is louder, especially in conjunction with an X-pipe.
-> GRINDING THE SNOUT:
This seems to be the deal breaker of this mod for most. However, if you take your time, it's really not that bad. Some pointers:
- You don't have to remove the radiator. Drain about a liter of coolant (or let it drip, and then refill)
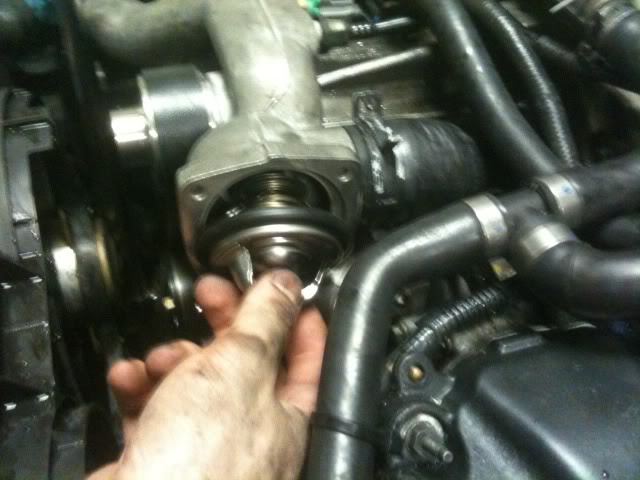
- Remove the belt, and remove the thermostat housing elbow, and other metal housing running above the SC. - You will need 2 new seals for each side of this metal housing, seal part C2C11477 - 8$ each from the dealer.
- You don't need to remove the bonnet - just unbolt the shocks and tilt all the way up, and slide a bolt in the hinge mechanism to keep it open!
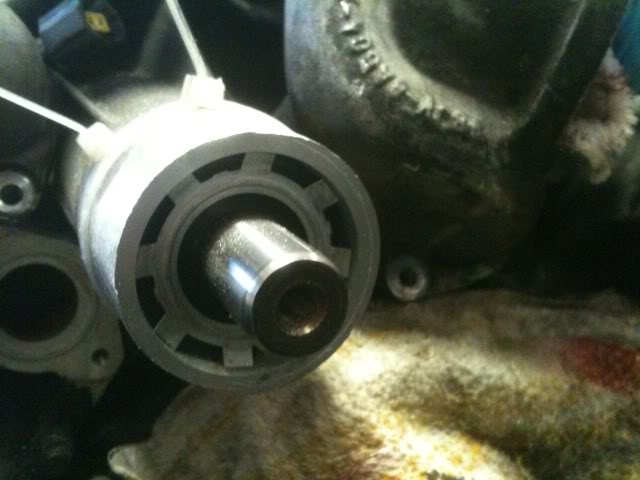
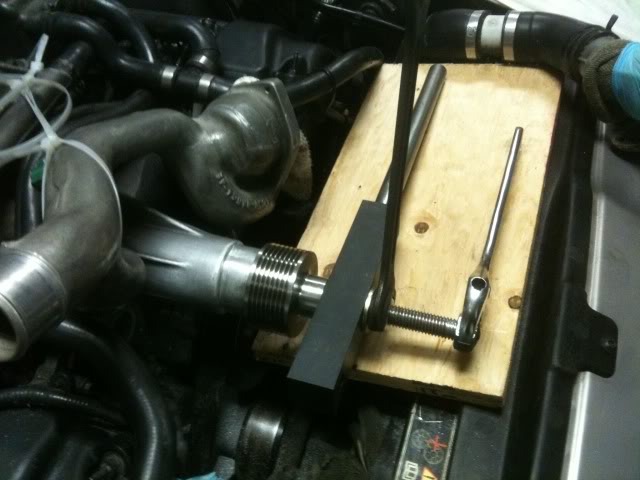
- Mark how far back the stock pulley reaches, up to here you'll need to "shave" the snout casing a bit. TIP: Use zip ties around this mark when using your hand file to easily guide it from sliding all over
- Remove the old SC pulley - I suggest you do this right and get the pulley puller rather than cutting the old pulley off. This way, you can also reinstall the stock pulley later if you'd like!
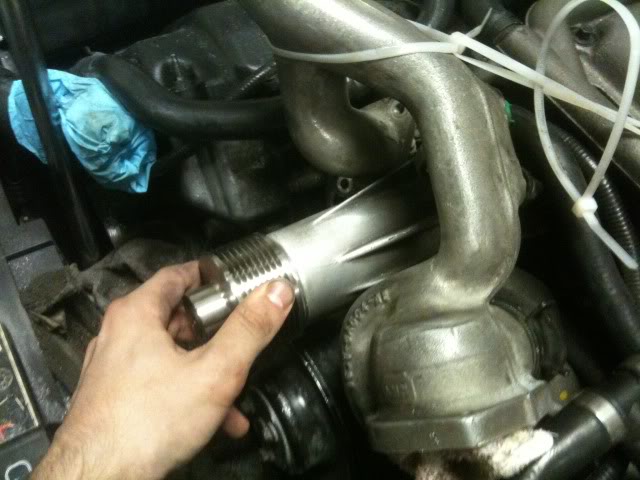
- Shave the snout housing - it's actually not that bad when you think about it. The new pulley is smaller, so it can't fit over the large stock snout. However, the stock snout is big because of a very rough aluminum cast housing. Just "shaving" and removing the casting marks on the housing gets you almost a 3rd way there to fitting the new pulley.
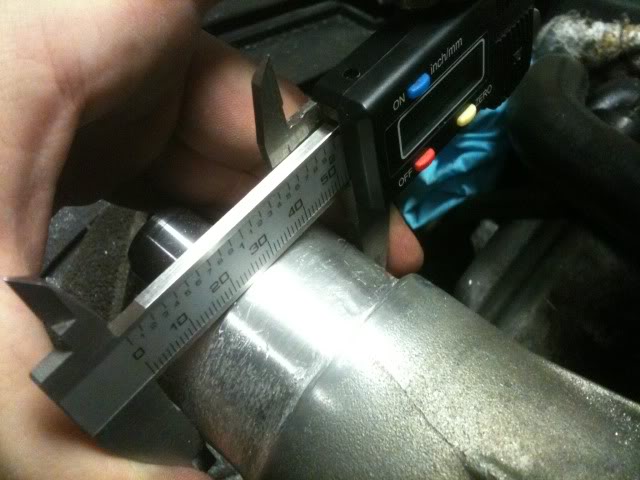
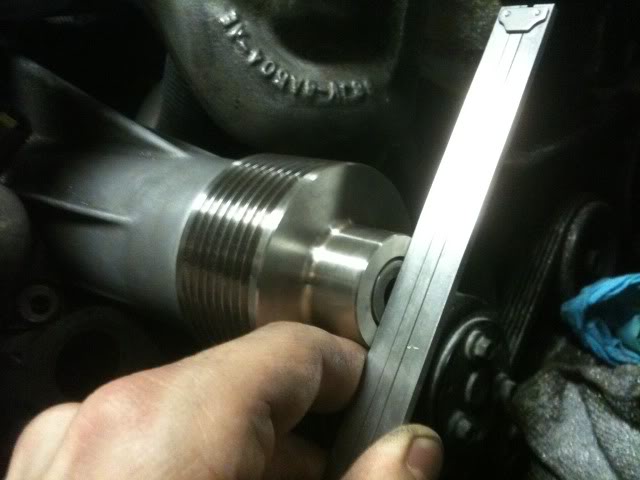
- TIP: use a caliper, to measure how much you need to take off, and use the sharp ends to mark a line as a guide how much to take off.
- I recommend you use a hand file. You'll have a lot more control, and although it will take you longer to grind the snout, there will be almost no chance of you grinding too far, and with a flat file you can easily keep the profile flat as well.
- Use the provided nylon dummy pulley to see when you've taken enough material off. You should be able to spin it freely. For extra measure, fit a small drill bit between the dummy pulley and the snout, and it should move freely around the whole diameter
- Use the pulley puller to reinstall the new pulley!
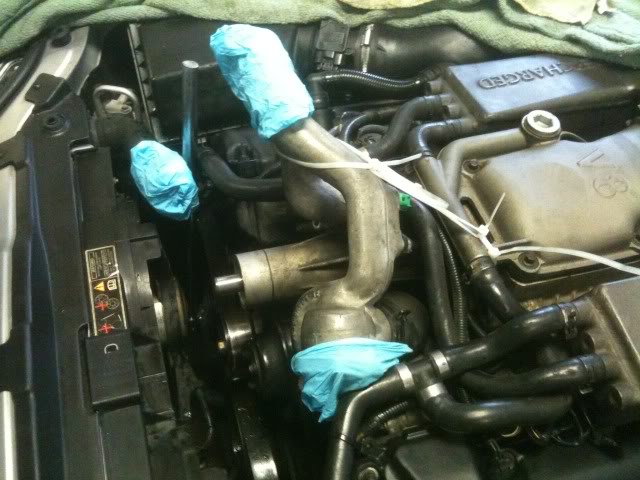
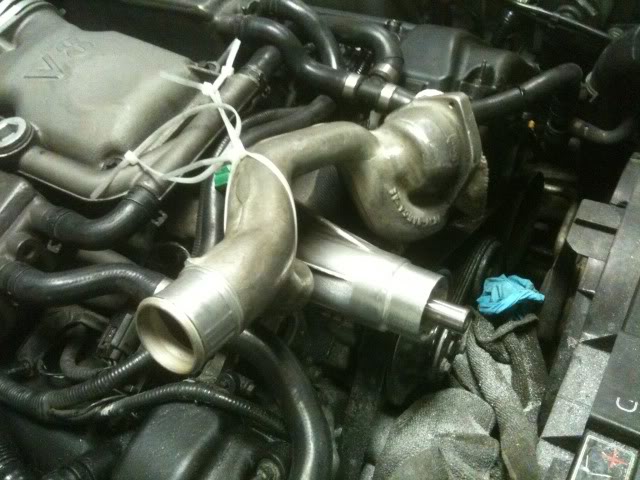
Zip tie things out of the way, cover the coolant lines as you'll have metal shavings around:
Grind a guide line in the snout to represent how much material you need to take off. This should be based on the ID of the new pulley, less clearance (I think I did 2-3mm)
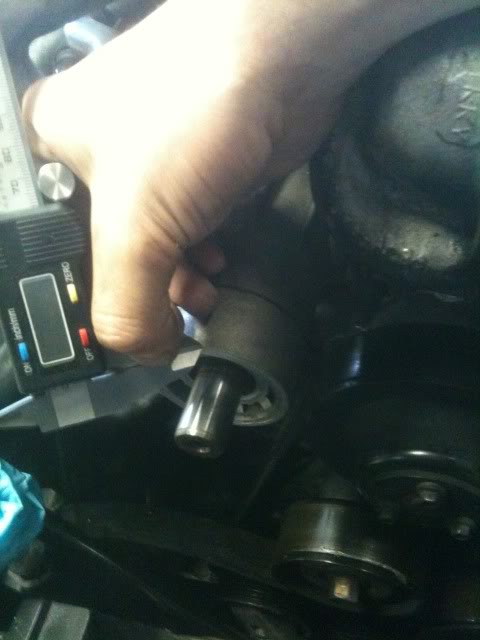
SC snout marked, ready to be ground (notice carved guide line by caliper)

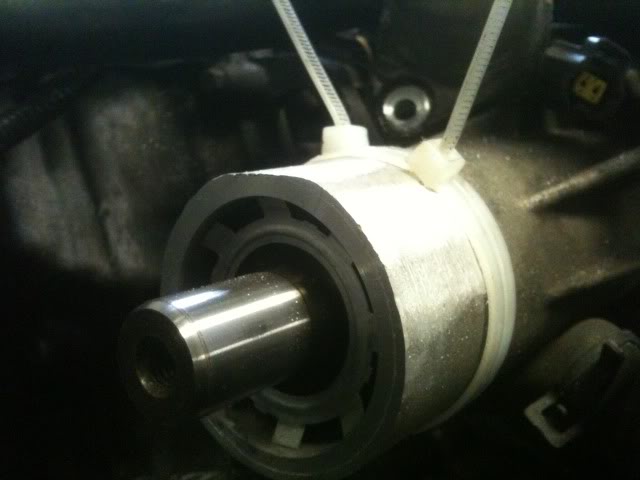
Zip ties to help you keep the file on path, notice how easily the material grinds away with just a few strokes of a hand file!
Few hours later: Check with a caliper to make sure you're within your new pulley ID + clearance numbers. Put slight pressure on the caliper tips together, and rotate to feel for "high spots". Remove these.
She spins freely!

Clean it up with a sand paper to smooth the grind marks, and a fine flat file to get a nice edge where the zip ties were
Use a small drill bit (I used a dremel bit, ~1mm), to see if it clearly slides between the new pulley and the ground snout. This is a good technique to reveal any high spots you need to take care of before you install the pulley.

Reinstall the new pulley with your pulley puller/install tool. Pray that it doesnt bind and goes on true .
.
Install the new pulley far enough so that the tip of the pulley lines up perfectly with the end of the snout shaft. Use a flat edge to check.
The eaton spins freely!
Good time to replace the thermostat. I used a gates part from rockauto, it was identical to the one removed, was even stamped ENGLAND.
- Now is also a good time to replace the belts. I installed Gatorback belts as they supposedly reduce slip. Same size as stock, just ordered per part numbers on rockauto.
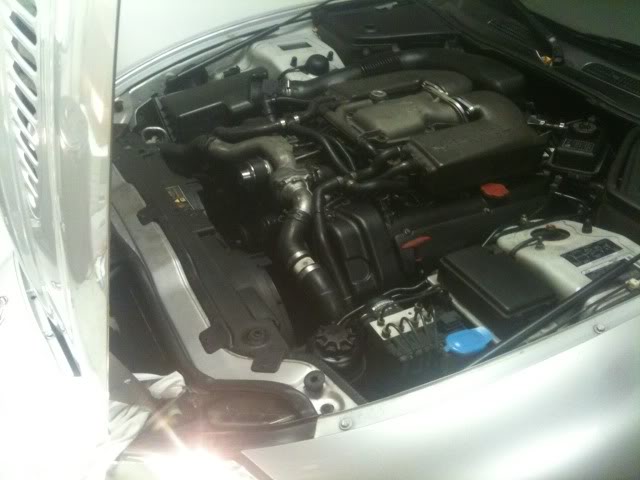
All back together!
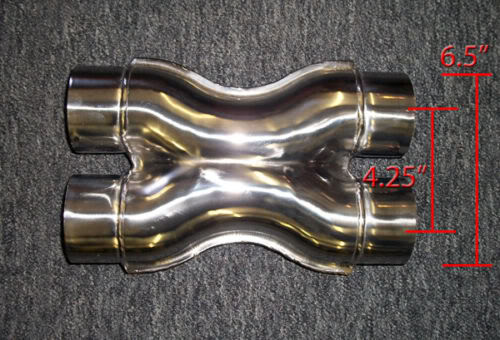
X-Pipe
Time: shop install - 2 hours labor
Cost: $30 for stainless X pipe, $30 for stainless piping
Needed: clamps if DIY, OR welder/shop
I decided to have a shop install an x-pipe in place of the stock muffler after reading other's experiences on here. Buying the parts online I had my mechanic weld the x pipe on, and he did a great job.
Some thoughts:
- Nice growl, should have been like that from the factory!
- No rasp or drone!
- Not very loud. Those looking for an aftermarket exhaust-like tone will be dissapointed. Keep in mind online sound clips sound louder on the computer than they really are in real life.
I bought my parts on ebay. They were quality stainless steel, heavy gauge, and I see no point in paying 3x as much for a brand name magnaflow/other part, when they're pretty much all the same.
This part fits the XK perfectly - $30 + shipping:
2.25" Crossover X Pipe Universal Exhaust 409 SS | eBay
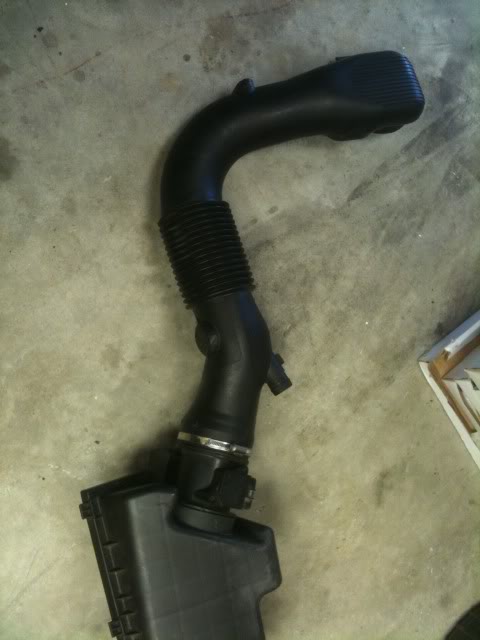
Intake Snorkel de-restriction
Time: ~2 hours
Cost: $0
Needed: Solder gun
See here for description on how to remove the "silencer" tubes to de-restrict the stock XKR air tube:
https://www.jaguarforums.com/forum/x...-w-pics-58619/
Fuel filter replacement
Time: 30min
Cost: $10
Needed: Filter, wrench, sockets to remove filter bracket
The AC Delco filter is identical to the Jag part removed, as far as I can tell. Even the filtration design and element look the same.
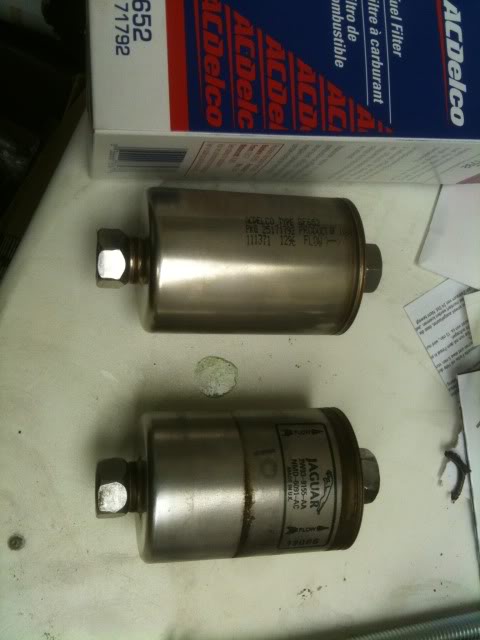
The filter is accessible from underneath near the driver's side wheel well. The stock bracket is a PIA, I didn't bother reinstalling it, just reinstalled the filter in the lines, the lines have support near the filters mount points anyways.
Emergency room story:
I usually release the fuel pressure by the rag around the filter+wrench line loosening method. Have been doing it like that for years. The jag bit back and sprayed fuel. By principle, I don't have my head right underneath, but as I tilted my face away a few drops got into my ear. What followed was one of the worst pains I've ever felt - it was like a stabbing pain in the ear. I got a ride to the emergency room, and an hour later (free Canadian healthcare...ugh) I had a doctor drop some magic drops in my ear which neutralized the petroleum burning my ear drum. At least I didn't pay anything (free Canadian healthcare...yay!). Two weeks of antibiotics drops in the ears followed.
Moral of the story - remove the fuel injector fuse, start it up, let it die, and remove the line pressure!
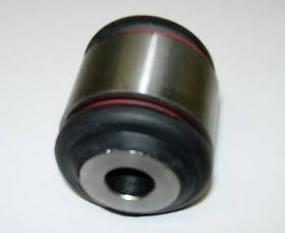
Part 4: Suspension
My XKR suffered from a banging/clunking like sound coming from the rear. Through some discussion on jaguarforums.com I decided to replace the lower shock bushings aka ball joints. I also replaced the sway bar end links and roll bar bushings while at it.
I had a shop do this, and am glad I did. From what my mechanic told me this would have been a major PIA/near impossible to do on stands at home. He charged me 4 hours labor, which I think is fair considering this was his first time doing a jag - but a Jag specific mechanic with experience might have cost less in this case.
I ordered aftermarket parts from britishcarparts (uk), as I really didn't want to pay jag $120 per bushing. These aftermarket parts turned out to be just fine, no issues.
- 2x Rear shock absorber bushing, Part number CCC6782 ~$60
- 2x Roll bar bushings, Part number: CBC4901X ~$10
- 2x Sway bar end link w/ bushings, Part number: MNA3505AE ~$40
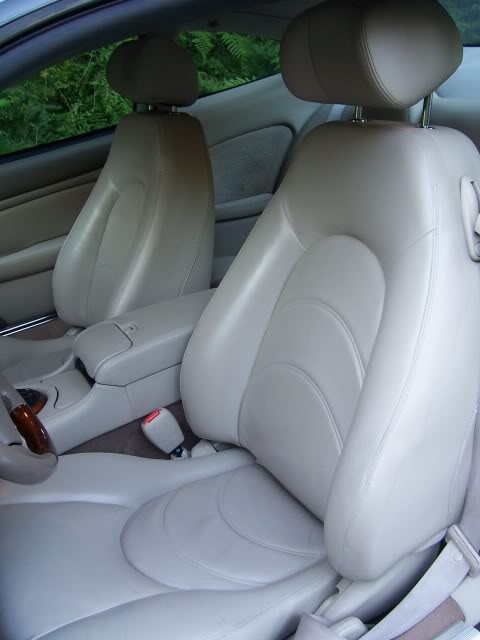
Part 5: Interior
Leather repair and redye kit
Time: ~2 hours + drying time overnight
Cost: $80
Liquid Leather Scuffmaster 250ml Vehicle specific: my case, Jaguar AGD (Oatmeal)
Liquid Leather GT12 250ml bottle cleaner
Liquid Leather GT11 250ml conditioner
Leather repair kit (liquid leather)
Other needed: sponge applicators, microfibre cloths

My interior was pretty roughed up. The seats had creases and cracks. The drivers seat bolster area was worn heavily, the leather almost completely worn through. The armrest color was worn off.
1. Use a damp microfibre cloth to clean the leather.
2. Use the GT cleaner and a soft brisstled brush to massage the honey like cleaner into the leather. This worked like a dream and very much reduced the noticeability of many of the creases and cracks. Worked especially well on the steering wheel - I didn't even use the dye on the wheel after what the cleaner did!
3. Damp cloth wipe again
4. Apply leather dye. I didn't bother color washing, and just used the dye soaked in a sponge applicator to apply several coats on the front two seats. The color matched perfectly, and I had enough to do the two front seats and armrest. I suspect even the 50ml would have been enough.
5. I let the dye dry and applied the conditioner. The conditioner needed to be left on overnight, and then there were still some shiny spots which I wiped down with a wet cloth.
The result is great! Like new!
For the almost torn through bolster, I used a liquid leather repair kit (its like a thick glue) to give a bit of material back on the bolster area where the leather was worn through to the cloth underneath. Let it dry - you can sand it then, but I didnt bother. Apply the formulated dye as it is, it will cover the material and blend in to the rest of the leather fine.
I was too embarrassed to even take any before pics, but here are the after pics!

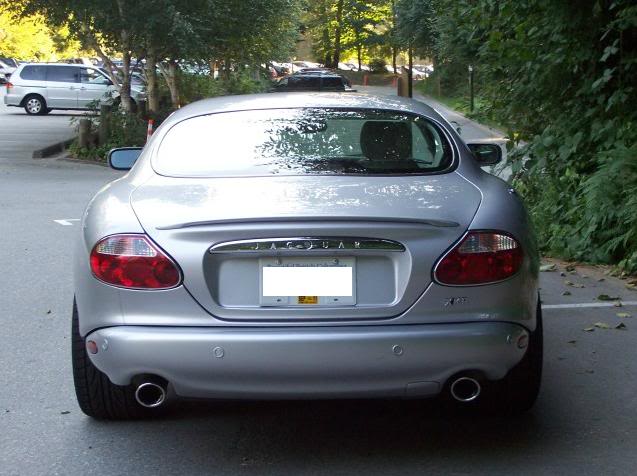
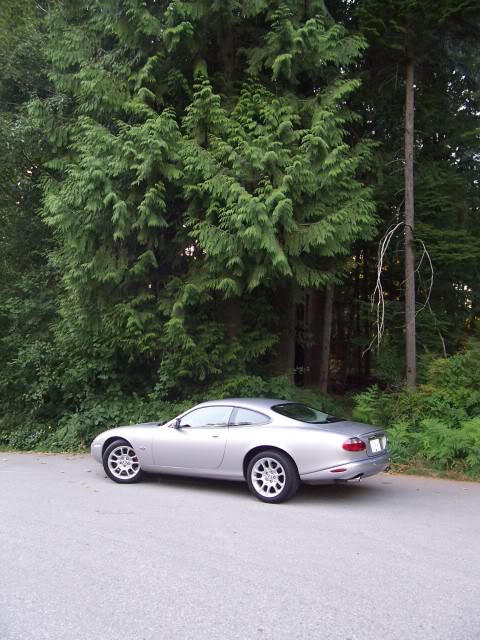
SOME FINAL PICTURES!
Part 1: Exterior
The XK has a classy design, no doubt, but in my opinion with a few tweaks can be made a bit more "modern" in a tasteful way.
Before:
Removed side molding
Time: ~2 hours
Cost: ~$10
Needed: Old credit card, 3M Automotive adhesive remover
The old molding is held on by 3m double sides tape. Gently pry away the molding, and "cut" the foam underneath with an old credit card or hard plastic. Then, remove the old foam tape - the 3m adhesive remover works great.
I noticed no difference in paint shades underneath, and any residual date was removed with a detailing clay bar, and buffed with a porter cable and mild cut polisher.
Clear Corner Turn signals
Time: ~1 hour
Cost: ~$40 from UK seller (ebay)
Needed: Heat gun, putty knife, new clear corners, glue, silicone sealant
Remove the orange turn signals in the front bumper, they are just clicked in place. Bulb removes easily from assembly by a 90* turn.
Use the heat gun to heat up the edges of the signal assemblies, pry the lens from the assembly with a putty knife, clear away old glue, and glue on the new "clear" lens. Then, use a bit of silicone sealant around the edge to make sure everything is sealed properly. Reinstall.
Antenna - unplugged
Time: 10min
Cost: $0
Needed: -
I don't like the look of a big "RC" type antenna on the back, so I unplugged the cable lead to the power antenna in the boot. Surprisingly, my radio still works perfectly well, and I haven't noticed any issues with the radio. Simple, easy.
Part 2: Wheels & Brakes
Wheel Spacers
Time: ~1 hour
Cost: ~$300 (ebay)
Needed: Spacers, jack and tire iron
Wheel spacers are a great way to make your stock wheels look great, in my opinion. This by bringing out the offset a bit to sit closer to "flush" with the wheel wells, like most modern vehicles (and on the XK, the same look that the pricier 20'' wheels have).
Cheap spacers can lead to vibrations. I actually purchased "no name" spacers and had two of the studs break on me, which was caught due to the increased vibration. I used the following:
H&R WHEEL SPACER 5X120.65 pattern 73.8 hub 25mm offset.
I purchased on ebay from a seller "kurumamotoring" who was very helpful and shipped fast. Absolutely zero issues with the spacers, and they look great!
Painted Calipers
Time: ~1 hour + 12 hours drying time
Cost: ~$50 G2 paint kit, vinyl JAG lettering, high temp clear coat
Needed: paint, jack and tire iron
OK, some don't like this modification, but I with the correct materials I think it's a great alternative to spending thousands on a Brembo kit. Also, I was pretty happy with the stock brakes, and saw no need to upgrade.
This is pretty straightforward, remove wheels, remove calipers (two allan style bolts covered by black plastic caps on the back of the calipers), support on the side. Remove old pads and metal clips. Clean off with a spray brake cleaner and scrub pad. Then, mask off the rotors, any rubber parts, and any moving parts (and bleeder screws). Mix the G2 paint and hardener, and start painting - you should have enough for about 3 coats on each caliper.
Let it dry overnight. Then apply vinyl lettering, I bought white for a nice contrast on the red paint.
Then, spray a few coats of high temp clear coat and again a few hours to dry. This is the key - few coats of high temp clear coat will not only preserve the paint underneath and make it "pop", but the slick smooth finish will also make the calipers super easy to clean and maintain that wet finish look for years to come.
I also installed new pads at the time, and painted the backside of the pads to match the calipers before I installed. Paint only the stationary pads, the ones held outside the pad that remain motionless through the action of the caliper piston.
Wider rear tires - 275 40 18's
Time: installed by shop
Cost: $250 for two falken 452's at a local shop
Needed: -
Wider, more aggresive stance than the stock 255's. No rubbing issues. Improved handling, noticeably more grips from stand still - looking forward to trying them at the track!
Akebono pads - ceramic premium pads - zero brake dust!
Time: ~1-2 hours
Cost: about $150 for the set
Needed: jack for car, c clamp to push the caliper piston in, bleeder kit
See any brake pad writeup on the net, pretty straightforwards. I'm very happy with the akebonos - zero dust (no more pain of cleaning wheels, they ALWAYS look like new), no squeaks. Pedal feel is a bit more spongy, which is perfectly fine for the city, but not for the track. That said, performance wise these are perfectly fine for the street. Very recommended.
Part 3: Engine & Mechanical
2ndary tensioners
Time: ~6 hours. Biggest part is taking the valve covers off, and putting them back on
Cost: ~$200 for tensioners, ~$100 for gasket kit, $125 for tool rental.
Needed: Tensioners, gasket set, tools. Socket sets & other tools.
There is plenty of material on here on tensioner changes, so I'll just give a few highlights:
- this is definitely a DIY project, very doable, even for those without heavy experience
- I recommend renting the lockdown tool set with two cam lockdown tools. These make the repair very easy, and basically negate any chance of you messing anything up
I rented the tools from another member on here for $250 shipped, with $125 refundable upon return. - My 2002 XKR had 75k miles. I was considering waiting and not changing the tensioners. I'm GLAD I DIDN'T WAIT, because even for this last year of the 4.0's, and low miles, and full synthetic changes, I had cracks in present in the stock plastic tensioners.
- Download the JTIS jag CD from the FAQ on jaguarforums.com
- Get a torque wrench, and torque the valve covers to specs, in order. Don't overtighten. I had leaks from my covers which have now been fixed with the new gaskets and proper tightening!
- I didn't do the primary tensioners, as I didn't want to dig that far into the motor, and the general knowledge seems to be their failures are fairly uncommon.
- Motor parts including gaskets for the 4.0 are interchangeable with the 2000-2002(?) Lincoln LS 3.9L.
- Paint the valve covers if they're already off!
- Get new spark plug seals while at it
- Clear the old gaskets off the old heads well, to make sure you get a good seal with the new gaskets. I recommend spraying a bit of a "gasket remover" on a rag, and rubbing around the mating surfaces with that.
Pics of the replaced old plastic tensioners, 2002 @75k miles, showing cracks:
Supercharger pulley!
Time: ~10 hours (mainly tedious filing of snout)
Cost: ~$200 for the 3 psi (2.6'') pulley. I purchased the pulley from powerhouseautomotive.co.uk which generously offers a discounted price to any jag specific forum members. They also offer the stainless pulley, which my understanding is higher quality and slips less than the aluminum ones.
$50 for special puller tool kit from WhiteXKR (the jag wrangler) - who was also great help with any questions I had with this mod.
Needed: pulley, pulley kit, general tools.
Please take a look at the other threads around here for the pros/cons of the SC pulley. Basically, for FI cars an SC pulley is about the best hp/$ mod you can do.
I decided to go with the +3psi pulley. I'm glad I did - the power is CLEARLY noticeable (differing reports on people running 1.5lbs pulley). I was personally worried about 2 things - overheating, fueling & lean conditions, and overheating. So, my thoughts:
- Go 3 psi. Power is clearly noticeable and the cat GROWLS! The SC engages earlier on so the motor is smoother, and the kick is just....awesome.
- The stock PCM can handle the extra 3 psi. Several jag gurus running even more boost confirmed this, and I hear no pinging and have noticed no adverse effects from the pulley.
- Fuel consumption has gone....unchanged. I get the the same mileage around city now (~16l/100km in traffic, driving spiritedly) as I did before.
- The operating temperatures have gone.....unchanged. I was expecting needing to upgrade the intercooler, or address cooling further...but coolant temps remain constant so, for at least my lightly spirited driving around town (and its even the summer!) the stock system seems fine.
Overall, it seems like most people I've talked to about this are worried about the effects of the 3 psi pulley, but I've seen none other than alot more power and a bigger lead foot on my part.
- On an interesting note, the growl is louder, especially in conjunction with an X-pipe.
-> GRINDING THE SNOUT:
This seems to be the deal breaker of this mod for most. However, if you take your time, it's really not that bad. Some pointers:
- You don't have to remove the radiator. Drain about a liter of coolant (or let it drip, and then refill)
- Remove the belt, and remove the thermostat housing elbow, and other metal housing running above the SC. - You will need 2 new seals for each side of this metal housing, seal part C2C11477 - 8$ each from the dealer.
- You don't need to remove the bonnet - just unbolt the shocks and tilt all the way up, and slide a bolt in the hinge mechanism to keep it open!
- Mark how far back the stock pulley reaches, up to here you'll need to "shave" the snout casing a bit. TIP: Use zip ties around this mark when using your hand file to easily guide it from sliding all over
- Remove the old SC pulley - I suggest you do this right and get the pulley puller rather than cutting the old pulley off. This way, you can also reinstall the stock pulley later if you'd like!
- Shave the snout housing - it's actually not that bad when you think about it. The new pulley is smaller, so it can't fit over the large stock snout. However, the stock snout is big because of a very rough aluminum cast housing. Just "shaving" and removing the casting marks on the housing gets you almost a 3rd way there to fitting the new pulley.
- TIP: use a caliper, to measure how much you need to take off, and use the sharp ends to mark a line as a guide how much to take off.
- I recommend you use a hand file. You'll have a lot more control, and although it will take you longer to grind the snout, there will be almost no chance of you grinding too far, and with a flat file you can easily keep the profile flat as well.
- Use the provided nylon dummy pulley to see when you've taken enough material off. You should be able to spin it freely. For extra measure, fit a small drill bit between the dummy pulley and the snout, and it should move freely around the whole diameter
- Use the pulley puller to reinstall the new pulley!
Zip tie things out of the way, cover the coolant lines as you'll have metal shavings around:
Grind a guide line in the snout to represent how much material you need to take off. This should be based on the ID of the new pulley, less clearance (I think I did 2-3mm)
SC snout marked, ready to be ground (notice carved guide line by caliper)
Zip ties to help you keep the file on path, notice how easily the material grinds away with just a few strokes of a hand file!
Few hours later: Check with a caliper to make sure you're within your new pulley ID + clearance numbers. Put slight pressure on the caliper tips together, and rotate to feel for "high spots". Remove these.
She spins freely!
Clean it up with a sand paper to smooth the grind marks, and a fine flat file to get a nice edge where the zip ties were
Use a small drill bit (I used a dremel bit, ~1mm), to see if it clearly slides between the new pulley and the ground snout. This is a good technique to reveal any high spots you need to take care of before you install the pulley.
Reinstall the new pulley with your pulley puller/install tool. Pray that it doesnt bind and goes on true
Install the new pulley far enough so that the tip of the pulley lines up perfectly with the end of the snout shaft. Use a flat edge to check.
The eaton spins freely!
Good time to replace the thermostat. I used a gates part from rockauto, it was identical to the one removed, was even stamped ENGLAND.
- Now is also a good time to replace the belts. I installed Gatorback belts as they supposedly reduce slip. Same size as stock, just ordered per part numbers on rockauto.
All back together!
X-Pipe
Time: shop install - 2 hours labor
Cost: $30 for stainless X pipe, $30 for stainless piping
Needed: clamps if DIY, OR welder/shop
I decided to have a shop install an x-pipe in place of the stock muffler after reading other's experiences on here. Buying the parts online I had my mechanic weld the x pipe on, and he did a great job.
Some thoughts:
- Nice growl, should have been like that from the factory!
- No rasp or drone!
- Not very loud. Those looking for an aftermarket exhaust-like tone will be dissapointed. Keep in mind online sound clips sound louder on the computer than they really are in real life.
I bought my parts on ebay. They were quality stainless steel, heavy gauge, and I see no point in paying 3x as much for a brand name magnaflow/other part, when they're pretty much all the same.
This part fits the XK perfectly - $30 + shipping:
2.25" Crossover X Pipe Universal Exhaust 409 SS | eBay
Intake Snorkel de-restriction
Time: ~2 hours
Cost: $0
Needed: Solder gun
See here for description on how to remove the "silencer" tubes to de-restrict the stock XKR air tube:
https://www.jaguarforums.com/forum/x...-w-pics-58619/
Fuel filter replacement
Time: 30min
Cost: $10
Needed: Filter, wrench, sockets to remove filter bracket
The AC Delco filter is identical to the Jag part removed, as far as I can tell. Even the filtration design and element look the same.
The filter is accessible from underneath near the driver's side wheel well. The stock bracket is a PIA, I didn't bother reinstalling it, just reinstalled the filter in the lines, the lines have support near the filters mount points anyways.
Emergency room story:
I usually release the fuel pressure by the rag around the filter+wrench line loosening method. Have been doing it like that for years. The jag bit back and sprayed fuel. By principle, I don't have my head right underneath, but as I tilted my face away a few drops got into my ear. What followed was one of the worst pains I've ever felt - it was like a stabbing pain in the ear. I got a ride to the emergency room, and an hour later (free Canadian healthcare...ugh) I had a doctor drop some magic drops in my ear which neutralized the petroleum burning my ear drum. At least I didn't pay anything (free Canadian healthcare...yay!). Two weeks of antibiotics drops in the ears followed.
Moral of the story - remove the fuel injector fuse, start it up, let it die, and remove the line pressure!
Part 4: Suspension
My XKR suffered from a banging/clunking like sound coming from the rear. Through some discussion on jaguarforums.com I decided to replace the lower shock bushings aka ball joints. I also replaced the sway bar end links and roll bar bushings while at it.
I had a shop do this, and am glad I did. From what my mechanic told me this would have been a major PIA/near impossible to do on stands at home. He charged me 4 hours labor, which I think is fair considering this was his first time doing a jag - but a Jag specific mechanic with experience might have cost less in this case.
I ordered aftermarket parts from britishcarparts (uk), as I really didn't want to pay jag $120 per bushing. These aftermarket parts turned out to be just fine, no issues.
- 2x Rear shock absorber bushing, Part number CCC6782 ~$60
- 2x Roll bar bushings, Part number: CBC4901X ~$10
- 2x Sway bar end link w/ bushings, Part number: MNA3505AE ~$40
Part 5: Interior
Leather repair and redye kit
Time: ~2 hours + drying time overnight
Cost: $80
Liquid Leather Scuffmaster 250ml Vehicle specific: my case, Jaguar AGD (Oatmeal)
Liquid Leather GT12 250ml bottle cleaner
Liquid Leather GT11 250ml conditioner
Leather repair kit (liquid leather)
Other needed: sponge applicators, microfibre cloths
My interior was pretty roughed up. The seats had creases and cracks. The drivers seat bolster area was worn heavily, the leather almost completely worn through. The armrest color was worn off.
1. Use a damp microfibre cloth to clean the leather.
2. Use the GT cleaner and a soft brisstled brush to massage the honey like cleaner into the leather. This worked like a dream and very much reduced the noticeability of many of the creases and cracks. Worked especially well on the steering wheel - I didn't even use the dye on the wheel after what the cleaner did!
3. Damp cloth wipe again
4. Apply leather dye. I didn't bother color washing, and just used the dye soaked in a sponge applicator to apply several coats on the front two seats. The color matched perfectly, and I had enough to do the two front seats and armrest. I suspect even the 50ml would have been enough.
5. I let the dye dry and applied the conditioner. The conditioner needed to be left on overnight, and then there were still some shiny spots which I wiped down with a wet cloth.
The result is great! Like new!
For the almost torn through bolster, I used a liquid leather repair kit (its like a thick glue) to give a bit of material back on the bolster area where the leather was worn through to the cloth underneath. Let it dry - you can sand it then, but I didnt bother. Apply the formulated dye as it is, it will cover the material and blend in to the rest of the leather fine.
I was too embarrassed to even take any before pics, but here are the after pics!
SOME FINAL PICTURES!
Last edited by pomosv; Sep 11, 2011 at 02:33 PM.
Veteran member
Joined: Jan 2011
Posts: 1,638
Likes: 173
From: France (UK expat)
A great series of tastelful mods there, well done. A great write-up, too. Thanks for sharing.
Just a couple of comments:
- I, too, used a dye kit to restore the side bolsters on my driver's seat. Initial opinion was favourable, but 6 months on I am looking for a professional retrimmer to actually replace the leather, because the paint is starting to crack again. It's better than it was when I got the car, but not as good as I would like.
- I think the chrome embelishment and leaper on the side indicator repeaters are too much. They would look better clean, or with clear lenses to match the front
Actually Frog, those are stock. Most (maybe all) of the US cars have a leaper emblem there rather than a repeater. XK8s are green, XKRs are red.
Veteran Member
Joined: Feb 2011
Posts: 1,059
Likes: 134
From: Mtn View, CA
Didn't they change in 03?
Veteran Member


Joined: Apr 2010
Posts: 7,657
Likes: 3,021
From: Arlington VA USA
Excellent write-up and choice of upgrades and a beautiful car!
One note on the intercooler temps....were you monitoring the intercooler fluid temperature or the radiator fluid temperature when you say the temperature is unchanged?
The two coolant circuits are largely isolated (except for a vent tube between them) and operate in vastly different temperature ranges.
Trending Topics
Veteran member
Joined: Jan 2011
Posts: 1,638
Likes: 173
From: France (UK expat)
I do prefer the straightforward, uncluttered indicators we get in Europe, although I always respect the wish to keep a car original looking


Veteran Member
Joined: Apr 2010
Posts: 7,657
Likes: 3,021
From: Arlington VA USA
Veteran Member
Joined: Aug 2011
Posts: 1,294
Likes: 372
From: South Carolina
Thanks for that great write-up, pomosv. Superb work.
What I wouldn't give for a couple of uninterrupted weeks in the garage with my coupe. I'll get to everything, but it will be one project at a time, in between jobs, wife, daughters, attic renovations and everything else.
And I'm glad those of us with XK8s don't have to worry about those intake silencer tubes!
Senior Member
Joined: Nov 2008
Posts: 944
Likes: 133
From: Chicago/Southern Wisconsin
Correct. My 2000 XK8 has the green lens and is not lit but has the repeater wiring harness behind it.
Thread Starter
|
Senior Member
Joined: Jun 2011
Posts: 355
Likes: 112
From: Vancouver
I was charged 4 hours of labor for the lower shock bushings and the endlinks and roll bar bushings (although the last two are DIY-able, if budget's tight). I'm sure a Jag specific mechanic could have done it in less, but not many of those nearby me here in Vancouver.
You're right, I didn't monitor the temps, I'm just going by the stock gauge, and feel here. It's probably not very accurate, and mechanically it only makes sense that the temperatures rose by some degree with the higher RPM's, but my aim was to share the car as a whole didn't seem to run hotter, and stayed within the normal operating temps - for those worried about that aspect of upgrading the pulley.
Thanks everyone!
One note on the intercooler temps....were you monitoring the intercooler fluid temperature or the radiator fluid temperature when you say the temperature is unchanged?
The two coolant circuits are largely isolated (except for a vent tube between them) and operate in vastly different temperature ranges.
The two coolant circuits are largely isolated (except for a vent tube between them) and operate in vastly different temperature ranges.
Thanks everyone!
Last edited by pomosv; Sep 11, 2011 at 02:36 PM.
Veteran Member
Joined: Apr 2010
Posts: 7,657
Likes: 3,021
From: Arlington VA USA
You're right, I didn't monitor the temps, I'm just going by the stock gauge, and feel here. It's probably not very accurate, and mechanically it only makes sense that the temperatures rose by some degree with the higher RPM's, but my aim was to share the car as a whole didn't seem to run hotter, and stayed within the normal operating temps - for those worried about that aspect of upgrading the pulley.
Thanks everyone!
Thanks everyone!
Last edited by WhiteXKR; Sep 11, 2011 at 03:23 PM.

