When you click on links to various merchants on this site and make a purchase, this can result in this site earning a commission. Affiliate programs and affiliations include, but are not limited to, the eBay Partner Network.
No (near zero) Compression Cylinder Head Removal or?
Hello All.
I've recently purchased a 2002 XK8 convertible. This is my second post on my journey.... The first/initial post (just joining the site) can be found HERE to give a little back story.
The initial advice I received from the first post (being clueless about some of the most basic particulars with Jags) was invaluable and if you read a few posts from the link above (with those suggestions) you'll see where I ended up, gratefully...
Today, now - there are manageable things I need to and can do, but there is one that has me stumped and a little afraid. I would like to do anything I can first, to not have to attempt (although I have a fair amount of confidence in my abilities) a full Cyl head removal.
Cylinder 8 is dead. I have spark, I have gas but I have 0 (zero) compression. ZERO! This is my only remaining fault code...
I've put a couple of ounces of 5w oil into the cylinder - still, ZERO... The only thing I can think is a valve issue or a pinned opened valve. With a dead cylinder, still, the car runs fairly well. A bit sluggish, bumpy on idle, throwing the P0308 misfire code and occasionally a P0300 and a B2 CAT code. Its sucking lots of fuel to compensate for O2 sensors detecting extra/unused O2 due to cyl 8 misfire I think (maybe a vacuum leak or two),,, but still it runs soso, even nicely.
I will take cam cover off this afternoon. I've taken them off before to check flats for timing (which were fine) thinking it might have something to do with this. I recently purchased the compression tool and learned of a flat/near flat/ ZERO on 8. I hadn't had a reason to look at the shims and buckets closely, yet. I want to see if a bucket is stuck in the down position or if there's anything out of order. If push comes to shove, remove a camshaft to see what I can see by individually pulling buckets and upper valve assemblies @ 8 with hopes finding the problem there,,,, and not having pulling an entire cylinder head.
ANYTHING anyone might be willing to offer would be greatly appreciated!
Q: Any problem solving or trouble shooting tips from point of cam covers removed?
Q: If cams are loosened, is it possible to tip up cam to work on (pull) tappet, shim, bucket assembly? Do they just slide out? Can I safely hold cam sprockets to chains with zip ties while doing this and simply replace cams OR do I need to drop the pin in the crank case to preserve TDC, in order to make a move like that??
Q: where can I find info on the bolt removal order (and torque downs) to remove and reinstall caps on camshaft?
Q: Is a cracked or busted valve spring possible? Whats possible cause?
The very first thing I would do is borrow/buy a fiber optic camera and poke it down the spark plug hole. The cause of the problem will likely be starring back at you. As the oil didn't help its not a Nikasal problem. My guess would be a dropped valve seat from an overheating incident in its past. If all the flats are lined up its not likely to be a bent valve. The camera will also let you see if a valve has ever contacted the piston leaving its mark. You can also see if there is any cylinder wall damage.
In any case a cylinder head removal is very likely in your future.
Kidding. Im gearing up for a CH removal. I just want to do all I can first. Rule as many things out as possible but I am fairly sure I will be able to remove the head, figure it out and get it back together... Thanks to this forum, all the wisdom, experience and willingness to offer suggestions here - well - it was what gave me confidence to purchase the car in the first place.
I have a (cheap) fiber optic camera coming and it should arrive tomorrow... Oh, I think my model is a couple of years past the Nakasil lined cylinder design,,,, I thought....?
Jay, I think you are just trying to avoid the inevitable. Stop running the engine before you do further damage like destroy the catalytic converter or break the valve and damage the piston.
If, after looking with a boroscope, you do want to remove the exhaust cam, rotate the engine using a 24mm socket on the crankshaft clockwise from the front until none of the lobes are pushing on the buckets. This is to avoid breaking the camshaft. Then loosen the cap bolts starting at each end working toward the middle. I apply vise grips to the camshaft and wiggle it while easing the cap bolts to be sure it doesn't hang up. As you mentioned, use zip ties on the sprocket.
But this only works for the exhaust cam, and I think it's a waste of time, because the head is going to have to come off.
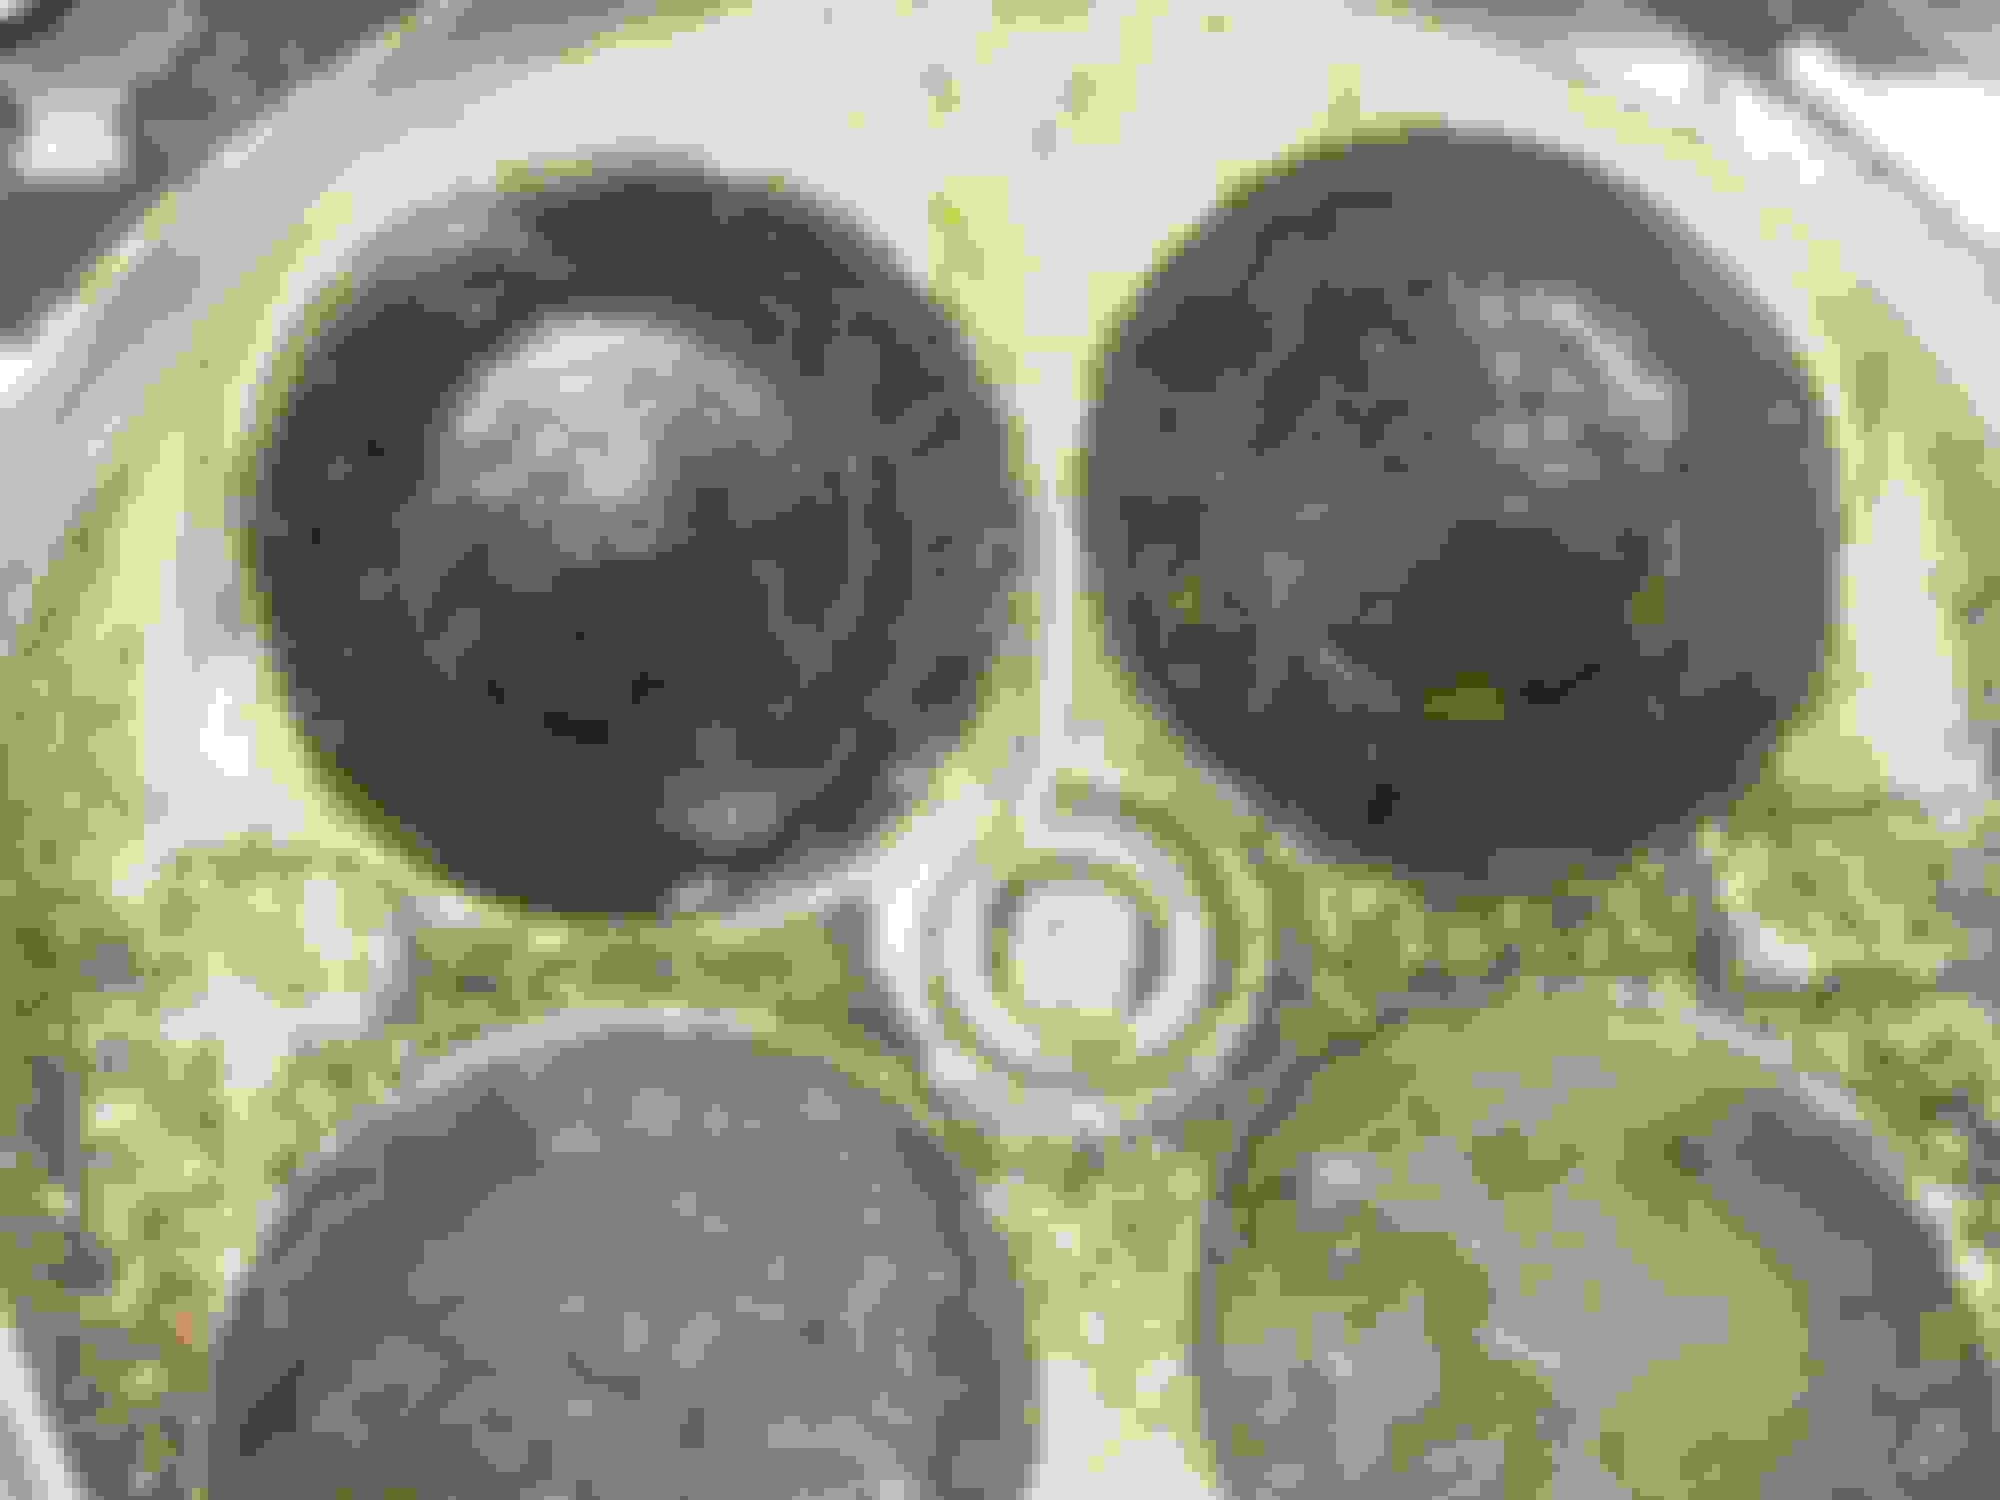
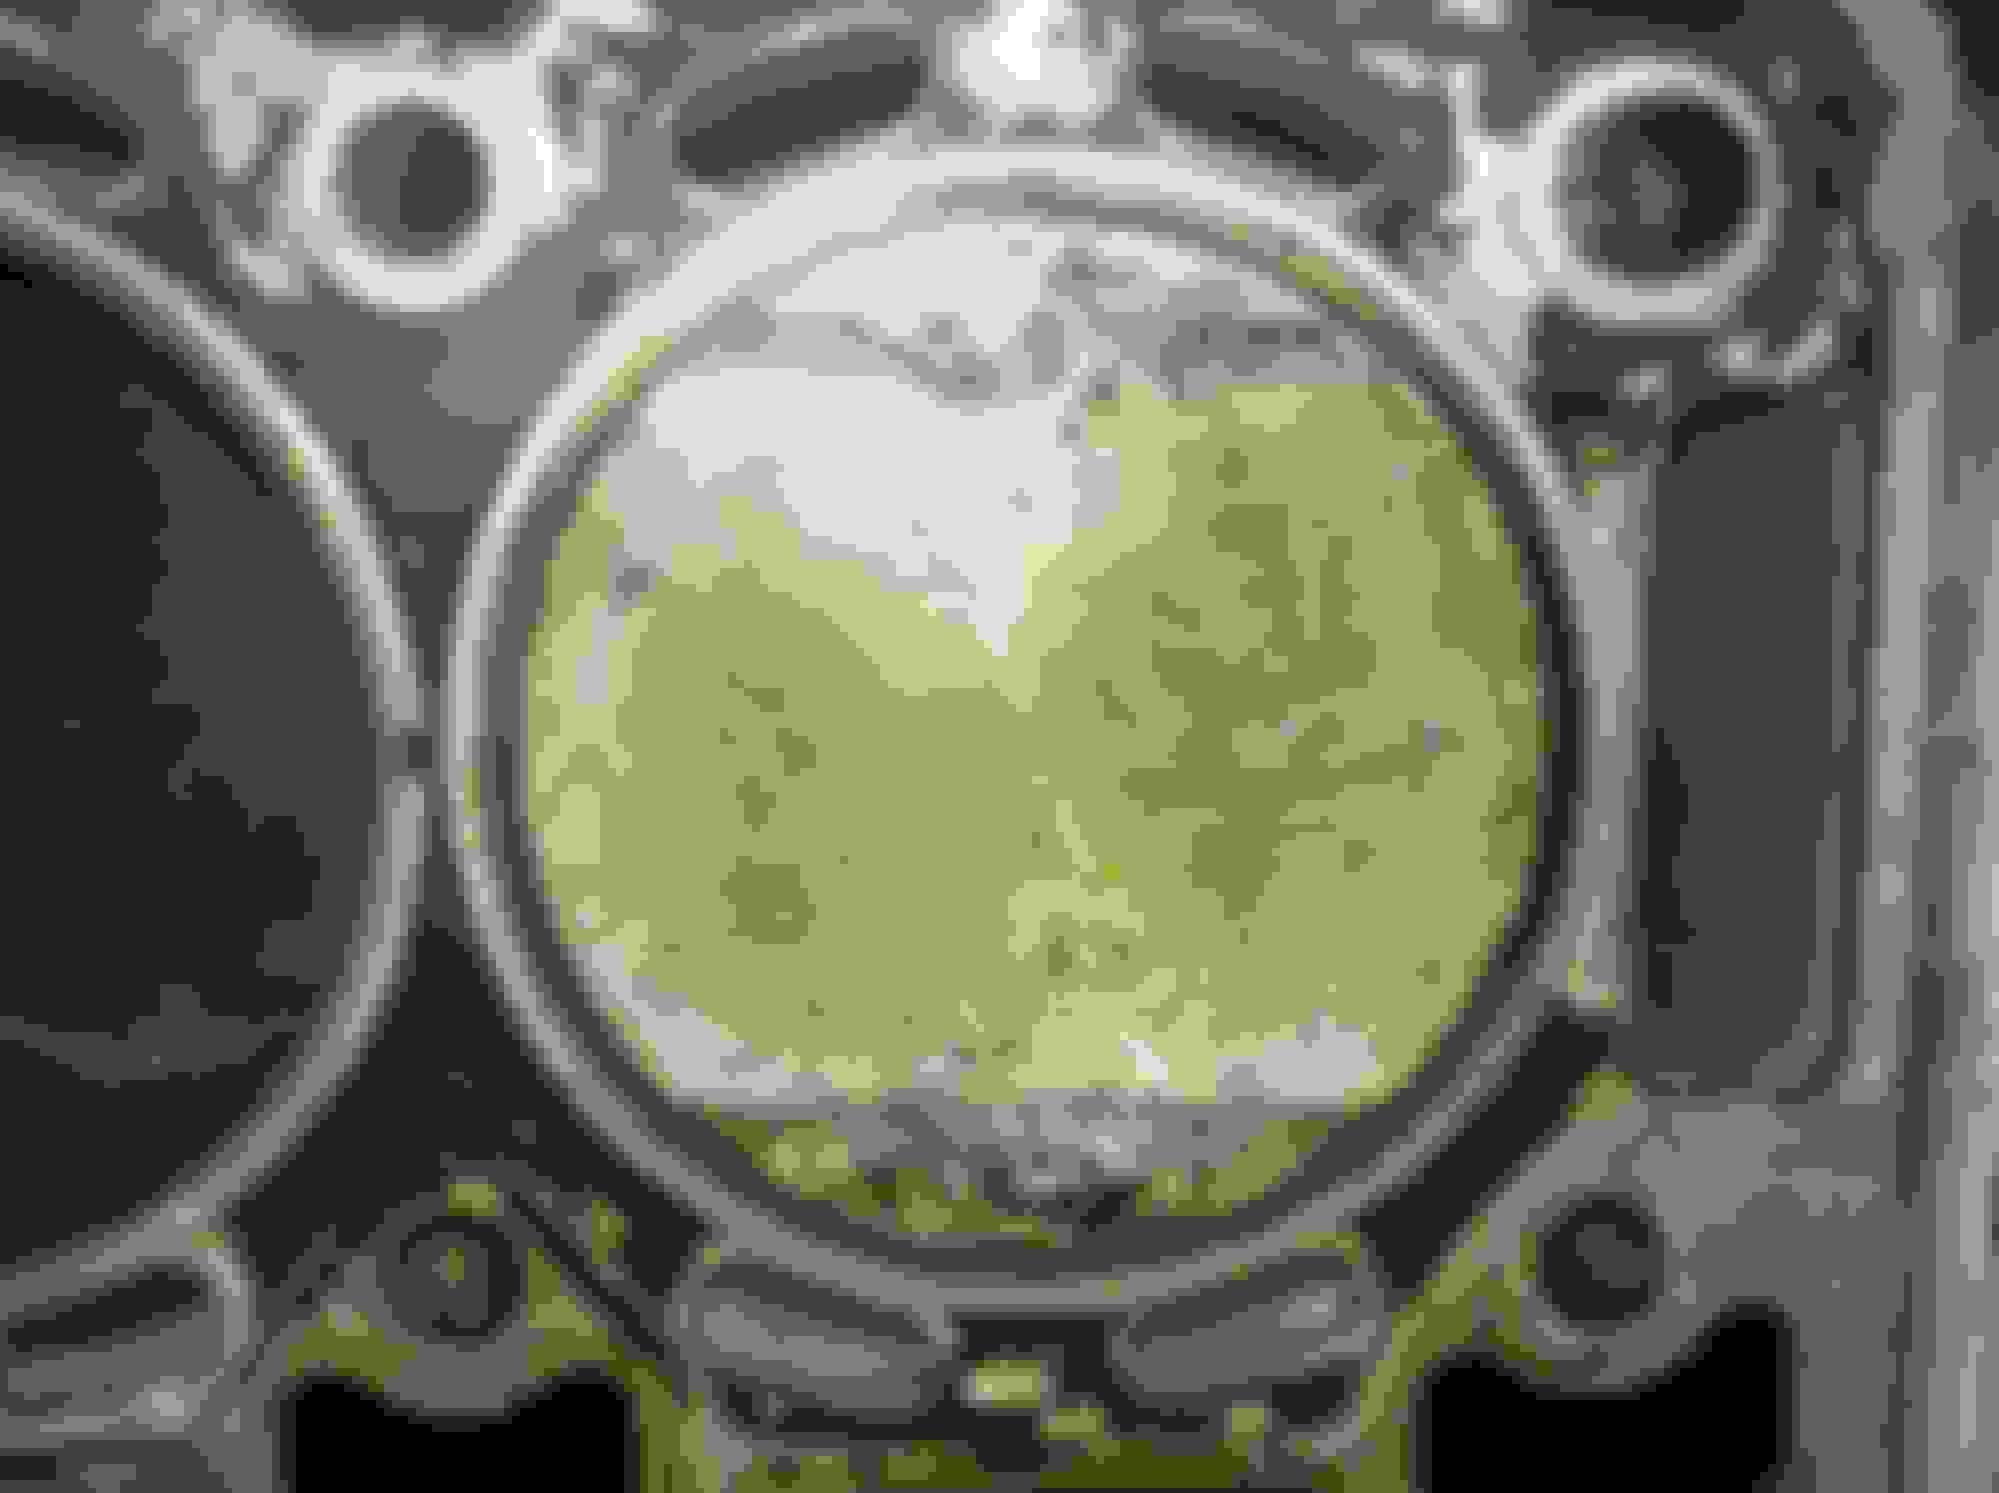
I made progress today. Was also able to have a conversation with a mechanic I like down the street. He tried (it seemed) to scare the BEEJesus outah me about the job. I took note, then headed right home and got to work... Took off the things I needed to,,,, to GIT to the things I needed to GIT to,,,, and OFF cam the intake manifold. And BAM! There it was. One good sized piece and a few small chips of an intake valve seat (the intake valve closest to the firewall) that had dropped and was blown back up and into the intake manifold. When I took the manifold off they were rattling around in there. With a shake - they hit the floor. I was like DAMN... All that engine digging with more to go, for that.
Then, looking down into the space, the intake inlet for the corresponding valve, I could easily see (I dont know if you can make it out in this picture) a big old chip broken off of the area that "holds" the seat around the valve... The aluminum seat frame setting.
I have a camera coming but dont think I'll need it now. Tomorrow I'll finish the pull and get the Cylinder Head off. I have a couple of questions. One is to do with removing the harmonic dampner, to remove timing chain cover. What can I do to stop it from turning while I try to loosen the 24mm bolt that holds the dampner to the crank shaft? The second,,, is looking for tips on actually pulling the harmonic balancer..? I hate the specialty tools thing - but I've read that all other pullys simply bend under the load of pulling the harmonic. Any suggestions would be welcome.
Anyways there is a $196 dollar XK8 Cylinder head on ebay that I DONT have the cash for right now but SHOULD tomorrow. But I'll have to see something after taking the head off ---- I will pray that the bore, the piston and area in the cylinder is not to beat up from the pieces that didnt end up in the intake manifold. Im guessing (praying) that the missing parts of the ring (see pic) shot out of the exhaust quickly. We'll see how badly it roughed up the bore, cylinder and other exhaust valve outlet area and,,, tomorrow.
What, in your experience, would a repair cost. Still, I don't know the full extent of the damage, if the valve stem guide is off, bent or ok - then more...
There are a number of things to keep in mind when dealing with this type of repair.
Firstly, under no circumstances is the crankshaft holding tool, which fits where the crankshaft position sensor goes, to be used to hold the crankshaft when loosening the front pulley bolt. In addition, under no circumstances is the engine to be rotated anti-clock when viewed from the front of the vehicle. Damage to the main bearings may result.
There is a Jaguar special tool to hold the crankshaft from turning, but if that is unavailable, you can cut a serpentine belt and wrap it around the pulley then use a chain wrench to hold the pulley whilst loosening the bolt.
Once the bolt is loose, you can use a universal puller to engage the threaded holes in the pulley, but care must be taken to not damage the timing case cover and the threaded end of the crankshaft.
What, in your experience, would a repair cost. Still, I don't know the full extent of the damage, if the valve stem guide is off, bent or ok - then more...
We shall see...
Any tips on removing dampner?
A competent machine shop can rebuild the aluminium around the broken valve seat with weld, then machine it to hold a new valve seat.
You will not know the full extent of the damage until the cylinder head is removed and you can see if there is any damage to the piston or cylinder wall. You can have the head checked for cracks and leakage as part of the inspection. Pricing can vary from location to location, so taking the head to two or three places for estimates is probably your best method.
Since the timing cover is off, also inspect the primary timing chain tensioners and guides for damage. If they are still the original plastic guides, they should be replaced with the newer version along with the chains and both primary and secondary tensioners.
'under no circumstances is the engine to be rotated anti-clock when viewed from the front of the vehicle. Damage to the main bearings may result.'
Could you share with us why this is so? I thought the reason for not reverse rotating the engine was that you risk the timing chain jumping, first time I've ever heard that the crank bearings might be damaged?
...Could you share with us why this is so? I thought the reason for not reverse rotating the engine was that you risk the timing chain jumping, first time I've ever heard that the crank bearings might be damaged?
Here is the quotation from the Workshop Manual:
'CAUTION:
Rotating the crankshaft in a counterclockwise direction may cause engine damage. Crankshaft journals are directionally machined. Rotating the crankshaft counterclockwise can raise burrs on bearing surfaces, reducing engine life.'
I've rebuilt several engines of various makes and that's the first time I've ever heard of the warning or the term. I think it would only apply to new components if at all, so for the couple of reverse turns I've done before, I don't think I'm going to lose any sleep over it.
Just quickly - I've also heard that rotating an engine opposite its run direction is BAD for the exact reasons stated... Just what I've heard and to me the reasoning makes sense.
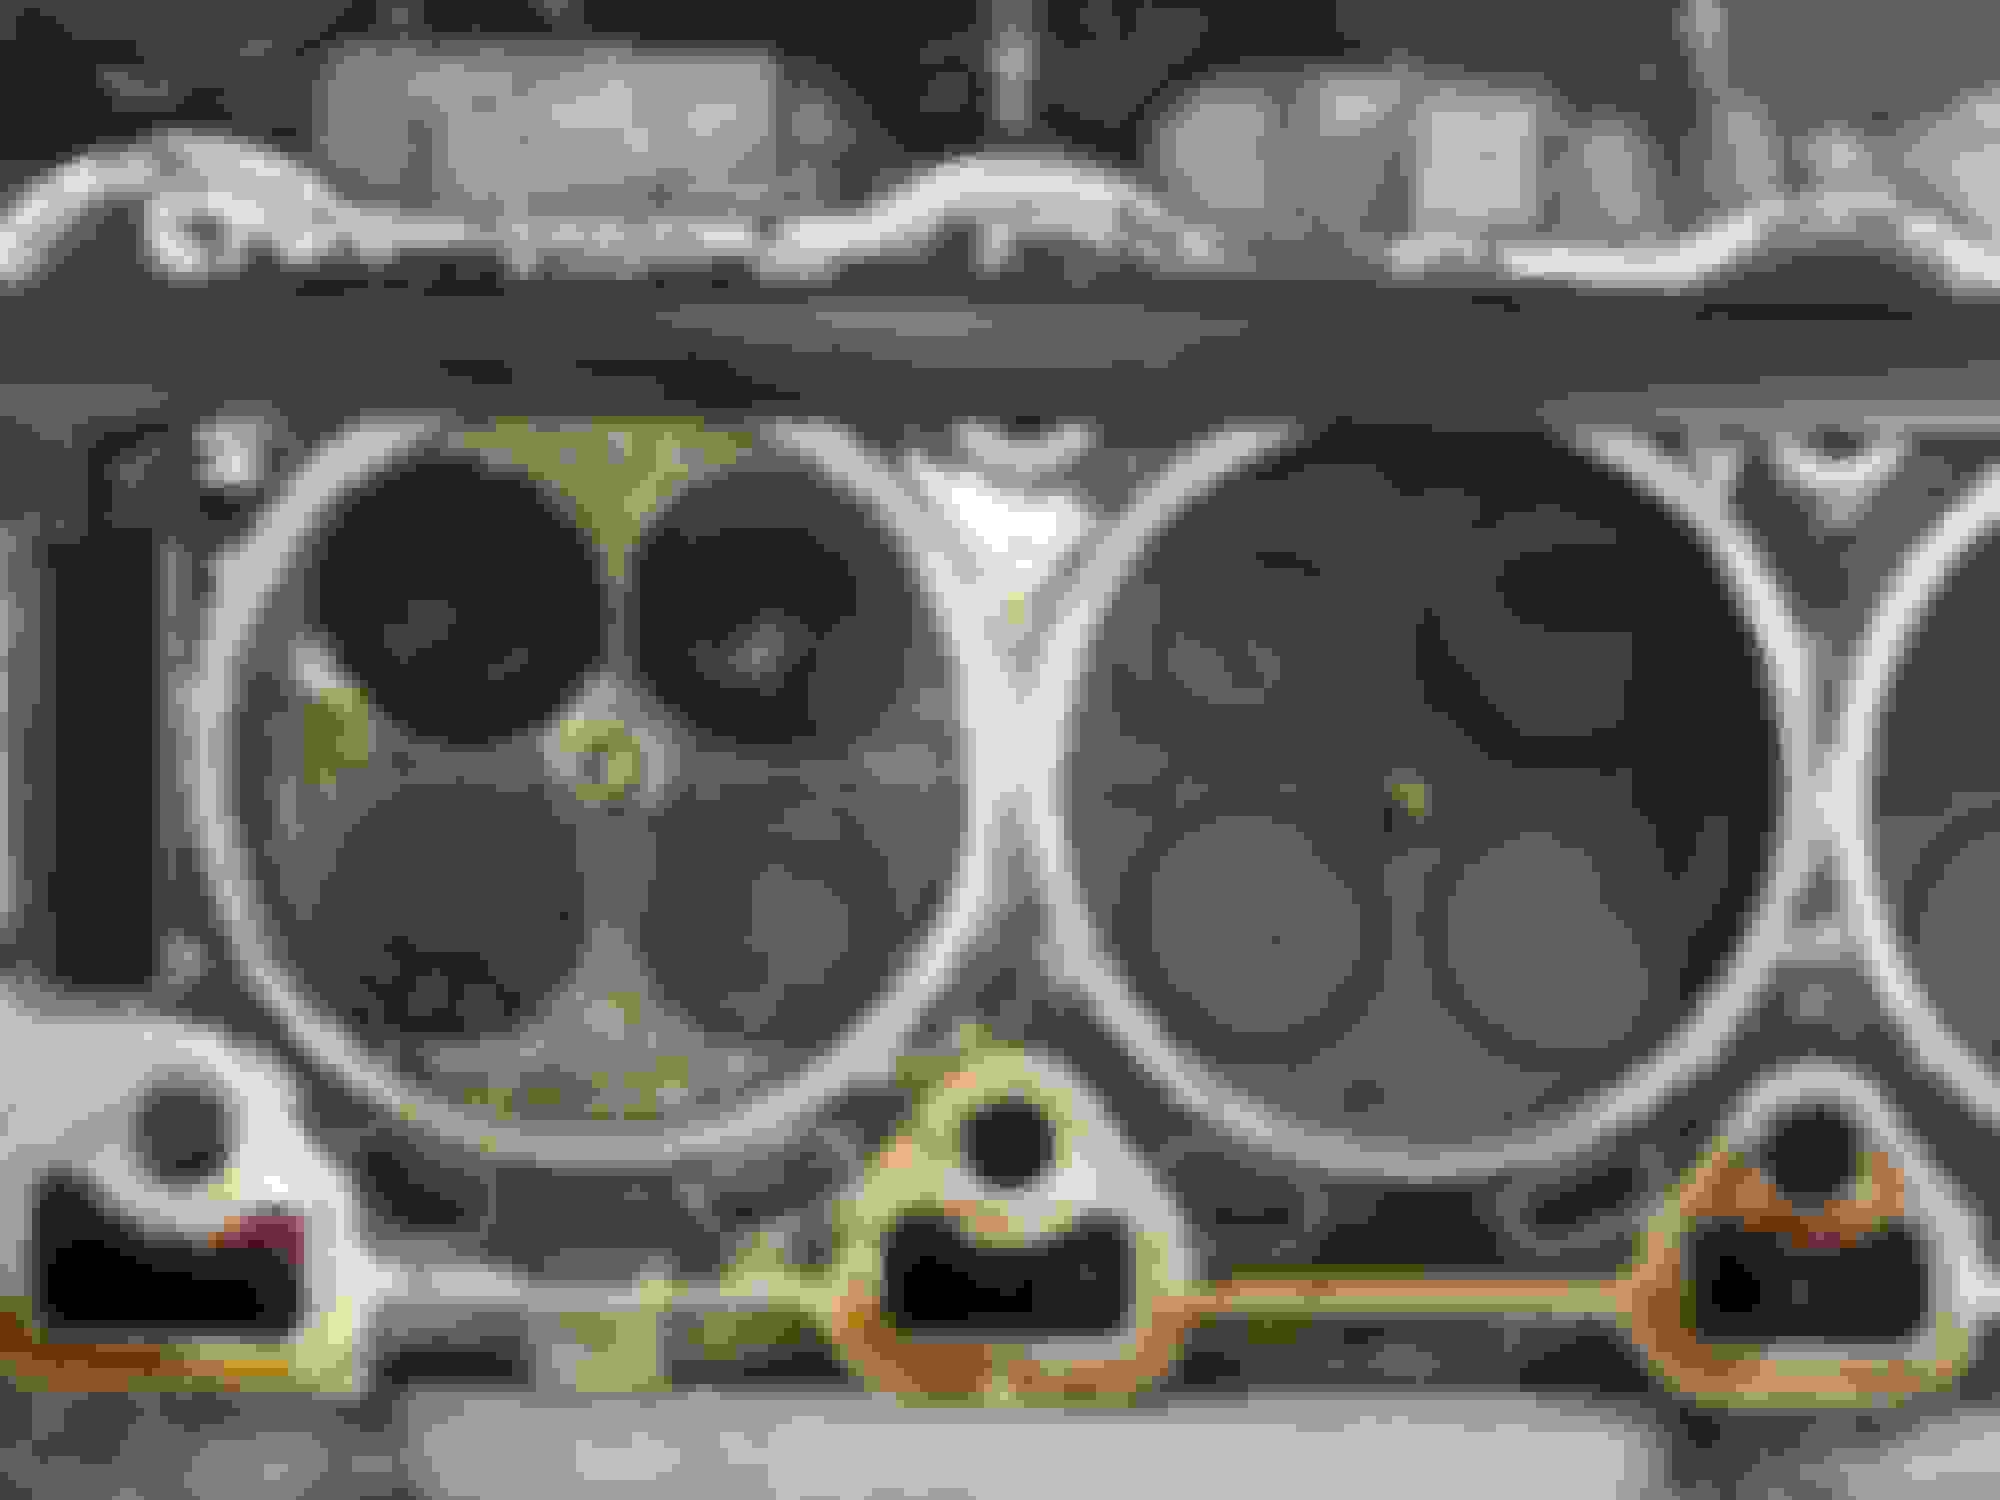
So. I pulled the cylinder head yesterday with no great surprises. Good news actually. Although the the cylinder is a little dinged up due to the pieces of the valve seat (temporarily) bouncing around in there - the cylinder/bore wall appears untouched (see pics) mirror-. Inspection with 'fingernail' test of the cylinder wall only reveals super smooth, near flawless, liner(ing)...
The cylinder head is shot (I think) and I'm in the market for a new cylinder head - which spurs my next round of questions. I will also start a new thread with these questions and at LEAST one or two of these same photos to try to get a few more brains in on the project... IF you know anyone, thru your experience on JagForums, that you think it would make sense to call in on this, I would appreciate your help! Thanks in advance.
Ill say this - time is of the essence (kinda). I've found a cylinder head on ebay with no camshafts. The camshafts on the old CHead and 'journal rounds' are smooth to fingernail test and in good shape, and, if necessary I would like to re-use them. Thing is,,, I've heard that camshafts, tappets/shims and buckets are not simply interchangeable and that there will be (ARE) variations (however slight) in the way all will "sit" in the new head. The new CH comes with buckets and tappets ((AT THE SAME TIME)) the buckets and shims/tappets in the old head look good and sit in there respective "slots" in the valve holes in the old CH nicely AND are 'SIZED' for the old camshaft. If I take those buckets, shims/tappets - with the old camshafts - and put them in the new CH,,, WILL THAT get me closer to specs?????? Increase or decrease slight variations in making my swap?????
Also, can someone recommend or help me with the idea of a QUALITY head gasket. Is Eurospare and,,, are there Eurospare fakes? There are lots and tonz of price ranges. Remember - I am NOT a rich man....
Please let me know if these pictures will not open...
Last edited by Norri; Oct 27, 2016 at 11:22 AM.
Reason: Added pics to post
Couldn't get your pics to load.
What does the piston look like.
I went through something similar a couple of months ago. He is a link to the thread. https://www.jaguarforums.com/forum/x...engine-164737/
I had to replace the piston too. I took a head from another motor that I have that had a bad rod. The person I bought the car from must have driven the car for some time with the bad rod because the cams and their journals were scratched. I took the cams from the car I was working on and fitted them to the donor head. I took pics of my process but haven't posted them or explained my procedure because I didn't think it would be of use to anyone till now. I can work on that and try to post my procedure this weekend.
As for the headgasket get one for a 03 XK8 4.2L. It will be MLS which is better than the stock fiber gaskets.
It is not impossible to get the clearances correct. It is just time consuming and you will need a lot of patience. Don't get in a hurry, just do it right.
It took me a day to refit the cams and then several hours to adjust the valve clearances. When you get done you will know why machine shops charge what they do.
When I post the procedure I'll post a link to the manual that Motorcarman, thank you again, has supplied for us.