When you click on links to various merchants on this site and make a purchase, this can result in this site earning a commission. Affiliate programs and affiliations include, but are not limited to, the eBay Partner Network.
some pics 1 is the original setting of the sat nav. 2 is the MDF bracket i made with the Xgody bracket on it. 3 is the back side of the bracket with 2 strips of thin metal that slide in the hole where the original sat nav is mounted. When in place it slides down a bit to stay ferm in place. The back side has a cloth backing to prvent scratches on the original sat nav.. 4 is the Xgody sat nav (7 inch). 5 is the Xgody in place.
When I found a beautiful, low-mileage XKR coupe for sale three years ago, I jumped at the chance to buy it. It was Jaguar racing green metallic with tan leather Recaro seats, 20” BBS Detroit alloy wheels, cross-drilled Brembo brakes with red calipers, and Alpine premium in-car entertainment (ICE) system. There were, however, three things I wanted that it lacked: a modern navigation system and the ability to make hands-free phone calls and play music from my iPhone.
After considerable thought and research (along with some invaluable advice from Steve Klonsky, TheJagWrangler) I found a way to kill all of these “birds” with one “stone” while adding a four-gauge display with “analog” clock and a rear-view backup camera. When I connect my iPhone 6S Plus to a lightning cable coming out of the coin holder located in front of the gearshift, the phone’s screen is mirrored on the in-dash navigation screen and its audio output plays through the car’s Alpine premium ICE system.
With this one simple connection, I now have all of the following:
A current navigation system with turn-by-turn voice directions, using either the Maps or Google Maps apps
With a subscription to AppleMusic, the ability to play anything in the vast iTunes library using the Music app
Hands-free phone calling, using Siri voice command and the Phone app
A four-gauge engine monitoring display with analog-style clock, showing oil pressure, supercharger boost, battery charge, and coolant temperature
An automatic rearview backup camera
Best of all, the entire installation looks “stock” – the only visible modification is a groove in the “change holder” in front of the gearshift, where I place the phone. You can find my write-up of the installation in the following two posts. Cheers!
Wow, I like he looks of it. Is all working like you wanted? I would like to install it into my 2005 XK8. Could you share the procedures. Thank you. HazMat 1075
I was really asking about Ron62 and his sort of clip-on set up. It looks to be the most elegant way to add a plug & play unit with essentially no modification.
- Is it hand made or a kit?
- Do you have instructions or a diagram with dimensions?
- Your post is from 2017. Have you upgraded your sat nav unit since then?
Last edited by tomfurie; Jan 30, 2024 at 02:00 PM.
I was really asking about Ron62 and his sort of clip-on set up. It looks to be the most elegant way to add a plug & play unit with essentially no modification.
- Is it hand made or a kit?
- Do you have instructions or a diagram with dimensions?
- Your post is from 2017. Have you upgraded your sat nav unit since then?
He says in the post that he made it himself. Honestly, its so easy to take the OEM sat nav out (four screws hold it in) and replace it with a Garmin DriveSmart 55 that then looks OEM, I can't see the point in disfiguring the car like that.
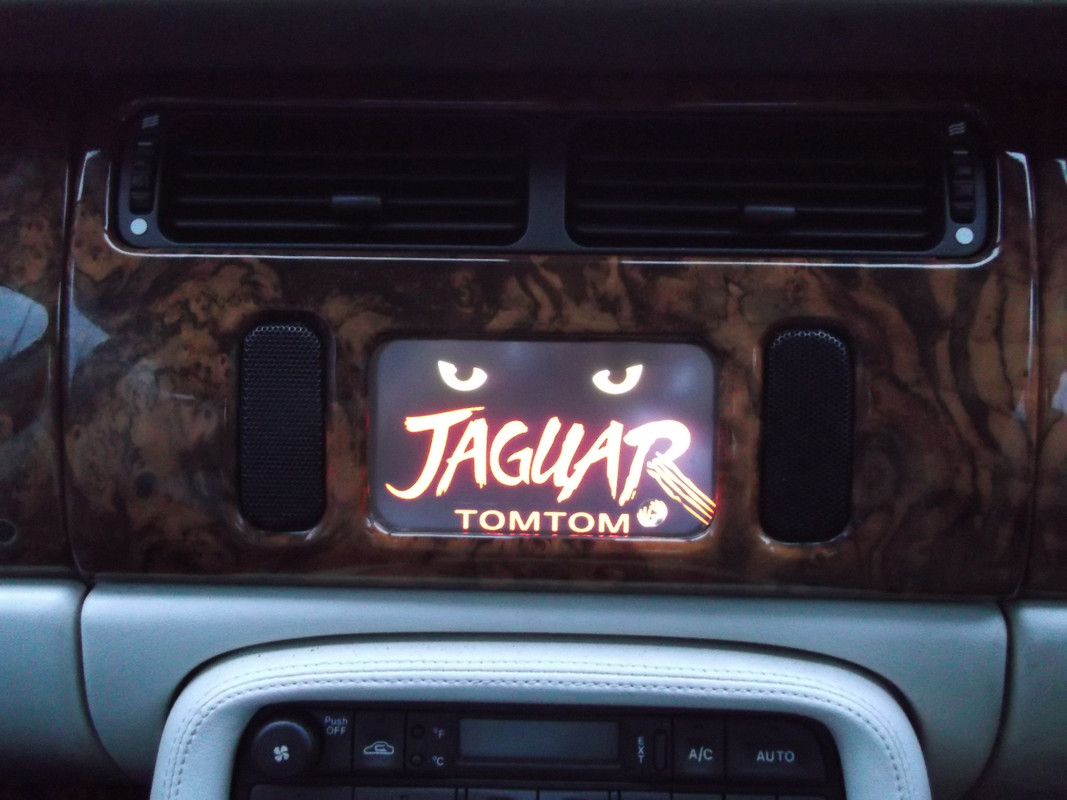
I don't see the reason to follow the Garmin route, because it is more expencive and needs to adjust the cars interior. This option keeps everything in place and hardly costs anything compared to the Garmin route. Not everyone is comfortable with removal of a dash panel and construct the backside of it to have a different tool. Also, if you want, the same thing can be done with this device that uses an Android software that is not costing anything to update. Also, i can still use the original sat nav and use the buttons to operate, while with the Garmin route,these buttons are useless and interfere originality of the car. The sound of the sat nav voice can be heared on the radio true the FM signal from the XGODY device.
So, still the same set up as before, only the device is newer since a few weeks. Still the XGODY device. Newer bracket placed with the screws in the same place. 2024 update installed and free updates for the future. Now i have EU installed but used it in Canada too with free software for "the America's"). Never disappointed me as a sat nav. I can take it out and use in my XJC and classic Mini as well.
To put the bracket in, the top with the longer strips are put in first and than the lower bottom end is placed in and the total will be hold at the top of the sat nav hole. Than lower the total so it is secured by gravity.
I'm doing something similar with mine, but I decided to keep the original switches (by dismantling the OEM satnav). I prefer the factory look, even if the switches do nothing, apart from the on/off switch which I have wired to power the Garmin on and off.
I also added a leaper logo to the Garmin on startup.
Mine also has a backup camera input, so I will finally get that functionality on the car nearly 15 years after it left the factory.
The Garmin Mechanic stuff looks great and I for one will be really interested to see that in action when you have it all working.
Hi! How did you do? I have a Garmin 3597 lmt.. thank's a lot.
Hi! How did you do? I have a Garmin 3597 lmt.. thank's a lot.
I don't think the newer Garmins allow you to change the start up screen - that photo was of my Garmin Nuvi 5000. Since then I've replaced it with a Garmin Drivesmart 55 which has a wireless backup camera, but no option to change the start screen unfortunately. It's a very nice sat nav.
Hey I love the shift knob! Mind linking me to where you got?
If you are asking about mine it's a Momo Sphere. The Jaguar gear lever is too narrow to fit the Momo snugly, so I used a wooden dowel with the centre drilled out as a shim.
You'll find them on eBay etc in a few different finishes.
Maybe this has been asked or tried before ... has anyone ever looked into modding a XKR 100 dash panel? i.e. strip the clear finish to the wood, remove the back metal panel, and rework the opening for the sat nav to a larger dimension, maybe out to the outer edges of the Sat nav controls, router/chamfer/smooth the opening edges like original - allowing a larger carplay screen to be fitted behind etc?