
Treadplate insert removal


Veteran Member
Joined: Sep 2012
Posts: 1,473
Likes: 655
From: Devon. U.K.
.................... and some warm air helps too.
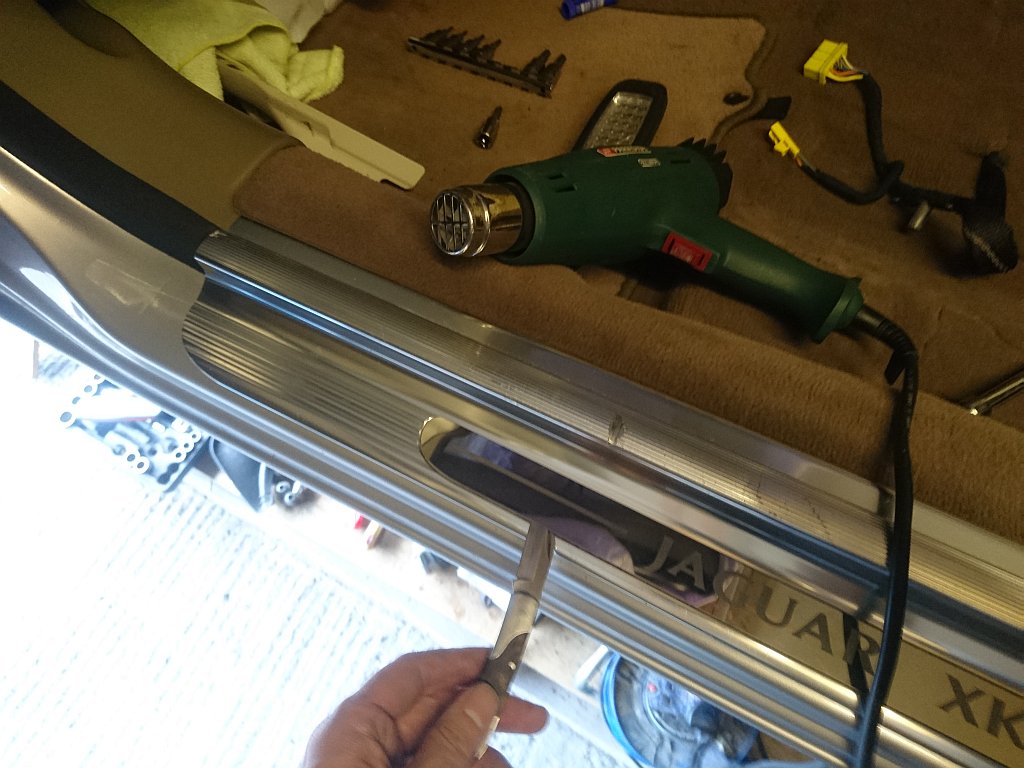
A hairdryer or heat-gun will soften the double sided adhesive tape which is what is holding it on, and which is what you will need to replace it afterwards.
A hairdryer or heat-gun will soften the double sided adhesive tape which is what is holding it on, and which is what you will need to replace it afterwards.


Joined: Dec 2011
Posts: 120,439
Likes: 17,018
From: Durham, UK
The insert is glued in position. To remove it, warm gently to soften the adhesive and carefully start to prise up one end with a wooden spatula or thin plastic blade.
Once the end is lifted, insert a length of nylon fishing line and free the remainder of the adhesive using a sawing action on the line.
Take great care because it's very easy to distort the Insert.
Once the Insert is removed, release the three Paint Clearing Screws beneath to free the Treadplate.
Graham

Senior Member

Joined: Oct 2010
Posts: 750
Likes: 308
From: Near Charlotte, NC
Along with others , I recommend being extremely careful not to distort that thin metal. Also, some heat guns can get hot enough to distort that metal (hot spot). Mine has been reattached for a few years now with no delammination or signs that it was ever removed.
Trending Topics
Veteran Member
Joined: Sep 2012
Posts: 1,473
Likes: 655
From: Devon. U.K.
Fair enough _ I guess you were lucky. Mine came off OK with a small amount of heat to soften the adhesive, but it only took an extra few minutes to remove all traces of the old double-sided tape with solvent, and use new to stick them back down again.