Jaguar Forums - Jaguar Enthusiasts Forum
  • LOG IN
  • REGISTER
  • Forums
    • General Jaguar Forums
      • New Member Area - Intro a MUST
      • Jaguar Forums Feedback & Suggestion Center
      • General Tech Help
    • Jaguar Models ( Current )
      • XF (X260)
      • F-Type ( X152 )
      • XE ( X760 )
      • E-Pace
      • F-Pace (X761) / C-X17
      • I-Pace EV
    • Jaguar Models ( Modern )
      • XF and XFR ( X250 )
      • XJ ( X351 )
      • X-Type ( X400 )
      • S-Type / S type R Supercharged V8 ( X200 )
      • XJ XJ6 / XJ8 / XJR ( X350 & X358 )
      • XJ XJ8 / XJR ( X308 )
      • XJ XJ12 ( X305 )
      • XJ XJ6 / XJR6 ( X300 )
      • XK8 / XKR ( X100 )
      • XK / XKR ( X150 )
    • Jaguar Models ( Classics )
      • Mark V - X 420G
      • MKI / MKII S type 240 340 & Daimler
      • XK120 XK140 XK150
      • E type ( XK-E )
      • XJ6 & XJ12 Series I, II & III
      • XJS ( X27 )
      • XJ40 ( XJ81 )
      • XKSS
      • XJ220
    • Other Jaguars
      • Other Jaguar Models / Concepts / Replicas
    • Diesel variants
      • Diesel variants - All models
    • Non Jaguar vehicles
      • Non-Jaguar Vehicles
    • Brand Review
      • Jaguar Press release
      • Jaguar Customer Relationship Centre
      • Jaguar Engines & transmissions
      • Wheels / Tires, Suspension & handling
      • Interior
      • Exterior
      • Audio/Visual Electronics
      • Detailing / Car care
      • Motorsports
    • Jaguar Classifieds
      • Marketplace
      • PRIVATE For Sale / Trade or Buy Classifieds
      • VENDOR 'For Sale' Classifieds
    • Regional
      • US Northeast
      • US Central
      • US Southwest
      • US Western
      • US Northwest
      • US Midwest
      • US Mid Atlantic
      • US Lower Atlantic
      • US Southern Midwest
      • Canada
      • Mexico, South America
      • UK & Eire
      • Europe
      • Australia - Queensland
      • Australia - New South Wales / ACT
      • Australia - Victoria / Tasmania
      • Australia - Western
      • Australia - South / NT
      • New Zealand
      • Other Areas
    • Official Site Sponsors
      • VENDOR Threads
    • General Interest / History
      • Sights N Sounds
      • Photography
      • Forum announcement archives / Forum History
      • Jaguarforums Merchandise
      • Memorial Section
  • News
  • Marketplace
    • Vendor Directory
    • Become a Vendor
    • Member Marketplace
    • Vendor Marketplace
    • Site Store
  • New Posts
  • Tools
    • Car Payment Calculator
    • Tire Rim Calculator
    • Vin Decoder
    • Recalls
    • Technical Service Bulletins (TSBs)
    • Members List
    • Live Feed
  • Gallery
  • View Dark Mode
    • Please register or login to enable Dark Mode.
  • Log In
  • Register
Jaguar Forums - Jaguar Enthusiasts Forum
    • Threads
      • Advanced
Dark Mode

Please register or login to enable Dark Mode.

Log In

Forgot your Password?

By logging into your account, you agree to our Terms of Use and Privacy Policy, and to the use of cookies as described therein.
or
 
  • Recent
  • Commented
  • Albums
  • My Pictures

Clive.R's Photos

View Profile
Sort:
Commented
  • Most Recent
  • Most Comments
  • Albums
  • Photos
I pondered for a while about how to start and finish the pinstripe, then this idea came to me so I tried it out, and it is now part of car. I kind of felt the need to be different again, hopefully without overdoing it.
0 2023/03/28 21:08:36 Clive.R
I have to shut it all down by this time, the sun has been covered and it is suddenly overcast, and I am not a weather man, so I am not taking any risks, give it a couple of days to get really hard, and then time to sand all over again. I am just thankfull I could get it all under way.
0 2023/03/28 21:05:33 Clive.R
I have removed the chrome cover plate and the join has been filled, I like the way it turned out so it is full steam ahead.
0 2023/03/28 21:01:51 Clive.R
I just have to apply a couple more coats, but that will have to wait for another day. I put the gold pinstripes on and sealed it all under some 2K clear. Then it will all need to be sanded nice and flat before I consider anymore clear to be put onto the car.
0 2023/03/28 20:58:34 Clive.R
0 2023/03/27 00:21:02 Clive.R
Not a good example in this shot, however take a look at the framework from the shock tower to where the evaporator hoses go through the firewall. Again on the other side, from the same place the shock tower this time to where the hearter hoses go through the firewall. also take a carefull look at the chassis rails themselves, they are upright as the narrow the engine bay all the way to the rear.
0 2023/03/27 00:12:06 Clive.R
A slightly different angle, as you can see it has been welded on both sides. The flux cored welding wire does not alway look as nice as a solid wire (Gas sheilded) but these should keep our engineer happy for a while.
0 2023/03/24 22:18:46 Clive.R
This one is the passenger side, for some reason it did not want to look the same as the other one, but it is done now.
0 2023/03/24 22:16:26 Clive.R
This is my first completed engine mount, it is on the drivers side (Australia RHD) Anyway you will probably recognise the cone shape of the Jaguar bases for engine mounts and the bush type of engine mount, I am pretty happy about the way they came out.
0 2023/03/24 22:13:10 Clive.R
It really is a huge surprise to see how little I had to do to get this all to fit so nicely. The new universal joints are on order so it will be a fairly simple job of fitting the, and the centre bearing and Jurid joint, and the shaft will be done.
0 2023/03/07 20:01:38 Clive.R
As we move along the drive line, we ar near the output saft extension. Here the Ford slip yoke is completely in the transmission and looking very much at home in there, but then again it has been there since 1987. There is only a small amount of movement with the shaft, 20mm all up.
0 2023/03/07 19:53:23 Clive.R
Here we can see the centre bearing, it too will be replaced, no point in making sure the tailshaft is in complete working order, then skimp out on the centre bearing, the whole shaft will be biven a good going over.
0 2023/03/07 19:52:44 Clive.R
Here at the centre bearing, the slip yoke here was completely pushed until it stopped, no force required. I had a feeling it was going to be close, but things were only going to get better.
0 2023/03/07 19:46:30 Clive.R
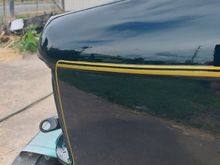
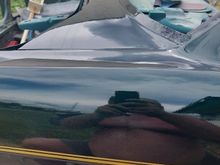
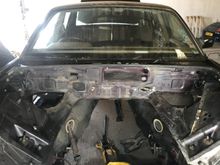
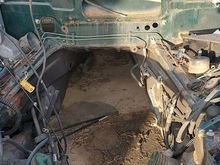
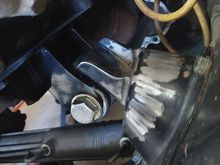
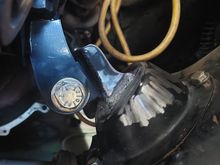
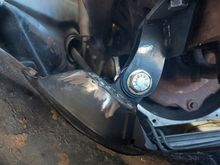
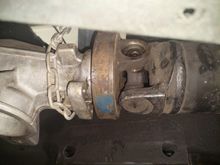
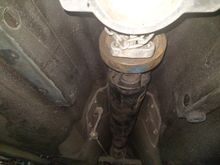
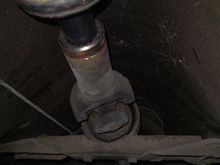
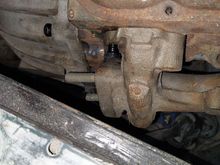
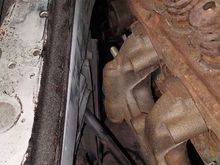
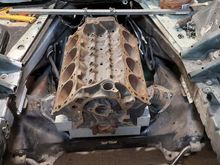
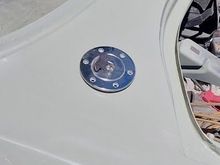
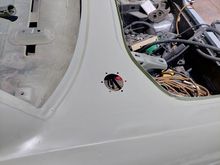
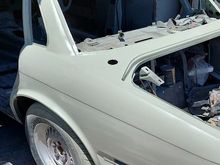
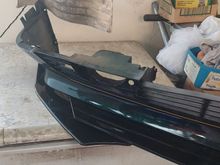
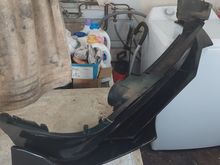
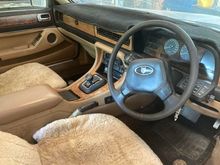
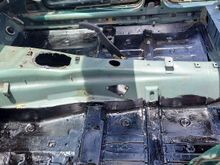
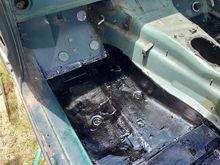
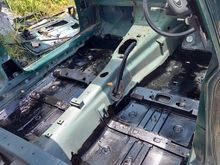
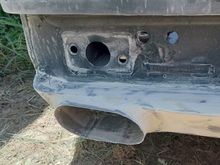
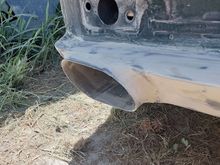
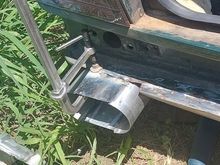
This picture once again makes things look a lot worse than they really are. I am extremely pleased about the outcome of todays efforts. I do realize that the bolts are not all done up, this will only give me more room when they are done, also remember that there are gaskets to go into some of these pictures, and that both the engine and transmission are dummies for the want of a better word, better to damage these rather than the item I will be using in the end,
0 2023/02/28 00:46:32 Clive.R
I have plenty of room here and it is not fouling any part of the car, and the added bonus of not having to touch the chassis rails on the car.
0 2023/02/28 00:46:02 Clive.R
This may look like I am not getting a decent amount of room here, but it certainly surprised me how much there actually is.
0 2023/02/28 00:41:06 Clive.R
While it appears to ave a lot of room in there, put on the heads and that room will very quickly be filled, and then comes the exhaust. When we get those all in place we will find out just how much room I actually have.
0 2023/02/20 00:53:53 Clive.R
I will try to get this part done today, and weather permitting I can get some more paint onto the car, both inside and out.
0 2023/02/15 18:43:07 Clive.R
I put down some bitumastic paint to seall all the joins again, so hopefully they won't leak when it all starts to go back together again.
0 2023/02/15 18:37:19 Clive.R
For some reason I had visions of this cap being too small for the car, so I ordered a larger one as well, however with this one sitting where I intended it to be, just seemed to look alright, so it will stay, I may find a use for the bigger one on something else.
0 2023/02/10 19:42:22 Clive.R
This seemed like a good idea at the time. so I decided to commit to the idea and cut out the hole for the filler neck to go through and marked and drilled ti 6 holes for the mounting bolts, none of which any pictures taken. just sat in place for the picture, 2 reasons;
1....the sun is so hot I can't touch anything on the car right now.
2....the paint is still a tad too green to put anyweight in it without the filler getting stuck in the paint.
This seemed like a good idea at the time. so I decided to commit to the idea and cut out the hole for the filler neck to go through and marked and drilled ti 6 holes for the mounting bolts, none of which any pictures taken. just sat in place for the picture, 2 reasons; 1....the sun is so hot I can't touch anything on the car right now. 2....the paint is still a tad too green to put anyweight in it without the filler getting stuck in the paint.
0 2023/02/10 19:41:55 Clive.R
I had a bit of a brain fart though, as I pondered the ideas about my filler point. I am loosing my marbles with the idea of making a new fuel cap rubber, and the underside where the cover control, if that is what you call it. Anyway; I welded a new plate over the top of where the flap use to be, and I removed all the mounts from underneath. The rust managed to make itself too much at home.
0 2023/02/10 19:30:30 Clive.R
Still considering putting a gold pinstripe around the outside edges, just not quite sure yet.
0 2023/01/30 00:13:28 Clive.R
Got this thing fitted to the front air dam I suppose you would call it. No struts on it yet, no car to attatch them to for now.
0 2023/01/30 00:11:46 Clive.R
0 2023/01/03 11:18:45 Clive.R
I will be painting a lot of this in epoxy paint on all the green stuff, then the ruberised tiles will be put as much as I can in before I put the underlay down, making it ready for the carpet.
0 2023/01/01 21:05:43 Clive.R
That fixed that problem, just got to wait because tomorrow I will give it all another coat, before I do much more to the floor pans.
0 2023/01/01 21:04:07 Clive.R
All the wiring has been removed, and the floor pan had some rustholes in the passenger side. I cut the rust out and welded it all in, about 5 holes in the passenger side and only 1 in the drivers side. I hit everything with the wire brush, and gave it a damned good vaccuuming then painted the bitumastic paint.
0 2023/01/01 21:00:28 Clive.R
I am now quite sure that when these are painted, and the bumpers put back on, these will lookawesome.
0 2022/12/19 17:51:32 Clive.R
Noe these I do like, they are only sitting in there for now so you can get an idea of what it is I have been trying to explain.
0 2022/12/19 17:50:02 Clive.R
Well here is the final product I have been hoping like you wouldn't believe that it would be this good to me, I am quietly impressed.
0 2022/12/19 17:48:05 Clive.R
These things are a tad taller than the underside of the car, so I had to make it curve down to the outside edge and even further on the outside as that panel is on its way uphill from the wheel arches. I placed 1 of the exhaust ends into the hole to see if it will look any good.
0 2022/12/19 17:44:17 Clive.R
Even in this picture it still looks like a gaping big hole, and I was still not entirely sure if it was the right idea.
0 2022/12/19 17:42:35 Clive.R
Well this is a bit different from the pinkish coloured lenses I had on them before, the one thing that had me worried at first, was the centre of the lenses had writing on the inside, and I didn't notice it until I put the coloured lenses in place. That writing made the lenses look as if they had been scratched or even cracked. A massive sigh of relief when I saw it wasn't damage. Anyway that is all for now.
0 2022/12/18 09:20:50 Clive.R
That worked out really well, I am really pleased the way they came out. I don't have any glue for them until tomorrow, so I sat them all together and I think they turned out great.
0 2022/12/18 09:18:46 Clive.R
I was lucky enough to have been given a pair of brand new, still in the box clear tail light lenses, so just like the housings they got a coat of adheasion promoter, and a couple of coats of epoxy black paint around the outside edges, but I painted them on the inside, hoping for a better finish.
0 2022/12/18 09:16:06 Clive.R
The reflectors didn't look too bad so I didn't touch them up, I don't think they needed it, but it still got a good clean up anyway.
0 2022/12/18 09:14:25 Clive.R
This  may look like a massive thing to be at the back of the car, but once the exhaust has been installed it will fill this up with only 12mm of clearance around the tailpipe. This is actually taken to where the chrome tail pipe extention starts, so it is not as big as it may first appear, I will also be putting a layer of heatshield around the inside so it won't make the fibreglass area too hot and stuff up the paint.
This may look like a massive thing to be at the back of the car, but once the exhaust has been installed it will fill this up with only 12mm of clearance around the tailpipe. This is actually taken to where the chrome tail pipe extention starts, so it is not as big as it may first appear, I will also be putting a layer of heatshield around the inside so it won't make the fibreglass area too hot and stuff up the paint.
0 2022/12/15 18:28:13 Clive.R
I gave myself the width of a 300mm steel ruler to move the end away from the body, I have also made a filler panel so there will be no unexpected holes around this part. As you can see I still need to make another filler panel to finish the other side. Because this goes lower than the rest of the car here, I am contemplating making a bit of a skirt to go around the lower rear of the car.
0 2022/12/15 18:24:00 Clive.R
Here I am tacking the part in place, the 2 halves of the 4 inch pipe and a flat sheet of 84mm wide I was able to make an oval shape to weld into the rear of the car on each side, these are going to have the twin pipe coming out on either side and with a little bit of length to get my pipes a little bit away from the body but still under the bumper.
0 2022/12/15 18:19:35 Clive.R
First
Page
3 of 5
Last
Go To
Page
  • 1
  • 2
  • 3
  • 4
  • 5
3 of 5
Go To GO
Go to page of 5 pages
  • 1
  • 2
  • 3
  • 4
  • 5

Top
Jaguar Forums - Jaguar Enthusiasts Forum
  • Contact Us
  • FAQ
  • Archive
  • Advertising
  • Cookie Policy
  • Privacy Statement
  • Terms of Service
  • Your Privacy Choices
  • Manage Preferences

© 2026 MH Sub I, LLC dba Internet Brands

Follow Us        


When you click on links to various merchants on this site and make a purchase, this can result in this site earning a commission. Affiliate programs and affiliations include, but are not limited to, the eBay Partner Network.