When you click on links to various merchants on this site and make a purchase, this can result in this site earning a commission. Affiliate programs and affiliations include, but are not limited to, the eBay Partner Network.
Fantastic write up and pics! Wife does most of driving on the Jag and loves driving it but at 141,000 miles it is definitely due for some quality upgrade!
Engine light on so took to local garage that works on it for me (when I don't!) They say she needs tune up new plugs nd news coils on bag side, oil leak into plug holes and of course change all the gaskets and the MAP sensor but did not say anything on the knock sensor? They wanted over 2,000 grand so I am getting pressed into doing this because kind of short on that kind of cash right now.
Snow storm here so will probably gather my parts together in a week or so before I start.
One question first off I do have. Why drain the antifreeze? I just had that changed oh I guess 5 months ago.
The solid tube that runs from the rear of the water pump to the inlet elbow under the intake manifold obscures the knock sensor so it must be removed. You may find coolant there from a leaking gasket on the elbow side of the tube. Change that o ring whilst you have it apart. Good luck.
Thanks blaydes99 I have been trying to find out the best way to change the knock sensor on my 2.5 X-type and found this post just in time I now know I should get the intake seals /gaskets and new plugs as well also an inlet gasket/seal I was just about to start pulling mine apart think it be better to have all those parts ready and waiting I just don't like the idea of leaving the internals open as I have found evidence of rodents under my hood.Also at around 92000 miles I think it best to do as you did and change the plugs yours looked worn out to me, the intake gaskets look worn badly as well.
blaydes99 Thanks for the excellent write up I just received the inlet gaskets today I already bought the knock sensor only I bought 6 inlet gaskets of one shape and 6 inlet gaskets of another shape, I plan on replacing the knock sensor on Sunday, my code reader gave me the code for a bad knock sensor and the car just drives in one gear I presume that is limp mode a higher gear than first because it takes alot of revs to pull away. I really hope this fixes my problems I already changed the vacuum hoses that were bad thing is I also have a gearbox fault on the driver display along with cruise control unavailable, I thought I would fix everything that I had codes on and see if they were causing the gearbox fault notice as well I guess that is wishful thinking on my part but who knows it might work its worth the couple hundred bucks to try.
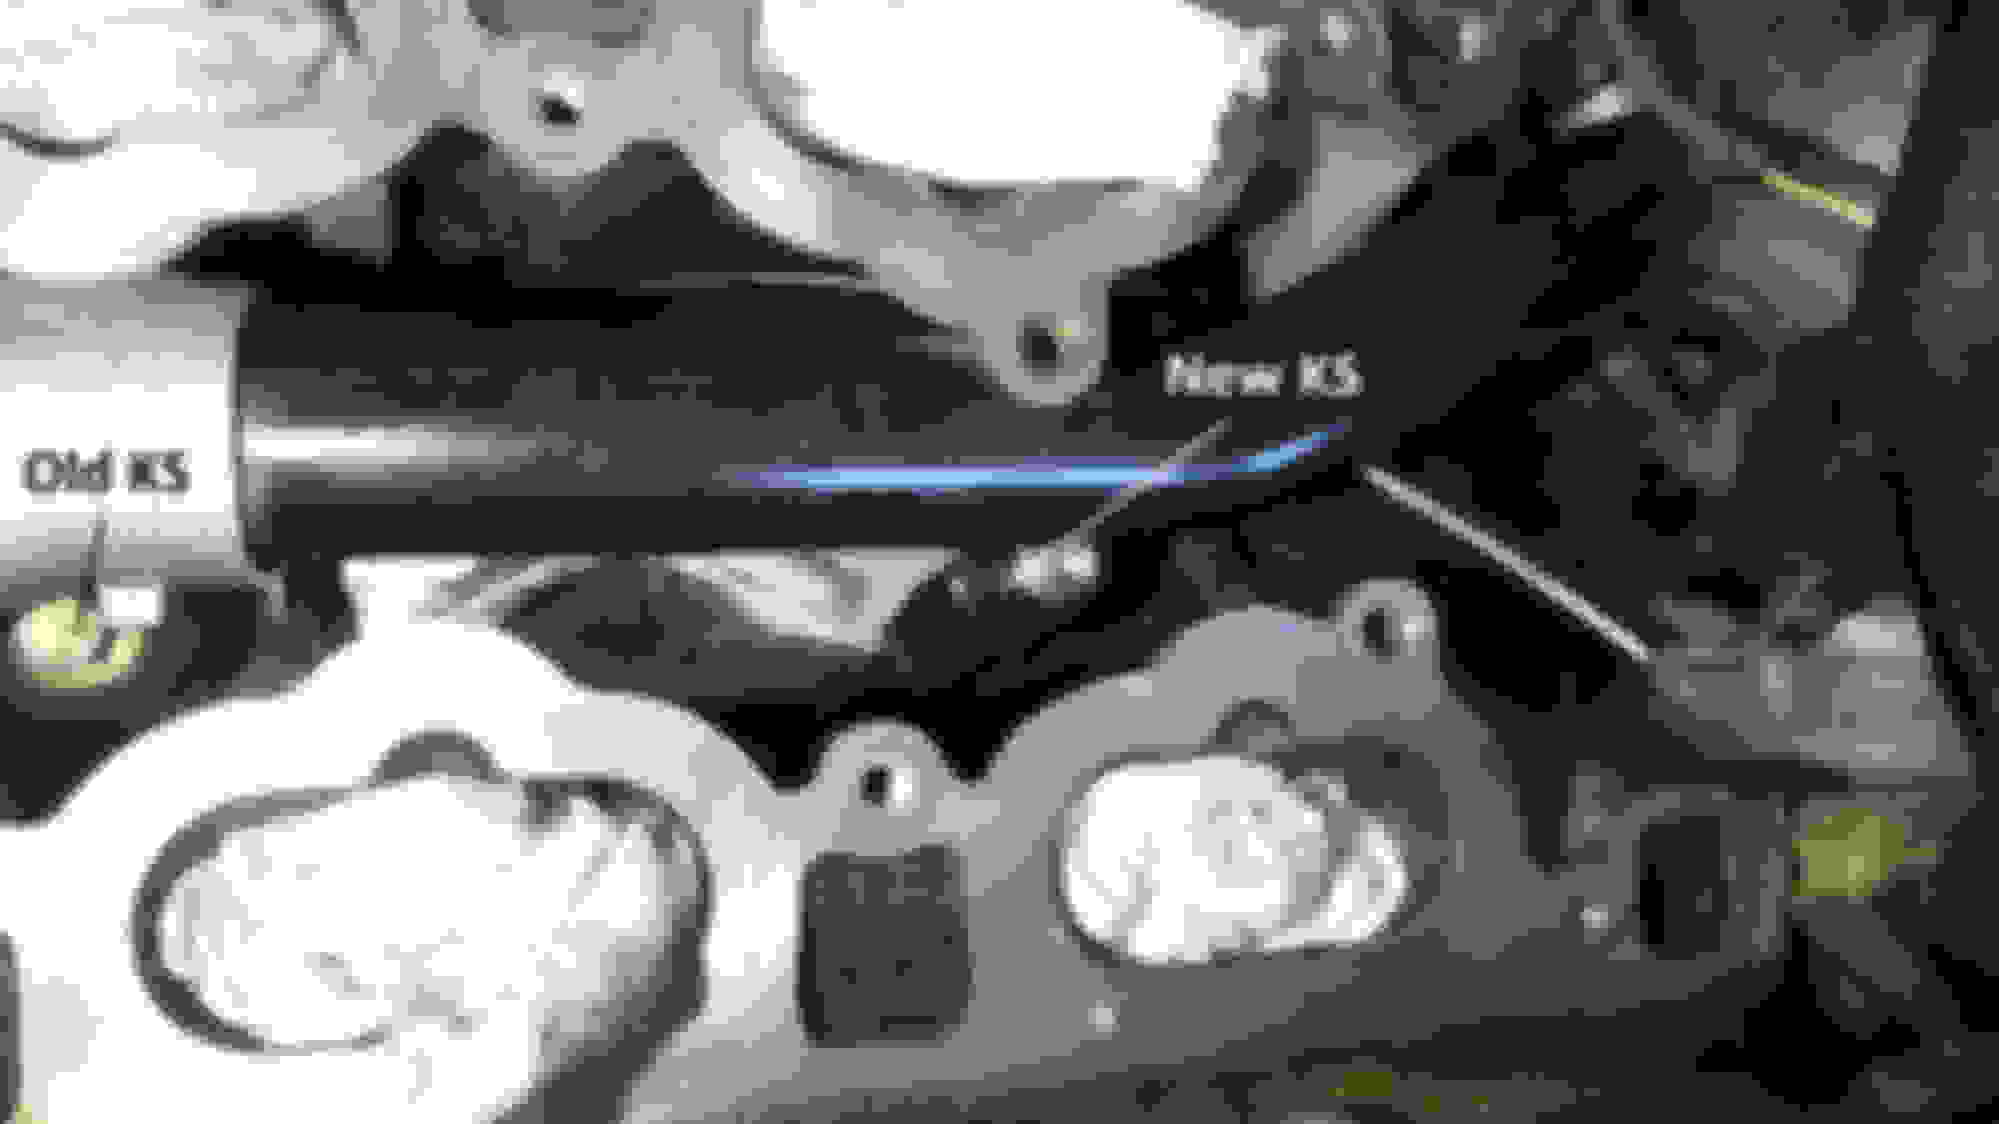
I didn't want to drain the coolant and get into tearing apart that steel water line from the water pump to the engine, so I left the old knock sensor in place and cut the harness off. Then I installed the new KS into a hole nearby and plugged the harness in. Learned that from a post here by a member in Paris.
How do you get the vacuum lines out of the inlet manifold there is a ring on the outer part of where they go into the manifold but short of putting heat on the vacuum lines and chancing ruining the vacuum lines I cannot get them free also I don't care to put heat on anything connected to a fuel source, I read elsewhere to push the retainer in to release them is there a special tool I tried a pointed probe on the metal rings but they dont go in when pressed on.
The brake booster line from booster where it enters the manifold, you press DOWN on the small outer ring into the manifold to then lift up and out the booster line.
Thanks dell Gailey, I appreciate your help thing is I had tried that by pressing the metal ring down with a pointed probe but it didn't budge is there a special tool to press the metal ring down with I will just keep on trying I dont want to buy another brake servo vacuum line by cutting it of.
Great write up only problem I had was removing the vacuum lines Dell Gailey told me to press the outer ring down and pull up I tried the outer ring it wouldn't move what I was pressing on and banging on was the outer ring that looks like its copper I don't know why but I tried the black ring and the vacuum lines popped right out.Thanks for putting me on the right track Dell Gailey.
Thanks for the right up it made my job alot easier getting it apart I'll repost when finished hopefully my car will run properly then.
Last edited by charlenej; 04-27-2018 at 08:25 PM.
Reason: added to my post
My post #49 that says pay heed to the #8 post in link was to show/tell you (if read), NOT to press on the metal ring but the interior ring to release the hose.
I installed the new KS into a hole nearby and plugged the harness in. Learned that from a post here by a member in Paris.
Patterson: Thanks for sharing this picture of a very clever work-around. For the benefit of others...� securing the knock sensor in the new location requires a new M6 bolt, as the existing bolt is too short. Several bolts I tried didn't work - either too long, or the head too wide to clear the steel pipe. The size that worked best was an M6 - 1.0 X 30mm Allen bolt. The Allen head is narrower than a hex head and doesn't require space for a socket over a hex head. It also helped to use an Allen wrench with ball end to work at a slight angle from the steel pipe while tightening it down, like these from Harbor Freight: https://www.harborfreight.com/13-pie...set-96416.html
Ha ha, yes sir! Finding that work-around was a big relief. I work in an engineering environment, so, have access to all kinds of fasteners. I don't recall the length, but yes, I used an M6 SHCS.
I'm due for a trip to Harbor Freight, need a good metric and ASE hex key set(s). It's so retarded, I have a box of random hex keys that I dig thru every time I need one, Lol. Also, need some socket extensions, but make sure to get the ones that are knurled for grip.
Hi all, Just in case this saves anyone some time and effort.
A few days ago my X type V6 Petrol (2004) went into limp mode showing a P0333 Knock Sensor 2 Circuit High Input (Bank 2). On inspection I noticed discoloured water marks on the right hand side of the engine including the area around the connector for the Knock Sensor. The water pump was leaking and spraying water. I changed the water pump, reset the fault codes and while its early days is seems to be ok and it looks like the Knock Sensor plug had shorted out.
I just saw a video on removing the pipe. He used a box wrench that could bend 90 degree, and it slipped on. So you could cut off an old 10mm wrench and weld it 90 degrees or buy one with the hinge. that way you don't have to bend anything. I"m thinking about replacing the plugs and coils and seeing if that settles it. Then if not, no big deal to pull the plenum again and remove the body. huh hum.
cool, we just had a freeze and a leak at the water pump, and the sensor coded. She hit a deer, and it still had a leak, and I fixed the leak, but was testing to see if more leaks, that night a freeze, and it pushed the freeze plug from the water pump out a bit. So, I'm rebuilding all that. hopefully the sensor was sensing just that. after reading your post, I think I might be in luck we'll see. Thanks for posting. Did it continue to run okay?
I removed the water pipe but how the heck do I get it back on is it a screw on or a push?
If you notice on the flange end of the pipe there is a tab bent perpendicular to the pipe. I put a clamp on that and on the pump pody. You have to get the angle right, and you tighten it in just a bit until the hole lines up so you can screw it to the pump body. Mine was not lined up until I figured out how to push the pipe in with some force. It didn't take much, so I was careful not to over force it, which was unecessary.
I still don’t understand! When I try to put the new one on it does not want to go on but when I put the old one on it fits perfect. Can you explain it to me a little more in depth maybe refer to a linked video if you have one. I’m still pretty new at working on this car so pretend your explaining it to a fifth grader lol.
I still don�t understand! When I try to put the new one on it does not want to go on but when I put the old one on it fits perfect. Can you explain it to me a little more in depth maybe refer to a linked video if you have one. I�m still pretty new at working on this car so pretend your explaining it to a fifth grader lol.
Take a few pics or video to show why it will not go on. I know that the o-ring was hard to slide past the rim, but I put soap or oil on it. Also, you have to clean the inside of the pipe with a small wire brush and maybe some fine sand paper to knock off corrosion if necessary. I need to see the obstacle before I can give you an answer.

 01-23-2016, 01:47 PM