
HLR - The true art of Headlight Lens Restoral by Innovative Detailing

Thread Starter
|
Senior Member
Joined: Sep 2009
Posts: 573
Likes: 86
From: Orange County, California. USA
I wanted to share this Headlight Lens Restoral I did with all you JaguarForums freeway runners out there.....There is nothing worse than all the gravel and asphalt that is loose and flying up on our local roads worldwide resulting in chipped, nicked and gauged polycarbonate headlights and foglights...
As we all know polycarbonate headlight lenses have many advantages but they also have a major dissadvantage, failure. Oxidation and discoloration is caused by having your headlights on or being exposed to the heat of the day. This ultimately causes the pores to open allowing debris from the road to get in and bond to the lens. Debris, together with a combination of environmental factors such as the sun (UV rays), car exhaust, acid rain, dew, fog and harsh chemicals used to wash you car can cause the plastic headlight lenses to become oxidized.
This complete headlight and fog light donor set came from a client of mine "CrazyFrank" whose 2007 C6 got peppered on our local SoCal 57 freeway.....The damage was so extensive it exceeded over $10,000 for the claim which included the replacement of all lights
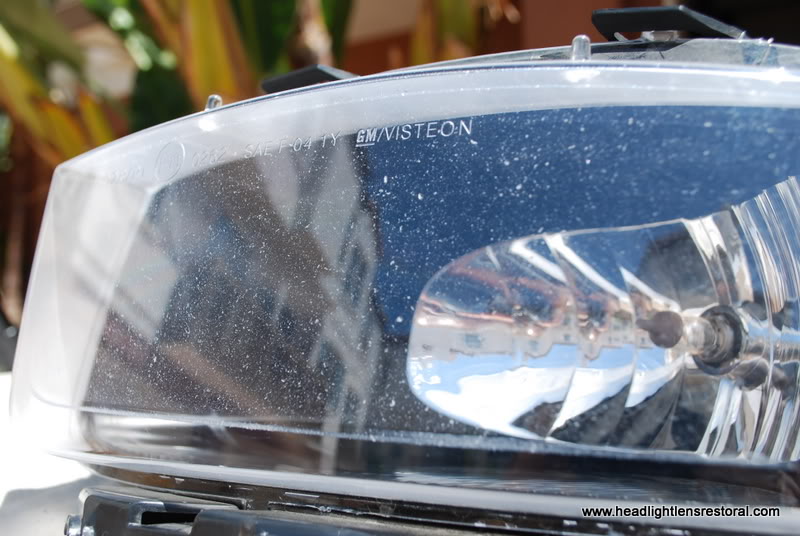
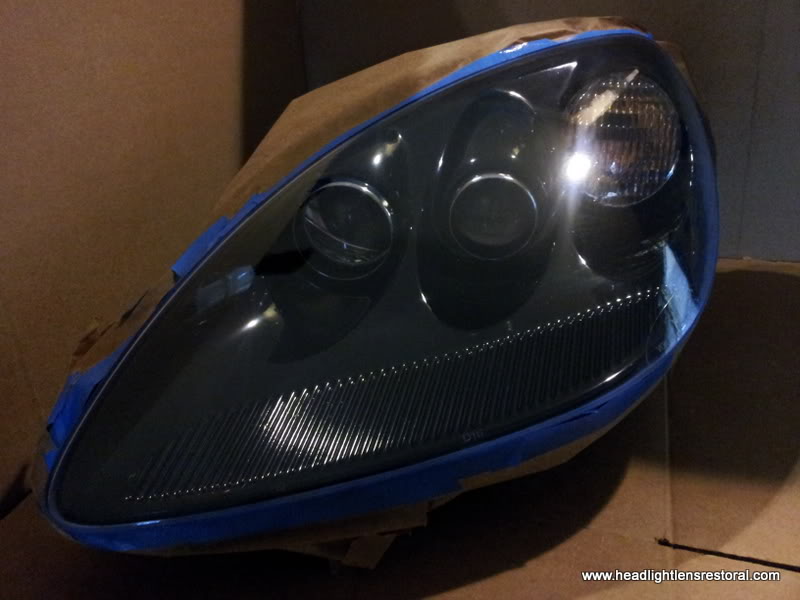
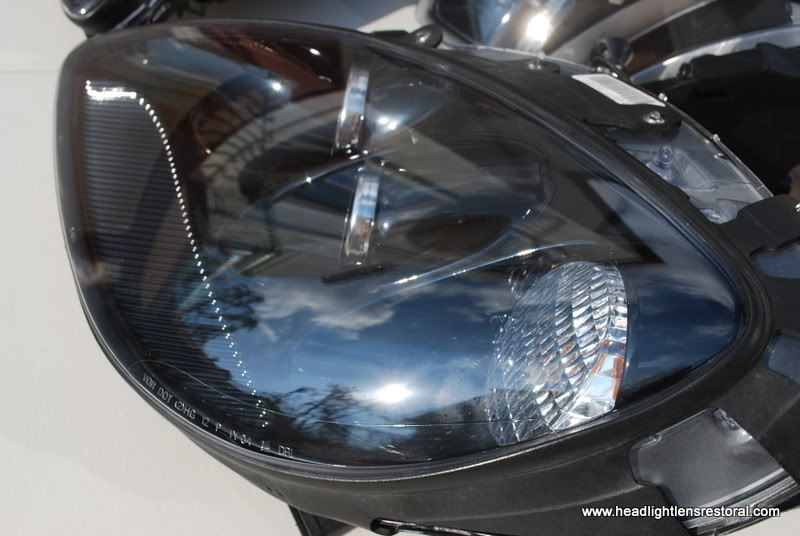
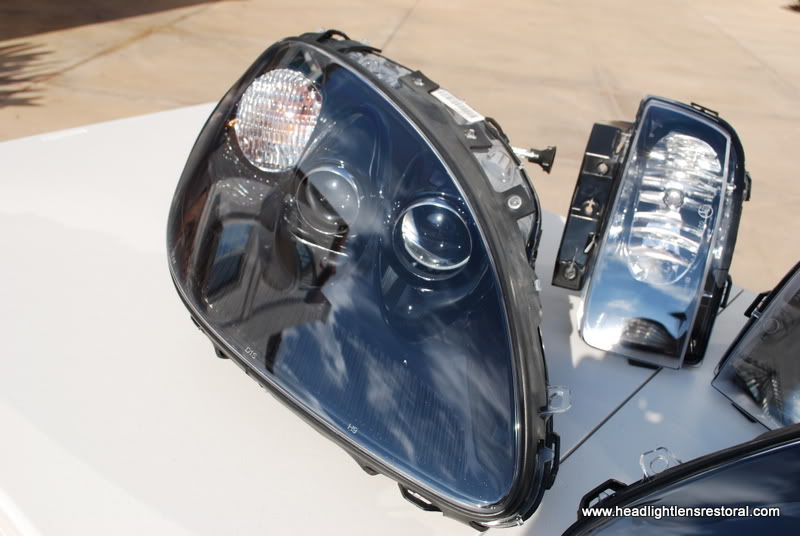
Take a look for yourself, they were tore up and blasted.....
Before lens restoral � Driving lights
Before Lens restoral - Fog light

Up and close shows all the exstensive pits, chips and nicks
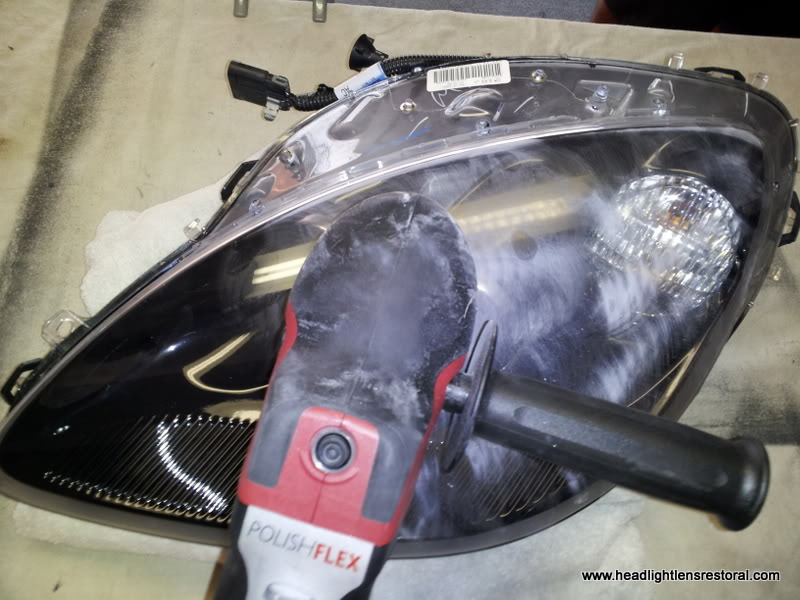
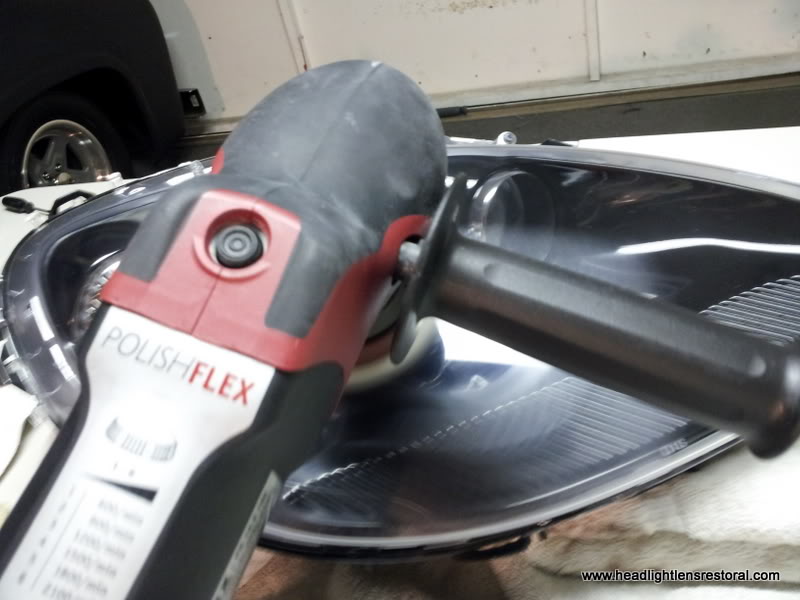
After inspecting and wiping down the lens my next step is to start resurfacing and removing the surface defects. Since the UV coating on these lenses are tough as nails my initial pass was using a 320g disc on my Flex rotary. This is not recommended for a novice as you could easily ruin a set of lenses......these btw retail for over $2,000 for the HID setup
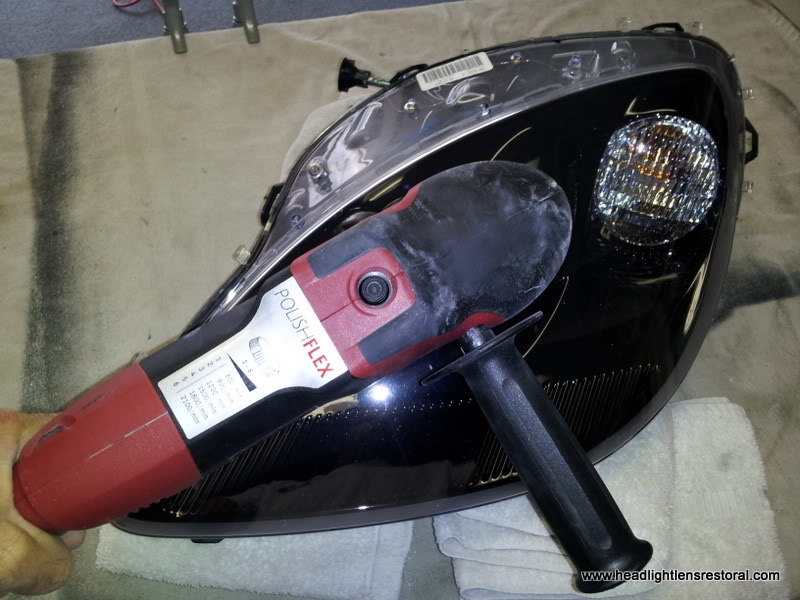
And I mean tough as nails, had this been automotive paint could you image the damage that my Flex rotary would of caused @ 2000rpm?
Barely cut into the UV coating on these C6 lenses.....
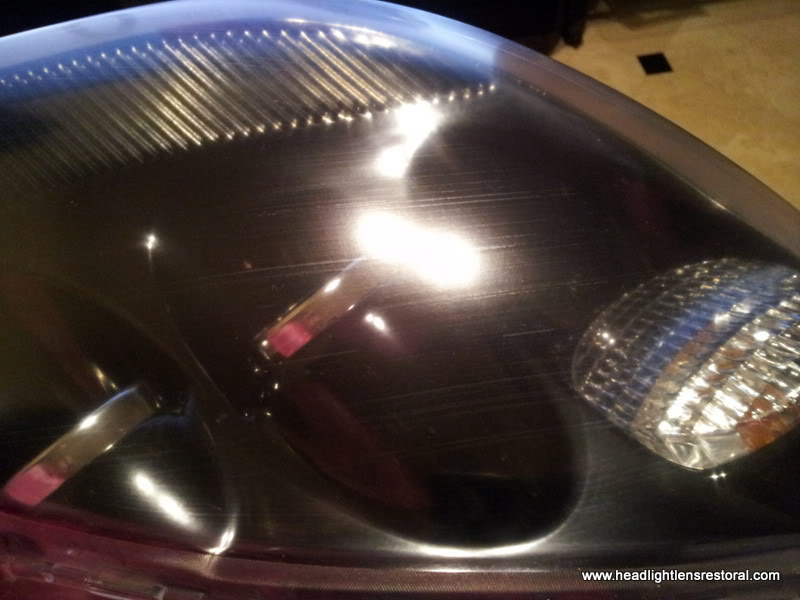
Some close ups of the main lenses that I am resurfacing and the chips and nicks that have scored and damaged them

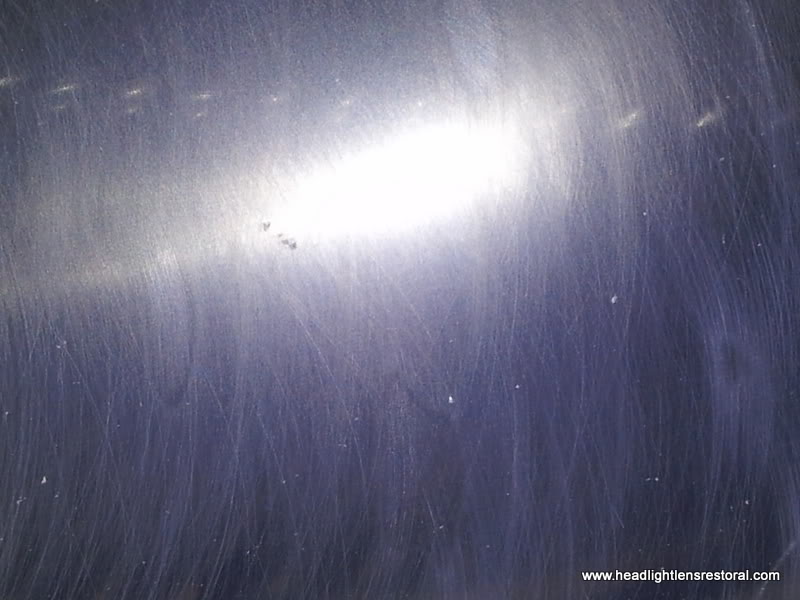
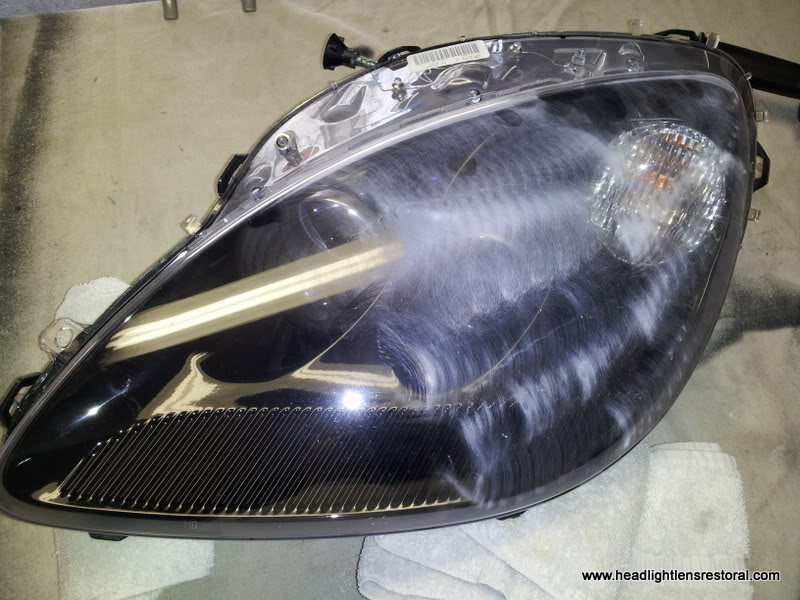
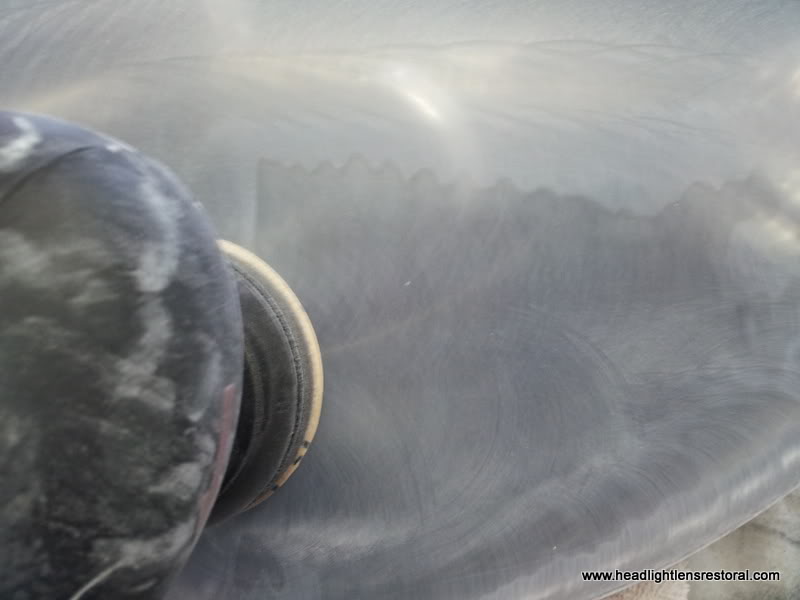
Just begining to break thru the factory OEM UV coating as seen in the photo at the 4 and 5 o'clock position
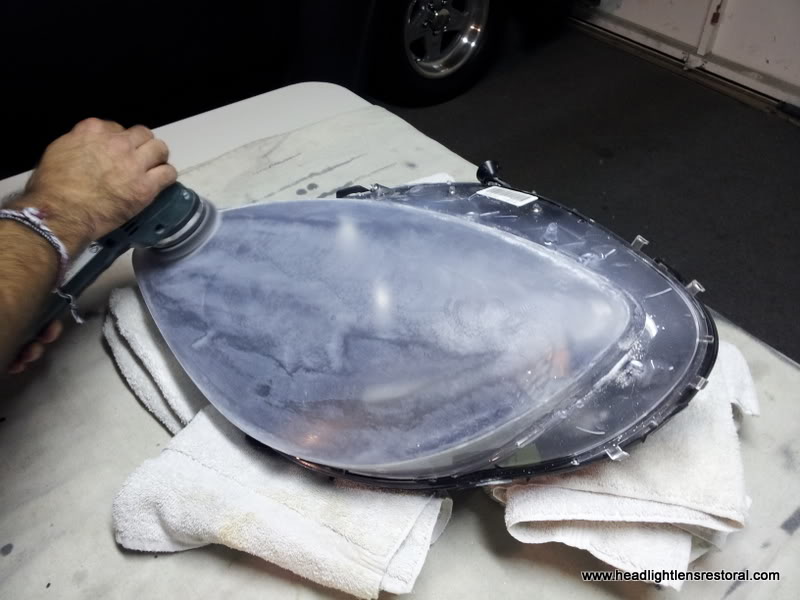
OEM UV coating is opening up and at the same time I am leveling out the gravel damage. Always use cool resurfacing techniques with the rotary or you could distort, warp or burn the lens..
I continue leveling out the defects with the Flex rotary and at the same time I am removing the UV coating.
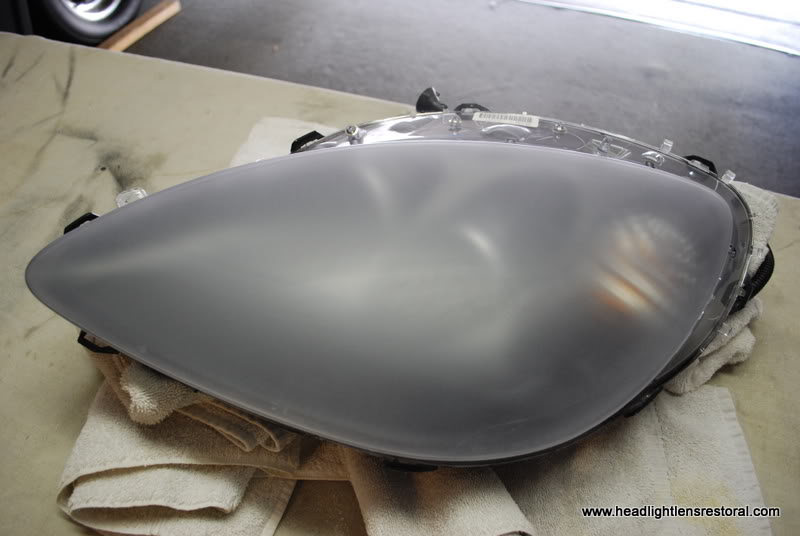
Inspect, inspect and more inspection insures a properly done HLR. At this stage gravel damage has been eliminated and UV coating removed...ready for the next step.
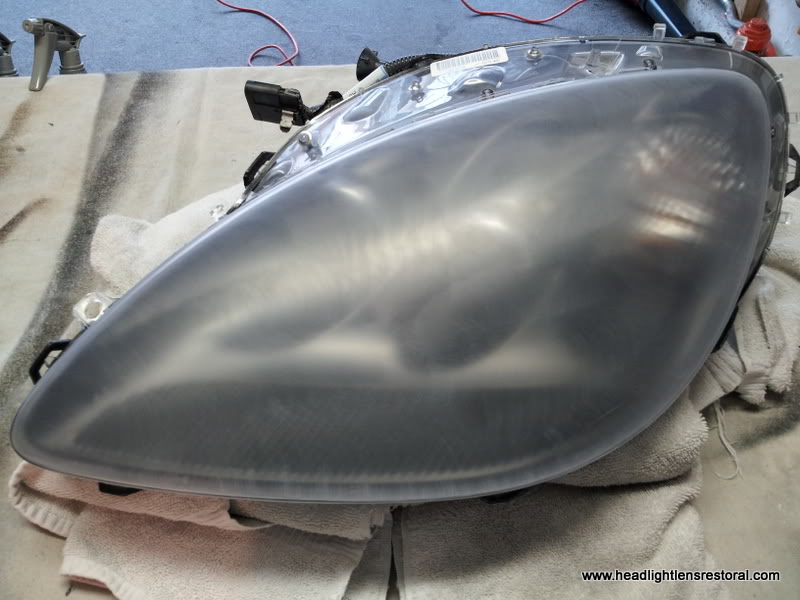
Working up to the next level of chasing pigtails and gaining clarity
And the next level
And the next level
And the next level
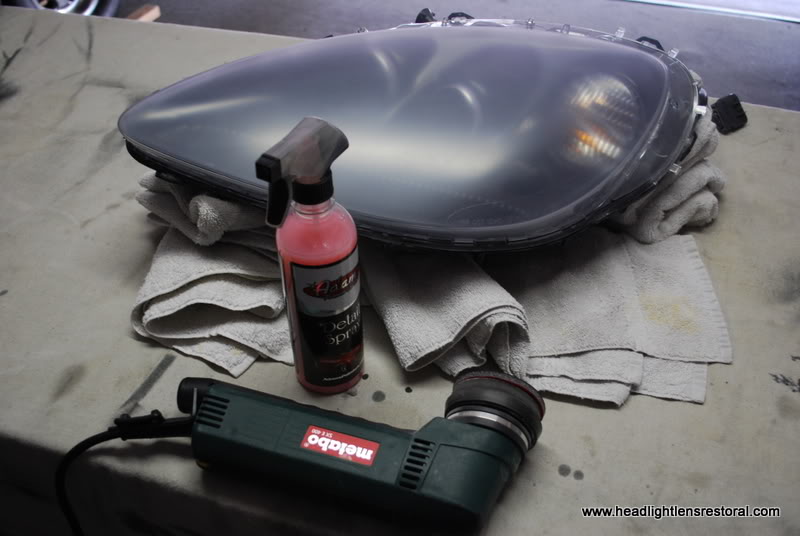
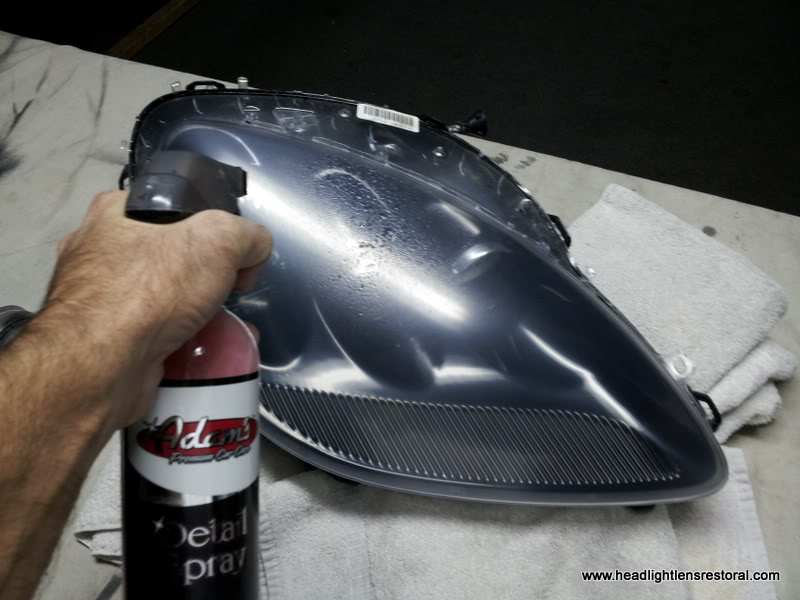
Here is where my favorite wetsanding lube of choice comes in, Adams Detail Spray...with this type of fine wetsanding I cant afford to create new scratches in the lens, and this product works awesome!
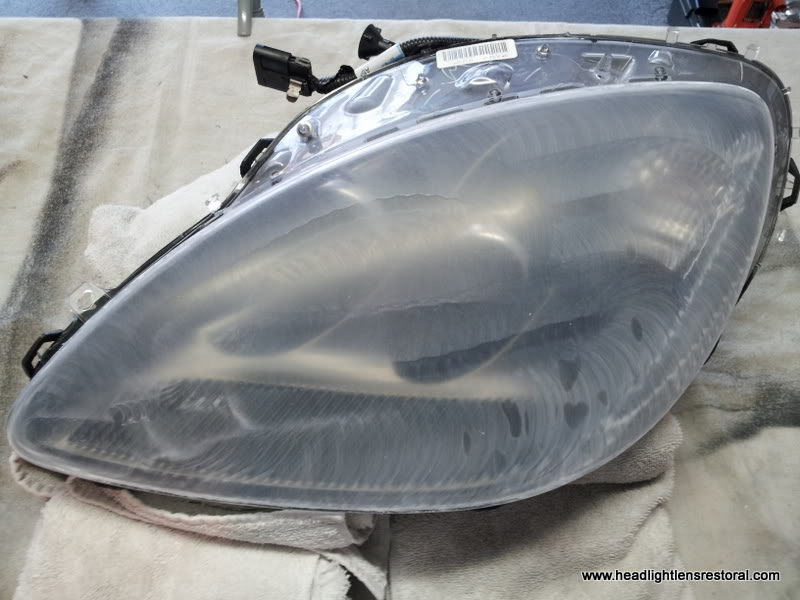
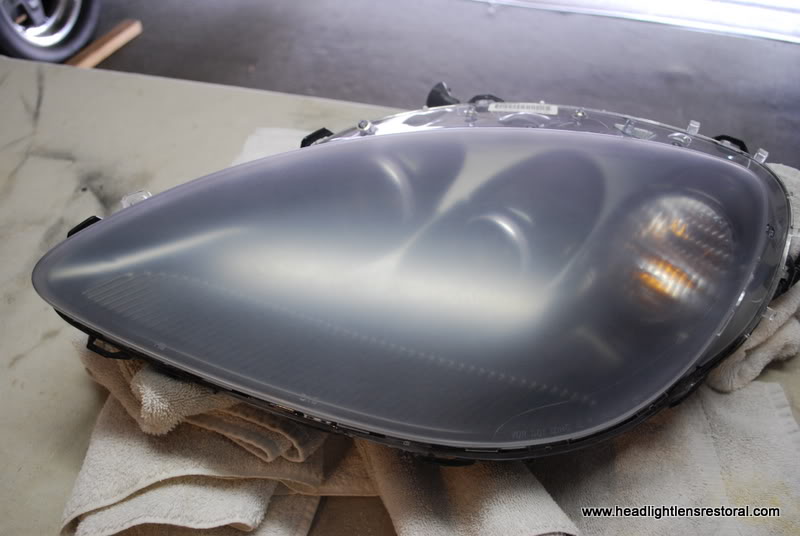
Next are 2 complete levels of micro wetsanding using Adams Detail Spray and the appropriate resurfacing discs..Just look at how the lens clarity is slowly being restored...
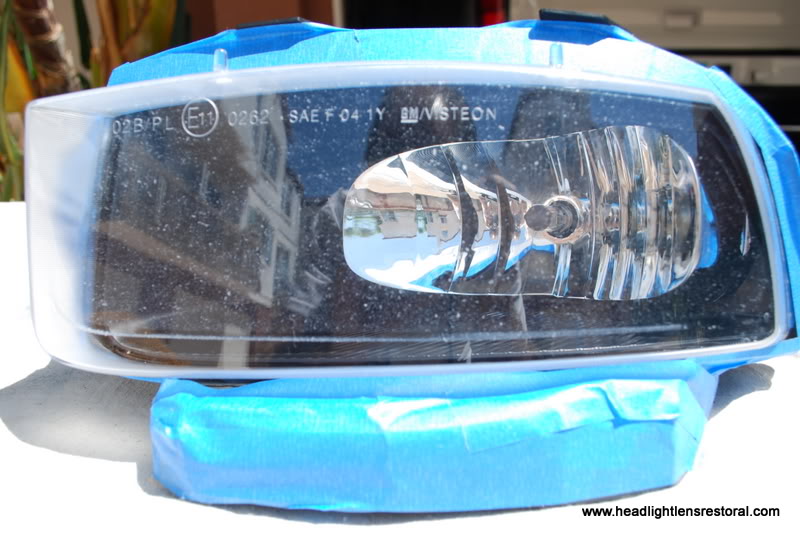
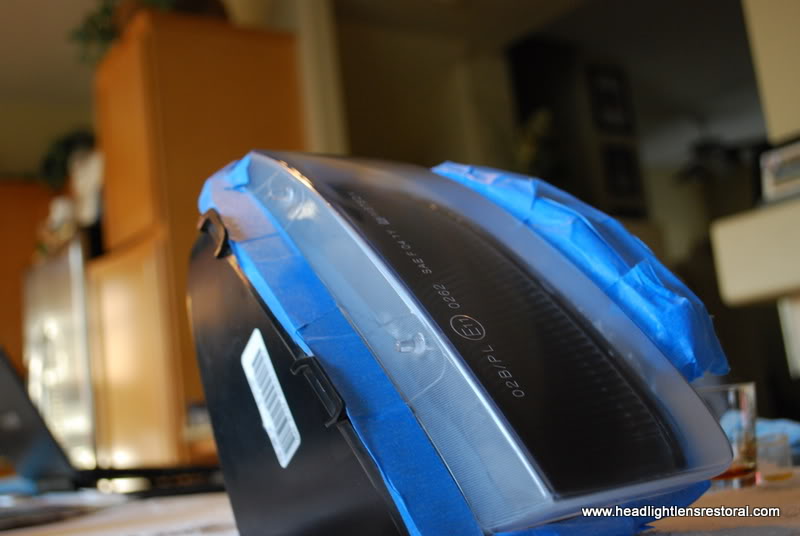
Foglights receive some of this lasik as well...here taped and ready for resurfacing...
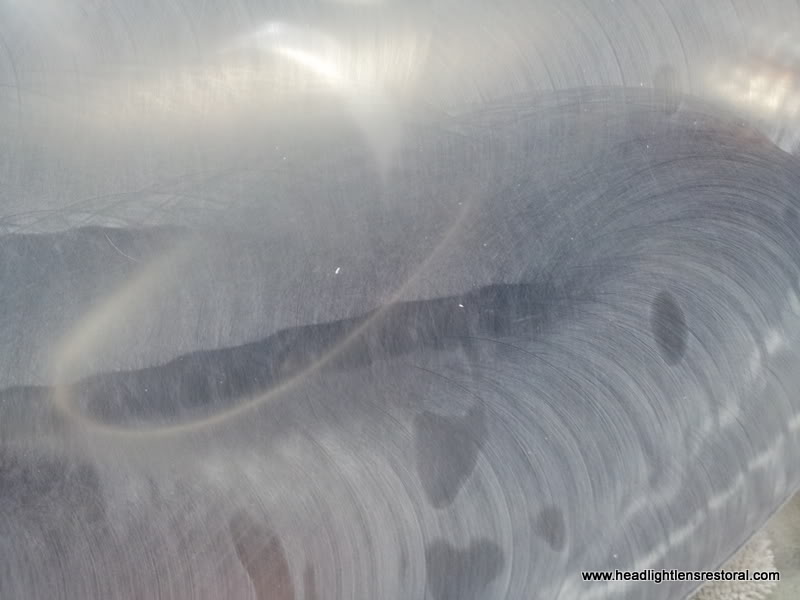
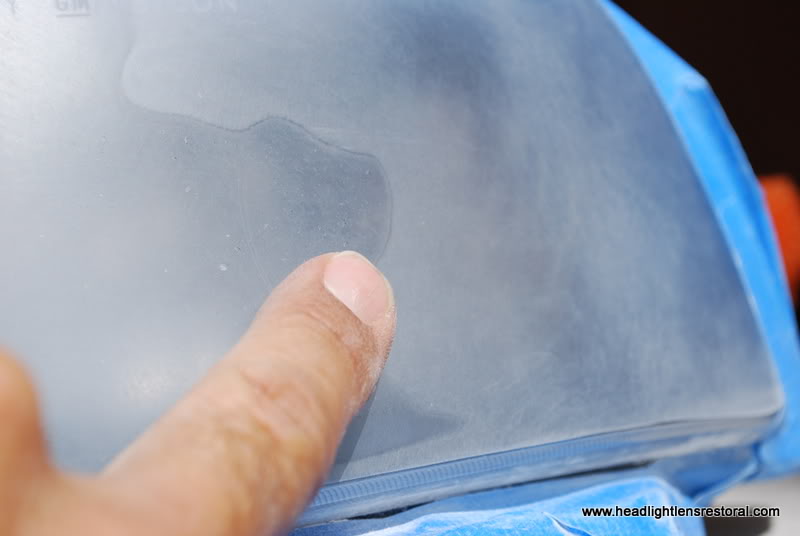
Clearly visible in this photo is the transition were the UV coating has been leveled ad partially removed.
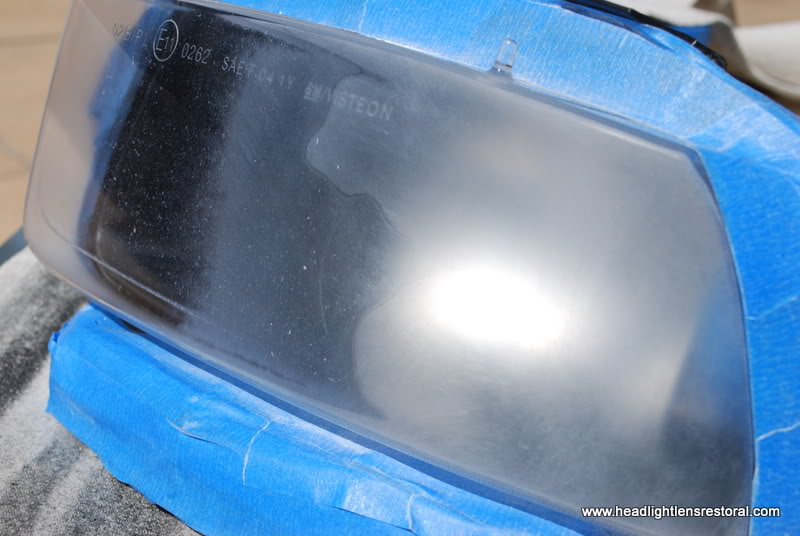
Close up of UV Coating that has been leveled off on the right.
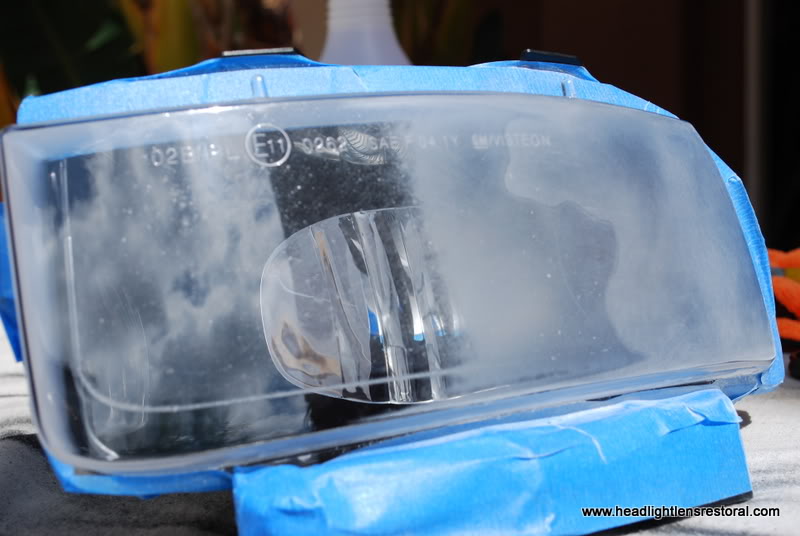
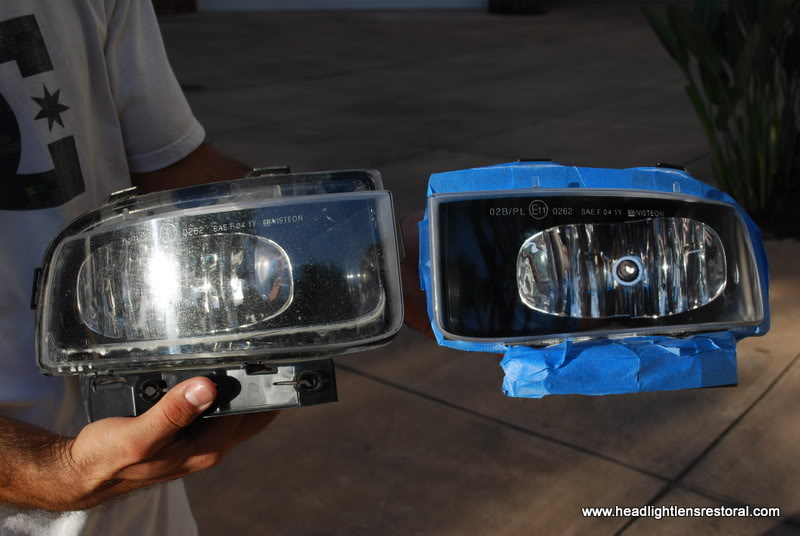
50/50 shot during resurfacing, chips and nicks still present on the left
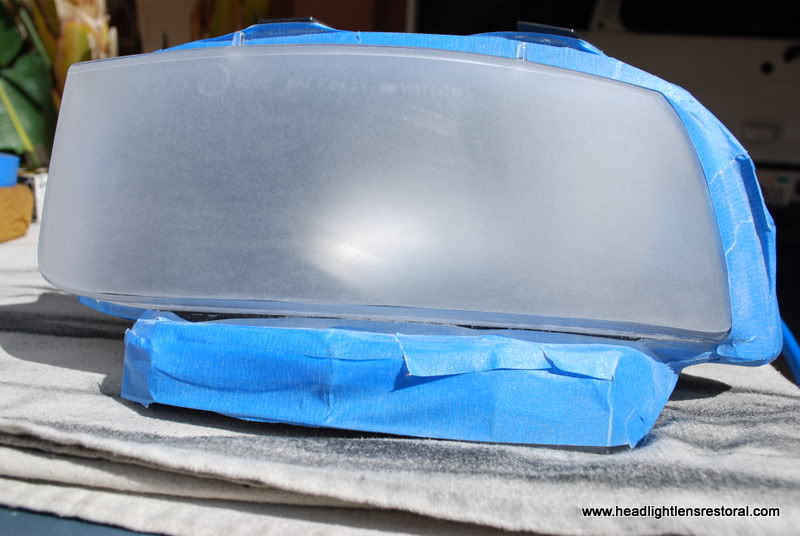
First step of resurfacing completed on the fogs
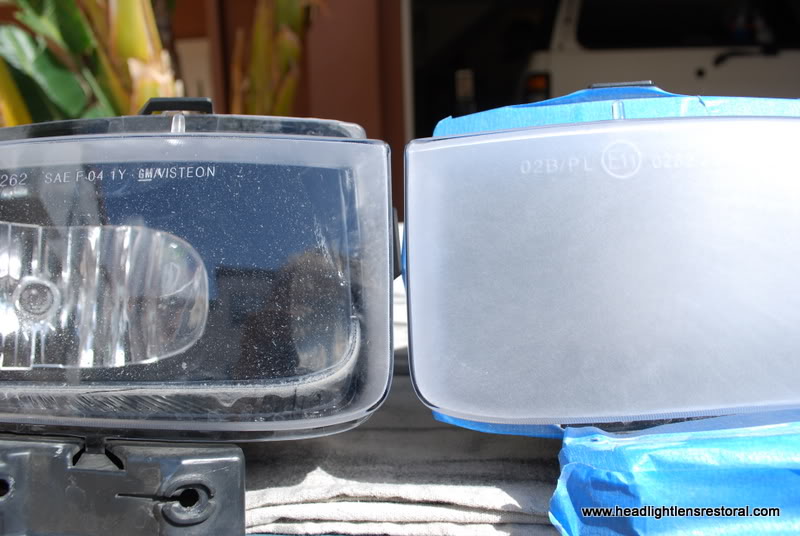
Comparison of damaged on the left and patient on the right
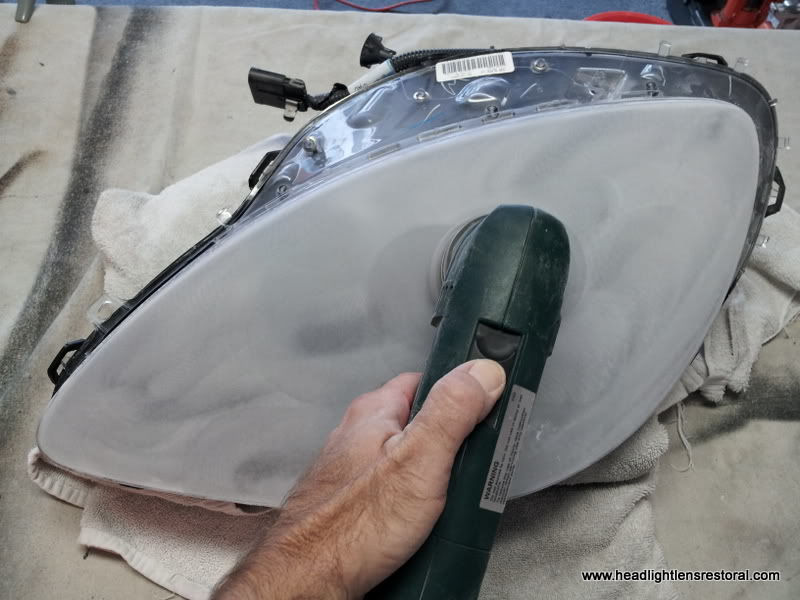
For those that have invested in pneumatic tools, this is where it pays off....Love my Blue Point 3" d/a
Next level up
Next level up
Next level up
Next level up
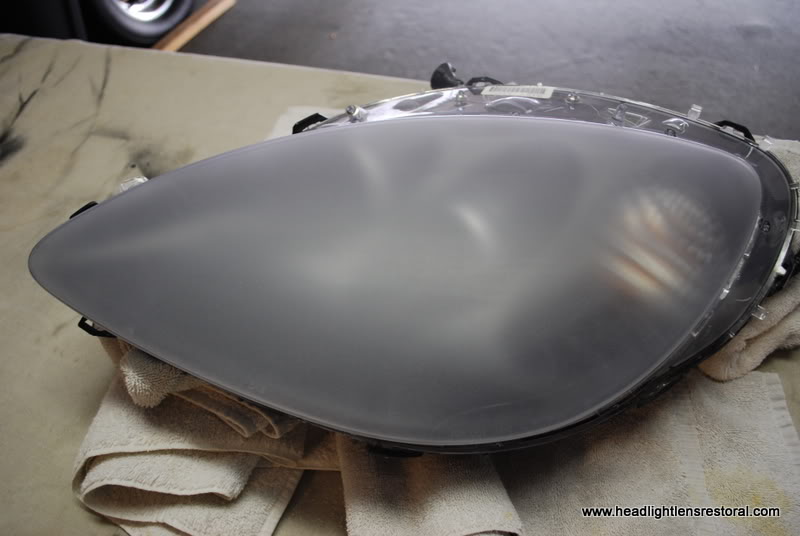
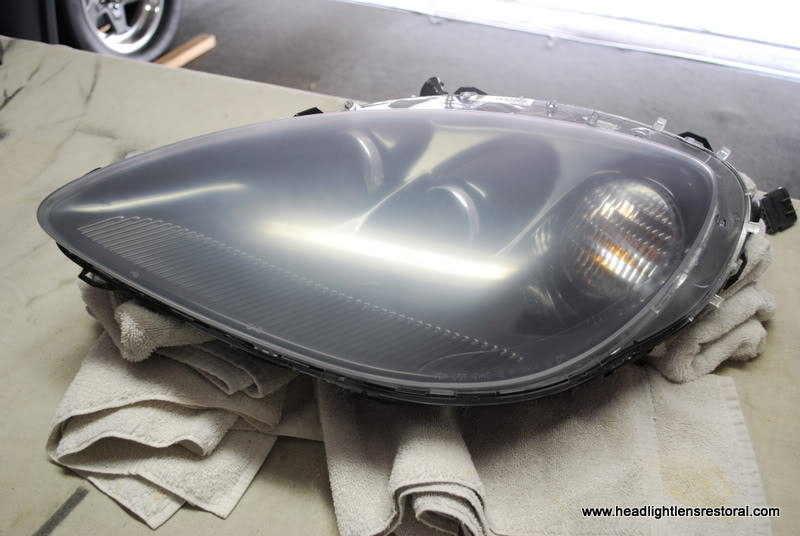
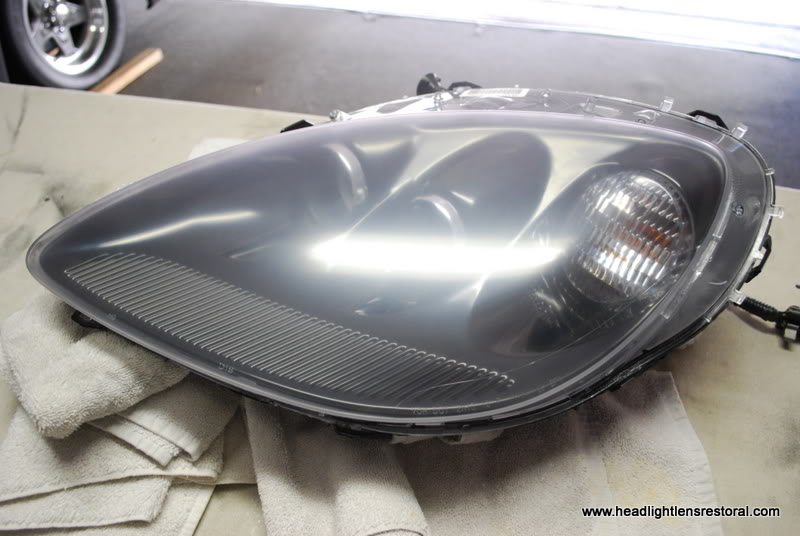
And my last resurfacing pass, clarity slowly coming back...
Untouched/Damaged on the left and resurfaced and leveled on the right
Time for a an ice cold beverage..... This was a collection off all the discs required in the first step to level out the nicks, chips and remove the OEM factory UV Coating....Wow!

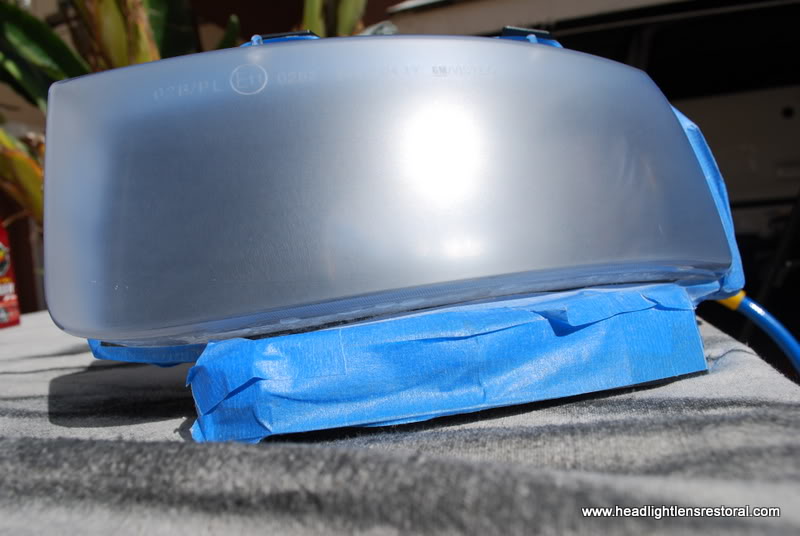
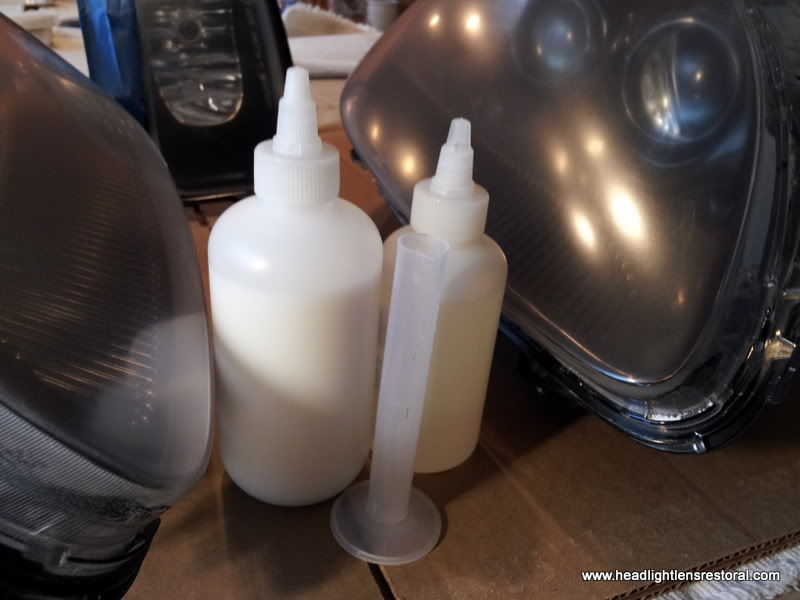
Now time to recoat with a UV coating, my first choice was a 2 part solvent based product. After a thorough inspection with my Brinkman and a wipe down with IPA, I was ready to go...
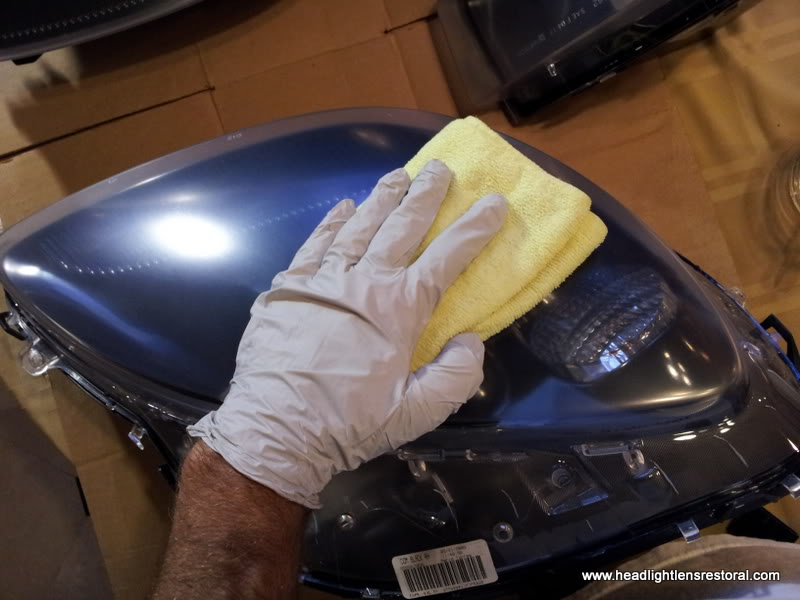
Using a lint free towel I applied the coating...
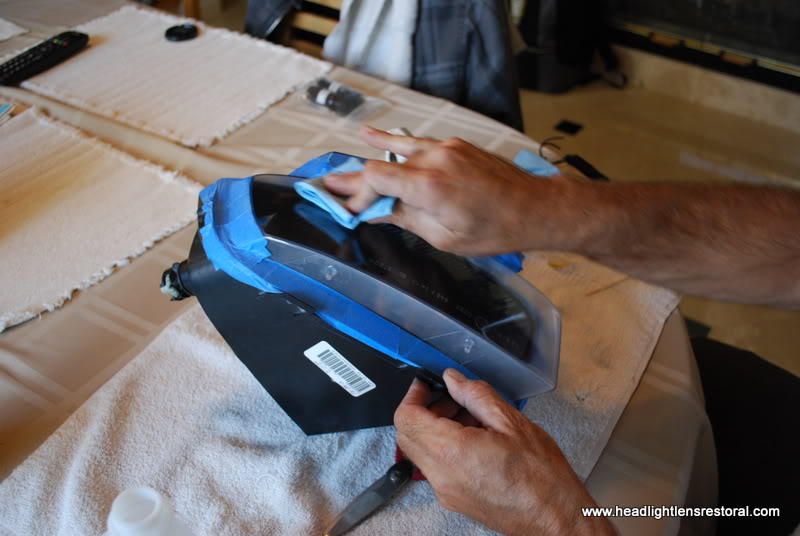
Wipe on coating results......product cured with heat

Cont.....
As we all know polycarbonate headlight lenses have many advantages but they also have a major dissadvantage, failure. Oxidation and discoloration is caused by having your headlights on or being exposed to the heat of the day. This ultimately causes the pores to open allowing debris from the road to get in and bond to the lens. Debris, together with a combination of environmental factors such as the sun (UV rays), car exhaust, acid rain, dew, fog and harsh chemicals used to wash you car can cause the plastic headlight lenses to become oxidized.
This complete headlight and fog light donor set came from a client of mine "CrazyFrank" whose 2007 C6 got peppered on our local SoCal 57 freeway.....The damage was so extensive it exceeded over $10,000 for the claim which included the replacement of all lights
Take a look for yourself, they were tore up and blasted.....
Before lens restoral � Driving lights
Before Lens restoral - Fog light
Up and close shows all the exstensive pits, chips and nicks
After inspecting and wiping down the lens my next step is to start resurfacing and removing the surface defects. Since the UV coating on these lenses are tough as nails my initial pass was using a 320g disc on my Flex rotary. This is not recommended for a novice as you could easily ruin a set of lenses......these btw retail for over $2,000 for the HID setup
And I mean tough as nails, had this been automotive paint could you image the damage that my Flex rotary would of caused @ 2000rpm?
Barely cut into the UV coating on these C6 lenses.....
Some close ups of the main lenses that I am resurfacing and the chips and nicks that have scored and damaged them
Just begining to break thru the factory OEM UV coating as seen in the photo at the 4 and 5 o'clock position
OEM UV coating is opening up and at the same time I am leveling out the gravel damage. Always use cool resurfacing techniques with the rotary or you could distort, warp or burn the lens..
I continue leveling out the defects with the Flex rotary and at the same time I am removing the UV coating.
Inspect, inspect and more inspection insures a properly done HLR. At this stage gravel damage has been eliminated and UV coating removed...ready for the next step.
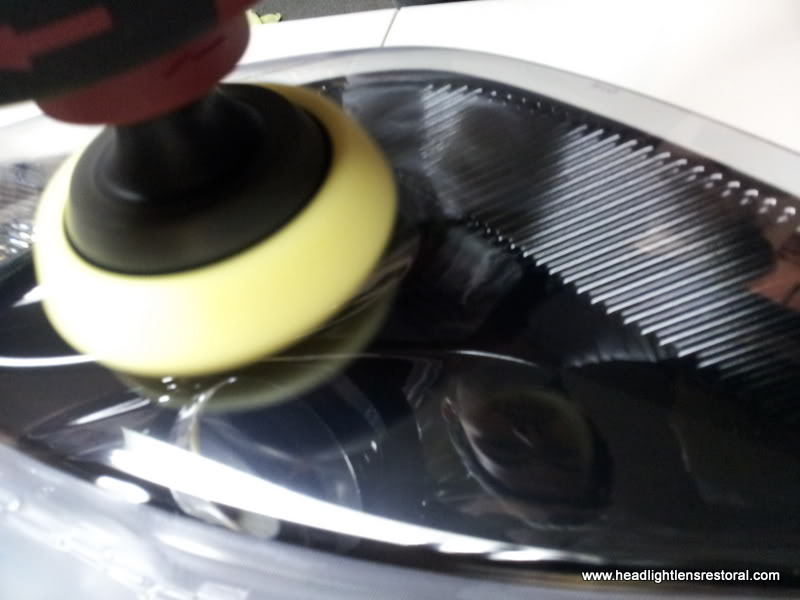
Working up to the next level of chasing pigtails and gaining clarity
And the next level
And the next level
And the next level
Here is where my favorite wetsanding lube of choice comes in, Adams Detail Spray...with this type of fine wetsanding I cant afford to create new scratches in the lens, and this product works awesome!
Next are 2 complete levels of micro wetsanding using Adams Detail Spray and the appropriate resurfacing discs..Just look at how the lens clarity is slowly being restored...
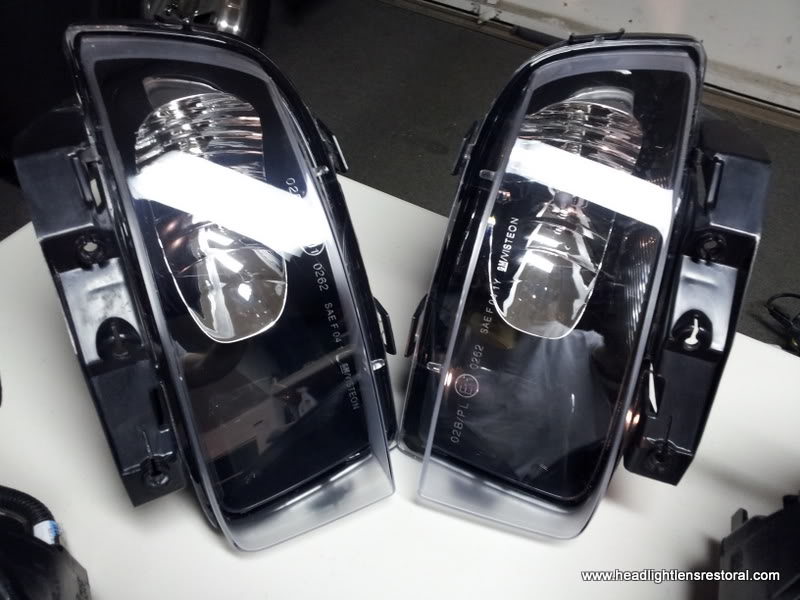
Foglights receive some of this lasik as well...here taped and ready for resurfacing...
Clearly visible in this photo is the transition were the UV coating has been leveled ad partially removed.
Close up of UV Coating that has been leveled off on the right.
50/50 shot during resurfacing, chips and nicks still present on the left
First step of resurfacing completed on the fogs
Comparison of damaged on the left and patient on the right
For those that have invested in pneumatic tools, this is where it pays off....Love my Blue Point 3" d/a
Next level up
Next level up
Next level up
Next level up
And my last resurfacing pass, clarity slowly coming back...
Untouched/Damaged on the left and resurfaced and leveled on the right
Time for a an ice cold beverage.....
This was a collection off all the discs required in the first step to level out the nicks, chips and remove the OEM factory UV Coating....Wow!Now time to recoat with a UV coating, my first choice was a 2 part solvent based product. After a thorough inspection with my Brinkman and a wipe down with IPA, I was ready to go...
Using a lint free towel I applied the coating...
Wipe on coating results......product cured with heat
Cont.....
Last edited by Innovative Detailing; Mar 2, 2012 at 01:41 AM.
Thread Starter
|
Senior Member
Joined: Sep 2009
Posts: 573
Likes: 86
From: Orange County, California. USA
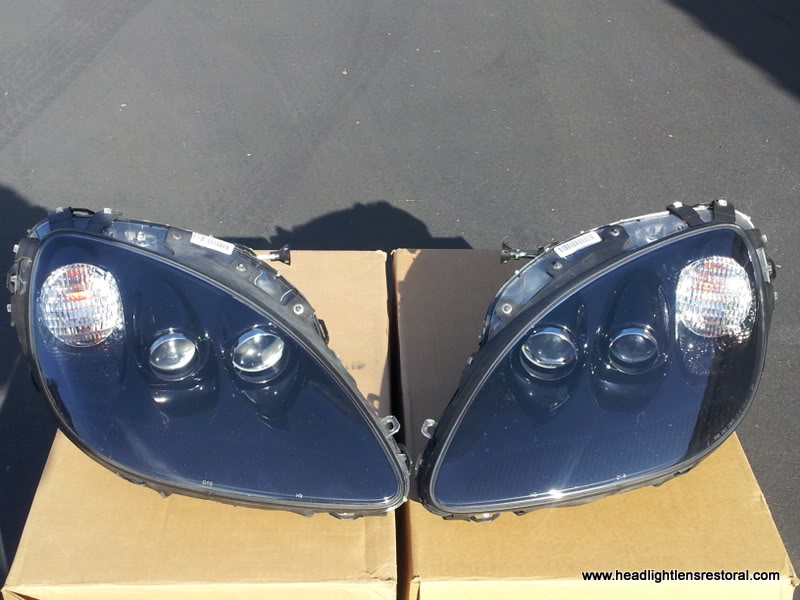
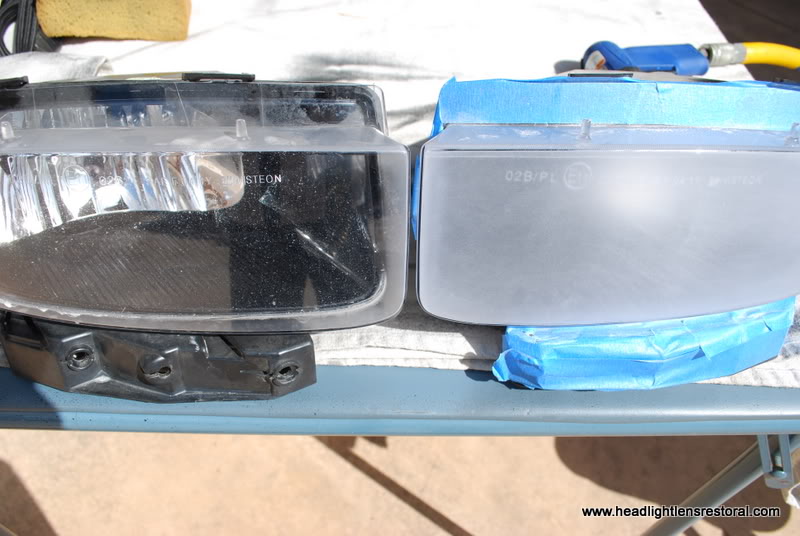
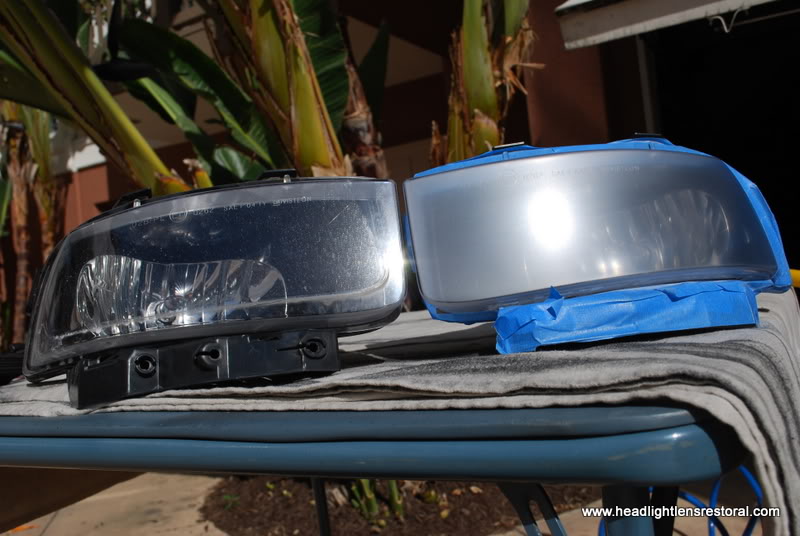
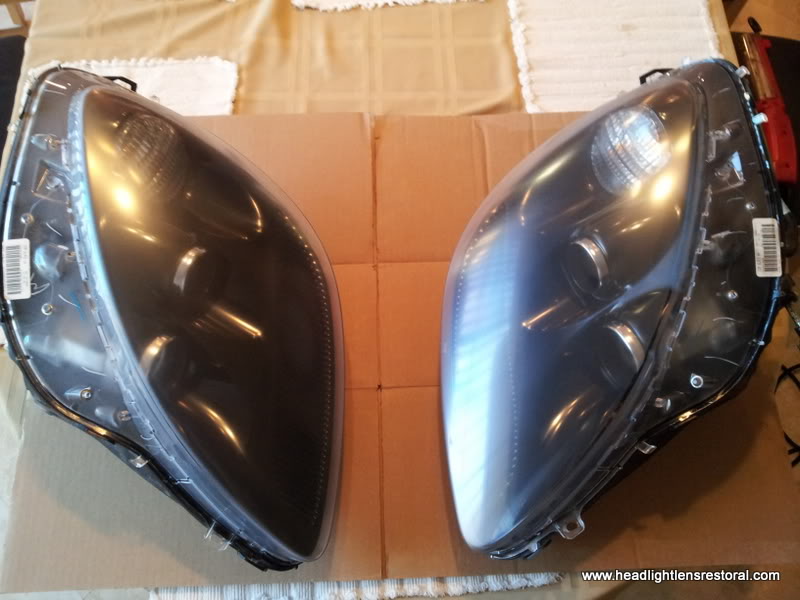
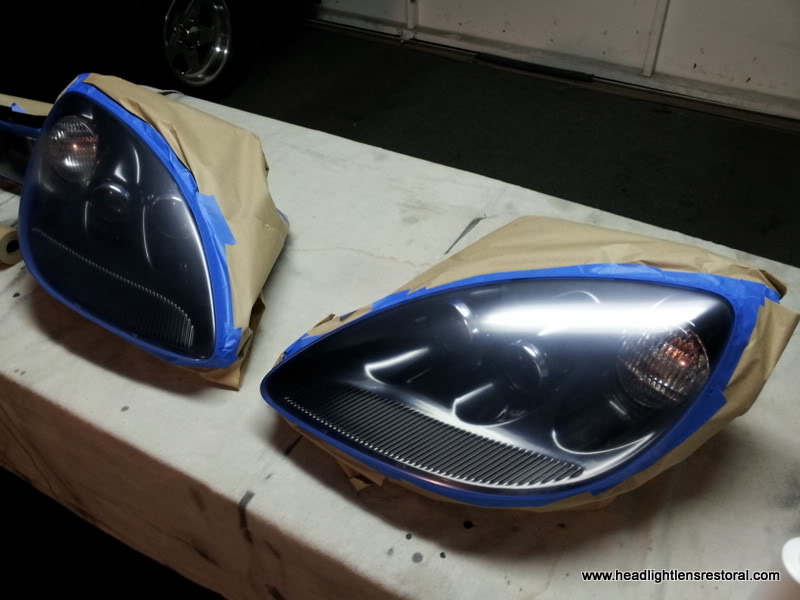
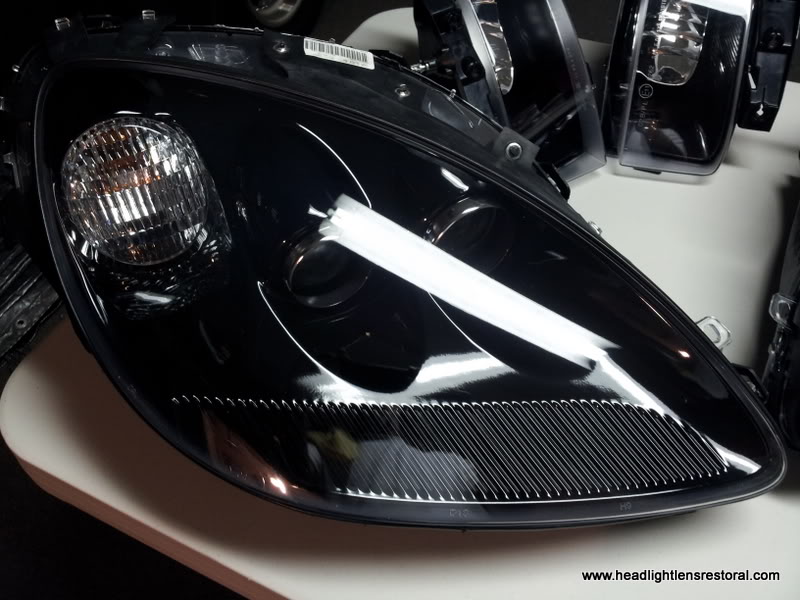
Side by side of both lenses, right side completed
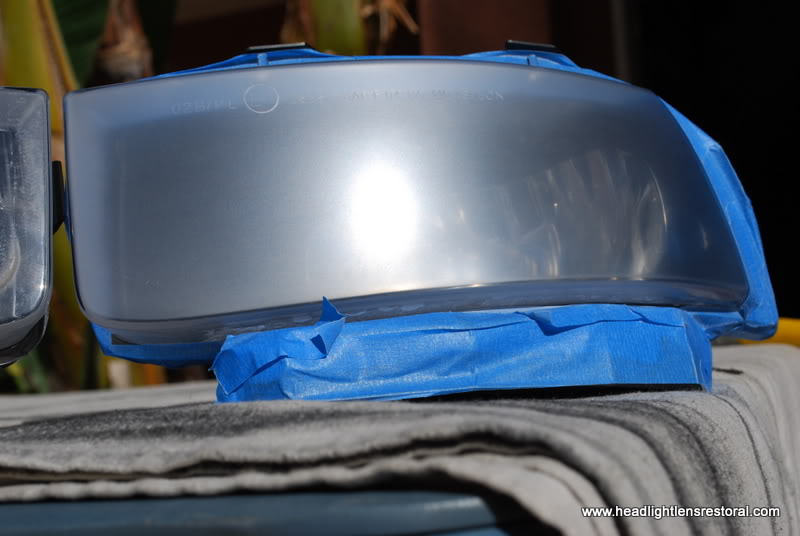
My next product of choice was to be a 2 part wipe on water based UV coating that air dries with cool air.
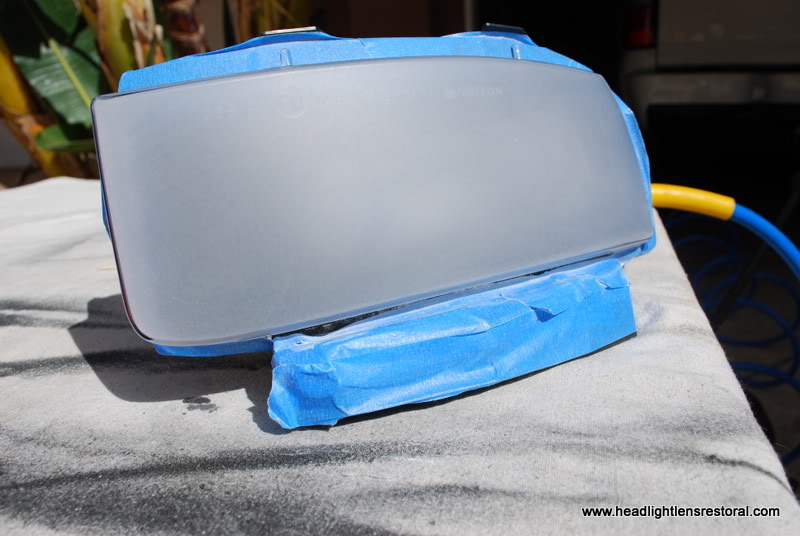
Lens wiped free of lint or dust with IPA
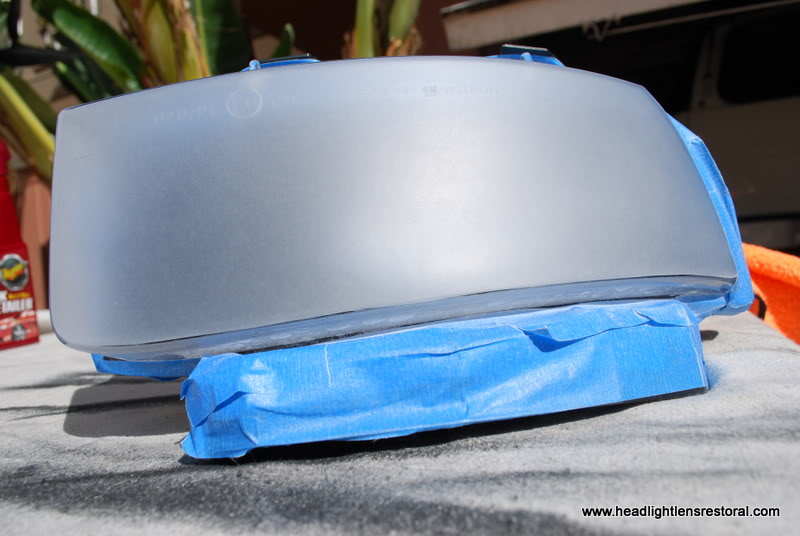
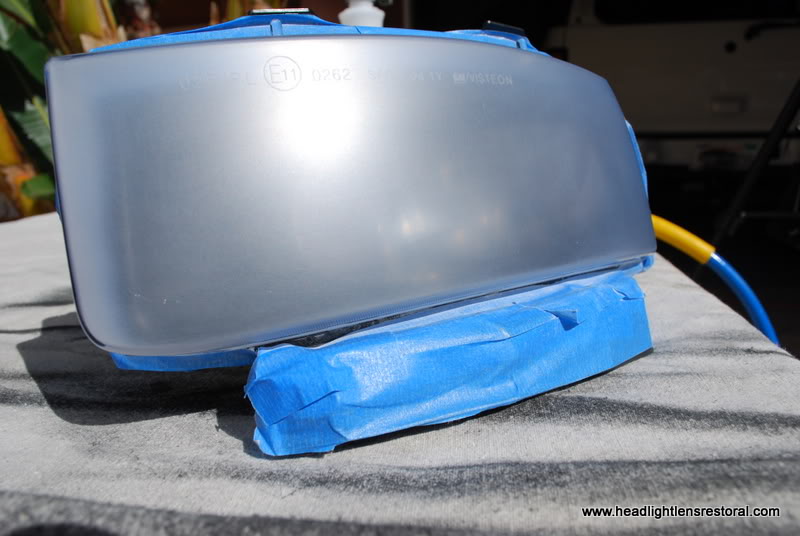
The results did nothing for me, streaky, lacked clarity and just dull!...

Close up..
Back to the drawing board......time to resurface all over again and remove the failed coating..

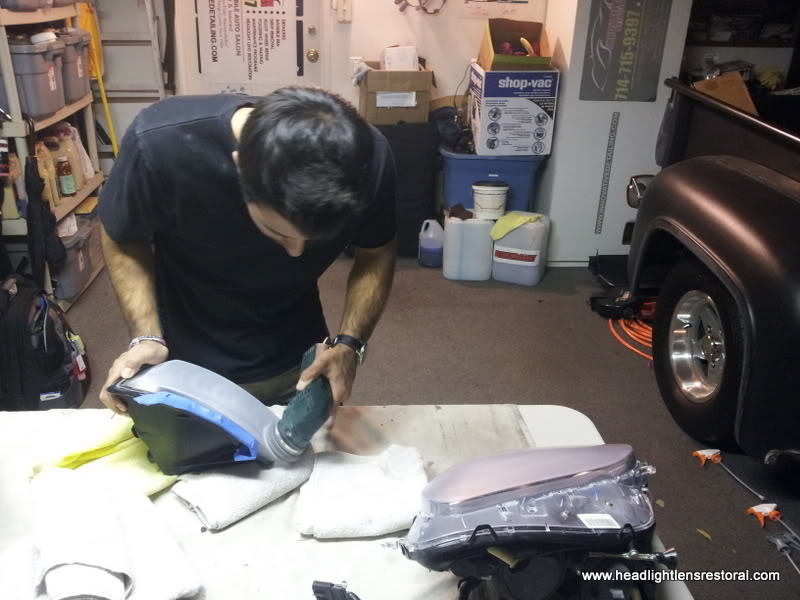
Thought I would get my son in on this one, its a great trade for him to learn....Our 53 F100 in the background (father and son) project.
So far neither wipe on coating surpased my high standards......
Prepped again and thoroughly masked of with tape...

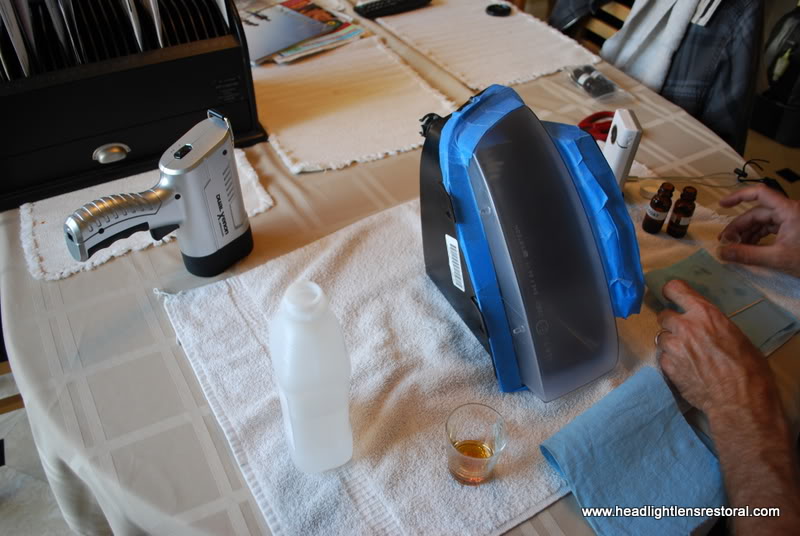
Next will be a spray on UV coating. I create a makeshift spray booth or at least a cubicle with sides to avoid any contaminants from landing on the fresh UV coating.
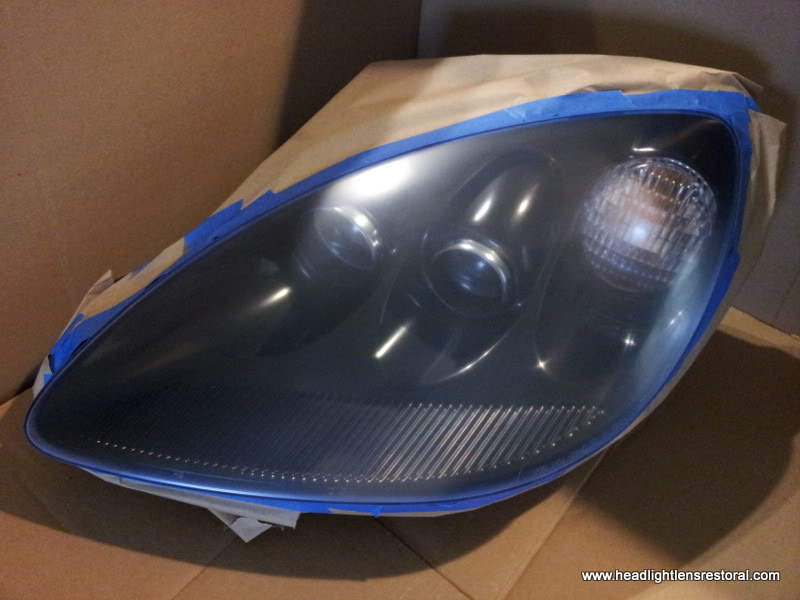
This UV coating goes on well and only requires one coat as it self levels. After a flash period of 5-10min, a UV lamp is used for curing. The problem I had was airborne contaminants, even though this was done in the house, lots of micro lint was floating and it was like a magnet and stuck to the coating...So it still didnt pass my totally flat OEM high gloss finish........time to remove this before it hardens, fortunatley I caught the lint on the lens before taking the lamp to it, again did not pass my QC.....
Last but not least I resorted to the fine art of polycarbonate lens polishing. The goal is to leave an absolute perfectly smooth finish with no RDS's, swirls, machine marks or cobwebbing in the plastic.
Since these lenses are so large in size they must be flawless, so this means no coatings.
Prepped and ready for the third time for some rotary polishing with my flex..

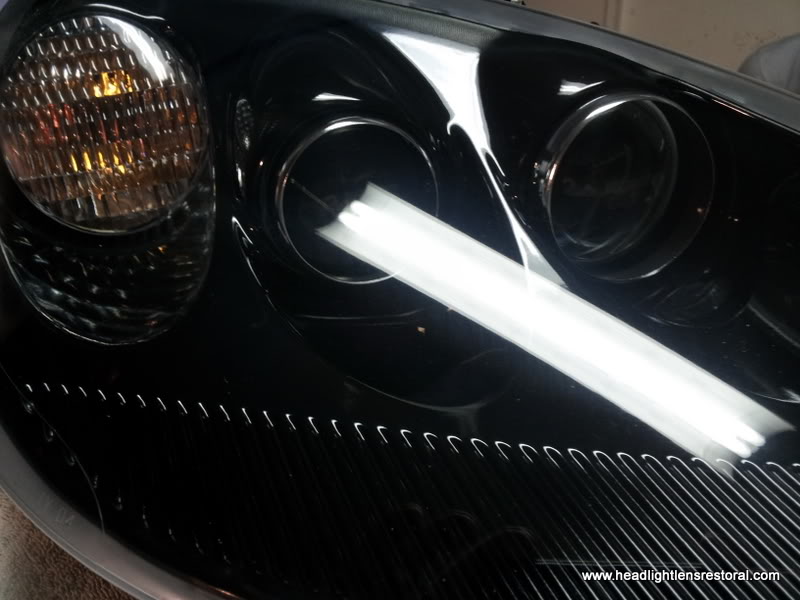
This clarity and shine was created only from sanding the polycarbonate lens back up to perfection. The detail in the light reflections shows it all....nice and clear.
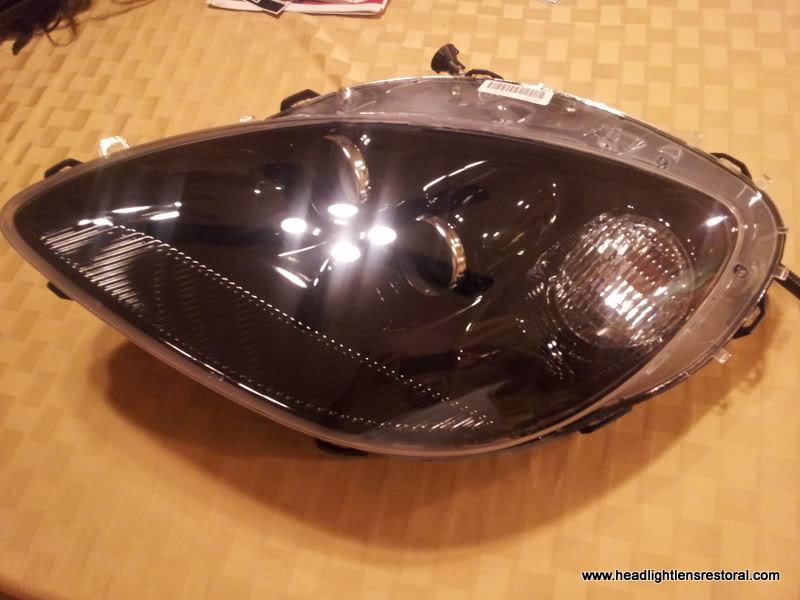
Now to leave these as clear as a CD case.....
Five more additional steps were involved here
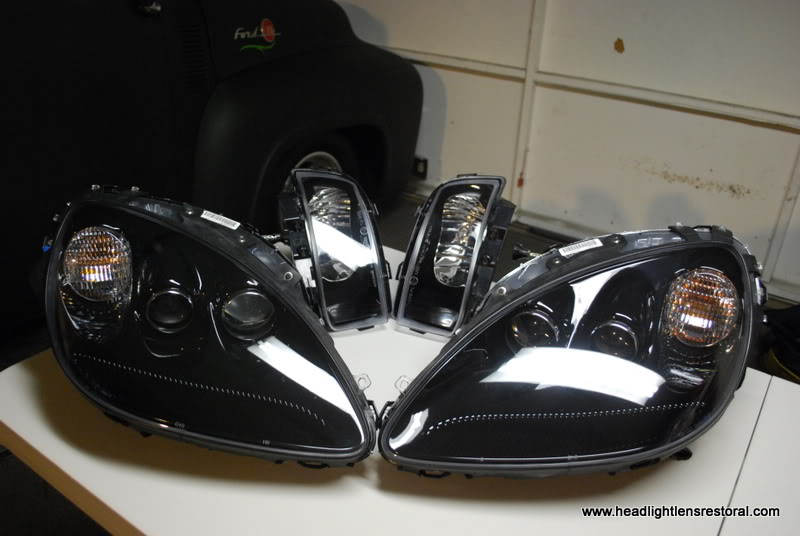
After having these lenses for almost 2.5 months the owner calls to say he needs some Christmas money and plans to sell them on Ebay. So using some of my secret sauce......Like a mad man I correct and jewel these lenses back to life....
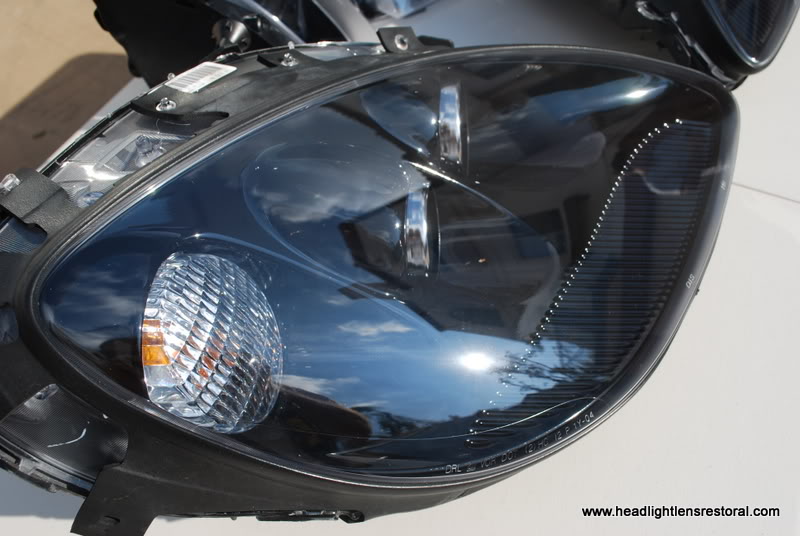
Under flourescent lights


Under natural light

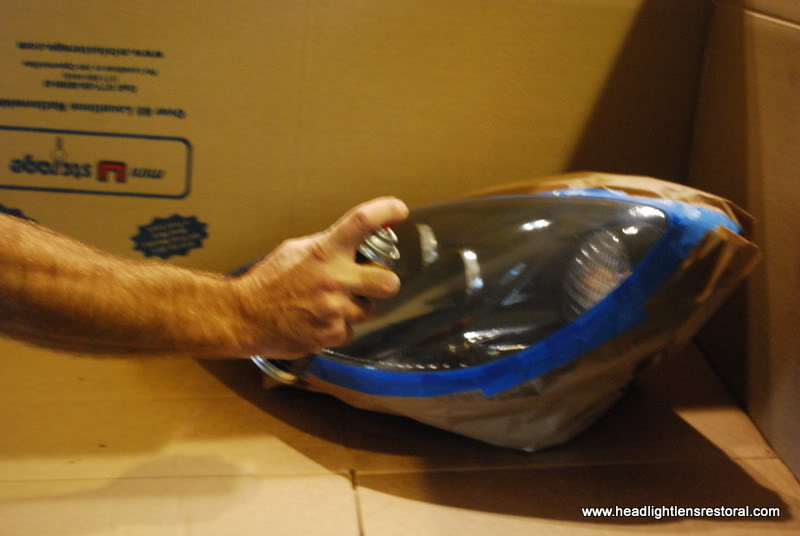
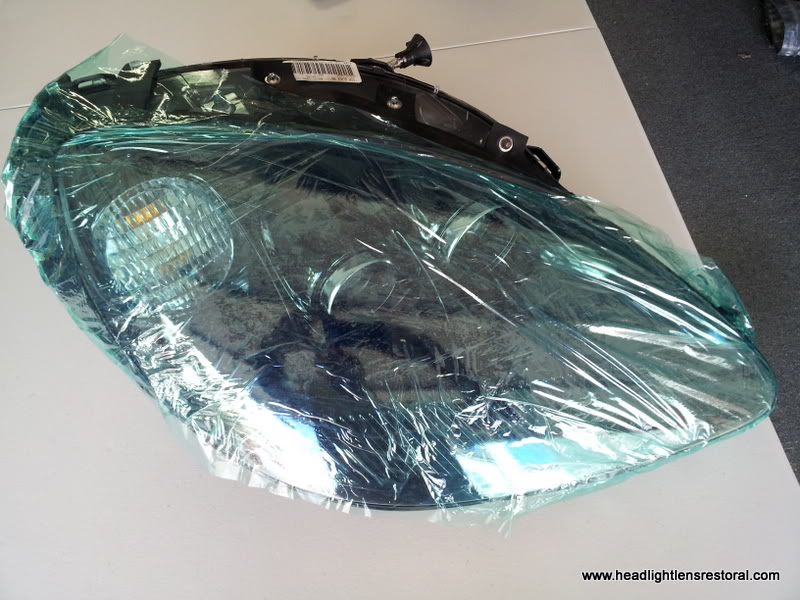
Wrapped up, packaged and ready to ship to the customer

One of my favorite shots...
So thats the whole process involved in my Corvette C6 HLR gravel and stone chip damage and my endevour to find the best overall coating and finish for these lenses...One thing to remember, heat is your worst enemy for this type of job. Learning how to contour to the lens is extremely important, last thing you want is a butchered or hacked up HLR (Headlight Lens Restoral)
Sold on Ebay to highest bidder!
Man I have patience, but then again to be a detailer you must have this!
You can imagine the time it takes to do this type of job, combined with documenting it and then making it into a thread......
Whollotta work! but I believe there is nothing better than a satisfied customer
Thanks for viewing my thread....
Have a great day!
My next product of choice was to be a 2 part wipe on water based UV coating that air dries with cool air.
Lens wiped free of lint or dust with IPA
The results did nothing for me, streaky, lacked clarity and just dull!...
Close up..
Back to the drawing board......time to resurface all over again and remove the failed coating..
Thought I would get my son in on this one, its a great trade for him to learn....Our 53 F100 in the background (father and son) project.
So far neither wipe on coating surpased my high standards......
Prepped again and thoroughly masked of with tape...
Next will be a spray on UV coating. I create a makeshift spray booth or at least a cubicle with sides to avoid any contaminants from landing on the fresh UV coating.
This UV coating goes on well and only requires one coat as it self levels. After a flash period of 5-10min, a UV lamp is used for curing. The problem I had was airborne contaminants, even though this was done in the house, lots of micro lint was floating and it was like a magnet and stuck to the coating...So it still didnt pass my totally flat OEM high gloss finish........time to remove this before it hardens, fortunatley I caught the lint on the lens before taking the lamp to it, again did not pass my QC.....
Last but not least I resorted to the fine art of polycarbonate lens polishing. The goal is to leave an absolute perfectly smooth finish with no RDS's, swirls, machine marks or cobwebbing in the plastic.
Since these lenses are so large in size they must be flawless, so this means no coatings.
Prepped and ready for the third time for some rotary polishing with my flex..
This clarity and shine was created only from sanding the polycarbonate lens back up to perfection. The detail in the light reflections shows it all....nice and clear.
Now to leave these as clear as a CD case.....
Five more additional steps were involved here
- Cutting polish or compound step
- Polish all areas to perfection removing any heavy polishing, compounding marring or colorsanding marks
- Fine polishing step that will bring the surface to perfection
- Micro-level polishing that will add depth and clarity
- Apply final top coat sealant and shine enhancement coat to all lens surfaces
After having these lenses for almost 2.5 months the owner calls to say he needs some Christmas money and plans to sell them on Ebay. So using some of my secret sauce......Like a mad man I correct and jewel these lenses back to life....
Under flourescent lights
Under natural light
Wrapped up, packaged and ready to ship to the customer
One of my favorite shots...
So thats the whole process involved in my Corvette C6 HLR gravel and stone chip damage and my endevour to find the best overall coating and finish for these lenses...One thing to remember, heat is your worst enemy for this type of job. Learning how to contour to the lens is extremely important, last thing you want is a butchered or hacked up HLR (Headlight Lens Restoral)
Sold on Ebay to highest bidder!
Man I have patience, but then again to be a detailer you must have this!
You can imagine the time it takes to do this type of job, combined with documenting it and then making it into a thread......
Whollotta work!
but I believe there is nothing better than a satisfied customerThanks for viewing my thread....
Have a great day!


Dave we're ALL appreciative of your work my friend.....that was one helluva lonnnnng post to read, so I can only imagine how long it was to actually do the work, then write the post!!
Having said that......so glad you did as it once again showcases what can be achieved.
An AS NEW finish once again

 . I always enjoy reading your work here and on other forums. Sent you a friend request on FB by the way.

Thread
Thread Starter
Forum
Replies
Last Post
FS[SouthEast]: S1 XKE OTS Left Tail-light
SCMike
PRIVATE For Sale / Trade or Buy Classifieds
1
Sep 22, 2015 07:34 PM
1964Daimler
MKI / MKII S type 240 340 & Daimler
0
Sep 9, 2015 11:28 AM
Currently Active Users Viewing This Thread: 1 (0 members and 1 guests)