
W reg 2000 Renault Clio - rejuvenation


I'm going to use the term rejuvenation here as I wouldn't want to insult Dave or any professional detailer with my efforts / products used to try and achieve what I want on this little car.
This is Peters car as he's just passed his test and I want to try and turn it out the best I can for him
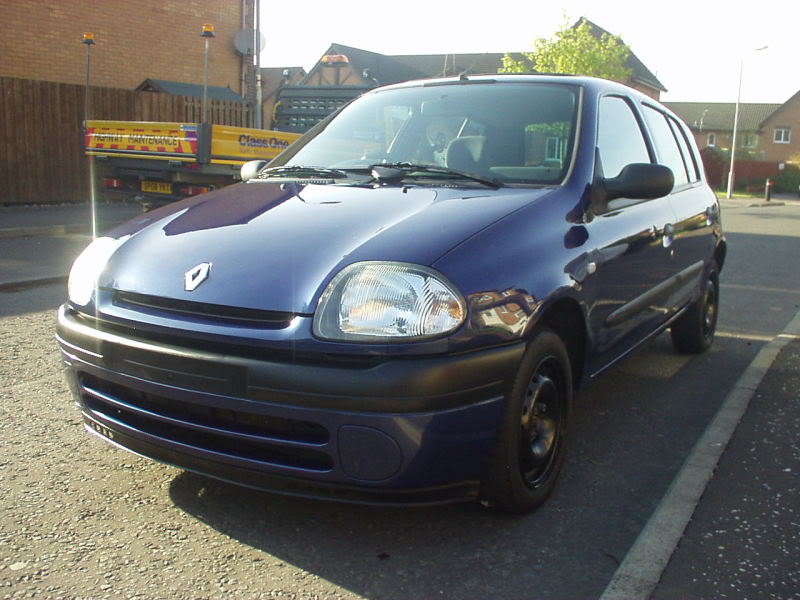
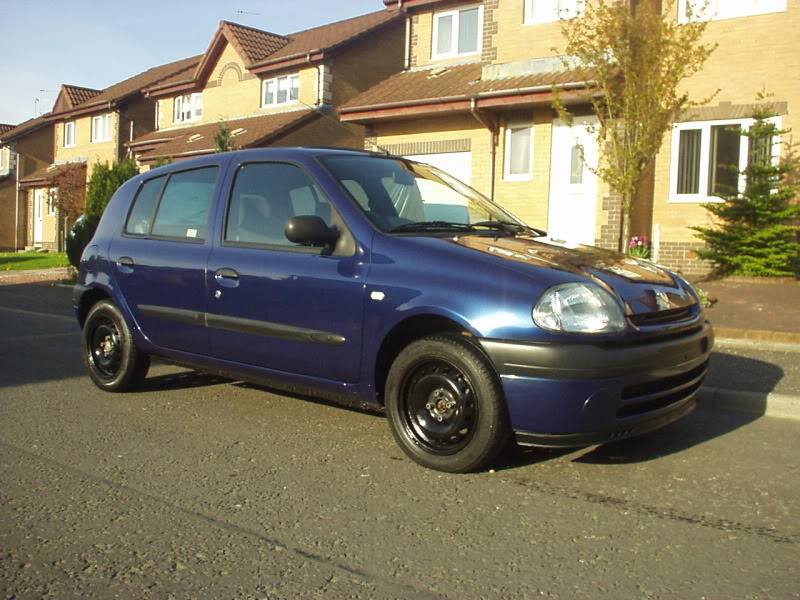
Ok, so here she is, a lovely little car for her age, but, unfortunately not quite as nice as the first one. She's a little dirty here n there and slightly rough round the edges, but I'm hoping to bring her back to as near her best as possible for a 10 year old car with 57k miles
Here's a few pics of her after I picked her up today, unwashed, just as is at present....
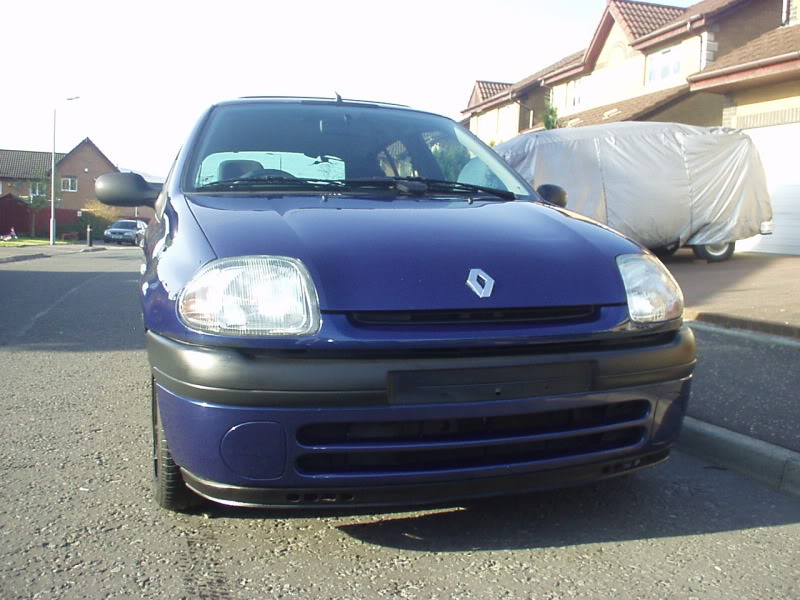
New number plates for the front to be fitted and headlight oxidation to be dealt with! New front wipers to be added also...
 This image has been resized. Click this bar to view the full image. The original image is sized 800x600 and weights 143KB.
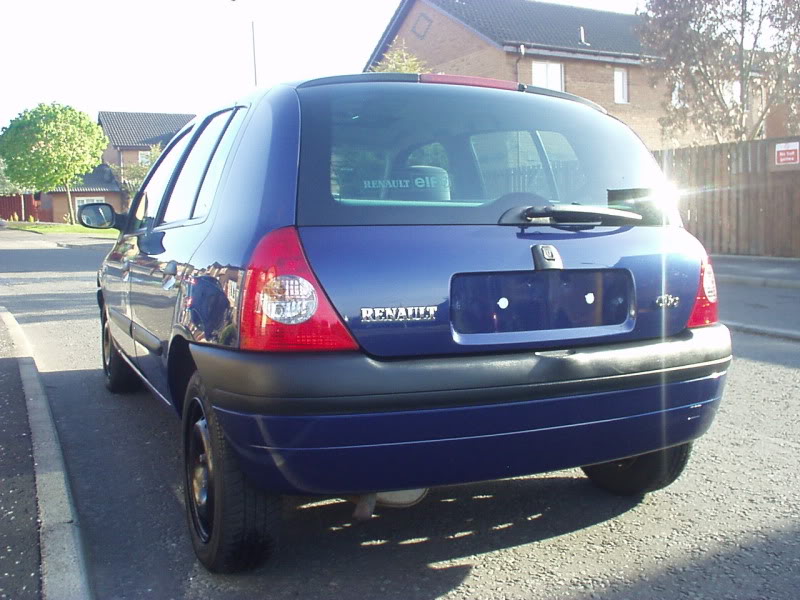
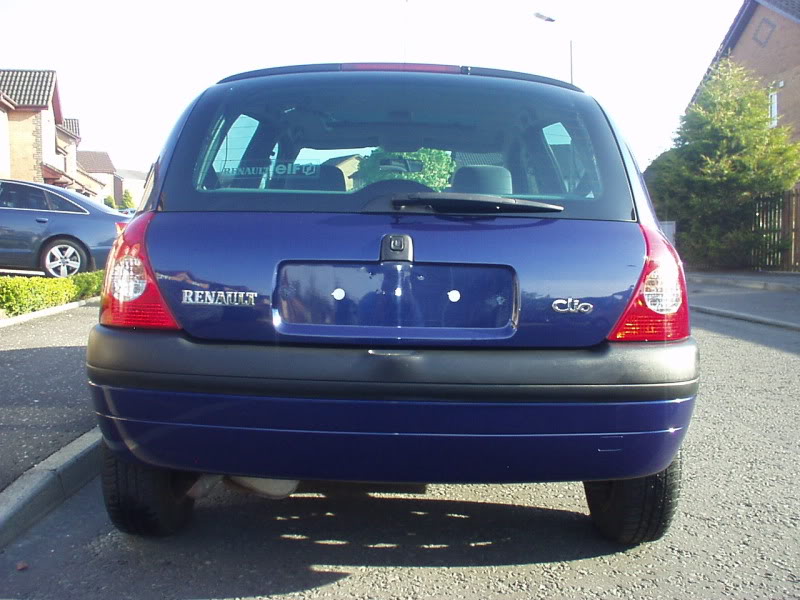
New rear number plates to be fitted as well as new rear wiper! Also new style rear light clusters to be fitted and re wired
This image has been resized. Click this bar to view the full image. The original image is sized 800x600 and weights 166KB.
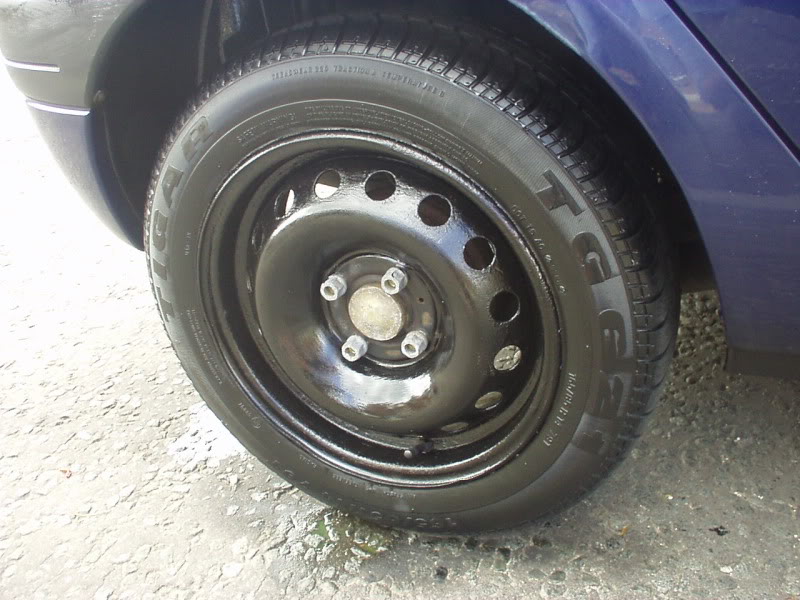
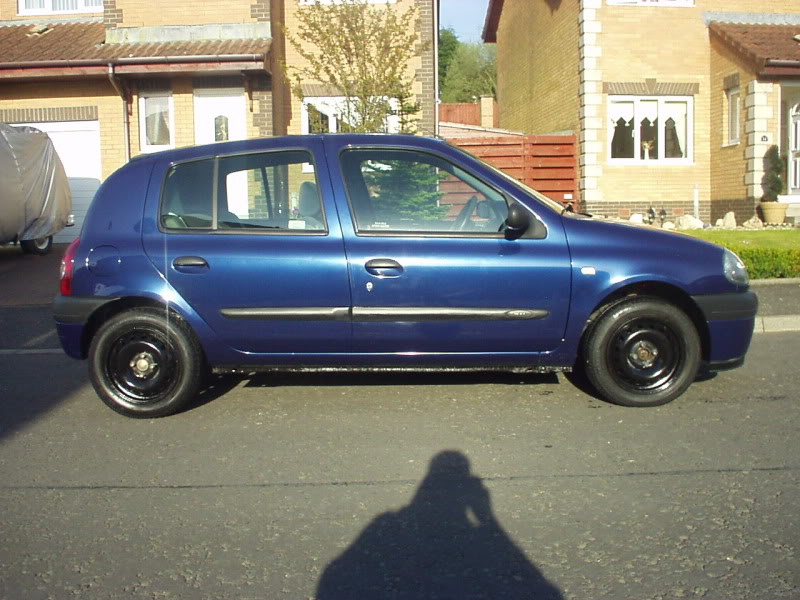
New style clear side repeaters will be fitted. Wheels and tyres will be steam cleaned, wheels to be wire brushed prior to painting hammerite black and then Aquarius style 14" genuine Renault wheel trims fitted. These will be married up with Saltire valve caps to finish the look
The sills although in decent condition will also be painted with Hammerite black smooth to renew!
This image has been resized. Click this bar to view the full image. The original image is sized 800x600 and weights 140KB.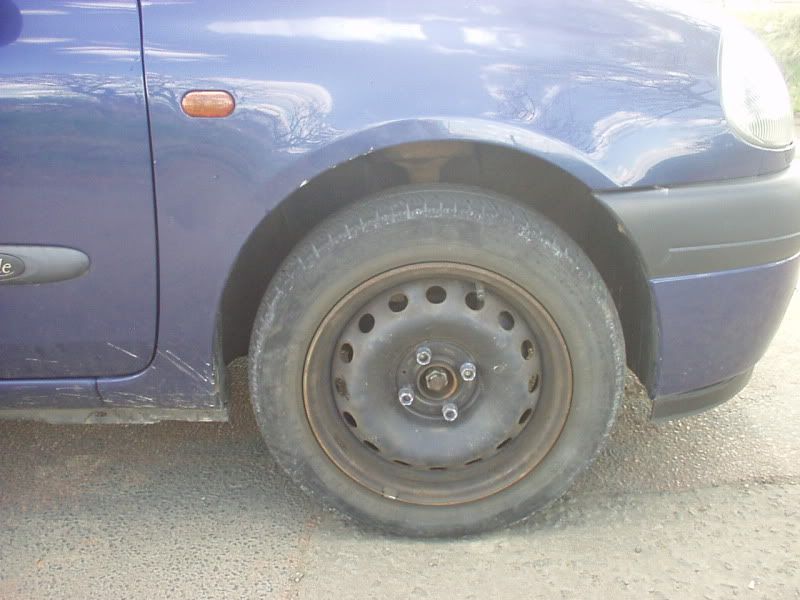
All door / boot / bonnet shut areas to be thoroughly cleaned with APC solution and 1" paintbrush then dried and perhaps polished. Door cards and various interior parts will get the Autoglym rubber / vinyl treatment along with all door rubbers. Hinges etc etc to be greased when cleaned
This image has been resized. Click this bar to view the full image. The original image is sized 800x600 and weights 160KB.
Sunroof trim to be thoroughly cleaned using APC in combo with paintbrush and steam cleaner. Once cleaned back to black trim solution to be applied to try and restore.
This image has been resized. Click this bar to view the full image. The original image is sized 800x600 and weights 202KB.
various door edges and certain areas suffer from poor paintowrk condition / scratched etc and require attention. Initially after a thorough wash these areas to be treated with colour T cut followed by Poorboys black hole to try and see what rejuvenation we can achieve here.
Door trim / bumpers etc to be treated with bumper black!
This image has been resized. Click this bar to view the full image. The original image is sized 800x600 and weights 118KB.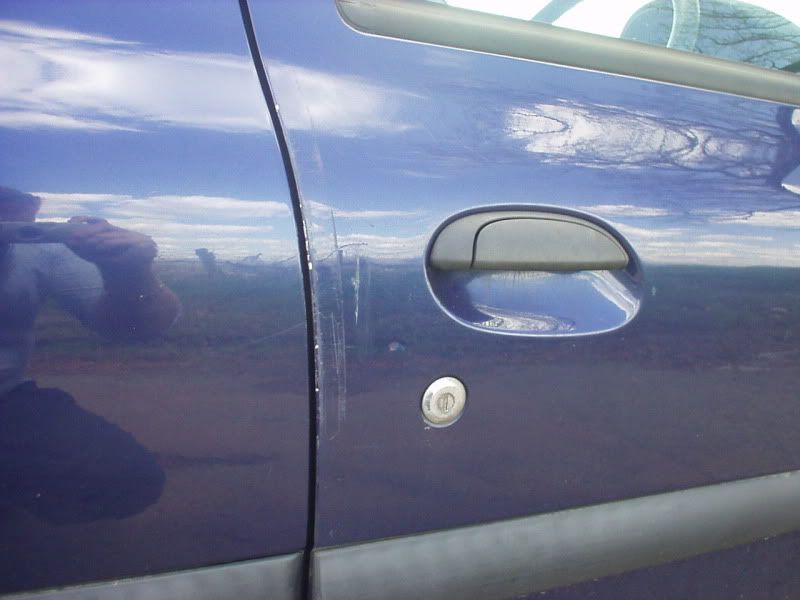
Here we have a "BEFORE" of the engine bay area and under the bonnet. As you can see pretty neglected looking with old leaves lying around, oil spotting and general filth
This image has been resized. Click this bar to view the full image. The original image is sized 800x600 and weights 173KB.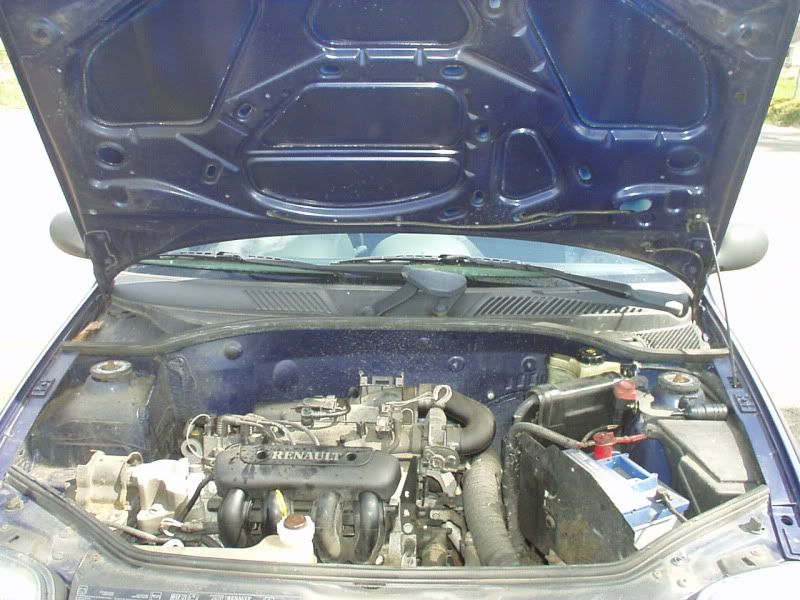
Here's an "AFTER" of the engne bay under the bonnet area. A couple of hours work with Gunk spray, warm soapy water, APC and a 2" paintbrush certainly made a big difference. This was then dried using a microfibre towel then treated with "Wet n Black" to enhance the wiper tray area, rubbers, engine cover and filter cap section.....turned out pretty good
 This image has been resized. Click this bar to view the full image. The original image is sized 800x600 and weights 172KB.
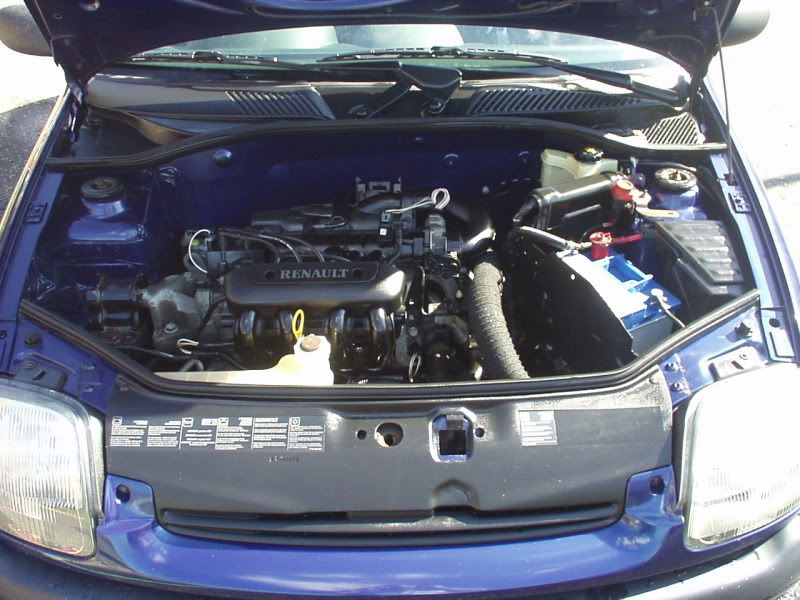 This image has been resized. Click this bar to view the full image. The original image is sized 800x600 and weights 176KB.
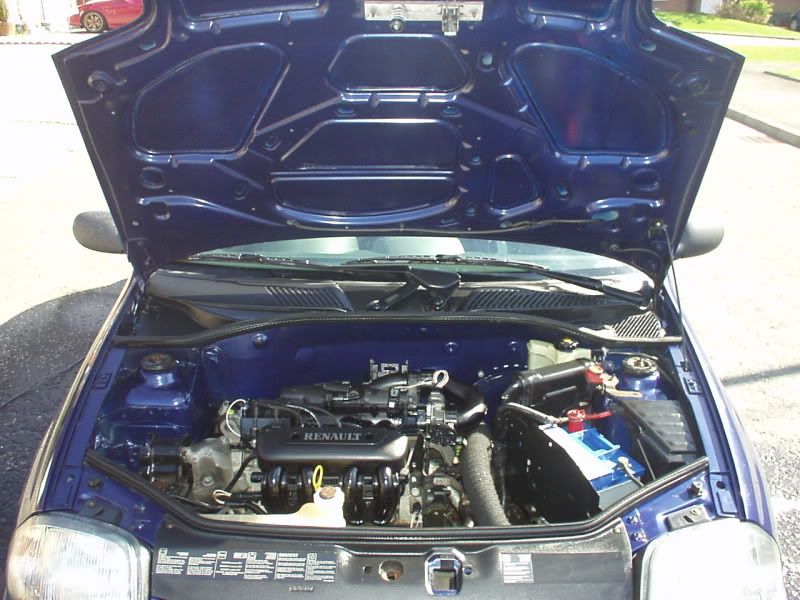
Tomorrow, weather permitting, the wheels will be wire brushed, treated with rust removing gel then painted with Hammerite black smooth in preparation to receive the new 14" Aquarius Renault wheel trims and Saltire valve caps when they arrive. All dash areas / vents etc to be cleaned with a 1" paintbrush to help remove dirt n dust, then followed with a cotton wool bud to remove any hard to reach areas stubborn dirt / dust deposits All interior windows to be washed n cleaned as well as any stickers / marks etc removed. The boot area - carpet removed and with the paintbrush remove any loose dirt / dust etc prior to vacumming followed by a wipe down with a damp cloth. All carpet areas to be vacummed to within an inch of their 10 years then wiped down with a damp cloth soaked in clean warm water and some Lemon Cif.... The pedals will be cleaned at this point too.
Hopefully, once thats all been sorted, the new Clio tax disc holder( hopefully c/w new tax - subject to insurance details arriving ) will be fitted.
Wheel arches to be cleaned with jet washer and thorough agitation with APC and brush and topped off with "Wet n Black"
Then its the bodywork - The lower panels to be treated with Autoglym Intensive Tar remover to remove any tar deposits, then a complete wash again n dried, followed by intensive treatment with T cut colour majic and then Poorboys black hole to see how that lifts the paintwork and new number plates fitted.
I'll post up how it goes so you can see how it turns out....
Thanks for reading
Jim
Veteran member


Joined: Mar 2007
Posts: 11,345
Likes: 1,165
From: Oak Ridge, TN
Day one, thats it??!? Engine bay only? lol, j/k jim, looking forward to the rest of the weekend progress reports. I hope Peter is watching and learning, and he takes some pride in what his 'new' ride is going to look like, and what it takes to keep it that way.

Thanks Matt, I hope he and Jamie both appreciate the time / money / effort and believe they will, as they are both great kids, although I am a little biased....lol
They are both starting to get what I meant when as youngsters in my car, they cleaned their feet before entering, didn't eat or drink in the vehicle and sometimes had a go if they scuffed their feet over the interior door seals as this has happened to them while their friends have been in their cars after they've spent an hour or two cleaning it ( well, Jamie has to date anyway )
In actual fact, I didn't mention that day one also consisted of ......
visit to Kwik Fit for a new tyre to be fitted to spare wheel. �25.00 30 mins
Wheel alignment to centre steering wheel and align wheels correctly �10 30 mins
Clear side repeaters fitted by myself 20 mins
visit to Auto sparky to fit / rewire new style lights ( still to be shown ) �20 1 1/2 hours
These to be posted up when the car is a little further along.......
Veteran Member

Joined: Mar 2007
Posts: 11,393
Likes: 649
From: Planetarium
That's a very nice detailing .They're lucky kids too  .I am pretty sure that your efforts and detailing job will help your kids love their rides more than usual .
Looking forward to seeing the rest of this job
.I am pretty sure that your efforts and detailing job will help your kids love their rides more than usual .Looking forward to seeing the rest of this job

well guys, following on from where I left off the other day....
I had to take Connor to his football game early on Saturday morning, so left Peter with instruction to remove the carpet and spare wheel and clean the boot area and the rest of the interior as I would be away for around 3 hours and we'd start the rest when I got back.
Arrived home around 12.30 and Peter had been at it for 3 hours or so, taken the carpet and spare out of the boot, used the paintbrush to loosen any offending dust / dirt then vacummed followed by a wipe down with a damp cloth and got great results. The same methods were employed on the rest of the interior with the paintbrush being used on all the vents, followed up by cotton buds to remove any dust etc, the dash / door cards etc cleaned with APC and followed with Autoglym vinyl and rubber care. The carpets vacummed thoroughly, then washed down with a damp cloth....the new mats installed to finish.....
From there we worked through to around 8.30 pm and worked as follows.....
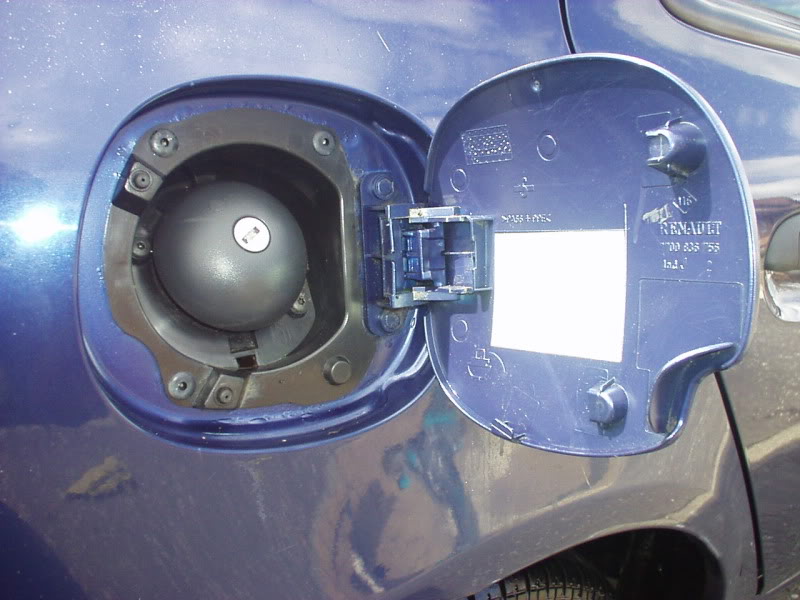
The fuel filler cap area was washed with APC and a paintbrush then dried to look almost as good as new. This procedure was used in combination with steam cleaner on ALL door shut areas, sunroof seal areas, wheel arches, and generally all crevices on the vehicle prior to washing the whole car thoroughly.....
The wheels having been wire brushed, cleaned and dried some time ago we decided to paint them using Hammerite black smooth paint just to freshen them up a little. Cosmetic really as only the very leading edge of the rim would ever likely be seen after the wheel trims were installed ( these should hopefully arrive tommorow - Monday and will be fitted asap )
At this point we decided to repaint the lower sills as well to freshen them up too
Whilst these dried, the windows were cleaned thoroughly inside n out, first removing a variety of small stickers here n there which looked terrible.
The paint was in a pretty bad way, really flat with lots of scratches here, there n everywhere, with some fairly deep RDS too.
The old licence plates were removed prior to the next step as new ones had been ordered to complete the look ( nothing worse than tatty OLD plates on a shiny car in otherwise decent condition!!!
We went straight to Colour T cut and went round the whole car working it in well and then buffing off and got really really good results all in all. This process took around 3 hours and was hard work, but worth it. After it was all buffed up this was followed by Poorboys Black hole all round, applied then buffed off to a high shine.
Once this was completed I broke out the Black bumper trim restorer and set to work on the bumper areas, side trim, door handles etc etc. The product was applied, left to soak for 10 mins or so then buffed to a deep shine and then wet n black was applied using a sponge.
The insurance docs had come through, so off to the post office with the V5 logbook, Insurance certificate and the MOT to get her taxed.
Once we returned the new window wipers were fitted, new tax disc put into the Clio tax disc holder, tyres were blackened using Wet n black with a sponge and various other bits n pieces attended to......
She's just about done now....
We're waiting for the new wheel trims to arrive tomorrow from Renault amd the new plates to arrive and be fitted as well.........
Other than that, its back to the dealer tomorrow as the keyfob central locking is inop ( a fairly common fault on these cars I believe ) not the end of the world but it'd be nice if we can get it fixed. The only other thing is a small oil leak, I believe from the sump plug and oil filter fitted incorrectly. So we are having a new sump plug with washer fitted tomorrow as well as a new oil filter and an oil change too....
Then it should all be good

I'll post up some pics of the completed car once these have been attended too
Jim
Veteran Member
Joined: Jul 2009
Posts: 12,704
Likes: 1,236
From: Brittany France
Looking good so far, miles better.
Next project, your Neighbour's camper van?? lol
Next project, your Neighbour's camper van?? lol
Last edited by Translator; May 10, 2010 at 10:47 AM. Reason: speling mistacs
Trending Topics

Senior Member
Joined: Mar 2009
Posts: 552
Likes: 61
From: Texas
Jim.
Fantastic results. Looks like a new car. The boys will enjoy it for a long time.
Can you post a pic of the products you used. I don't know if all are available here in the States but sometimes a photo will spark the memory.
Thanks.
Fantastic results. Looks like a new car. The boys will enjoy it for a long time.
Can you post a pic of the products you used. I don't know if all are available here in the States but sometimes a photo will spark the memory.
Thanks.

Hey there black cat, I've pasted links to the products I've used as it may help some!
I'm sure you can buy either these or similar / better products in the US quite easily.
T cut is frowned upon by detailers I guess as they use more sophisticated products but it works and works well.
As for the other stuff, just general automotive APC ( All purpose cleaner ) any soft bristled paintbrush although you can buy "specific" brushes but at a specific price of course
t-Cut-colour-fast-polish
black-in-a-flash-bumper-n-trim-gel
hammerite-smooth-black
hammerite-smooth-silver
Hope this helps some
Got the wheel trims put onto the car today as well as the number plates. Nothing can be done with the fob ( well not at a reasonable price and not without going to Renault ) so thats that I'm afraid.
The oil leak was sorted with a new sump plug washer and a new oil filter and had an oil change at the same time....
All good now...
Will post a few final pics when I can
Thanks
Senior Member
Joined: Sep 2009
Posts: 573
Likes: 86
From: Orange County, California. USA
Jim, looks great, nice sparkle for 10 years old! and she is fortunate to have an owner like you to give it a new lease on life....You guys did a great job giving her a rejuvination, something the kids will enjoy for years!

Thanks Dave, for even replying to this thread...lol
On a scale of 1-10 in detailing what you and your fellow professionals do is a 10+...What we've managed to achieve here is maybe a 2 at best...lol
This is however, a 10 year old �1000 runabout and both kids with their respective vehicles are over the moon I'm glad to say
Blackcat - Dave will I'm sure be able to recommend alternative / superior products that will achieve similar / better results and be available locally


Thread
Thread Starter
Forum
Replies
Last Post
mikiep
XK8 / XKR ( X100 )
14
Dec 20, 2019 07:37 PM
jimforrest (uk)
XK8 / XKR ( X100 )
22
Feb 28, 2019 06:42 PM
FS[SouthWest]: 19" Aquila Wheels with Tires
jorgef858
PRIVATE For Sale / Trade or Buy Classifieds
4
Jan 14, 2016 11:32 AM
Currently Active Users Viewing This Thread: 1 (0 members and 1 guests)