
Wes_R + XK8(60 pics)


Thread Starter
|
Member
Joined: Nov 2010
Posts: 87
Likes: 27
From: Toronto
Hi Everybody,
My first thread in this section which is on an XK8. I thoroughly documented the process and will explain each step why and how it was done, so that hopefully the clean car lovers can learn something new in keeping their cars shiny . Anyways on to the write up.
I was recommended by a friend to the owner who had just bought this XK8 for an amazing price and wanted to give the paint a refresh as the interior was already perfect. We discussed his expectations and came to the conclusion that a 1 stage polish would be realistic as this was going to be a daily driver and getting the paint perfect and keeping it that way was not realistic. So aiming for a huge improvement but not perfection we finally set a date.
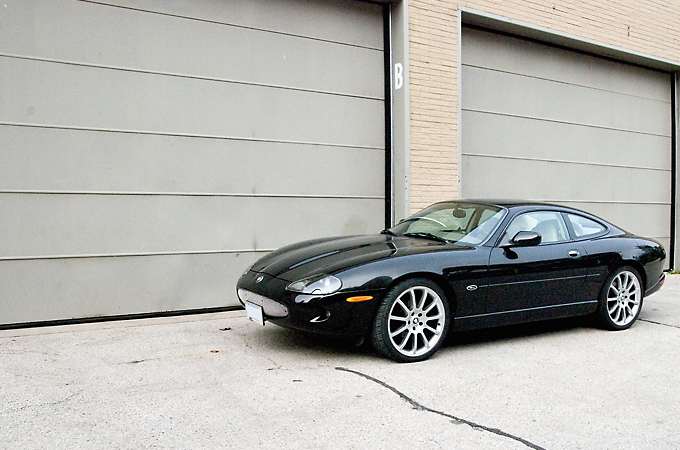
And now here it is
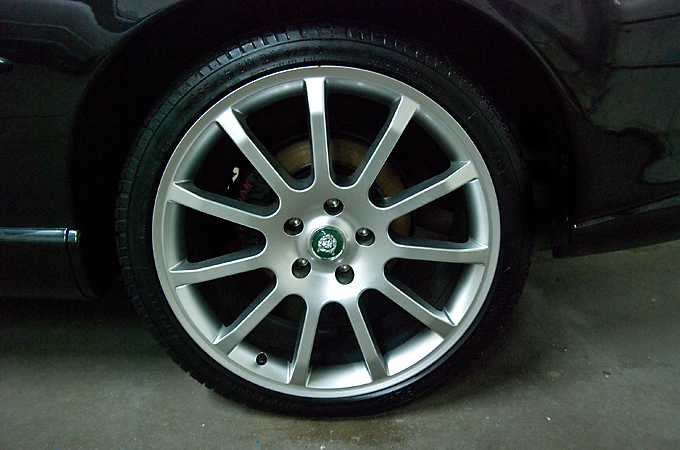
I like to start with the wheels as trying to clean them after the car is washed makes things difficult because of all the splatter from the brushes and power washer
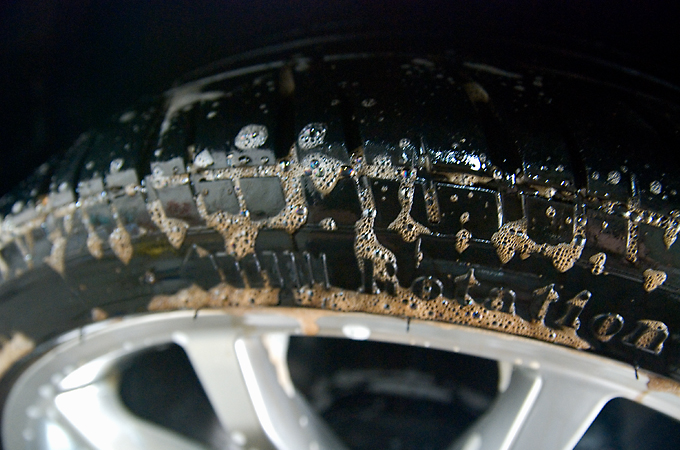
Autoglym Custom Wheel Cleaner was sprayed on the rims and tires

I love this stuff because 1 it is non acidic and 2 it really pulls the dirt off the tires which helps to get them back to black rather then that dirty brown they sometimes can get. lol who wants a shiny brown tire(not me)
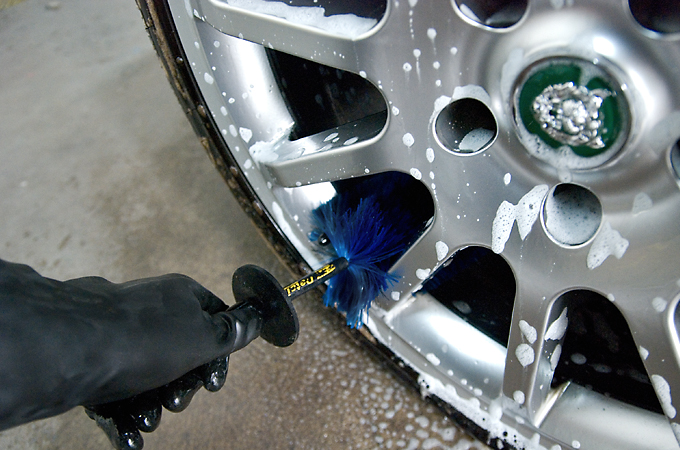
So I started on the inner barrel with my EZ Brush
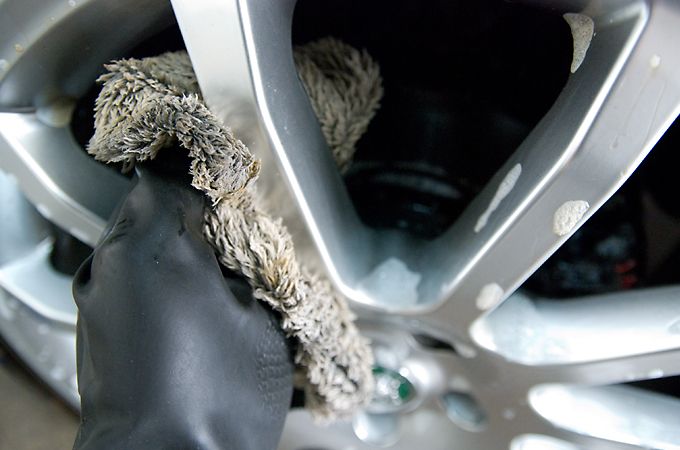
Cleaned the rim face with my microfibre mitt
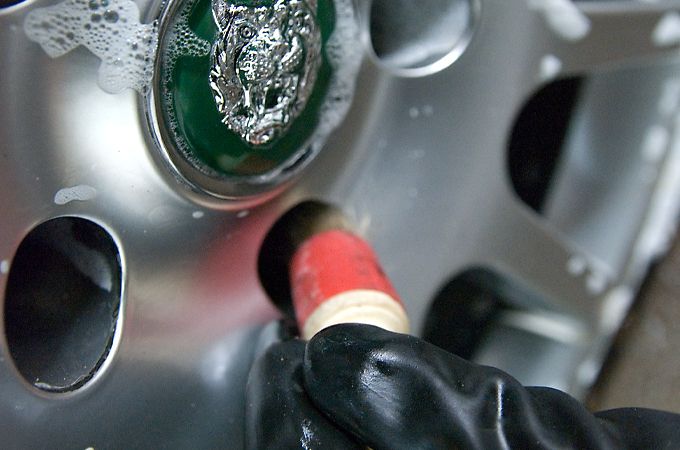
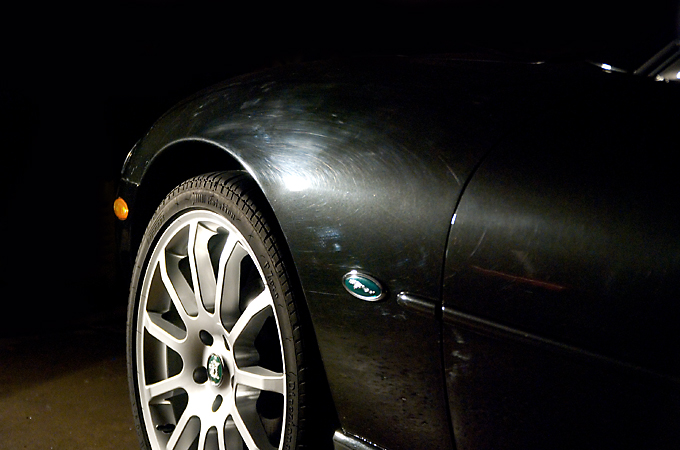
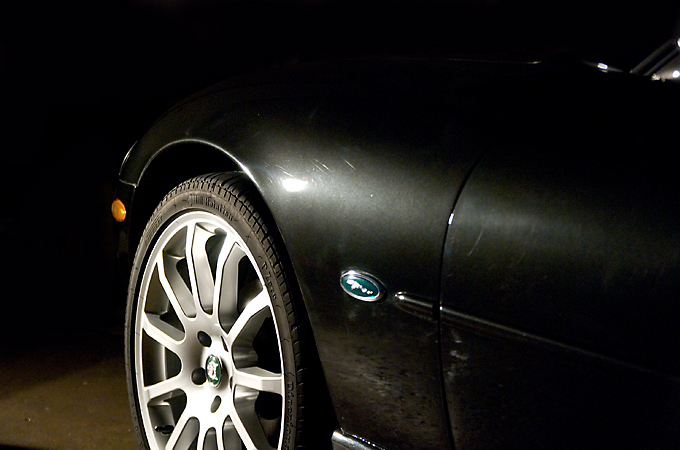
And used a detail brush to get in the lug nuts(I love the way the emblem came out in this pic)
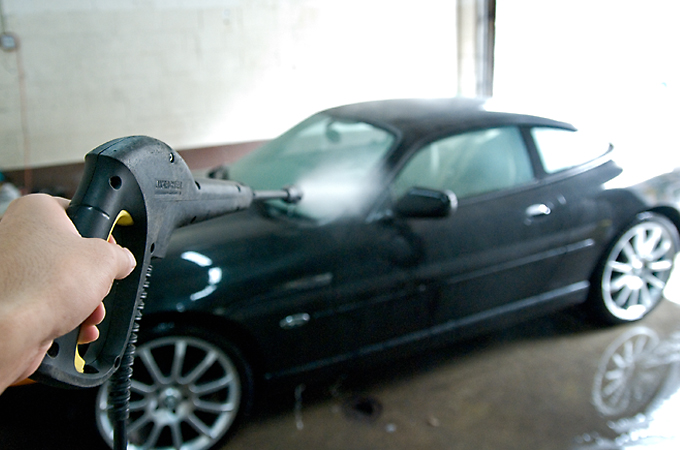
After cleaning the rims I rinsed down the car
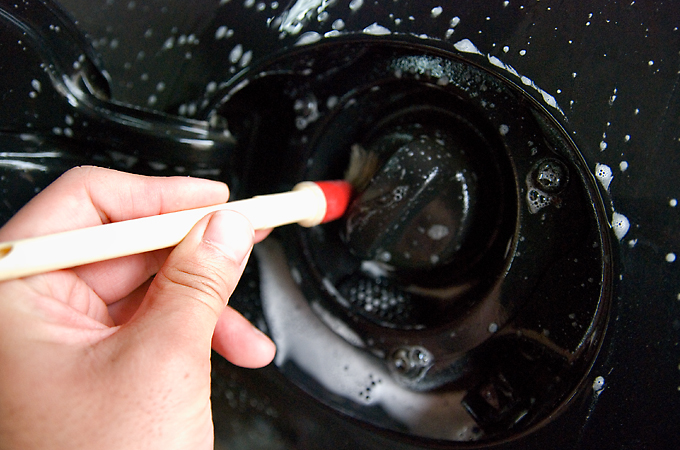
Then used another detail brush to clean some tight areas like the gas cap etc
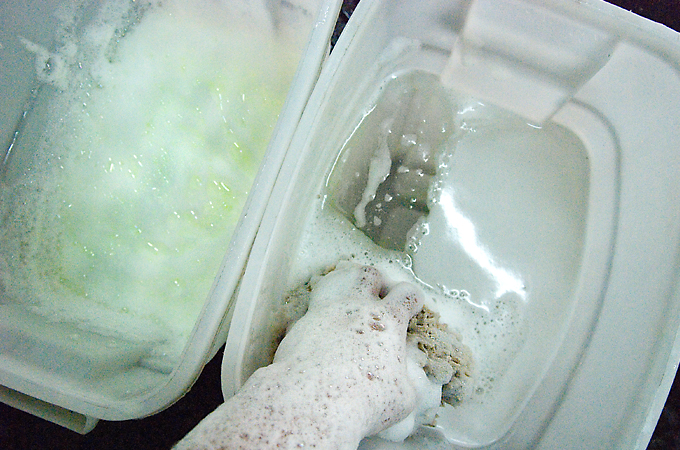
I washed the car using a natural sea sponge and chemical guys citrus wash n gloss.

The 2 bucket method was used and my sponge was rinsed off in the water only bucket every panel or half a panel.
The 2 bucket method is very simple, you have 2 buckets one with soap and the other water only. After every panel or half a panel you rinse the dirt off your wash media in the water only bucket so that you don't get your soap water dirty. Basically eliminating the potential of dragging dirt all over your paint and causing swirls on your paint.
While the car was still wet I clayed barred the car to remove any surface contaminants that were embedded in the clear coat.
If you feel your paint after you wash your car you'll notice that it is still pretty rough. That's the surface contaminants stuck in your clear coat that can only be removed by clay bar.

Pretty dirty

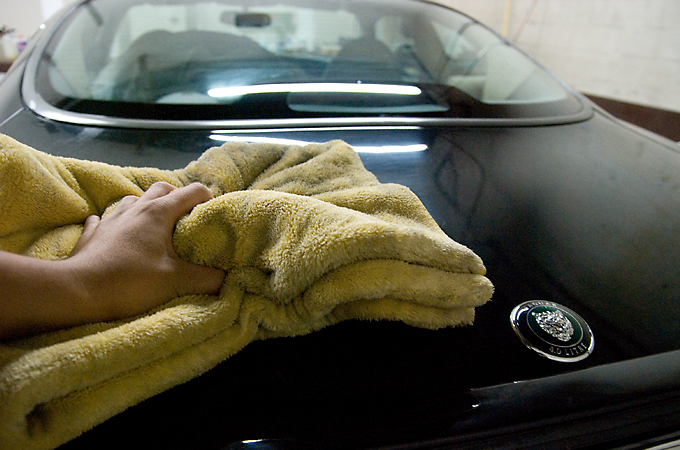
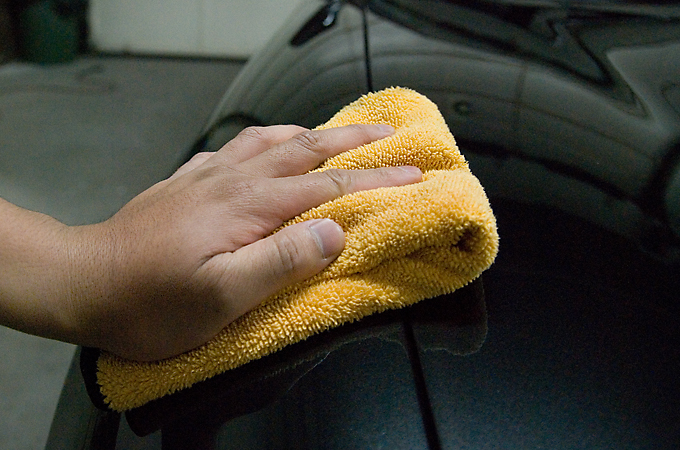
After claying I dried off the car with my plush microfibre towel
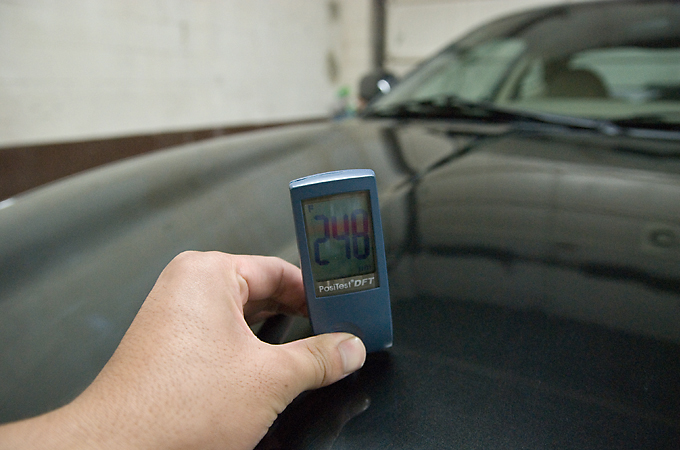
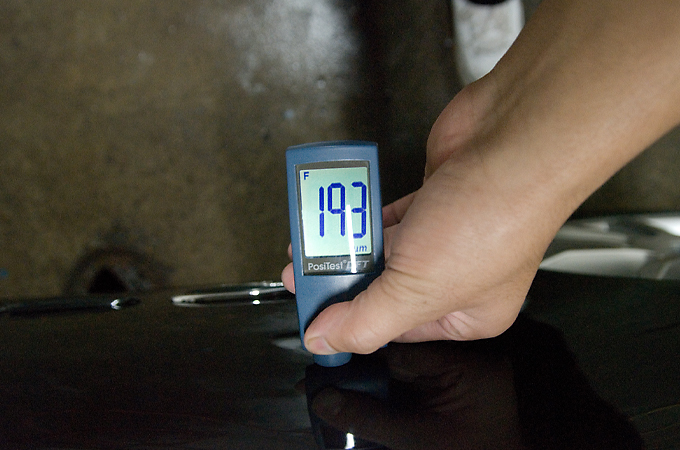
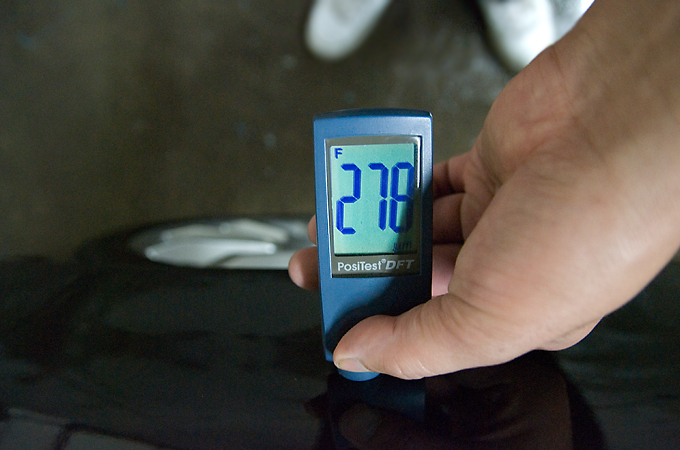
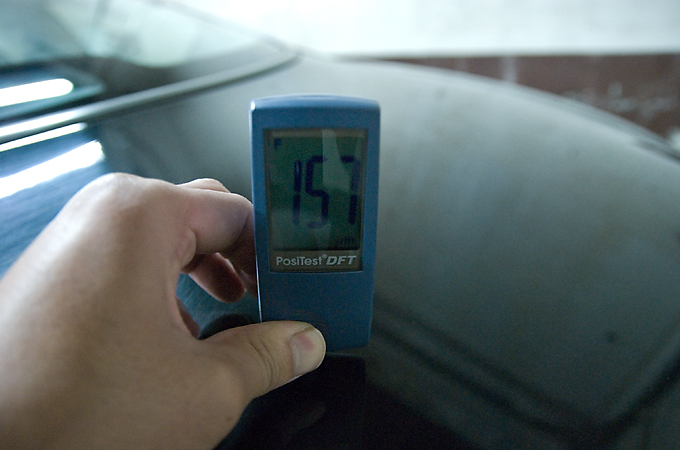
I then started taking measurements of the paint in microns to see how much paint I had to work with

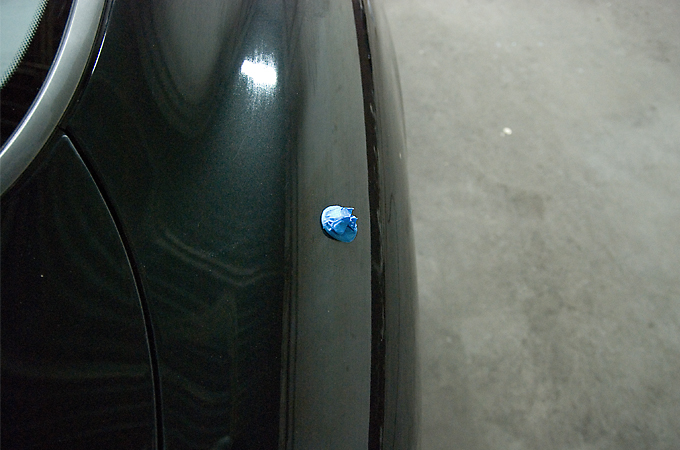
haha there wasn't much rubber trim to mask just the rubber seal around the antenna
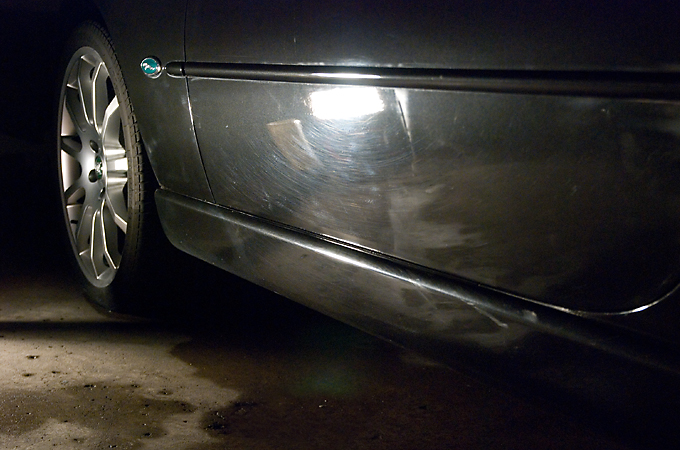
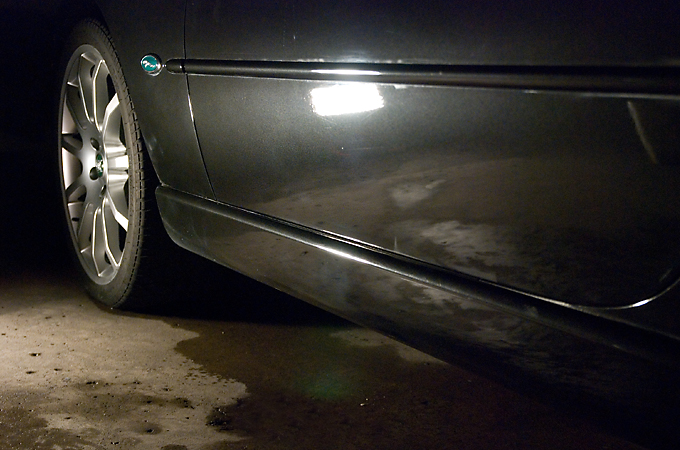
Now we could begin the polishing and I decided to go with a Uber Yellow pad and Menzerna Powerfinish on my Flex DA.
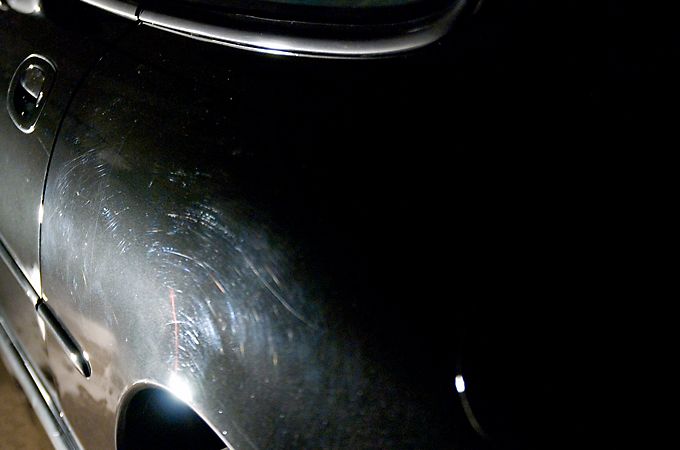
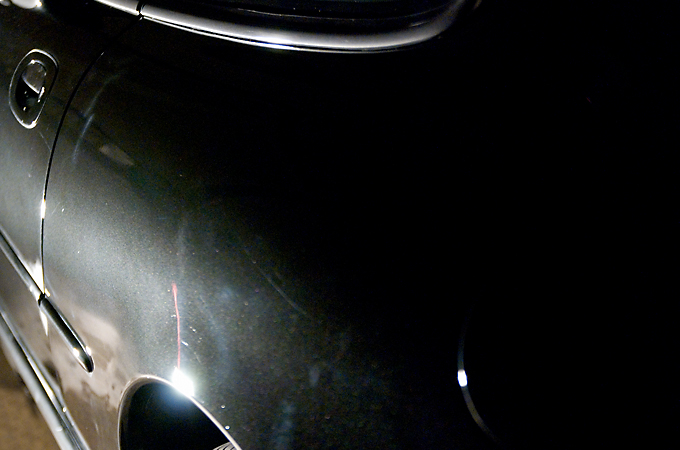
Here are the results I was achieving. I have to add that the paint was in pretty rough shape but Jaguar paint is fairly soft so I was able to achieve a huge improvement.
Before
After
Before
After
Before

After
Before
After
Before
After
Before
After

Before
After
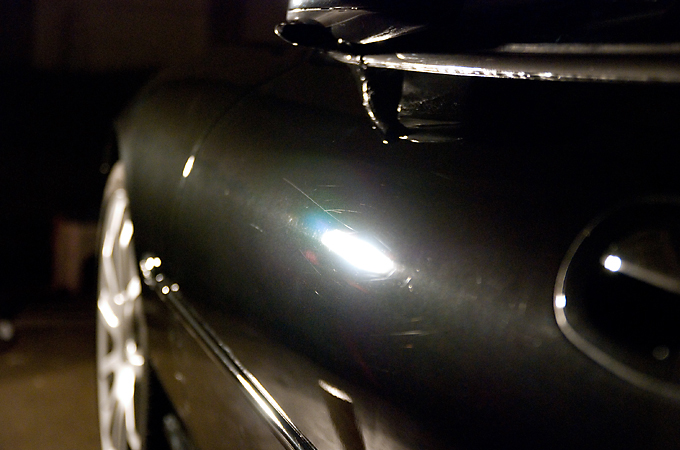
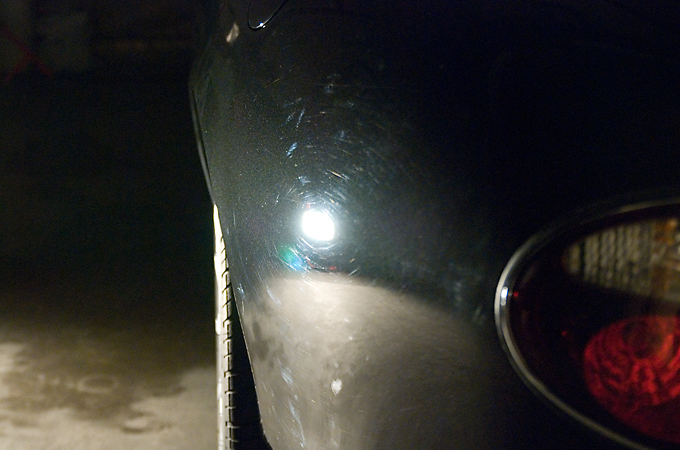
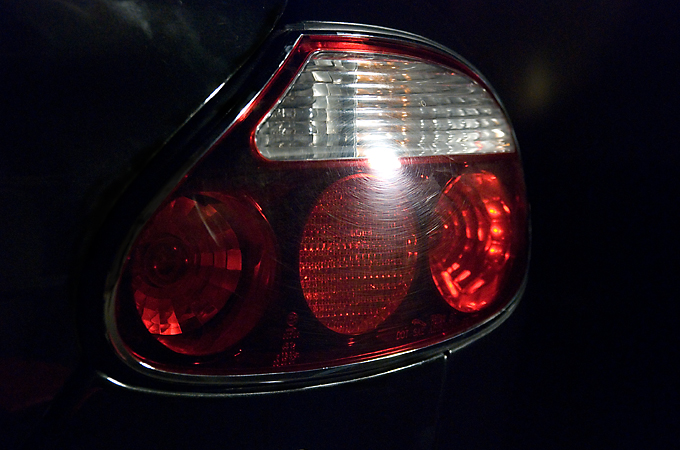
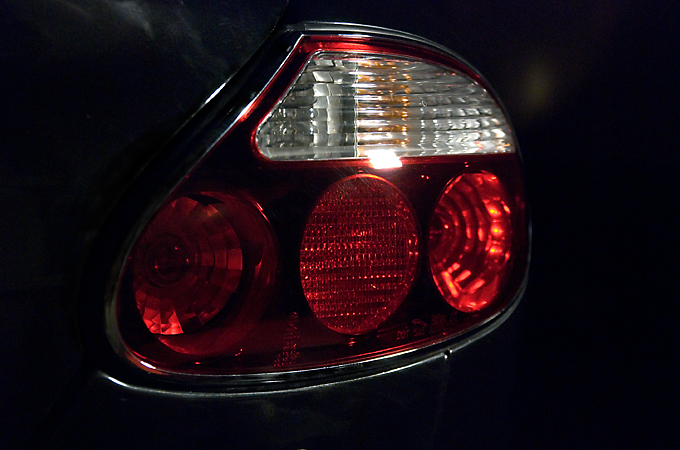
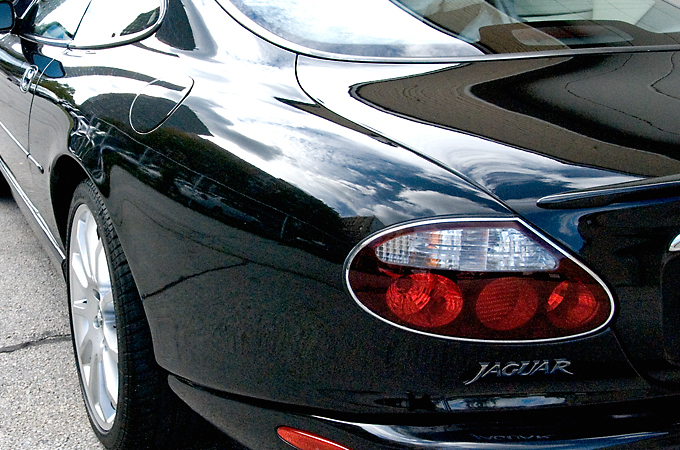
The tail lights needed a good polish as they were very dull and full of swirls
Before
After
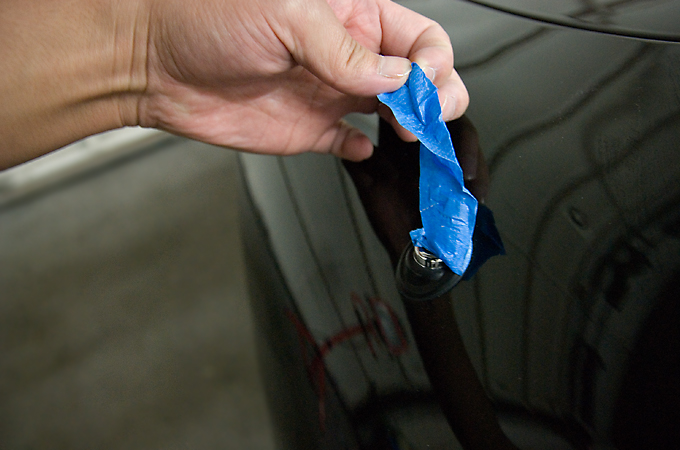
After all the polishing I unmasked the tape
My first thread in this section which is on an XK8. I thoroughly documented the process and will explain each step why and how it was done, so that hopefully the clean car lovers can learn something new in keeping their cars shiny
. Anyways on to the write up.I was recommended by a friend to the owner who had just bought this XK8 for an amazing price and wanted to give the paint a refresh as the interior was already perfect. We discussed his expectations and came to the conclusion that a 1 stage polish would be realistic as this was going to be a daily driver and getting the paint perfect and keeping it that way was not realistic. So aiming for a huge improvement but not perfection we finally set a date.
And now here it is
I like to start with the wheels as trying to clean them after the car is washed makes things difficult because of all the splatter from the brushes and power washer
Autoglym Custom Wheel Cleaner was sprayed on the rims and tires
I love this stuff because 1 it is non acidic and 2 it really pulls the dirt off the tires which helps to get them back to black rather then that dirty brown they sometimes can get. lol who wants a shiny brown tire(not me)
So I started on the inner barrel with my EZ Brush
Cleaned the rim face with my microfibre mitt
And used a detail brush to get in the lug nuts(I love the way the emblem came out in this pic)
After cleaning the rims I rinsed down the car
Then used another detail brush to clean some tight areas like the gas cap etc
I washed the car using a natural sea sponge and chemical guys citrus wash n gloss.
The 2 bucket method was used and my sponge was rinsed off in the water only bucket every panel or half a panel.
The 2 bucket method is very simple, you have 2 buckets one with soap and the other water only. After every panel or half a panel you rinse the dirt off your wash media in the water only bucket so that you don't get your soap water dirty. Basically eliminating the potential of dragging dirt all over your paint and causing swirls on your paint.
While the car was still wet I clayed barred the car to remove any surface contaminants that were embedded in the clear coat.
If you feel your paint after you wash your car you'll notice that it is still pretty rough. That's the surface contaminants stuck in your clear coat that can only be removed by clay bar.
Pretty dirty
After claying I dried off the car with my plush microfibre towel
I then started taking measurements of the paint in microns to see how much paint I had to work with
haha there wasn't much rubber trim to mask just the rubber seal around the antenna
Now we could begin the polishing and I decided to go with a Uber Yellow pad and Menzerna Powerfinish on my Flex DA.
Here are the results I was achieving. I have to add that the paint was in pretty rough shape but Jaguar paint is fairly soft so I was able to achieve a huge improvement.
Before
After
Before
After
Before
After
Before
After
Before
After
Before
After
Before
After
The tail lights needed a good polish as they were very dull and full of swirls
Before
After
After all the polishing I unmasked the tape
Thread Starter
|
Member
Joined: Nov 2010
Posts: 87
Likes: 27
From: Toronto
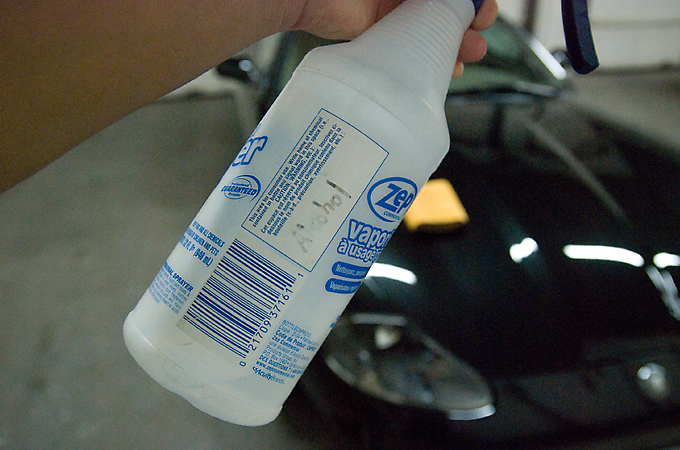
I gave the paint an alcohol wipe down to clean off the oils from the polish as this would hinder the wax from bonding properly to the paint
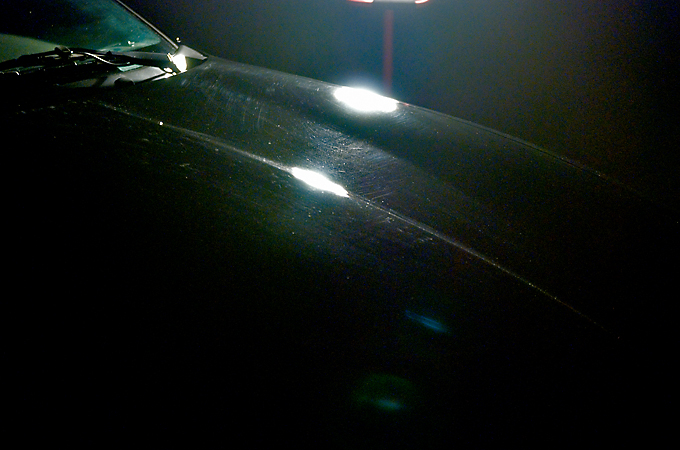
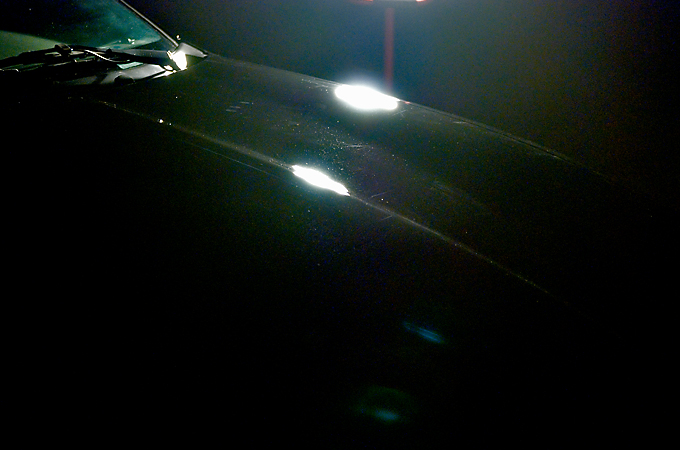
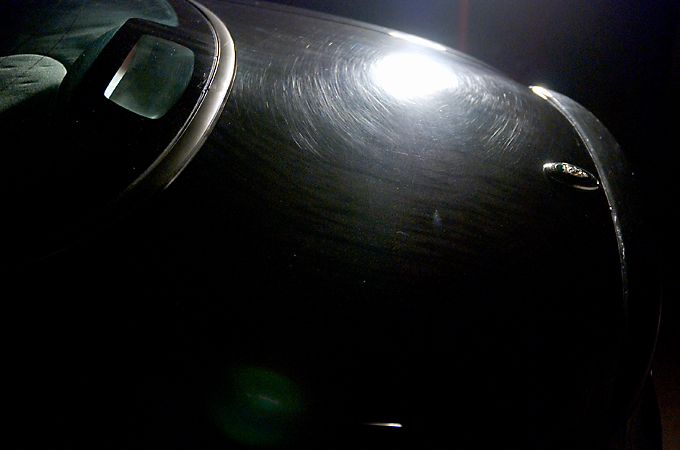
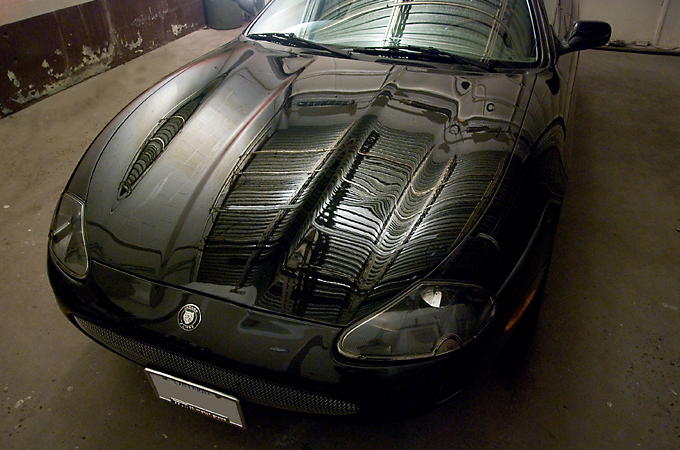
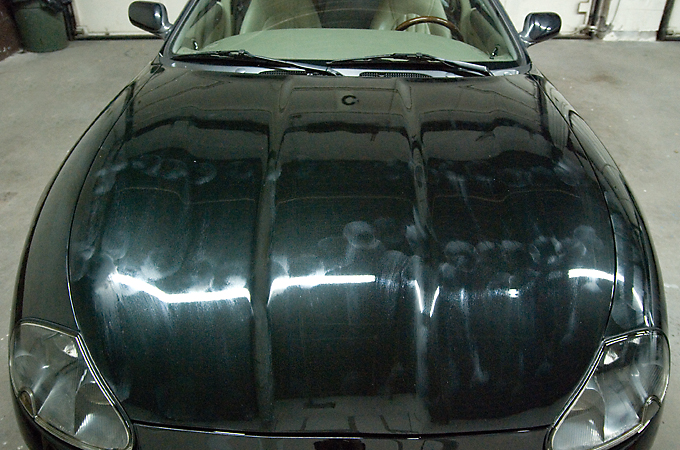
And here are some teaser shots of the paints shine and this is without wax
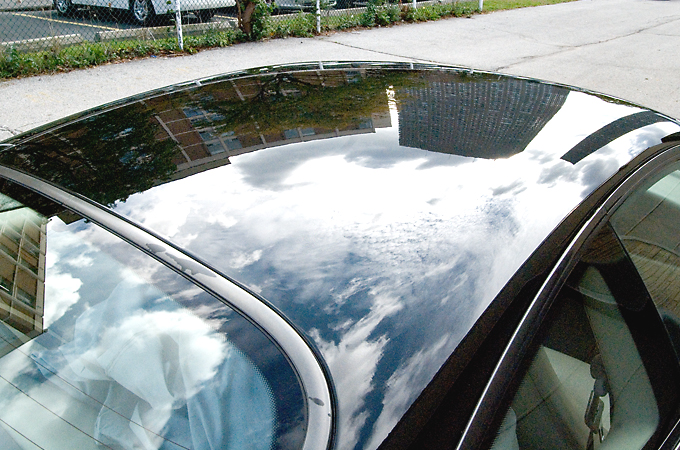
I love the way the ceiling was reflecting on the hood. This is one of my favorite pics in the write up
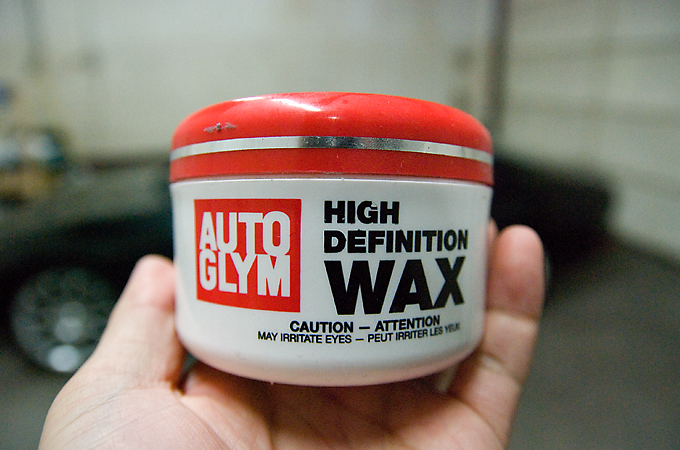
The wax I used was Autoglym HD. A very British wax for a British car
Applied to the car
While the wax was curing I applied dressing to the tires
And cleaned the windows

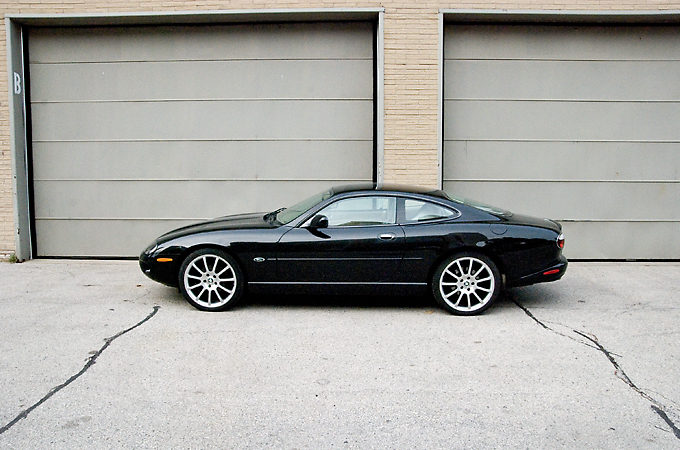
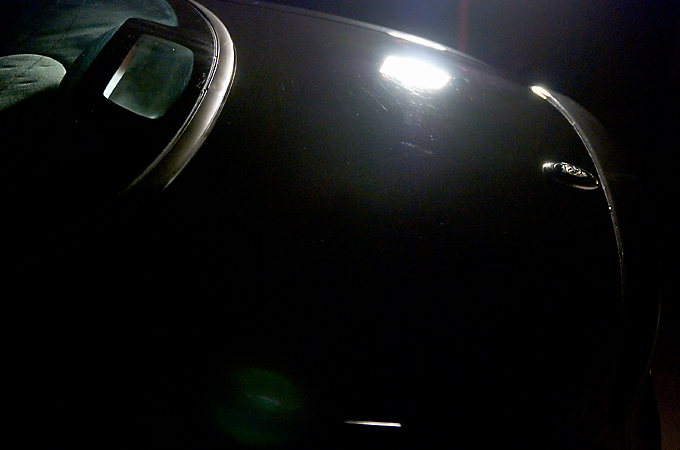
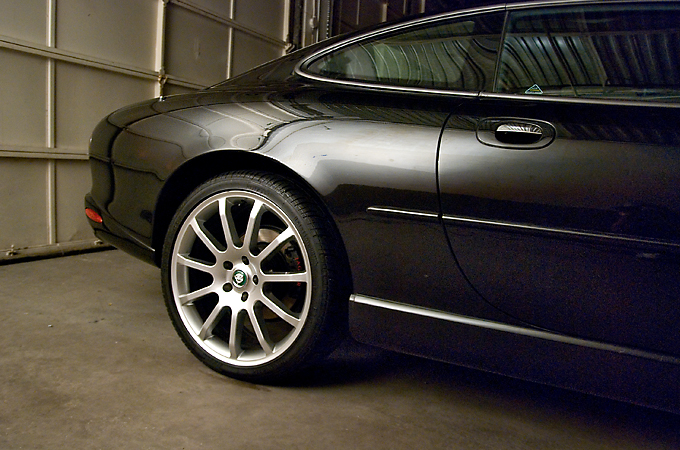
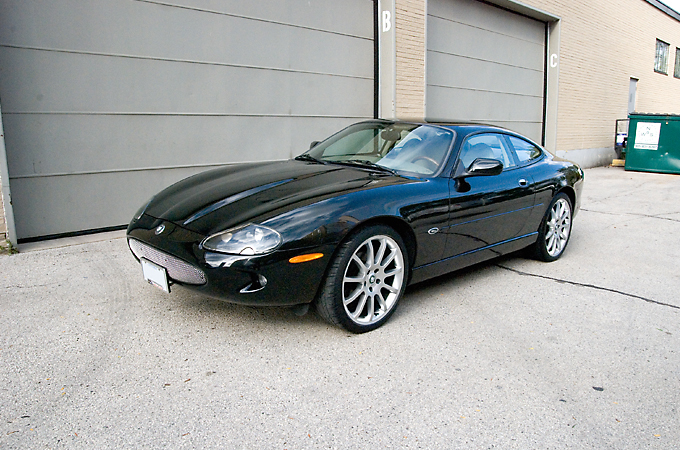
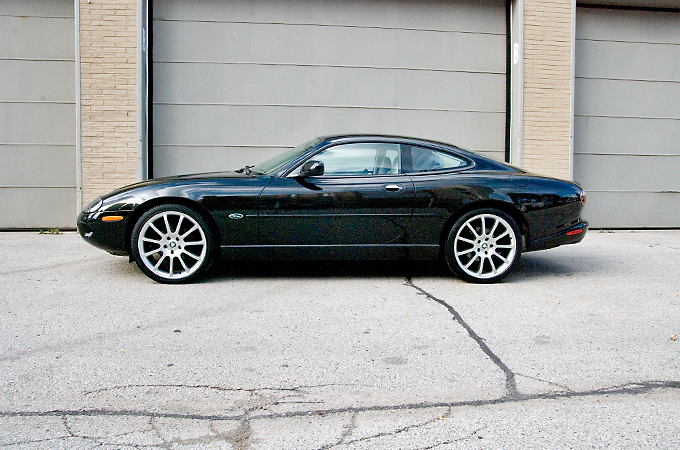
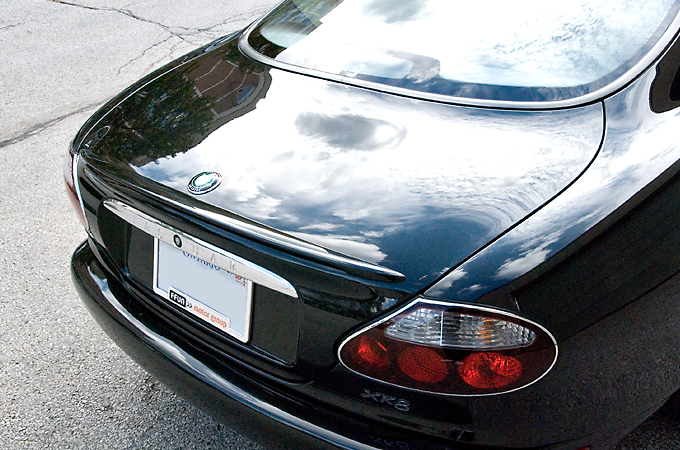
Finally we reach the eye candy. Here are the completed shots
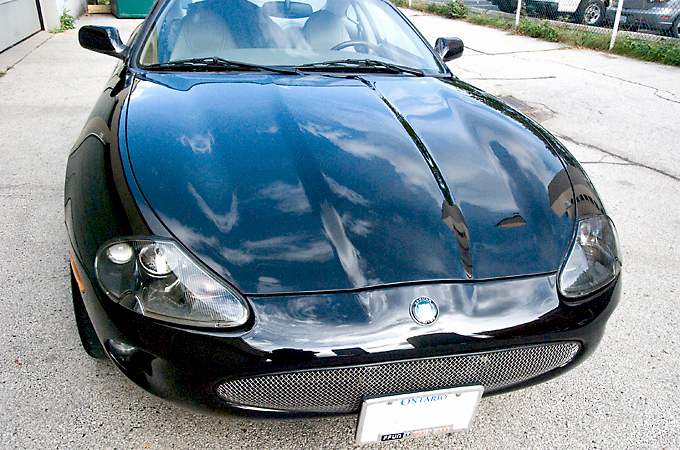
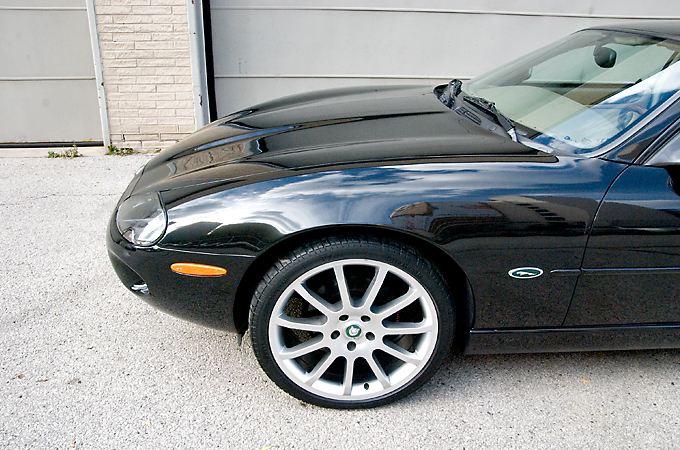
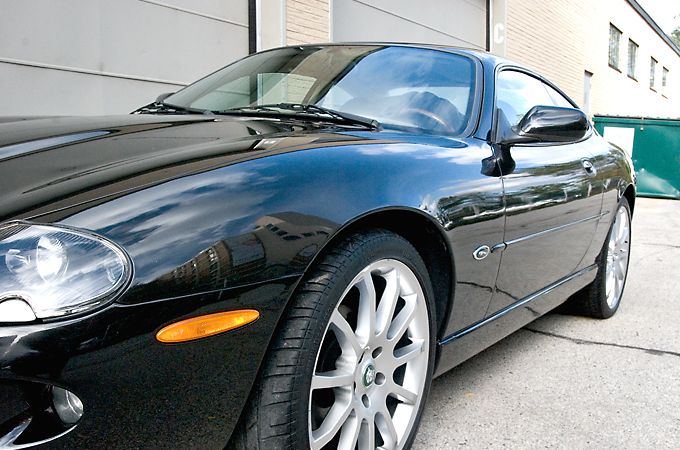
I really like the composition in this pic
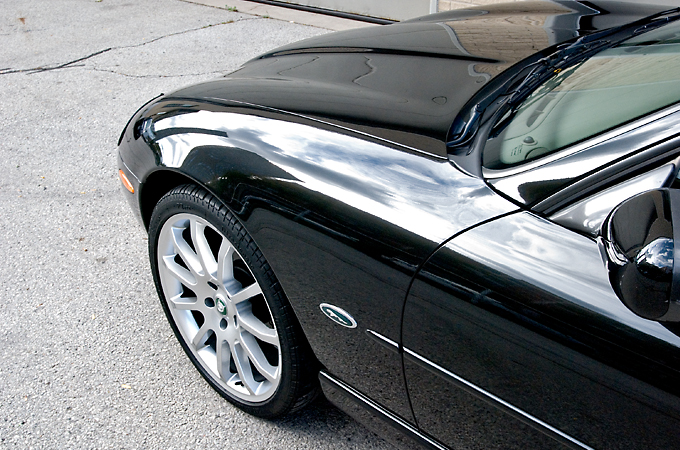
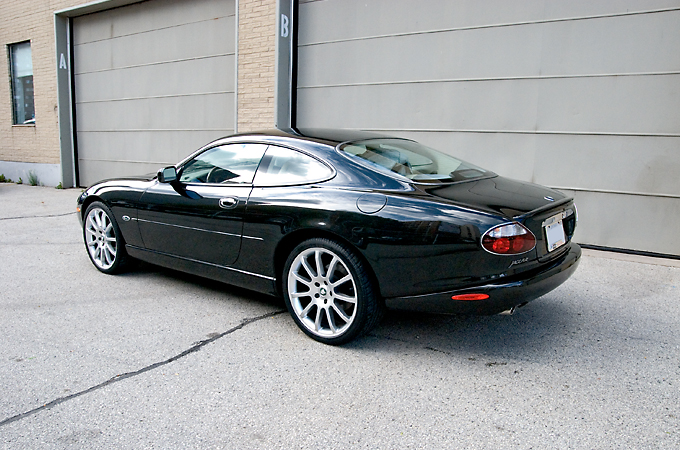
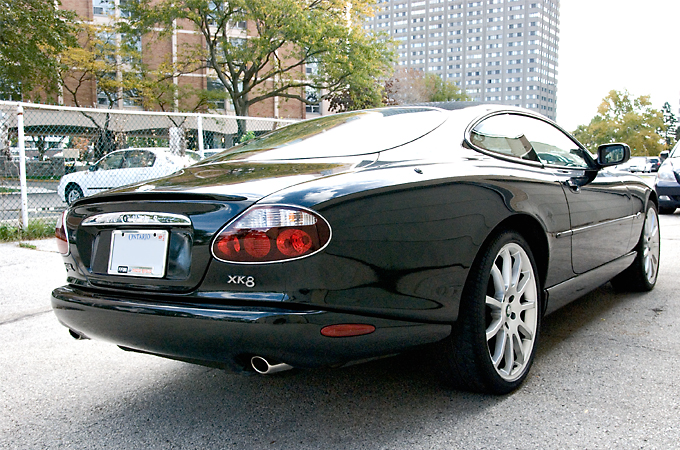
I love the cloud reflections in this pic
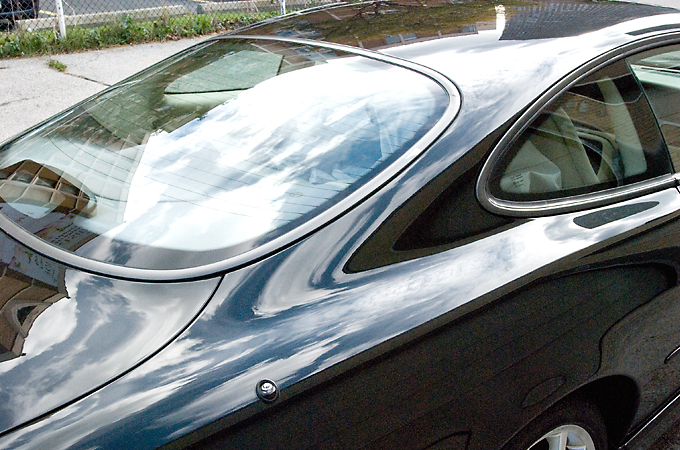
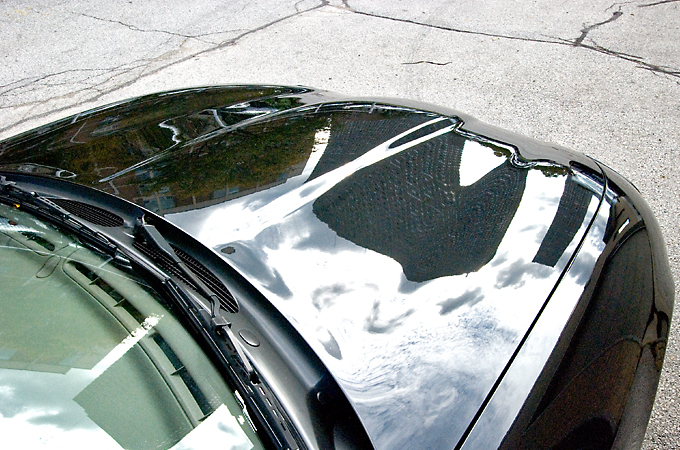
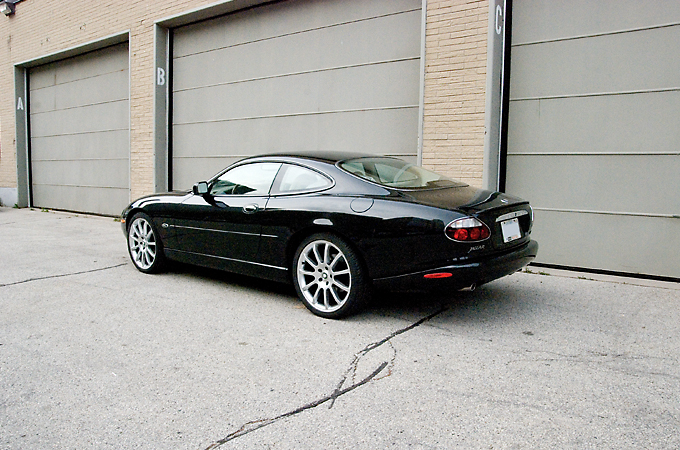
And to complete the walk around my last two favorite pics
The roof looks like a marble
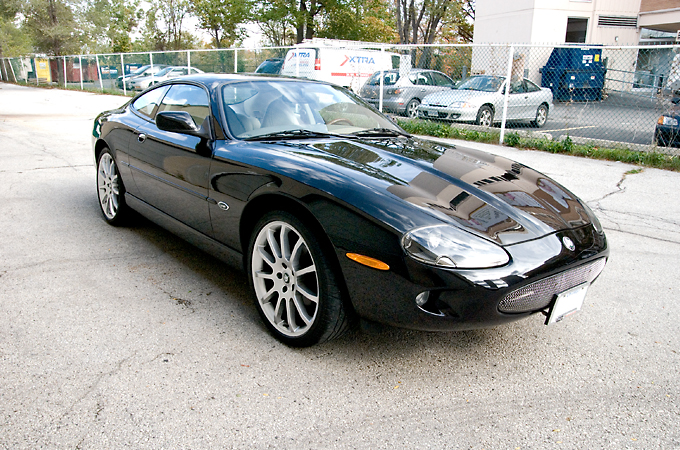
Hope you enjoyed the write up and seeing the transformation of a dull to shiny finish.
Cheers,
Wes
And here are some teaser shots of the paints shine and this is without wax
I love the way the ceiling was reflecting on the hood. This is one of my favorite pics in the write up
The wax I used was Autoglym HD. A very British wax for a British car
Applied to the car
While the wax was curing I applied dressing to the tires
And cleaned the windows
Finally we reach the eye candy. Here are the completed shots
I really like the composition in this pic
I love the cloud reflections in this pic
And to complete the walk around my last two favorite pics
The roof looks like a marble
Hope you enjoyed the write up and seeing the transformation of a dull to shiny finish.
Cheers,
Wes
Last edited by Wes_R; Feb 29, 2012 at 08:18 AM.


Senior Member
Joined: Sep 2009
Posts: 573
Likes: 86
From: Orange County, California. USA
Very nice, thanks for sharing your detailing project with us all here on the forum. I also appreciate the fact that you took the time to document with photography your before and afters. Was curious what type of paint correction and polishing steps you took, and did you use a machine? if so which and what type if pads....
Keep up the good work!
Keep up the good work!
Thread Starter
|
Member
Joined: Nov 2010
Posts: 87
Likes: 27
From: Toronto
Thanks!!
It was a 1 step with Menzerna Power Finish and a Buff & Shine yellow pad on the Flex 3401. Speed 6 to cut, Speed 4 refine, then speed 2 to jewel.
Very nice, thanks for sharing your detailing project with us all here on the forum. I also appreciate the fact that you took the time to document with photography your before and afters. Was curious what type of paint correction and polishing steps you took, and did you use a machine? if so which and what type if pads....
Keep up the good work!
Keep up the good work!
Trending Topics

Senior Member
Joined: Dec 2011
Posts: 835
Likes: 143
From: Southern California, USA
I found it interesting how you clayed while the car was still wet. I realize you were in a covered area away from the sun but did you have to keep wetting down the car to prevent water spots and did you use a clay lubricant such as spray on wax?
Also, can you please elaborate on using the alcohol wipe down prior to waxing. I have not seen that before.
Thanks for sharing and the photos. Great work and great car!
Also, can you please elaborate on using the alcohol wipe down prior to waxing. I have not seen that before.
Thanks for sharing and the photos. Great work and great car!
Senior Member
Joined: Sep 2009
Posts: 573
Likes: 86
From: Orange County, California. USA
Ok thanks for elaborating on your technique, IMO it seems had you done a multi step proccess perhaps more of the fine hairline scratches could have been eliminated. Generally when working on these Jaguar finishes its necessary to bump up the correction method to include a cut/cleaner step, a complete polishing step and then wax or seal step.
XJL, in regards to claying, yes it can be done with water, but many times this marr's the finish more than using conventional clay lube. Even if I have to cut my quick detailer 1:1 with water, its always better to use a lube, less chances of inducing new scratches.
In regards to IPA, many times detailers will use this in between steps to remove any filler oils and make sure the correction is perfect....
Again great job on a sweet ride!
Thread Starter
|
Member
Joined: Nov 2010
Posts: 87
Likes: 27
From: Toronto
Hopefully more to come.
I found it interesting how you clayed while the car was still wet. I realize you were in a covered area away from the sun but did you have to keep wetting down the car to prevent water spots and did you use a clay lubricant such as spray on wax?
Also, can you please elaborate on using the alcohol wipe down prior to waxing. I have not seen that before.
Thanks for sharing and the photos. Great work and great car!
Also, can you please elaborate on using the alcohol wipe down prior to waxing. I have not seen that before.
Thanks for sharing and the photos. Great work and great car!
Yeah I just go straight to claying after washing as I would rather not dry then wet and then dry again if possible. I do spray with either lube or water the surface I am claying and then dry that section. Water spots are not really a problem as the water here is not harsh. If I was washing outside though in the sun etc I would definitely dry first but if I can save the time I will, always depending on the circumstances though.
Basically what David said below regarding being able to inspect the true condition of the paint but I'll also add that the polishes oils need to be cleaned away because the wax needs a clean surface to bond to the paint properly in order to get the good durability. If you just go straight to waxing without cleaning the polish oils away then your just applying wax on top of oils rather then directly to paint. If you see Menzerna polishes in action they are pretty oily.
Ok thanks for elaborating on your technique, IMO it seems had you done a multi step proccess perhaps more of the fine hairline scratches could have been eliminated. Generally when working on these Jaguar finishes its necessary to bump up the correction method to include a cut/cleaner step, a complete polishing step and then wax or seal step.
XJL, in regards to claying, yes it can be done with water, but many times this marr's the finish more than using conventional clay lube. Even if I have to cut my quick detailer 1:1 with water, its always better to use a lube, less chances of inducing new scratches.
In regards to IPA, many times detailers will use this in between steps to remove any filler oils and make sure the correction is perfect....
Again great job on a sweet ride!
XJL, in regards to claying, yes it can be done with water, but many times this marr's the finish more than using conventional clay lube. Even if I have to cut my quick detailer 1:1 with water, its always better to use a lube, less chances of inducing new scratches.
In regards to IPA, many times detailers will use this in between steps to remove any filler oils and make sure the correction is perfect....
Again great job on a sweet ride!
As I said in the 2nd paragraph the owner and I came to the conclusion that a 1 step polish would be best and more practical as he would not be able to keep it perfect had I M105 and Po106Fa the paint.
Looks awesome! I wish my 'before' pictures looked as good as yours, my car is a mess. A friend of mine is looking to start his own auto detailing/tuning garage business so I'm going to have him work on it next weekend. My wife usually does my detailing for me, LOL.
I love the XK8 though, good looking car!
I love the XK8 though, good looking car!
Thread Starter
|
Member
Joined: Nov 2010
Posts: 87
Likes: 27
From: Toronto
Looks awesome! I wish my 'before' pictures looked as good as yours, my car is a mess. A friend of mine is looking to start his own auto detailing/tuning garage business so I'm going to have him work on it next weekend. My wife usually does my detailing for me, LOL.
I love the XK8 though, good looking car!
I love the XK8 though, good looking car!


Joined: Dec 2011
Posts: 120,439
Likes: 17,014
From: Durham, UK
Please drop by the New Member Area - Intro a MUST section and introduce yourself and your vehicle to all the members.
Graham

Thread Starter
|
Member
Joined: Nov 2010
Posts: 87
Likes: 27
From: Toronto
Thanks! Yes they do.
Thanks David, hope all is well with you!
Thanks David, hope all is well with you!