
My SVR build thread, yes I am going to mod it.


Thread Starter
|
Senior Member
Joined: Nov 2011
Posts: 536
Likes: 135
From: UK
Well after all the recent polishing and wax for the first time I truly got to see how the car looks in the sun today and boy does it look awesome, what a truly stunning car. Also it really turns heads as well being such a good looking car in such a bright colour.
Having just enjoyed seeing an SVR in Top Gear and of course pretty much my buddies Mustang also it only made sense to post up these images I took today.
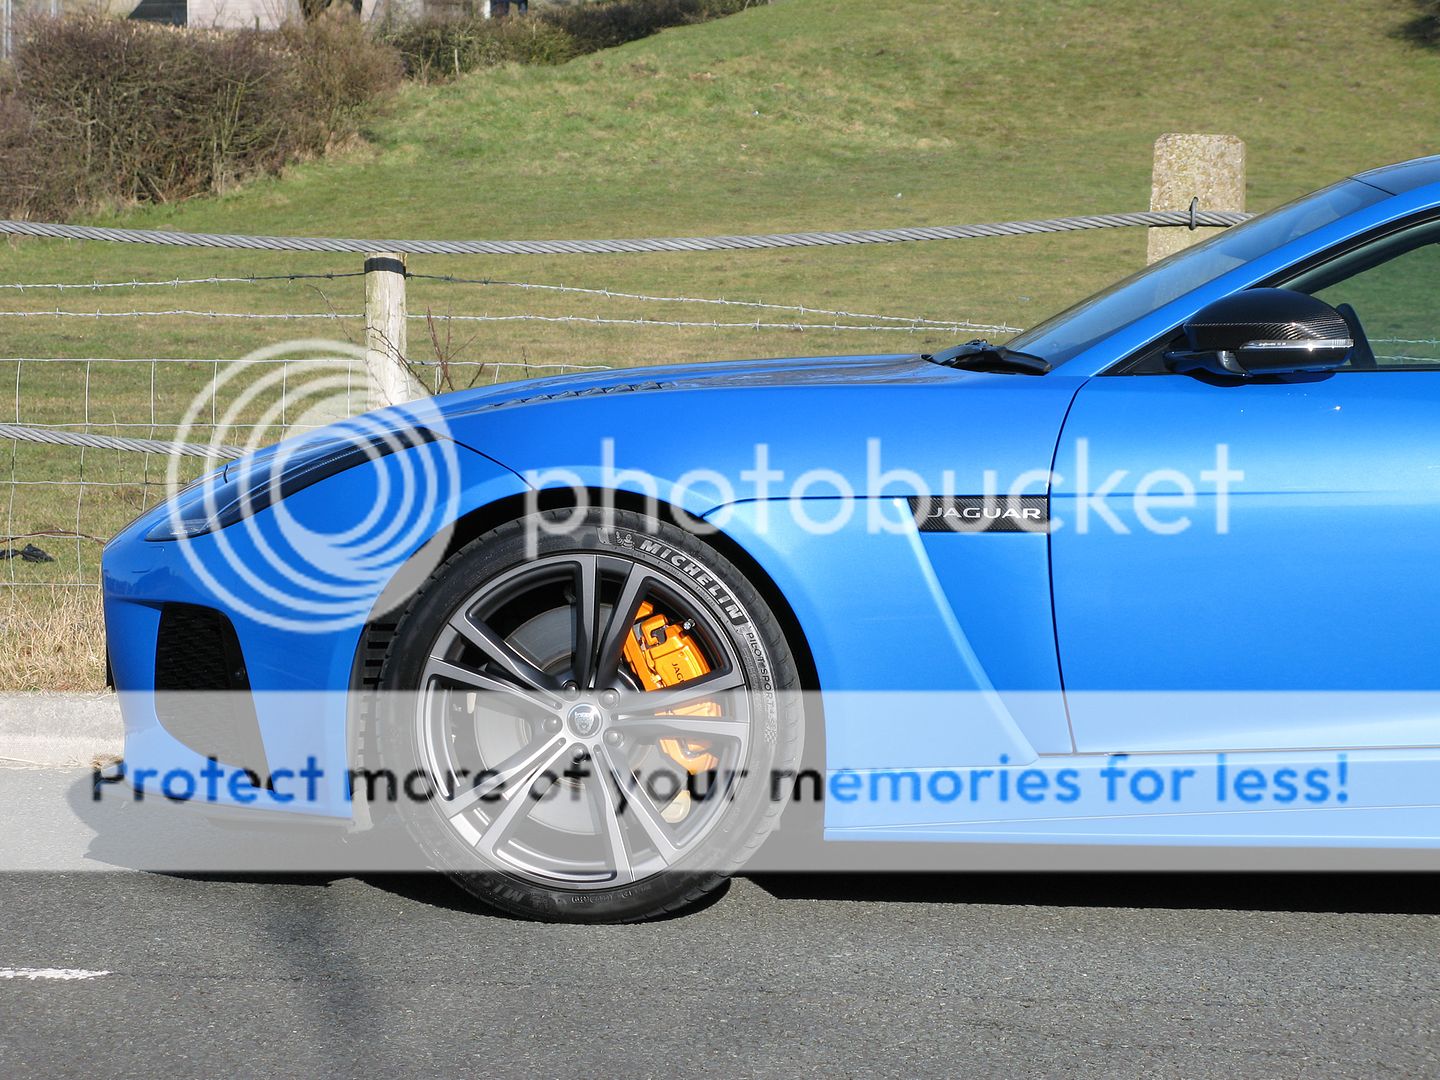
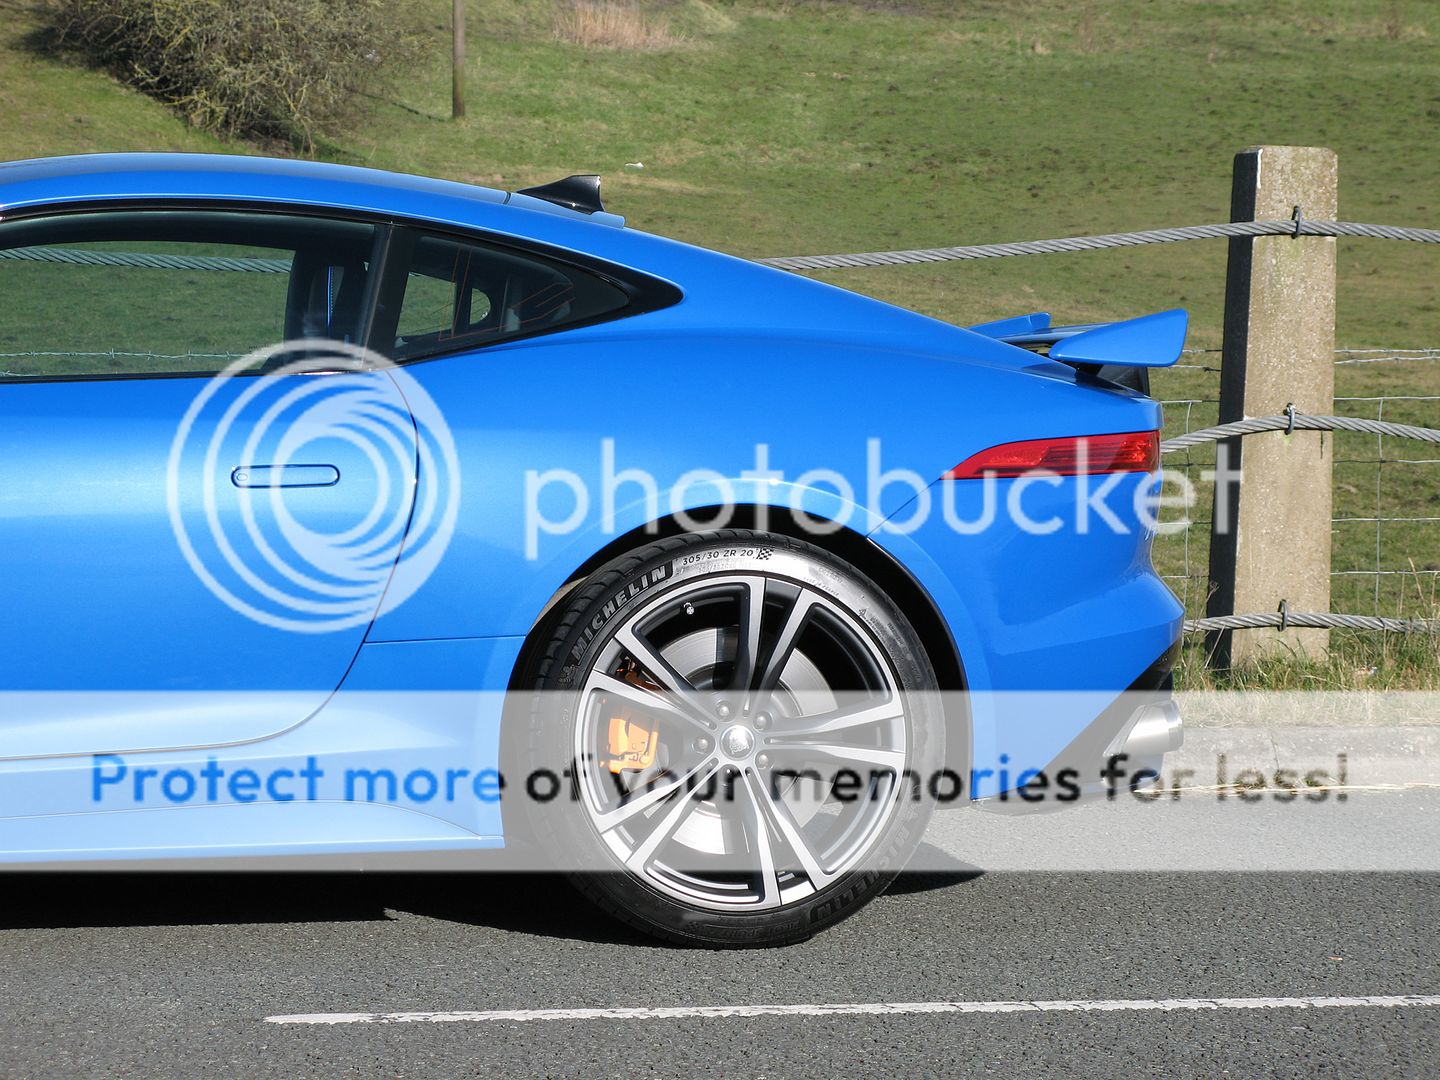
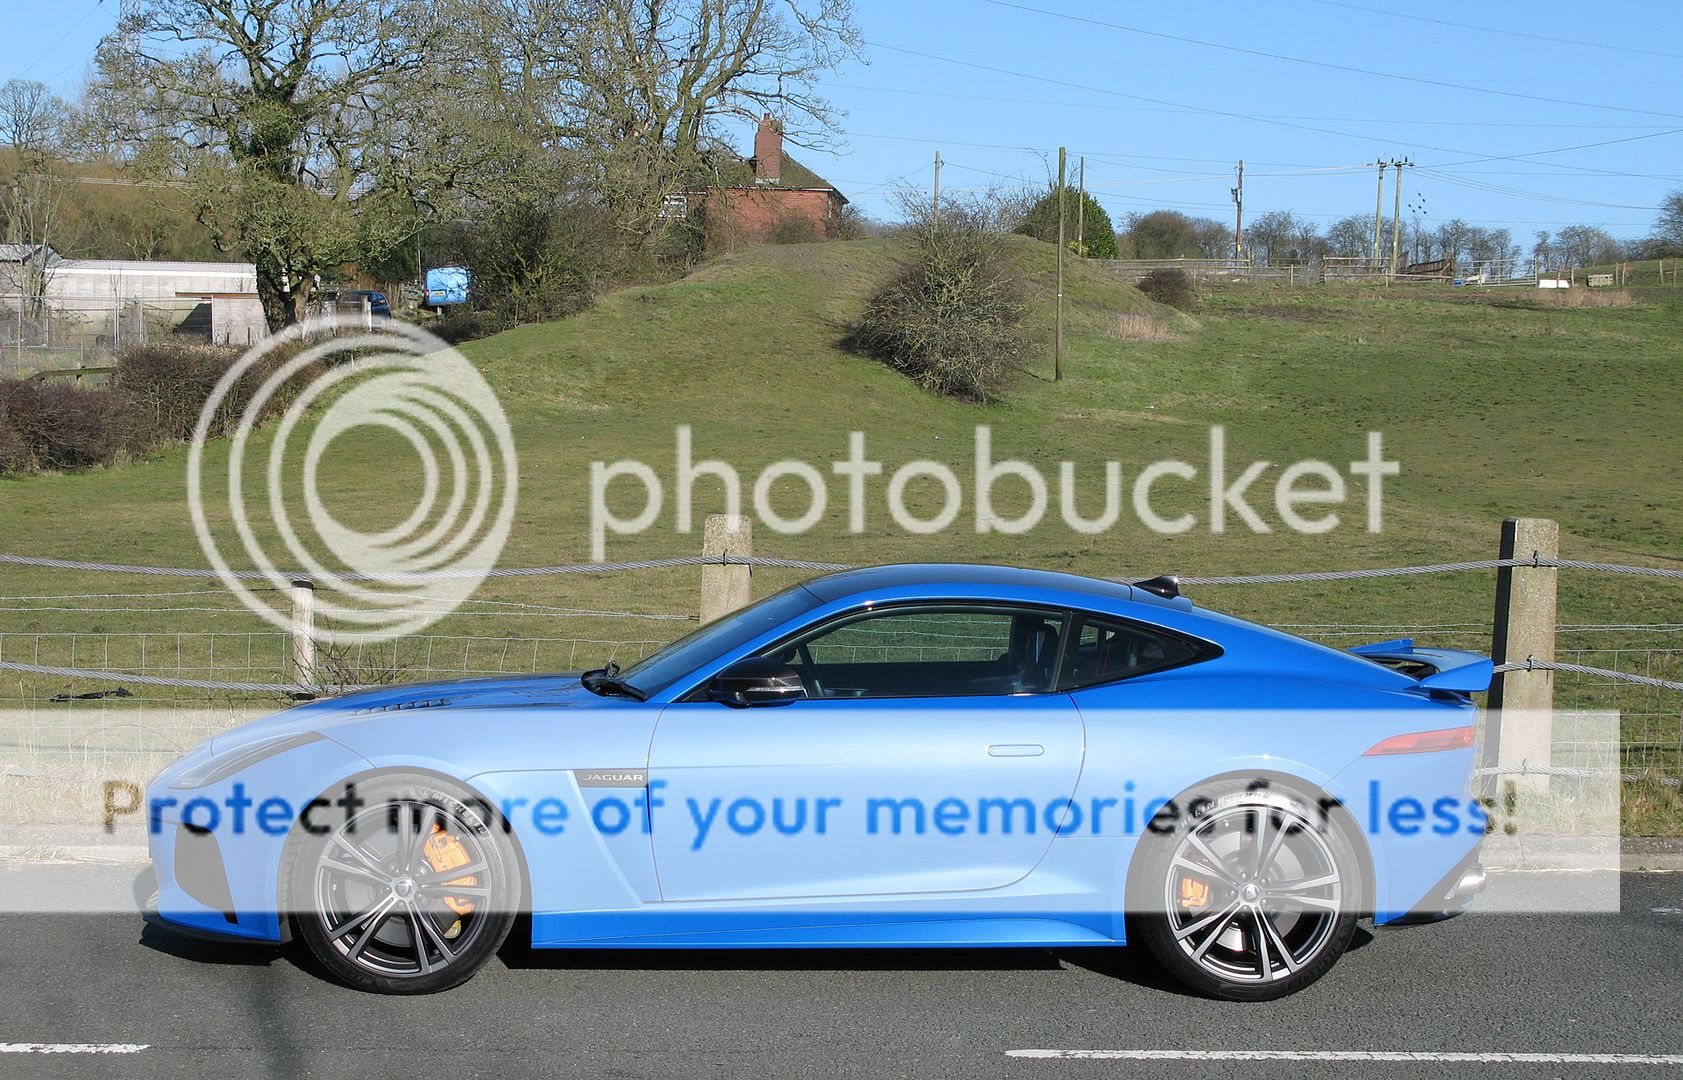
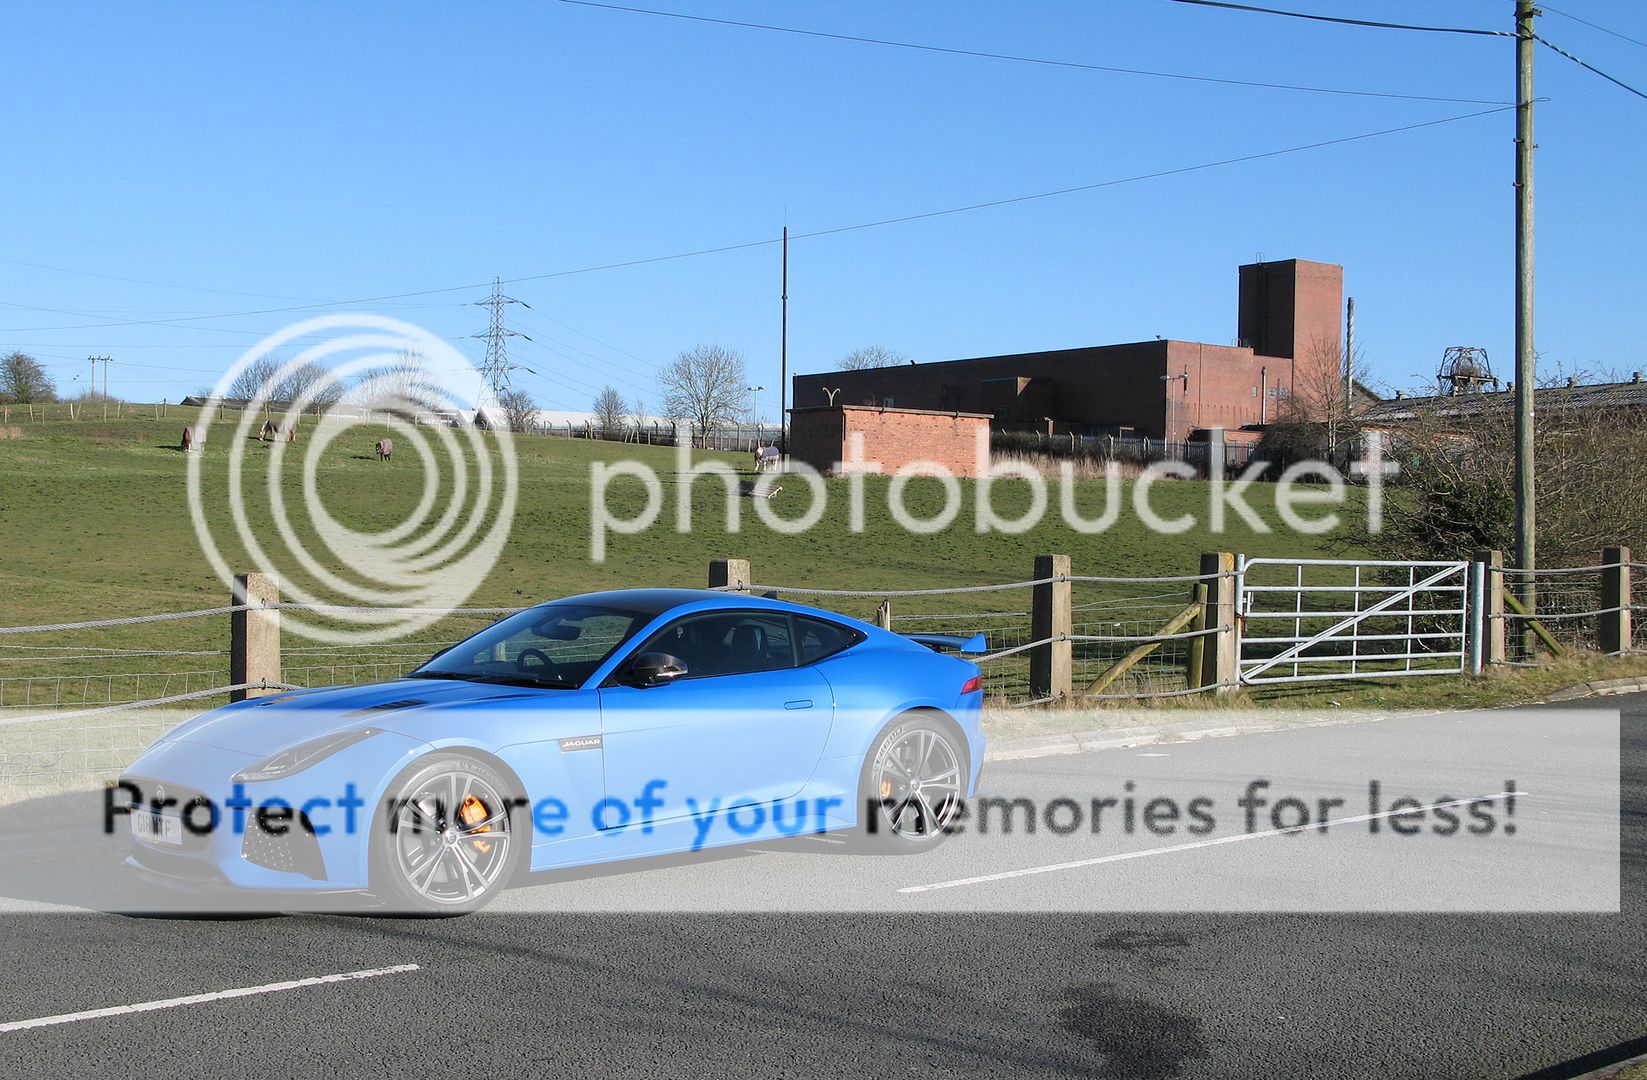

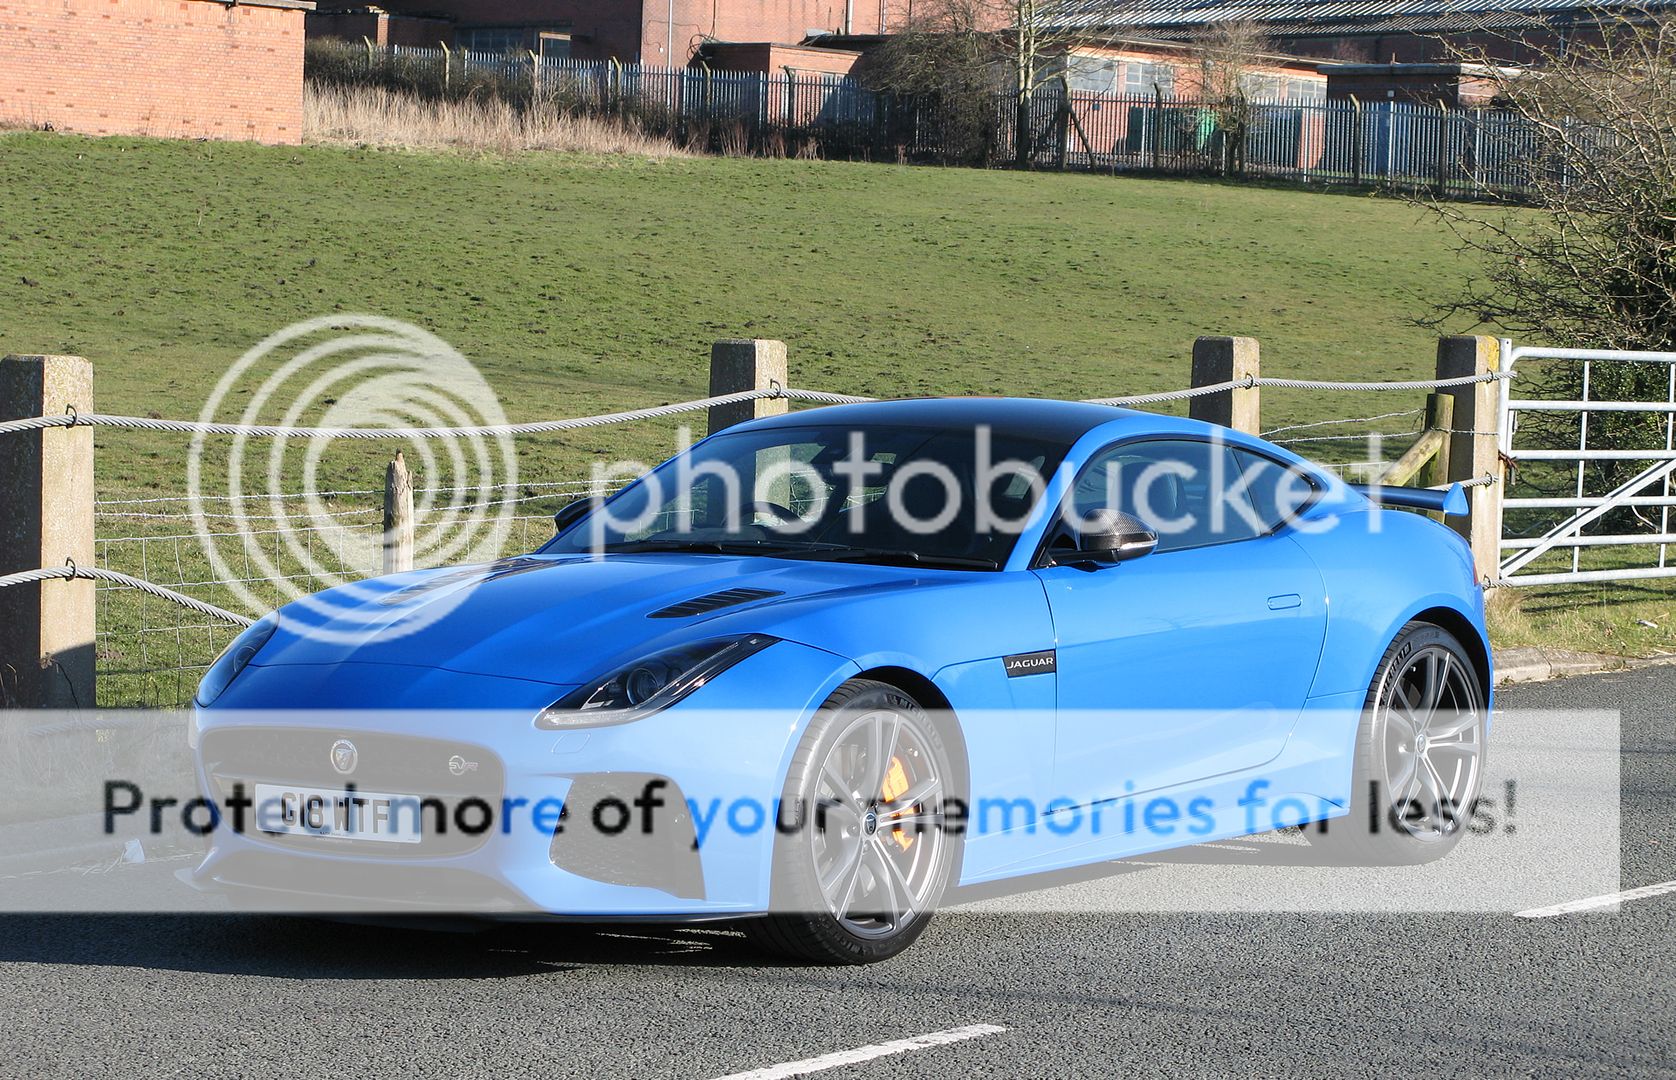
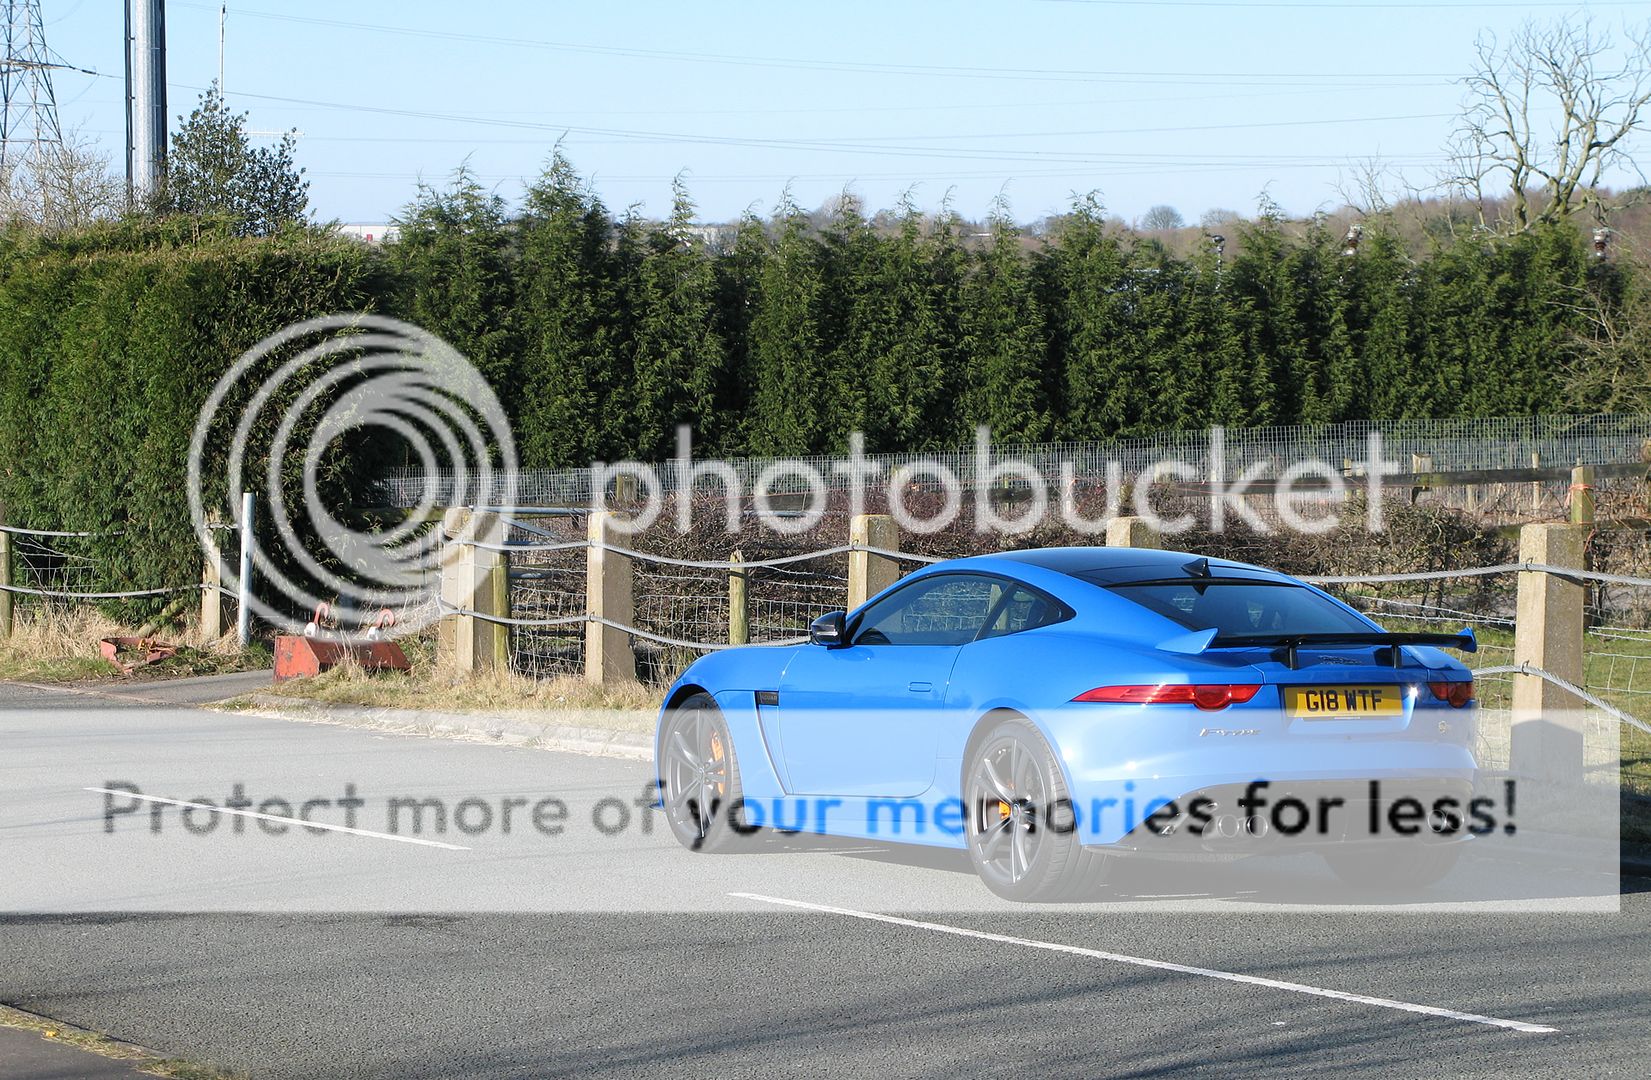
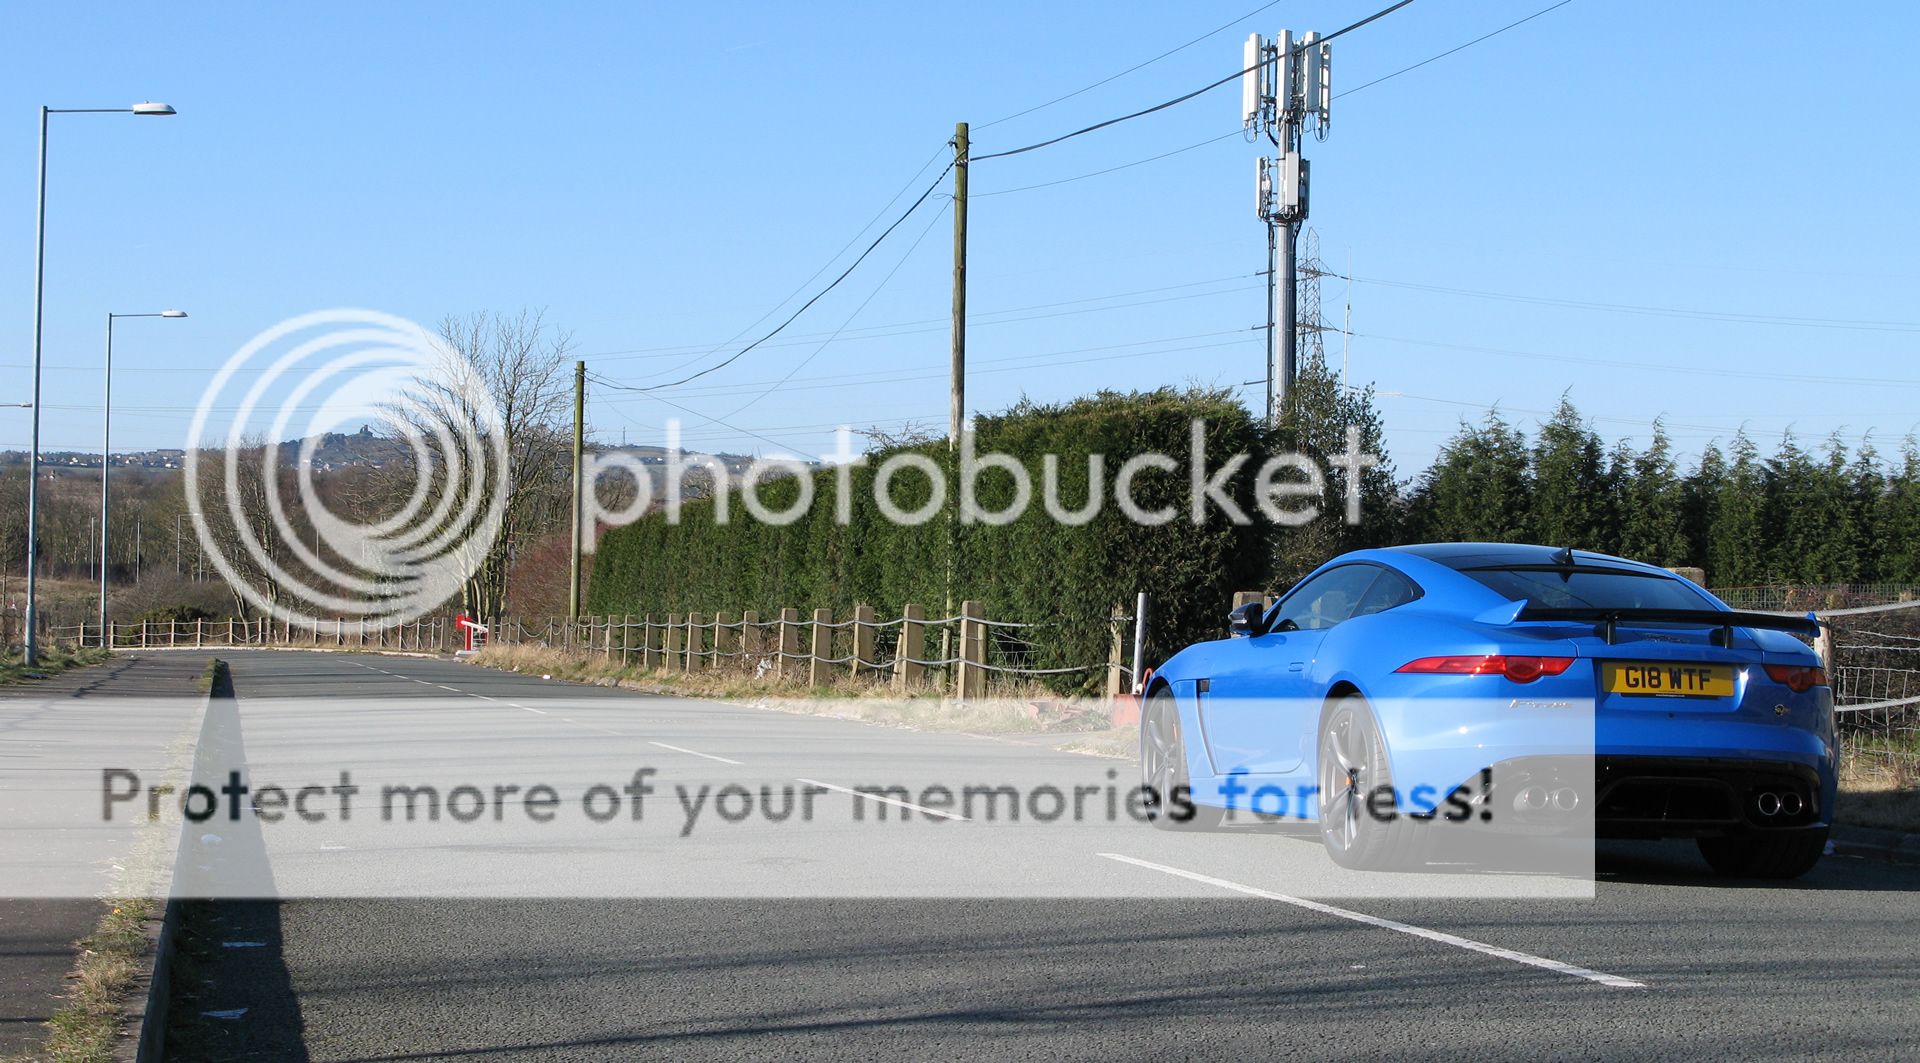
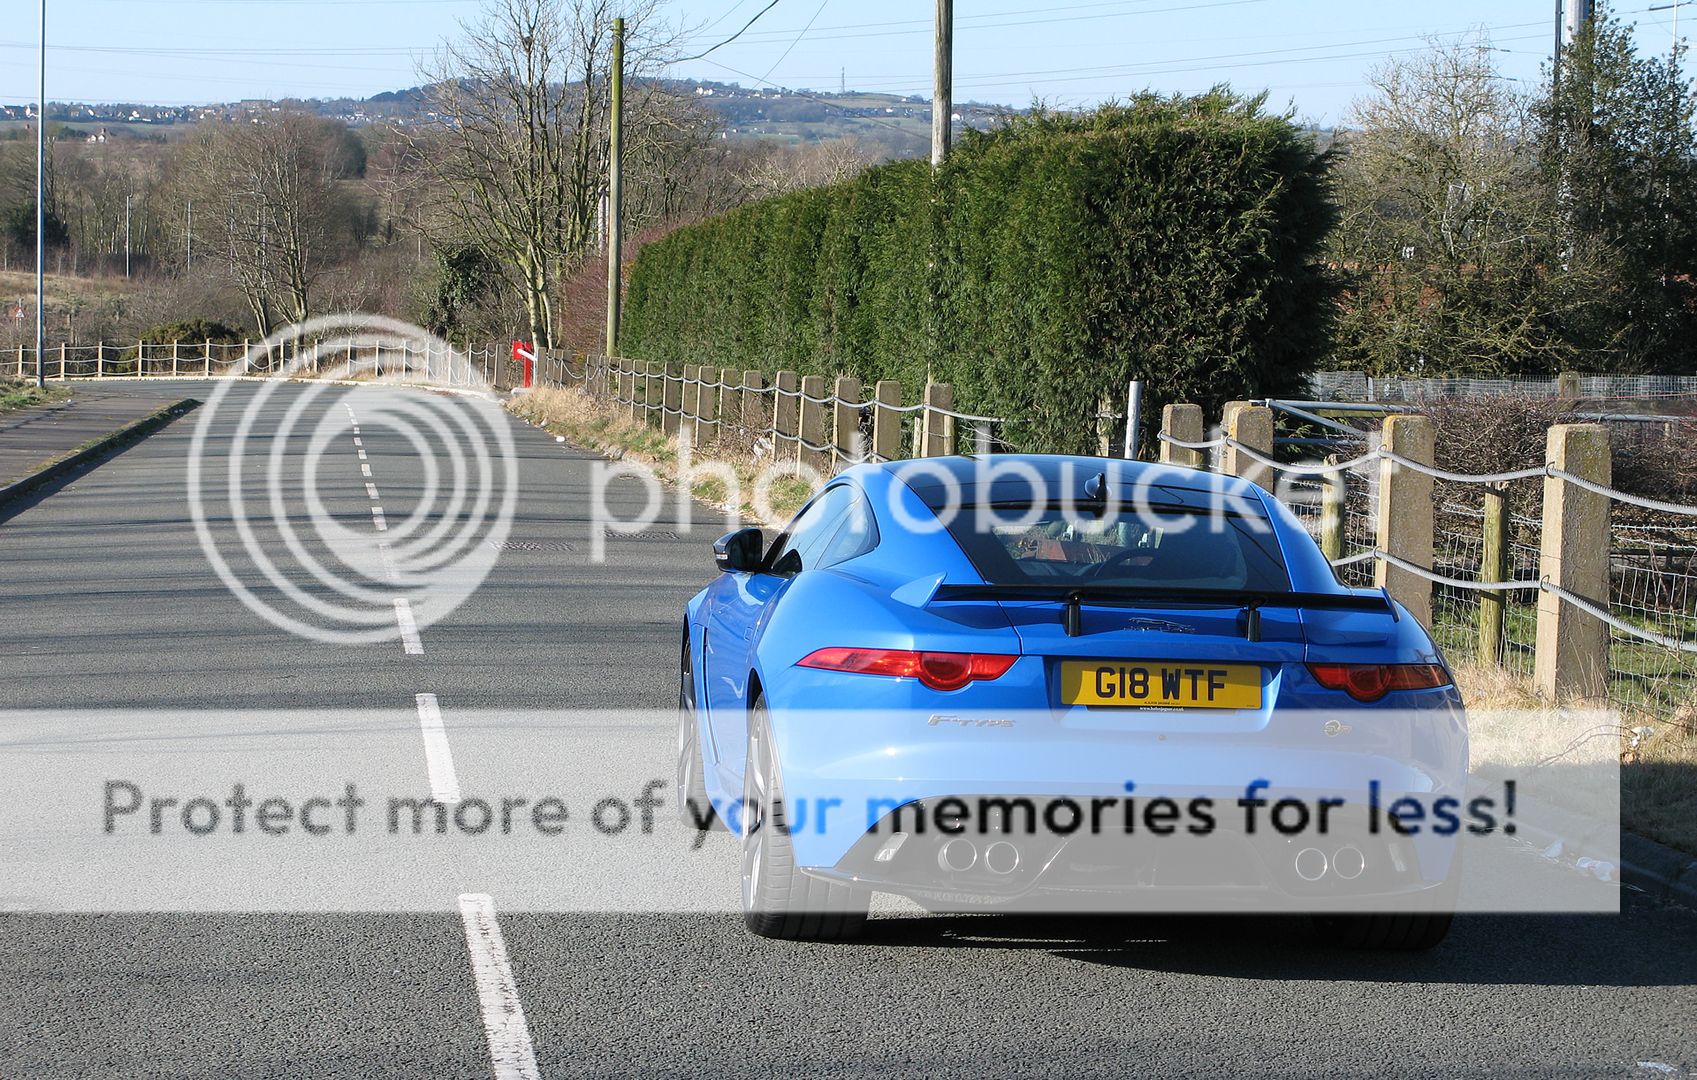
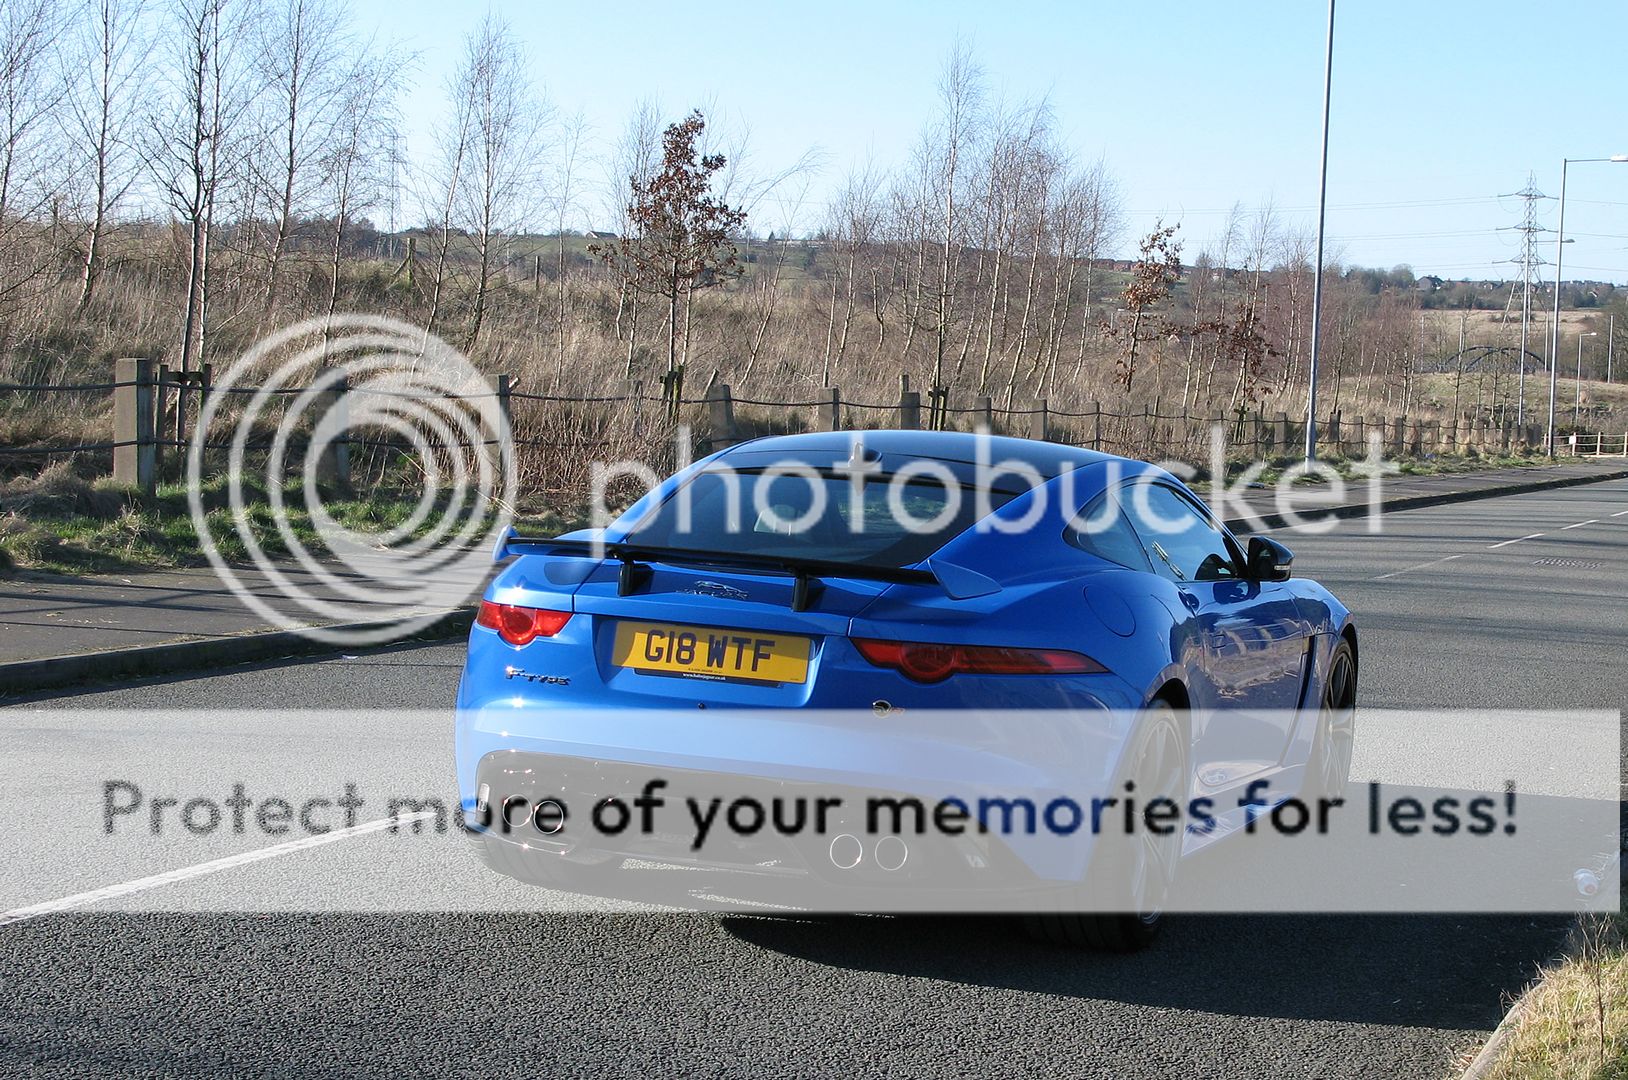

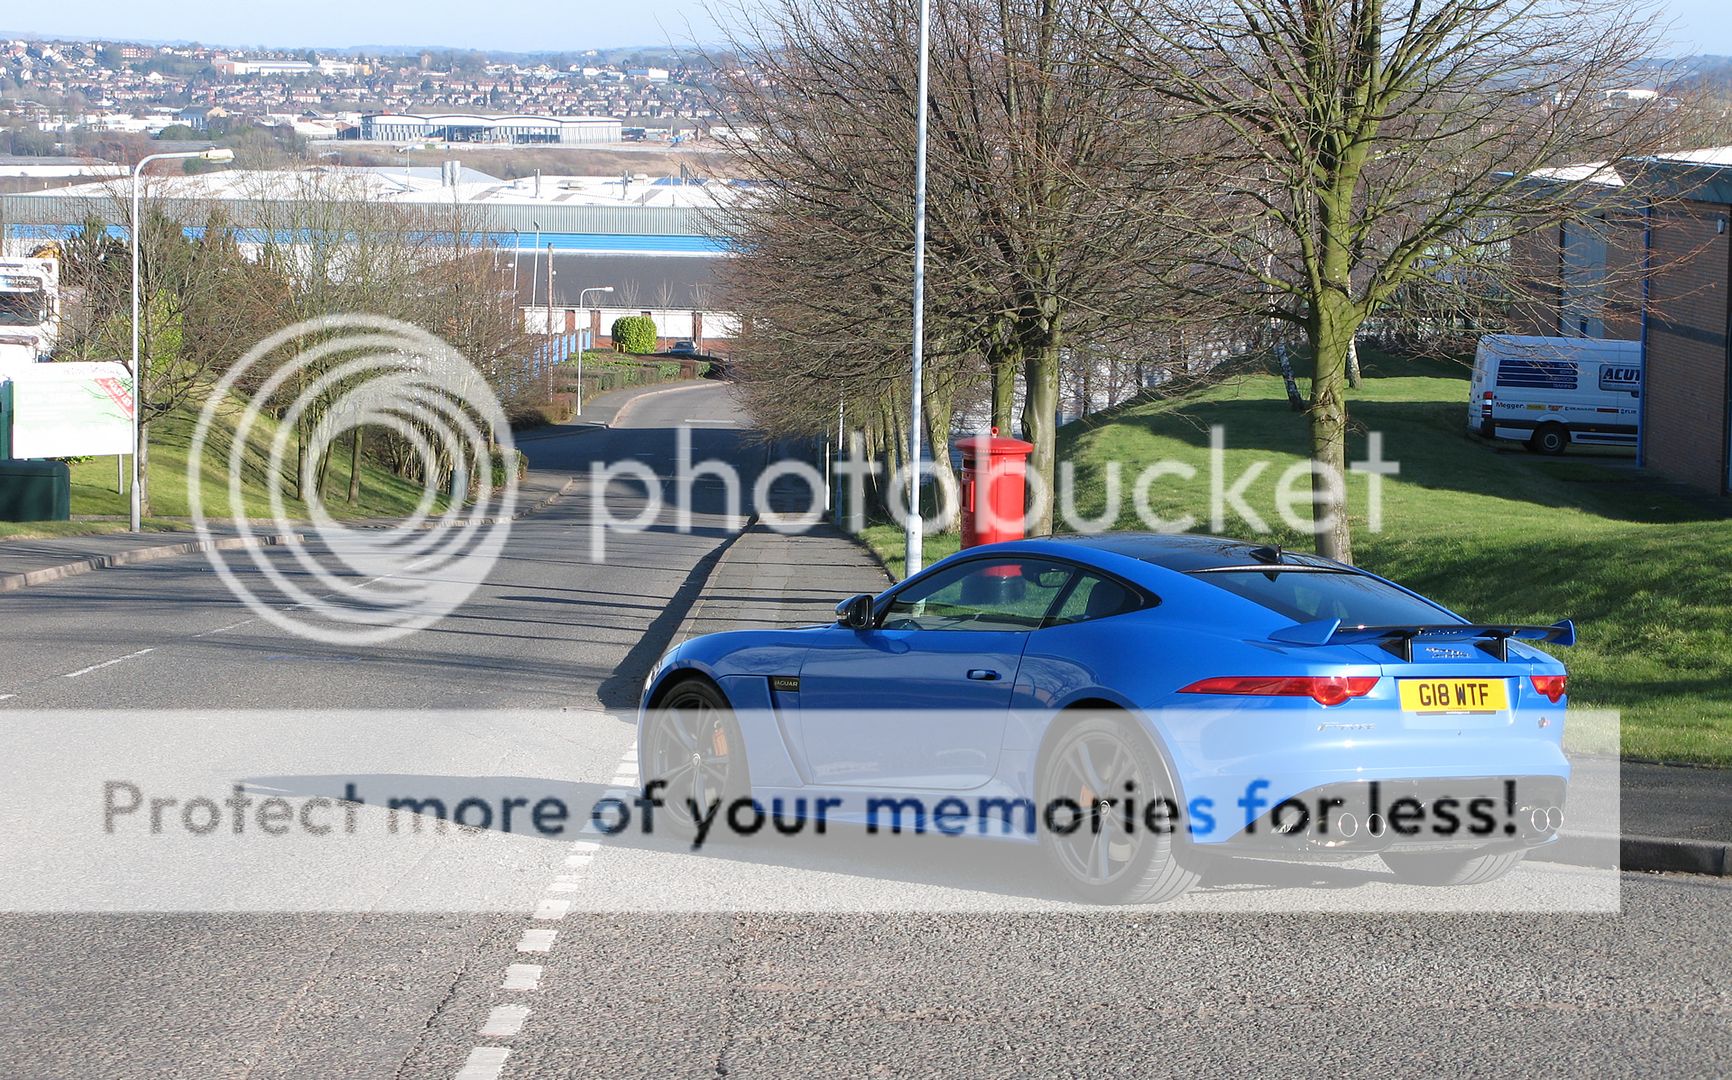

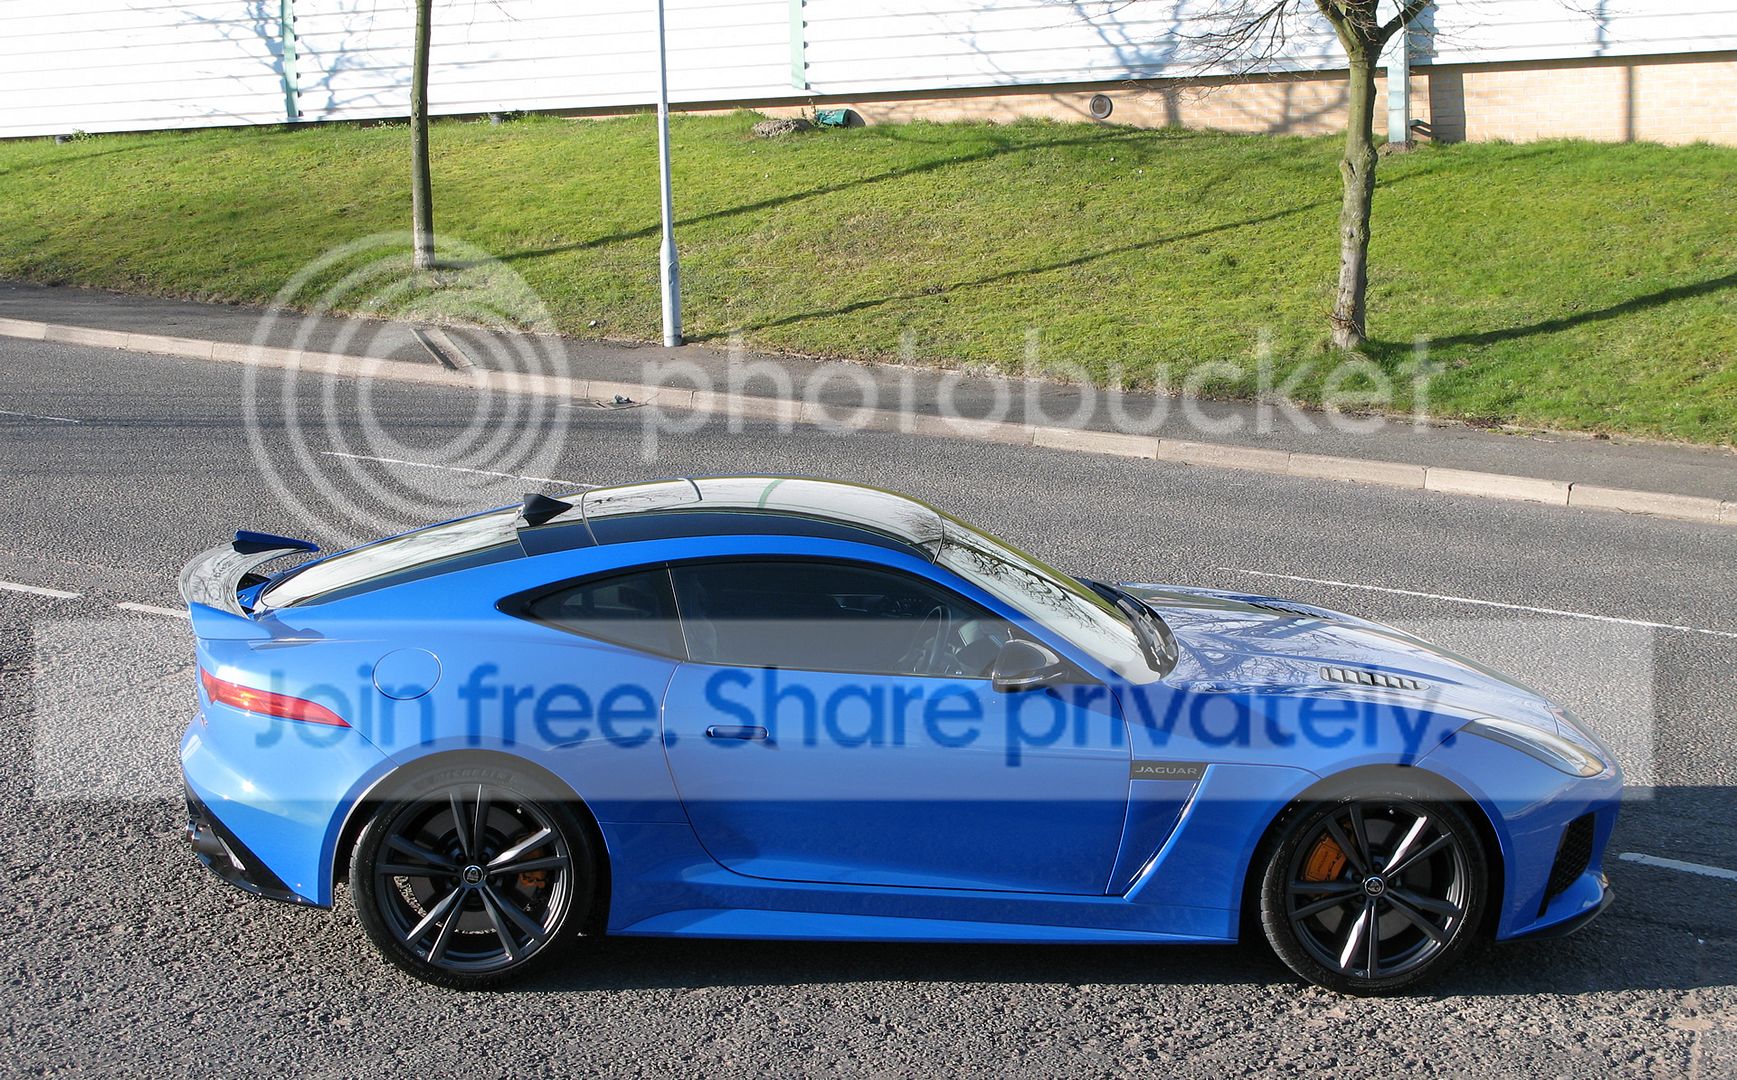
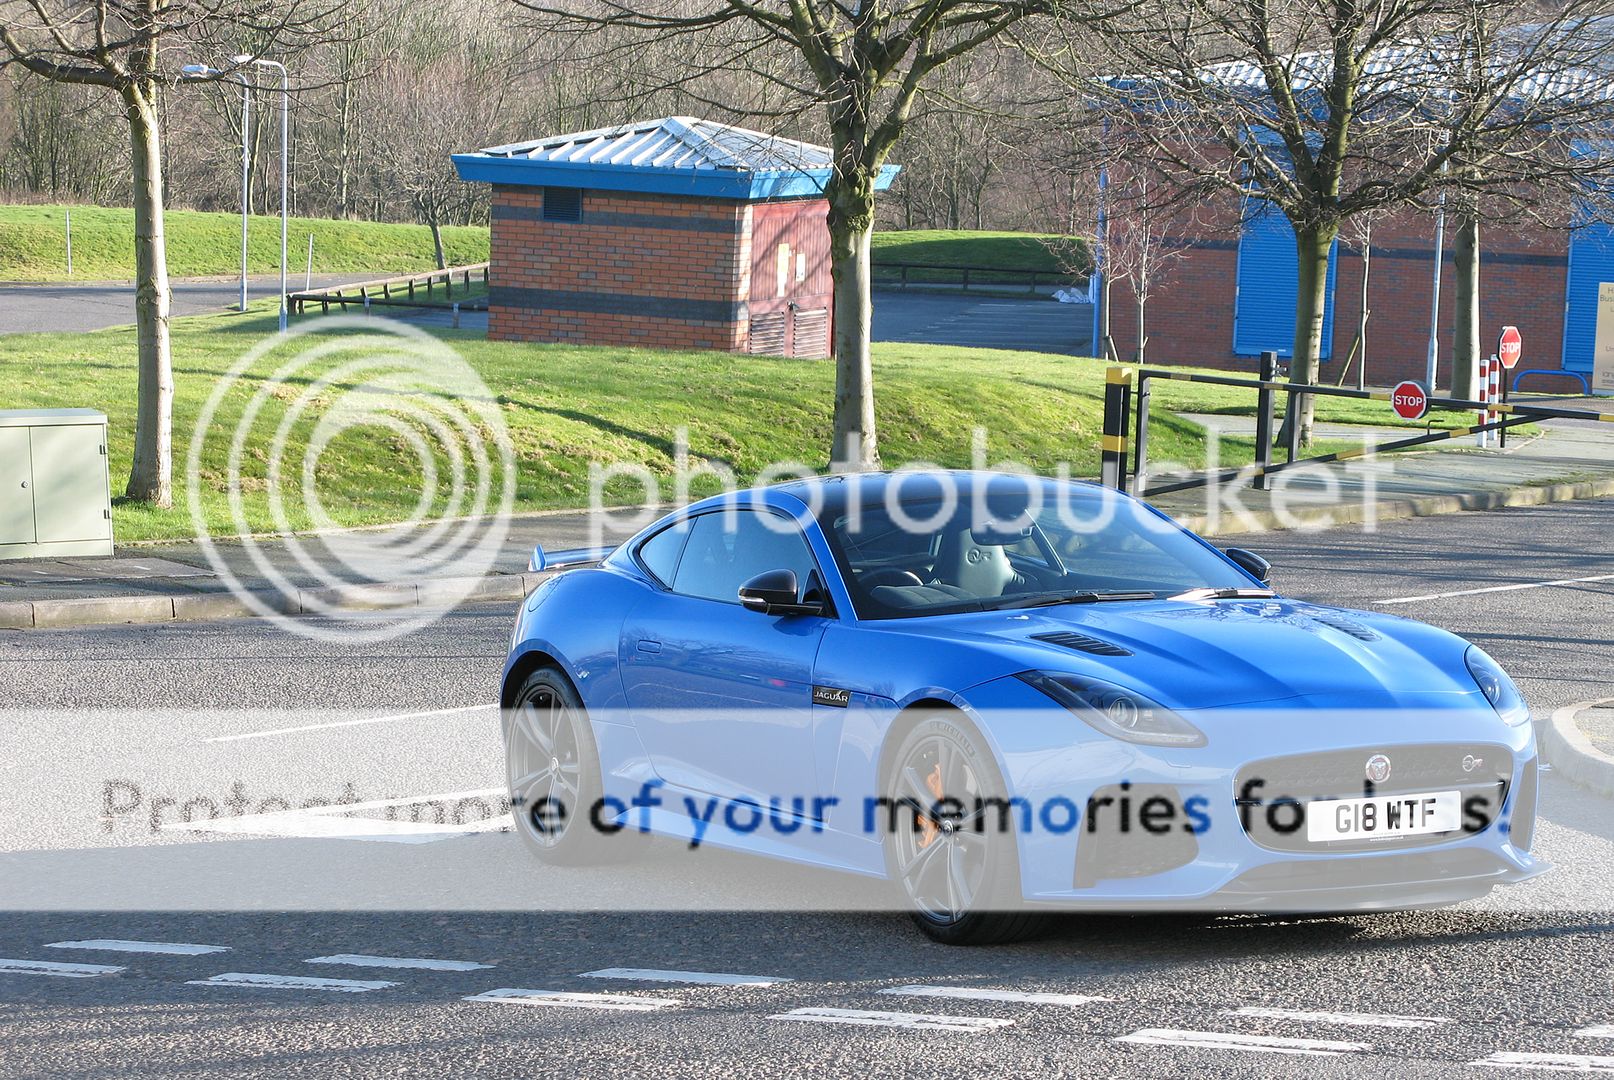
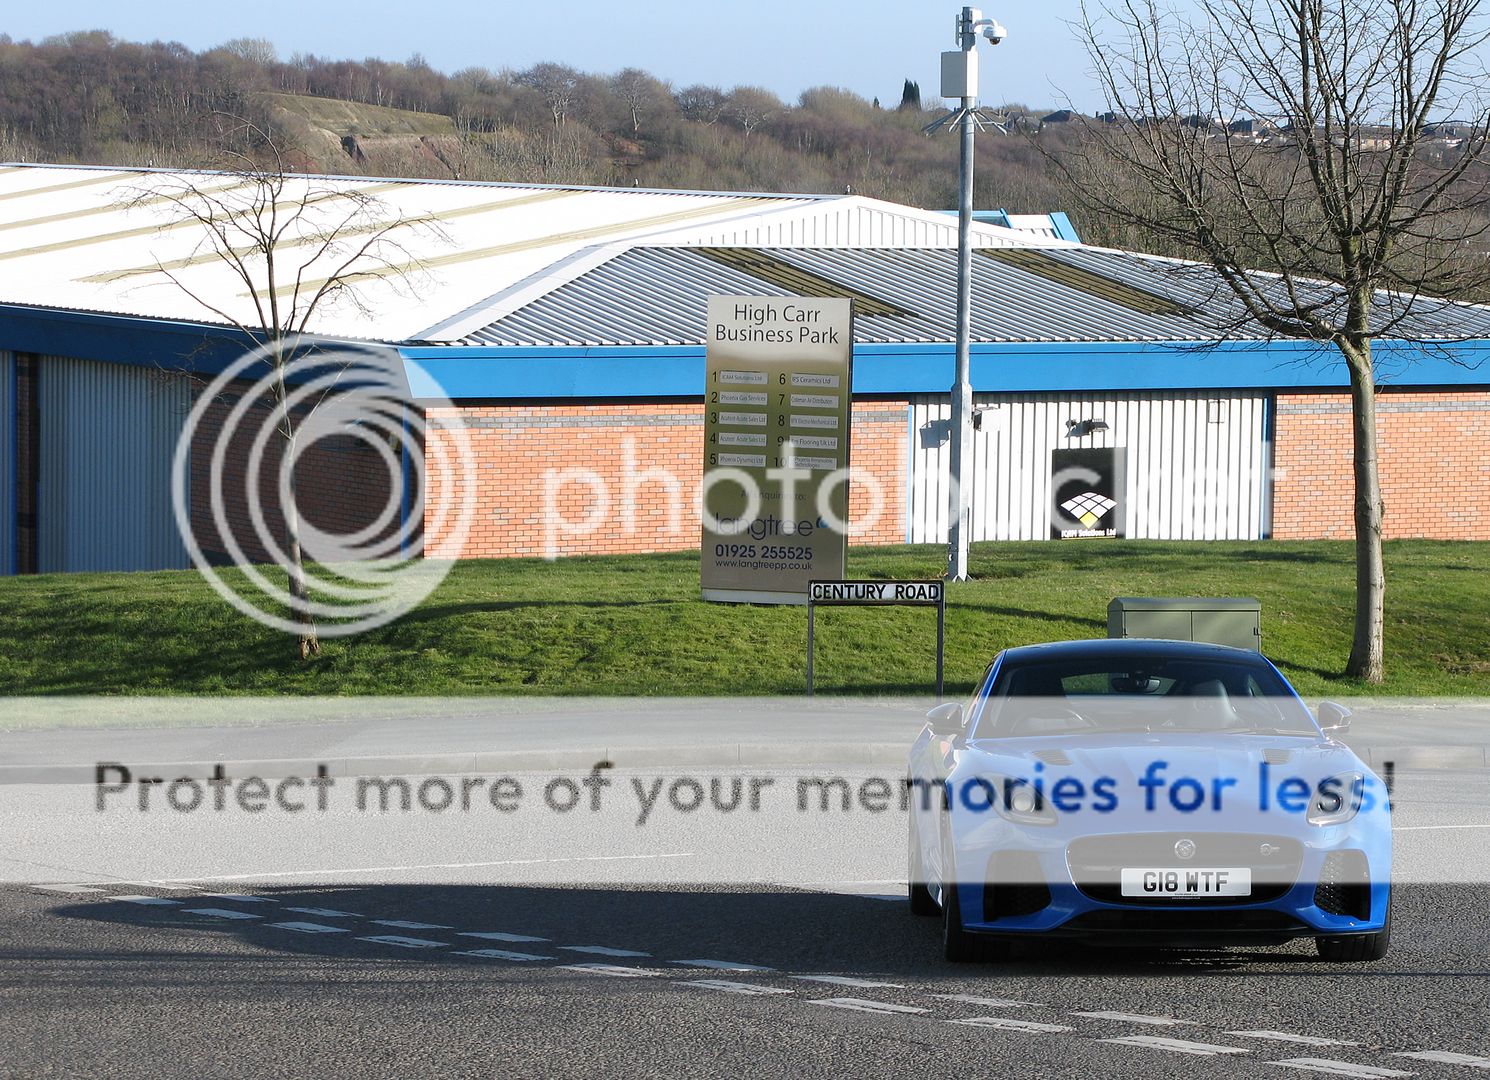
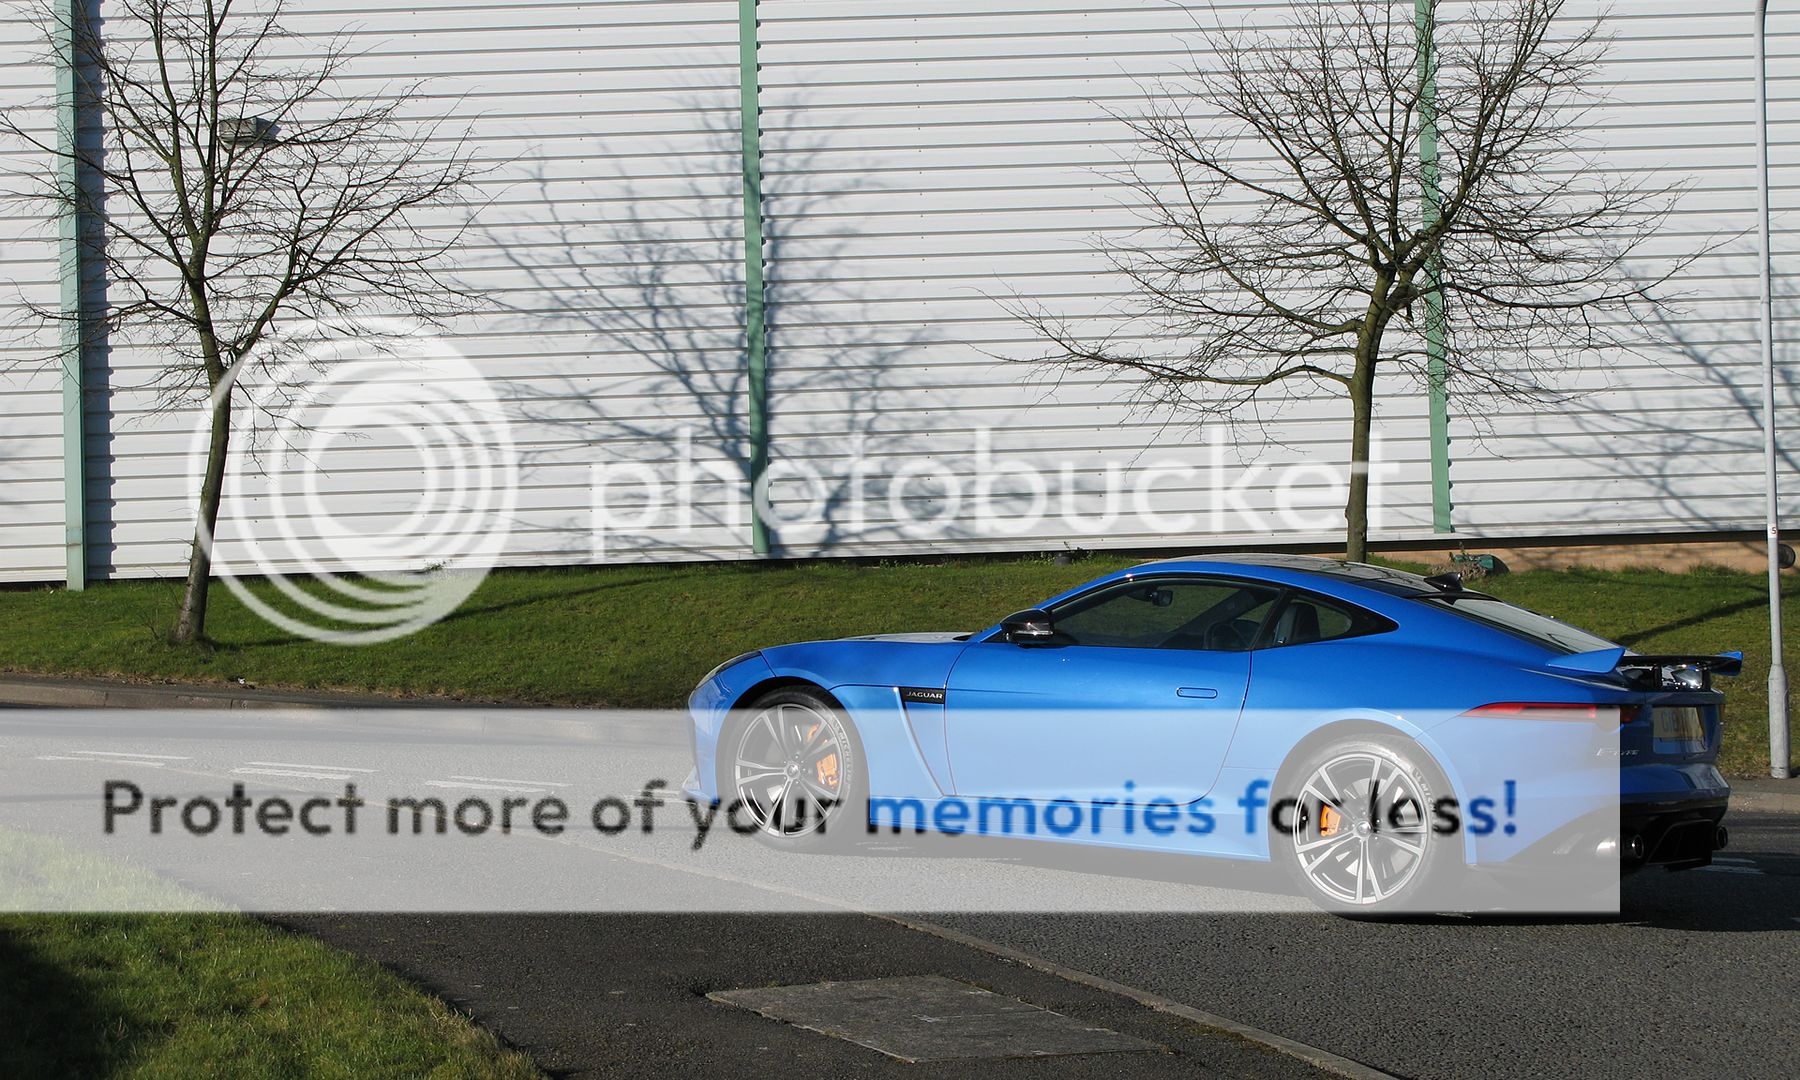
Really enjoying this car and I think the small little styling tweaks have worked so well with the orange calipers, black wheel centres and lug nuts.
Having just enjoyed seeing an SVR in Top Gear and of course pretty much my buddies Mustang also it only made sense to post up these images I took today.
Really enjoying this car and I think the small little styling tweaks have worked so well with the orange calipers, black wheel centres and lug nuts.

Veteran Member


Joined: Feb 2014
Posts: 9,030
Likes: 3,664
From: Adelaide, South Australia
But you pulled the plug well before 200 mph!
Did you chicken out or what?
Just kidding, probably traffic and/or ran out of straight road.
(PS - I notice your TPMS warning light flashing away).
Did you chicken out or what?
Just kidding, probably traffic and/or ran out of straight road.
(PS - I notice your TPMS warning light flashing away).
Thread Starter
|
Senior Member
Joined: Nov 2011
Posts: 536
Likes: 135
From: UK
Yes dud TPMS sensors in new wheels, will change them out at somepoint.
Here is me racing my mates GTR, the SVR is savage off the line:

Thread Starter
|
Senior Member
Joined: Nov 2011
Posts: 536
Likes: 135
From: UK
Yes I am planning following:
- 2PC Wortec rotors, should save me 20kg / 45lbs, similar to ceramics. Going to see if I can get some carbotech pads made up as well to go with new disc.
- Searching for a lighter battery, to save another 10kg or so, but not a crazy expensive lithium one.
- Weight reduction, if I find something I can remove I shall, its free afterall, but seems not so much to remove without spoiling the car.
Then in a year or so time I shall probably get a VAP Tune and smaller SC pulley to put the car around 650HP.
P.S. I have a black growler badge for front grill once I figure out how to remove the red growler, it don't want to budge, LOL!
Any ideas you may I have, I am listening. Would love to get the weight down as a priority but like I say am really out of ideas. Could maybe look at removing the subwoofers if they are easily accessible as I don't play music so much with the amazing sound from engine. Mine also has powered tailgate, am guessing their is a motor for that which could be removed?
Last edited by Gibbo205; Mar 13, 2018 at 07:03 AM.
Veteran Member
Joined: Feb 2014
Posts: 9,030
Likes: 3,664
From: Adelaide, South Australia
I vaguely recall Cambo telling me one day that the power tailgate motors are in the actual struts. If that is true then you would need to swap them out for "plain" struts and the small weight saving probably wouldn't justify the cost.
Thread Starter
|
Senior Member
Joined: Nov 2011
Posts: 536
Likes: 135
From: UK
Had a chat with Dale Lomas today, the guy who drives the ring taxi SVR to see if I was imagining the additional confidence when driving the car in wet mode in the wet. He has confirmed:
Rain Mode: AWD split is as close to 50/50 automatic as possible.
Dynamic mode: AWD split is 90% rear and 10% front automatic.
So when I was feeling the rear slide out in the wet and then straighten in dynamic but in wet mode I could just really keep the car tidier and put power down with less traction cut was not me imagining it.
I am amazed Jaguar do not market this, as I feel its yet another real strength of the car to be able to adjust the AWD split on the fly with the wet, normal and dynamic modes. No idea what AWD split normal is as I've not asked.
Dale said on wet and slippery laps he puts the SVR in wet mode, DSC fully off and manual gears and it gives a real advantage to running the car in dynamic mode in such conditions.
Veteran Member
Joined: Feb 2014
Posts: 9,030
Likes: 3,664
From: Adelaide, South Australia
It looks like Cambo was right, different parts for plain vs power with the power struts costing more than twice as much, see items 9 and 10 on this diagram: https://www.jaguarlandroverrenoparts...-hardware-scat
Thread Starter
|
Senior Member
Joined: Nov 2011
Posts: 536
Likes: 135
From: UK
Hood:
First attempt adjusting the six rubber height adjusters, they may achieve the alignment you want.
If that fails the hinges have stop nuts, you can screw them down or up and these have quite an impact on the height of hood towards outer edges and if I remember is just a 10mm socket.
Lastly and more difficult is loosening the hinge itself which then gives you full hood adjustment in all directions and is really a two man job and a lot more tricky but this gives you a lot more movement both up and down and forwards and backward. If you need to go this route be prepared for a lot of fine tuning and hassle.
Trunk / boot:
Again easy method adjust the two rubbers in the trunk lid to level the boot up. For most this should work.
If however its still too high and you need to pull it down more or adjust it up then remove the boot interior trim and slacken of the locking mechanism and then move it up or down a couple of mm depending on which direction you need to adjust in, then re-tighten.
Veteran Member
Joined: Feb 2014
Posts: 9,030
Likes: 3,664
From: Adelaide, South Australia
Hood:
First attempt adjusting the six rubber height adjusters, they may achieve the alignment you want.
If that fails the hinges have stop nuts, you can screw them down or up and these have quite an impact on the height of hood towards outer edges and if I remember is just a 10mm socket.
Lastly and more difficult is loosening the hinge itself which then gives you full hood adjustment in all directions and is really a two man job and a lot more tricky but this gives you a lot more movement both up and down and forwards and backward. If you need to go this route be prepared for a lot of fine tuning and hassle.
Trunk / boot:
Again easy method adjust the two rubbers in the trunk lid to level the boot up. For most this should work.
If however its still too high and you need to pull it down more or adjust it up then remove the boot interior trim and slacken of the locking mechanism and then move it up or down a couple of mm depending on which direction you need to adjust in, then re-tighten.
On my car the gap across the front edge of the hood (where it meets the bumper) was very uneven - about 3 mm gap on the RHS and about 6 mm gap on the LHS.
Instead of adjusting the hood (which was perfectly aligned) I adjusted the bumper.
I simply loosened off the three bolts across the top of the bumper on the LHS (there are six bolts in all across the top) and pushed that side of the bumper in towards the car about 3 mm, then tightened the bolts back up again. Hey presto, perfectly even gap across the front! You will need to keep pressure on the bumper as you tighten up the bolts as it will want to spring back out.

Junior Member
Joined: Mar 2016
Posts: 12
Likes: 2
From: Florida
It looks like Cambo was right, different parts for plain vs power with the power struts costing more than twice as much, see items 9 and 10 on this diagram: https://www.jaguarlandroverrenoparts...-hardware-scat
Thread Starter
|
Senior Member
Joined: Nov 2011
Posts: 536
Likes: 135
From: UK
Focus RS launch control VS my right foot!
You can see how well the SVR hooks, equalling the RS launch control. You then also see the advantage of an automatic over a manual, when the RS changes from 1st to 2nd, its bye bye RS.
For those interested RS crossed the mile marker at 154mph GPS, I never ran it out the full mile due to braking distance but had 186mph indicated which I'd expect to be around 175mph GPS.
https://www.youtube.com/watch?v=LFIEyHItthM
Focus RS launch control VS my right foot!
You can see how well the SVR hooks, equalling the RS launch control. You then also see the advantage of an automatic over a manual, when the RS changes from 1st to 2nd, its bye bye RS.
For those interested RS crossed the mile marker at 154mph GPS, I never ran it out the full mile due to braking distance but had 186mph indicated which I'd expect to be around 175mph GPS.
Thread Starter
|
Senior Member
Joined: Nov 2011
Posts: 536
Likes: 135
From: UK
I'd suspect the speedo's are all calibrated equal or very close.