Mark 2 wood repair
#1
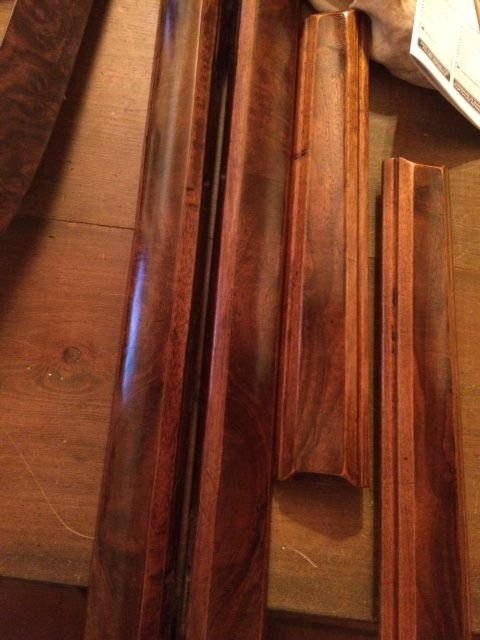
Refinished pieces with original veneer still intact
Oneof the things I see on MK2s is wood that is in really bad shape with crackledfinish and peeling veneer. While there are some great places that willmake your wood look like new, it is a lot of work, and thus quiteexpensive. I just didn't see the return on investment, so Idecided to try and do the wood myself, and have been very happy with theresults, so I thought I would share my process.
WhenI started this project I had very little knowledge of veneering, and now as I finishup a second set here are my thoughts on how to do it.
Firststep is to evaluate what you have, If just the finish is cracked, you canuse a furniture refinisher like Formby's and 0000 steel wool to strip thefinish. Then after a light sanding with 500 grade sand paper, you canspray it with a gloss polyurethane. Sand the first coat back down to thewood, and then re apply additional coats with light sanding in between. Iadvise waiting a week between coats, and 2-3 coats should do the trick. I havebeen told you can lightly buff that with 2000 grit sandpaper and then polishout with a cutting polish, but have not tried that yet. That is the happypath, and the first photo is a couple pieces of door trim where I followed thatprocess. They are still in the process of getting additional coats ofpolyurethane.
The following users liked this post:
StuG (11-26-2016)
#2
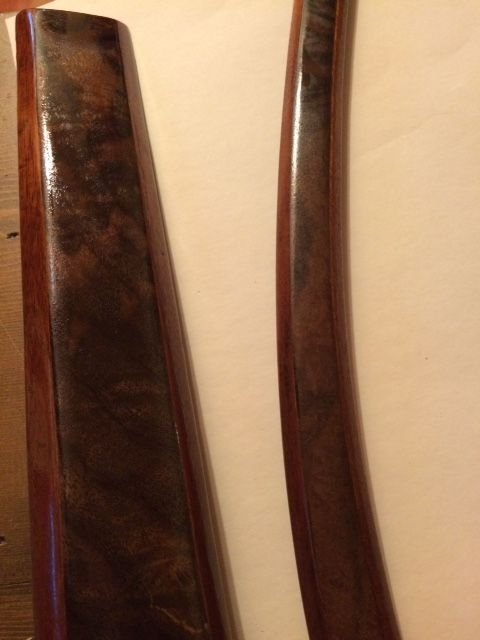
First coat of polyurathane
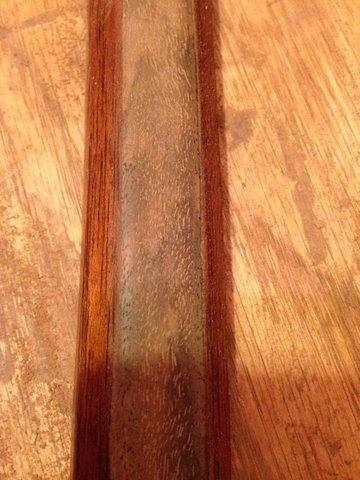
Ready for finish

Edges before and after sanding/final trimming
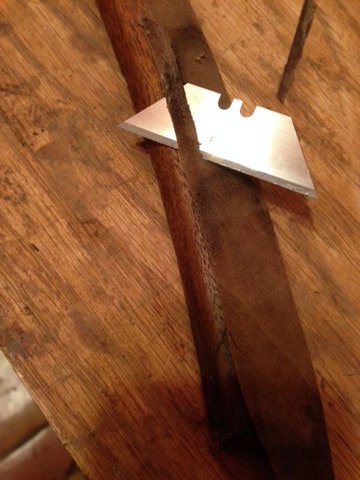
Trimming edges
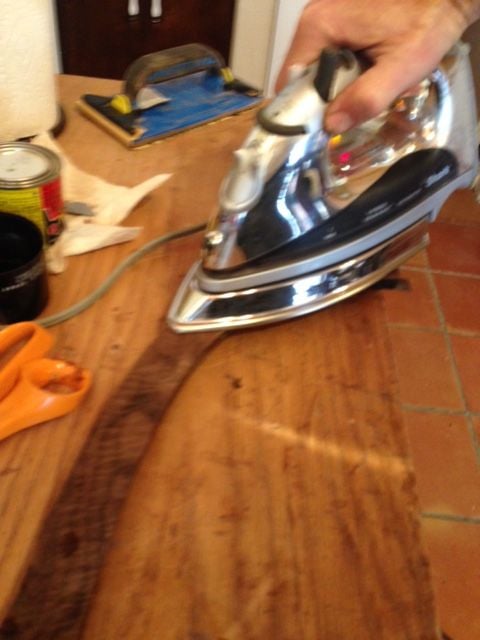
Attaching veneer with iron (Don't let your wife know
 )
)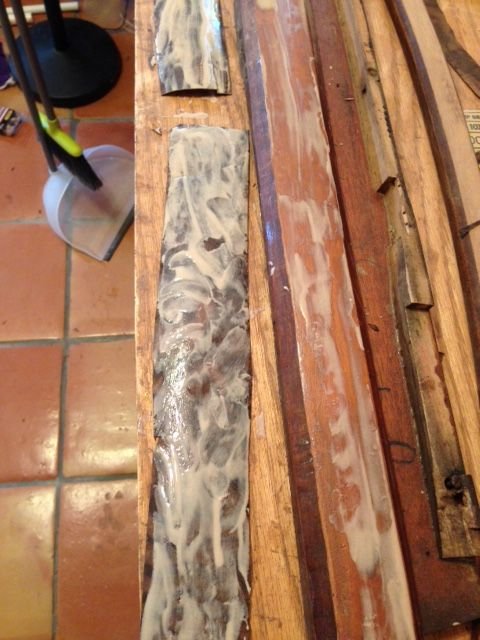
Glue applied to pieces and waiting to dry a bit
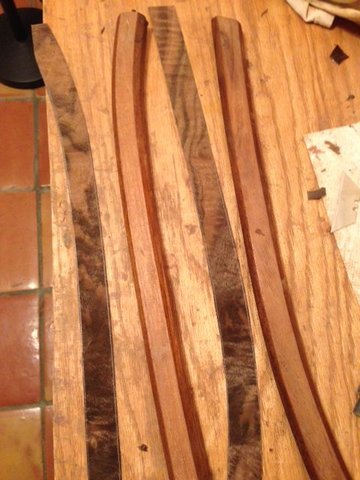
Ready for glue

Peeling up old veneer
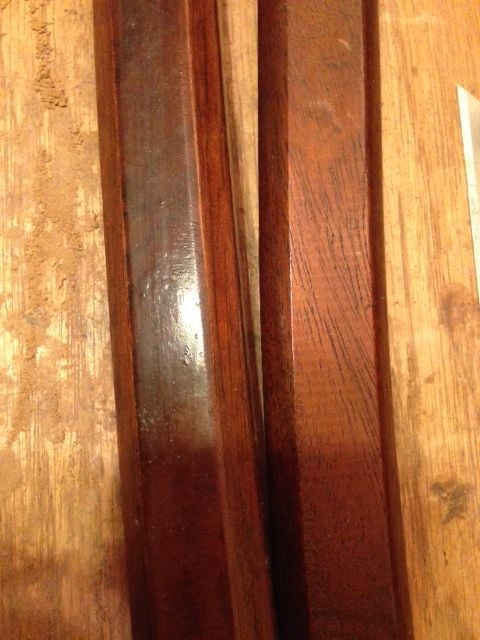
Not great repair jobs
If your veneer is peeling off, there are a few more steps in the process. Photo 1 is of a couple of pieces that had been refinished and put back in the car- one without veneer, and one with partial veneer. They look nice enough, but are not right. So photo two is stripping the veneer. This is relatively easy with a sharp chisel. No hammering need, the veneer will come up just pushing the chisel by hand, if it isn't falling off on its own. Just take you time, and try not to gouge the wood. After the veneer was off, I lightly sanded sanded the pieces to prep them for newveneer, and used the furniture refinisher to remove the old finish on the sides.
It then laid the pieces out on a piece of burled walnut veneer, traced the outline, and cut along the outline with a pair of scissors. You can see from photo three the pieces of veneer waiting for glue.
I use a heat lock veneer glue to attach the veneer, and have been very happy with the results. No need for a press- the iron does that. You apply a smooth, thin layer of glue to both the veneer, and the piece you are attaching it too. Make it as smooth and even as you can, I use my fingers. Pictures four and five show this. The glue in the pictures is not quite as even as I would like, but it is close enough. After a few minutes both sides are dry/tacky, you put the veneer in place. It will be sticky, but you can move the veneer around as needed to get in into place. Then use an iron on high heat (picture 6) to activate the glue, and press the veneer into place. This is kindof like ironing on a stick on patch to a jacket. Keep in mind as the glue heats up, the veneerwill slide around a little until you get it hot enough to attach permanently. This is important if you are attaching two separate pieces as you want to keep their seams tight. You will normally only have seams on long pieces where you “bookmark” the veneer pattern, or pieces like the hockey stick that are too long for most veneer pieces.
Once the veneer is attached, you will want to trim off the excess veneer. This in my mind is the real trick to doing it yourself. It is very difficult to cut a piece of veneer to the exact size and shape you need. However with the jaguar wood pieces, they all have a sloped edge that you can use to shave off the excess and keep a nice straight line. Picture 7 shows this process. I use a very sharp razor blade,and run it along the angle of the side shaving off the excess veneer. This gives a nice edge that you finish off with 320 and then 400 grit sandpaper to smooth and taper. Picture 8 shows the before and after sanding.
Because the wood I am putting in my car is pretty dark, I stained the wood edges to get a consistent finish color, sanded any excess stain off the veneer, and then applier the polyurethane.
#3
#4
#5
Good post but in my opinion I still think for the wood it is worth it if you can afford it to pay a professional. The look of what a professional can do is so much more like high end furniture finish which is one of the unique things of this era of automobiles. I have seen many people on the forum do their own wood restorations but none really seem to have the look of what the pro's do in my opinion,
Here are some examples of how the wood should look like
Jaguar_Mk_II_3_8_Saloon_1960
British Autowood > Dashboards
Here are some examples of how the wood should look like
Jaguar_Mk_II_3_8_Saloon_1960
British Autowood > Dashboards
Last edited by primaz; 11-24-2016 at 03:31 AM.
#6
#7
I truly love the work they do. In fact, there are a lot of places that do fabulous work on MK2s. Metal work, paint, engine rebuilding, upholstery, etc. With no trouble at all I or anyone restoring a MK2 could spend $100K on a restoration. Or there are things that the normal handy person can do themselves, and get a very good quality result.
Everyone restoring or maintaining an old car has to make those trade offs. Nice thing about this forum is it provides different experiences and expertise that make those trade offs a little easier.
Everyone restoring or maintaining an old car has to make those trade offs. Nice thing about this forum is it provides different experiences and expertise that make those trade offs a little easier.
Trending Topics
#8
I truly love the work they do. In fact, there are a lot of places that do fabulous work on MK2s. Metal work, paint, engine rebuilding, upholstery, etc. With no trouble at all I or anyone restoring a MK2 could spend $100K on a restoration. Or there are things that the normal handy person can do themselves, and get a very good quality result.
Everyone restoring or maintaining an old car has to make those trade offs. Nice thing about this forum is it provides different experiences and expertise that make those trade offs a little easier.
Everyone restoring or maintaining an old car has to make those trade offs. Nice thing about this forum is it provides different experiences and expertise that make those trade offs a little easier.
I second that
#10
Re-did my wood just recently. Certainly not concours but as a DIY quite acceptable. I think the final result is directly proportional to the # of times you sand back, recoat, polish etc.
Just short warning - When replacing the rear "hockey sticks", take great care with replacing the screws that sit under the door seals. The rear ones, if holes are not carefully pre-drilled, will tend to split the wood, I think due to the fact the wood grain runs vertically where the trims start to curve around the door.
Just short warning - When replacing the rear "hockey sticks", take great care with replacing the screws that sit under the door seals. The rear ones, if holes are not carefully pre-drilled, will tend to split the wood, I think due to the fact the wood grain runs vertically where the trims start to curve around the door.
Last edited by redtriangle; 12-07-2016 at 05:31 AM. Reason: mistrake
#11
#12
I was quoted more than $1300 to restore just the two main dash pieces (instrument panel and glove box panel). I was really apprehensive about tackling the job myself because I have never done anything like that before. With Chuck's encouragement and some helpful advice, I was able to repair the delaminated panels, apply new veneer and apply the urethane top coats and the results were far better than my expectation. My cost was around $100. I guess it depends on how much time or money one has to do things yourself or have it done professionally, but I have more confidence in myself now and will continue to do as much of the restoration on my old black cat as I can. The forum is a great place for this kind of advice and I would encourage folks to try things yourself. It is not a money issue as much as the satisfaction in knowing you did it yourself.


