When you click on links to various merchants on this site and make a purchase, this can result in this site earning a commission. Affiliate programs and affiliations include, but are not limited to, the eBay Partner Network.
Friday the ABS light came on while my wife was driving our �02 3.0L S-type. I called all the brake shops in town and none of them would look at it. I called all the auto parts places in town and none of them had a code reader that could pull the ABS codes. I have previously asked the service centers in town if they would look at my Jag. They have all said they did not have the equipment to deal with a Jag.
I did a Google search for the nearest service center that lists Jag Service. I called them to see if they had a code reader that could read ABS codes for the �02 S-type. They did. They said they could not look at the car until Monday. The shop is a good hour from my home, but at least 30 minutes closer than the nearest Jag dealer.
Yesterday, I took the S-type over to them to let them read the codes. They hooked her up and came up with a C1233 code which means: Speed Wheel LF Input Signal Missing. The shop wanted $525 including parts and labor to fix it. Plus, they could not do the repair for three days. While I was waiting for them to read the codes, I called NAPA Auto Parts to see if they could get the Axle Hug Assembly. They were able to get one and the cost was $178 plus tax. They said they could have it by the next day, Tuesday.
I paid the shop their $73 and got in the S-type and drove the hour home, passing by NAPA and ordering the hub assembly on the way home.
The assembly came in this morning so I went to pick it up. I started pulling out the tools needed to change out the hub assembly at about 9:25am this morning and I finished the test drive by 11:15am. I decided to take a few pictures as I went through so I could post them in this �Do To DIY� thread.
The pictures are 'thumbnails'. Click on them to see the full-size image.
There she is. And her broken hub assembly that is causing her to throw the C1233 ABS code, is hiding somewhere behind that wheel and freshly installed Goodyear Eagle GT tire. So the first job is to take off the tire and wheel. To do that we need to jack up the car. (I put blocks behind the rear wheels already. So under goes the jack.
Up goes the car and off goes the wheel. (I broke the lug nuts loose with a 19mm deep socket and the breaker bar you see in the before I raise the car.)
Once the wheel is off, she looks like this underneath.
Normally I would already have a jack stand under the suspension supporting the vehicle just in case it drops. I left it out for the picture at this point, but you will see the jack stand in subsequent pictures. I do not do anything under a vehicle without proper support devices.
The next step is to get that brake disc and caliper off of there. (You may notice the disc is pretty shinny. I just replaced it two months ago, so it does not have much rust yet.) There are two bolts with 55mm heads holding the caliper on. The bolts enter from the back of the caliper and are a little bit difficult to find from �street side� the first time. One is hiding here (where the socket is hanging from.)
The second bolt is also a 15mm, and it is down lower behind the position where the hydraulic line is screwed secured. Remove both of those bolts and set them aside. Before you remove the caliper, find a piece of flexible, but strong wire, like a clothes hanger, and make a �hanger� for the caliper once it is loose. The wire needs to be about 12-15� longer. A little longer will not hurt, shorter might be too short. We need to support the caliper once it is loose so the hydraulic line is not damaged in the next steps. The top of the wire can be nicely wrapped around the suspension supports above. This is a poor quality picture, but it will give you an idea. (The bottom of the wire is just dangling loose at this point.)
Next, we need to remove the caliper. If the disc is not worn too much the caliper will simply lift off the disc. If the disc is worn, you may have to exert a bit of force to �walk� the caliper off the disc. Once you have the caliper loose, use the hanger to support the disc similar to what is seen in this picture.
Now the axle looks like this. You can see the caliper hanging nicely in the background.
The brake disc will now pull nicely of the axle bolts. It is sitting there loose, but it has some mass so hold it firmly as you pull it off, or it might find your toes or worse, land hard on some concrete and be damaged. Once the disc is removed, set it safely aside. Your �work area� will look like this.
Those five bolts that stick out (which held the wheel on previously) are hard-mounted in the hub assembly. The four bolts that hold the hub assembly on, enter from the rear. You cannot see them in the photo above, but they can be seen from the backside. Turn the �wheel� out toward the front (as in the picture below) and you will be able to access them more easily. These bolts are also removed with a 15mm socket.
Once these four bolts are removed, the hub assembly is loose, except for the wire supports and electrical plug. (If I were doing this again, I would undo the wheel well splash guard and disconnect the speed sensor wire before I took the hug bolts out. As I was doing it, I realized the problem and left the last bolt in loosely until I got the wire disconnected.
Before you unhook the speed sensor wire, pay attention to the path it takes on the way behind the splash screen. In case you forget to pay attention, this picture shows the route it takes. (This is important. If routed incorrectly there is a risk the wire may be damaged and a cheap replacement sensor costs at least $110.) The picture below shows the route it takes. Once behind the wire passes behind the strut, it follows the hydraulic line behind the splash shield.
The connector is at the end of the wire. Take a good look at the replacement. They should be identical and looking at the plug will help you see the tab that must be pushed to release the wire from the socket.
Once the back of the wheel well splash shield is loosened, the area looks like this.
That silver cylinder on the right of the picture is the fuel filter. If you have not changed that, this is a good time to do it. I did a write-up of that process previously. You should be able to find that thread with lots of pics on this forum. (You may want to look at that thread for more details on getting the splash shield loosened as well.)
The speed sensor wire is coming in from the left in the picture above. The clip is out of view and you have to reach the plug retention clip and push it blindly. If you looked at the new one, you will be able to feel it and get push it long enough to pull the wire loose.
Once the wire is disconnected, remove the last bolt from the hub assembly and pull the assembly out. It should come out easily. Once removed, the �work area� looks like this. (I guess I did not get a pic of that?!?!)
The new hub assembly and the old look a little different. But the dimensions seem to be the same. Here they are side by side.
The new assembly is obviously the one on the right. (The one on the left has seen over 114k miles.) There are a few differences between them. The speed sensor is secured with a torx bolt instead of a clip. This may be a good upgrade since dirt and moisture infiltration are a major causes of failure.
So to continue, feed the sensor wire through the opening the old sensor came out of. I then hand threaded the four retaining bolts and screwed them in until hand tight. Then I replaced and rerouted the wire. Before I plugged the wire into the socket, I added a little dielectric grease inside of the plug (since I am not going to be in here for a long time). Once the wires are connected, torque the four retaining bolts. The JTIS says they need 90 Nm which translates to 66.4 ft.lb. That seemed low so I went to 80 ft.lb, but if you break a bolt off, remember I told you the JTIS says 66.4! Close up the wheel well splash guard.
Now the work area looks like this. (Those are grease dots on the new hub assembly.)
Reverse the order and replace the brake disc, caliper and wheel/tire. Make certain to torque the caliper bolts and lug nuts to the JTIS listed torque values. (I used 80 ft.lb on the caliper bolts and 100 ft.lb on the lug nuts.) Everything should look like this now.
Then it is time to clean the hands and go for the long awaited test drive to see if the ABS light will turn off. From what I have read, the ABS fault should reset within a 0.5 mile drive above 10mph.
Mine reset in a very short distance, probably less than 0.1 mile. Yes, I was very happy to see it reset.
I saved over $270 by doing it myself. I know everything was done correctly and I know the vehicle just a little be more intimately now. (I need a scanner so I can determine these fault codes without paying out $75 a pop in the future!)
I hope this helps a few JaguarForum friends feel comfortable enough to do this on their own and save some $$$. It is not hard. It took just under 2 hours. (JoycesJag says he can do it in 20 minutes, but he forgot to take pics!)
Let me know if you have any questions about the process. Ride safely!
Am I the only one who doesn't have any images (thumbnails or otherwise) showing in the write-up?
Looking at the HTML of the page, I can see that they exist, but they don't show up. I'm using firefox 3 which hasn't given me trouble over the long time I've used it.
Looking just at the media (hit Ctrl+I) a lot list as 0px by 0px but sometimes as the correct size (only the thumbnails are shown in that firefox page, which is as expected).
I don't have imageshack or any such blocked and as I say some show some of the time in the media page.
I don't need them (no offence but I have a different car and lots is different plus I can do this kind of stuff) but wonder if others can't see them. If they can't, it's worth trying to figure out a fix but if it's just me, no worries.
BugDoc - on my 2004 STR (it has Brembo brakes), the caliper bolts are not reusable and I wonder if that may also be the case with the earlier cars? Did you check and/or does it worry you?
I think it may be due to threadlock but I suppose it could be to do with metal deformation (stretching).
I bought replacement bolts ahead of time for my car and they weren't too expensive.
Am I the only one who doesn't have any images (thumbnails or otherwise) showing in the write-up?
I'm using Explorer 7 and I see the thumbnails just fine. They link after a click to Imageshack which unfortunately brings up an annoying ad. Such is the internet ...
So if the imageshack entry goes away the tip becomes a lot less helpful. One reason to upload it to this website. Off course picture size is limited here.
Bob S.
Last edited by Staatsof; Jul 21, 2010 at 05:25 AM.
Did mine a few months back but had problems with the old hub bolts shearing off then the hub itself would not pull off due to rust. Several hours of spraying with WD40 penetrating oil and adding a hub puller and slide hammer eventually freed it off.
BugDoc - on my 2004 STR (it has Brembo brakes), the caliper bolts are not reusable and I wonder if that may also be the case with the earlier cars? Did you check and/or does it worry you?
I think it may be due to threadlock but I suppose it could be to do with metal deformation (stretching).
I bought replacement bolts ahead of time for my car and they weren't too expensive.
Nice write-up (with or without pics lol).
John
Hi John,
I do not see anything in the JTIS or the AllDataDIY info about replacing the caliper bolts. It is probably not too bad an idea after lots of miles.
The bolts I would be more concerned about possibly replacing would be the four bolts that hold the hub assembly on. If those break, the whole wheel comes off. But I (could have missed it but I) do not see any mention of replacing these either.
.
.
.
Did mine a few months back but had problems with the old hub bolts shearing off then the hub itself would not pull off due to rust. Several hours of spraying with WD40 penetrating oil and adding a hub puller and slide hammer eventually freed it off.
These bolts were tight coming out on mine too. No rust, but lots of brake dust, grease and wheel dust had accumulated on the exposed threaded part of the bolts. I went slowly removing them and it took some torque to get them out. I never felt like they might break, but this vehicle has been in the south of the USA all its life. So there is little rust anywhere on it. WD40 is your friend if a bolt is stuck. A lot of header bolts like to break if they are not treated nicely before force is applied. There are a few other penetrating products that work well too.
If I was going to replace any bolts of those removed in this process, it would likely be these four. I thought about it as I was going through, but there did not seem to be any stress wear on them. (Knock on wood!)
JagV8, Have several browsers, including Firefox, and I can see the pictures in all browsers I have tried.
I wonder if the UK is blocking Imageshack.com???
Sorry you cannot see them.
I can download the pics outside firefox (I opened the page as source code HTML and copied URLs) so it has to be a firefox-something, but as it works for you (thanks for confirming it) I can likely get it to work..... I'll try restarting it later (have stuff open that I don't want to mess with right now). So, just something with my local firefox. No worries.
I do not see anything in the JTIS or the AllDataDIY info about replacing the caliper bolts. It is probably not too bad an idea after lots of miles.
The bolts I would be more concerned about possibly replacing would be the four bolts that hold the hub assembly on. If those break, the whole wheel comes off. But I (could have missed it but I) do not see any mention of replacing these either.
.
.
.
Thanks for the write up. I read it looking for help getting my hubs off. The four bolts came out fine but hubs are not moving and feel like a slide hammer is not gonna get it as it did for one poster. I'm hoping penetrating oil will do it's thing overnight and they will come out tomorrow. Any advise will be appreciated.
Nice write up. I just became a member and just spend a few hours a week just learning. I hat to dive into anything with out the correct tools and knowledge. It never fails I always learn something new when I tear into something myself.
Great post guy I see what ya talking about but I'm in trouble with my s-type she has the ABS light on and going into traction default just had my front brakes done rotors and pads and now this 2 weeks ago. I'm just outside of lex,ky and problem is high end will look for code but charging an arm and leg 225.00 heck all my money is gone before the work even starts any ideas please . My girl needs help and going strong don't want the trans to mess up and burns no oil at all now at 205, miles she is super . I love my 2000 s-type 3.0 v-6
Not sure if its the same issue - within a few days of changing my front brake pads I started getting the ABS light /traction failure and some brake noise from the front right wheel. Took the pads off, readjusted the spring clips on the top of the pads (made sure they had room to move up and down and were facing the right way, may have adjusted with a flathead screwdriver to widen them a tad) and reinserted into caliper - that fixed the problem. This is for 2002 S-type 3.0.
Bump to an old thread. Wanted to share some little details I learned replacing the front hubs on my '02. Not a bad job at all, but I've got a couple of thoughts that may help the next guy, including some suggested tools. Wish I thought to take some pics since the originals here are long gone, but I didn't see this thread until after I was done.
Something I haven't seen discussed very often is how to diagnose when the hubs need to be replaced. (No ABS issues for me, just some bearing noise.) I recently replaced the tires, and they seemed to be a lot noisier than the old tires. That struck me as odd, as usually tires get noisier as they wear down. Trust me, I got every last mile out of those old tires. The new tires were the exact same tires from the same vendor, so I was scratching my head over that one, wondering if the bearings may have been starting to go. Then I took a trip over some windy mountain roads and that's when I noticed something odd. My typical commute is mostly freeway, with no sharp turns at higher speeds. But on this mountain road, I found myself taking some moderate curves at higher speeds, and the noise would go away. Straighten the steering wheel (back on a straightaway, in case I have to be specific) and the noise returned. Put some side load on the front wheels in a turn, and things got much quieter. Eureka! The bearings were getting sloppy, and quieting down with an extra load applied.
When I got home, I jacked up the front end to investigate. I wasn't able to shake the wheels, a typical sign of failed bearings. Nor was there any noise when I spun the wheels. It was only after I removed the wheels and brakes, down to the bare hubs, before I could hear any sort of rumbling while spinning them. Also, the hubs would spin quite freely, maybe a turn or two after I stopped rotating them. The new ones had a lot more resistance (hopefully normal...,), and did not spin free on their own.
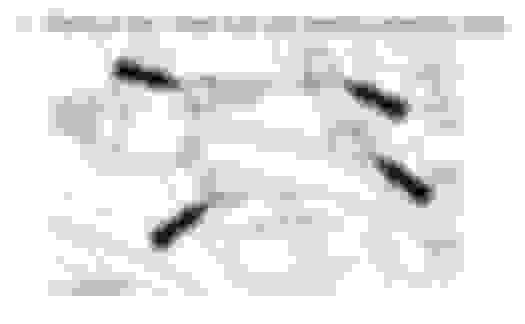
As far as doing the job, if you are comfortable replacing brake pads and discs, you will be just fine. Changing the front hubs is only a couple more steps after removing the brake calipers and discs. Here's an excerpt from the manual showing the four bolts you must unthread to remove the hub/bearing assembly. This view is from the inboard looking out, with the steering tie rod partially blocking the view:
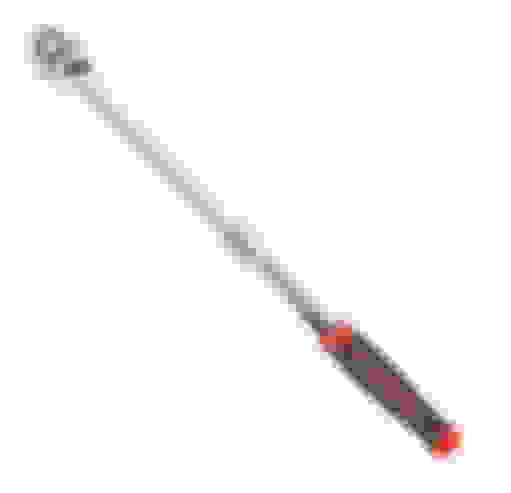
The first problem I encountered is it takes a lot of torque to loosen these four bolts. You can't get a regular impact gun in there. I have a 90 degree ratchet impact, slicker than snot for tight spots, but even that couldn't do the job. You need a beefy ratchet or breaker bar, but you'll find yourself in a Goldilocks situation of needing just the right size. Too short and you can't apply enough force. First I tried a 1/2" ratchet about 9" overall, but it just wasn't long enough. My breaker bar was too long (17") so there was not enough room to get inside the wheel well. I ended up slipping a short piece of pipe over the shorter ratchet, and that kinda sorta worked. If I were to do the job again, I'd try an adjustable length ratchet like this one, and collapse it just enough to clear the fender:
The bolts were secured with threadlocker, so I estimate it took about 150 ft-lbs to break them loose. Luckily, all those years of little chocolate donuts on my breakfast table finally paid off for me.
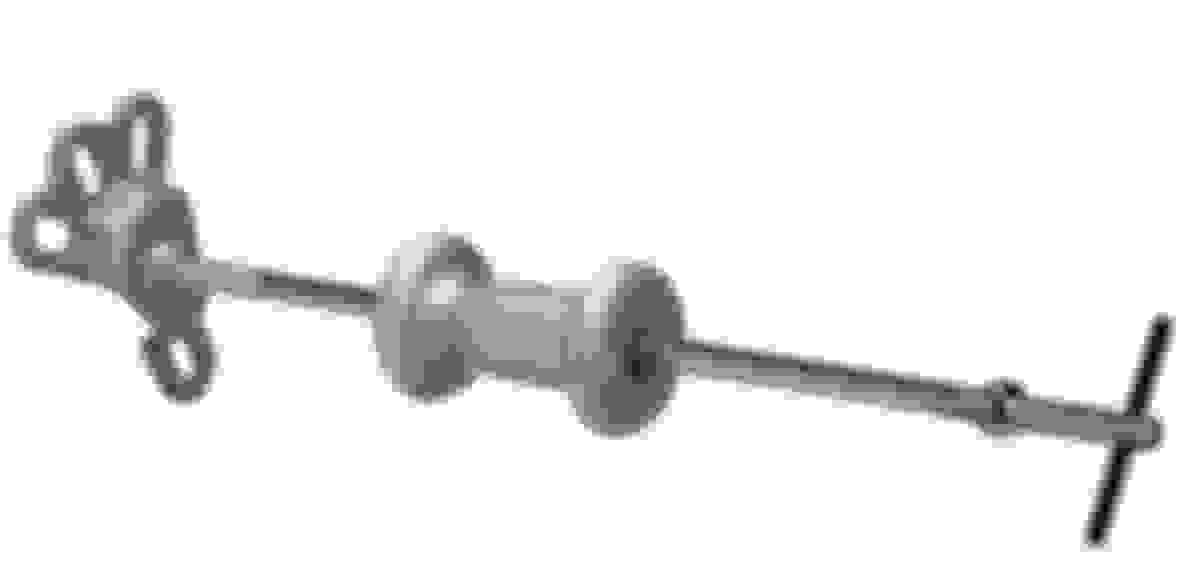
The first hub came off quite easily once the bolts were removed. I was hoping to get the other side done even more quickly, but no such luck. The hub did not want to separate from the knuckle. The hub is steel and the knuckle is aluminum (or similar alloy) and dissimilar corrosion had set it, practically gluing the pieces together. I fought and fought to separate the two pieces, using a thin putty knife, pry bars, and professional-grade foul language. Be careful, because it's VERY easy to gouge the relatively soft knuckle. (I do not care to discuss how I know this.) Looking back, I wish I had thought to use a slide hammer puller like this example, an OTC 7374. Heck, I already own one but forgot all about it. It would have made quick work of pulling the hub assembly from the knuckle:
The hubs I installed were Timken #HA590224, ordered from RockAuto. (Remember, my car is an '02, not sure if this number is applicable for all years.) I was busy patting myself on the back for ordering a quality name brand, but then I saw the dreaded "Made in China" once the parts arrived. It's no-name Chinese stuff that really scares me, so hopefully the Timken brand will hold up fine.
The new hubs bolted up perfectly, but there was one minor issue with the wheel speed sensors. The Timken hubs came with new sensors, but I was hoping to swap them for the original Jaguar sensors. Just remove one simple clip and they slip right out from the back of the hub. Unfortunately, the Timken sensors were a slightly different design than the original Jaguar parts and were not interchangeable. Still, they plugged right into the Jaguar connector, hidden under the plastic wheel well liner. No problems to report, so don't let that scare you away.


 The pictures are 'thumbnails'. Click on them to see the full-size image.


 The pictures are 'thumbnails'. Click on them to see the full-size image.